![This raspberry chia seed jam is simple and healthy. It uses fresh raspberries, chia seeds, and a touch of sweetness. You can whip it up in about 15 minutes. This jam is perfect for toast, pancakes, or yogurt. - 2 cups fresh raspberries - 1/4 cup honey or maple syrup (adjust to your taste) - 2 tablespoons chia seeds - 1 tablespoon freshly squeezed lemon juice - 1/2 teaspoon vanilla extract (optional) You can add other flavors to your jam. Try mixing in some cinnamon for warmth. You could also add a pinch of salt to balance the sweetness. If you like a spicier kick, a dash of ginger works well too. Each of these adds a unique twist to the classic jam! First, wash your fresh raspberries. Rinse them gently under cold water. This helps remove dirt and small bugs. Next, place the clean raspberries in a medium saucepan. Add your choice of honey or maple syrup. This gives your jam a sweet touch. Turn the heat to medium. Stir the mixture as it heats. Cook for about 5 to 7 minutes. The raspberries will soften and burst. You will see their juices flow. After they soften, use a fork or potato masher. Mash the raspberries to your liking. You can leave it smooth or chunky. Now it is time to add the chia seeds. Toss in the freshly squeezed lemon juice next. If you want, add vanilla extract for extra flavor. Mix everything well. Keep cooking for another 2 to 3 minutes. This helps the chia seeds soak up the juices. The jam will thicken nicely. When finished, take the saucepan off the heat. Let the jam cool down to room temperature. Once it is cool, transfer the jam into a clean jar. Seal it tightly and refrigerate. The jam will thicken more as it cools. For detailed steps, refer to the [Full Recipe]. To get the texture just right, focus on how you mash the raspberries. If you want a smooth jam, mash them well. For a chunkier option, leave some pieces whole. The chia seeds will help thicken the jam as they absorb moisture. Let it sit for a bit after cooking. This will give it time to thicken up even more. Sweetness is key in a jam. Start with 1/4 cup of honey or maple syrup, then taste. If you want it sweeter, add more syrup a little at a time. You can also try using other sweeteners like agave or stevia. Remember, the natural sweetness of the raspberries can change based on their ripeness. To make your jam look even more tempting, serve it in a cute jar. Add some twine or a ribbon for charm. Place a small spoon on the side for easy serving. This makes a great gift too! You can top pancakes, yogurt, or spread it on toast. Each bite will be a treat for the eyes and the taste buds. {{image_4}} You can mix flavors in your raspberry chia seed jam. Try adding other fruits for fun twists. Strawberries or blueberries work great! Just mash them with the raspberries while cooking. You can also add a hint of spices. Cinnamon or ginger can give your jam a warm flavor. Experiment to find what you like best! If you want to cut sugar, use alternatives. Agave syrup or maple syrup are good picks. You can also try stevia or monk fruit sweetener. These options keep the jam sweet without extra calories. Adjust the amount to match your taste. Remember, some sweeteners are stronger than others, so use less! You can make jam without cooking! Just mash fresh raspberries in a bowl. Then, mix in chia seeds, sweetener, and lemon juice. Let it sit for about 30 minutes. The chia seeds will absorb the juices and thicken the mix. This method keeps all the fresh fruit flavor. It’s quick and easy, perfect for busy days! For the full recipe, be sure to check the details above. To keep your raspberry chia seed jam fresh, use clean jars. Make sure to sterilize the jars before filling them. This helps kill germs. After filling, seal them tightly. Store the jars in the fridge. Always use a clean spoon when serving. This keeps the jam safe from bacteria. Homemade raspberry chia seed jam lasts about two weeks in the fridge. If you see any mold, throw it away. Always check for signs of spoilage before eating. The jam may thicken more as it sits. This is normal and makes it even better for spreading. You can freeze this jam for longer storage. Use freezer-safe containers or bags. Leave some space in the container. The jam will expand when frozen. It can last up to six months in the freezer. When ready to use, thaw it in the fridge overnight. Enjoy this tasty treat anytime! For the full recipe, check above. Chia seeds pack a punch of nutrients. They have fiber, protein, and healthy fats. These seeds help with digestion and keep you full. They also provide omega-3 fatty acids, which are good for your heart. Plus, chia seeds contain antioxidants that fight free radicals. This makes them a great choice for healthy eating. Yes, you can use frozen raspberries! They work well in the jam. Just make sure to thaw them before cooking. Frozen raspberries may have a bit more liquid, so you might need to cook the jam a little longer. This will help thicken it up. The flavor will still be delicious and fresh! Homemade jam lasts about two weeks in the fridge. Store it in a clean, airtight jar. Make sure to keep it sealed. If you want it to last longer, consider freezing it. Frozen jam can last for months, allowing you to enjoy your raspberry chia seed jam anytime. This article covered how to make delicious homemade raspberry jam. You learned about key ingredients, step-by-step instructions, and helpful tips for the perfect result. We also explored fun variations and smart storage methods. Making your own jam lets you control sweetness, flavor, and texture. Now, you can enjoy tasty jam on toast or as a gift. Follow these tips, and create a delightful treat to share with others. Start making jam today and savor your creation!](https://recipesstation.com/wp-content/uploads/2025/05/25f4730b-dbe2-4eb7-98ef-7cc764749128-768x768.webp)
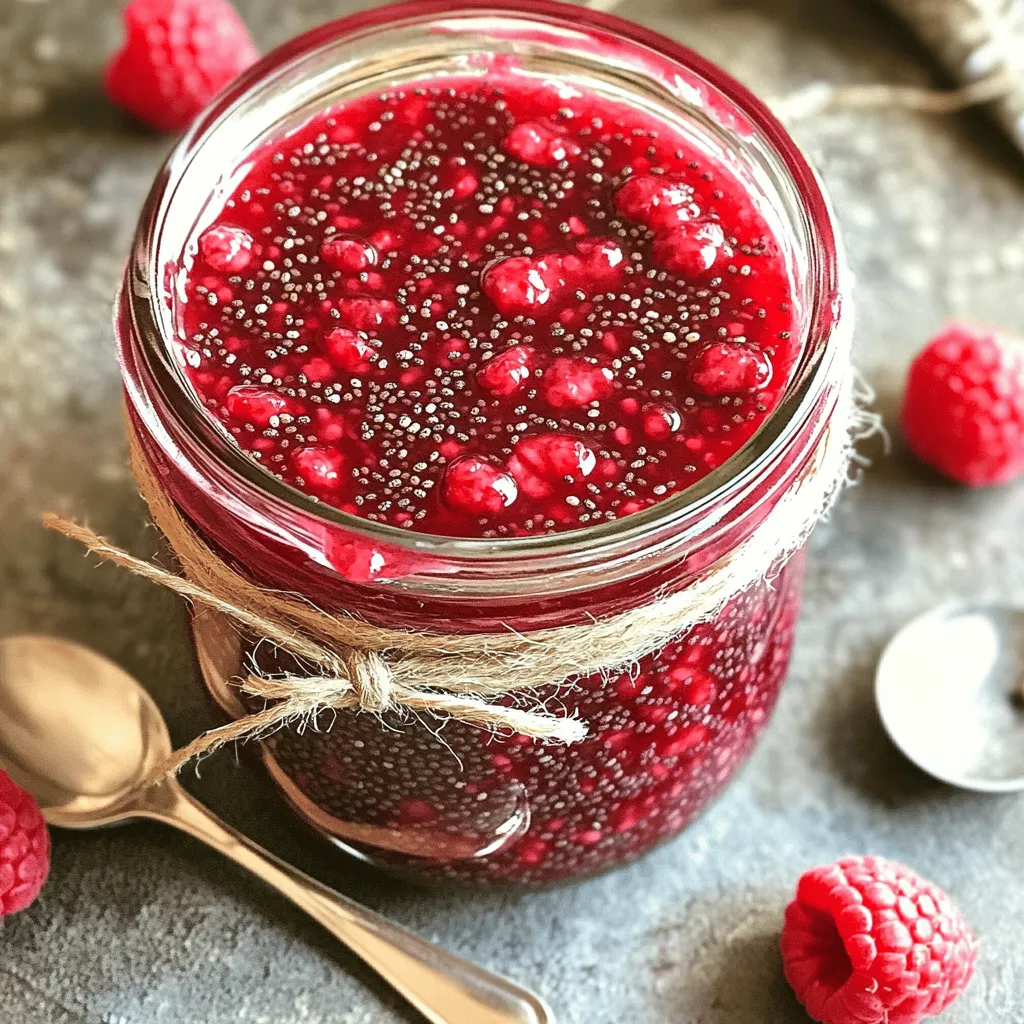
Looking for a tasty way to enjoy healthy snacks? This Raspberry Chia Seed Jam is your answer! With just a few simple ingredients, you can whip up a nutritious jam that’s perfect for breakfast or dessert. Packed with antioxidants and fiber, it’s a delight on toast or yogurt. Let’s dive into this easy, step-by-step recipe and make your own flavorful jam that you’ll love to share!It uses fresh raspberries, chia seeds, and a touch of sweetness. You can whip it up in about 15 minutes. This jam is perfect for toast, pancakes, or yogurt.
Key Ingredients List
– 2 cups fresh raspberries
– 1/4 cup honey or maple syrup (adjust to your taste)
– 2 tablespoons chia seeds
– 1 tablespoon freshly squeezed lemon juice
– 1/2 teaspoon vanilla extract (optional)
Optional Add-Ins
You can add other flavors to your jam. Try mixing in some cinnamon for warmth. You could also add a pinch of salt to balance the sweetness. If you like a spicier kick, a dash of ginger works well too. Each of these adds a unique twist to the classic jam!
Step-by-Step Instructions
Preparing the Raspberries
First, wash your fresh raspberries. Rinse them gently under cold water. This helps remove dirt and small bugs. Next, place the clean raspberries in a medium saucepan. Add your choice of honey or maple syrup. This gives your jam a sweet touch.
Cooking Process
Turn the heat to medium. Stir the mixture as it heats. Cook for about 5 to 7 minutes. The raspberries will soften and burst. You will see their juices flow. After they soften, use a fork or potato masher. Mash the raspberries to your liking. You can leave it smooth or chunky.
Finalizing the Jam Consistency
Now it is time to add the chia seeds. Toss in the freshly squeezed lemon juice next. If you want, add vanilla extract for extra flavor. Mix everything well. Keep cooking for another 2 to 3 minutes. This helps the chia seeds soak up the juices. The jam will thicken nicely.
When finished, take the saucepan off the heat. Let the jam cool down to room temperature. Once it is cool, transfer the jam into a clean jar. Seal it tightly and refrigerate. The jam will thicken more as it cools.
Tips & Tricks
Achieving the Perfect Texture
To get the texture just right, focus on how you mash the raspberries. If you want a smooth jam, mash them well. For a chunkier option, leave some pieces whole. The chia seeds will help thicken the jam as they absorb moisture. Let it sit for a bit after cooking. This will give it time to thicken up even more.
Sweetness Adjustment Techniques
Sweetness is key in a jam. Start with 1/4 cup of honey or maple syrup, then taste. If you want it sweeter, add more syrup a little at a time. You can also try using other sweeteners like agave or stevia. Remember, the natural sweetness of the raspberries can change based on their ripeness.
Presentation Suggestions
To make your jam look even more tempting, serve it in a cute jar. Add some twine or a ribbon for charm. Place a small spoon on the side for easy serving. This makes a great gift too! You can top pancakes, yogurt, or spread it on toast. Each bite will be a treat for the eyes and the taste buds.
Variations
Flavor Combinations
You can mix flavors in your raspberry chia seed jam. Try adding other fruits for fun twists. Strawberries or blueberries work great! Just mash them with the raspberries while cooking. You can also add a hint of spices. Cinnamon or ginger can give your jam a warm flavor. Experiment to find what you like best!
Sugar Alternatives
If you want to cut sugar, use alternatives. Agave syrup or maple syrup are good picks. You can also try stevia or monk fruit sweetener. These options keep the jam sweet without extra calories. Adjust the amount to match your taste. Remember, some sweeteners are stronger than others, so use less!
No-Cook Method Explanation
You can make jam without cooking! Just mash fresh raspberries in a bowl. Then, mix in chia seeds, sweetener, and lemon juice. Let it sit for about 30 minutes. The chia seeds will absorb the juices and thicken the mix. This method keeps all the fresh fruit flavor. It’s quick and easy, perfect for busy days!
Storage Info
Best Practices for Storing Homemade Jam
To keep your raspberry chia seed jam fresh, use clean jars. Make sure to sterilize the jars before filling them. This helps kill germs. After filling, seal them tightly. Store the jars in the fridge. Always use a clean spoon when serving. This keeps the jam safe from bacteria.
Shelf Life and Refrigeration Tips
Homemade raspberry chia seed jam lasts about two weeks in the fridge. If you see any mold, throw it away. Always check for signs of spoilage before eating. The jam may thicken more as it sits. This is normal and makes it even better for spreading.
Freezing Options and Tips
You can freeze this jam for longer storage. Use freezer-safe containers or bags. Leave some space in the container. The jam will expand when frozen. It can last up to six months in the freezer. When ready to use, thaw it in the fridge overnight. Enjoy this tasty treat anytime!
FAQs
What are the health benefits of chia seeds?
Chia seeds pack a punch of nutrients. They have fiber, protein, and healthy fats. These seeds help with digestion and keep you full. They also provide omega-3 fatty acids, which are good for your heart. Plus, chia seeds contain antioxidants that fight free radicals. This makes them a great choice for healthy eating.
Can I use frozen raspberries for the recipe?
Yes, you can use frozen raspberries! They work well in the jam. Just make sure to thaw them before cooking. Frozen raspberries may have a bit more liquid, so you might need to cook the jam a little longer. This will help thicken it up. The flavor will still be delicious and fresh!
How long does homemade jam last in the fridge?
Homemade jam lasts about two weeks in the fridge. Store it in a clean, airtight jar. Make sure to keep it sealed. If you want it to last longer, consider freezing it. Frozen jam can last for months, allowing you to enjoy your raspberry chia seed jam anytime.
This article covered how to make delicious homemade raspberry jam. You learned about key ingredients, step-by-step instructions, and helpful tips for the perfect result. We also explored fun variations and smart storage methods.
Making your own jam lets you control sweetness, flavor, and texture. Now, you can enjoy tasty jam on toast or as a gift. Follow these tips, and create a delightful treat to share with others. Start making jam today and savor your creation!
![This raspberry chia seed jam is simple and healthy. It uses fresh raspberries, chia seeds, and a touch of sweetness. You can whip it up in about 15 minutes. This jam is perfect for toast, pancakes, or yogurt. - 2 cups fresh raspberries - 1/4 cup honey or maple syrup (adjust to your taste) - 2 tablespoons chia seeds - 1 tablespoon freshly squeezed lemon juice - 1/2 teaspoon vanilla extract (optional) You can add other flavors to your jam. Try mixing in some cinnamon for warmth. You could also add a pinch of salt to balance the sweetness. If you like a spicier kick, a dash of ginger works well too. Each of these adds a unique twist to the classic jam! First, wash your fresh raspberries. Rinse them gently under cold water. This helps remove dirt and small bugs. Next, place the clean raspberries in a medium saucepan. Add your choice of honey or maple syrup. This gives your jam a sweet touch. Turn the heat to medium. Stir the mixture as it heats. Cook for about 5 to 7 minutes. The raspberries will soften and burst. You will see their juices flow. After they soften, use a fork or potato masher. Mash the raspberries to your liking. You can leave it smooth or chunky. Now it is time to add the chia seeds. Toss in the freshly squeezed lemon juice next. If you want, add vanilla extract for extra flavor. Mix everything well. Keep cooking for another 2 to 3 minutes. This helps the chia seeds soak up the juices. The jam will thicken nicely. When finished, take the saucepan off the heat. Let the jam cool down to room temperature. Once it is cool, transfer the jam into a clean jar. Seal it tightly and refrigerate. The jam will thicken more as it cools. For detailed steps, refer to the [Full Recipe]. To get the texture just right, focus on how you mash the raspberries. If you want a smooth jam, mash them well. For a chunkier option, leave some pieces whole. The chia seeds will help thicken the jam as they absorb moisture. Let it sit for a bit after cooking. This will give it time to thicken up even more. Sweetness is key in a jam. Start with 1/4 cup of honey or maple syrup, then taste. If you want it sweeter, add more syrup a little at a time. You can also try using other sweeteners like agave or stevia. Remember, the natural sweetness of the raspberries can change based on their ripeness. To make your jam look even more tempting, serve it in a cute jar. Add some twine or a ribbon for charm. Place a small spoon on the side for easy serving. This makes a great gift too! You can top pancakes, yogurt, or spread it on toast. Each bite will be a treat for the eyes and the taste buds. {{image_4}} You can mix flavors in your raspberry chia seed jam. Try adding other fruits for fun twists. Strawberries or blueberries work great! Just mash them with the raspberries while cooking. You can also add a hint of spices. Cinnamon or ginger can give your jam a warm flavor. Experiment to find what you like best! If you want to cut sugar, use alternatives. Agave syrup or maple syrup are good picks. You can also try stevia or monk fruit sweetener. These options keep the jam sweet without extra calories. Adjust the amount to match your taste. Remember, some sweeteners are stronger than others, so use less! You can make jam without cooking! Just mash fresh raspberries in a bowl. Then, mix in chia seeds, sweetener, and lemon juice. Let it sit for about 30 minutes. The chia seeds will absorb the juices and thicken the mix. This method keeps all the fresh fruit flavor. It’s quick and easy, perfect for busy days! For the full recipe, be sure to check the details above. To keep your raspberry chia seed jam fresh, use clean jars. Make sure to sterilize the jars before filling them. This helps kill germs. After filling, seal them tightly. Store the jars in the fridge. Always use a clean spoon when serving. This keeps the jam safe from bacteria. Homemade raspberry chia seed jam lasts about two weeks in the fridge. If you see any mold, throw it away. Always check for signs of spoilage before eating. The jam may thicken more as it sits. This is normal and makes it even better for spreading. You can freeze this jam for longer storage. Use freezer-safe containers or bags. Leave some space in the container. The jam will expand when frozen. It can last up to six months in the freezer. When ready to use, thaw it in the fridge overnight. Enjoy this tasty treat anytime! For the full recipe, check above. Chia seeds pack a punch of nutrients. They have fiber, protein, and healthy fats. These seeds help with digestion and keep you full. They also provide omega-3 fatty acids, which are good for your heart. Plus, chia seeds contain antioxidants that fight free radicals. This makes them a great choice for healthy eating. Yes, you can use frozen raspberries! They work well in the jam. Just make sure to thaw them before cooking. Frozen raspberries may have a bit more liquid, so you might need to cook the jam a little longer. This will help thicken it up. The flavor will still be delicious and fresh! Homemade jam lasts about two weeks in the fridge. Store it in a clean, airtight jar. Make sure to keep it sealed. If you want it to last longer, consider freezing it. Frozen jam can last for months, allowing you to enjoy your raspberry chia seed jam anytime. This article covered how to make delicious homemade raspberry jam. You learned about key ingredients, step-by-step instructions, and helpful tips for the perfect result. We also explored fun variations and smart storage methods. Making your own jam lets you control sweetness, flavor, and texture. Now, you can enjoy tasty jam on toast or as a gift. Follow these tips, and create a delightful treat to share with others. Start making jam today and savor your creation!](https://recipesstation.com/wp-content/uploads/2025/05/25f4730b-dbe2-4eb7-98ef-7cc764749128-250x250.webp)
