Craving something tasty for your next gathering? Try my easy Philly Cheesesteak Sliders! They pack all the flavor of the classic sandwich into bite-sized treats. I’ll share simple steps to make juicy sliders with melted cheese, along with tips for custom flavors and storage ideas. Whether you’re a chef or a novice, this recipe will help you impress your friends and family. Let’s dive into the delicious details!
Ingredients
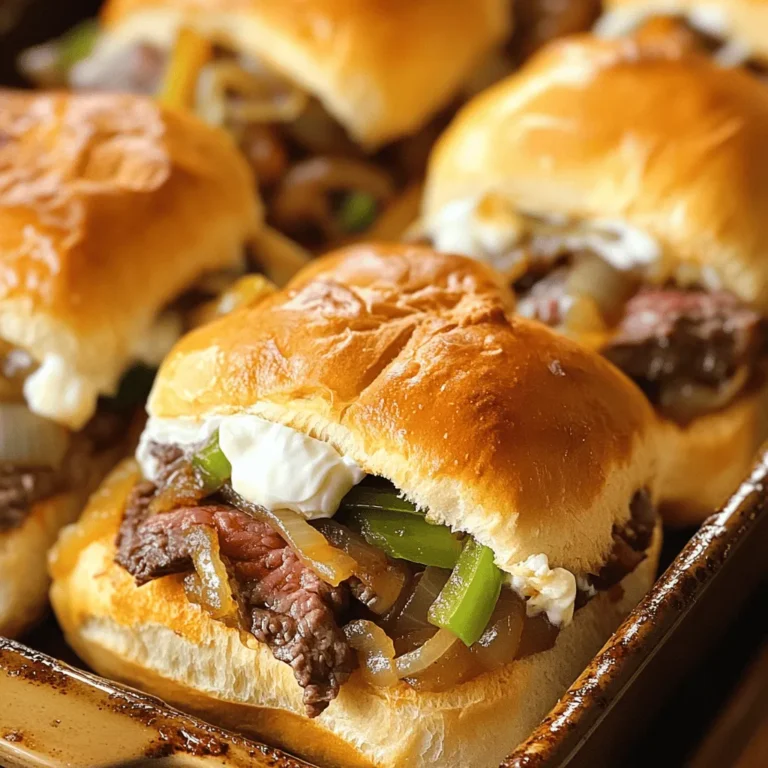
Main Ingredients for Philly Cheesesteak Sliders
To make great Philly cheesesteak sliders, you’ll need:
– 12 slider rolls
– 1 pound ribeye steak, thinly sliced
– 1 medium onion, thinly sliced
– 1 medium green bell pepper, thinly sliced
– 1 cup provolone cheese, shredded
– 1/2 cup cream cheese, softened at room temperature
– 2 tablespoons olive oil
– 1 teaspoon garlic powder
– Salt and pepper to taste
– Optional: 1 tablespoon Worcestershire sauce
These ingredients create the perfect mix of flavors. The ribeye steak gives a rich taste. The onions and bell peppers add some sweetness and crunch. Provolone cheese makes everything gooey and delicious. Cream cheese adds a nice, creamy layer.
Optional Add-ins and Flavor Enhancers
You can customize your sliders with fun add-ins. Here are a few ideas:
– Mushrooms for an earthy flavor
– Jalapeños for some heat
– Spinach for a healthy twist
– Fresh herbs like parsley or basil for a fresh taste
Adding these extras can really make your sliders stand out. Mix and match to find your favorite blend.
Suggested Condiments and Side Dishes
Serving sides with your sliders makes the meal more fun. Here are some great options:
– Pickles for a tangy crunch
– Potato chips for a salty side
– Ketchup or mustard for dipping
– A fresh salad for a light touch
These sides add extra flavor and texture. They also help balance the richness of the sliders.
Step-by-Step Instructions
Detailed Preparation of the Meat and Vegetables
To start, we need to get our meat and veggies ready. First, heat olive oil in a large skillet over medium-high heat. The oil should shimmer before adding the veggies. Toss in the thinly sliced onion and bell pepper. Sauté them for about 5 to 7 minutes. Stir often until they become soft and a bit caramelized. Once done, take them out of the skillet and set them aside.
Next, it’s time for the ribeye steak. In the same skillet, add the thinly sliced steak. Season it with garlic powder, salt, and pepper. If you want, add Worcestershire sauce for extra flavor. Cook the steak for 3 to 4 minutes. Stir it often until it turns a nice brown but stays tender. Once it’s cooked, mix in the sautéed onions and bell peppers. Make sure everything is well combined, then remove it from the heat.
Assembling the Sliders
Now, let’s build our sliders! Carefully slice the slider rolls in half horizontally. Place the bottom halves in a greased 9×13 inch baking pan. Spread the softened cream cheese evenly over these bottom halves. This step creates a creamy base for our filling.
Next, spoon the steak and vegetable mixture on top of the cream cheese. Spread it out evenly. After that, sprinkle shredded provolone cheese generously over the steak. This will ensure that every bite is cheesy and delicious. Finally, place the top halves of the slider rolls onto the cheese layer.
Baking Instructions
It’s baking time! Cover the baking pan with aluminum foil. Place it in the preheated oven at 350°F (175°C) and bake for 15 minutes. After that, take off the foil. Continue baking for another 5 to 10 minutes. Look for bubbling cheese and golden brown tops.
Once done, remove the pan from the oven. Let the sliders cool for a few minutes before slicing them into individual servings. Enjoy your tasty sliders that are sure to impress!
Tips & Tricks
Best Practices for Perfectly Cooked Steak
To make your steak tasty, choose ribeye. It has great marbling, which gives flavor. Slice it thinly against the grain. This makes each bite tender. Cook the steak quickly on high heat. This keeps it juicy and flavorful. Aim for a perfect sear for that nice crust. Don’t overcrowd the pan; cook in batches if needed.
How to Keep Sliders Moist and Flavorful
To ensure sliders stay moist, use cream cheese on the rolls. This adds creaminess and keeps the bread from drying out. Mix the cooked steak with sautéed veggies. This adds moisture and flavor. Cover the sliders with foil while baking. This traps steam and keeps them soft. You can also drizzle a bit of broth over the filling before baking for extra moisture.
Baking Techniques for Golden Brown Toppings
For a perfect golden brown topping, brush the tops of the rolls with olive oil or melted butter. This helps them brown nicely. Bake covered for the first part of cooking. Remove the foil for the last few minutes to let the tops crisp. Keep an eye on them to prevent burning. The goal is a crunchy outer layer with gooey cheese inside.

Variations
Alternative Cheeses for a Unique Twist
You can switch up the cheese for your Philly Cheesesteak Sliders. Instead of provolone, try mozzarella or cheddar. These cheeses melt well and add a nice flavor. For a sharper taste, use aged gouda or Swiss. Each cheese brings its own flair to the dish. Experiment with different combinations to find your favorite.
Creative Vegetable Additions
You can add more veggies to your sliders for extra flavor and crunch. Mushrooms bring an earthy taste that pairs well with steak. Spinach or arugula offers a fresh bite. If you like a bit of heat, add jalapeños or banana peppers. These options make your sliders more colorful and delicious. Mix and match to create your perfect blend.
Gluten-Free and Low-Carb Slider Options
For those who avoid gluten, use lettuce wraps instead of slider rolls. This option keeps the flavors while cutting carbs. You can also find gluten-free slider rolls at many stores. If you want a low-carb choice, use portobello mushrooms as buns. They hold the filling well and add a nice taste. This way, everyone can enjoy these tasty sliders.
Storage Info
How to Store Leftovers Properly
To keep your sliders fresh, let them cool first. Place the sliders in an airtight container. Make sure to layer parchment paper between them. This step prevents sticking. Store the container in the fridge. Your sliders will stay tasty for up to three days.
Reheating Instructions for Optimal Flavor
Reheat your sliders for the best taste. Preheat the oven to 350°F (175°C). Wrap the sliders in aluminum foil. Heat them for about 10-15 minutes. This method keeps them moist. If you prefer, you can microwave them too. Just cover them with a damp paper towel. Heat in short bursts until warm.
Freezing Options for Later Enjoyment
Freezing is a great option for longer-term storage. Wrap each slider in plastic wrap tightly. Then, place them in a freezer bag. Remove as much air as possible. Your sliders can last up to three months in the freezer. To enjoy, thaw in the fridge overnight. Then, follow the reheating instructions to bring back the flavor.
FAQs
Can I use a different type of meat?
Yes, you can use other meats. Chicken or pork work well, too. Just slice them thin. Cook them just like the ribeye. Each meat brings its own taste. Adjust the seasonings if needed.
How do I make these sliders spicier?
To add heat, use spicy cheese like pepper jack. You can also mix in jalapeños. For a kick, add hot sauce to the meat while cooking. Taste as you go to find your perfect spice level.
What’s the best cheese for Philly Cheesesteak Sliders?
Provolone is my top choice. It melts well and adds great flavor. You can also use cheddar for a sharper taste. Mixing cheeses can create a unique flavor blend. Experiment to find your favorite combo!
Can I prepare the filling in advance?
Absolutely! You can make the filling a day ahead. Just store it in the fridge. When ready, reheat it before assembling the sliders. This makes for quick and easy meal prep. Enjoy your tasty sliders with less fuss!
Philly cheesesteak sliders are simple to make and packed with flavor. We covered the key ingredients, step-by-step instructions, and handy tips to ensure your sliders shine. Don’t forget the fun variations and smart storage tips. You can mix and match to suit any taste or diet. Enjoy these sliders fresh, or save some for later. With the right care, you’ll always have a tasty treat on hand. Now, grab your ingredients and start cooking!

