![This easy cherry pie uses simple ingredients. You can make it with fresh or frozen cherries. The pie has a sweet and tart filling that pairs well with a flaky crust. You will love how easy it is to prepare. - 2 cups fresh or frozen cherries, pitted - 1 cup granulated sugar - 2 tablespoons cornstarch - 1 teaspoon pure vanilla extract - 1 tablespoon fresh lemon juice - 1 tablespoon unsalted butter, cut into small pieces - 1 pre-made pie crust (store-bought or homemade) - 1 large egg, beaten (for egg wash) - 1 tablespoon coarse sugar (for topping) You can make this cherry pie gluten-free. Just use a gluten-free pie crust. For a vegan option, swap the butter for a plant-based butter. Skip the egg wash and use a splash of plant milk instead for shine. This way, everyone can enjoy this tasty treat! Start by preheating your oven to 425°F (220°C). A hot oven helps make the crust flaky and golden. This step is key for a tasty pie. In a medium saucepan, mix the pitted cherries, sugar, cornstarch, vanilla, and lemon juice. Heat this mixture over medium heat. Stir gently as it warms up. Cook for about 5-7 minutes or until it thickens and bubbles. Once thick, take it off the heat. Let it cool for a few minutes before using it. If you make your own crust, roll it out on a floured surface. Aim for about 1/8 inch thick. If you use a store-bought crust, press it into a 9-inch pie dish. Make sure it fits snugly against the bottom and sides. Pour the cooled cherry filling into the crust. Spread the filling evenly. For extra flavor, add small pieces of butter on top of the cherries. If you have extra dough, create a lattice or add another layer over the filling. Press the edges together to seal. Crimp the edges with a fork or fingers. Cut 3-4 small slits in the top to allow steam to escape. Place the pie in your hot oven. Bake for 25-30 minutes. Watch it closely so it doesn’t over-brown. The crust should be golden, and the filling should bubble. Once baked, take the pie out of the oven. Allow it to cool for at least 30 minutes. This helps the filling set. Serve the pie warm or at room temperature for the best taste. Enjoy your delightful cherry bliss pie! To get a flaky crust, chill your butter before using it. Cold fat creates pockets in the dough. This leads to a light, flaky texture. Use ice-cold water when mixing your dough. This keeps it cool and prevents it from becoming tough. Roll the dough gently on a floured surface. Don't overwork it; just mix until combined. Having the right tools makes baking easier. Here’s what I recommend: - Rolling pin - 9-inch pie dish - Mixing bowls - Pastry cutter or fork - Sharp knife for cutting slits - Brush for the egg wash These tools help you create the perfect cherry pie with ease. Sometimes things don’t go as planned. Here are a few fixes: - Crust too tough? You may have overmixed the dough. Try mixing less next time. - Filling too runny? Use more cornstarch to thicken it. - Crust burning? Cover the edges with foil if it browns too quickly. With these tips, you can avoid common pitfalls and enjoy a delicious cherry pie. For the full recipe, check out the [Full Recipe]. {{image_4}} If you love cherry pie, you might enjoy other fruit pies too. You can try making a blueberry pie. Blueberries burst with sweet flavor. Another great choice is apple pie. The tartness of apples pairs well with spices. You can also use peaches or raspberries. Each fruit brings its own unique taste. Feel free to swap out the cherries in the Full Recipe with your favorite fruits. To take your cherry pie to the next level, think about adding unique flavors. A touch of almond extract can give a nice nutty twist. You can also mix in a bit of cinnamon for warmth. If you want some zest, add lemon or orange peel. These flavors blend well with cherries. They can make your pie stand out at any gathering. The crust can change the pie's look and taste. A lattice crust is a fun option. It lets the filling peek through and looks pretty. A crumble topping adds a nice, crunchy texture. You can mix oats and brown sugar for the crumble. If you want something different, try a cookie crust. Just crush your favorite cookies and press them into the pie dish. Each crust type can give your cherry pie a new flair. To keep your pie fresh, cover it with plastic wrap or aluminum foil. You can also place it in an airtight container. Store it in the fridge for up to four days. This keeps the crust from getting soggy while keeping the cherries tasty. If you want to enjoy it longer, freezing is a good option. You can freeze cherry pie for up to three months. Make sure the pie is completely cool before freezing. Wrap it tightly in plastic wrap, then aluminum foil. This double layer keeps out air and prevents freezer burn. You can also freeze slices if you want to enjoy them one at a time. To reheat, preheat your oven to 350°F (175°C). Place the pie on a baking sheet to catch drips. Heat for about 15-20 minutes if it's whole. For slices, heat for 10-15 minutes. You want the filling to be warm and the crust to be crispy again. Enjoy your warm pie just like fresh! Yes, you can use frozen cherries. Frozen cherries work well in this pie. They save time and still taste great. Just make sure to thaw and drain them before use. This helps keep your pie from getting too watery. Making pie crust is simple. You need a few basic ingredients. Combine 1 ½ cups of flour, ½ cup of cold butter, and a pinch of salt. Mix until it looks like crumbs. Then, add ice water, one tablespoon at a time. Form the dough into a ball and chill for 30 minutes. Roll it out, and you have a perfect crust! Cherry pie pairs well with many toppings. You can serve it with whipped cream for a sweet touch. Ice cream makes it extra special. Try vanilla or even a scoop of chocolate! Fresh mint leaves can add a nice pop of color and flavor too. Cherry pie lasts about 2 to 3 days at room temperature. Cover it with plastic wrap or foil. If you keep it in the fridge, it can last up to a week. You can also freeze it for longer storage. Just wrap it well and it can last for about 2 months. In this blog post, we explored how to make a delicious cherry pie. We covered the ingredients needed, step-by-step directions, and helpful tips. You learned about dietary options, variations, and storage tricks for leftovers. Cherry pie is easy and fun to make at home. Use this guide to create your perfect pie, share it, and enjoy every bite!](https://recipesstation.com/wp-content/uploads/2025/06/34be6c9a-9dc6-43dd-ba18-3e4c9b029bb1-768x768.webp)
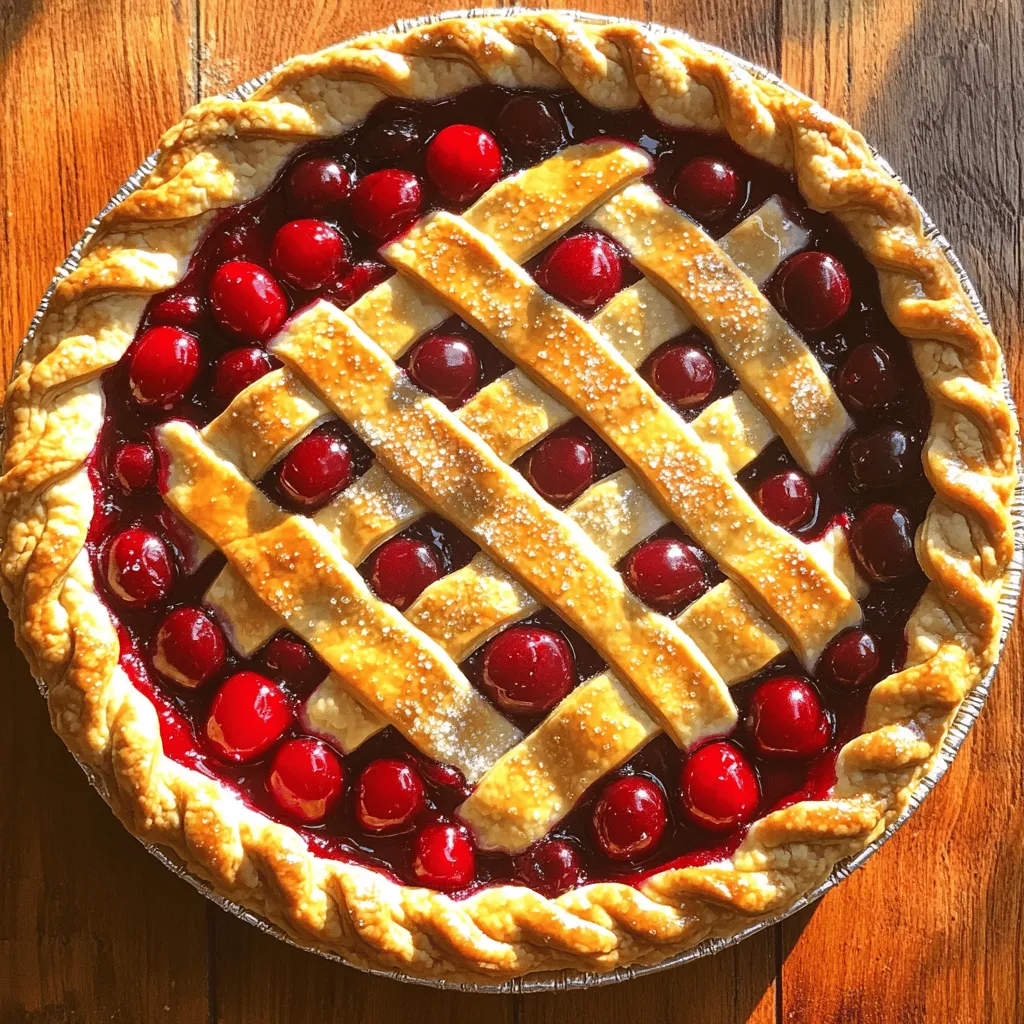
Are you ready to bake a pie that’s easy and delicious? This Easy Cherry Pie will make your taste buds dance with joy. You’ll learn how to prepare a tasty cherry filling, assemble the perfect crust, and bake it all to perfection. No experience needed! Follow my simple steps to create a treat your family will love. Let’s dive in and make some magic in the kitchen!You can make it with fresh or frozen cherries. The pie has a sweet and tart filling that pairs well with a flaky crust. You will love how easy it is to prepare.
Detailed Ingredients List
– 2 cups fresh or frozen cherries, pitted
– 1 cup granulated sugar
– 2 tablespoons cornstarch
– 1 teaspoon pure vanilla extract
– 1 tablespoon fresh lemon juice
– 1 tablespoon unsalted butter, cut into small pieces
– 1 pre-made pie crust (store-bought or homemade)
– 1 large egg, beaten (for egg wash)
– 1 tablespoon coarse sugar (for topping)
Dietary Modifications (Gluten-free, Vegan, etc.)
You can make this cherry pie gluten-free. Just use a gluten-free pie crust. For a vegan option, swap the butter for a plant-based butter. Skip the egg wash and use a splash of plant milk instead for shine. This way, everyone can enjoy this tasty treat!
Step-by-Step Instructions
Preheating the Oven
Start by preheating your oven to 425°F (220°C). A hot oven helps make the crust flaky and golden. This step is key for a tasty pie.
Preparing the Cherry Filling
In a medium saucepan, mix the pitted cherries, sugar, cornstarch, vanilla, and lemon juice. Heat this mixture over medium heat. Stir gently as it warms up. Cook for about 5-7 minutes or until it thickens and bubbles. Once thick, take it off the heat. Let it cool for a few minutes before using it.
Assembling the Pie Crust
If you make your own crust, roll it out on a floured surface. Aim for about 1/8 inch thick. If you use a store-bought crust, press it into a 9-inch pie dish. Make sure it fits snugly against the bottom and sides.
Filling and Topping the Pie
Pour the cooled cherry filling into the crust. Spread the filling evenly. For extra flavor, add small pieces of butter on top of the cherries. If you have extra dough, create a lattice or add another layer over the filling. Press the edges together to seal. Crimp the edges with a fork or fingers. Cut 3-4 small slits in the top to allow steam to escape.
Baking Instructions
Place the pie in your hot oven. Bake for 25-30 minutes. Watch it closely so it doesn’t over-brown. The crust should be golden, and the filling should bubble.
Cooling and Serving Suggestions
Once baked, take the pie out of the oven. Allow it to cool for at least 30 minutes. This helps the filling set. Serve the pie warm or at room temperature for the best taste. Enjoy your delightful cherry bliss pie!
Tips & Tricks
How to Ensure a Flaky Crust
To get a flaky crust, chill your butter before using it. Cold fat creates pockets in the dough. This leads to a light, flaky texture. Use ice-cold water when mixing your dough. This keeps it cool and prevents it from becoming tough. Roll the dough gently on a floured surface. Don’t overwork it; just mix until combined.
Recommended Tools and Equipment
Having the right tools makes baking easier. Here’s what I recommend:
– Rolling pin
– 9-inch pie dish
– Mixing bowls
– Pastry cutter or fork
– Sharp knife for cutting slits
– Brush for the egg wash
These tools help you create the perfect cherry pie with ease.
Troubleshooting Common Issues
Sometimes things don’t go as planned. Here are a few fixes:
– Crust too tough? You may have overmixed the dough. Try mixing less next time.
– Filling too runny? Use more cornstarch to thicken it.
– Crust burning? Cover the edges with foil if it browns too quickly.
With these tips, you can avoid common pitfalls and enjoy a delicious cherry pie.
Variations
Alternative Fruit Pie Ideas
If you love cherry pie, you might enjoy other fruit pies too. You can try making a blueberry pie. Blueberries burst with sweet flavor. Another great choice is apple pie. The tartness of apples pairs well with spices. You can also use peaches or raspberries. Each fruit brings its own unique taste.
Unique Flavor Additions
To take your cherry pie to the next level, think about adding unique flavors. A touch of almond extract can give a nice nutty twist. You can also mix in a bit of cinnamon for warmth. If you want some zest, add lemon or orange peel. These flavors blend well with cherries. They can make your pie stand out at any gathering.
Crust Variations (Lattice, Crumble, etc.)
The crust can change the pie’s look and taste. A lattice crust is a fun option. It lets the filling peek through and looks pretty. A crumble topping adds a nice, crunchy texture. You can mix oats and brown sugar for the crumble. If you want something different, try a cookie crust. Just crush your favorite cookies and press them into the pie dish. Each crust type can give your cherry pie a new flair.
Storage Info
How to Store Leftover Pie
To keep your pie fresh, cover it with plastic wrap or aluminum foil. You can also place it in an airtight container. Store it in the fridge for up to four days. This keeps the crust from getting soggy while keeping the cherries tasty. If you want to enjoy it longer, freezing is a good option.
Freezing Instructions
You can freeze cherry pie for up to three months. Make sure the pie is completely cool before freezing. Wrap it tightly in plastic wrap, then aluminum foil. This double layer keeps out air and prevents freezer burn. You can also freeze slices if you want to enjoy them one at a time.
Reheating Tips
To reheat, preheat your oven to 350°F (175°C). Place the pie on a baking sheet to catch drips. Heat for about 15-20 minutes if it’s whole. For slices, heat for 10-15 minutes. You want the filling to be warm and the crust to be crispy again. Enjoy your warm pie just like fresh!
FAQs
Can I use frozen cherries for this recipe?
Yes, you can use frozen cherries. Frozen cherries work well in this pie. They save time and still taste great. Just make sure to thaw and drain them before use. This helps keep your pie from getting too watery.
How can I make my pie crust from scratch?
Making pie crust is simple. You need a few basic ingredients. Combine 1 ½ cups of flour, ½ cup of cold butter, and a pinch of salt. Mix until it looks like crumbs. Then, add ice water, one tablespoon at a time. Form the dough into a ball and chill for 30 minutes. Roll it out, and you have a perfect crust!
What can I serve with cherry pie?
Cherry pie pairs well with many toppings. You can serve it with whipped cream for a sweet touch. Ice cream makes it extra special. Try vanilla or even a scoop of chocolate! Fresh mint leaves can add a nice pop of color and flavor too.
How long does cherry pie last?
Cherry pie lasts about 2 to 3 days at room temperature. Cover it with plastic wrap or foil. If you keep it in the fridge, it can last up to a week. You can also freeze it for longer storage. Just wrap it well and it can last for about 2 months.
In this blog post, we explored how to make a delicious cherry pie. We covered the ingredients needed, step-by-step directions, and helpful tips. You learned about dietary options, variations, and storage tricks for leftovers.
Cherry pie is easy and fun to make at home. Use this guide to create your perfect pie, share it, and enjoy every bite!
![This easy cherry pie uses simple ingredients. You can make it with fresh or frozen cherries. The pie has a sweet and tart filling that pairs well with a flaky crust. You will love how easy it is to prepare. - 2 cups fresh or frozen cherries, pitted - 1 cup granulated sugar - 2 tablespoons cornstarch - 1 teaspoon pure vanilla extract - 1 tablespoon fresh lemon juice - 1 tablespoon unsalted butter, cut into small pieces - 1 pre-made pie crust (store-bought or homemade) - 1 large egg, beaten (for egg wash) - 1 tablespoon coarse sugar (for topping) You can make this cherry pie gluten-free. Just use a gluten-free pie crust. For a vegan option, swap the butter for a plant-based butter. Skip the egg wash and use a splash of plant milk instead for shine. This way, everyone can enjoy this tasty treat! Start by preheating your oven to 425°F (220°C). A hot oven helps make the crust flaky and golden. This step is key for a tasty pie. In a medium saucepan, mix the pitted cherries, sugar, cornstarch, vanilla, and lemon juice. Heat this mixture over medium heat. Stir gently as it warms up. Cook for about 5-7 minutes or until it thickens and bubbles. Once thick, take it off the heat. Let it cool for a few minutes before using it. If you make your own crust, roll it out on a floured surface. Aim for about 1/8 inch thick. If you use a store-bought crust, press it into a 9-inch pie dish. Make sure it fits snugly against the bottom and sides. Pour the cooled cherry filling into the crust. Spread the filling evenly. For extra flavor, add small pieces of butter on top of the cherries. If you have extra dough, create a lattice or add another layer over the filling. Press the edges together to seal. Crimp the edges with a fork or fingers. Cut 3-4 small slits in the top to allow steam to escape. Place the pie in your hot oven. Bake for 25-30 minutes. Watch it closely so it doesn’t over-brown. The crust should be golden, and the filling should bubble. Once baked, take the pie out of the oven. Allow it to cool for at least 30 minutes. This helps the filling set. Serve the pie warm or at room temperature for the best taste. Enjoy your delightful cherry bliss pie! To get a flaky crust, chill your butter before using it. Cold fat creates pockets in the dough. This leads to a light, flaky texture. Use ice-cold water when mixing your dough. This keeps it cool and prevents it from becoming tough. Roll the dough gently on a floured surface. Don't overwork it; just mix until combined. Having the right tools makes baking easier. Here’s what I recommend: - Rolling pin - 9-inch pie dish - Mixing bowls - Pastry cutter or fork - Sharp knife for cutting slits - Brush for the egg wash These tools help you create the perfect cherry pie with ease. Sometimes things don’t go as planned. Here are a few fixes: - Crust too tough? You may have overmixed the dough. Try mixing less next time. - Filling too runny? Use more cornstarch to thicken it. - Crust burning? Cover the edges with foil if it browns too quickly. With these tips, you can avoid common pitfalls and enjoy a delicious cherry pie. For the full recipe, check out the [Full Recipe]. {{image_4}} If you love cherry pie, you might enjoy other fruit pies too. You can try making a blueberry pie. Blueberries burst with sweet flavor. Another great choice is apple pie. The tartness of apples pairs well with spices. You can also use peaches or raspberries. Each fruit brings its own unique taste. Feel free to swap out the cherries in the Full Recipe with your favorite fruits. To take your cherry pie to the next level, think about adding unique flavors. A touch of almond extract can give a nice nutty twist. You can also mix in a bit of cinnamon for warmth. If you want some zest, add lemon or orange peel. These flavors blend well with cherries. They can make your pie stand out at any gathering. The crust can change the pie's look and taste. A lattice crust is a fun option. It lets the filling peek through and looks pretty. A crumble topping adds a nice, crunchy texture. You can mix oats and brown sugar for the crumble. If you want something different, try a cookie crust. Just crush your favorite cookies and press them into the pie dish. Each crust type can give your cherry pie a new flair. To keep your pie fresh, cover it with plastic wrap or aluminum foil. You can also place it in an airtight container. Store it in the fridge for up to four days. This keeps the crust from getting soggy while keeping the cherries tasty. If you want to enjoy it longer, freezing is a good option. You can freeze cherry pie for up to three months. Make sure the pie is completely cool before freezing. Wrap it tightly in plastic wrap, then aluminum foil. This double layer keeps out air and prevents freezer burn. You can also freeze slices if you want to enjoy them one at a time. To reheat, preheat your oven to 350°F (175°C). Place the pie on a baking sheet to catch drips. Heat for about 15-20 minutes if it's whole. For slices, heat for 10-15 minutes. You want the filling to be warm and the crust to be crispy again. Enjoy your warm pie just like fresh! Yes, you can use frozen cherries. Frozen cherries work well in this pie. They save time and still taste great. Just make sure to thaw and drain them before use. This helps keep your pie from getting too watery. Making pie crust is simple. You need a few basic ingredients. Combine 1 ½ cups of flour, ½ cup of cold butter, and a pinch of salt. Mix until it looks like crumbs. Then, add ice water, one tablespoon at a time. Form the dough into a ball and chill for 30 minutes. Roll it out, and you have a perfect crust! Cherry pie pairs well with many toppings. You can serve it with whipped cream for a sweet touch. Ice cream makes it extra special. Try vanilla or even a scoop of chocolate! Fresh mint leaves can add a nice pop of color and flavor too. Cherry pie lasts about 2 to 3 days at room temperature. Cover it with plastic wrap or foil. If you keep it in the fridge, it can last up to a week. You can also freeze it for longer storage. Just wrap it well and it can last for about 2 months. In this blog post, we explored how to make a delicious cherry pie. We covered the ingredients needed, step-by-step directions, and helpful tips. You learned about dietary options, variations, and storage tricks for leftovers. Cherry pie is easy and fun to make at home. Use this guide to create your perfect pie, share it, and enjoy every bite!](https://recipesstation.com/wp-content/uploads/2025/06/34be6c9a-9dc6-43dd-ba18-3e4c9b029bb1-250x250.webp)
