![To make a delicious Strawberry Kiwi Pavlova, you will need the following items: - 4 large egg whites - 1 cup granulated sugar - 1 teaspoon white vinegar - 1 teaspoon cornstarch - 1 cup heavy whipping cream - 2 tablespoons powdered sugar - 1 teaspoon vanilla extract - 1 cup strawberries, hulled and sliced - 2 kiwis, peeled and sliced - Fresh mint leaves for garnish (optional) Each ingredient plays a key role in the final dish. The egg whites create a light and airy base, while the sugar helps to stabilize the meringue. Vinegar adds a hint of tang, and cornstarch gives structure. The heavy cream, whipped to perfection, offers a rich and creamy layer. Fresh strawberries and kiwis add vibrant colors and sweet-tart flavors. As you gather these ingredients, think about how you can personalize this recipe. Maybe you want to add a splash of orange zest or try a different fruit. The options are endless! For the complete cooking process, check out the Full Recipe. - Preheat your oven to 275°F (135°C). - Line a baking sheet with parchment paper. - Lightly trace a 9-inch circle in the center. This circle helps shape your meringue. - In a large bowl, beat the egg whites with an electric mixer. - Start on medium speed until soft peaks form, about 2-3 minutes. - Gradually add the granulated sugar, one tablespoon at a time. - Keep beating until you see stiff peaks and a glossy finish, around 5-7 minutes. - Carefully fold in the white vinegar and cornstarch with a spatula. - Make sure to keep the volume by folding, not stirring. - Spoon the meringue onto the prepared parchment paper. - Use the drawn circle as a guide to shape a round, shallow nest. - Create slightly raised edges for a beautiful look. - Place the meringue in the preheated oven and bake for 1 hour. - After baking, turn off the oven and let the pavlova cool inside. - Leave the oven door slightly ajar to allow heat to escape slowly. This method creates a crisp outer layer and a soft inside. You will soon have a stunning pavlova ready for toppings! For the full recipe, check the provided details. To make the best meringue, start with room temperature egg whites. Cold egg whites do not whip well. Let them sit at room temp for about 30 minutes. This small step helps in getting that perfect volume. Avoid moisture in the egg whites by using clean bowls and tools. Even a tiny bit of fat or water can ruin your meringue. Make sure everything is dry and clean before you begin. Whipping cream can be tricky. Use heavy cream and chill your mixing bowl for best results. Beat the cream slowly at first, then increase to medium-high speed. Stop when you see soft peaks. If you beat it too much, you will get butter! Flavor your whipped cream for extra taste. You can add vanilla extract, cocoa powder, or even some fresh fruit puree. This adds a fun twist to your pavlova. Your pavlova deserves an eye-catching display. Serve it on a decorative cake stand to impress your guests. Slice it at the table for a dramatic reveal of that crunchy meringue and fluffy cream. For garnishes, fresh mint leaves add color and a nice touch. You can also sprinkle some powdered sugar over the top for a snowy effect. Creative presentation makes your pavlova even more delightful. For a complete guide, refer to the [Full Recipe]. {{image_4}} You can switch up the fruit on your pavlova to match the season or your taste. Here are some great ideas: - Peaches: Sweet and juicy, they add a lovely flavor. - Mango: This gives a tropical twist to the dish. - Blueberries: Their burst of flavor pairs well with cream. - Raspberries: They add a tart contrast to the sweet meringue. Using seasonal fruits can enhance the taste and make your pavlova even more special. In summer, go for berries. In winter, try citrus like oranges or pomegranates. Think about adding zest to your meringue. A little lemon or lime zest can brighten the taste. You can also try extracts like almond or orange for a fun twist. For the whipped cream, you can be creative. Mix in cocoa powder for a chocolate flavor. Or add instant coffee for a coffee-flavored cream. These options can change the whole vibe of your dessert! Making this pavlova gluten-free is simple. The main ingredients are already gluten-free. Just ensure your sugar and cornstarch are free from cross-contamination. If you want a dairy-free version, swap the heavy cream for coconut cream. Chill a can of coconut milk overnight, then scoop out the solid part. It whips up nicely and adds a tropical taste. For a healthier pavlova, try using natural sweeteners like honey or agave. Adjust the amounts since they can be sweeter than sugar. These swaps let you enjoy this treat while sticking to your dietary needs. For the full recipe, check the section above. To keep your pavlova fresh, store the meringue and cream separately. This way, the meringue stays crunchy, and the cream remains fluffy. Place the meringue in an airtight container at room temperature. It can last up to two days this way. For the cream, keep it in the fridge in a covered bowl. Use the cream within 24 hours for best taste. Can pavlova be frozen? Yes, but it's not the best option. Freezing can change the texture of the meringue. If you must freeze it, follow these steps: 1. Prepare the Meringue: Let it cool completely. Wrap it in plastic wrap tightly. 2. Store in a Container: Place the wrapped meringue in a freezer-safe bag or container. 3. Thawing: To thaw, take it out and let it sit at room temperature for a few hours. Avoid using a microwave, as it can make it soggy. While freezing is possible, enjoy your pavlova fresh for the best experience! For the full recipe, check out the Strawberry Kiwi Pavlova Delight. Pavlova is a light dessert made from meringue. It has a crispy outer shell and a soft, chewy inside. The dessert is named after the Russian ballerina Anna Pavlova. It is popular in Australia and New Zealand. There, it is often served at parties and special events. The meringue symbolizes celebration, bringing a touch of elegance. Yes, you can make pavlova ahead of time. Bake the meringue a day before your event. Let it cool in the oven overnight. This helps prevent cracks. You can whip the cream and prepare the fruit just before serving. This way, your pavlova stays fresh and tasty. Cracks in meringue can happen for many reasons. Here are some tips to help you: - Don't overmix: Once you reach stiff peaks, stop mixing. - Bake at low heat: A low oven temperature helps the meringue dry without burning. - Don’t open the oven: Opening the door can cause temperature drops, leading to cracks. Serving your pavlova is easy and fun. Here are some tips: - Use a cake stand: This adds height and elegance to your dessert. - Layer the cream: Spread whipped cream evenly on top of the meringue. - Add fruit beautifully: Arrange strawberries and kiwis in a colorful pattern. - Garnish: Fresh mint leaves can add a nice touch. For the full recipe, check the Full Recipe section. Enjoy your delicious Strawberry Kiwi Pavlova! Making a perfect Strawberry Kiwi Pavlova takes skill and care. You learned about key ingredients and followed helpful step-by-step instructions. With tips for perfecting your meringue and whipping cream, you can elevate your dish. Variations help you customize the pavlova to your taste and dietary needs. Proper storage ensures your leftovers remain fresh. Enjoy making this delightful dessert, impressing your friends and family with each bite. Remember, practice makes perfect. Now, it's time for you to create your own delicious pavlova!](https://recipesstation.com/wp-content/uploads/2025/07/5e855d2f-7c76-48e5-94d7-8dfe891bc7fa-768x768.webp)
Are you ready to impress your friends with a stunning dessert? This Strawberry Kiwi Pavlova is not only easy to make but also a feast for the eyes. With its crisp meringue, fluffy cream, and fresh fruit, it’s sure to be a hit at any gathering. In this article, I’ll guide you through each step, share handy tips, and even explore delicious variations. Let’s get started on this delightful treat!
Ingredients
To make a delicious Strawberry Kiwi Pavlova, you will need the following items:
– 4 large egg whites
– 1 cup granulated sugar
– 1 teaspoon white vinegar
– 1 teaspoon cornstarch
– 1 cup heavy whipping cream
– 2 tablespoons powdered sugar
– 1 teaspoon vanilla extract
– 1 cup strawberries, hulled and sliced
– 2 kiwis, peeled and sliced
– Fresh mint leaves for garnish (optional)
Each ingredient plays a key role in the final dish. The egg whites create a light and airy base, while the sugar helps to stabilize the meringue. Vinegar adds a hint of tang, and cornstarch gives structure. The heavy cream, whipped to perfection, offers a rich and creamy layer. Fresh strawberries and kiwis add vibrant colors and sweet-tart flavors.
As you gather these ingredients, think about how you can personalize this recipe. Maybe you want to add a splash of orange zest or try a different fruit. The options are endless!
Step-by-Step Instructions
Preparing the Oven and Baking Sheet
– Preheat your oven to 275°F (135°C).
– Line a baking sheet with parchment paper.
– Lightly trace a 9-inch circle in the center. This circle helps shape your meringue.
Whipping Egg Whites
– In a large bowl, beat the egg whites with an electric mixer.
– Start on medium speed until soft peaks form, about 2-3 minutes.
– Gradually add the granulated sugar, one tablespoon at a time.
– Keep beating until you see stiff peaks and a glossy finish, around 5-7 minutes.
Shaping and Baking the Meringue
– Carefully fold in the white vinegar and cornstarch with a spatula.
– Make sure to keep the volume by folding, not stirring.
– Spoon the meringue onto the prepared parchment paper.
– Use the drawn circle as a guide to shape a round, shallow nest.
– Create slightly raised edges for a beautiful look.
– Place the meringue in the preheated oven and bake for 1 hour.
– After baking, turn off the oven and let the pavlova cool inside.
– Leave the oven door slightly ajar to allow heat to escape slowly.
This method creates a crisp outer layer and a soft inside. You will soon have a stunning pavlova ready for toppings!
Tips & Tricks
Achieving Perfect Meringue
To make the best meringue, start with room temperature egg whites. Cold egg whites do not whip well. Let them sit at room temp for about 30 minutes. This small step helps in getting that perfect volume.
Avoid moisture in the egg whites by using clean bowls and tools. Even a tiny bit of fat or water can ruin your meringue. Make sure everything is dry and clean before you begin.
Whipping Cream Tips
Whipping cream can be tricky. Use heavy cream and chill your mixing bowl for best results. Beat the cream slowly at first, then increase to medium-high speed. Stop when you see soft peaks. If you beat it too much, you will get butter!
Flavor your whipped cream for extra taste. You can add vanilla extract, cocoa powder, or even some fresh fruit puree. This adds a fun twist to your pavlova.
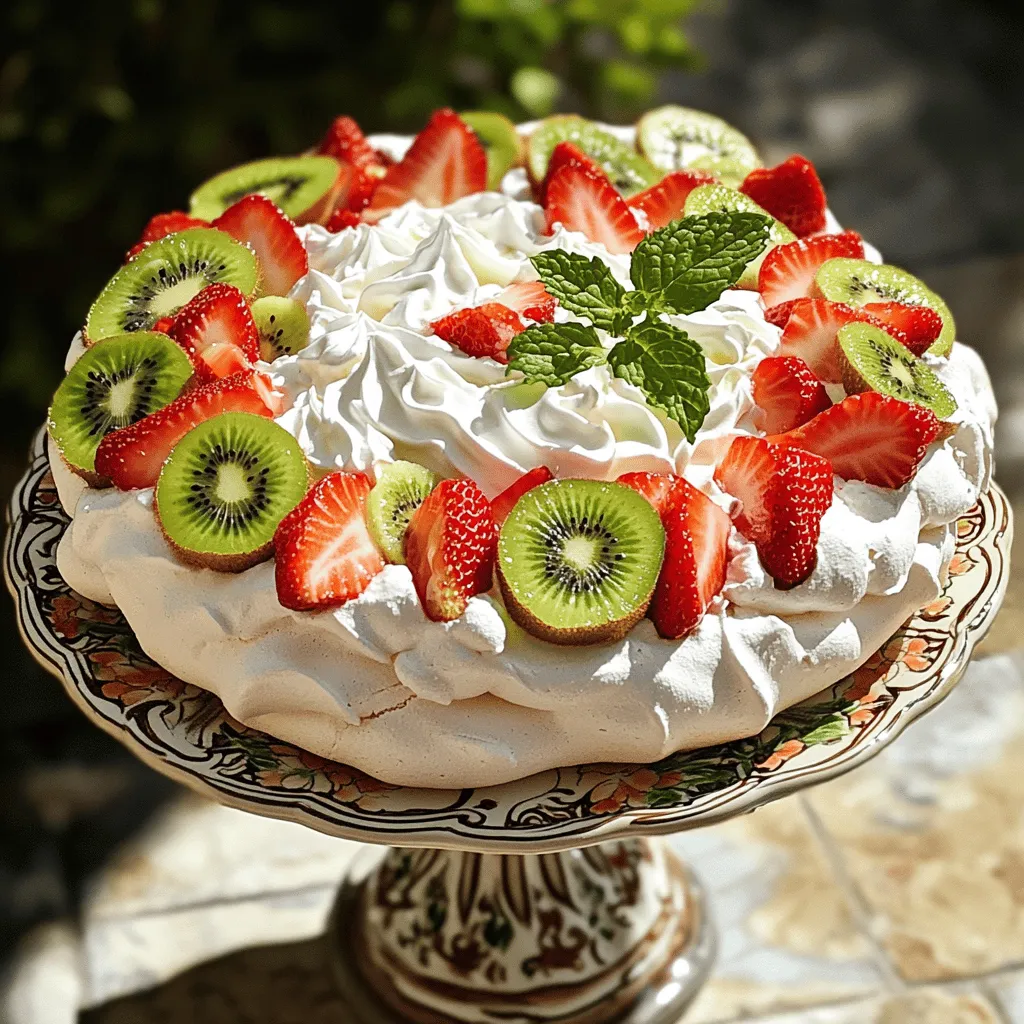
Presentation Suggestions
Your pavlova deserves an eye-catching display. Serve it on a decorative cake stand to impress your guests. Slice it at the table for a dramatic reveal of that crunchy meringue and fluffy cream.
For garnishes, fresh mint leaves add color and a nice touch. You can also sprinkle some powdered sugar over the top for a snowy effect. Creative presentation makes your pavlova even more delightful.
Variations
Alternative Fruit Toppings
You can switch up the fruit on your pavlova to match the season or your taste. Here are some great ideas:
– Peaches: Sweet and juicy, they add a lovely flavor.
– Mango: This gives a tropical twist to the dish.
– Blueberries: Their burst of flavor pairs well with cream.
– Raspberries: They add a tart contrast to the sweet meringue.
Using seasonal fruits can enhance the taste and make your pavlova even more special. In summer, go for berries. In winter, try citrus like oranges or pomegranates.
Flavor Enhancements
Think about adding zest to your meringue. A little lemon or lime zest can brighten the taste. You can also try extracts like almond or orange for a fun twist.
For the whipped cream, you can be creative. Mix in cocoa powder for a chocolate flavor. Or add instant coffee for a coffee-flavored cream. These options can change the whole vibe of your dessert!
Dietary Substitutions
Making this pavlova gluten-free is simple. The main ingredients are already gluten-free. Just ensure your sugar and cornstarch are free from cross-contamination.
If you want a dairy-free version, swap the heavy cream for coconut cream. Chill a can of coconut milk overnight, then scoop out the solid part. It whips up nicely and adds a tropical taste.
For a healthier pavlova, try using natural sweeteners like honey or agave. Adjust the amounts since they can be sweeter than sugar. These swaps let you enjoy this treat while sticking to your dietary needs.
Storage Info
Best Practices for Storing Pavlova
To keep your pavlova fresh, store the meringue and cream separately. This way, the meringue stays crunchy, and the cream remains fluffy. Place the meringue in an airtight container at room temperature. It can last up to two days this way. For the cream, keep it in the fridge in a covered bowl. Use the cream within 24 hours for best taste.
Freezing Tips
Can pavlova be frozen? Yes, but it’s not the best option. Freezing can change the texture of the meringue. If you must freeze it, follow these steps:
1. Prepare the Meringue: Let it cool completely. Wrap it in plastic wrap tightly.
2. Store in a Container: Place the wrapped meringue in a freezer-safe bag or container.
3. Thawing: To thaw, take it out and let it sit at room temperature for a few hours. Avoid using a microwave, as it can make it soggy.
While freezing is possible, enjoy your pavlova fresh for the best experience!
FAQs
What is Pavlova and its Origin?
Pavlova is a light dessert made from meringue. It has a crispy outer shell and a soft, chewy inside. The dessert is named after the Russian ballerina Anna Pavlova. It is popular in Australia and New Zealand. There, it is often served at parties and special events. The meringue symbolizes celebration, bringing a touch of elegance.
Can I make Pavlova in advance?
Yes, you can make pavlova ahead of time. Bake the meringue a day before your event. Let it cool in the oven overnight. This helps prevent cracks. You can whip the cream and prepare the fruit just before serving. This way, your pavlova stays fresh and tasty.
How do I prevent my meringue from cracking?
Cracks in meringue can happen for many reasons. Here are some tips to help you:
– Don’t overmix: Once you reach stiff peaks, stop mixing.
– Bake at low heat: A low oven temperature helps the meringue dry without burning.
– Don’t open the oven: Opening the door can cause temperature drops, leading to cracks.
What is the best way to serve Strawberry Kiwi Pavlova?
Serving your pavlova is easy and fun. Here are some tips:
– Use a cake stand: This adds height and elegance to your dessert.
– Layer the cream: Spread whipped cream evenly on top of the meringue.
– Add fruit beautifully: Arrange strawberries and kiwis in a colorful pattern.
– Garnish: Fresh mint leaves can add a nice touch.Enjoy your delicious Strawberry Kiwi Pavlova!
Making a perfect Strawberry Kiwi Pavlova takes skill and care. You learned about key ingredients and followed helpful step-by-step instructions. With tips for perfecting your meringue and whipping cream, you can elevate your dish. Variations help you customize the pavlova to your taste and dietary needs. Proper storage ensures your leftovers remain fresh. Enjoy making this delightful dessert, impressing your friends and family with each bite. Remember, practice makes perfect. Now, it’s time for you to create your own delicious pavlova!
![To make a delicious Strawberry Kiwi Pavlova, you will need the following items: - 4 large egg whites - 1 cup granulated sugar - 1 teaspoon white vinegar - 1 teaspoon cornstarch - 1 cup heavy whipping cream - 2 tablespoons powdered sugar - 1 teaspoon vanilla extract - 1 cup strawberries, hulled and sliced - 2 kiwis, peeled and sliced - Fresh mint leaves for garnish (optional) Each ingredient plays a key role in the final dish. The egg whites create a light and airy base, while the sugar helps to stabilize the meringue. Vinegar adds a hint of tang, and cornstarch gives structure. The heavy cream, whipped to perfection, offers a rich and creamy layer. Fresh strawberries and kiwis add vibrant colors and sweet-tart flavors. As you gather these ingredients, think about how you can personalize this recipe. Maybe you want to add a splash of orange zest or try a different fruit. The options are endless! For the complete cooking process, check out the Full Recipe. - Preheat your oven to 275°F (135°C). - Line a baking sheet with parchment paper. - Lightly trace a 9-inch circle in the center. This circle helps shape your meringue. - In a large bowl, beat the egg whites with an electric mixer. - Start on medium speed until soft peaks form, about 2-3 minutes. - Gradually add the granulated sugar, one tablespoon at a time. - Keep beating until you see stiff peaks and a glossy finish, around 5-7 minutes. - Carefully fold in the white vinegar and cornstarch with a spatula. - Make sure to keep the volume by folding, not stirring. - Spoon the meringue onto the prepared parchment paper. - Use the drawn circle as a guide to shape a round, shallow nest. - Create slightly raised edges for a beautiful look. - Place the meringue in the preheated oven and bake for 1 hour. - After baking, turn off the oven and let the pavlova cool inside. - Leave the oven door slightly ajar to allow heat to escape slowly. This method creates a crisp outer layer and a soft inside. You will soon have a stunning pavlova ready for toppings! For the full recipe, check the provided details. To make the best meringue, start with room temperature egg whites. Cold egg whites do not whip well. Let them sit at room temp for about 30 minutes. This small step helps in getting that perfect volume. Avoid moisture in the egg whites by using clean bowls and tools. Even a tiny bit of fat or water can ruin your meringue. Make sure everything is dry and clean before you begin. Whipping cream can be tricky. Use heavy cream and chill your mixing bowl for best results. Beat the cream slowly at first, then increase to medium-high speed. Stop when you see soft peaks. If you beat it too much, you will get butter! Flavor your whipped cream for extra taste. You can add vanilla extract, cocoa powder, or even some fresh fruit puree. This adds a fun twist to your pavlova. Your pavlova deserves an eye-catching display. Serve it on a decorative cake stand to impress your guests. Slice it at the table for a dramatic reveal of that crunchy meringue and fluffy cream. For garnishes, fresh mint leaves add color and a nice touch. You can also sprinkle some powdered sugar over the top for a snowy effect. Creative presentation makes your pavlova even more delightful. For a complete guide, refer to the [Full Recipe]. {{image_4}} You can switch up the fruit on your pavlova to match the season or your taste. Here are some great ideas: - Peaches: Sweet and juicy, they add a lovely flavor. - Mango: This gives a tropical twist to the dish. - Blueberries: Their burst of flavor pairs well with cream. - Raspberries: They add a tart contrast to the sweet meringue. Using seasonal fruits can enhance the taste and make your pavlova even more special. In summer, go for berries. In winter, try citrus like oranges or pomegranates. Think about adding zest to your meringue. A little lemon or lime zest can brighten the taste. You can also try extracts like almond or orange for a fun twist. For the whipped cream, you can be creative. Mix in cocoa powder for a chocolate flavor. Or add instant coffee for a coffee-flavored cream. These options can change the whole vibe of your dessert! Making this pavlova gluten-free is simple. The main ingredients are already gluten-free. Just ensure your sugar and cornstarch are free from cross-contamination. If you want a dairy-free version, swap the heavy cream for coconut cream. Chill a can of coconut milk overnight, then scoop out the solid part. It whips up nicely and adds a tropical taste. For a healthier pavlova, try using natural sweeteners like honey or agave. Adjust the amounts since they can be sweeter than sugar. These swaps let you enjoy this treat while sticking to your dietary needs. For the full recipe, check the section above. To keep your pavlova fresh, store the meringue and cream separately. This way, the meringue stays crunchy, and the cream remains fluffy. Place the meringue in an airtight container at room temperature. It can last up to two days this way. For the cream, keep it in the fridge in a covered bowl. Use the cream within 24 hours for best taste. Can pavlova be frozen? Yes, but it's not the best option. Freezing can change the texture of the meringue. If you must freeze it, follow these steps: 1. Prepare the Meringue: Let it cool completely. Wrap it in plastic wrap tightly. 2. Store in a Container: Place the wrapped meringue in a freezer-safe bag or container. 3. Thawing: To thaw, take it out and let it sit at room temperature for a few hours. Avoid using a microwave, as it can make it soggy. While freezing is possible, enjoy your pavlova fresh for the best experience! For the full recipe, check out the Strawberry Kiwi Pavlova Delight. Pavlova is a light dessert made from meringue. It has a crispy outer shell and a soft, chewy inside. The dessert is named after the Russian ballerina Anna Pavlova. It is popular in Australia and New Zealand. There, it is often served at parties and special events. The meringue symbolizes celebration, bringing a touch of elegance. Yes, you can make pavlova ahead of time. Bake the meringue a day before your event. Let it cool in the oven overnight. This helps prevent cracks. You can whip the cream and prepare the fruit just before serving. This way, your pavlova stays fresh and tasty. Cracks in meringue can happen for many reasons. Here are some tips to help you: - Don't overmix: Once you reach stiff peaks, stop mixing. - Bake at low heat: A low oven temperature helps the meringue dry without burning. - Don’t open the oven: Opening the door can cause temperature drops, leading to cracks. Serving your pavlova is easy and fun. Here are some tips: - Use a cake stand: This adds height and elegance to your dessert. - Layer the cream: Spread whipped cream evenly on top of the meringue. - Add fruit beautifully: Arrange strawberries and kiwis in a colorful pattern. - Garnish: Fresh mint leaves can add a nice touch. For the full recipe, check the Full Recipe section. Enjoy your delicious Strawberry Kiwi Pavlova! Making a perfect Strawberry Kiwi Pavlova takes skill and care. You learned about key ingredients and followed helpful step-by-step instructions. With tips for perfecting your meringue and whipping cream, you can elevate your dish. Variations help you customize the pavlova to your taste and dietary needs. Proper storage ensures your leftovers remain fresh. Enjoy making this delightful dessert, impressing your friends and family with each bite. Remember, practice makes perfect. Now, it's time for you to create your own delicious pavlova!](https://recipesstation.com/wp-content/uploads/2025/07/5e855d2f-7c76-48e5-94d7-8dfe891bc7fa-250x250.webp)
