Are you ready to add a burst of flavor to your table? Pickled okra is not just a tasty treat; it’s also a fun way to preserve fresh veggies. In this guide, I’ll show you how to make crunchy, zesty pickled okra that you won’t be able to resist. Whether you’re snacking or serving it as a side, this recipe will delight your taste buds. Let’s dive in and discover the joy of pickling!
Ingredients
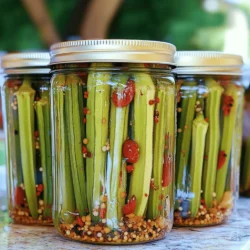
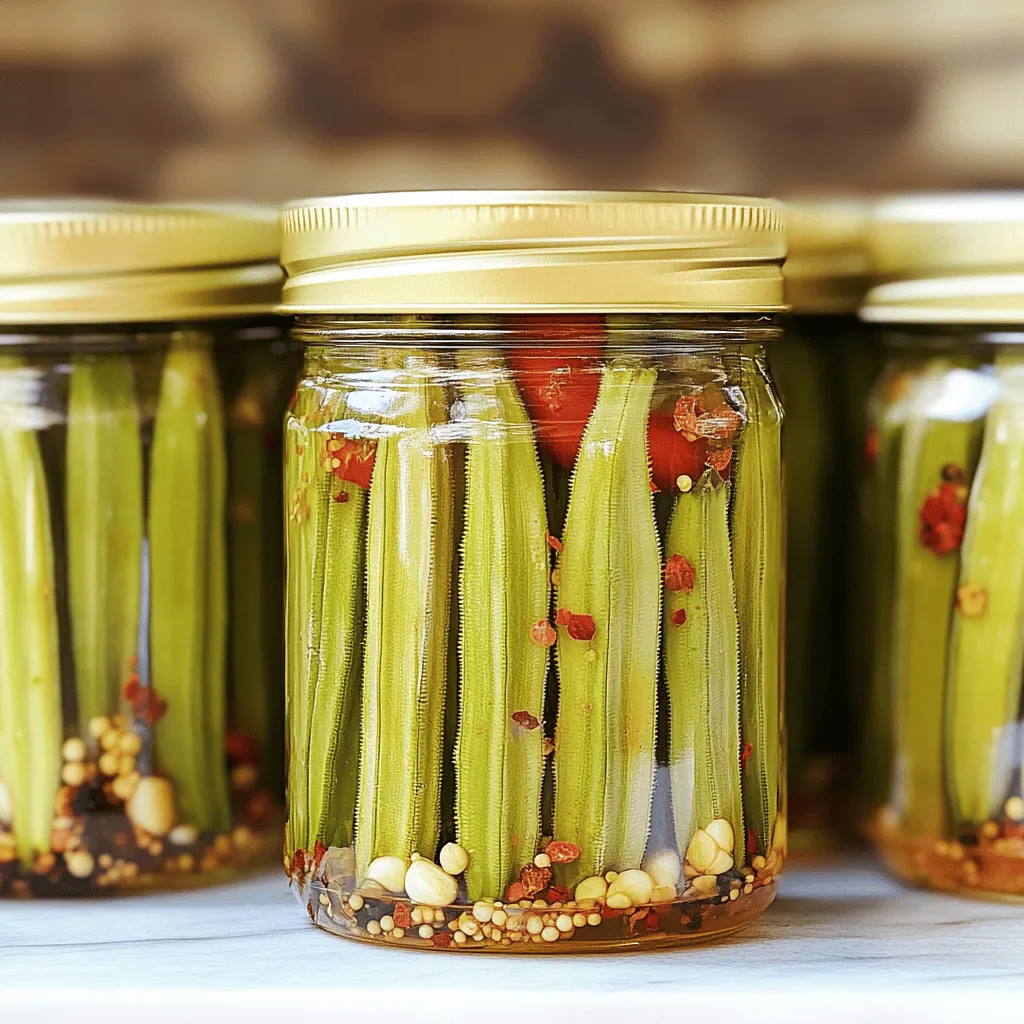
Fresh Ingredients for Pickled Okra
– 1 pound fresh okra, rinsed and trimmed
– 4 cloves garlic, smashed
– 1 whole red chili pepper
– Optional: chopped fresh herbs or colorful sliced peppers for presentation
Brine Ingredients
– 2 cups water
– 1 cup apple cider vinegar
– 2 tablespoons sea salt
– 2 tablespoons sugar
– 1 teaspoon black peppercorns
– 1 teaspoon mustard seeds
– 1 teaspoon coriander seeds
– Optional: 1/2 teaspoon smoked paprika
Equipment Needed
– Medium saucepan
– Large pot for sterilizing
– Clean jars with lids
– Measuring cups and spoons
I love using fresh okra for this recipe. The crunch and flavor shine through. When choosing okra, pick bright green pods that are firm. Avoid any that feel soft or look dull.
For the brine, apple cider vinegar adds a nice tang. The sugar and salt help create balance. This makes the pickled okra taste amazing. The spices give extra flavor. Black peppercorns and mustard seeds add depth. The optional smoked paprika gives a unique twist.
You will need a medium saucepan to make the brine. A large pot helps sterilize the jars too. Clean jars with lids keep the pickled okra fresh. Measuring cups and spoons ensure perfect amounts.
Step-by-Step Instructions
Preparing the Brine
First, gather your brine ingredients. You need 2 cups of water, 1 cup of apple cider vinegar, 2 tablespoons of sea salt, and 2 tablespoons of sugar. Combine these in a medium saucepan. Stir well and bring the mixture to a boil over medium-high heat. Keep stirring until the salt and sugar dissolve completely. Once dissolved, take the saucepan off the heat and let the brine cool slightly.
Sterilizing the Jars
While the brine cools, it’s time to prepare your jars. Take a large pot of hot water and boil the jars for about 10 minutes. This step is crucial. Sterilizing your jars helps preserve the pickles and keeps them safe to eat.
Packing the Jars
After you sterilize the jars, they should still be warm. Place the smashed garlic cloves, black peppercorns, mustard seeds, coriander seeds, and the whole red chili pepper at the bottom of each jar. Next, pack the trimmed okra into the jars, standing them upright. This creates a beautiful look and helps the flavors mix well.
Adding the Brine
Now it’s time for the brine. Carefully pour the warm brine over the packed okra in each jar. Make sure the okra is fully submerged in the brine. Leave about 1/2 inch of space at the top of each jar. This headspace is important for sealing.
Sealing and Cooling
Wipe the rims of the jars with a clean cloth. This step removes any residue that may prevent a good seal. Secure the jars with their lids and let them cool to room temperature. This cooling step helps the flavors meld together nicely.
Refrigerating
Once the jars cool, place them in the fridge. Let the okra pickle for at least 48 hours. This time allows the flavors to develop fully. When stored properly, pickled okra can last up to 3 months in the fridge.
Tips & Tricks
Achieving the Perfect Crunch
To get that perfect crunch, always use fresh okra. Look for firm, bright green pods. Fresh okra makes all the difference in taste and texture. After you pack the jars, let the okra pickle for at least 48 hours. This rest time allows flavors to blend well and enhances the crunch.
Flavor Enhancements
You can spice up your pickled okra with various flavors. Try adding whole mustard seeds or coriander seeds for a zesty kick. Experimenting with different peppers can also change the heat level. Adding a whole red chili gives a nice balance of spice. Fresh herbs, like dill or thyme, can add a unique taste too.
Serving Suggestions
Pickled okra shines as a snack or a side. Serve it on charcuterie boards for a colorful touch. It also adds a fun crunch to salads. Use it as a garnish for cocktails or sandwiches. Its bright flavor can elevate any dish. Enjoy your pickled okra straight from the jar or as part of a meal!
Variations
Spicy Pickled Okra
To make spicy pickled okra, adjust the chili levels for heat. You can add more dried chili peppers for a stronger kick. You can also try using different types of peppers. Jalapeños or serranos work well. They bring a fun twist to the flavor. You can even mix peppers for more depth. Experiment with the heat until you find your perfect balance.
Sweet and Savory Versions
For a sweet and savory twist, add honey or maple syrup to your brine. These sweeteners blend well with the tang of vinegar. They help balance the sweet and sour flavors. You can start with a tablespoon and adjust to taste. If you prefer less sweetness, use less syrup. This version is great for those who enjoy a sweeter pickled snack.
Mediterranean-Style Pickled Okra
For a Mediterranean-style pickled okra, use olive oil and fresh herbs. Rosemary, thyme, and oregano add great flavor. You can also incorporate other vegetables. Carrots or bell peppers create a colorful medley. This version pairs well with Mediterranean dishes. It adds a unique twist to your pickled okra recipe.
Storage Info
Proper Storage Techniques
To keep your pickled okra fresh, store it in the fridge. Use clean, airtight jars to secure the okra. This step prevents air from spoiling your delicious snack. A good seal helps keep the flavors locked in.
Shelf Life of Pickled Okra
Pickled okra stays fresh in the fridge for about three months. After this time, the taste may change. Look for signs of spoilage, like off smells or a cloudy brine. If you see mold or the okra looks slimy, it’s best to toss it.
Freezing Pickled Okra
You can freeze pickled okra, but it may not stay crunchy. If you want to try freezing, pack it tightly in freezer-safe containers. Leave some space at the top for expansion. When you’re ready to eat, thaw it in the fridge overnight for the best results.
FAQs
How long does pickled okra last?
Pickled okra can last up to three months in the fridge. Make sure to keep them sealed well. After opening, enjoy them within a month for the best taste.
Can I use frozen okra for pickling?
I do not recommend using frozen okra for pickling. Frozen okra loses its crunch and texture. Fresh okra works best for a crisp bite in your pickles.
Where can I purchase pickled okra?
You can find pickled okra at local grocery stores and farmers’ markets. Online retailers also sell various brands of pickled okra. Look for specialty shops that focus on Southern foods.
What are the health benefits of okra?
Okra is low in calories and high in fiber. It contains vitamins A and C, which help boost your immune system. Pickled okra still retains many nutrients, but watch for added salt.
Can pickled okra be eaten straight from the jar?
Yes, you can enjoy pickled okra right from the jar. They make a great snack or garnish for meals. Just ensure the jar has been stored properly for safety.
Making pickled okra is easy and fun. We covered all the steps, from fresh ingredients to storage tips. Remember to use crisp okra for the best crunch. Experiment with flavors to find your favorite.
Enjoy this tasty treat in salads, as snacks, or on charcuterie boards. With just a bit of effort, you can create a flavorful and colorful addition to your meals. Now, get started and enjoy your homemade pickled okra!