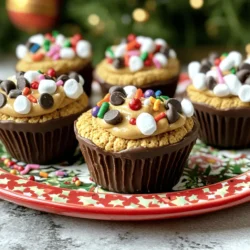
Get ready to impress your family and friends with No Bake Christmas Cookie Cups! These festive treats are easy to make and packed with flavor. In just a few simple steps, you can whip up a fun snack everyone will love. Whether you’re a baking newbie or a pro, these cookie cups are perfect for the holiday spirit. Let’s dive into the ingredients and step-by-step instructions for your new favorite holiday delight!
Ingredients
Complete List of Ingredients
– 1 cup graham cracker crumbs
– 1/2 cup unsweetened cocoa powder
– 1/2 cup powdered sugar
– 1/2 cup unsalted butter, melted
– 1 teaspoon vanilla extract
– 1/2 cup creamy peanut butter
– 1 cup mini chocolate chips
– 1/2 teaspoon ground cinnamon (optional)
– Edible decorations (e.g., colorful sprinkles, mini marshmallows, or crushed candy canes)
Gathering the right ingredients is key to making No Bake Christmas Cookie Cups. You can find most of them in your pantry or local store.
The graham cracker crumbs form the base of your cookie cup. They add a sweet crunch. Cocoa powder gives a rich, chocolate flavor. You can use unsweetened cocoa to control the sweetness.
Next, powdered sugar adds extra sweetness and binds the mixture. Melted unsalted butter helps to hold your cookie base together. Don’t skip the vanilla extract; it adds a warm, inviting flavor.
Creamy peanut butter brings richness and creaminess. Mini chocolate chips provide a delightful burst of chocolate in each bite. If you’re feeling adventurous, add ground cinnamon for a holiday twist.
Finally, the edible decorations let you personalize your cookie cups. Colorful sprinkles, mini marshmallows, or crushed candy canes work well. They make your treats festive and fun.
Step-by-Step Instructions
Preparation of Cookie Base
To start, gather all your dry ingredients. In a medium bowl, mix:
– 1 cup graham cracker crumbs
– 1/2 cup unsweetened cocoa powder
– 1/2 cup powdered sugar
Stir well until everything combines evenly. This mixture gives your cookie cups a solid base.
Next, add the wet ingredients. Pour in:
– 1/2 cup unsalted butter, melted
– 1 teaspoon vanilla extract
Use a spatula to mix. Blend until the dough forms. It should feel crumbly but hold shape.
Shaping the Cookie Cups
Now, line a muffin tin with cupcake liners. This makes it easy to remove the cups later.
Take about 1 tablespoon of your dough. Press it gently into the bottom and up the sides of each liner. Make the edges a bit thick. This adds strength to your cookie cups.
Filling the Cookie Cups
For the filling, blend the creamy peanut butter and mini chocolate chips in a separate bowl.
Use:
– 1/2 cup creamy peanut butter
– 1 cup mini chocolate chips
Stir until smooth. If you like, add 1/2 teaspoon ground cinnamon for extra flavor. This step is optional but fun!
Now, use a spoon to fill each cookie cup. Make sure to fill them to the top.
Chilling and Serving
Place the filled cookie cups in the refrigerator. Let them chill for at least 30 minutes. This helps them set and makes them easier to handle.
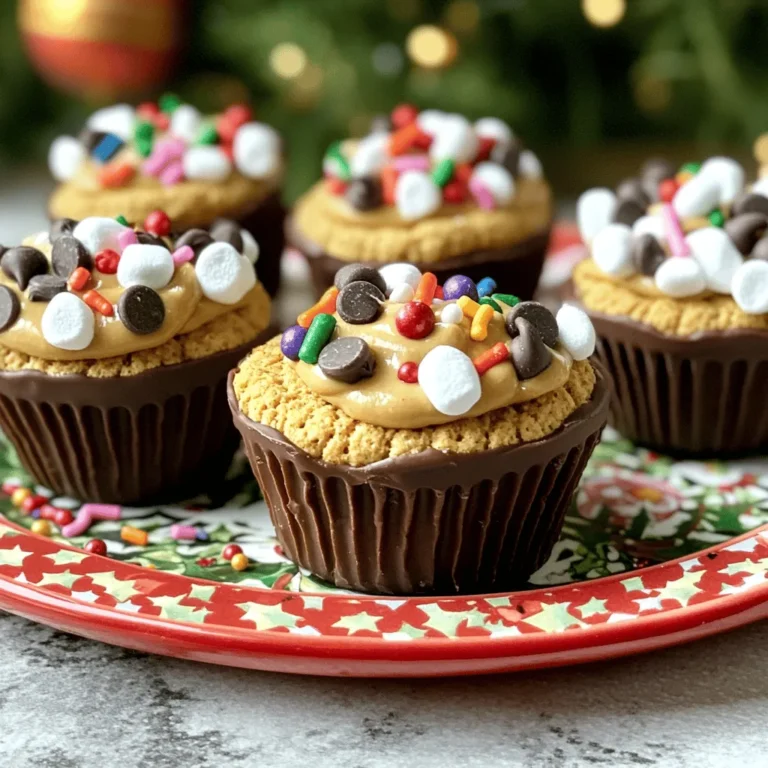
After chilling, take them out and decorate! Use:
– Edible decorations like colorful sprinkles
– Mini marshmallows
– Crushed candy canes
Get creative and make them look festive! For a great display, arrange them on a platter with some extra chocolate chips around.Enjoy your delightful No Bake Christmas Cookie Cups!
Tips & Tricks
Pro Tips for Perfect Cookie Cups
– Achieving the right consistency: When mixing your ingredients, ensure the dough feels sticky but not wet. It should hold together when pressed. If it crumbles too much, add a touch more melted butter.
– Ensuring a clean release from muffin tin: Use cupcake liners to avoid sticking. After chilling, gently pull the liners away from the cookie cups. This will help keep their shape intact.
Decoration Ideas
– Festive topping variations: Get creative with your toppings! Use colorful sprinkles, mini marshmallows, or crushed candy canes. Each option adds a fun, festive touch.
– Creative presentation suggestions: Arrange your cookie cups on a bright platter. Scatter some extra chocolate chips and decorations around them. This creates an inviting display. You can even use seasonal napkins for an extra festive flair!
Common Mistakes to Avoid
– Overmixing the ingredients: Mixing too much can make your cookie cups tough. Stir just until combined for a light and crumbly texture.
– Not chilling long enough: Chilling your filled cookie cups for at least 30 minutes is key. This time allows them to set properly. If you skip this step, they may fall apart when served.

Variations
Flavor Variations
You can change the taste of your cookie cups in fun ways. Try different nut butters like almond or cashew. Each nut butter gives a unique flavor. You can also use flavored cookie crumbs. For example, chocolate or gingerbread crumbs add a festive twist. Mix and match to find your favorite combo.
Dietary Adjustments
These cookie cups can fit many diets. For gluten-free options, swap graham cracker crumbs for gluten-free ones. You can find these at most stores. If you want a vegan treat, use coconut oil instead of butter. For peanut butter, use almond butter or sunflower seed butter. Both options work great and taste delicious.
Seasonal Twists
Bring more fun to your cookie cups by adding seasonal spices. Ground nutmeg or pumpkin spice can make them extra special. You can also decorate for other holidays. Use red and green sprinkles for Christmas or pastel colors for Easter. Get creative with the toppings to match the season.
Storage Info
Best Practices for Storage
To keep your no bake Christmas cookie cups fresh, follow these simple steps:
– Refrigeration: Store the cookie cups in the fridge. The cool air helps them stay firm and tasty.
– Airtight Containers: Use airtight containers to prevent moisture. This keeps them from getting soggy or stale.
Freezing Options
You can freeze your cookie cups if you want to save some for later. Here’s how:
– Freezing: Place the cookie cups in a single layer in a freezer-safe container. Separate layers with parchment paper to prevent sticking.
– Thawing: When you’re ready to eat them, take them out of the freezer. Let them thaw in the fridge for a few hours. This keeps the taste fresh and yummy.
Shelf Life
Knowing how long your cookie cups last is key:
– How Long They Last: In the fridge, cookie cups stay good for about a week. In the freezer, they can last up to two months.
– Signs of Spoilage: Check for any off smells or changes in texture. If they feel sticky or look dry, it’s time to toss them.
By following these tips, you can enjoy your no bake Christmas cookie cups any time!
FAQs
How do I make No Bake Christmas Cookie Cups without peanut butter?
You can use almond butter or sunbutter. Both options give a great flavor. If you prefer a nut-free option, try using cream cheese. It adds a nice texture and creaminess. Just mix in some vanilla for extra taste.
Can I use different types of chocolate chips?
Yes, you can! Dark chocolate chips add richness. White chocolate chips give a sweet touch. You can even mix them for a fun look. If you like mint, try mint chocolate chips for a festive twist.
What can I substitute for graham cracker crumbs?
You can use crushed vanilla wafers or digestive biscuits. They both create a tasty crust. If you want a gluten-free option, try almond flour or gluten-free cookies. Each choice gives a unique flavor.
How can I make these cookie cups more festive?
Get creative with decorations! Use colorful sprinkles, mini marshmallows, or crushed candy canes. You can also drizzle some melted chocolate on top. Consider serving them in holiday-themed cupcake liners for a fun look.
These no-bake cookie cups are easy to make and delicious. We covered the key ingredients and steps needed to create them. I shared tips to avoid common mistakes, so your cookie cups turn out great. Don’t forget about the many variations you can try, from seasonal twists to dietary adjustments. Lastly, I provided storage tips to keep your treats fresh. Enjoy making these fun cookie cups for any occasion!