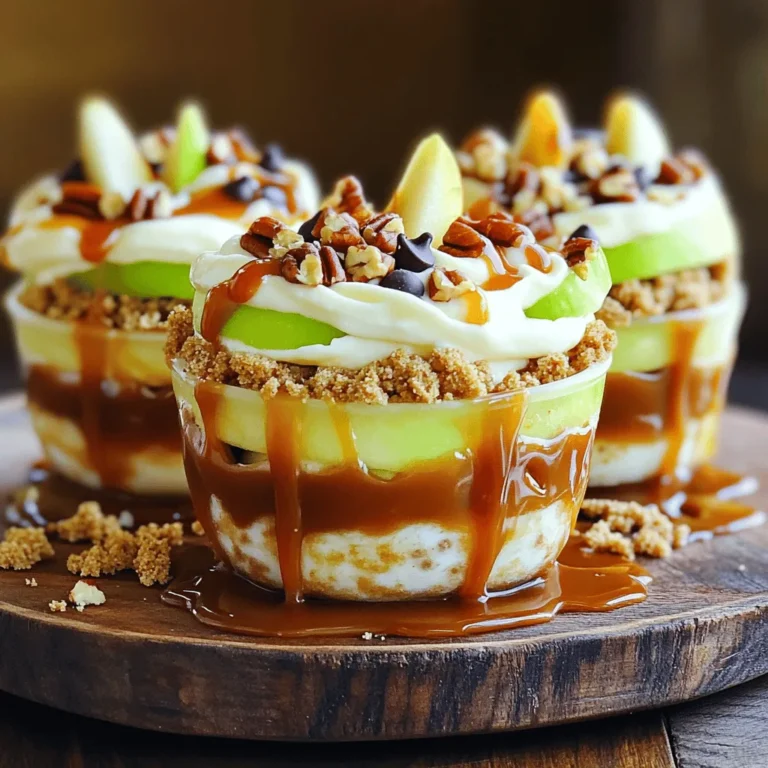
Looking for a sweet and fun treat? Caramel Apple Dip Cups are your answer! These bite-sized delights combine crisp apple wedges with creamy goodness. You’ll find this recipe simple and perfect for any gathering. Whether it’s a school snack or a party dessert, everyone will love them. Let’s dive into this tasty treat that will wow your friends and family! Ready to create some fun?
Ingredients
To make the delicious caramel apple dip cups, you need a few simple ingredients. Here’s what you’ll need:
– 2 large apples (preferably Granny Smith or Honeycrisp), cored and sliced into wedges
– 1 cup caramel sauce (store-bought or homemade)
– 1 cup cream cheese, softened to room temperature
– 1/4 cup powdered sugar
– 1 teaspoon pure vanilla extract
– 1/2 teaspoon ground cinnamon
– 1/2 cup chopped nuts (pecans or walnuts)
– 1/2 cup mini chocolate chips (optional)
– 1/4 cup graham cracker crumbs (for garnish)
These ingredients work together to create a fun and tasty treat. The apples add crunch, while the caramel and cream cheese provide a sweet, creamy flavor. You can customize the recipe with your favorite nuts or toppings, too.
Step-by-Step Instructions
Preparation of the Cream Cheese Mixture
To start, gather your ingredients. In a medium bowl, mix the cream cheese, powdered sugar, vanilla extract, and ground cinnamon. Use an electric mixer on medium speed. Blend until the mixture is smooth and creamy. This step is key for a delightful dip. The cream cheese adds a rich texture that pairs well with apples.
Layering the Ingredients in Cups
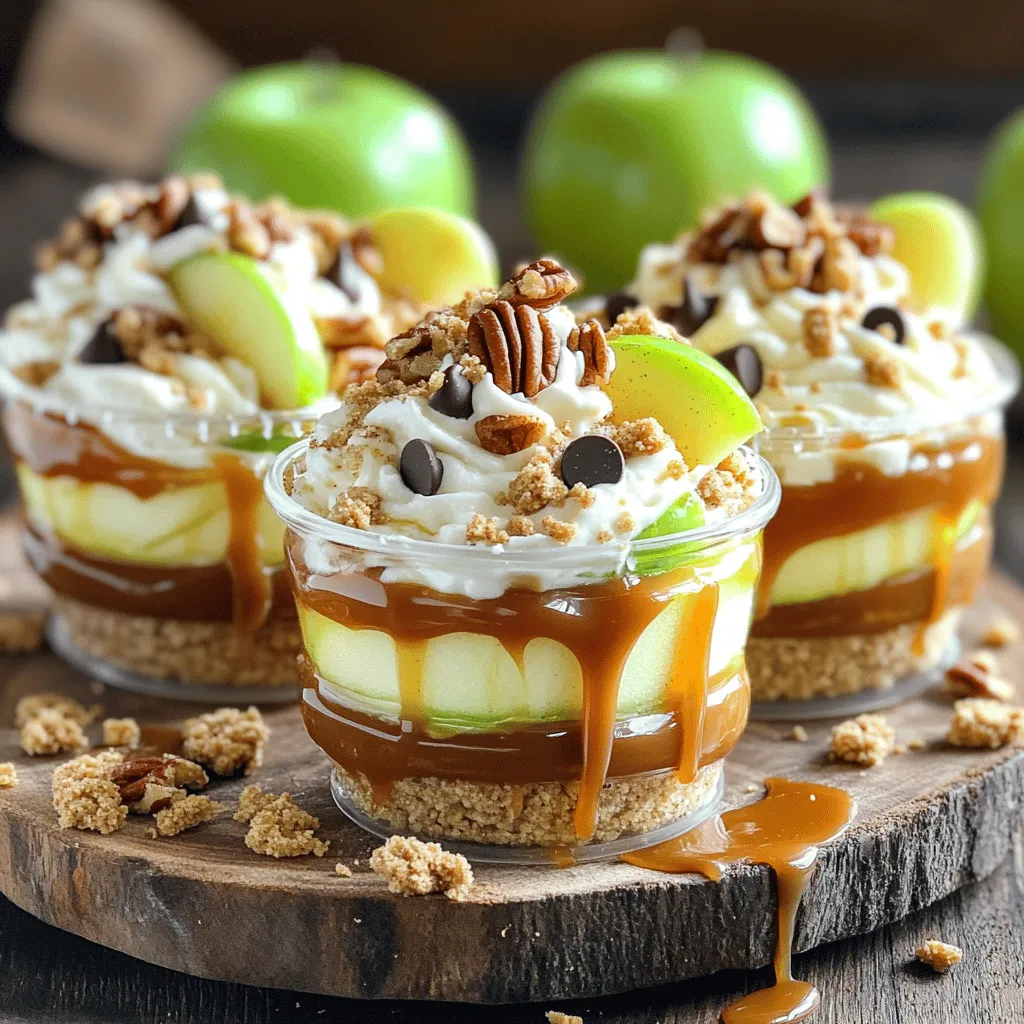
Now, choose cups or small glasses for your dip. Spoon about one-third of the cream cheese mixture into each cup. This forms a nice base. Next, drizzle caramel sauce over this layer. Let it flow over the edges for a tempting look. Then, add a few apple wedges on top of the caramel. This creates a fun and colorful display. Repeat the layers: more cream cheese, more caramel, and more apples. Fill the cups to the brim for a delicious treat.
Chilling and Final Touches
For the final touches, sprinkle chopped nuts and mini chocolate chips on top if you like. This adds a nice crunch and sweetness. Then, add graham cracker crumbs for extra texture. After that, place your cups in the refrigerator. Chill for at least 30 minutes. This helps the flavors mix and the dip to set.Enjoy your delightful caramel apple dip cups!
Tips & Tricks
How to Achieve the Perfect Creamy Texture
To get that smooth and creamy dip, start with soft cream cheese. Let it sit out for about 30 minutes. This helps it blend well. Mix it with powdered sugar, vanilla, and cinnamon. Use an electric mixer on medium speed. This makes it light and fluffy. Don’t rush this step; the texture matters. If it’s too thick, add a touch of milk or more caramel. This will make it creamier.
Presentation Ideas for Special Occasions
For a fun look, use clear cups. You can see the layers, which adds to the charm. Arrange the cups on a bright platter. Drizzle extra caramel around the base of each cup. This creates a lovely touch. You can also add sliced apples around the cups. This makes the display more inviting. Consider using colored napkins that match your theme. It only takes a bit of effort to impress your guests!
Best Caramel Sauce Options for Flavor
You can choose between store-bought and homemade caramel. Store-bought is quick and easy. Look for a high-quality brand for the best taste. If you want to make your own, combine sugar and cream in a pot. Cook over low heat until it thickens. You can also add a pinch of sea salt for a gourmet touch. Try using flavored caramel, like apple or vanilla, for extra fun!
Variations
Alternate Fruits for Dipping
You can use many fruits with caramel apple dip cups. While apples are classic, pears are a sweet choice. Their soft flesh pairs well with the creamy dip. Sliced bananas add a fun twist and a creamy texture. Strawberries bring a fresh taste that complements the caramel. You can even try orange slices for a zesty kick. Using different fruits keeps the treat exciting and fresh.
Nut-Free and Allergy-Friendly Options
If you need nut-free options, skip the nuts entirely. You can add more chocolate chips or use seeds instead. Sunflower seeds provide a nice crunch without nuts. For dairy-free versions, use a plant-based cream cheese. Make sure your caramel sauce is dairy-free too. Always check labels to avoid allergens. These swaps help everyone enjoy the dip safely.
Different Toppings and Garnishes
Toppings can change the whole look and taste of your dip cups. Try adding mini marshmallows for a chewy texture. Crushed cookies like Oreos or Animal Crackers give a fun twist. Shredded coconut adds a tropical flair. You could also sprinkle cinnamon or cocoa powder for extra flavor. Drizzling extra caramel sauce on top makes it look tempting. Get creative with your toppings for fun presentations.
Storage Info
How to Store Leftover Dip Cups
To keep your caramel apple dip cups fresh, cover them tightly with plastic wrap. You can also use a lid if your cups have one. Store them in the refrigerator. This will help keep them fresh for up to three days. If you notice any browning on the apple slices, you can sprinkle a bit of lemon juice on them before storage. This will help keep the apples looking nice.
Best Practices for Enjoying Freshness
For the best taste, serve the dip cups within one day of making them. The longer they sit, the softer the apples will get. If you’re making them for a party, prepare the cream cheese layer and caramel ahead of time. You can then layer the cups right before serving. This way, the apples will stay crisp, and the flavors will shine.
Freezing Options for Long-Term Storage
You can freeze the cream cheese mixture for later use. Place it in airtight containers or freezer bags. Just make sure to leave some space for expansion. When you’re ready to enjoy, thaw it in the fridge overnight. However, I do not recommend freezing the assembled cups. The apples will not hold up well after freezing. For the best experience, enjoy them fresh!
FAQs
Can I make the caramel apple dip ahead of time?
Yes, you can make the caramel apple dip cups ahead of time. Prepare the cream cheese mixture and layer the cups. Then, cover them tightly with plastic wrap. Store them in the fridge for up to two days before serving. This saves you time and lets the flavors blend well. Just add the apple wedges right before serving to keep them fresh.
What is the best way to slice apples to prevent browning?
To keep apple slices from turning brown, use acid. You can soak them in lemon juice or a mixture of water and vinegar. This stops oxidation, keeping the apples crisp and bright. After slicing, dip them in the solution for about five minutes. Rinse them gently and pat dry. This quick step makes your dip cups look fresh and inviting.
Where can I buy pre-made caramel apple dip cups?
You can find pre-made caramel apple dip cups at many grocery stores. Look in the dessert aisle or the refrigerated section. Some stores even sell them in the produce section next to the apples. If you prefer, many online retailers offer them as well. Check local delivery services for convenience.
This blog post covered how to make a fun and delicious caramel apple dip. You learned the key ingredients, careful steps for prep, and tips for flavor and texture. I shared ways to store leftovers and variations for allergies or personal taste.
In the end, this dip is great for parties or a sweet treat. Enjoy making it and sharing it with friends and family!

