Skip to content
DisclaimerTerms Of UseGDPR PolicyCookie Policy

recipesstation

  • Home
  • Drinks
  • Appetizers
  • Dinner
  • Dessert
  • About
  • Contact
  • Privacy Policy
DisclaimerTerms Of UseGDPR PolicyCookie Policy

Emily

- 1 lb large shrimp, peeled and deveined - 2 tablespoons olive oil - 1 cup mixed bell peppers (red, yellow, green), sliced into thin strips

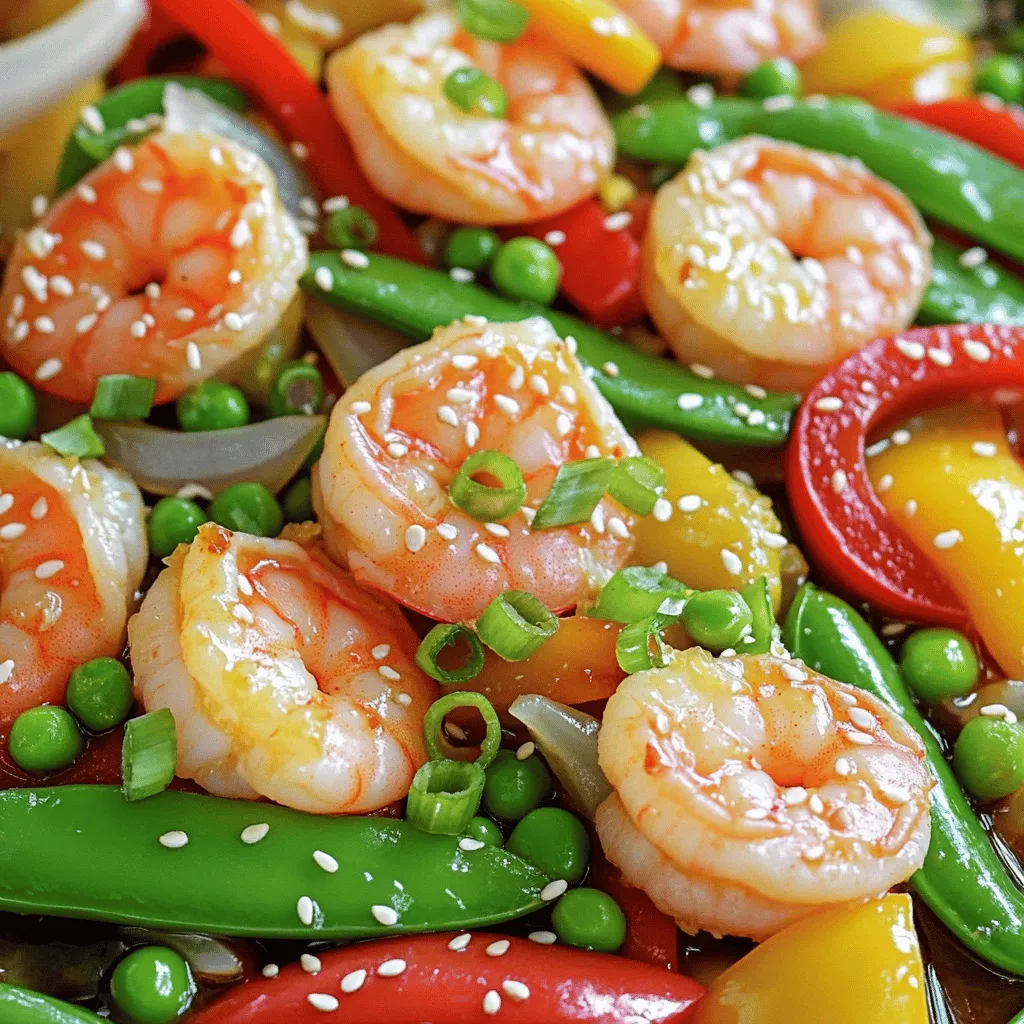
Flavorful Shrimp Stir Fry Quick and Easy Recipe

Are you craving a quick and tasty meal? Look no further than this flavorful shrimp stir fry! With just a

- 4 large poblano peppers - 1 cup cooked quinoa (or substitute with brown rice) - 1 cup shredded Monterey Jack cheese - 1 cup shredded sharp cheddar cheese

Easy Chile Relleno Casserole Recipe Savory and Simple

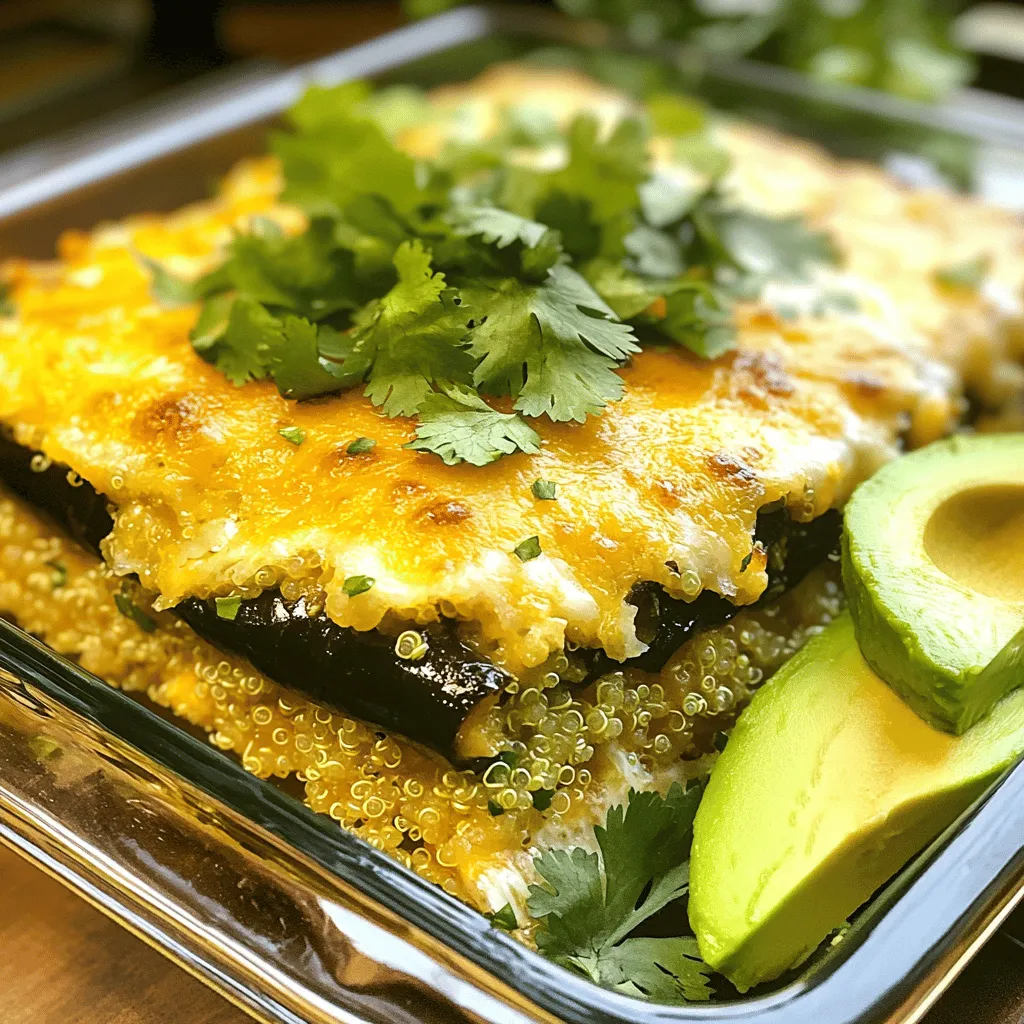
Are you looking for a delicious meal that’s easy to make? This Easy Chile Relleno Casserole Recipe hits the spot!

- 2 lbs beef chuck roast - 4 cups beef broth - 3 dried guajillo chilies, seeded - 2 dried ancho chilies, seeded - 1 teaspoon ground cumin - 1 teaspoon dried oregano - 4 cloves garlic, minced - 1 onion, quartered - 2 bay leaves - Salt and ground black pepper to taste The main ingredients bring rich flavors to your tacos. The beef chuck roast is flavorful and tender when cooked right. The beef broth adds depth to the dish. Guajillo and ancho chilies give a smoky, sweet taste. Cumin and oregano add warmth, while garlic and onion enhance the overall flavor. Use salt and pepper to taste. - 1 ½ cups shredded Oaxaca cheese (or mozzarella) - About 12 corn tortillas Oaxaca cheese is stringy and melts perfectly. If you can't find it, mozzarella works well. Corn tortillas are essential for this dish. They hold the filling and add a nice texture. - Fresh cilantro, chopped (for garnish) - 1 lime, cut into wedges (for serving) Fresh cilantro adds brightness and flavor. Lime wedges bring a zesty kick when squeezed over the tacos. These simple garnishes elevate your dish and make it more vibrant. {{ingredient_image_2}} Toasting the chilies First, grab your dried guajillo and ancho chilies. Put them in a dry skillet over medium heat. Toast them for about 2-3 minutes. Stir them often to avoid burning. You want them to smell fragrant, not charred. Soaking the chilies Once toasted, take the chilies off the heat. Place them in a bowl and cover them with hot water. Let them soak for about 20 minutes. This softens the chilies and makes them easier to blend. Blending the spice paste After the chilies are soft, drain them. Move them to a blender. Add in ground cumin, dried oregano, minced garlic, and quartered onion. Pour in a little beef broth to help it blend smoothly. Blend until you have a thick and smooth paste. Combining ingredients in the pot Now, it's time to cook the meat. In a large pot, add your beef chunks. Pour in the spice paste you just made, and add the rest of the beef broth. Toss in bay leaves and season with salt and pepper. Cooking time and technique Bring the pot to a boil over high heat. Once boiling, turn the heat down to a simmer. Cover the pot and let it cook for 2-3 hours. The beef should be fork-tender when done. Removing and shredding the meat When the meat is tender, take it out of the pot. Place it on a cutting board. Use two forks to shred the beef into small pieces. Straining the broth Next, strain the cooking broth through a fine mesh sieve. This will give you a clear consommé for dipping. Dipping tortillas in broth Heat a skillet over medium-high heat. Take a corn tortilla and dip it quickly in the reserved broth. This softens the tortilla and adds flavor. Filling and cooking the tacos Place the dipped tortilla on the skillet. Fill it with shredded beef and a generous amount of Oaxaca cheese. Fold the tortilla in half and cook for about 2-3 minutes per side. You want the cheese to melt and the tortilla to get crispy. Garnishing and serving suggestions Once cooked, remove the tacos from the skillet. Sprinkle chopped cilantro on top for freshness. Serve them hot with lime wedges and a bowl of the reserved consommé for dipping. Enjoy! - Ensuring tenderness in beef: Start with beef chuck roast. It has fat that keeps the meat juicy. Cook the beef slowly for 2-3 hours on low heat. This makes the beef fork-tender. Always check if it shreds easily. - Achieving crispy tortillas: Use corn tortillas for great flavor. Dip each tortilla briefly in the reserved broth. This softens them. Then, heat them in a skillet with some oil. Cook until they are golden and crispy on both sides. - Additional spices to consider: Besides cumin and oregano, add smoked paprika for depth. A pinch of cinnamon can bring warmth, too. Experiment with chili powder for extra heat. Adjust based on your taste! - Adding extras to the filling: For more flavor, mix in sautéed onions or peppers. Shredded carrots can add sweetness. You can even include black beans for texture and taste. - Best sides to accompany tacos: Serve with Mexican rice for a full meal. Fresh guacamole adds creaminess. Pickled onions give a tangy crunch. Don't forget a simple corn salad for freshness. - Alternatives to consommé for dipping: If you want a twist, try a salsa verde. A creamy avocado sauce can also be great. For a unique flavor, serve with a spicy ranch dip. Pro Tips Choose Quality Meat: Opt for a well-marbled beef chuck roast for the best flavor and tenderness. Chili Toasting: Toast the chilies until fragrant but not burnt to enhance their natural flavors. Consommé Uses: Don't discard the cooking broth; it's perfect for dipping your tacos and adds extra flavor. Perfectly Crispy Tacos: Make sure the skillet is hot enough before adding the tortillas for that perfect crispy texture. {{image_4}} You can easily switch up the meat in Cheesy Birria Tacos. Chicken and pork are great options. Chicken cooks faster and absorbs flavors well. Opt for thighs for more moisture. Pork brings a nice sweetness and tenderness. Use pork shoulder for the best results. If you want to go meatless, try mushrooms or jackfruit. These options soak up the tasty spices. You’ll still get a rich flavor. Just cook them until tender for the best texture. While Oaxaca cheese is popular, you can use others. Mozzarella melts beautifully and is creamy. Cheddar adds a sharp kick. For a more unique flavor, try pepper jack. It gives a nice spicy twist. The cheese you choose impacts the taco's taste. Creamy cheeses create a rich mouthfeel. Stronger cheeses add depth. Experiment with different types to find your favorite. Salsas can elevate your tacos. A fresh pico de gallo adds brightness. It contrasts well with the rich meat. For a smoky flavor, try a roasted salsa. This brings another layer of taste. Other toppings enhance the dish, too. Sliced radishes give crunch. Avocado or guacamole adds creaminess. Don’t forget fresh cilantro for a burst of flavor. Lime wedges are perfect for squeezing over the top. To keep your cheesy birria tacos fresh, store them in an airtight container. Place them in the fridge right after they cool. They can stay good for about 3 days. If you notice any signs of spoilage, it is best to throw them away. If you want to save your tacos for later, freezing is a great option. Wrap each taco in plastic wrap tightly. Then, place the wrapped tacos in a freezer bag. They can last up to 3 months in the freezer. When you're ready to eat, thaw them in the fridge overnight. To reheat, bake them in the oven at 350°F for about 15-20 minutes until hot. Don’t waste any leftover beef or broth! Use shredded beef in quesadillas or on nachos. You can also add it to soups for extra flavor. For leftover broth, consider making a savory stew or a flavorful rice dish. These ideas help reduce waste and keep your meals exciting. Cheesy Birria Tacos are a tasty Mexican dish. They originated in the state of Jalisco, Mexico. The dish features tender, slow-cooked beef and melted cheese. The beef is cooked in a rich broth made from chilies and spices. People often enjoy these tacos with a side of broth for dipping. Yes, you can prepare Cheesy Birria Tacos in advance. Cook the beef and make the sauce a day before. Store them in the fridge. When ready to serve, reheat the beef and sauce. Assemble the tacos just before serving for the best taste. For Cheesy Birria Tacos, Oaxaca cheese is best. It melts well and has a mild flavor. Mozzarella works too if you can't find Oaxaca cheese. Both cheeses create a creamy and delicious filling. Absolutely! You can use chicken or pork as alternatives. For chicken, cook it in the same way as beef but for a shorter time. Pork can add a nice flavor, too. Just ensure it becomes tender and easy to shred. To make Cheesy Birria Tacos gluten-free, use corn tortillas. They are perfect for this dish. Check your beef broth to ensure it has no gluten. Many brands offer gluten-free broth options. Cheesy birria tacos are a delicious dish that blends flavor and texture. We covered the key ingredients, tips for cooking, variations, and storage methods. You now have solid ways to make and enjoy this meal. Remember, you can adapt ingredients and try new flavors. Get creative with salsas and toppings. With these steps, you can impress family and friends. Enjoy your cooking journey and savor each bite of your tasty tacos!

Cheesy Birria Tacos Flavorful and Savory Delight

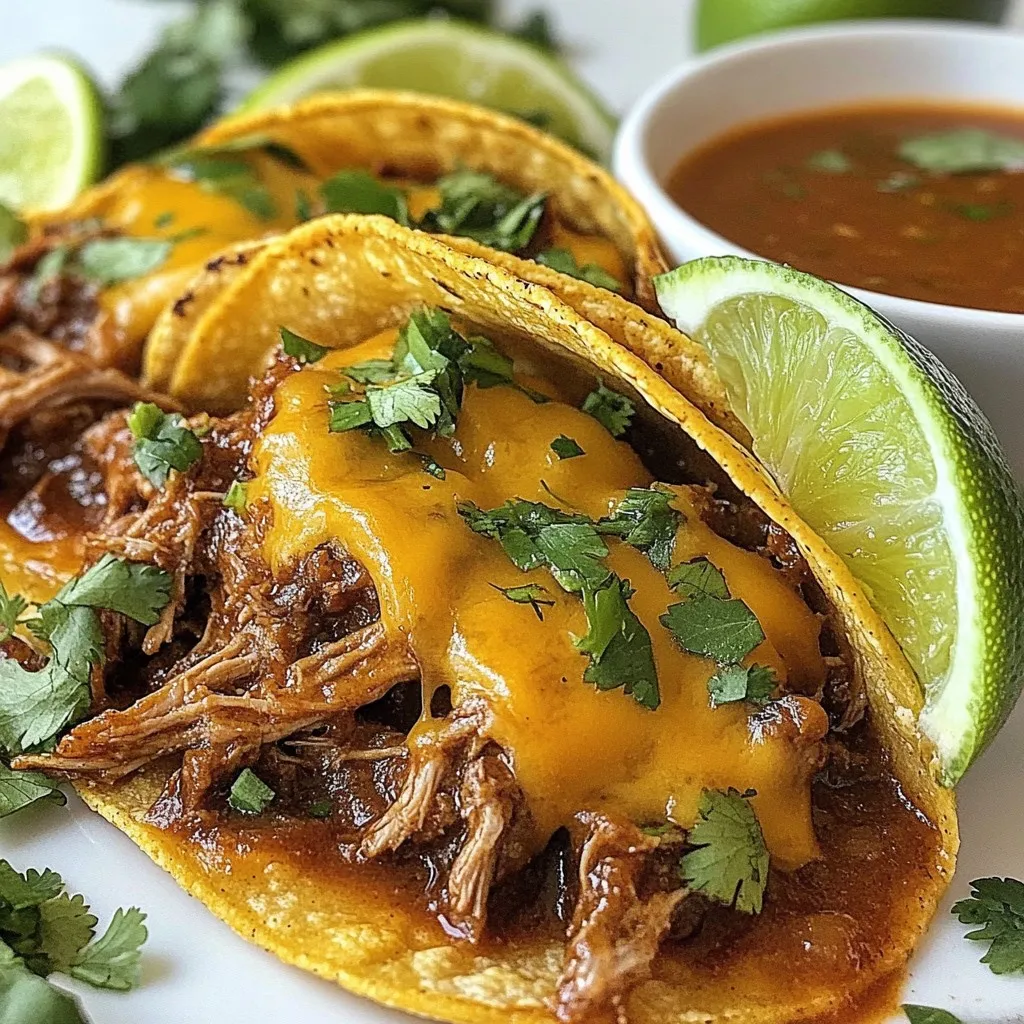
If you crave a burst of flavor, you need to try Cheesy Birria Tacos! This delicious dish pairs slow-cooked, tender

- 4 bone-in, skin-on chicken thighs - 2 tablespoons extra virgin olive oil - 2 tablespoons freshly squeezed lemon juice - Zest of 1 medium lemon - 1 tablespoon smoked paprika - 1 teaspoon garlic powder - 1 teaspoon onion powder - 1 teaspoon dried oregano - Salt and freshly ground black pepper, to taste - Fresh parsley, finely chopped, for garnish When measuring olive oil, use a tablespoon for accuracy. Fresh lemon juice adds brightness. Zest from the lemon gives extra flavor. Use a tablespoon for the smoked paprika, as it packs a punch. The garlic and onion powder both need a teaspoon. Dried oregano also uses a teaspoon. If you do not have smoked paprika, you can use regular paprika. For a fresh twist, try fresh herbs instead of dried oregano. You can replace olive oil with melted butter for a richer taste. If you want a lighter option, use skinless chicken thighs. Feel free to use lemon juice from a bottle, but fresh is best. {{ingredient_image_2}} Start by preheating your oven to 400°F (200°C). This step is key for roasting. A hot oven helps the chicken cook evenly and get that nice crispy skin. In a large bowl, mix these ingredients: - 2 tablespoons extra virgin olive oil - 2 tablespoons freshly squeezed lemon juice - Zest of 1 medium lemon - 1 tablespoon smoked paprika - 1 teaspoon garlic powder - 1 teaspoon onion powder - 1 teaspoon dried oregano - Salt and freshly ground black pepper, to taste Whisk them together until they form a smooth marinade. This blend of flavors will make your chicken shine. Take your 4 chicken thighs and sprinkle them with salt and pepper. Then, add them to the bowl with your marinade. Toss the chicken well until each piece is coated. For the best taste, let the chicken sit for at least 30 minutes. If you have more time, marinate it for up to 2 hours in the fridge. This helps the flavors soak in deeply. After marinating, place the chicken thighs skin-side up on a baking sheet lined with parchment paper. Make sure they have space around them for even cooking. Slide the tray into your hot oven. Roast the chicken for about 35-40 minutes. You know it’s done when the skin is crispy and the internal temperature hits 165°F (75°C). Once cooked, take the chicken out of the oven. Let it rest for about 5 minutes. This helps keep the juices inside the meat. Before serving, sprinkle some fresh parsley on top for a pop of color and flavor. Serve the chicken on a platter with lemon wedges for a fresh touch. Enjoy your meal! Marinating chicken thighs adds flavor and tenderness. To start, mix your marinade well. Use olive oil, lemon juice, zest, smoked paprika, garlic powder, onion powder, and oregano. Toss the chicken in this blend. For best results, let it sit. Aim for at least 30 minutes. If you have time, go for 2 hours in the fridge. This wait helps the flavors soak in deeply. Crispy skin is key to tasty chicken. First, dry the chicken thighs with paper towels. This helps remove moisture. Next, season the skin well with salt and pepper. The salt draws out more moisture during cooking. When you roast, place the chicken skin-side up. The heat will crisp it perfectly. Roasting at 400°F (200°C) for 35-40 minutes works best. Keep an eye on the skin; it should turn golden brown. Lemon paprika roast chicken thighs pair well with many sides. Try serving them with roasted vegetables like carrots and broccoli. A fresh salad with lemon vinaigrette adds a nice touch. For a heartier option, consider creamy mashed potatoes or rice. You can even add crusty bread to soak up the tasty juices. Each side complements the zesty flavors of the chicken, making your meal even better. Pro Tips Marinate Longer for More Flavor: If time allows, marinate the chicken thighs in the refrigerator for up to 2 hours. This allows the flavors to penetrate deeper into the meat, resulting in a more flavorful dish. Use a Meat Thermometer: To ensure your chicken is perfectly cooked, use a meat thermometer. The internal temperature should reach 165°F (75°C) for safe consumption. Resting is Key: Allow the chicken to rest for about 5 minutes after cooking. This will help the juices redistribute, making your chicken juicy and tender. Enhance Presentation: Serve the chicken on a rustic platter with lemon wedges and a sprinkle of parsley. This not only enhances the visual appeal but also adds a burst of freshness to each serving. {{image_4}} Want to amp up the heat? You can make a spicy version of this dish. Add cayenne pepper or crushed red pepper flakes to the marinade. Start with just a pinch, and adjust to your taste. This adds a kick that pairs well with the lemon and paprika. The spice level can bring a new depth to the flavors. If you love fresh herbs, try making citrus herb chicken thighs. Swap the smoked paprika for fresh herbs like thyme or rosemary. Add extra lemon juice and zest for a bright flavor. This version keeps the chicken juicy and adds a fresh twist. Feel free to mix in your favorite herbs for a personalized touch. You can cook these chicken thighs in different ways. Grilling gives the chicken a smoky flavor. Preheat your grill to medium heat and cook the thighs for about 25-30 minutes. Turn them halfway through for even cooking. If you prefer slow cooking, this method is great for tender meat. Place the marinated chicken in a slow cooker. Cook on low for 4-6 hours. The chicken will soak up all the flavors, making it super tasty. Both methods bring out the deliciousness of lemon paprika roast chicken thighs. After cooking, let the chicken cool down to room temperature. Place the chicken thighs in an airtight container. They will stay fresh for 3 to 4 days in the fridge. If you want to keep them longer, consider freezing. To freeze, wrap each chicken thigh tightly in plastic wrap. Then, place them in a freezer-safe bag or container. They will keep well for up to 3 months. When ready to eat, move them to the fridge to thaw overnight. To reheat, preheat your oven to 350°F (175°C). Place the chicken on a baking sheet. Cover with foil to keep them moist. Heat for about 20 minutes or until warm. Check the temperature; it should reach 165°F (75°C) to be safe. Enjoy your tasty chicken again! You should marinate chicken thighs for at least 30 minutes. This time allows the flavors to soak in. For a deeper taste, you can marinate them for up to 2 hours in the fridge. Longer marinating makes the chicken even tastier. Yes, you can use chicken breasts. They will cook faster than thighs. Adjust the cooking time to about 25-30 minutes. The breasts will still be juicy, but they may not have the same rich flavor. Lemon paprika roast chicken thighs go well with many sides. You can serve them with: - Roasted vegetables - Rice pilaf - A fresh green salad - Mashed potatoes - Couscous with herbs These sides balance the dish and enhance the meal. Feel free to mix and match! You explored the key steps to make delicious lemon paprika roast chicken thighs, including ingredients and instructions. We covered how to marinate and roast chicken for the best flavor. You learned tips for crispy skin and great side dishes. Finally, I shared ideas for variations. With these insights, you can create a tasty meal that your family will love. Enjoy your cooking, and remember to experiment with different flavors!

Lemon Paprika Roast Chicken Thighs Flavorful Dish

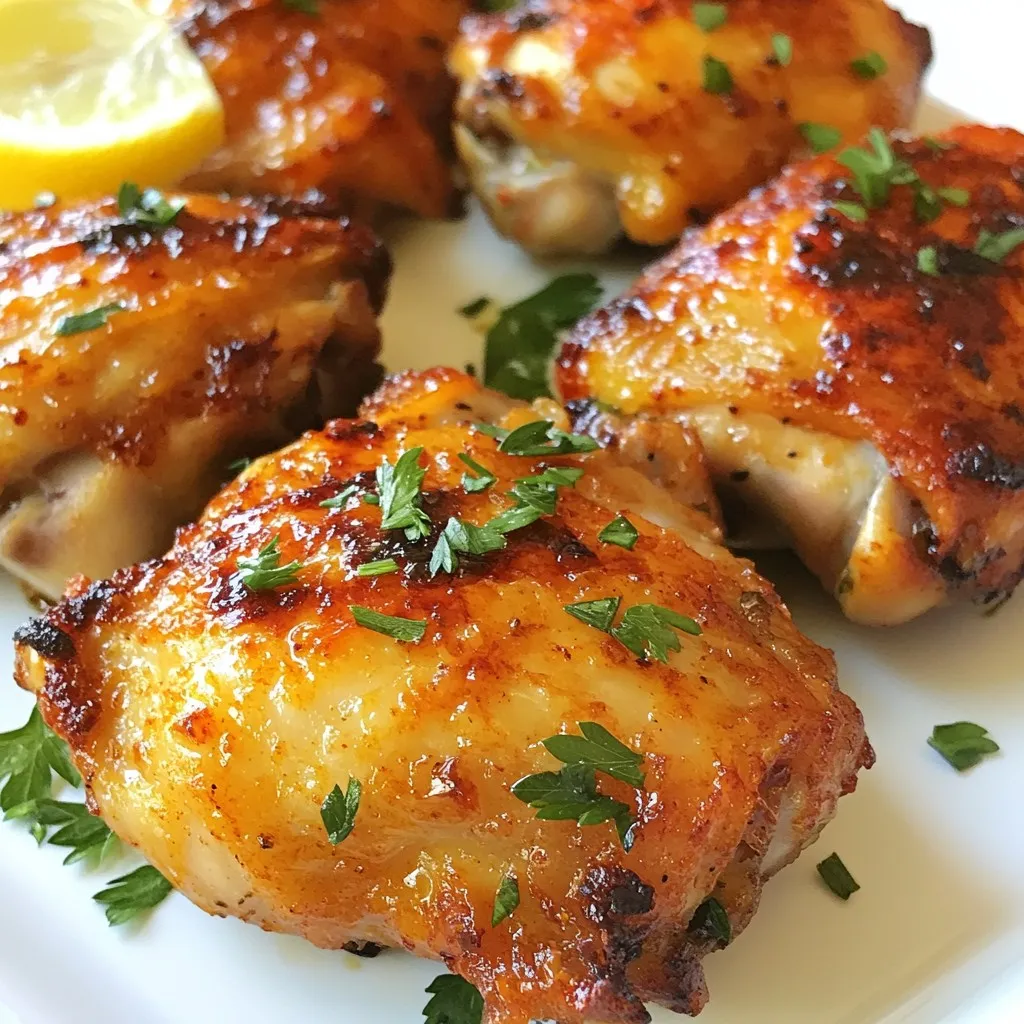
If you’re craving a dish that’s both zesty and comforting, you’re in for a treat. Lemon Paprika Roast Chicken Thighs

To make this one-pot lasagna soup, gather these items: - 1 tablespoon extra virgin olive oil - 1 medium onion, finely diced - 3 cloves garlic, minced - 1 pound ground beef (or ground turkey) - 1 can (28 ounces) crushed tomatoes - 4 cups chicken or vegetable broth - 2 teaspoons dried Italian seasoning - 1 teaspoon red pepper flakes (optional) - 8 lasagna noodles, broken into bite-sized pieces - 1 cup creamy ricotta cheese - 1 cup freshly shredded mozzarella cheese - ½ cup grated Parmesan cheese - Fresh basil leaves for garnish - Sea salt and freshly cracked black pepper to taste You can easily adjust this recipe to fit your needs: - Ground beef can be swapped with ground turkey for a leaner option. - Use vegetable broth instead of chicken broth for a vegetarian choice. - For a vegan diet, replace all cheeses with plant-based alternatives. - Gluten-free lasagna noodles can replace regular noodles to suit gluten-free diets. When measuring ingredients, precision matters: - Use a dry measuring cup for cheeses and noodles. - A liquid measuring cup is best for broth and crushed tomatoes. - Fresh herbs should be lightly packed for best flavor. - Always taste your soup and adjust salt and pepper as needed. {{ingredient_image_2}} 1. Heat the oil: Start by heating one tablespoon of extra virgin olive oil in a large pot over medium heat. This oil gives great flavor. 2. Cook the onion: Add one finely diced medium onion. Sauté it for about three to four minutes until it turns soft and clear. 3. Add garlic: Next, stir in three minced garlic cloves. Cook for one more minute. You want to smell that garlic but be careful not to burn it! 4. Brown the meat: Now, add one pound of ground beef (or ground turkey if you prefer). Cook until it is brown. Use a wooden spoon to break it up as it cooks. If there is too much fat, drain it. 5. Add tomatoes and broth: Pour in one can of crushed tomatoes and four cups of chicken or vegetable broth. Then, add two teaspoons of dried Italian seasoning and one teaspoon of red pepper flakes if you like it spicy. Mix it all up. 6. Bring to a boil: Heat the soup until it gently boils. Then, lower the heat to let it simmer. 7. Add noodles: Break eight lasagna noodles into bite-sized pieces and toss them into the pot. Cover and let it cook for about 15 minutes. This is when the noodles get soft. 8. Melt the cheeses: Reduce the heat and stir in one cup of creamy ricotta cheese, one cup of shredded mozzarella, and half a cup of grated Parmesan cheese. Cook for another two to three minutes, until the cheeses melt into the soup. 9. Season to taste: Taste your soup and add sea salt and black pepper as needed to make it flavorful. 10. Serve: Ladle the soup into bowls and top with fresh basil leaves. This adds color and taste. - Always have your ingredients ready before you start. Chop the onion and mince the garlic beforehand. This helps keep things moving. - When cooking the meat, make sure it is well-browned. This adds more flavor to your soup. - Stir the soup often after adding the noodles. It helps to avoid sticking and ensures even cooking. - Consider taking pictures or making a video for each step. Show how the onions look when soft and the color of the soup as it cooks. - If you are adventurous, record the melting of the cheese. This is a great moment to capture! - Share your final dish. A photo of a bowl with fresh basil and cheese on top is always appealing. To get the best noodle texture, break the lasagna noodles into small pieces. This helps them absorb the broth without getting mushy. Cook them for about 15 minutes. Check them often to see if they are al dente. You want them firm but tender. If you overcook them, they will turn to mush in the soup. Herbs and spices make your soup pop with flavor. I love using dried Italian seasoning. It gives a warm, rich taste. You can also add red pepper flakes for a kick. If you want more freshness, toss in some chopped basil at the end. This simple touch brightens up your dish. Avoid adding all the cheese at once. If you add it too fast, it may clump together. Stir in the cheeses gently to help them melt evenly. Another mistake is not tasting the soup before serving. Always adjust the salt and pepper to suit your taste. Lastly, don’t skip the olive oil. It adds depth and richness to your soup. Pro Tips Use Fresh Herbs: Fresh basil adds a vibrant flavor and aroma, enhancing the overall taste of your soup. Stir in some just before serving for the best effect. Customize Your Proteins: Feel free to swap out the beef for cooked sausage, chicken, or even a plant-based protein for different flavor profiles. Cheese Variety: Experiment with different cheeses like provolone or fontina for a unique twist on the classic cheesy flavor. Make It Ahead: This soup can be made in advance and stored in the refrigerator for up to three days. Reheat gently on the stove and add a splash of broth if it thickens. {{image_4}} If you want a vegetarian version, swap the ground beef for a mix of chopped veggies. Use mushrooms, bell peppers, and zucchini for great flavor. For a vegan option, replace the ricotta and mozzarella with plant-based cheese. You can also use silken tofu blended with nutritional yeast for a creamy texture. For a carb-free soup, skip the lasagna noodles. Instead, add spiralized zucchini or cauliflower rice. These options keep the soup hearty and low in carbs. You can also use chopped leafy greens like spinach or kale for added nutrition. Want to add more flavor? Toss in fresh spinach or kale right before serving. Mushrooms give a rich taste, too. Add them when you sauté the onion and garlic. You can also mix in fresh herbs like thyme or oregano for a burst of freshness. To store leftovers, let the soup cool first. Then, place it in an airtight container. You can keep it in the fridge for up to four days. This way, you can enjoy your tasty soup later. When you are ready to eat your leftovers, pour the soup into a pot. Heat it on medium-low heat until warm. Stir it often to prevent sticking. If the soup looks thick, add a splash of broth or water. This keeps it creamy. If you want to save the soup longer, it’s easy to freeze. Use freezer-safe containers or bags. Make sure to leave some space at the top for expansion. The soup can last in the freezer for up to three months. When you are ready to eat, thaw it overnight in the fridge. Then, reheat it on the stove as mentioned. Enjoy your convenient meal! Yes, you can make this soup ahead of time. Just cook it fully and let it cool. Store it in an airtight container in the fridge for up to three days. When you’re ready to eat, reheat it on the stove over low heat. You may need to add a little broth to loosen it up. This soup tastes even better the next day, as the flavors blend more. Absolutely! You can use different cheeses to change the flavor. Try using feta for a tangy twist or gouda for a smoky taste. Cream cheese can also work well, giving the soup a nice creaminess. Just remember to adjust the amounts to keep the soup balanced and tasty. To make this lasagna soup gluten-free, swap out the regular lasagna noodles for gluten-free ones. Look for brands that make noodles from rice, corn, or lentils. Make sure to check the labels to ensure they are truly gluten-free. This way, everyone can enjoy this delicious meal! This blog post covered the essential ingredients, step-by-step cooking instructions, and helpful tips to make a delicious soup. You learned about substitutions for dietary needs, ensuring perfect noodle texture, and ways to enhance flavor. Also, we explored fun variations to make the soup your own. Lastly, we provided useful storage techniques to keep your leftovers fresh. Use these insights to create your best soup yet. Cooking should be easy and enjoyable, so dive in and start making it!

One-Pot Lasagna Soup Simple and Flavorful Meal

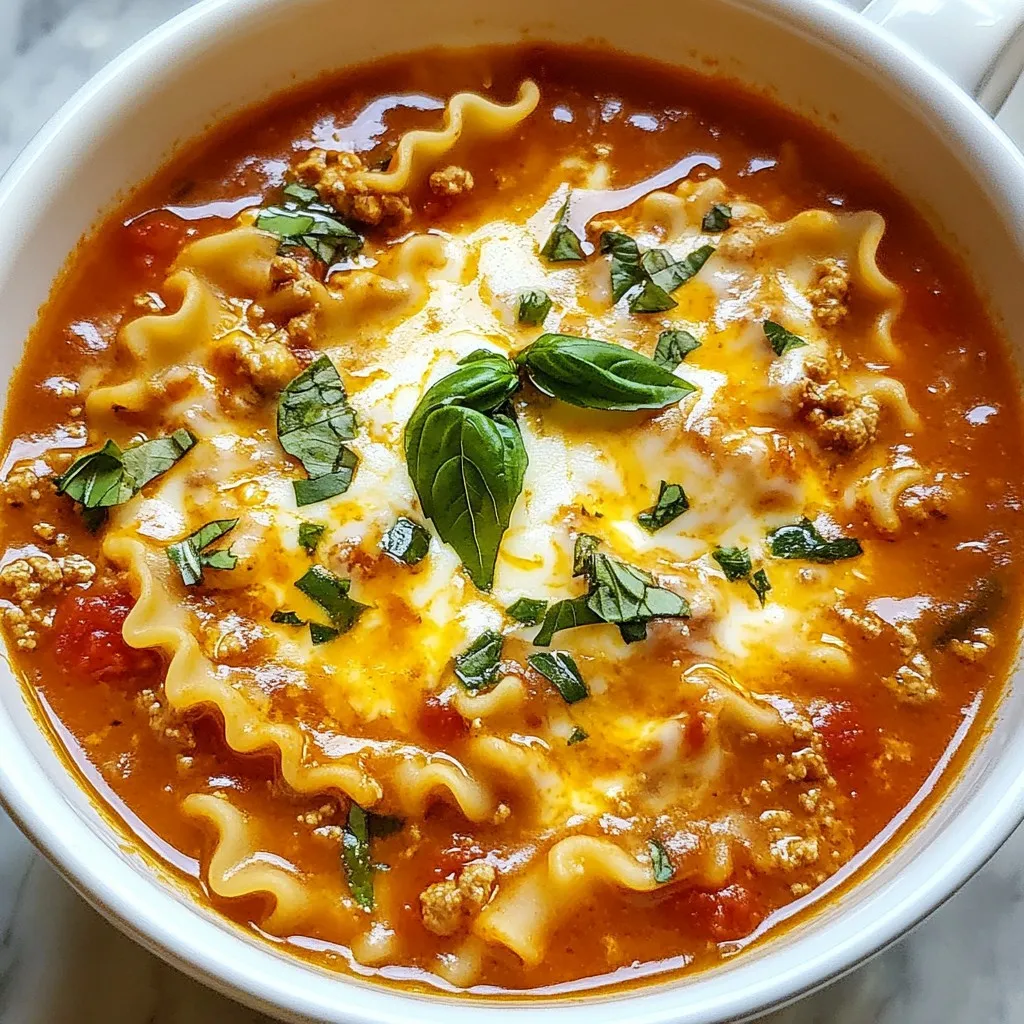
Looking for an easy, hearty meal that warms you from the inside out? Try my One-Pot Lasagna Soup—a comforting twist

- 1.5 lbs chicken, cut into bite-sized pieces - 4 large tomatoes, pureed - 1 red bell pepper, pureed - 2-3 habanero peppers, pureed - 1 large onion, thinly sliced - 4 cloves garlic, finely minced - 1 tablespoon fresh ginger, grated or minced - 2 teaspoons ground coriander - 2 teaspoons ground cumin - 1 teaspoon dried thyme - 2 teaspoons curry powder - Salt to taste To make Spicy Nigerian Chicken Stew, you need fresh ingredients. Start with chicken, ripe tomatoes, and bell peppers. The habanero peppers bring the heat. Next, use a large onion, garlic, and ginger to enhance flavors. These aromatics add depth to your stew. For spices, ground coriander and cumin create warmth. Dried thyme and curry powder add earthy notes. Don’t forget salt to bring it all together. Gather these ingredients before you start. This makes cooking smooth and easy. You’ll enjoy the process and the tasty results! {{ingredient_image_2}} This blog post covered how to make a delicious Spicy Nigerian Chicken Stew. We explored key ingredients, from the tender chicken to the vibrant peppers and spices that add flavor. I shared step-by-step instructions for preparing, cooking, and serving the stew. You learned tips for customizing spice levels and various protein options for this dish. Lastly, we discussed storage tips to keep your stew fresh. Enjoy making this hearty meal, and feel free to experiment with the flavors!

Spicy Nigerian Chicken Stew Flavorful and Easy Dish

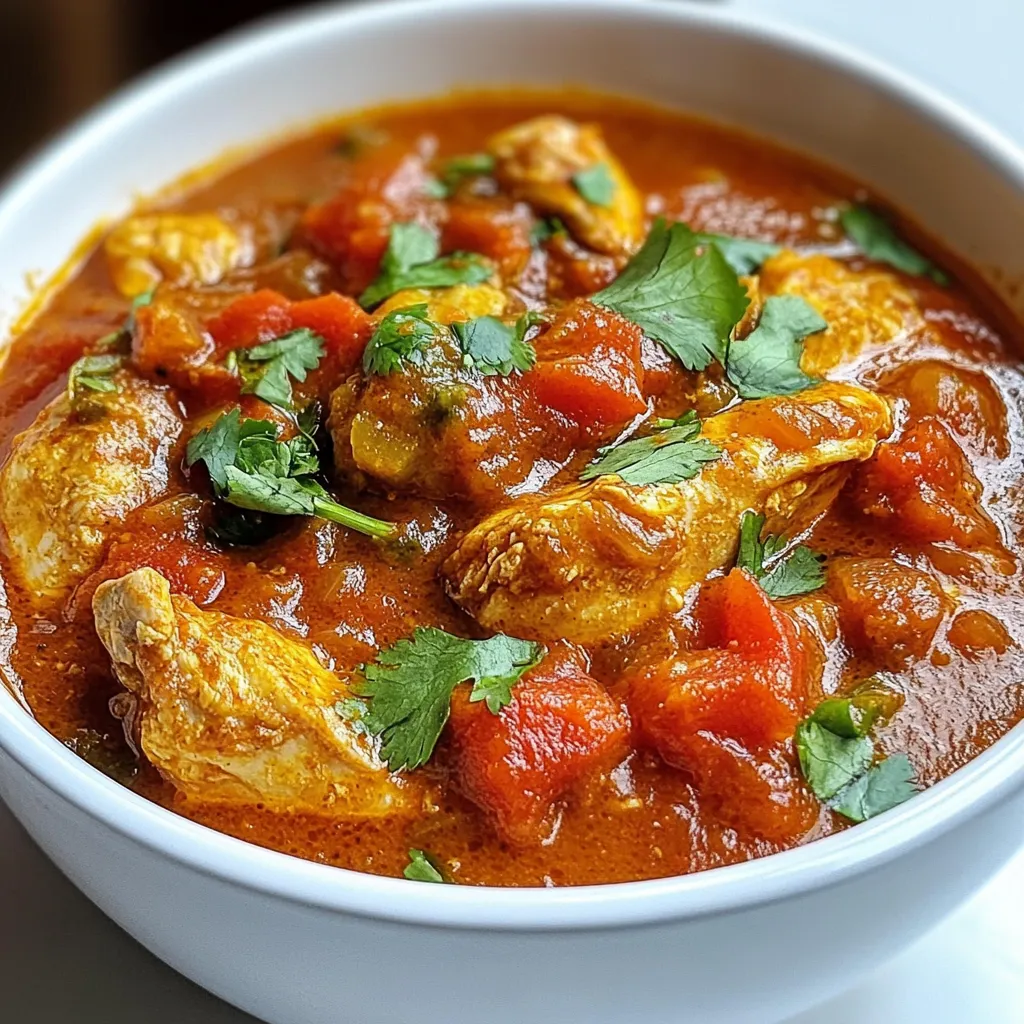
Are you ready to spice up your dinner routine? My Spicy Nigerian Chicken Stew is not only bursting with flavor

- Chicken and Spaghetti: Use 2 cups of cooked spaghetti and 2 cups of cooked chicken. The chicken can be shredded or diced. This base gives the casserole its heartiness. - Cheese Types: The dish shines with three kinds of cheese. You need 1 cup each of shredded mozzarella, shredded cheddar, and 1/2 cup of grated Parmesan. This blend makes the casserole creamy and delicious. - Vegetables and Seasonings: You will add flavor with 1/2 cup of diced bell peppers, 1/2 cup of diced onion, and 2 cloves of minced garlic. For extra taste, use 1 teaspoon of Italian seasoning, plus salt and pepper to suit your taste. These veggies and spices make the dish vibrant and tasty. Each ingredient plays a key role in making the casserole rich and filling. You can mix and match flavors based on your preference, but this combo works wonderfully. {{ingredient_image_2}} Preheating the Oven First, preheat your oven to 350°F (175°C). This makes sure it’s hot enough for baking. Sautéing the Vegetables Next, get a large skillet and add two tablespoons of olive oil. Heat it over medium heat. Once hot, toss in half a cup of diced onion and half a cup of diced bell peppers. I like to use both red and green bell peppers for color. Add two cloves of minced garlic. Stir and cook for about 5-7 minutes. The onion should turn soft and smell great. Combining Ingredients In a big mixing bowl, combine two cups of cooked spaghetti and two cups of cooked chicken, shredded or diced. Add your sautéed veggies to the bowl. Then, pour in one cup of marinara sauce and one cup of cream of mushroom soup. Sprinkle in one teaspoon of Italian seasoning and a bit of salt and pepper. Mix everything well until the spaghetti is covered in sauce. Incorporating Cheese Now, fold in half a cup of shredded mozzarella and half a cup of shredded cheddar cheese. This will add a nice creaminess to the dish. Make sure to mix well, but save the rest of the cheese for later. Transferring to Casserole Dish Take a 9x13 inch casserole dish and grease it lightly. Pour the spaghetti and chicken mixture into the dish. Use a spatula to spread it out evenly. Topping with Cheese Sprinkle the remaining mozzarella and cheddar cheese over the top. For an extra cheesy finish, add half a cup of grated Parmesan cheese on top as well. Covering and Baking Cover the casserole dish with aluminum foil. This helps it bake evenly. Place it in the oven and bake for 25 minutes. Finishing Baking Process After 25 minutes, take off the foil. Keep baking for another 15-20 minutes. Watch it until the cheese is melted and bubbly. The top should be golden brown. Cooling Before Serving Once it’s done, take the casserole out of the oven. Let it cool for about 5 minutes before serving. This helps the layers set and makes it easier to cut. Ensuring Perfect Cheese Melt To get that perfect cheese melt, mix half the cheese into the pasta. This helps it blend well. When you top it, add the rest of the cheese. This way, the top gets golden and bubbly. Avoiding a Dry Casserole Keep your casserole moist by using enough sauce. The cream of mushroom soup and marinara sauce add moisture. If you see it getting dry, cover it with foil while baking. This will lock in the steam. Adjusting Seasoning Levels Taste as you go! Start with a little salt and pepper. You can always add more, but you can’t take it out. The Italian seasoning adds a nice flavor, but adjust to your taste. Presentation Tips Serve the casserole hot from the dish for a cozy feel. If you want to impress, transfer it to a nice serving platter. Ideal Accompaniments Pair your casserole with a fresh side salad. A crisp salad balances the hearty dish. Garlic bread also makes a nice side. Garnishing Ideas Add a pop of color with fresh herbs. Chopped basil or parsley looks great on top. You can also sprinkle extra cheese for a cheesy finish. Pro Tips Cook Pasta Al Dente: Make sure to cook your spaghetti until just al dente, as it will continue to cook in the oven and prevent a mushy casserole. Use Rotisserie Chicken: For a quicker preparation, consider using store-bought rotisserie chicken. It adds flavor and saves time on cooking. Add Extra Veggies: Feel free to include additional vegetables like spinach or mushrooms for added nutrition and flavor. Let it Rest: Allow the casserole to sit for a few minutes after baking. This helps it set, making it easier to cut and serve. {{image_4}} Using Different Proteins You can switch up the chicken in this dish. Try turkey or cooked shrimp. For a meaty flavor, use ground beef or sausage. Each option brings a new taste. Gluten-Free Alternatives If you need gluten-free, use rice pasta instead of regular spaghetti. This swap keeps the dish hearty while meeting dietary needs. You can also look for gluten-free marinara sauce and soup. Vegan Options To make this dish vegan, replace chicken with chickpeas or tofu. Use a plant-based cream of mushroom soup and choose vegan cheese. These swaps maintain the heartiness without animal products. Adding Spices and Herbs You can boost flavor by adding spices. Try adding smoked paprika or cayenne for heat. Fresh herbs like basil or parsley can also brighten the dish. Incorporating Different Sauces Instead of marinara, use Alfredo or pesto sauce for a different twist. Each sauce gives the casserole a unique taste and richness. Experiment to find your favorite combination. Customizing Cheese Blend Feel free to mix your cheese options. Use gouda or pepper jack for added flavor. You can even throw in cream cheese for creaminess. The cheese blend can change the whole dish. - Best Storage Practices: Always let the casserole cool down before storing. This helps keep it fresh. You can store it in the fridge for up to 3 days. Use airtight containers to prevent moisture loss. - Recommended Containers: Glass or plastic containers with tight lids work best. You can also use aluminum foil if you don’t have containers. Just make sure to cover it well to keep it fresh. - Shelf Life Details: In the fridge, your Chicken Spaghetti Casserole will last around 3 days. If you want to keep it longer, consider freezing it. It can last up to 3 months in the freezer. - Best Methods for Reheating: The oven is the best way to reheat this casserole. Preheat your oven to 350°F (175°C). Place the casserole in an oven-safe dish and cover it with foil. Heat for about 20-25 minutes. - Ensuring Quality and Flavor: If you want to keep it moist, add a splash of chicken broth or water before reheating. This helps to bring back the creamy texture and flavor. If using a microwave, heat in short bursts, stirring in between to ensure even warming. Yes, you can make Chicken Spaghetti Casserole ahead of time. Prepare the casserole and cover it tightly with plastic wrap or foil. You can store it in the fridge for up to 24 hours before baking. This makes it easy for busy days. Just remember to adjust the baking time if it's cold from the fridge. You can serve many tasty sides with this casserole. A crisp side salad pairs well. Garlic bread is also a favorite. You can even try steamed vegetables for a healthy touch. If you want something warm, consider a bowl of soup. Each side adds a nice balance to the meal. Freezing is simple! Once it cools, wrap the casserole in plastic wrap and then foil. Label it with the date so you know when you made it. You can freeze it for up to three months. To reheat, thaw it in the fridge overnight and bake as usual. This way, you have a hearty meal ready anytime! You learned how to make a delicious Chicken Spaghetti Casserole with the right ingredients and steps. We covered the main ingredients, cooking tips, and even variations to try. Remember, you can change up proteins and flavors to fit your taste. Store leftovers wisely to enjoy them later. This dish is easy, tasty, and great for sharing. I hope you enjoy making it as much as I do!

Chicken Spaghetti Casserole Simple and Hearty Meal

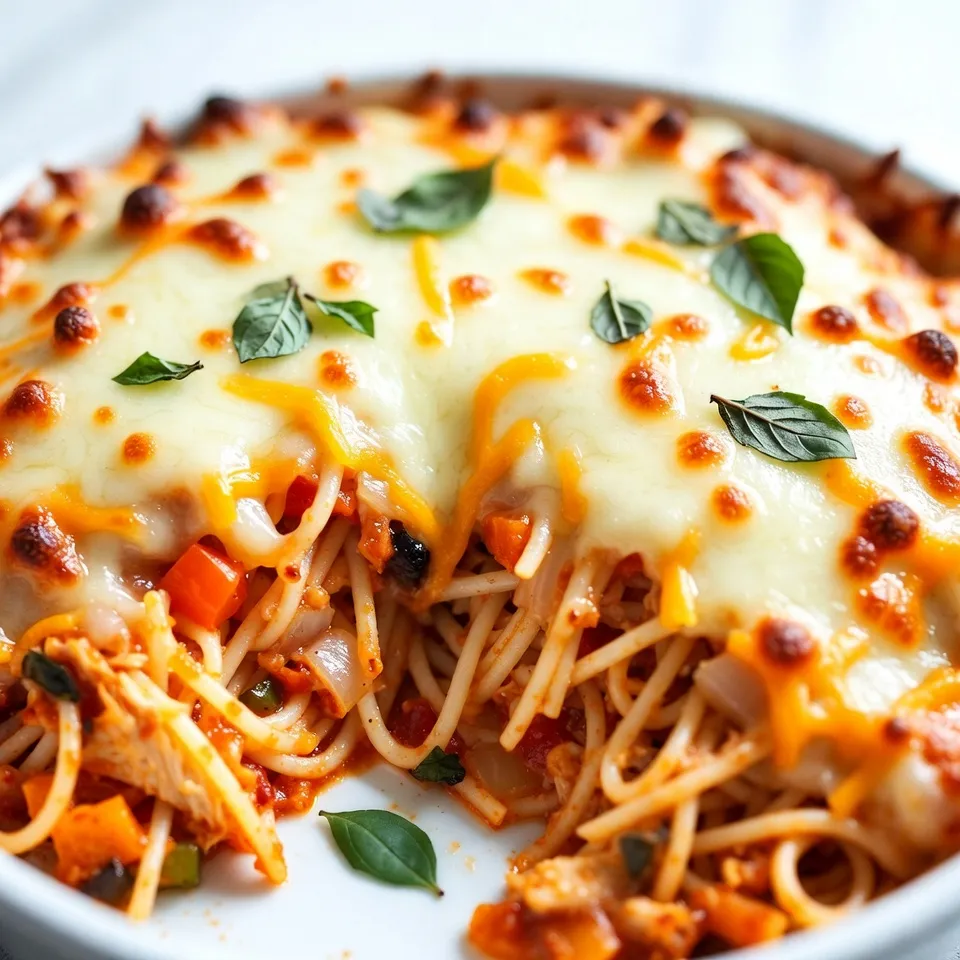
Are you ready to whip up a meal that’s both simple and delicious? Chicken Spaghetti Casserole fits the bill perfectly!

- 1 lb boneless, skinless chicken breast, sliced into thin strips - 1 medium bell pepper (red or green), sliced into thin strips - 1 large onion, sliced into half-rings - 2 cloves fresh garlic, minced - 1 tablespoon extra virgin olive oil - 1 teaspoon chili powder - 1 teaspoon ground cumin - 1/2 teaspoon smoked paprika - 1/2 teaspoon dried oregano - Salt and freshly ground black pepper to taste - 2 cups cooked rice (white or brown) - 1 cup canned black beans, rinsed and drained - 1 ripe avocado, diced - 1/2 cup corn (fresh off the cob or frozen) - Fresh cilantro, roughly chopped (for garnish) - Lime wedges (for serving) When cooking, fresh ingredients often bring the best taste. Fresh chicken, peppers, and onions have bright flavors. Fresh garlic adds a strong kick. However, frozen ingredients can save time. Frozen corn and beans still taste great when heated. Use what you can find. Both fresh and frozen work well in this dish. Spices make a big difference. Chili powder gives the chicken heat and depth. Ground cumin adds an earthy note. Smoked paprika brings warmth and a hint of smoke. Dried oregano adds a touch of herbiness. Adjust the salt and pepper to fit your taste. If you want more heat, add cayenne pepper or red chili flakes. {{ingredient_image_2}} Start with one pound of boneless, skinless chicken breast. Slice it into thin strips. This helps the chicken cook quickly and evenly. Heat one tablespoon of extra virgin olive oil in a large skillet over medium heat. Once the oil is hot, add the chicken strips to the skillet. Season them with one teaspoon of chili powder, one teaspoon of ground cumin, half a teaspoon of smoked paprika, half a teaspoon of dried oregano, and a pinch of salt and pepper. Stir the chicken well to coat it with the spices. Cook for about five to seven minutes. The chicken should be browned and fully cooked, reaching an internal temperature of 165°F. When the chicken is almost done, it’s time for the veggies. Add a sliced medium bell pepper and one large onion, cut into half-rings. Also, add two cloves of minced garlic for extra flavor. Stir the mixture and cook for another four to five minutes. You want the vegetables to be tender but still crisp. Look for a slight char on them for that perfect fajita taste. Now it’s time to assemble your rice bowls. Start with two cups of cooked rice as the base in each bowl. Spread it out evenly. Next, pile on the spicy chicken and vegetable mix. Make sure to get a good amount for a hearty meal. Add one cup of rinsed black beans and half a cup of corn on top. Finally, finish off each bowl with diced avocado and a sprinkle of fresh cilantro for a burst of flavor. Just before serving, squeeze fresh lime juice over the bowls. This will brighten all the flavors and make each bite even better. To cook chicken just right, slice it into thin strips. This helps it cook evenly. Heat olive oil in your skillet until it shimmers. Add the chicken strips and season them well. Use chili powder, cumin, smoked paprika, oregano, salt, and pepper. Stir the chicken to coat it in spices. Cook it for about 5-7 minutes until it browns and reaches 165°F inside. This keeps your chicken juicy and full of flavor. To boost flavor, consider adding fresh lime juice just before serving. This brightens the dish and adds zest. You can also mix in a pinch of cayenne for heat. Fresh cilantro gives a lovely finish too. If you like more texture, add crunchy toppings like tortilla strips or radishes. These changes make your fajita rice bowls even more exciting and tasty. Make your bowls pop with color! Use vibrant bowls to showcase the fresh ingredients. Layer your rice first, then the chicken and veggies. Top with warm black beans and corn. Don’t forget to add diced avocado and cilantro. Place lime wedges on the side. This not only looks good but also invites everyone to enjoy their meal. Pro Tips Marinate for More Flavor: Consider marinating the chicken in the spices and some lime juice for at least 30 minutes before cooking to enhance the flavor. Use Fresh Ingredients: Fresh bell peppers and onions not only add vibrant color but also contribute to the dish's crunch and overall flavor. Customize Your Toppings: Feel free to add your favorite toppings such as shredded cheese, sour cream, or jalapeños for a personalized touch. Meal Prep Friendly: These bowls are perfect for meal prep! Cook a larger batch and store them in airtight containers for quick, reheatable lunches during the week. {{image_4}} You can make these rice bowls vegetarian by skipping the chicken. Use extra veggies like zucchini, mushrooms, or even eggplant instead. For a vegan option, replace chicken with plant-based protein like tofu or tempeh. Just season them the same way as the chicken for great flavor. This gives you a tasty, meat-free meal. If chicken isn't your favorite, try other proteins. Shrimp cooks fast and adds a nice twist. Beef or pork strips also work well, just adjust the cooking time. For a lighter option, use turkey. Each protein brings its own flavor, making your rice bowl unique every time. Toppings can change your dish completely. Add fresh salsa, sour cream, or cheese for richness. Pickled jalapeños give a nice kick. For a fresh taste, throw on some chopped tomatoes or radishes. Don’t forget to drizzle lime juice over the top. Each topping adds a new layer of flavor and fun. To store your chicken fajita rice bowls, let them cool first. Place them in an airtight container. You can keep them in the fridge for up to three days. If you want to store them longer, freeze them. They will last for about three months in the freezer. Just remember to label your containers with the date. When you're ready to enjoy your leftovers, reheat them properly. For the microwave, put the bowl in for about 2-3 minutes. Stir halfway through to heat evenly. If you prefer the stove, use a pan over low heat. Add a splash of water or broth to keep it moist. Heat until warm, stirring often. Meal prepping these bowls is easy and fun! Cook a big batch of rice at the start of the week. Slice up your chicken and veggies ahead of time. Store them in separate containers. When you're ready, just cook them up fresh. This way, you can enjoy a quick, healthy meal any day. Yes, you can use brown rice. It adds a nutty flavor and more fiber. Brown rice takes longer to cook, so plan for that. Use the same amount of cooked brown rice as white rice. Just make sure it’s fully cooked and fluffy for the best texture. You can add many vegetables to your chicken fajita rice bowls. Consider these options: - Zucchini - Mushrooms - Spinach - Cherry tomatoes - Jalapeños for heat These veggies add color and nutrients. Feel free to mix and match to suit your taste! To add some heat, try these tips: - Use spicy chili powder instead of regular. - Add sliced jalapeños to the skillet with the veggies. - Top with a spicy salsa or hot sauce before serving. Adjust according to your spice level. Enjoy the kick! This blog post covered key steps to make tasty rice bowls. We explored what ingredients to use, including fresh and frozen options. I shared tips for cooking chicken perfectly and enhancing flavor with spices. We also looked at fun variations like vegetarian choices and how to store leftovers. In cooking, remember to enjoy the process. Experiment with different ingredients and flavors to make the dish your own. Keep these tips in mind, and you'll impress everyone at the table.

Chicken Fajita Rice Bowls Quick and Flavorful Meal

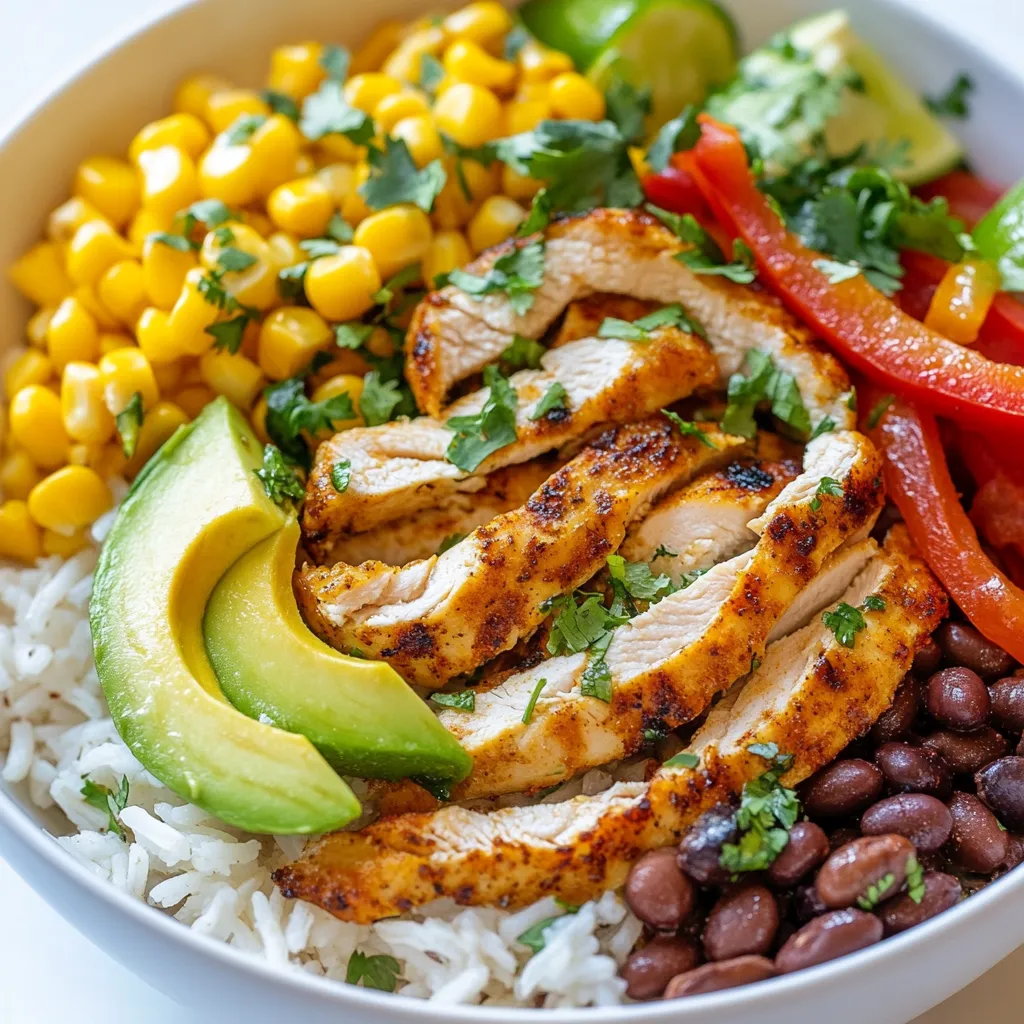
Are you looking for a quick and tasty meal? Chicken Fajita Rice Bowls are the perfect solution! They blend vibrant

To make delicious Ground Chicken Rice Burritos, you need fresh and flavorful ingredients. Here’s what you will need: - 1 lb ground chicken - 1 cup cooked brown rice - 1 cup black beans, rinsed and drained - 1 bell pepper, diced (choose red for sweetness or green for a bit more bite) - 1 small onion, finely chopped - 2 cloves garlic, minced - 1 teaspoon chili powder - 1 teaspoon ground cumin - ½ teaspoon sweet paprika - Salt and pepper to taste - ½ cup corn (use canned or frozen corn) - ½ cup shredded cheese (cheddar or Monterey Jack for a creamy finish) - 4 large tortillas (flour or whole wheat) - Fresh cilantro, chopped (for garnish) - 1 avocado, sliced (for topping) - Salsa or hot sauce (for dipping and added flavor) These tasty ingredients create a filling meal that everyone will enjoy. Ground chicken adds lean protein, while black beans and brown rice provide fiber and nutrients. Fresh veggies like bell pepper and onion add crunch and color. Don't forget the spices! They bring warmth and depth to every bite. Using these ingredients ensures a balanced and satisfying burrito that bursts with flavor. Feel free to mix and match based on what you have at home. Cooking should be fun and adaptable! {{ingredient_image_2}} - Start by heating a large skillet over medium heat. Add a drizzle of olive oil. - When the oil is hot, add the finely chopped onion and diced bell pepper. - Sauté the vegetables for about 5 minutes until they soften. The onion should turn translucent. - Next, add the minced garlic and cook for another minute. Stir often until the garlic smells great. - Now, add the ground chicken to the skillet. Use a spatula to break it apart as it cooks. - Cook the chicken until it turns brown and is no longer pink. This will take about 7 to 10 minutes. - Season the chicken with chili powder, cumin, paprika, salt, and pepper. Mix it well to coat the meat evenly. - Fold in the cooked brown rice, rinsed black beans, and corn into the chicken mixture. - Stir everything together and let it cook for another 2 to 3 minutes. This helps the flavors come together. - Remove the skillet from heat and add the shredded cheese. Stir gently until the cheese melts and blends in. - Lay out a tortilla flat on a clean surface. Spoon a good amount of the chicken mixture into the center. - Fold in the sides of the tortilla, then roll it tightly from the bottom up. This keeps the filling secure. - Repeat the process with the remaining tortillas and filling until all burritos are made. - Optional: To make them crispy, grill the burritos. Place them seam-side down in a skillet with a bit of oil. - Cook each side for about 2 minutes until they turn golden brown and crispy. - Slice each burrito in half and serve warm with fresh avocado slices and cilantro. Add salsa or hot sauce for extra flavor! - Choosing the right spices: Use chili powder, cumin, and paprika. These spices bring warmth and depth. Feel free to adjust the amount based on your taste. For extra heat, add more chili powder or a dash of cayenne. - Ensuring chicken is fully cooked: Cook the ground chicken until it turns golden brown. It should not have any pink bits. This step keeps your burritos safe and tasty. Use a meat thermometer for accuracy; the chicken should reach 165°F. - Serving suggestions: Plate the burritos on a vibrant dish. This makes the colors pop. Add a small bowl of salsa or hot sauce on the side for easy dipping. - Garnishing with avocado and cilantro: Top each burrito with fresh avocado slices. Sprinkle chopped cilantro for a burst of color and flavor. These garnishes not only look great but taste amazing too. - Recommended dips: Salsa and hot sauce are perfect for these burritos. They add zing and freshness. Use your favorite store-bought salsa or make your own for a personal touch. - Additional toppings: Add sour cream for creaminess. Shredded lettuce can add crunch. Both toppings enhance the overall taste and texture of your meal. Pro Tips Choose the Right Tortilla: Opt for larger flour or whole wheat tortillas to easily wrap the filling and avoid tearing. Add Extra Flavor: Consider adding lime juice or hot sauce to the chicken mixture for a zesty kick that enhances the overall taste. Customize Your Fillings: Feel free to mix in other vegetables or proteins, like zucchini or ground turkey, to make the burritos your own. Perfectly Melted Cheese: For a gooey cheese experience, use a mix of cheeses and let them sit in the warm filling for a minute before rolling. {{image_4}} You can swap ground chicken for other proteins. Ground turkey is lean and tasty. Ground beef gives a richer flavor. For a plant-based option, use lentils or a meat substitute. You can also change the grains. Quinoa is a great choice for added protein. White rice works well if you prefer a softer texture. Want some heat? Add jalapeños to the mix for a spicy kick. You can also make a vegetarian version. Just leave out the chicken and add more beans. Black beans or pinto beans are great options. This keeps the burrito filling and satisfying. You can change up the salsa for different tastes. Try mango salsa for a sweet twist. A spicy chipotle salsa adds a smoky flavor. If you want to make your own sauce, blend fresh tomatoes, onion, and cilantro. A squeeze of lime juice brightens the flavor. This is a fun way to personalize your meal! To keep your burritos fresh, store them in the fridge. Use an airtight container. This helps keep moisture in and flavors intact. Leftovers stay good for about 3 to 4 days in the fridge. If you want to store them longer, try freezing. Wrap each burrito in plastic wrap, then place them in a freezer bag. This way, they can last up to 3 months. When it’s time to eat your leftovers, you have a few options for reheating. 1. Microwave Method - Unwrap the burrito from any plastic. - Place it on a microwave-safe plate. - Heat for 1 to 2 minutes, or until warm. Check to make sure it heats evenly. 2. Skillet Method for Best Texture - Heat a skillet over medium heat. - Add a little oil to the pan. - Place the burrito seam-side down in the skillet. - Cook for about 2-3 minutes on each side until the outside is crispy and heated through. This method keeps the burrito tasty and adds a nice crunch. Ground chicken rice burritos last about 3 to 4 days in the fridge. Make sure to store them in an airtight container. This keeps them fresh and tasty. If you want them to last longer, consider freezing them! Yes, you can use whole wheat tortillas. They add a nutty flavor and extra fiber to your meal. Just make sure they are large enough to hold all the filling. Ground chicken rice burritos can be healthy. They have lean protein, fiber from beans, and nutrients from veggies. You can control the calories by adjusting the cheese and sauces you add. Absolutely! You can prepare burritos ahead of time. Just wrap them tightly in foil or plastic wrap. Store them in the fridge or freezer. Reheat them when you are ready to eat. You can serve burritos with a side of salsa or guacamole. A fresh salad or corn on the side also works well. These add color and flavor to your meal. You've learned how to create tasty ground chicken rice burritos. We covered key ingredients, step-by-step cooking, and useful tips. You can even swap ingredients for fun variations. Remember, these burritos are not only delicious but also easy to customize. Perfect for a quick meal or a fun gathering. Enjoy making, sharing, and eating your burritos!

Ground Chicken Rice Burritos Flavorful and Filling Meal

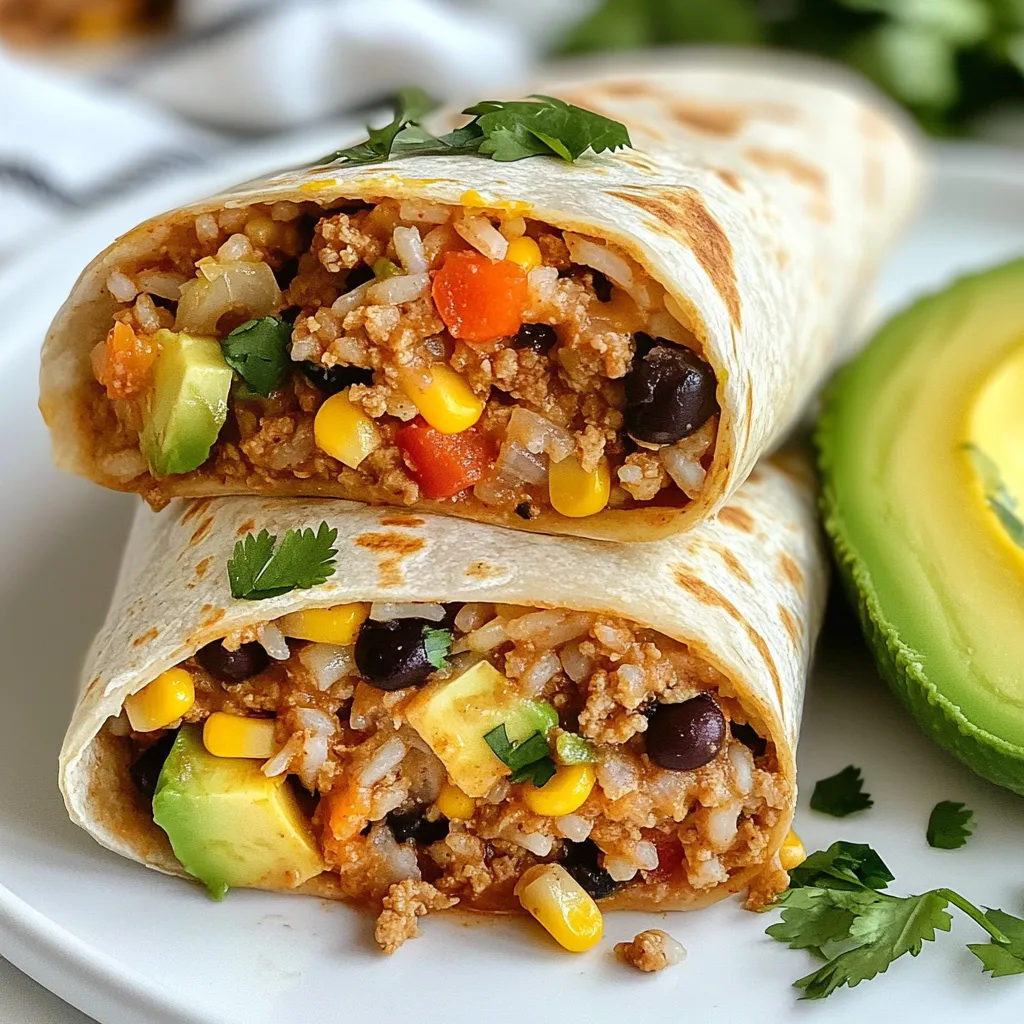
Are you ready to make a meal that’s both flavorful and filling? Ground Chicken Rice Burritos are the perfect dish

- Puff pastry - Onions - Olive oil - Balsamic vinegar - Granulated sugar - Fresh thyme - Gruyère cheese - Ricotta cheese - Salt and pepper - Egg (for egg wash) Gathering the right ingredients is key for great tarts. You will need puff pastry, which serves as a light and flaky base. I recommend using fresh onions, as they caramelize beautifully, adding rich flavor. Olive oil is best for sautéing the onions. A splash of balsamic vinegar brightens up the taste. Granulated sugar helps the onions caramelize perfectly. Fresh thyme brings a lovely herbal note. Gruyère cheese gives a nutty flavor, while ricotta cheese adds creaminess. Don't forget salt and pepper to enhance all the flavors. Lastly, an egg wash will create a gorgeous golden crust. Having these ingredients ready will make your cooking process smooth and enjoyable! {{ingredient_image_2}} First, preheat your oven to 400°F (200°C). This step is key for a nice bake. Next, heat 2 tablespoons of olive oil in a large skillet over medium heat. Add 3 large, thinly sliced onions. Cook these for about 15-20 minutes. Stir often until the onions are soft and golden. They should smell sweet and rich. Once the onions are caramelized, add 1 tablespoon of balsamic vinegar, 1 teaspoon of granulated sugar, and 1 teaspoon of fresh thyme leaves. Season with salt and freshly ground black pepper to taste. Stir this mix and let it cook for another 5 minutes. Remove the skillet from heat and let it cool slightly. On a lightly floured surface, roll out 1 sheet of thawed puff pastry. Make a rectangle that is easy to work with. Cut the pastry into squares or rounds that fit your tart pans or baking sheet. Transfer the pastry pieces to your prepared baking sheet. Pre-bake them for 10 minutes, until they puff slightly. In a bowl, mix 1 cup of ricotta cheese with half of the 1 cup of grated Gruyère cheese. Add a pinch of salt and freshly ground black pepper. Spread this creamy mix over the pre-baked pastry. Leave a small border around the edges. Next, top with the cooled caramelized onions, spreading them evenly. Finally, sprinkle the remaining Gruyère cheese on top. In a small bowl, beat 1 egg. Use this egg wash to brush the edges of the pastry. This gives your tarts a golden color. Place the tarts in the oven and bake for 15-20 minutes. Watch for the cheese to bubble and the pastry to turn golden brown. When done, remove from the oven and let them cool a few minutes before serving. To caramelize onions well, control the heat. Use medium heat to avoid burning. If the heat is too high, the onions may cook too fast. Stir the onions often. This keeps them from sticking and helps them cook evenly. For best results, let them cook slowly. This brings out their natural sweetness. An egg wash gives your tarts a shiny finish. Make sure to brush it on the edges before baking. It helps the pastry turn golden brown. Pre-bake the pastry for about 10 minutes. This step helps it puff up nicely. Keep an eye on the time. You want it slightly puffed, not fully baked yet. Adding fresh herbs boosts the flavor of your tarts. Consider using rosemary or oregano alongside thyme. These herbs add depth to your dish. You can also swap out cheeses. Try using mozzarella for a milder taste or gorgonzola for a kick. Mixing cheeses can create unique flavors. Experiment to find your favorite combination! Pro Tips Choose the Right Onions: For sweeter caramelized onions, opt for yellow or sweet onions. They develop a rich flavor as they cook down, enhancing your tarts. Don’t Rush the Caramelization: Allow the onions to slowly caramelize over medium heat. This process can take time but results in a deeper, more complex flavor. Experiment with Cheese: While Gruyère adds a lovely nutty flavor, you can mix in other cheeses like fontina or goat cheese for a unique twist. Serve Fresh: These tarts are best served warm out of the oven. If you need to reheat them, do so in an oven to preserve the pastry's flakiness. {{image_4}} You can easily swap Gruyère cheese for other tasty options. For a sharper bite, try aged cheddar. Its bold flavor pairs well with sweet onions. If you love a creamier texture, consider using mozzarella. It melts beautifully and creates a lovely stretch when you bite in. You might also enjoy adding blue cheese or goat cheese. Blue cheese brings a tangy punch that balances the sweet onions. Goat cheese adds a creamy and slightly tart flavor. Both options elevate your tart and impress guests. Feel free to add more vegetables to your tarts. Sautéed mushrooms bring an earthy depth. Spinach adds vibrant color and nutrients. Zucchini is another great choice. It adds moisture and a light taste that complements the cheese. Seasonal variations can also inspire your choices. In spring, consider asparagus for a fresh touch. In fall, roasted butternut squash adds sweetness and warmth. You can mix and match based on what you love or what’s in season. If you need gluten-free options, look for gluten-free puff pastry. Many brands offer good alternatives that taste great too. You can also make your own using almond flour or rice flour for a fun twist. For vegan adaptations, replace cheeses with cashew cream or a store-bought vegan cheese. Use a flaxseed or chia seed mixture instead of the egg wash. This keeps your tarts plant-based while still being delicious. To keep your delicious tarts fresh, store them in the fridge. Place them in an airtight container. This will help prevent them from drying out. If you have extra tarts, layer parchment paper between them. This keeps them from sticking together. When reheating, I recommend using the oven. Preheat your oven to 350°F (175°C). Place the tarts on a baking sheet. Bake for about 10-12 minutes. This helps keep the pastry crispy. If you use a microwave, the pastry may get soft. If you must use the microwave, heat them for 30 seconds. Check them often to avoid sogginess. Yes, you can make the tarts ahead of time. To prepare them early, follow these tips: - Cook the onions: You can caramelize the onions a day before. Store them in the fridge. - Pre-bake the pastry: You can also pre-bake the puff pastry. Let it cool, then keep it in an airtight container. - Assemble before baking: When you are ready to serve, just layer the cheese and onions on the pastry. Then, bake them fresh. These tarts shine when served warm. Here are some serving suggestions: - Presentation: Serve them on a rustic wooden board. - Garnish: Add fresh thyme or peppery arugula for color. - Drizzle: A light balsamic glaze adds a delightful touch. - Pairing: They go well with a crisp salad or a light soup. Perfectly baked tarts have clear signs. Look for these: - Color: The pastry should be golden brown. - Texture: The cheese should be bubbly and slightly browned. - Time: Bake for 15-20 minutes at 400°F (200°C). - Cooling: Let them cool for a few minutes before serving. These caramelized onion tarts are easy and fun to make. You learned how to prepare the ingredients, from caramelizing onions to baking the puff pastry. Flavor tips help you create a dish that stands out. You can also try different cheeses or add veggies for personal touches. Now, you have the tools to impress family and friends. Enjoy making these tarts and sharing them at your next gathering!

Caramelized Onion & Cheese Tarts Savory Delight

Are you ready to impress your guests with a simple yet delicious dish? My Caramelized Onion & Cheese Tarts are

Older posts
Newer posts
← Previous Page1 … Page102 Page103 Page104 … Page115 Next →

dsad

© 2025 recipesstation • Built with GeneratePress

Our Policies

  • Copyright Policy
  • Cookie Policy
  • GDPR Policy
  • Privacy Policy
  • Disclaimer
  • Terms Of Use

More Information

  • Home
  • About
  • Contact
  • Appetizers
  • Dessert
  • Dinner
  • Drinks
©2025, recipesstation About Back To Top