Skip to content
DisclaimerTerms Of UseGDPR PolicyCookie Policy

recipesstation

  • Home
  • Drinks
  • Appetizers
  • Dinner
  • Dessert
  • About
  • Contact
  • Privacy Policy
DisclaimerTerms Of UseGDPR PolicyCookie Policy

Emily

- 4 medium apples (recommended varieties: Granny Smith or Honeycrisp), peeled, cored, and thinly sliced - 1 cup granulated sugar, divided - 1/2 cup unsalted butter, melted - 1 cup all-purpose flour - 1 cup rolled oats - 1 teaspoon ground cinnamon - 1/2 teaspoon ground nutmeg - 1/4 teaspoon salt - 1 cup caramel sauce (store-bought or homemade) - Vanilla ice cream (for serving, optional) I love using Granny Smith and Honeycrisp apples for this dessert. Granny Smith apples are tart and hold their shape well. They create a nice contrast with the sweet crumble. Honeycrisp apples are juicy and sweet, adding a rich flavor. Mixing these apples can give your crumble a balanced taste. Feel free to try other varieties like Fuji or Gala if you like them better! For the best experience, serve your caramel apple crumble warm. A scoop of vanilla ice cream on top makes it even better. The cold ice cream melts slightly, mixing with the warm crumble. You can also drizzle extra caramel sauce over the ice cream. This adds a sweet touch and makes the dish look more appealing. Enjoy your dessert with family and friends! {{ingredient_image_2}} First, gather your apples. I like using Granny Smith or Honeycrisp. These apples add a nice tartness. Peel and core the apples, then slice them thinly. In a mixing bowl, combine the sliced apples with half a cup of sugar. Add ground cinnamon, nutmeg, and salt. Toss the apples well to coat them evenly. Spread this mixture in a greased 9x13 inch baking dish. Make sure the apples cover the bottom evenly. In another bowl, melt half a cup of butter. Mix this with the remaining half cup of sugar, flour, and rolled oats. Stir until the mixture looks like coarse crumbs. This crumble topping gives a nice texture. You want it to be crumbly but not too dry. If it feels too wet, add a bit more flour. Now it’s time to assemble. Evenly spread the crumble topping over the apples in the baking dish. Drizzle caramel sauce all over the crumble. This adds rich flavor and sweetness. Preheat your oven to 350°F (175°C). Bake for 35-40 minutes. You want the apples to be tender and the topping golden brown. Let it cool for about 10 minutes before serving. Warm servings are great with ice cream on top! Choose firm apples for the best flavor and texture. I love using Granny Smith or Honeycrisp apples. They balance sweetness and tartness perfectly. Always pick apples that feel heavy for their size. Avoid any that have bruises or soft spots. Fresh apples will keep your crumble from getting too mushy. For a great crumble, mix the butter and dry ingredients well. You want it to look like coarse crumbs. Use cold butter for a flakier topping. If the topping is too wet, add a bit more flour or oats. Bake until the top is golden brown. This adds a nice crunch that contrasts with the soft apples. Serve your caramel apple crumble warm for the best taste. A scoop of vanilla ice cream makes it even better. The cold ice cream melts slightly on the warm crumble. This creates a delicious mix of flavors. Drizzle extra caramel sauce over the ice cream for a sweet touch. Enjoy every bite! Pro Tips Choose the Right Apples: For the best flavor and texture, use a combination of tart and sweet apples like Granny Smith and Honeycrisp. Make Your Own Caramel: If time allows, consider making homemade caramel sauce for a richer flavor compared to store-bought options. Keep it Warm: Serve the crumble warm for the best experience; reheat leftovers in the oven for a few minutes to revive the crisp topping. Experiment with Spices: Feel free to add other spices such as ginger or allspice to customize the flavor profile to your liking. {{image_4}} You can easily add nuts or spices to your caramel apple crumble. Chopped walnuts or pecans give a nice crunch. Mix in about half a cup for a tasty twist. If you like spices, try adding cardamom or ginger for a warm kick. Just a pinch can change the flavor in a fun way. If you need a gluten-free option, swap the all-purpose flour with almond or oat flour. These flours work well and keep the crumble texture. You can also use gluten-free oats for the topping. Always check labels to ensure they are certified gluten-free. This way, everyone can enjoy your dessert! While caramel sauce shines in this recipe, you can try other sauces too. Chocolate sauce adds a sweet and rich layer. Fruit sauces, like raspberry or cherry, bring a fresh burst of flavor. Drizzle your chosen sauce over the top before serving for a delightful surprise. Experimenting with sauces lets you make this dessert your own! To keep your caramel apple crumble fresh, cover it tightly with plastic wrap or aluminum foil. You can also store it in an airtight container. This will help keep the crumble from getting soggy. Leftovers can stay good in the fridge for about three days. If you want to enjoy it later, consider freezing it. To reheat your caramel apple crumble, preheat the oven to 350°F (175°C). Place the crumble in an oven-safe dish and cover it with foil. Heat for about 15-20 minutes or until it warms through. You can also use a microwave for a quicker option. Heat it in 30-second bursts until warm, but the oven gives a better texture. You can freeze caramel apple crumble for up to three months. Before freezing, let it cool completely. Then, wrap it tightly in plastic wrap and then in aluminum foil. For easy use, you can freeze it in individual portions. When ready to eat, thaw it overnight in the fridge and reheat as mentioned above. Enjoy the delicious flavors even after freezing! Yes, you can prepare this dessert ahead of time. To do this, follow the recipe up to the point of baking. After assembling, cover the dish with foil or plastic wrap. Store it in the fridge for up to 24 hours. When ready to bake, just remove the cover and bake it straight from the fridge. This method helps the flavors to blend together nicely. Reheating caramel apple crumble is easy. Place individual servings in a microwave-safe dish. Heat them in the microwave for about 30 seconds to 1 minute. If you prefer the oven, preheat it to 350°F (175°C). Bake the crumble for about 10-15 minutes until warmed through. Both methods work well, but the oven gives a crispier topping. Making homemade caramel sauce is simple. You need just three ingredients: - 1 cup granulated sugar - 6 tablespoons unsalted butter - 1/2 cup heavy cream Start by heating the sugar in a saucepan over medium heat. Stir until it melts and turns golden brown. Quickly add the butter and stir until melted. Next, slowly add the heavy cream while stirring. Be careful as it may bubble. Cook for another minute, then remove from heat. Let it cool before using. Yes, you can make this recipe vegan with a few swaps. Use plant-based butter instead of unsalted butter. For the caramel sauce, you can use coconut cream and coconut sugar to create a vegan version. Choose apples and oats that are certified vegan. This way, you can enjoy the same great taste while keeping it plant-based. This blog post covered how to make a delicious caramel apple crumble. We went through key ingredients, including apple varieties and serving suggestions. The step-by-step instructions helped you prepare the apples and make the crumble topping smoothly. I shared tips for selecting apples and perfecting the texture. You can also explore variations, storage methods, and answers to common questions. In the end, enjoy your homemade dessert and share it with loved ones.

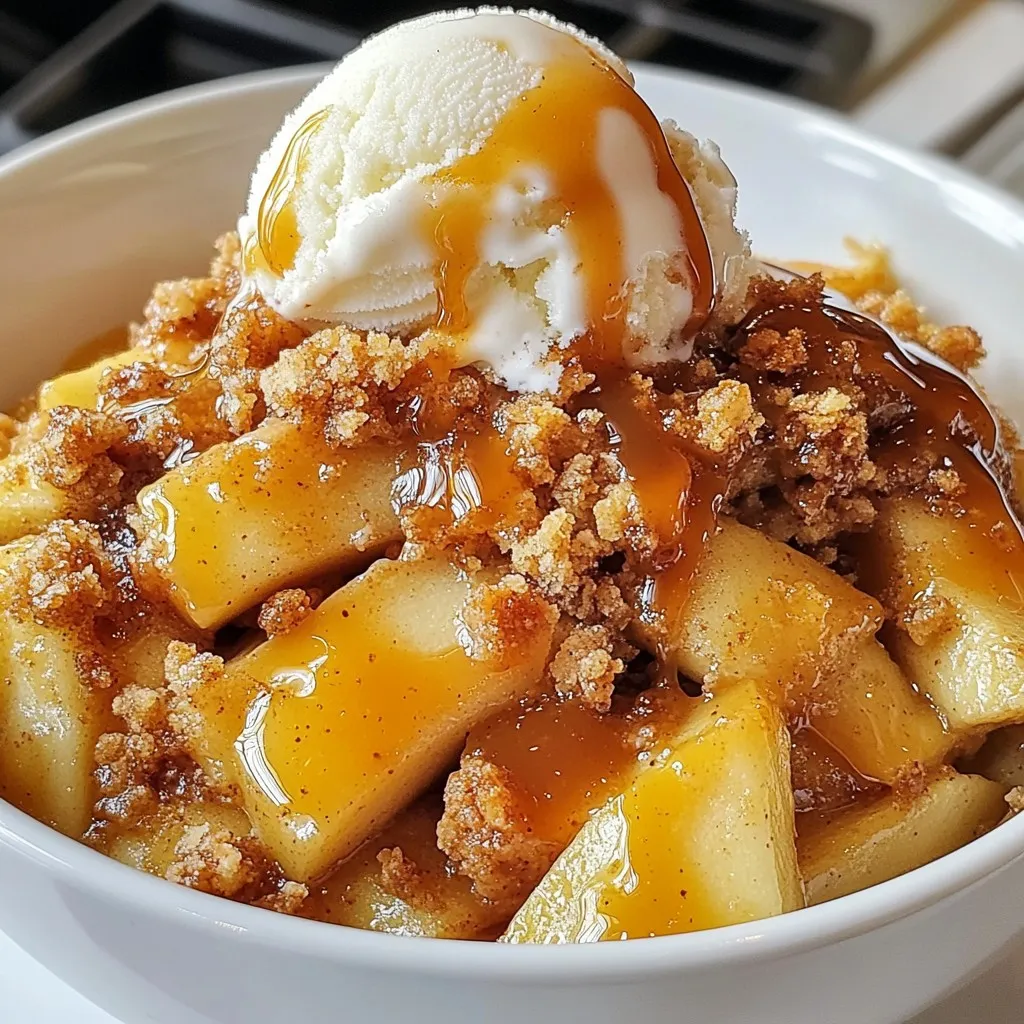
Caramel Apple Crumble Irresistible Dessert Recipe

Are you craving a sweet treat that warms your heart? My Caramel Apple Crumble is just what you need! With

- 10 cloves of garlic, minced - 1 medium onion, finely chopped - 2 tablespoons olive oil - 1 teaspoon ground turmeric - 1 teaspoon ground cumin - 4 cups vegetable broth - 1 cup water - 1 cup fresh kale, roughly chopped - 1 medium carrot, diced - 1 teaspoon fresh thyme leaves or ½ teaspoon dried thyme - Salt and black pepper, to taste - Juice of 1 lemon - Fresh parsley, chopped (for garnish) Garlic is great for your immune system. It has compounds that help fight germs. Onions add flavor and also boost your health. They contain antioxidants that help keep you strong. Olive oil is heart-healthy and adds richness to the soup. Turmeric is a golden spice known for its anti-inflammatory properties. Cumin aids digestion and adds a warm taste. Vegetable broth gives the soup depth and nutrients. Kale is packed with vitamins A, C, and K. Carrots are sweet and full of beta-carotene, which supports vision and skin health. Thyme is another herb that can fight off sickness. Lemon juice brightens the flavor and adds vitamin C. Finally, parsley not only garnishes but also provides more nutrients. Using fresh ingredients makes a big difference in flavor. Fresh garlic and herbs give the soup a vibrant taste. However, if you have dried thyme or garlic powder, you can still use them. Just remember, dried herbs are more potent. Use less if you are substituting. Fresh vegetables bring more nutrients and a better texture. But in a pinch, frozen or canned options can work too. Aim for fresh whenever possible for the best results! {{ingredient_image_2}} To start, gather all your ingredients. You need: - 10 cloves of garlic, minced - 1 medium onion, finely chopped - 2 tablespoons olive oil - 1 teaspoon ground turmeric - 1 teaspoon ground cumin - 4 cups vegetable broth - 1 cup water - 1 cup fresh kale, roughly chopped - 1 medium carrot, diced - 1 teaspoon fresh thyme leaves or ½ teaspoon dried thyme - Salt and black pepper, to taste - Juice of 1 lemon - Fresh parsley, chopped (for garnish) Wash your vegetables well. Chop the onion and carrot into small pieces. Mince the garlic. This prep makes cooking easier. Heat the olive oil in a large pot over medium heat. Add the chopped onion. Sauté for about 3 to 4 minutes. You want the onion to turn soft and clear. Next, add the minced garlic. Cook it for 2 minutes. This will release a nice smell. Be careful not to let it brown. Now, add the ground turmeric and cumin. Stir for 30 seconds. This lets the spices cook a bit and brings out their flavor. Slowly pour in the vegetable broth and water. Bring this mixture to a boil. Once boiling, add the diced carrots, chopped kale, and thyme. Lower the heat and cover the pot. Let it simmer for 15 to 20 minutes. The goal is to make the veggies tender. After cooking, remove the pot from heat. Stir in the lemon juice for a fresh taste. Now it’s time to blend the soup. You can use an immersion blender right in the pot. If you have a regular blender, be careful. Blend in small batches and let it cool a bit first. Blend until the soup is smooth and creamy. Taste it. Add salt and black pepper as needed. Your soup is now ready to serve. Enjoy it hot, garnished with fresh parsley! To bring out the best flavors in your garlic soup, use fresh ingredients. Fresh garlic and herbs, like thyme, add depth. I love to sauté onions until soft and sweet. This step builds a great base for the soup. Don't skip toasting the spices. It wakes them up and makes your soup pop. Adding a splash of lemon juice at the end brightens the flavor, too! One big mistake is overcooking the garlic. It should smell great but not brown. Brown garlic tastes bitter. Another error is not seasoning enough. Taste your soup and adjust with salt and pepper. Lastly, avoid blending the soup too long. A smooth texture is great, but over-blending can make it too thin. Garnishing adds flair to your soup. I recommend a sprinkle of fresh parsley for color and taste. You can also drizzle extra olive oil on top for richness. For some crunch, try adding croutons or toasted seeds. A few slices of lemon can brighten up the bowl, too! Pro Tips Maximize Garlic Flavor: To enhance the garlic's flavor, allow the minced garlic to sit for about 10 minutes before adding it to the pot. This activates its beneficial compounds. Customize Your Greens: Feel free to substitute kale with other leafy greens like spinach or Swiss chard, depending on your preference or availability. Adjusting Consistency: If you prefer a chunkier soup, blend only half of the soup and mix it back in. This adds texture while still providing a creamy base. Infuse Extra Flavor: For an extra depth of flavor, consider adding a splash of apple cider vinegar or a dash of hot sauce just before serving. {{image_4}} This garlic soup is naturally gluten-free. You can enjoy it without any special changes. Just make sure to use gluten-free vegetable broth. This way, everyone can savor its goodness. To make this soup even healthier, think about adding legumes or grains. Chickpeas or lentils work great. They add protein and fiber, making your soup heartier. If you want a grain, try cooked quinoa or brown rice. Both add a nice texture and extra nutrients. You can easily change the flavor of this soup. Try adding fresh basil or cilantro for a twist. A dash of red pepper flakes adds warmth. If you like it spicy, add some fresh ginger or cayenne pepper. Each change gives you a new experience with every bowl. After making your immune-boosting garlic soup, let it cool down first. Once cool, transfer the soup to an airtight container. Store it in the fridge for up to four days. Make sure to seal it well to keep out air and moisture. If you want to save some for later, freezing is a great option. Pour the cooled soup into freezer-safe containers or bags. Leave some space at the top, as it will expand. You can freeze it for up to three months. When you’re ready to eat it, thaw it in the fridge overnight. Reheating is easy! If the soup is frozen, let it thaw in the fridge first. To reheat, pour the soup into a pot on medium heat. Stir it often until it’s hot. You can also heat it in the microwave. Just make sure to use a microwave-safe bowl and cover it loosely. Heat it in 1-minute intervals, stirring in between, until warm. Enjoy your tasty soup again! Garlic has many health benefits. It can help boost your immune system. It contains a compound called allicin, which fights germs. Garlic may lower blood pressure and improve heart health. It also has antioxidants that help reduce inflammation. Eating garlic may even improve your cholesterol levels. When you cook garlic, it still keeps many of its benefits. Yes, you can use other vegetables! This soup is very flexible. Carrots and kale are great, but feel free to add others. Try spinach, zucchini, or even bell peppers. Just chop them into small pieces so they cook well. Mix and match to your taste. This way, you can boost the soup's nutrition and flavor. This soup is already vegan-friendly! It uses vegetable broth and no animal products. Just make sure to check the broth label. Some brands may add non-vegan ingredients. If you want to enhance the flavor, add extra herbs or spices. You can also add a splash of coconut milk for creaminess without dairy. Enjoy this healthy soup guilt-free! This article covered key ingredients in our recipe, their nutrition, and the choice between fresh and dry. We explored step-by-step instructions for preparation and cooking, along with blending techniques for the best texture. I shared tips to enhance flavor, avoid mistakes, and garnish your dish. We also discussed gluten-free options and ways to boost nutrition through variations. Finally, I provided storage info and answered common questions. Use this guide to create a delicious meal that fits your needs and tastes. Happy cooking!

Immune Boosting Garlic Soup Healthy and Simple Recipe

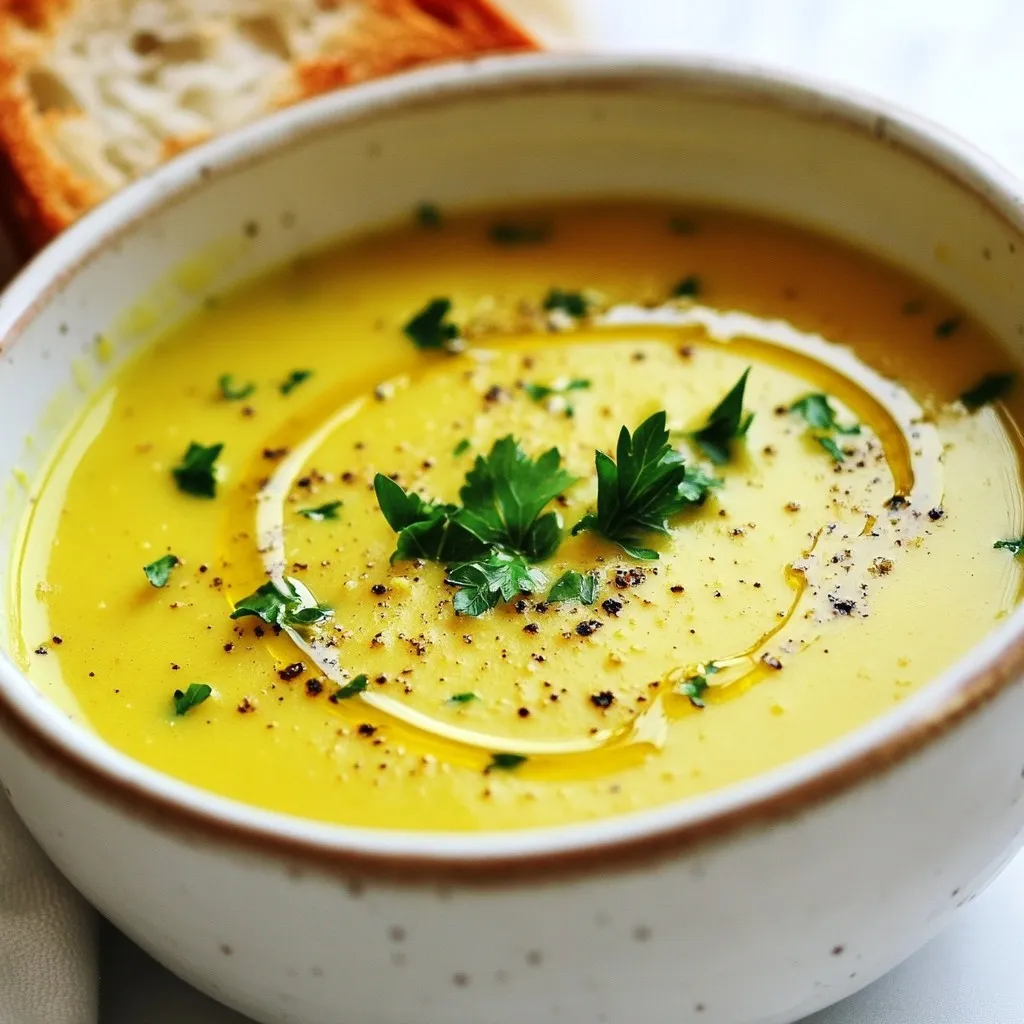
Are you looking to boost your immune system with a simple and tasty dish? This Immune Boosting Garlic Soup is

- 1 lb large shrimp, peeled and deveined - 4 tablespoons unsalted butter - 4 cloves garlic, finely minced - 1 teaspoon red pepper flakes - Juice of 1 lemon - Sea salt - Freshly cracked black pepper - Fresh parsley, finely chopped - 1 cup cherry tomatoes, halved - 1 cup fresh spinach leaves - 1 teaspoon extra virgin olive oil The main star of the show is the large shrimp. You want them fresh and firm. Use about one pound for four servings. Butter adds richness and depth. You need four tablespoons of unsalted butter to make the garlic sauce shine. Garlic brings a lovely aroma and taste. Four cloves, minced finely, create the base of flavor. If you like heat, add red pepper flakes. Just one teaspoon will give it a gentle kick. Lemon juice adds brightness. Squeeze one lemon to get that zing. Season with sea salt and black pepper to taste. Fresh parsley is great for garnish. It gives a pop of color and flavor. Cherry tomatoes bring sweetness and color. Use one cup, halved to mix well. Spinach adds a fresh touch; one cup will wilt nicely. Finally, a teaspoon of olive oil helps with cooking the veggies. This simple list of ingredients makes a dish full of flavor. Each one plays its part in creating the taste you will love. {{ingredient_image_2}} Start by taking a large skillet. Place it on the stove over medium-high heat. Add 2 tablespoons of unsalted butter. Let it melt until it foams a bit. This should take about a minute. Next, add 4 cloves of minced garlic and 1 teaspoon of red pepper flakes. Stir constantly for about 1 minute. You want the garlic to smell nice but not brown. If it browns, it can taste bitter. Now, raise the heat to high. Carefully add 1 pound of large shrimp to the skillet. Season it with sea salt and freshly cracked black pepper. Cook the shrimp for 2 to 3 minutes. Stir occasionally until the shrimp turn pink and opaque. Once done, use a slotted spoon to take the shrimp out. Place them on a plate and set aside. In the same skillet, add the remaining 2 tablespoons of butter and 1 teaspoon of extra virgin olive oil. Let the butter melt fully. Then, add 1 cup of halved cherry tomatoes. Cook them for about 2 minutes. You want them to soften and release some juice. After that, toss in 1 cup of fresh spinach leaves. Sauté for about 1 minute until they wilt. Now, return the cooked shrimp to the skillet. Squeeze in the juice of 1 lemon. Gently toss everything together. Heat for another minute. Taste and adjust with more salt or pepper as needed. To make One-Pan Garlic Butter Shrimp shine, focus on fresh ingredients. Use large shrimp for a juicy bite. Fresh garlic gives the best flavor. Don’t skip the lemon juice; it adds brightness. Red pepper flakes bring a nice kick. Adjust spice levels to your taste. Make sure to season well with salt and pepper during cooking. You can swap out some ingredients if needed. If you don’t have shrimp, use chicken or firm tofu. For a dairy-free option, replace butter with coconut oil. You can use any fresh herb instead of parsley, like cilantro or basil. Cherry tomatoes can be swapped with bell peppers or zucchini. Feel free to mix in your favorite veggies for extra color and nutrients. Make your dish look as good as it tastes. Arrange the shrimp and veggies in a colorful pattern on a large plate. Garnish with fresh parsley for a pop of green. Serve with lemon wedges for a fresh touch. You can pair this meal with crusty bread or fluffy rice. This way, diners can enjoy the rich garlic butter sauce fully. Pro Tips Use Fresh Shrimp: For the best flavor and texture, opt for fresh shrimp instead of frozen. If using frozen, ensure they are completely thawed before cooking. Adjust Spice Level: Feel free to modify the amount of red pepper flakes to suit your taste. Start with a small amount and add more if you prefer extra heat. Don’t Overcook the Shrimp: Keep a close eye on the shrimp while cooking. They only need about 2-3 minutes until they turn pink and opaque. Overcooking can make them rubbery. Enhance with Herbs: Experiment with different herbs like basil or cilantro for added flavor. Fresh herbs can elevate the dish and add a pop of color. {{image_4}} If you love spice, add more red pepper flakes. Start with one teaspoon, then increase it based on your taste. You can also use diced jalapeños for fresh heat. They bring a nice crunch and flavor to the dish. Just sauté them with the garlic for extra kick. For a smoky flavor, try adding a pinch of smoked paprika. This twist will make your One-Pan Garlic Butter Shrimp even more exciting. You can swap shrimp for chicken or tofu. Chicken thighs work well since they stay juicy. If you're using tofu, choose firm or extra-firm. Cut it into cubes and cook it as you do the shrimp. For veggies, try bell peppers or zucchini. These add color and texture. Just chop them up and toss them in with the cherry tomatoes. You’ll have a vibrant and tasty meal. To make this dish gluten-free, ensure your butter is safe or use a dairy-free alternative. Olive oil is a great substitute for butter. You can also use coconut oil for a tropical twist. Use tamari instead of soy sauce if you need a gluten-free sauce. This way, you keep all the flavors while adjusting for dietary needs. Enjoy your meal without worry! Storing leftovers is easy. First, let the shrimp cool to room temperature. Next, place the shrimp in an airtight container. Make sure to add any sauce or veggies to keep them moist. You can store them in the fridge for up to three days. If you want to keep them longer, freezing is a great option. When you're ready to eat the leftovers, you can reheat them quickly. Use a skillet over low heat. Add a splash of water or broth to keep the shrimp juicy. Stir gently until heated through. This keeps the shrimp from getting tough. You can also use a microwave, but be careful not to overcook them. Heat in short bursts to maintain tenderness. Freezing garlic butter shrimp works well too. Place the cooled shrimp in a freezer-safe bag. Remove as much air as possible before sealing. This helps prevent freezer burn. You can freeze the shrimp for up to two months. When you're ready to enjoy, thaw them in the fridge overnight. Reheat them as mentioned above for the best results. You can pair this dish with several tasty sides. Here are some ideas: - Crusty bread: Perfect for dipping into the rich garlic butter sauce. - Rice: Fluffy white or brown rice soaks up the flavors well. - Pasta: Serve it over spaghetti or linguine for a comforting meal. - Salad: A fresh green salad adds a nice crunch and balance. - Vegetables: Roasted or steamed veggies complement the shrimp nicely. Shrimp cook quickly and are done when they change color. Here’s what to look for: - Color: They should turn pink and opaque. - Shape: Cooked shrimp curl into a C shape. - Texture: They should feel firm to the touch. Checking these signs ensures your shrimp are perfectly cooked. Yes, you can prep some parts ahead. Here are some tips: - Shrimp: You can peel and devein them a day before. - Cut vegetables: Chop the tomatoes and spinach in advance. - Cooked dish: It’s best to serve it fresh. If you must, reheat gently on low heat. Plan to eat it soon after cooking for the best taste. This blog post covered how to make One-Pan Garlic Butter Shrimp. We explored the key ingredients and step-by-step instructions. You learned tips for great flavors, ingredient swaps, and how to serve the dish. We even looked at variations to suit different tastes and dietary needs. Lastly, I provided storage info for leftovers and answered common questions about the dish. Enjoying this simple, tasty meal can bring joy to your table. Try it out and impress your friends!

One-Pan Garlic Butter Shrimp Quick and Tasty Meal

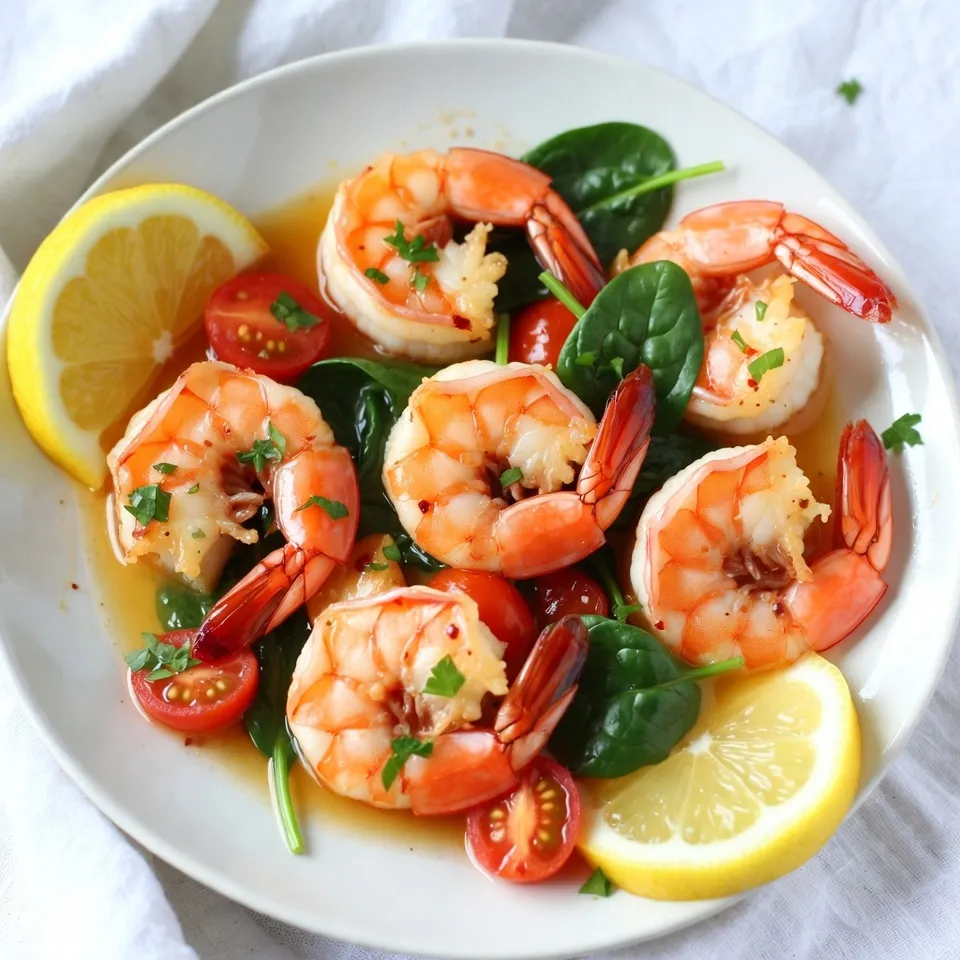
Looking for a quick and tasty meal? You’ve found it! One-Pan Garlic Butter Shrimp is simple, fast, and packed with

- 1 cup strong brewed espresso, cooled to room temperature - 1/2 cup almond milk (or your favorite non-dairy milk) - 1 tablespoon unsweetened cocoa powder - 2 tablespoons pure maple syrup (to taste) - 1/4 teaspoon pure vanilla extract - A handful of ice cubes These main ingredients come together to create a rich, creamy drink. The strong brewed espresso gives it a bold flavor. The almond milk adds a smooth texture. Cocoa powder brings in a nice chocolate taste. Maple syrup sweetens it just right. Vanilla extract finishes it with a lovely aroma. - Fresh coffee beans Garnishing with coffee beans makes your drink look nice. It also adds a lovely aroma when you sip. You can place a few beans on top of the drink. This simple touch turns your cocktail into a festive treat. - Cocktail shaker - Strainer - Martini glasses A cocktail shaker is key for mixing your drink. It helps to combine all the flavors well. Use a strainer to pour the drink into your glasses. This step keeps any ice or solid bits out. Chilled martini glasses make your drink feel extra special. They keep your cocktail cool and refreshing. {{ingredient_image_2}} First, brew one cup of strong espresso. I prefer using a moka pot or an espresso machine. This gives you a rich flavor. Let your espresso cool to room temperature. Cooling is key so it does not melt the ice too fast. If you skip this, your drink may get watery. Grab a cocktail shaker. Pour in the cooled espresso. Next, add half a cup of almond milk. I love using almond milk, but any non-dairy milk works well. Now, add one tablespoon of unsweetened cocoa powder. This gives your drink a nice chocolatey kick. Then, pour in two tablespoons of pure maple syrup. Adjust the amount to fit your sweet tooth. Finally, add a quarter teaspoon of pure vanilla extract for extra flavor. Now it’s time to shake! Add a handful of ice cubes to the shaker. Seal it tightly. Shake it hard for about 15 to 20 seconds. You want it to be frothy and creamy. After shaking, carefully strain the mix into chilled martini glasses. This keeps your drink cool and fresh. For a lovely touch, garnish with a few whole coffee beans on top. This not only looks great but also adds a nice aroma. Enjoy your Holiday Baileys Espresso Martini! To get that lovely foam on top, I recommend shaking hard. Use a cocktail shaker and add plenty of ice. Shake for 15-20 seconds. This gives your drink a nice, frothy texture. The key is to mix well but not too long. If you shake too much, the foam can get too watery. For a festive twist, try adding spices. A pinch of cinnamon or nutmeg can make your drink sparkle. You can also use flavored syrups. Peppermint or gingerbread syrup adds a cozy touch. Adjust the sweetness to your taste. The maple syrup gives a nice base, but feel free to add more if you like it sweeter. Presentation matters! Use chilled martini glasses for that wow factor. Before serving, drizzle a bit of chocolate syrup inside the glass. This adds a festive look. Garnish with fresh coffee beans on top. It looks pretty and adds a coffee aroma. You can also add a sprinkle of cocoa powder for extra flair. Pro Tips Use Fresh Espresso: Always brew your espresso fresh for the best flavor. Pre-ground coffee can lose its aroma and taste quickly. Chill Your Glasses: For an extra refreshing experience, chill your martini glasses in the freezer for about 10 minutes before serving. Adjust Sweetness: Feel free to adjust the amount of maple syrup based on your personal taste preference; start with less and add more as needed. Experiment with Milk Alternatives: Try different non-dairy milks like coconut or oat for varied flavors and creaminess in your espresso delight. {{image_4}} If you want a dairy-free version, use almond milk. It works well with the other flavors. You can also try oat milk or coconut milk. These options give a nice creaminess without dairy. Just measure out the same amount as the recipe calls for. They will taste great in your martini! You can change up the flavors too! Add a splash of peppermint extract for a minty twist. This works well for the holiday season. For a chocolate taste, mix in chocolate syrup. You can also try hazelnut syrup for a nutty flavor. Just remember to adjust the sweetness so it stays balanced. If it’s warm outside, you can make an iced version! Simply blend all the ingredients with ice instead of shaking them. This gives you a frozen treat that’s perfect for summer. You can also serve it over ice in a tall glass. It’s refreshing and fun, making it a great choice for any warm day! If you have leftover ingredients, store them in the fridge. Place almond milk in a sealed container. Keep cocoa powder in a cool, dry place. Maple syrup can stay in your pantry. Make sure each item is tightly sealed to keep it fresh. You can make this cocktail ahead of time. Mix the espresso, almond milk, cocoa powder, maple syrup, and vanilla. Store this mix in the fridge for up to two days. When ready to serve, just shake with ice and strain. This keeps the drink fresh and tasty. The shelf life of almond milk is about 7-10 days once opened. Cocoa powder lasts for a long time, up to two years if stored right. Pure maple syrup can stay fresh for about a year. Always check for any changes in smell or color before using. Yes, you can use decaf espresso. If you want to enjoy the flavor without caffeine, decaf is perfect. It still gives that rich coffee taste. Just make sure it is strong enough to stand out in your drink. You can mix Baileys with many spirits. Vodka works well for a classic martini. You can also try rum for a sweeter taste. If you want a twist, use flavored liqueurs like hazelnut or coffee. To make a non-alcoholic version, skip the Baileys. Use your favorite non-alcoholic cream instead. You can also add a splash of vanilla extract for flavor. This way, you still enjoy a delicious drink without alcohol. In this post, we explored the holiday Baileys espresso martini. We covered main ingredients, garnishes, and tools needed. I shared step-by-step instructions for making this drink, plus tips for perfect foam and seasonal flavors. You learned variations like dairy-free options and iced recipes. Don’t forget storage tips for leftovers or pre-made cocktails. This drink is a delightful mix for any holiday gathering. Try these ideas and enjoy your time with friends and family. The holiday season can be even better with this unique drink in hand.

Holiday Baileys Espresso Martini Delightful Recipe

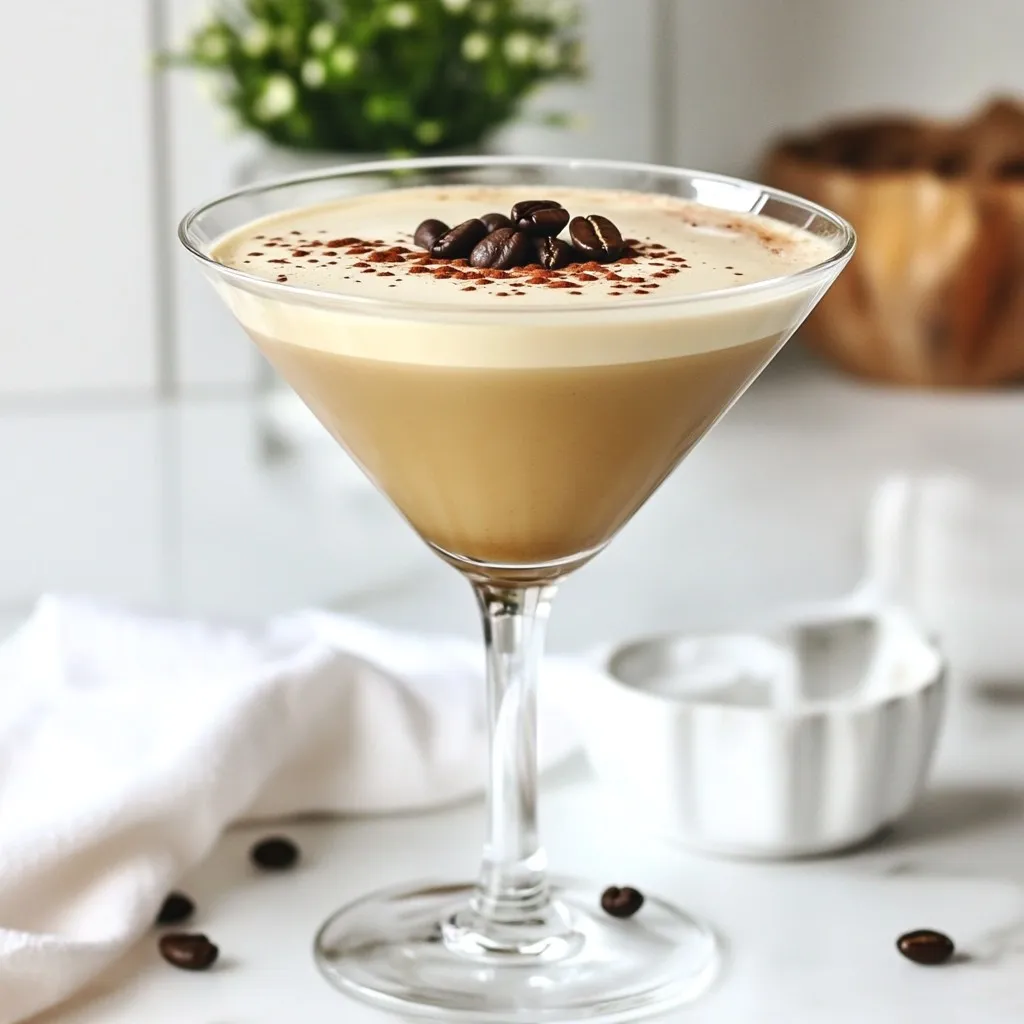
Get ready to wow your guests this holiday season with a Baileys Espresso Martini! This delightful recipe combines rich coffee

- 1 cup red lentils, thoroughly rinsed under cold water - 3 large carrots, peeled and chopped into bite-sized pieces - 1 medium onion, finely diced - 2 cloves garlic, minced - 1 teaspoon ground cumin - 1 teaspoon turmeric powder - 4 cups vegetable broth (homemade or store-bought) - 1 can (14 oz) coconut milk, preferably full-fat for creaminess - 2 tablespoons extra virgin olive oil - Salt and freshly ground pepper, to taste - Fresh cilantro leaves, roughly chopped, for garnish (optional) - Lemon wedges, for serving When preparing Creamy Carrot Lentil Soup, I focus on fresh, simple ingredients. Red lentils are my go-to for their quick cooking time. They turn soft and creamy, perfect for this soup. I love using vibrant carrots for sweetness and color. Onions and garlic build the base flavor. Their aroma fills the kitchen as they sauté. Cumin and turmeric add warmth and depth. They complement the carrots nicely. Coconut milk brings a rich creaminess. I recommend using full-fat for the best texture. Vegetable broth ties everything together and enhances the taste. Finally, I season with salt and pepper. Optional garnishes of cilantro and lemon wedges brighten each bowl. They add freshness and a touch of zing. {{ingredient_image_2}} 1. Heat 2 tablespoons of olive oil in a large pot over medium heat. 2. Once the oil is hot, add 1 finely diced onion. Sauté until it looks soft and clear, around 5 minutes. 3. Next, add 2 minced cloves of garlic, 1 teaspoon of ground cumin, and 1 teaspoon of turmeric powder. Stir and cook for 1 more minute. 4. Now, add 3 chopped carrots and 1 cup of rinsed red lentils. Mix well, so the spices coat everything. 5. Pour in 4 cups of vegetable broth and bring it to a boil. 6. When boiling, lower the heat and let it simmer uncovered for about 20 minutes. The lentils and carrots should be soft. 1. After cooking, use an immersion blender to puree the soup. Blend until it reaches your desired smoothness. 2. If you don’t have an immersion blender, let the soup cool a bit. Then, blend it in a traditional blender, being careful of steam. 3. Return the blended soup to the pot on low heat. Stir in 1 can of coconut milk until it is creamy and mixed well. 4. Season with salt and freshly ground pepper to taste. Warm it for about 5 more minutes, stirring occasionally. - Serve the soup hot in individual bowls. - For a nice touch, drizzle a bit of extra coconut milk on top. - Add a small sprig of cilantro in the center. - You can also sprinkle a pinch of cumin or paprika for color. - Serve lemon wedges on the side for a bright flavor boost. - Best practices for cooking lentils: Rinse your red lentils well. This removes dirt and helps them cook evenly. Cook them for about 20 minutes. They should be soft but not mushy. - Achieving the desired creaminess: Use full-fat coconut milk for the best texture. Blend the soup until it’s smooth. If you want it creamier, add more coconut milk. - Essential tools: An immersion blender is great for pureeing the soup right in the pot. If you use a traditional blender, let the soup cool first. Be careful of the steam! - Recommended pot types: A heavy-bottomed pot works well for even cooking. It helps avoid burning the soup while stirring. - Additional spices to try: Experiment with a pinch of paprika or cayenne for heat. You can also add fresh ginger for a vibrant kick. - Suggested toppings or alternative garnishes: Top your soup with fresh cilantro or a dollop of yogurt. Lemon wedges add a bright touch when squeezed on top. Pro Tips Use Fresh Spices: For the best flavor, make sure your ground cumin and turmeric are fresh. Stale spices can dull the taste of your soup. Adjust the Creaminess: If you prefer a creamier texture, feel free to add more coconut milk. Just taste as you go to achieve your desired richness. Blend to Your Liking: Depending on your preference, you can blend the soup until completely smooth or leave some chunks for texture. Experiment to find your favorite consistency! Garnish Creatively: Consider adding toasted pumpkin seeds or a drizzle of chili oil on top for additional flavor and visual appeal. {{image_4}} You can switch out red lentils for other types. Green or brown lentils work well, but they take longer to cook. If you need a faster option, try canned lentils. For a creamier soup without dairy, use nut milk. Almond or cashew milk can replace coconut milk. You can also use silken tofu blended with water for creaminess. Adding greens can boost nutrition and flavor. Spinach or kale blend nicely into this soup. Just stir them in during the last few minutes of cooking. You can also experiment with spices. Try adding smoked paprika or coriander for a different taste. A pinch of red pepper flakes adds warmth, too. To give this soup a Mediterranean twist, add olives or feta cheese. These ingredients bring a salty kick that pairs nicely with the sweet carrots. For an Indian-inspired version, add garam masala or curry powder. These spices infuse the soup with warmth and depth. You can also garnish with fresh cilantro or a squeeze of lime for extra flavor. After you enjoy your creamy carrot lentil soup, you may have some left. To keep it fresh, let it cool first. Then, store it in the fridge in airtight containers. Use glass or BPA-free plastic containers for the best results. Make sure to seal them well to prevent any odors from other foods. You can freeze this soup for later! Pour the cooled soup into freezer-safe containers or bags. Leave some space at the top since soup expands when frozen. It’s best to freeze it in single servings so you can thaw just what you need. When you're ready to eat, move the soup to the fridge to thaw overnight. If you're in a hurry, you can thaw it in the microwave. Heat it slowly, stirring often, to avoid hot spots. This soup stays fresh in the fridge for about 3 to 5 days. If you freeze it, it can last for up to 3 months. Always check for signs of spoilage before eating. If the soup has an off smell, color, or texture, it’s best to throw it away. Enjoy your delicious soup safely! Can I make this soup ahead of time? Yes, you can make this soup ahead of time. Prepare it, then cool it down. Store it in an airtight container in the fridge for up to three days. Reheat it gently on the stove before serving. Is the soup gluten-free? Yes, this soup is gluten-free. All the ingredients, like lentils and vegetables, are naturally gluten-free. You can enjoy it without any worries about gluten. How can I make the soup spicier? To add heat, try these options: - Add a pinch of cayenne pepper. - Stir in some red pepper flakes. - Include diced jalapeños when cooking. These will boost the flavor and warmth of your soup. Caloric content per serving Each serving of this creamy carrot lentil soup has about 250 calories. This makes it a filling choice without being heavy. Nutritional benefits of key ingredients - Red lentils: Packed with protein and fiber. - Carrots: High in beta-carotene, great for your eyes. - Coconut milk: Provides healthy fats and adds creaminess. - Spices: Cumin and turmeric have anti-inflammatory properties. How many servings does this recipe yield? This recipe serves four people. It’s perfect for a family meal or as a hearty lunch. Suggestions for scaling the recipe up or down - To make more, double each ingredient. - For fewer servings, halve the amounts. Adjust cooking time as needed, but keep an eye on the soup as it cooks. Creamy Carrot Lentil Soup is easy to make and truly satisfying. You learned about key ingredients and steps for preparation. We covered tips for perfecting the soup's texture and ways to enhance flavor. I also shared variations to suit your taste and how to store leftovers effectively. Experimenting with different spices and garnishes opens up new flavors. This soup can fit anyone's meal plan, providing warmth and comfort. Enjoy this tasty recipe any day, knowing it's both simple and delicious.

Creamy Carrot Lentil Soup Simple and Satisfying Bowl

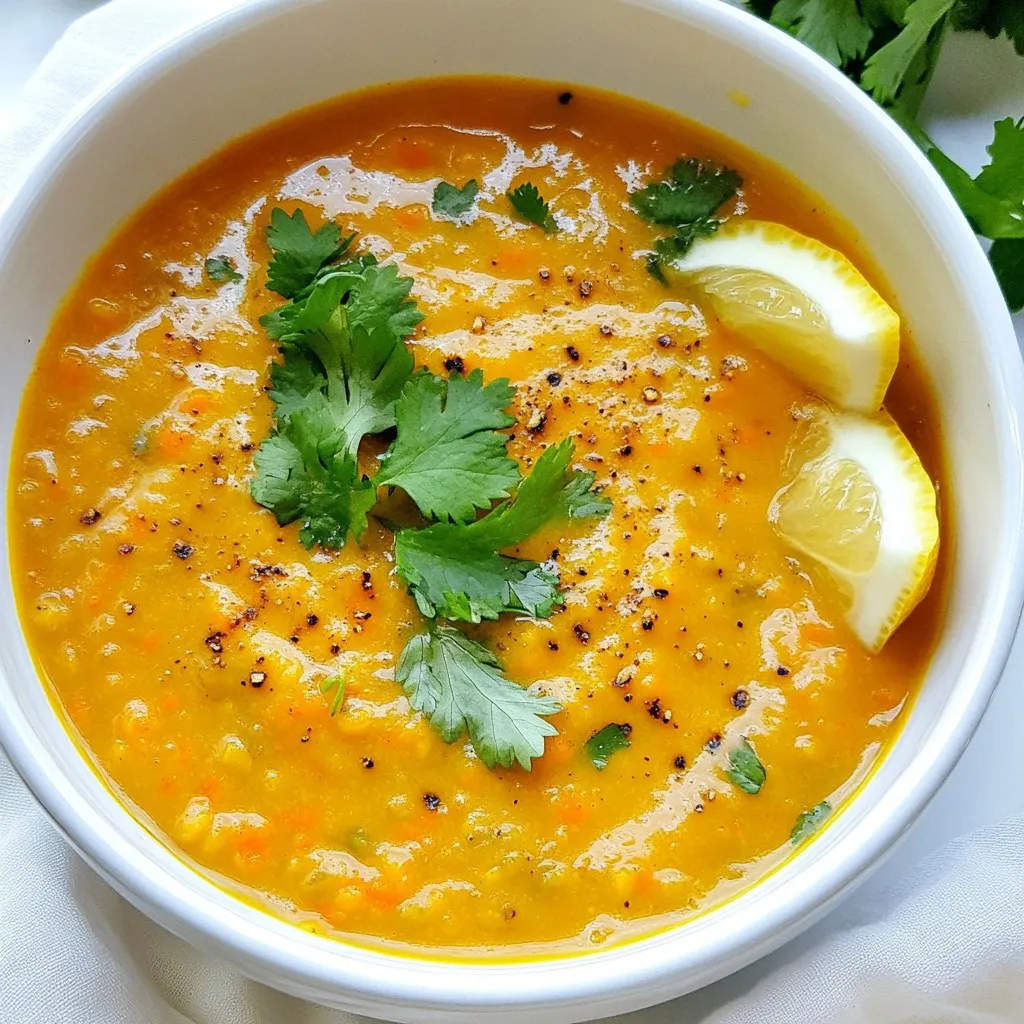
Are you ready for a warm, heart-healthy meal that’s easy to make? My creamy carrot lentil soup is just the

To make these tasty truffles, you need a few key ingredients: - 1 cup semi-sweet chocolate chips - 1/2 cup sweetened condensed milk - 1 tablespoon unsalted butter - 1 teaspoon vanilla extract - A pinch of sea salt These basic ingredients create a rich and creamy truffle base. The chocolate chips give a deep flavor, while the sweetened condensed milk adds sweetness and creaminess. The butter helps to create a smooth texture. You can make these truffles your own by adding some optional ingredients: - 1/4 cup cocoa powder (for rolling) - 1/4 cup chopped nuts (hazelnuts, almonds, or walnuts) Rolling the truffles in cocoa powder gives a nice bitter contrast to the sweet chocolate. Chopped nuts add a crunchy texture and extra flavor. If you want to make some changes, here are some ideas: - Use milk chocolate instead of semi-sweet for a sweeter taste. - Try using dark chocolate for a richer flavor. - Substitute coconut oil for butter for a dairy-free option. These changes can help fit different diets or needs. Feel free to explore and find what works best for you! {{ingredient_image_2}} To start, grab a medium saucepan and set it over low to medium heat. Add 1 cup of semi-sweet chocolate chips, 1/2 cup of sweetened condensed milk, and 1 tablespoon of unsalted butter. Stir the mixture with a spatula or wooden spoon. Keep stirring until the chocolate chips melt and the mixture becomes smooth and glossy. This step is key for a creamy texture. Once the chocolate is melted, take the saucepan off the heat. Stir in 1 teaspoon of vanilla extract and a pinch of sea salt. Make sure these flavors blend well. Let the mixture cool at room temperature for a bit. After that, cover the saucepan with plastic wrap and pop it into the refrigerator. Chill for about 1 to 2 hours. You want it firm enough to handle but not too hard. After chilling, take the mixture out of the fridge. Use a small cookie scoop or your hands to portion it. Roll each piece into a ball about 1 inch wide. This size is perfect for popping in your mouth. If the mixture feels sticky, dampen your hands with a little water. This makes it easier to roll. Now for the fun part: rolling the truffles! You can coat them in 1/4 cup of cocoa powder or 1/4 cup of chopped nuts. Just place your chosen coating in a shallow dish. Roll each truffle in the coating until fully covered. This gives them a nice texture and taste. Once coated, place the truffles on a baking sheet lined with parchment paper. Return them to the fridge for another 30 minutes. This final chill helps them set properly, ensuring they hold their shape. Enjoy your tasty treat! To get a smooth chocolate mix, start with low heat. This prevents burning. Stir often with a spatula or wooden spoon. It helps blend the chocolate chips with the sweetened condensed milk. Keep stirring until the mix is glossy and shiny. If you see lumps, keep mixing. You can also add a bit more butter if needed. Chilling is key for good truffles. After mixing, let the chocolate cool at room temperature. Then cover it with plastic wrap. Place it in the fridge for 1 to 2 hours. This makes the mixture firm enough to handle. If it’s too soft, rolling will be hard. Check it after an hour. It should feel firm to the touch. For round truffles, use a cookie scoop for even sizes. This gives you uniform truffles that look nice. If you prefer, you can use your hands. Just make sure to roll them gently. Coat your palms with cocoa powder to avoid sticking. Once rolled, place them on parchment paper to set. This keeps them from sticking to the surface. Pro Tips Use Quality Chocolate: The flavor of your truffles heavily depends on the quality of the chocolate you use. Opt for high-quality semi-sweet chocolate chips for the best results. Chill Properly: Ensure the chocolate mixture is thoroughly chilled before rolling into balls. This makes the process easier and helps the truffles hold their shape better. Experiment with Coatings: Don’t limit yourself to cocoa powder and nuts. Try rolling some truffles in shredded coconut, sprinkles, or crushed freeze-dried fruits for a fun twist! Store Correctly: Keep your truffles in an airtight container in the refrigerator to maintain their texture and flavor. They can last up to two weeks if stored properly. {{image_4}} You can coat your truffles in many fun ways. Try rolling them in cocoa powder for a classic touch. If you want a crunch, use chopped nuts like hazelnuts, almonds, or walnuts. You can also dip them in melted chocolate for a rich layer. Add sprinkles for a festive look, or use shredded coconut for a tropical twist. Each coating adds a unique taste and texture. You can change the flavor of your truffles easily. Add a few drops of mint extract for a fresh taste. For a fruity flavor, mix in some orange or raspberry zest. You can even fold in a spoonful of your favorite nut butter for creaminess. Experiment with spices like cinnamon or sea salt to enhance the chocolate flavor. Get creative and find your perfect combo! Making these truffles vegan is simple. Use dairy-free chocolate chips and coconut cream instead of condensed milk. For gluten-free truffles, ensure your chocolate and nuts are certified gluten-free. You can also swap the butter for a vegan option like coconut oil. These changes allow everyone to enjoy this sweet treat without worry. To store chocolate truffles, place them in an airtight container. Use parchment paper to separate layers. Keep the container in the fridge. This helps maintain their texture and taste. Chocolate truffles last up to two weeks in the fridge. If you want to keep them longer, freeze them. They can last for about three months in the freezer. Just make sure to wrap them well in plastic wrap. Place them in a freezer bag before sealing. Always store truffles in a cool place. Avoid direct sunlight and humidity. When you take them out of the fridge, let them sit at room temperature. This helps them regain their smooth texture. Enjoy your sweet treats while they are fresh! Yes, you can use milk chocolate. Milk chocolate will make the truffles sweeter. This change will also affect the texture. The truffles may be creamier and less rich. If you like a sweeter treat, milk chocolate is a good choice. Just remember to adjust the amount of sweetened condensed milk if you want less sweetness. You can make these truffles ahead of time with ease. Just follow the steps as usual. After shaping the truffles, place them in an airtight container. Keep them in the fridge for up to a week. If you want to store them longer, freeze the truffles. They will last for about three months in the freezer. Just let them thaw in the fridge before serving. Gifting chocolate truffles is a sweet idea! First, choose a nice box or container. Line it with parchment paper for a pretty touch. You can also add a ribbon for flair. For a personal touch, write a small note. Include details like the flavors or the story behind the truffles. This will make your gift special and memorable. Making condensed milk chocolate truffles is fun and easy. We explored key ingredients, foolproof steps, and helpful tips. You can customize your truffles with different flavors or dietary needs. The storage tips ensure your treats stay fresh for longer. In the end, these truffles are a sweet and simple delight. Enjoy making them for yourself or as gifts!

Condensed Milk Chocolate Truffles Simple and Sweet Treat

Are you ready to indulge in something sweet? These Condensed Milk Chocolate Truffles are easy to make and full of

- 1 fresh baguette, sliced into 1/2 inch thick pieces - 1 lb flank steak - 3 cloves garlic, finely minced - 2 tablespoons extra virgin olive oil (plus more for brushing) - 1 tablespoon unsalted butter - Sea salt and freshly ground black pepper, to taste - 1 cup arugula or baby spinach leaves - 1/2 cup finely grated Parmesan cheese - 1 tablespoon balsamic glaze (optional for drizzling) When you make Garlic Steak Crostini, you need fresh, high-quality ingredients. The baguette gives a great base. Flank steak brings rich flavor and texture. Garlic adds a nice kick, while olive oil keeps everything moist. Butter makes the garlic flavor pop, and salt and pepper enhance all the tastes. For the greens, you can use arugula or baby spinach. I like arugula for its peppery bite. Lastly, Parmesan cheese adds a nutty finish. If you want, drizzle balsamic glaze on top for extra sweetness. This mix of flavors makes each bite a delight. {{ingredient_image_2}} First, season the flank steak. Use sea salt, black pepper, and half of the minced garlic. Rub it in well for good flavor. After seasoning, let the steak rest for about 15 minutes. This step helps the meat absorb the seasoning. Next, heat the olive oil in a large skillet. Set the heat to medium-high. Once the oil shimmers, add the flank steak. Sear each side for 4-5 minutes. You want it medium-rare, but cook it longer if you prefer. After cooking, take the steak off the heat. Let it rest on a cutting board for 5 minutes. This resting time allows the juices to spread throughout the meat. Slice the steak thinly against the grain for the best texture. While the steak is resting, preheat your oven to 400°F (200°C). Slice the baguette into 1/2 inch thick pieces. On a baking sheet, arrange the slices in a single layer. Brush both sides of each slice with olive oil. Toast the baguette slices in the oven for 5-7 minutes. Look for a golden brown color and a crispy texture. In a small saucepan, melt the unsalted butter over medium heat. Once the butter has melted, add the rest of the minced garlic. Sauté the garlic for about 1 minute. Be careful not to let it brown, as this will make it taste bitter. Start with a toasted baguette slice. Brush it generously with the garlic butter. Next, layer a few slices of the rested steak on top. Add a small handful of arugula or baby spinach for a fresh pop. Sprinkle a good amount of finely grated Parmesan cheese over each crostini. If you want, drizzle some balsamic glaze on top for extra flavor. Arrange the crostini nicely on a platter. They are best served warm to enjoy all the flavors. - How to achieve the perfect steak doneness: Start by seasoning your flank steak. Use sea salt, black pepper, and half of the minced garlic. Let it rest for 15 minutes. This step helps the flavor soak in. Heat olive oil in a skillet over medium-high heat. Sear the steak for 4-5 minutes on each side for medium-rare. If you prefer it more cooked, add a minute or two. Let the steak rest for 5 minutes before slicing. Cut against the grain for tender slices. - Best methods for toasting baguette: Preheat your oven to 400°F (200°C). Lay the baguette slices on a baking sheet. Brush both sides with olive oil. Toast for 5-7 minutes until golden brown. Keep an eye on them to avoid burning. - Suggestions for garlic butter variations: To change up your garlic butter, try adding some herbs. Fresh parsley or thyme can bring a new taste. You might also add a squeeze of lemon juice for brightness. - Adding herbs or spices to steak: You can mix herbs like rosemary or oregano into the seasoning for the steak. A pinch of smoked paprika can add a nice depth. Experiment with flavors that excite you! - Serving style ideas: Serve your crostini on a rustic wooden board. It creates a warm and inviting look. Arrange the crostini in a way that shows off the layers. - Garnishing options for visual appeal: Add a sprig of fresh arugula on top for color. A light sprinkle of extra Parmesan cheese can also catch the eye. If you drizzle balsamic glaze, it adds a shiny finish. Pro Tips Resting the Steak: Allow the cooked steak to rest for at least 5 minutes before slicing. This helps keep the juices locked in, resulting in a more flavorful and tender bite. Choosing the Right Bread: Opt for a fresh baguette or a crusty artisan bread for the crostini. The texture will enhance the overall experience and provide a satisfying crunch. Garlic Butter Timing: Make the garlic butter right before assembling the crostini to preserve its fresh flavor. Sauté the garlic just until fragrant to avoid bitterness. Layering Flavors: Feel free to add additional toppings like roasted red peppers or a touch of horseradish for extra flavor. Experimenting can lead to delightful variations! {{image_4}} You can switch up the meat in your crostini. Try using chicken or turkey instead of steak. Both options will still give you a tasty bite. Simply season them the same way as the steak. Cook until they reach the right temperature, then slice thinly. If you want a vegetarian option, use roasted vegetables. Bell peppers, zucchini, and eggplant work great. Roast them with olive oil, salt, and pepper. Then layer them on the toasted baguette for a colorful dish. Changing the cheese can really boost the flavor. Instead of Parmesan, try goat cheese or feta. These cheeses add a creamy texture and tanginess. You can also mix cheeses for a rich taste. Experiment with different sauces too. A spicy aioli or a zesty chimichurri can add fun flavors. Drizzle these over your crostini for a unique twist. For fall, consider toppings like caramelized onions or roasted butternut squash. These ingredients add warmth and sweetness. A sprinkle of sage or thyme will enhance the fall vibe. In summer, use fresh vegetables like tomatoes or corn. You can even add a slice of avocado for creaminess. These fresh toppings brighten up the dish and keep it light. To store leftover crostini ingredients, follow these steps: - Steak: Place sliced steak in an airtight container. You can keep it in the fridge for up to three days. - Baguette: If you have leftover baguette slices, store them in a paper bag. This keeps them from getting too soft. - Garlic Butter: Store garlic butter in a small jar or container in the fridge. It can stay fresh for about a week. - Greens: Keep arugula or spinach in a sealed bag or container. Use them within three days for the best taste. To reheat your crostini, preheat the oven to 350°F (175°C). Place the bread on a baking sheet. Warm them for about 5-10 minutes until they are crispy again. For the steak, warm it in a pan over low heat to keep it tender. For shelf life, here are some key points: - Fridge: Store components separately for the best quality. Cooked steak lasts for three days, while garlic butter stays fresh for one week. Greens should be eaten within three days. - Freezing Options: You can freeze cooked steak slices for up to three months. Wrap them tightly in plastic. Garlic butter also freezes well; just scoop it into ice cube trays and freeze. This way, you can easily use it later for quick meals. By following these tips, you can enjoy your garlic steak crostini even after the party! You can pair a lot of great sides with garlic steak crostini. Here are some ideas: - Bruschetta: Fresh tomato and basil can add a nice touch. - Cheese Board: Offer a variety of cheeses like brie or goat cheese. - Olives: A bowl of mixed olives adds a salty bite. - Salad: A light arugula or mixed green salad complements the crostini well. - Dips: Serve with hummus or a yogurt-based dip for variety. Yes, you can prep the crostini ahead of time. Here are some tips: - Toast the Baguette: You can toast the baguette slices a few hours before serving. Store them in an airtight container to keep them crisp. - Cook the Steak: Cook the steak and slice it in advance. Store it in the fridge until you assemble. - Assembly Timing: Assemble the crostini just before serving. This keeps the bread from getting soggy. The best steak cut for crostini is flank steak. Here’s why: - Flavor: Flank steak has a rich flavor that stands out. - Texture: It is tender when cooked right and sliced against the grain. - Cost: Flank steak is often more affordable than other cuts. You could also use sirloin or skirt steak for a delicious option. You can easily make garlic steak crostini gluten-free with these substitutions: - Gluten-Free Baguette: Look for gluten-free bread at your local store. - Homemade Crostini: Use gluten-free bread and toast it like regular baguette slices. - Check Labels: Ensure other ingredients, like sauces, are gluten-free. We explored making delicious garlic steak crostini with fresh ingredients and simple steps. You learned how to prepare, cook, and assemble each layer for a tasty bite. Remember, you can mix and match flavors with different meats, cheeses, or toppings. Store any extras properly to enjoy later. With these tips, your crostini will impress anyone. Enjoy your cooking and the smiles you bring to the table!

Garlic Steak Crostini Flavor-Packed Party Snack

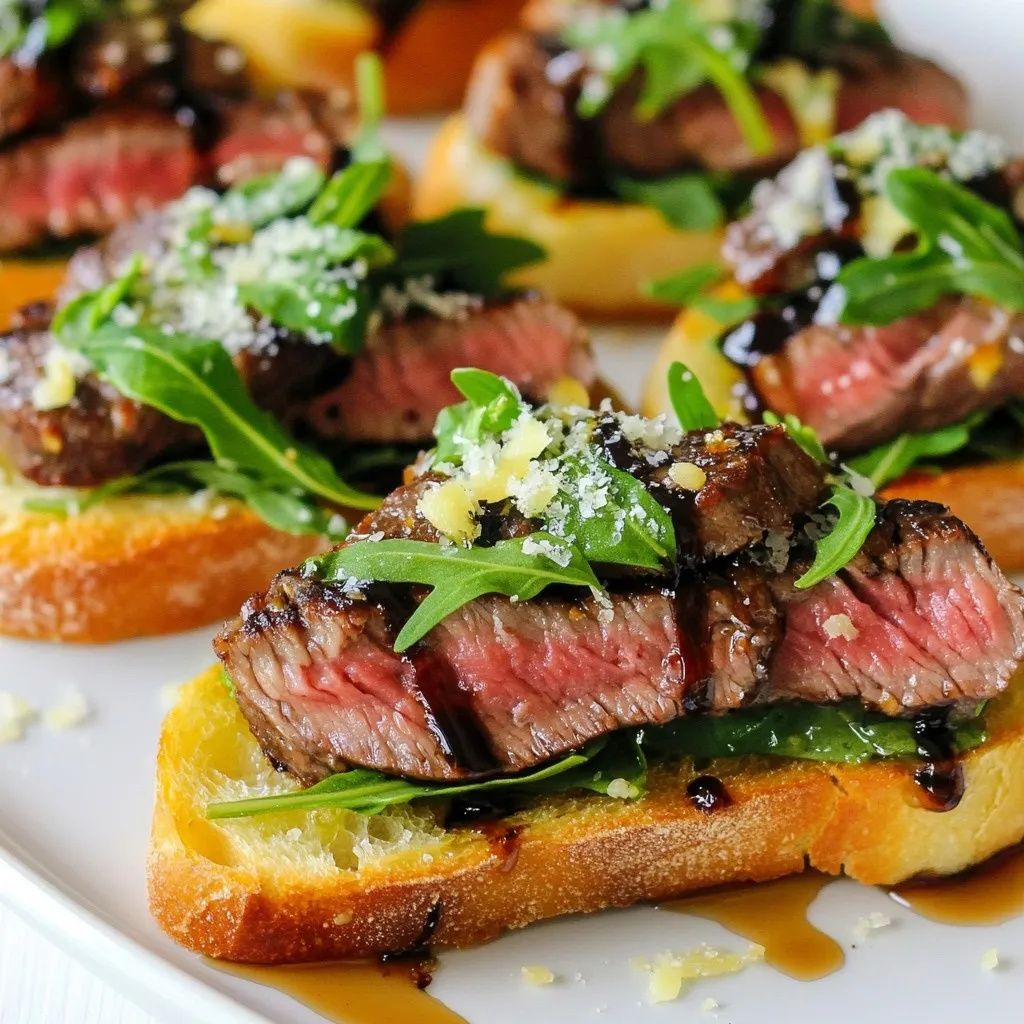
Looking for the ultimate party snack that impresses? Look no further than Garlic Steak Crostini! This mouth-watering treat combines juicy

Here is the detailed list of ingredients you’ll need to make soft sugar cookies: - 2 ¾ cups all-purpose flour - 1 teaspoon baking powder - ½ teaspoon baking soda - ½ teaspoon fine salt - 1 cup unsalted butter, softened to room temperature - 1 ½ cups granulated sugar - 1 large egg - 1 teaspoon pure vanilla extract - 1 teaspoon almond extract (optional) - ½ cup powdered sugar (for rolling) Each ingredient plays a key role in creating the perfect soft sugar cookie. The flour gives structure, while the butter adds richness and flavor. Baking powder and baking soda help the cookies rise and stay soft. Salt enhances the sweetness, and the sugars provide that lovely sweetness we crave. You can choose to add almond extract for a nice twist, but it's not required. The powdered sugar is essential for that snowy, sweet finish. Gather these ingredients before you start. Having everything ready makes the process smooth and fun. Enjoy the sweet journey to your soft sugar cookies! {{ingredient_image_2}} 1. Preheat your oven to 350°F (175°C). This helps the cookies bake evenly. 2. Prepare two baking sheets. Line them with parchment paper to stop the cookies from sticking. 1. In a medium bowl, combine the dry ingredients. Use 2 ¾ cups all-purpose flour, 1 teaspoon baking powder, ½ teaspoon baking soda, and ½ teaspoon fine salt. Whisk them together until mixed well. 2. In a large bowl, cream 1 cup of softened butter and 1 ½ cups of sugar together. Use an electric mixer on medium speed for 3-4 minutes. You want the mixture to be fluffy and light. 3. Add 1 large egg, 1 teaspoon pure vanilla extract, and 1 teaspoon almond extract (if using) to the mix. Stir on low speed until everything blends together. Scrape down the bowl as needed. 1. Gradually mix the dry and wet ingredients together. Do this on low speed until the dough forms. Be careful not to overmix, or your cookies might not be soft. 2. Take a cookie scoop or a tablespoon to portion the dough. Roll each piece into a smooth ball using your hands. 3. Roll each dough ball in ½ cup of powdered sugar. This adds a sweet touch and makes them look pretty. 1. Place the cookies on the baking sheets with space between them. This helps them spread while baking. 2. Bake in the preheated oven for 10-12 minutes. Look for slight golden edges while keeping the centers soft. 3. Once done, take them out and let them cool for about 5 minutes on the baking sheet. Then, move them to a wire rack to cool completely. To get soft sugar cookies, start with soft butter. When your butter is soft, it mixes easily and helps keep cookies fluffy. Cold butter will make your cookies hard and dense. Next, avoid overmixing your dough. When you mix too much, cookies can turn tough. Mix just until the flour disappears. This keeps your cookies light and soft. Adjust your baking time for the best results. Bake cookies until the edges are slightly golden, but the centers should look pale and soft. This way, they stay chewy inside. If you bake too long, they become hard. For serving, stack your cookies on a pretty plate. This makes a lovely display. You can also lightly dust them with more powdered sugar for a charming touch. Garnish with edible flowers or fresh mint leaves. This adds color and makes your cookies look fancy. Guests will love the sweet surprise! Pro Tips Chill the Dough: For even softer cookies, chill the dough in the refrigerator for about 30 minutes before baking. This helps the cookies maintain their shape and enhances their texture. Use Fresh Ingredients: Ensure your baking powder and baking soda are fresh. Expired leavening agents can result in flat cookies that don’t rise properly. Don’t Overbake: Keep a close eye on your cookies as they bake. They should come out of the oven when the edges are lightly golden but the centers still appear soft; they will continue to set as they cool. Experiment with Flavors: Feel free to add in your favorite mix-ins like chocolate chips, nuts, or dried fruit for a unique twist on these classic sugar cookies! {{image_4}} You can make soft sugar cookies even more exciting by adding fun flavors. Here are two easy ideas: - Adding citrus zest: Grate some lemon or orange peel into your dough. This gives your cookies a fresh, zesty kick that brightens up their taste. - Incorporating chocolate chips or nuts: Add a cup of chocolate chips or chopped nuts to the dough. This will add texture and make your cookies even more delicious. These flavor tweaks are simple. They let you create cookies that fit any mood or occasion. Changing your cookies for holidays can be fun and creative. Here are two great ways to do this: - Festive colors with food dye: Divide your dough into portions. Add a few drops of food coloring to each portion. You can make vibrant red, green, or any color you like. This adds a festive touch that everyone will enjoy. - Decorating for special occasions: Use icing, sprinkles, or edible glitter to decorate your cookies. This makes them stand out at parties or family gatherings. You can even shape them into holiday symbols like stars or hearts. These ideas help you celebrate special times while enjoying tasty treats. To keep your soft sugar cookies fresh, store them in an airtight container. This helps keep them soft and chewy. You can layer parchment paper between the cookies to prevent sticking. If you want to save some for later, freezing is a great option. Place the cooled cookies in a single layer on a baking sheet. Freeze them for about an hour. Once frozen, transfer the cookies to a freezer-safe bag or container. They will stay fresh for up to three months. At room temperature, your cookies will last about five days. Keep them in a cool, dry place. If you store them in the fridge, they can last up to two weeks. Just remember to seal them well to avoid drying out. Enjoy your cookies at their best! How do I make my sugar cookies less dense? To make your cookies lighter, use room-temperature butter. Soft butter mixes better with sugar. This helps add air. Also, measure your flour correctly. Use the spoon and level method. Overpacking flour leads to dense cookies. Can I substitute ingredients in this recipe? Yes, you can! For a dairy-free option, use margarine or vegan butter. If you lack almond extract, just use vanilla. You can also swap granulated sugar for coconut sugar. This will change the flavor slightly but will still taste great. What can I do if my dough is too sticky? If your dough is sticky, chill it in the fridge for about 30 minutes. This helps the butter firm up. You can also sprinkle a bit of flour on your hands while shaping. Just be careful not to add too much flour. Why did my cookies spread too much? If your cookies spread, it may be due to warm dough. Make sure to chill it before baking. Also, check your oven temperature. An oven that runs hot can cause cookies to spread too. How can I fix cookies that are too hard? If your cookies are hard, you may have overbaked them. Keep an eye on the baking time next time. To soften hard cookies, place them in a container with a slice of bread. The bread adds moisture back to the cookies. We explored the ingredients needed for soft sugar cookies, along with each step from mixing to baking. I shared tips to keep your cookies soft and tasty. We also discussed fun variations for every occasion and how to store them for freshness. In conclusion, these cookies are not just a treat; they can spark joy at any gathering. Enjoy making these special cookies and get creative with your flavors and decorations!

Soft Sugar Cookies Delightful and Easy Recipe Guide

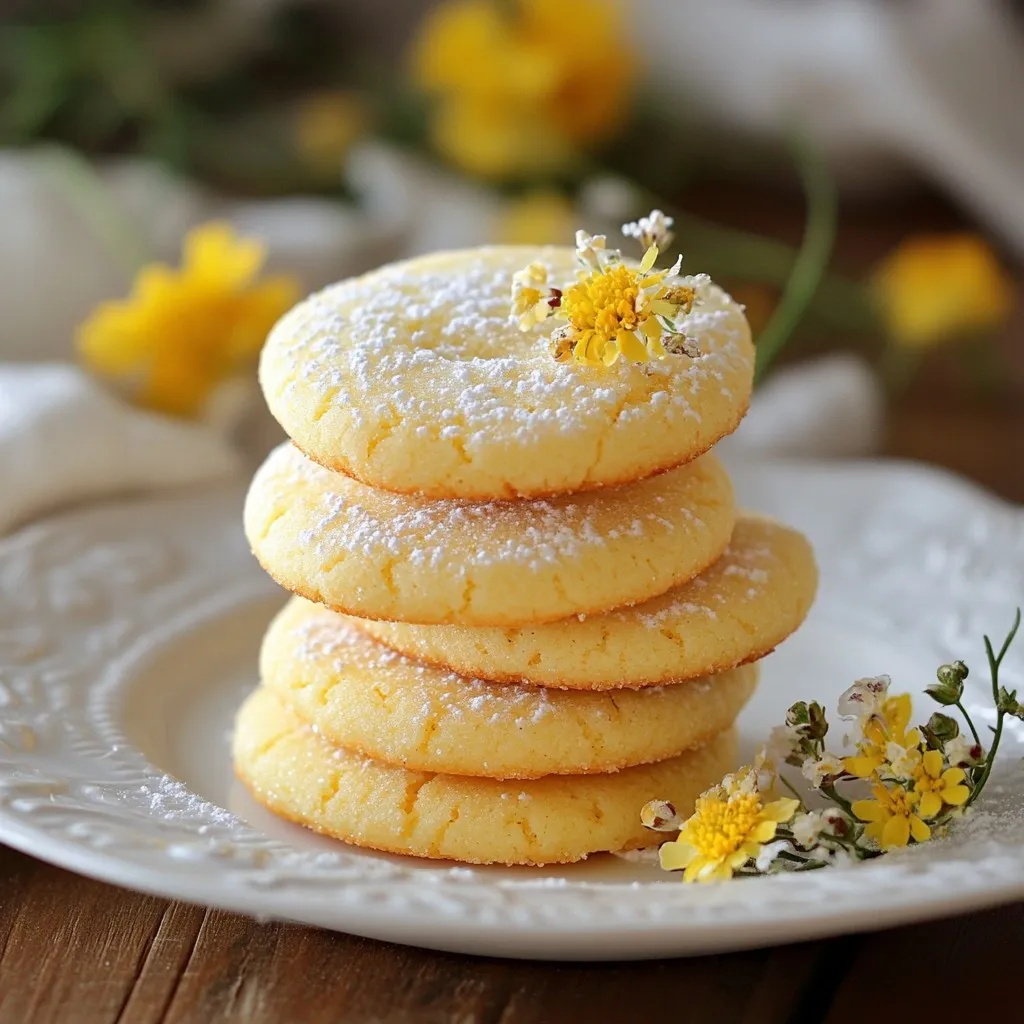
Are you ready to bake the softest sugar cookies you’ve ever tasted? In this easy recipe guide, I’ll take you

- 4 ripe pears, peeled, cored, and sliced - 1 teaspoon ground cinnamon - 1 teaspoon ground ginger - 1/2 teaspoon ground cardamom - 1/4 teaspoon ground cloves - 1/4 teaspoon freshly grated nutmeg - 3/4 cup packed brown sugar - 2 tablespoons freshly squeezed lemon juice - 3 tablespoons cornstarch - 1 tablespoon unsalted butter, cut into small cubes - 1 premade pie crust (store-bought or homemade) - 1 egg, beaten (for egg wash) - Optional: Whipped cream or vanilla ice cream for serving The pears are the star of this pie. They add natural sweetness and a soft texture. I recommend using ripe, juicy pears for the best flavor. The spices create that warm chai taste. Ground cinnamon and ginger add warmth, while cardamom, cloves, and nutmeg bring depth. Brown sugar adds sweetness and a rich color to the filling. The cornstarch thickens the filling, making it nice and gooey. Finally, the lemon juice brightens the flavors, balancing the sweetness. If you cannot find ripe pears, apples work well too. They add a nice crunch. For the spices, you can mix and match according to what you have on hand. If you want a different sweetener, maple syrup or honey can replace brown sugar. If you're dairy-free, use a plant-based butter in place of unsalted butter. You can even skip the egg wash if you prefer a vegan pie. Just brush the crust with almond milk for a golden look. {{ingredient_image_2}} First, set your oven to 375°F (190°C). While it warms up, grab a 9-inch pie dish. Place your premade pie crust inside the dish. Make sure to trim any extra dough hanging over the edges. This step sets you up for a neat, tasty pie. In a large mixing bowl, combine 4 ripe pears that you’ve peeled, cored, and sliced. Pour in 2 tablespoons of freshly squeezed lemon juice. Add 3/4 cup of packed brown sugar and 3 tablespoons of cornstarch. Now, sprinkle in the spices: 1 teaspoon ground cinnamon, 1 teaspoon ground ginger, 1/2 teaspoon ground cardamom, 1/4 teaspoon ground cloves, and 1/4 teaspoon freshly grated nutmeg. Toss everything gently. Make sure the pears are coated well with the sweet and spiced mix. Pour the pear mixture into your prepared pie crust. Spread it evenly across the bottom. For an extra burst of flavor, dot the filling with small cubes of 1 tablespoon unsalted butter. If you want a top crust, you can cover it now. Crimp the edges to seal, or cut strips to make a lovely lattice top. Brush the top crust with a beaten egg. This gives your pie a nice, shiny finish. Place the pie in the oven. Bake for 45-50 minutes until the crust is golden brown and the filling bubbles. If the edges brown too fast, cover them with foil. Once done, take the pie out and let it cool on a wire rack for at least 30 minutes. This cooling time helps the filling set, making it easier to slice. A great pie starts with a good crust. Here are some easy tips to make it perfect: - Chill your ingredients: Cold butter helps the crust be flaky. - Don’t overwork the dough: Mix just until combined. Too much mixing makes it tough. - Use a light hand: When rolling out the dough, be gentle. This keeps it tender. - Trim and crimp: After placing your crust in the dish, trim the edges and crimp them for a pretty look. Want to add more flavor to your pie? Here are some ideas: - Add vanilla: A splash of vanilla extract brightens the taste. - Use brown sugar: It gives a deep, caramel flavor instead of white sugar. - Mix in nuts: Chopped walnuts or pecans add a nice crunch. - Try other spices: A touch of allspice or nutmeg gives a unique twist. Sometimes, pies don’t turn out as planned. Here’s how to fix some common problems: - Soggy bottom crust: Pre-bake the crust for 10 minutes before adding the filling. - Burned edges: Cover them with foil during baking to prevent burning. - Filling spills over: Use cornstarch to thicken the filling. It helps keep everything in place. - Underbaked filling: Make sure your oven is at the right temperature. If it’s too low, the filling won’t cook properly. These tips will help you create a delicious Chai Spiced Pear Pie that impresses everyone! Pro Tips Choose the Right Pears: For the best flavor and texture, opt for ripe, sweet varieties such as Bartlett or Bosc pears. Spice It Up: Feel free to adjust the spices according to your preference. Adding a pinch of cayenne can give your pie a subtle kick. Let It Rest: Allowing the pie to cool for at least 30 minutes before slicing helps the filling set and makes for cleaner slices. Serving Suggestions: Enhance the dessert experience by serving with a scoop of vanilla ice cream or a drizzle of caramel sauce. {{image_4}} You can swap pears for other fruits. Apples work well, giving a tart taste. Peaches add a sweet and juicy twist. For a fun blend, try mixing fruits. Combine pears and apples for a unique flavor. Experimenting with fruits keeps the pie exciting. To make this pie gluten-free, use a gluten-free pie crust. Many brands offer great options. For a vegan version, swap out the butter with coconut oil. You can also replace the egg wash with almond milk. These changes still deliver a tasty pie without animal products. Serve your Chai Spiced Pear Pie warm for the best taste. A scoop of vanilla ice cream pairs perfectly. Whipped cream adds a nice touch too. You can even sprinkle some cinnamon on top for extra flavor. A cup of chai tea would complement the spices well. Enjoying this pie with friends makes it even better! After baking your Chai Spiced Pear Pie, it’s important to let it cool. Place the pie on a wire rack for at least 30 minutes. This allows the filling to set, making slicing easier. Once cooled, cover the pie with plastic wrap or aluminum foil. Store it in the fridge for up to three days. Keeping it covered helps maintain freshness and flavor. To reheat your pie, preheat your oven to 350°F (175°C). Slice the pie into individual pieces. Place the slices on a baking sheet. Cover them lightly with foil to prevent burning. Heat for about 10-15 minutes, or until warm. You can also use a microwave for quick reheating. Just warm each slice for about 30 seconds, but note that this may make the crust less crispy. If you have leftover pie or want to save some for later, freezing is a great option. First, let the pie cool completely. Wrap the pie tightly in plastic wrap, then in aluminum foil. This helps prevent freezer burn. You can freeze the pie for up to three months. When ready to enjoy, thaw it in the fridge overnight. Reheat as mentioned above for the best taste. Yes, you can mix up the spices. Try adding star anise or fennel for fun. Each spice brings a new taste. Just keep the main chai flavors like cinnamon and ginger. Experiment until you find your favorite mix! Check the crust and filling. The crust should be golden brown. Look for bubbles in the filling. This means the pears are cooked. Bake for about 45-50 minutes. If the edges brown too fast, cover them with foil. This pie pairs well with whipped cream or vanilla ice cream. The cold cream balances the warm pie. You can also serve it with a scoop of yogurt for a tangy twist. Enjoy it warm for the best taste! The pie stays fresh for about 3-4 days in the fridge. Cover it well to keep it moist. If you want to keep it longer, consider freezing it. Just make sure to thaw it overnight before serving! Chai Spiced Pear Pie is a delightful treat made with fresh pears and warm spices. We covered key ingredients, smart substitutions, and essential tips for a perfect bake. I shared ways to mix in flavors and tweak the recipe to fit your needs. Remember, you can store this delicious pie and enjoy it later. With these steps, you can create a pie that impresses everyone. Now, go bake with confidence and enjoy this tasty twist on a classic pie!

Chai Spiced Pear Pie Deliciously Warm Dessert Delight

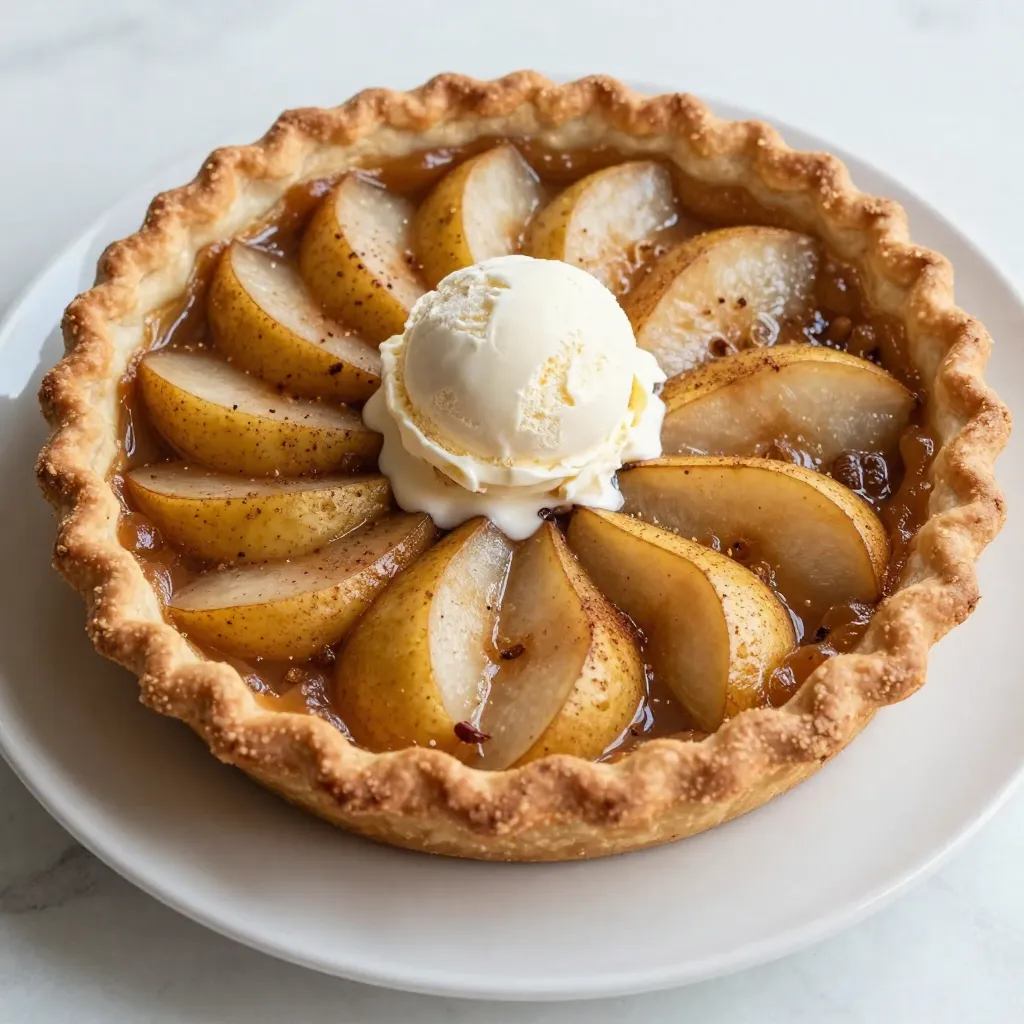
Get ready to indulge in a warm and cozy treat! My Chai Spiced Pear Pie combines sweet pears with aromatic

To make a tasty Hot Honey Ricotta Dip, you need these simple ingredients: - 1 cup fresh ricotta cheese - 1/2 cup honey - 1 teaspoon red pepper flakes - 1 tablespoon extra virgin olive oil - 1 teaspoon freshly grated lemon zest - Sea salt to taste - Freshly cracked black pepper to taste The ricotta cheese gives the dip a creamy base. The honey adds sweetness, while the red pepper flakes bring heat. The olive oil keeps everything smooth and rich. Lemon zest adds a fresh twist, balancing the flavors. Season with salt and pepper for the perfect taste. This dip pairs well with various dippers. Here are a few great options you can use: - Toasted baguette slices - Crunchy fresh vegetables (like carrots and bell peppers) - An assortment of crackers Toasted baguette slices taste fantastic with the dip's creaminess. Fresh veggies add a nice crunch. Crackers are always a crowd-pleaser, making each bite fun. You can take this dip to the next level with some extra seasonings. Consider these options: - Fresh herbs, like basil or thyme - A dash of smoked paprika for a deeper flavor - More red pepper flakes for extra heat These small changes can enhance your dip. Fresh herbs add brightness. Smoked paprika gives it a warm depth. Adjust the heat level to suit your taste. Enjoy experimenting! {{ingredient_image_2}} Start by preheating your oven to 350°F (175°C). This step is key for baking. While the oven warms up, gather your ingredients. You will need fresh ricotta, honey, red pepper flakes, olive oil, lemon zest, sea salt, and black pepper. Having everything ready makes cooking easier. In a medium bowl, mix the ricotta cheese with the lemon zest. Add a pinch of sea salt. Use a spatula or spoon to blend these ingredients until smooth. The lemon zest adds a nice brightness to the dip. It’s important to get a creamy texture. This will be the base of your dip. Now, take another bowl and combine the honey, red pepper flakes, and olive oil. Stir these together until smooth. Adjust the red pepper flakes to your heat preference. You can make it mild or spicy. This honey mixture adds a sweet and spicy kick to the dip. Transfer the ricotta mixture into a small, oven-safe dish. Spread it evenly for a flat layer. Pour the hot honey mixture over the top. Make sure it covers the ricotta completely. Place the dish in the preheated oven. Bake for about 15-20 minutes. Watch for bubbly edges and a golden top. Once it’s done, let it cool slightly. For extra sweetness, drizzle a bit more honey on top. Finally, sprinkle with black pepper and a touch more sea salt before serving. Enjoy this warm dip with your favorite dippers! To get the best texture for your dip, start with fresh ricotta cheese. I like to use a spatula to blend the ricotta with lemon zest. Mix until it feels smooth and creamy. If it seems too thick, add a tiny splash of olive oil. This helps the dip stay rich and easy to scoop. Red pepper flakes bring a nice kick to the dip. Start with one teaspoon if you like some heat. If you want it spicier, add more flakes. Remember, you can always add more, but it's hard to tone it down. Mix the red pepper with honey and olive oil for a balanced flavor. Presentation is key! Serve the dip warm on a large platter. Add a mix of dippers like toasted baguette slices, fresh veggies, or crunchy crackers. For a pop of color and flavor, sprinkle extra red pepper flakes on top. This makes it look appealing and enticing. Enjoy your delicious creation! Pro Tips Use Fresh Ricotta: For the best flavor and texture, always opt for fresh ricotta cheese. It will make your dip creamier and more delicious. Control the Heat: Adjust the amount of red pepper flakes based on your spice tolerance. Start with less and add more until it reaches your desired heat level. Experiment with Honey: Try different types of honey such as wildflower or clover for varying flavors. Each type will lend a unique taste to your dip. Garnish for Presentation: Enhance the visual appeal by garnishing with fresh herbs like basil or thyme, along with a drizzle of honey before serving. {{image_4}} To make your Hot Honey Ricotta Dip even better, try adding fresh herbs. Basil or thyme add a nice twist. For a bolder taste, sprinkle in smoked paprika or garlic powder. You can also use fresh herbs like parsley or chives for a fresh and bright flavor. These small additions can boost your dip from good to amazing. If you want a change from ricotta, consider using mascarpone. Mascarpone brings a creamy and rich texture that pairs well with honey. You can also try goat cheese for a tangy flavor. Blending these cheeses with ricotta creates a unique dip with a mix of textures and tastes. Experimenting with cheese can help you find your favorite version. Using seasonal ingredients can add fun flavors to your dip. In spring, mix in fresh peas or asparagus. In summer, add diced tomatoes or roasted peppers for a vibrant look. Autumn brings the chance to add roasted butternut squash for a sweet touch. In winter, try mixing in caramelized onions for warmth. These seasonal twists keep your dip fresh and exciting all year round. Store any leftover hot honey ricotta dip in an airtight container. Make sure to cool it to room temperature first. This helps keep it fresh and tasty. Place the container in the fridge. It will stay good for about three days. If you want to enjoy it later, avoid mixing in the dippers. Keep them separate to maintain crunchiness. To reheat your dip, use an oven or microwave. If using the oven, set it to 350°F (175°C). Place the dip in an oven-safe dish. Heat for about 10 minutes until warm. Stir halfway through to ensure even heating. If using a microwave, warm it in short bursts of 30 seconds. Stir in between to prevent hot spots. Avoid overheating, as it can change the texture. You can freeze the hot honey ricotta dip for longer storage. Use a freezer-safe container and leave some space at the top. The dip can stay fresh for up to two months. When ready to enjoy, thaw it in the fridge overnight. Reheat as mentioned above. Note that freezing may alter the texture slightly, but the flavors will still shine. Yes, you can prepare the dip ahead of time. Mix the ricotta and lemon zest, then store it in the fridge. You can also mix the honey and red pepper flakes. Keep both parts in separate containers. When you're ready, bake them together. This saves time and keeps the flavors fresh. If you don’t have ricotta, try cottage cheese or mascarpone. Both give a creamy texture. For a lighter option, use Greek yogurt. It adds a tangy taste. Adjust the amount of salt to match your choice. Each substitute will change the flavor a bit, but they all work well. To keep the dip warm, use a small slow cooker or a warming tray. If you don’t have these, place the dip in an oven-safe dish. Cover it with foil and keep it in a low oven. Set the temperature to about 200°F (93°C). This will help keep the dip warm for guests. In this article, we explored the tasty world of Hot Honey Ricotta Dip. We covered the main ingredients and how to prep them, along with step-by-step instructions. I shared tips for getting the right thickness, adjusting spice levels, and creating beautiful presentations. You learned about flavor variations, smart storage, and common questions. Hot Honey Ricotta Dip is fun to make and is perfect for sharing. So, try it out and enjoy a delicious twist on dip!

Hot Honey Ricotta Dip Flavorful and Easy Delight

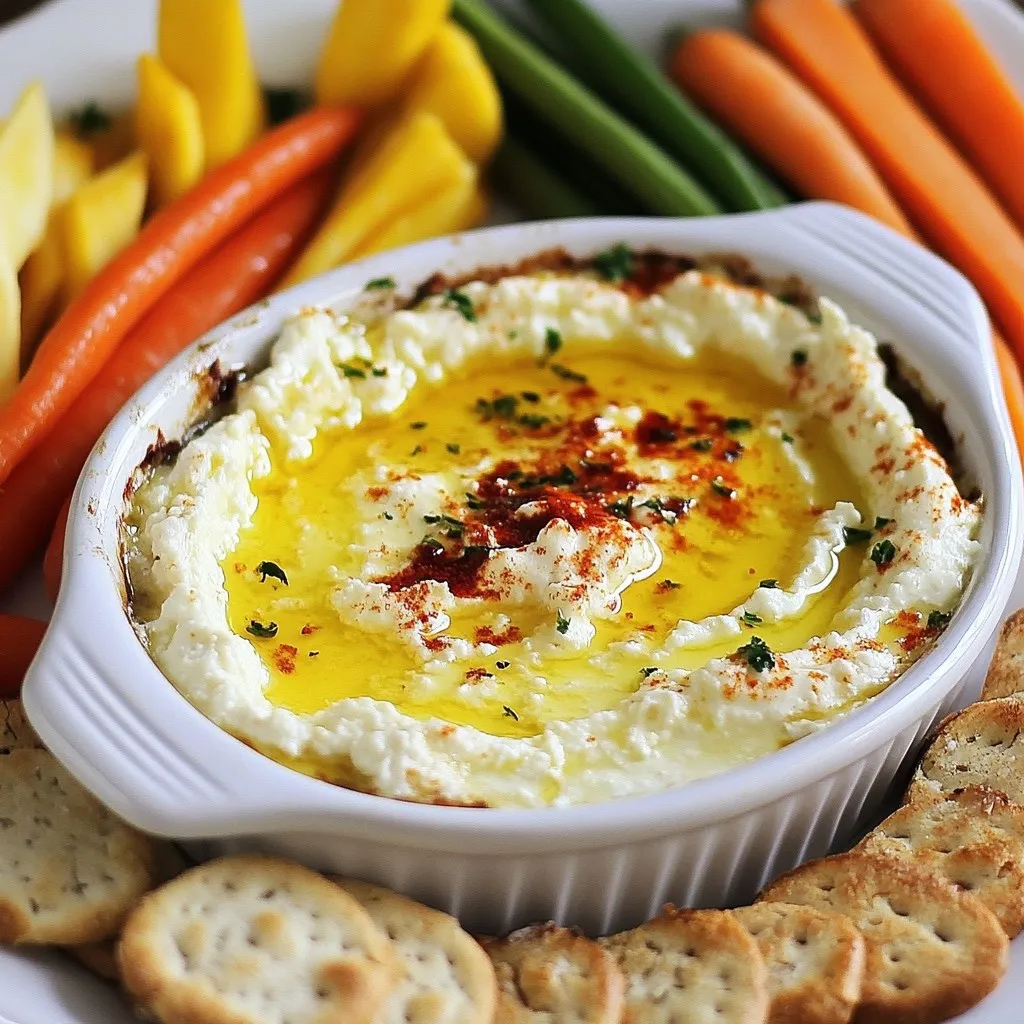
Looking for a dip that’s creamy, sweet, and slightly spicy? You’ve found it! My Hot Honey Ricotta Dip is super

Older posts
Newer posts
← Previous Page1 … Page103 Page104 Page105 … Page115 Next →

dsad

© 2025 recipesstation • Built with GeneratePress

Our Policies

  • Copyright Policy
  • Cookie Policy
  • GDPR Policy
  • Privacy Policy
  • Disclaimer
  • Terms Of Use

More Information

  • Home
  • About
  • Contact
  • Appetizers
  • Dessert
  • Dinner
  • Drinks
©2025, recipesstation About Back To Top