Skip to content
DisclaimerTerms Of UseGDPR PolicyCookie Policy

recipesstation

  • Home
  • Drinks
  • Appetizers
  • Dinner
  • Dessert
  • About
  • Contact
  • Privacy Policy
DisclaimerTerms Of UseGDPR PolicyCookie Policy

Emily

To make these chicken cutlets, gather these main ingredients: - 2 boneless, skinless chicken breasts - 1/4 cup brown sugar - 2 tablespoons soy sauce - 1 tablespoon olive oil - 2 cloves garlic, minced - 1 teaspoon fresh ginger, grated - 1/2 teaspoon freshly cracked black pepper - 1/2 teaspoon sea salt - 1 tablespoon apple cider vinegar These ingredients come together to create tender, sweet, and savory cutlets. The mix of brown sugar and soy sauce creates a great balance. The brown sugar adds sweetness, while soy sauce gives a rich, salty taste. Garlic and ginger enhance the flavors, making each bite exciting. Black pepper and sea salt add depth to the marinade. The apple cider vinegar brings a tangy note that brightens the dish. For a fresh finish, add chopped green onions. They provide a nice crunch and color. You could also use sesame seeds for a nutty touch. If you want more zing, a squeeze of lime or lemon juice works well too. These garnishes make your dish more appealing and tasty. {{ingredient_image_2}} Start by taking the chicken breasts. Place them between two sheets of plastic wrap. Use a meat mallet or a rolling pin to gently pound the chicken. Aim for an even thickness of about 1/2 inch. This step helps the chicken cook evenly and stay tender. Grab a small mixing bowl. Add the following ingredients: - 1/4 cup brown sugar - 2 tablespoons soy sauce - 1 tablespoon olive oil - 2 cloves garlic, minced - 1 teaspoon fresh ginger, grated - 1/2 teaspoon freshly cracked black pepper - 1/2 teaspoon sea salt - 1 tablespoon apple cider vinegar Whisk these ingredients together until smooth. This marinade packs a lot of flavor and doubles as a sauce for the chicken. Take the pounded chicken cutlets and place them in a resealable plastic bag or a shallow dish. Pour the marinade over the chicken, ensuring it’s well-coated. Seal the bag or cover the dish with plastic wrap. Let it chill in the fridge for at least 15 minutes. For better flavor, let it marinate for up to 1 hour. Next, heat a large skillet over medium-high heat. Add a drizzle of olive oil. When the skillet is hot, take the chicken out of the marinade. Let the excess marinade drip off. Carefully place the chicken cutlets in the pan. Cook for about 3-4 minutes on each side. Your goal is a golden brown color and an internal temperature of 165°F (75°C). Once cooked, transfer the chicken to a plate. Let it rest for about one minute. This helps keep the chicken juicy. If you want to enhance the sauce, pour any remaining marinade into the skillet. Stir it constantly for about a minute until it thickens. Slice the chicken cutlets into strips. Drizzle the sauce over them. Garnish with chopped green onions for a fresh touch. Enjoy your flavorful dish! To get tender chicken cutlets, start by pounding the chicken. Place the breasts between plastic wrap. Use a meat mallet or rolling pin to gently flatten them. Aim for about 1/2 inch thickness. This step helps the chicken cook evenly. It also keeps the meat juicy and soft. You can change the marinade to fit your taste. Try adding lime juice for a zesty kick. You can also mix in honey for extra sweetness. For a spicy twist, add red pepper flakes. Experimenting with flavors makes cooking fun and personal. Cook the chicken in a hot skillet. Use medium-high heat and a little olive oil. This helps to brown the chicken nicely. Cook for about 3-4 minutes on each side. Make sure the chicken reaches 165°F (75°C) inside. Let it rest for a minute after cooking. This makes the chicken juicy and flavorful. Pro Tips Even Thickness: Pounding the chicken to an even thickness ensures that it cooks evenly, resulting in tender and juicy cutlets. Marinate for Flavor: For a deeper flavor, marinate the chicken for up to 1 hour. The longer it sits, the more the flavors develop. Resting Time: Allowing the chicken to rest for a minute after cooking helps retain its juices, making each bite more succulent. Sauce Enhancement: If you like a thicker sauce, simmer the remaining marinade in the skillet for an extra minute before serving. {{image_4}} You can swap chicken for other proteins. Try turkey cutlets or pork chops. These meats will soak up the marinade well. They will also give the dish a new taste. If you prefer seafood, use shrimp or firm fish like salmon. Cook shrimp for just a few minutes until they turn pink. Salmon fillets can be cooked similarly, but check for doneness often. For a vegetarian dish, use tofu or tempeh. Press the tofu to remove extra moisture. Cut it into thick slices for even cooking. Marinate the tofu just like the chicken. Cook it in the skillet until it's golden brown. If you want a vegan option, use soy sauce or coconut aminos. Replace honey with maple syrup for sweetness. These swaps keep the dish flavorful and satisfying. You can change the flavor with different spices and sauces. Try adding chili flakes for heat. A splash of lime juice can give a fresh twist. For an Asian flair, add sesame oil to the marinade. You can also mix in herbs like cilantro or basil for a bright taste. Experimenting with flavors will keep your meal exciting and new every time. After cooking, let the chicken cutlets cool down. Place them in an airtight container. Proper storage helps keep the chicken fresh. Store in the fridge for up to three days. Reheat them gently to enjoy the flavors again. To freeze, first cool the chicken cutlets completely. Wrap each cutlet in plastic wrap. Then, place them in a freezer-safe bag. Remove as much air as possible to avoid freezer burn. The cutlets can last up to three months in the freezer. Thaw overnight in the fridge before reheating. For the best texture, reheat the chicken in a skillet. Heat a splash of oil over medium heat. Add the cutlets and cook for about 3-4 minutes on each side. This method retains moisture and keeps them tender. You can also use an oven set at 350°F (175°C) for about 10-15 minutes. This ensures even heating throughout. You should marinate the chicken for at least 15 minutes. This allows the flavors to soak in. For the best taste, try marinating for up to 1 hour. The longer time helps make the chicken even more tasty and tender. Yes, you can use different types of sugar. White sugar or coconut sugar works well. Each type brings its own unique flavor. However, brown sugar gives the best caramel notes, making the chicken sweet and savory. You can serve these chicken cutlets with many sides. Steamed rice pairs nicely, soaking up the sauce. A crisp salad adds a fresh crunch. You might also try roasted veggies for a colorful plate. Each option complements the chicken well, making a full meal. You learned how to make Minute Brown Sugar Chicken Cutlets with key ingredients, flavors, and tips. Remember to marinate the chicken well and choose cooking methods for the best taste. Explore variations like using other proteins or plant-based options. After cooking, store leftovers properly for later meals. This dish is versatile and easy to adapt. Enjoy your cooking adventure!

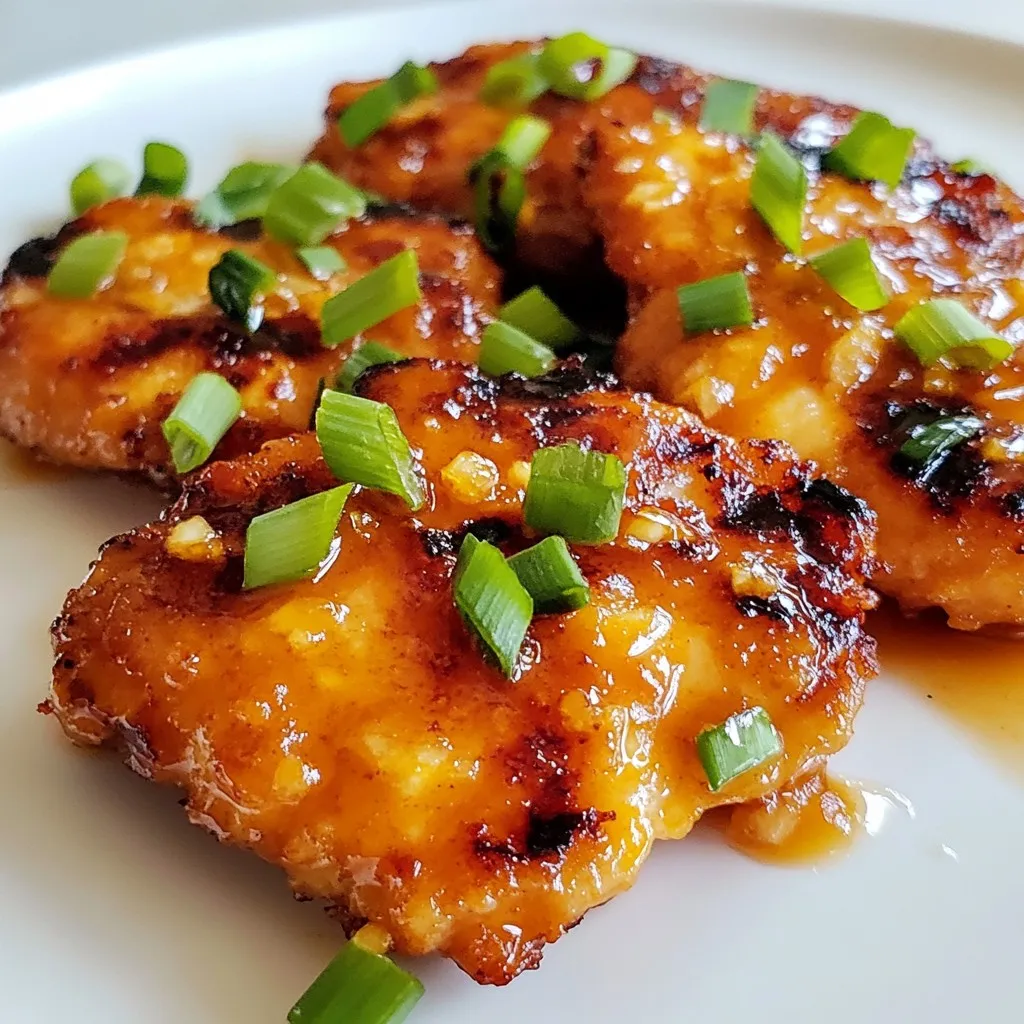
Minute Brown Sugar Chicken Cutlets Flavorful Delight

Are you ready to impress your taste buds without spending hours in the kitchen? My Minute Brown Sugar Chicken Cutlets

- 1 cup unsalted butter (2 sticks), melted - 2 cups granulated sugar - 4 large eggs, at room temperature - 1 teaspoon vanilla extract - 1 cup all-purpose flour - 1 cup unsweetened cocoa powder - 1/2 teaspoon baking powder - 1/4 teaspoon fine sea salt The brownie layer is the heart of this dessert. It gives a rich, chocolatey base. The butter melts and blends well with sugar. Eggs add moisture and a fluffy texture. The cocoa powder brings deep chocolate flavor. Make sure to sift the dry ingredients to avoid lumps. - 16 oz (2 packages) cream cheese, softened to room temperature - 1 cup granulated sugar - 3 large eggs, at room temperature - 1 teaspoon vanilla extract - 1/2 cup sour cream The cheesecake layer is creamy and smooth. Softened cream cheese makes mixing easy. The sugar sweetens it just right. Eggs help set the filling. Sour cream adds tanginess, which balances the sweetness. - 1 cup granulated sugar - 6 tablespoons unsalted butter, cut into pieces - 1/2 cup heavy cream, at room temperature - 1/4 teaspoon fine sea salt The caramel sauce adds a sweet, gooey finish. Sugar melts into a golden syrup. Butter adds richness, while heavy cream makes it silky. Salt enhances the flavors and cuts the sweetness. Be careful when making caramel; it can get very hot! {{ingredient_image_2}} Start by preheating your oven to 350°F (175°C). This step is key for even baking. Next, grab a 9-inch springform pan. Lightly grease it and add parchment paper at the bottom. This helps with easy removal after baking. In a medium saucepan, melt 1 cup of unsalted butter over low heat. Stir it until fully liquid. Remove the pan from heat. Whisk in 2 cups of granulated sugar until mixed well. Now add 4 large eggs, one by one, mixing after each. Don’t forget the 1 teaspoon of vanilla extract at this point. In another bowl, sift together 1 cup of all-purpose flour, 1 cup of cocoa powder, 1/2 teaspoon baking powder, and 1/4 teaspoon of fine sea salt. Gradually mix this dry blend into your wet ingredients. Stir until everything is smooth. Pour the brownie batter into your prepared pan and spread it evenly. Place the pan in your preheated oven. Bake the brownie layer for 20 minutes. After baking, take it out and let it cool slightly. This cooling time is important for the next step. In a large bowl, beat 16 oz of softened cream cheese with an electric mixer. Mix on medium speed until it’s creamy and smooth. Gradually add 1 cup of granulated sugar, mixing well each time. Now, add 3 large eggs, one at a time, mixing on low speed until combined. Finally, fold in 1 teaspoon of vanilla extract and 1/2 cup of sour cream. Mix until smooth. Carefully pour the cheesecake batter over the cooled brownie layer. Smooth the top with a spatula to make it even. Now, put the cheesecake in the oven. Bake for 45 to 50 minutes. The edges should be set, but the center can still jiggle a bit. After baking, turn off the oven. Leave the cheesecake inside with the door slightly ajar for 1 hour. This helps prevent cracks. After the hour is up, transfer the cheesecake to the refrigerator. Chill it for at least 4 hours, or better yet, overnight. This sets the cheesecake perfectly. In a medium saucepan over medium heat, add 1 cup of granulated sugar. Stir constantly until it melts into a golden-brown liquid. Carefully add 6 tablespoons of cut butter, stirring until it melts. Gradually pour in 1/2 cup of room-temperature heavy cream while whisking. Expect some bubbling! Stir in 1/4 teaspoon of fine sea salt. Let the caramel cool slightly. Once chilled, remove the cheesecake from the springform pan. Drizzle it with the caramel sauce. Now, slice and serve. Enjoy this delicious treat with friends or family! To get a great brownie texture, start with melted butter. It helps create a fudgy base. Mix the sugar in until it's smooth. Be careful not to overmix the batter after adding flour. This keeps the brownies soft. Bake them just until they are set but still slightly gooey. Let them cool before adding the cheesecake layer. This helps the brownie hold its shape. Cheesecakes can crack if they bake too long. Always check for a gentle jiggle in the center. After baking, turn off the oven and leave the door ajar. This helps the cheesecake cool slowly. Also, let it chill in the fridge for at least four hours. A longer chill time gives it a better texture. Making caramel sauce is easy. Start with sugar in a saucepan over medium heat. Stir constantly until it melts. Once it’s golden brown, add butter. Stir until melted, then pour in heavy cream slowly. It will bubble up, so be careful! Add salt for flavor. Let it cool before drizzling on your cheesecake. Homemade caramel sauce adds a rich, sweet touch. Pro Tips Use Room Temperature Ingredients: Make sure your cream cheese and eggs are at room temperature before mixing. This helps achieve a smoother, creamier cheesecake texture. Don’t Overmix: When adding the eggs to the cheesecake layer, mix just until combined. Overmixing can create air bubbles, leading to cracks in the cheesecake. Cool Gradually: After baking, leave the cheesecake in the oven with the door ajar for an hour. This gradual cooling process helps prevent cracks on the surface. Chill Overnight: For the best flavor and texture, chill the cheesecake overnight before serving. It allows the flavors to meld beautifully and sets the cheesecake perfectly. {{image_4}} You can add nuts to your caramel brownie cheesecake for a fun crunch. Pecans or walnuts work well. Just sprinkle them on top of the brownie layer before adding the cheesecake mix. You can also mix nuts into the brownie batter. This gives the dessert a richer flavor and a delightful texture. For a chocolate chip twist, add mini chocolate chips to the brownie layer. You can stir in about one cup of mini chips after mixing the batter. This will create gooey pockets of chocolate throughout your cheesecake. The extra chocolate pairs perfectly with the caramel sauce. You can change the flavors based on the season. For a pumpkin version, add one cup of pumpkin puree and some pumpkin spice to the cheesecake layer. If you want a peppermint twist, mix in a teaspoon of peppermint extract. Top with crushed candy canes for a festive touch. These variations keep the dessert exciting all year long! To keep your caramel brownie cheesecake fresh, cover it tightly. Use plastic wrap or foil. Place it in the fridge. It can last up to five days. Ensure the cheesecake is cool before wrapping. This keeps it from getting soggy. Freezing this cheesecake is easy. Slice the cheesecake into pieces first. Wrap each slice in plastic wrap. Then place them in a freezer bag. Make sure to remove air to prevent freezer burn. It can stay in the freezer for up to three months. When ready to eat, thaw overnight in the fridge. Store your caramel sauce in an airtight container. Let it cool to room temperature first. Then, seal it tightly and refrigerate. It can last for up to two weeks in the fridge. If it thickens, warm it gently in the microwave. Stir well before drizzling it over your cheesecake. Yes, you can use store-bought caramel sauce. It saves time and tastes great. Just drizzle it over the cheesecake before serving. If you want a homemade touch, try making your own caramel sauce for extra flavor. Check the edges of the cheesecake. They should be set, while the center will have a slight jiggle. This means it will firm up as it cools. Remember, the cheesecake continues to cook while it cools in the oven. You can use plain yogurt or cream cheese as a substitute for sour cream. Both will provide a creamy texture and tangy flavor. If you want a dairy-free option, try coconut cream for a rich taste. You can keep the cheesecake in the fridge for about 5 days. Make sure to cover it well to prevent it from drying out. It tastes even better after chilling, as the flavors meld together. Yes, you can make this recipe gluten-free. Simply replace all-purpose flour with a gluten-free flour blend. Ensure other ingredients, like baking powder, are also gluten-free for best results. Many toppings go well with this cheesecake. Try whipped cream, chocolate shavings, or crushed nuts. Fresh berries add a nice tartness, while extra caramel sauce gives a sweet touch. Choose your favorites for a delicious finish! You learned about making a delicious caramel brownie cheesecake in this post. We covered key ingredients like brownie mix, cream cheese, and caramel sauce. I shared step-by-step instructions to guide you through making this treat. Tips for great texture and cracking prevention can help. Feel free to try variations with nuts or seasonal flavors. Remember, storing leftovers correctly keeps them fresh. Enjoy this dessert and impress your friends and family. Happy baking!

Caramel Brownie Cheesecake Delightful Dessert Recipe

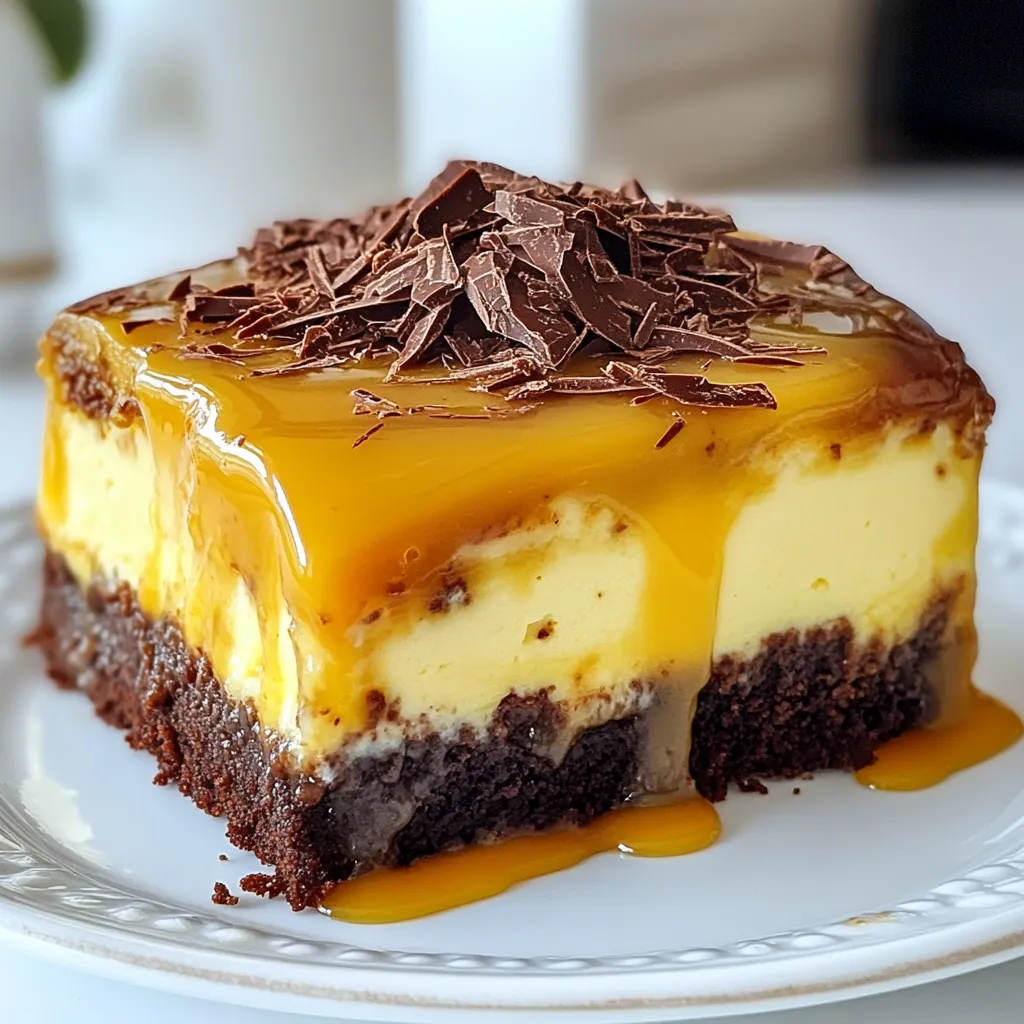
Are you ready to indulge in a rich and creamy treat? This Caramel Brownie Cheesecake is a delightful blend of

- 2 boneless, skinless chicken breasts, thinly sliced - 4 cloves garlic, minced - 1 cup broccoli florets - 1 bell pepper (any color), sliced - 1 medium carrot, julienned - 1 cup snap peas, trimmed - 3 tablespoons low-sodium soy sauce - 1 tablespoon honey - 1 teaspoon freshly grated ginger - Salt and freshly ground black pepper Gathering the right ingredients is key to a great stir fry. I love using fresh, vibrant produce, as it adds life to the dish. Start with two boneless, skinless chicken breasts. Slice them thinly for even cooking. Next, garlic is a must. Using four cloves of minced garlic gives a strong flavor. Garlic not only adds taste but also has health benefits. Broccoli florets add a nice crunch and bright color. For your veggies, pick a bell pepper. Any color works, but I prefer red for sweetness. A medium carrot, julienned, adds a touch of sweetness and crunch. Snap peas give a crisp bite that everyone loves. Now, let's talk sauce. Three tablespoons of low-sodium soy sauce balance the flavors well. One tablespoon of honey adds a hint of sweetness. Freshly grated ginger gives a warm, spicy note. Don’t forget salt and black pepper for seasoning. With these ingredients, you can create a tasty and healthy meal. Each part plays a role in making the stir fry delicious. Enjoy the cooking process and the tasty results! {{ingredient_image_2}} First, heat 2 tablespoons of olive oil in a large skillet or wok over medium-high heat. Once the oil shimmers, add 2 thinly sliced boneless chicken breasts. Season the chicken with salt and freshly ground black pepper. Cook the chicken for 5 to 7 minutes until it is browned and fully cooked. After cooking, transfer the chicken to a plate and set it aside for later. Next, in the same skillet, add the remaining tablespoon of olive oil. Then, add 4 cloves of minced garlic and 1 teaspoon of freshly grated ginger. Sauté these for about 30 seconds, stirring constantly. You want them to become fragrant but be careful not to burn them. Now it's time to add the veggies! Toss in 1 cup of broccoli florets, 1 sliced bell pepper, 1 julienned medium carrot, and 1 cup of trimmed snap peas. Stir-fry these vibrant vegetables for 4 to 5 minutes. You want them to look bright and be tender-crisp. After the vegetables are cooked, return the chicken to the skillet. In a small bowl, mix together 3 tablespoons of low-sodium soy sauce and 1 tablespoon of honey until smooth. Pour this sauce mixture over the chicken and veggies. Stir well to coat everything evenly. Continue to cook the stir-fry for another 2 to 3 minutes. This allows the sauce to thicken and mingle with the ingredients. Once done, serve the stir-fry over fluffy cooked jasmine rice or quinoa. For a finishing touch, garnish with toasted sesame seeds and finely sliced green onions. Enjoy your colorful and healthy meal! For garlic chicken veggie stir fry, use high heat. This method helps to keep the chicken juicy and the veggies crisp. Heat your skillet or wok until it shimmers. Then, add the chicken and let it sear without stirring for a minute. This gives it a nice color and flavor. Do not overcook your vegetables! They should remain vibrant and tender-crisp. Stir-fry them for just a few minutes. This will keep their nutrients and taste fresh. You can boost the flavor with spices. Try adding red pepper flakes for heat. A dash of black sesame seeds adds nutty notes. Fresh herbs like cilantro or basil can brighten the dish. Choose fresh ingredients whenever possible. Fresh garlic and ginger give a much stronger flavor than dried. If you use dried, cut the amount in half. It’s less potent but still adds depth. Presentation is key! Top your stir fry with toasted sesame seeds for crunch. Thinly sliced green onions add a pop of color. You can also sprinkle some chopped cilantro for freshness. To make it look like a restaurant dish, serve it on a white plate. This contrast highlights the vibrant colors. Add a drizzle of soy sauce or honey on top for a glossy finish. Pro Tips Marinate for Extra Flavor: Consider marinating the chicken in soy sauce, garlic, and ginger for at least 30 minutes before cooking to enhance its flavor. Use Fresh Vegetables: Opt for fresh, seasonal vegetables for the best taste and texture. Frozen vegetables can become mushy when stir-fried. High Heat is Key: Make sure your skillet or wok is hot before adding the ingredients. This helps to sear the chicken and maintain the crispness of the vegetables. Customize Your Sauce: Feel free to tweak the sauce with additional ingredients like sesame oil or chili flakes for an extra kick. {{image_4}} You can easily switch the chicken for shrimp or tofu. Shrimp cooks fast and adds a sweet taste. Tofu is great for a plant-based meal and soaks up flavor well. If you want other meats, try beef or pork. Both add a hearty twist to the dish. Feel free to customize the stir fry with seasonal vegetables. Think about what is fresh at the market. You might try zucchini, asparagus, or mushrooms. Adding leafy greens like spinach or kale gives it a healthy boost. These greens cook quickly and add nice color. Experiment with different sauces to find your favorite flavor. Teriyaki sauce gives a sweet and savory taste. Oyster sauce adds depth and richness. If you want a vegan option, swap honey for agave syrup or maple syrup. This keeps the sauce sweet without using animal products. To store leftovers, let the stir-fry cool down first. Place it in a tight container. Make sure to seal it well. This keeps moisture in and air out. Store it in the fridge for up to three days. If you want, you can keep the rice or quinoa separate from the stir-fry. This helps to keep the rice fluffy. If you have extra stir-fry, freezing is a great option. Pack it in a freezer-safe container or bag. Remove as much air as you can before sealing. Label the bag with the date. You can freeze it for up to three months. When you want to eat it, just thaw it in the fridge overnight before reheating. To reheat the stir-fry, use a skillet or a microwave. If using a skillet, heat it over medium heat. Add a splash of water or broth to keep it moist. Stir often until it’s warmed through. In the microwave, use a microwave-safe bowl. Cover it loosely with a lid or a paper towel. Heat it in short bursts, stirring in between. This way, you keep the veggies crisp and the chicken juicy. Garlic chicken veggie stir fry lasts for about 3 to 4 days in the fridge. Store it in an airtight container. This keeps the food fresh and safe. If you notice any strange smell or change in color, it’s best to toss it out. Yes, you can make this recipe ahead of time. Cook the stir fry and let it cool. Then, place it in the fridge for later. You can also prep the ingredients the night before. Slice the chicken and chop your veggies. This makes cooking easier and faster on a busy day. Garlic chicken veggie stir fry pairs well with a few sides. Consider serving it over jasmine rice or quinoa. You can also add a side salad for some crunch. Steamed rice noodles are another tasty option. For a flavorful twist, try it with some fresh spring rolls. This blog post explored a simple and tasty garlic chicken veggie stir-fry. You learned about key ingredients, step-by-step cooking instructions, and helpful tips to enhance your dish. We discussed variations like protein substitutes and alternative sauces to keep your meals exciting. When you try this recipe, you’ll create a flavorful dish that is healthy and satisfying. Enjoy customizing it to meet your tastes. Happy cooking!

Garlic Chicken Veggie Stir Fry Flavorful and Easy Meal

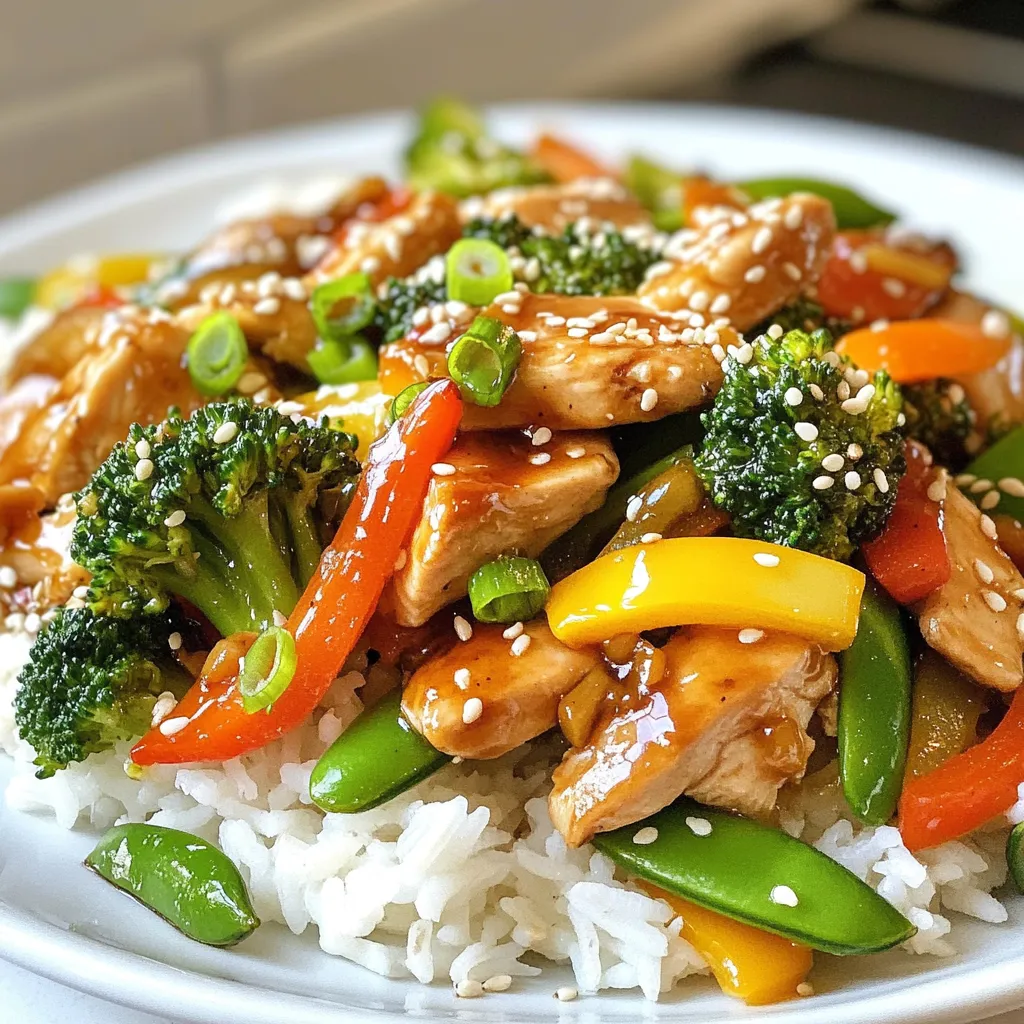
Looking for a quick and tasty dinner idea? Try my Garlic Chicken Veggie Stir Fry! It’s packed with fresh veggies,

- 2 cups shredded rotisserie chicken - 1 package (8 oz) cream cheese, softened - 1/2 cup buffalo wing sauce - 1/2 cup ranch dressing - 1 cup shredded sharp cheddar cheese, divided I love using rotisserie chicken for this dip. It saves time and adds rich flavor. Cream cheese gives it that creamy texture we all crave. Buffalo wing sauce makes it spicy and fun. Adjust the sauce to suit your taste. Ranch dressing adds a nice coolness to balance the heat. The sharp cheddar cheese gives the dip a nice bite. - 1/2 cup fresh green onions, chopped - Tortilla chips - Celery sticks - Carrot sticks For garnishes, I like to use fresh green onions. They add color and a fresh taste. Serve this dip with crunchy tortilla chips. Celery and carrot sticks are great for dipping too. They provide a nice crunch and a healthy option. This mix of dippers makes the dip even more delightful! {{ingredient_image_2}} Preheating your oven is key. It helps the dip cook evenly and thoroughly. Set your oven to 350°F (175°C). This is the perfect temperature for baking. Start by mixing cream cheese, buffalo sauce, and ranch dressing. Use a large bowl for this step. Blend them together until smooth. A spatula works well, but you can also use a hand mixer. Make sure there are no lumps. A smooth base makes the dip creamy and rich. Next, fold in the shredded rotisserie chicken. Be gentle to keep the mix light. Then, add half of the shredded cheddar cheese. Mix it carefully so everything combines well. Spoon the chicken mix into a medium-sized baking dish. Spread it evenly across the bottom. Top it with the remaining shredded cheddar cheese. Now, place the dish in the oven. Bake for 20-25 minutes. Look for a hot, bubbly dip with melted cheese on top. To keep your buffalo dip fresh, store it in an airtight container. This helps lock in the flavor and moisture. You can keep it in the fridge for up to three days. If you want to enjoy it later, consider freezing it. Just make sure to use a freezer-safe container. It can last for up to three months in the freezer. To make your dip look fancy, serve it on a large platter. Arrange tortilla chips, celery sticks, and carrot sticks around the dip. This not only adds color but also offers a variety of textures. For parties, you can use small ramekins to give everyone their own portion. This adds a personal touch and makes serving easy. If you love spice, add more buffalo wing sauce. Start with a little and taste as you go. For a milder dip, reduce the buffalo sauce by half. You can also swap it with a milder hot sauce. Another tip is to add some sour cream or Greek yogurt to cool it down. This gives you control over the heat level while keeping the dip creamy and delicious. Pro Tips Adjust Spice Level: If you prefer a milder dip, reduce the amount of buffalo wing sauce or mix in a bit more ranch dressing to balance the flavors. Make Ahead: Prepare the dip a day in advance and store it in the fridge. Just bake it when you're ready to serve for a quick and easy appetizer. Experiment with Cheese: For a different flavor profile, try mixing in some pepper jack cheese or using a blend of cheeses for added depth. Serve with Variety: In addition to tortilla chips, consider including pita chips or sliced bell peppers for a colorful and crunchy dipping option. {{image_4}} You can switch up the cheese in this dip. Try using mozzarella for a milder taste. Gouda adds a smooth, rich flavor, too. If you love blue cheese, mix it in for a bold kick. Each cheese offers a different vibe, so have fun exploring these options. Feel free to add more to your dip for extra flavor. Chopped bell peppers bring sweetness and crunch. Spinach adds a healthy touch and bright color. You can even toss in some jalapeños for heat. Think outside the box to make your dip unique. If you want a lighter dip, swap cream cheese for Greek yogurt. This change cuts calories and adds protein. Greek yogurt keeps the dip creamy while still making it tangy. You won’t miss the cream cheese at all! To store leftover dip in the fridge, place it in an airtight container. Make sure the lid seals tightly. Keep the dip in the fridge for about three to five days. Before serving, check for any changes in smell or texture. If it looks good, you can enjoy it again! Yes, you can freeze buffalo dip! To freeze, put the dip in a freezer-safe container. Leave some space at the top to allow for expansion. It can last up to three months in the freezer. When you're ready to eat it, move the dip to the fridge to defrost overnight. You can also use the microwave on low power for a quicker option, checking every few minutes. For the best texture, reheat the dip slowly. Use the oven at 350°F (175°C) for about 15-20 minutes. This method keeps the dip creamy and delicious. You can also use the microwave, but do it in short bursts. Stir in between to avoid hot spots. Enjoy your dip warm for the best taste! Yes, you can use regular chicken. Rotisserie chicken adds flavor and saves time. If you use raw chicken, cook it first. Boil or bake it, then shred it. Keep the meat juicy by seasoning it well. This will help you get the taste you want. It takes about 35 minutes total. You will spend 10 minutes preparing the dip. Baking takes 20 to 25 minutes. This makes it easy to whip up for parties or game days. You have many tasty options! Serve with: - Tortilla chips - Celery sticks - Carrot sticks These dippables add crunch and freshness. You can also use crackers or pita bread. Mix and match to please your guests! In this post, we explored how to make a tasty buffalo chicken dip. We covered the main ingredients, like shredded chicken, cream cheese, and buffalo sauce. You learned step-by-step instructions for preparation and baking. We also shared helpful tips for serving and storage. Now, you have all the tools to create this crowd-pleaser. Whether for a party or a quiet night, enjoy your delicious dip any time!

Rotisserie Chicken Buffalo Dip Delightful and Rich

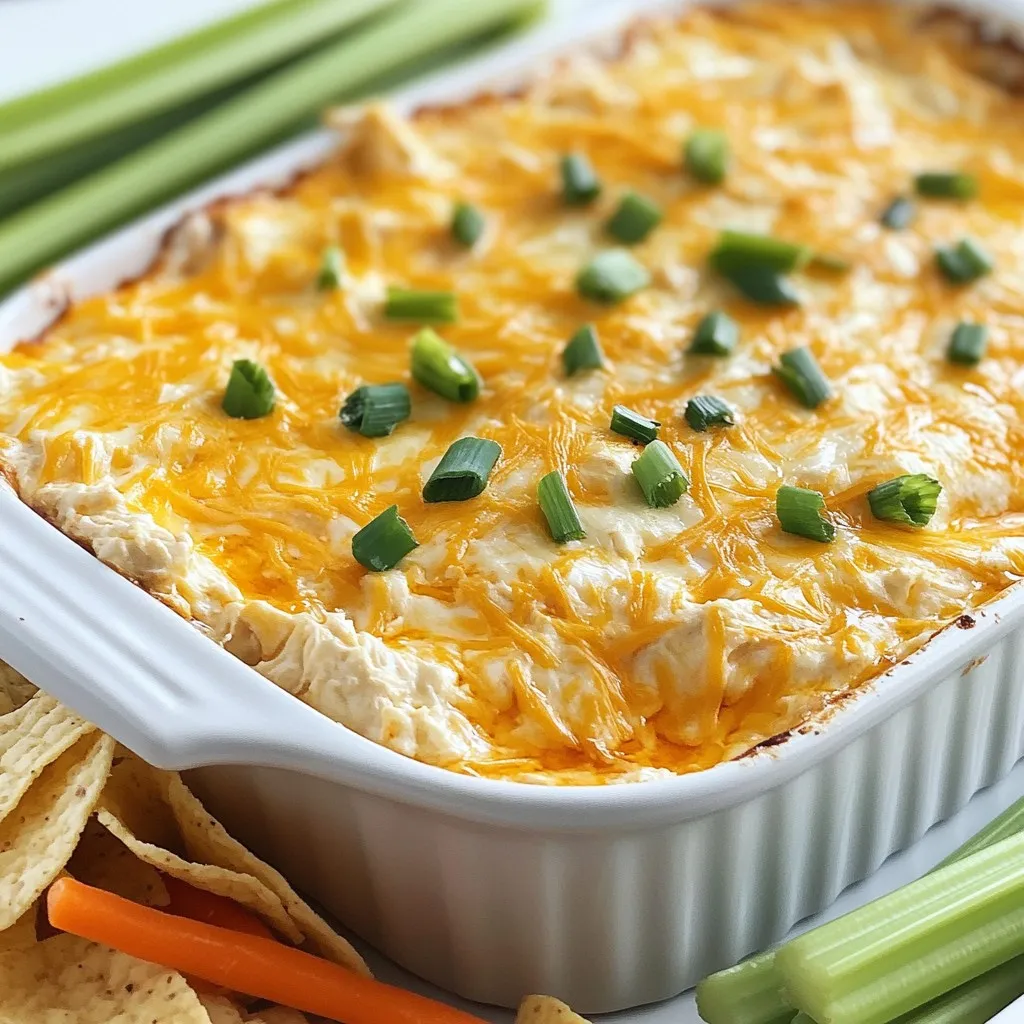
Looking for a quick and tasty party dip? This Rotisserie Chicken Buffalo Dip is rich, creamy, and packed with flavor.

- 2 lbs boneless, skinless chicken thighs, cut into bite-sized chunks - 4 medium carrots, peeled and sliced into rounds - 3 medium potatoes, diced into 1-inch cubes - 1 large onion, finely chopped - 3 cloves garlic, minced - 1 cup celery, sliced into small pieces - 4 cups low-sodium chicken broth - 1 cup frozen green peas - 1 tablespoon Worcestershire sauce - 1 teaspoon dried thyme - 1 teaspoon dried rosemary - Salt and freshly ground black pepper, to taste - 2 tablespoons olive oil - Fresh parsley, chopped, for garnish Using fresh, high-quality ingredients makes a big difference. I prefer using organic chicken and vegetables when possible. This choice not only enhances flavor but also supports local farmers. Fresh herbs, such as rosemary and thyme, bring vibrant taste. So, if you can find them, use fresh instead of dried. Some ingredients can be swapped if needed. For the chicken, you can use chicken breasts if you prefer leaner meat. If you’re short on time, pre-cut veggies work well. For a gluten-free option, ensure your Worcestershire sauce is gluten-free. Lastly, if you don't have fresh parsley, try using green onions for garnish. {{ingredient_image_2}} Start by gathering all your ingredients. You will need: - 2 lbs boneless, skinless chicken thighs, cut into bite-sized chunks - 4 medium carrots, peeled and sliced into rounds - 3 medium potatoes, diced into 1-inch cubes - 1 large onion, finely chopped - 3 cloves garlic, minced - 1 cup celery, sliced into small pieces - 4 cups low-sodium chicken broth - 1 cup frozen green peas - 1 tablespoon Worcestershire sauce - 1 teaspoon dried thyme - 1 teaspoon dried rosemary - Salt and freshly ground black pepper, to taste - 2 tablespoons olive oil - Fresh parsley, chopped, for garnish Next, heat the olive oil in a large skillet over medium heat. Add the chopped onion and minced garlic. Cook for 3-5 minutes until the onion is soft and smells great. This step boosts the flavor of your stew. Carefully transfer the onion and garlic to your slow cooker. This is where the magic happens! Now it’s time to add the chicken. Place the bite-sized chicken thighs into the slow cooker. Next, add the sliced carrots, diced potatoes, and sliced celery. Sprinkle in the dried thyme and rosemary evenly. Pour in the low-sodium chicken broth and add the Worcestershire sauce. Stir everything gently but well to mix. Season with salt and freshly ground black pepper to your liking. Cover the slow cooker. You can cook on low for 6-8 hours or high for 3-4 hours. The chicken should be tender and cooked through. In the last 30 minutes of cooking, stir in the frozen peas. This keeps them bright and fresh without getting mushy. When cooking time is up, taste your stew. Adjust the seasoning if needed. Ladle the hearty stew into bowls. Top each bowl with freshly chopped parsley for a pop of color. Serve with slices of warm, crusty bread for a complete meal. Enjoy the warmth and comfort of your savory stew! To make a perfect chicken stew, start with good chicken. Use boneless, skinless thighs for the best flavor. Cut them into bite-sized chunks for even cooking. Sauté the onion and garlic first. This adds depth to your stew. Cook them until the onion is soft and clear. Then, add them to the slow cooker. Layer your ingredients. Add the chicken, carrots, potatoes, and celery. This helps all the flavors mix well. Pour in the chicken broth last to keep everything moist. Check the seasoning. Always taste your stew before serving. Adjust with salt and pepper as needed. A few simple tricks can boost your stew's flavor. Add Worcestershire sauce for a savory kick. Use fresh herbs like parsley for bright notes. Consider adding a splash of lemon juice at the end. It brightens the flavors. You can also try a pinch of cayenne for heat. Don't skip the frozen peas. Stir them in during the last 30 minutes. They add color and sweetness to the dish. One common mistake is overcooking the chicken. Slow cookers work slowly, so don't rush. Set it to low for 6-8 hours. Avoid cooking on high for too long. Another mistake is not seasoning enough. Chicken can be bland without enough salt and pepper. Taste as you go to ensure balance. Lastly, don't crowd the slow cooker. Ensure there’s enough space for steam. This helps the stew cook evenly and stay flavorful. Pro Tips Use Fresh Herbs: Fresh herbs can elevate the flavor profile of your stew significantly. Consider adding fresh thyme or rosemary just before serving for an aromatic finish. Layering Flavors: Sautéing the onions and garlic before adding them to the slow cooker enhances their flavor. This simple step builds a more complex taste in your stew. Adjust Consistency: If your stew turns out too thick, add a bit more chicken broth or water to reach your desired consistency. If too thin, let it simmer uncovered for a while to thicken. Freezing Tips: This stew freezes well, making it a great make-ahead meal. Portion leftovers into airtight containers and freeze for up to three months. Reheat gently on the stove or in the microwave. {{image_4}} You can swap chicken with other meats. Try turkey or pork for a twist. Both options work well in a slow cooker. Cut the meat into bite-sized pieces. Use the same cooking times as chicken. You can also try beef for a heartier stew. Just remember to choose cuts like chuck or brisket. These will become tender and tasty when cooked slowly. Want a meat-free stew? You can make a vegetarian version easily. Replace the chicken with hearty vegetables. Use mushrooms, chickpeas, or lentils for protein. Add more root veggies like sweet potatoes or parsnips. You can also use vegetable broth instead of chicken broth. This keeps the flavor rich and satisfying. A mix of beans adds extra texture and taste. Spice up your stew with different seasonings. Try adding smoked paprika for a smoky flavor. You could add a pinch of cayenne for some heat. Herbs like basil or oregano can change the taste, too. A splash of lemon juice brightens the flavors nicely. Don't forget to taste as you go. Adjust the salt and pepper to suit your palate. These small changes make a big difference! To keep your chicken stew fresh, allow it to cool first. Once cooled, transfer it to an airtight container. Be sure to leave some space at the top for expansion if you freeze it. Store the stew in the fridge for up to three days. If you want to keep it longer, freezing is a great option. When you’re ready to enjoy your stew again, reheat it on the stove or in the microwave. For the stove, use a medium heat. Stir it often to ensure even warming. If using a microwave, place it in a microwave-safe bowl. Heat in 1-minute intervals, stirring in between. Make sure it’s hot all the way through before serving. If you plan to freeze the stew, do so within two hours of cooking. Divide it into portions before freezing. Use freezer-safe bags or containers. Label each container with the date. You can freeze the stew for up to three months. When ready to eat, thaw it in the fridge overnight before reheating. You can store Slow Cooker Chicken Stew in the fridge for about three to four days. Make sure to keep it in an airtight container. If you want to keep it longer, you can freeze it. In the freezer, it lasts up to three months. Just remember to label the container with a date! Yes, you can cook this stew on the stovetop. Start by sautéing the onion and garlic in a large pot, just like in the slow cooker recipe. Then add the chicken and the other veggies. Pour in the broth and seasonings. Let it simmer for about 30 to 40 minutes. The key is to cook until the chicken and veggies are tender. Chicken stew goes well with many sides. Here are some tasty options: - Crusty bread for dipping - Rice to soak up the sauce - A simple green salad for freshness - Mashed potatoes for extra comfort food Try these sides to make your meal even better! In this article, we explored the key ingredients and steps to make a great chicken stew. You learned how to choose high-quality ingredients and use special substitutes. I shared tips to avoid common mistakes and enhance the flavor. We also discussed ways to store leftovers and keep your stew fresh. Remember, cooking is a fun journey. Try new variations and make this dish your own. Enjoy your delicious chicken stew!

Savory Slow Cooker Chicken Stew Simple and Tasty Meal

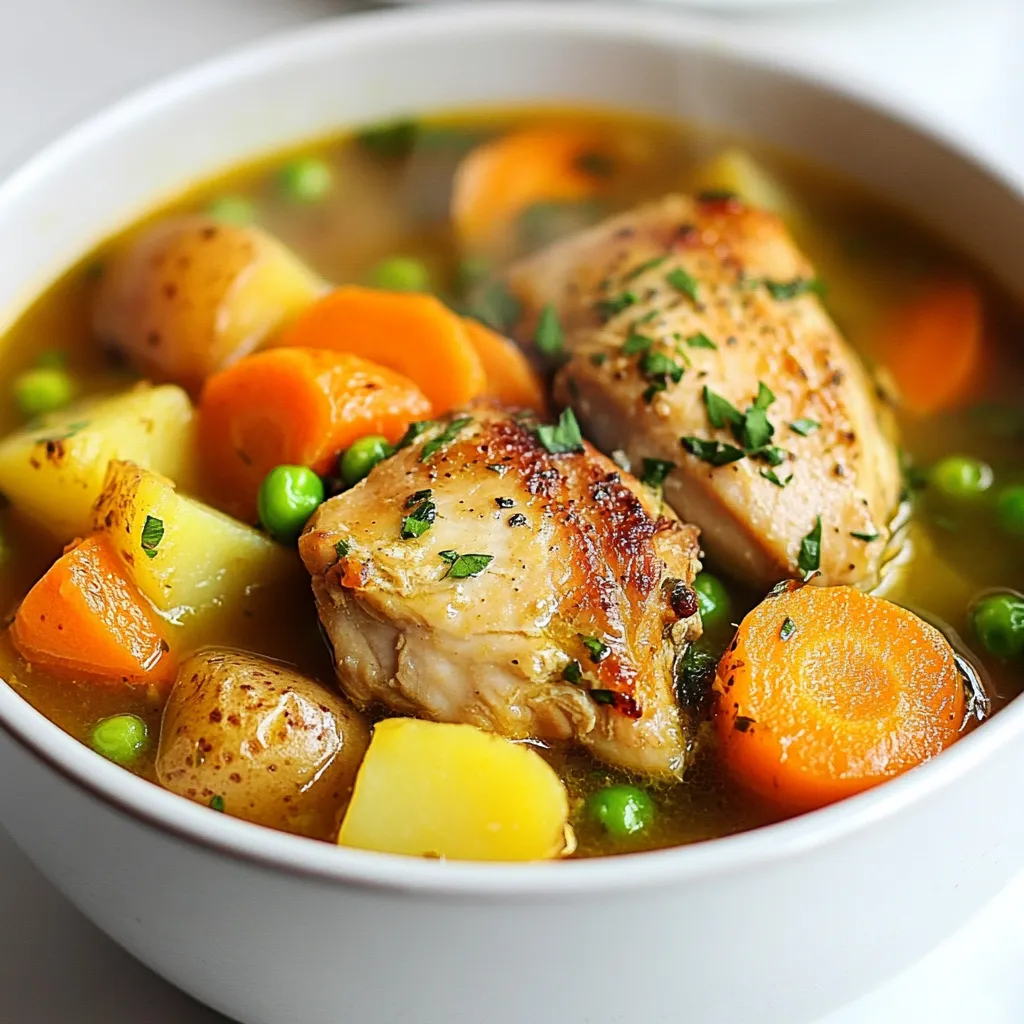
Are you ready to make an easy and warm meal? This savory slow cooker chicken stew is both simple and

- 1 pound ground turkey - 3 medium zucchinis, diced - 1 cup cherry tomatoes, halved - 1 medium onion, finely chopped - 2 cloves garlic, minced - 1 cup shredded mozzarella cheese - 1 cup ricotta cheese - 1 teaspoon dried oregano - 1 teaspoon dried basil - Salt and pepper to taste - 2 tablespoons olive oil - 1/2 cup grated Parmesan cheese This dish starts with ground turkey. It provides lean protein and a nice texture. Zucchini adds moisture and a mild flavor. Cherry tomatoes bring sweetness and color. Onions and garlic give a strong aroma. Mozzarella and ricotta cheeses make it creamy and rich. Oregano and basil offer a lovely herb taste. - Red pepper flakes (for heat) - Spinach or kale (for greens) - Bell peppers (for crunch) You can spice things up with red pepper flakes. Adding spinach or kale boosts nutrients. Bell peppers add a nice crunch and flavor. - Calories: 350 - Protein: 30g - Carbohydrates: 15g - Fat: 20g - Fiber: 3g This casserole is balanced. It gives you protein, healthy fats, and some carbs. Each serving is filling yet good for you. {{ingredient_image_2}} Start by preheating your oven to 375°F (190°C). This step is key for the casserole to cook evenly. While the oven heats, you can prepare your other ingredients. In a large skillet, pour in two tablespoons of olive oil and heat it on medium. Add one finely chopped onion and two minced garlic cloves. Sauté for about 3-4 minutes. You want the onion to be soft and fragrant. This mix adds a great flavor base. Next, add one pound of ground turkey to the skillet. Use a spatula to break the meat into smaller pieces. Cook for about 5-7 minutes until the turkey is browned and fully cooked. This step ensures the meat is safe to eat. Now, add three diced zucchinis and one cup of halved cherry tomatoes to the skillet. Sprinkle in one teaspoon each of dried oregano and dried basil, plus salt and pepper to taste. Stir everything well and cook for another 5 minutes. This will soften the zucchini and blend the flavors. Take the skillet off the heat. Carefully fold in one cup of ricotta cheese until it’s creamy and all ingredients mix well. Grease a 9x13 inch casserole dish with olive oil. Layer half of the turkey and veggie mix in the dish. Spread half of one cup of shredded mozzarella cheese on top. Pour the rest of the turkey mixture over the first layer. Add the remaining mozzarella cheese on top. Finish with half a cup of grated Parmesan cheese. Cover the dish with aluminum foil and bake for 20 minutes. After that, remove the foil and bake for another 10-15 minutes until the cheese is golden and bubbly. Let it cool for a few minutes before slicing and serving. When picking zucchini, look for firm ones. They should be bright green with no blemishes. Smaller zucchinis taste better and are less watery. Aim for zucchinis about six to eight inches long. These will have a good flavor and texture for your casserole. Herbs can boost the taste of your casserole. I love using dried oregano and basil. They add warmth and depth. You can also try fresh herbs if you have them. Just chop them finely and mix them in at the end. This will keep the flavors bright. A watery casserole can ruin the dish. To prevent this, salt the zucchini before cooking. Let it sit for about 10 minutes. This draws out excess water. After that, pat it dry with a paper towel. This step helps keep your casserole rich and creamy. Pro Tips Use Fresh Herbs: Fresh basil and oregano can elevate the flavor profile of your casserole. Add them just before serving for a burst of freshness. Customize Your Veggies: Feel free to swap out zucchini for other vegetables like bell peppers or spinach, depending on your preference or what you have on hand. Make Ahead: This casserole can be prepared in advance and stored in the refrigerator. Just reheat it in the oven before serving for a quick meal. Cheese Variations: Experiment with different cheeses such as cheddar or feta for a unique twist on the traditional flavor. {{image_4}} You can swap zucchini for cauliflower for a low-carb twist. Cauliflower adds a nice texture. Just chop it into small pieces. Steam it lightly before mixing it with turkey. This keeps it firm and flavorful. Use the same spices and cheeses for a tasty result. Want a meatless meal? Try using lentils instead of ground turkey. Lentils cook fast and are packed with protein. Use 1 cup of cooked lentils. Combine them with the same veggies and spices. This dish will still taste hearty and satisfying. If you like some heat, add red pepper flakes. Just a pinch will do. Mix them in with the ground turkey. This adds a fun spicy flavor. You can adjust the amount to fit your taste. Spice can change the whole vibe of your casserole! To keep your Ground Turkey Zucchini Casserole fresh, let it cool first. Then, place it in an airtight container. You can store it in the fridge for up to 3 days. Make sure it is tightly sealed to prevent drying out. Reheat the casserole in the oven or microwave. For the oven, set it to 350°F (175°C). Cover it with foil to keep it moist. Heat for about 15-20 minutes or until warm. In the microwave, use a safe dish and heat in short bursts. Stir between each burst to ensure even heating. You can freeze this casserole for later meals. First, let it cool completely. Then, wrap it tightly in plastic wrap and foil. Label it with the date. It can last in the freezer for up to 3 months. When ready to eat, thaw it in the fridge overnight before reheating. Yes, you can use ground beef in place of turkey. Ground beef adds a rich flavor. Just choose a lean cut to keep it healthier. You may need to adjust cooking time based on the fat content. If you need a ricotta substitute, try cottage cheese. It has a similar texture. You can also blend cream cheese with a little milk for a creamy mix. Silken tofu works well for a dairy-free option. To make this casserole dairy-free, skip the ricotta and mozzarella. Use vegan cheese or nutritional yeast for a cheesy flavor. Almond milk or coconut milk can replace any dairy milk you might use. This casserole goes well with a crisp salad. A simple green salad adds freshness. You can also serve it with garlic bread for a cozy touch. Steamed veggies are a healthy choice too. In the fridge, the casserole lasts about 3 to 4 days. Make sure to store it in an airtight container. Reheat individual portions in the microwave or oven until warm throughout. You learned about making a tasty ground turkey zucchini casserole. We covered key ingredients, step-by-step instructions, and helpful tips. You also discovered fun variations and how to store leftovers. This dish is easy to make and perfect for any meal. Experiment with flavors and enjoy healthy options. Keep this recipe handy for busy nights or family meals. Enjoy your cooking adventure!

Ground Turkey Zucchini Casserole Easy Family Meal

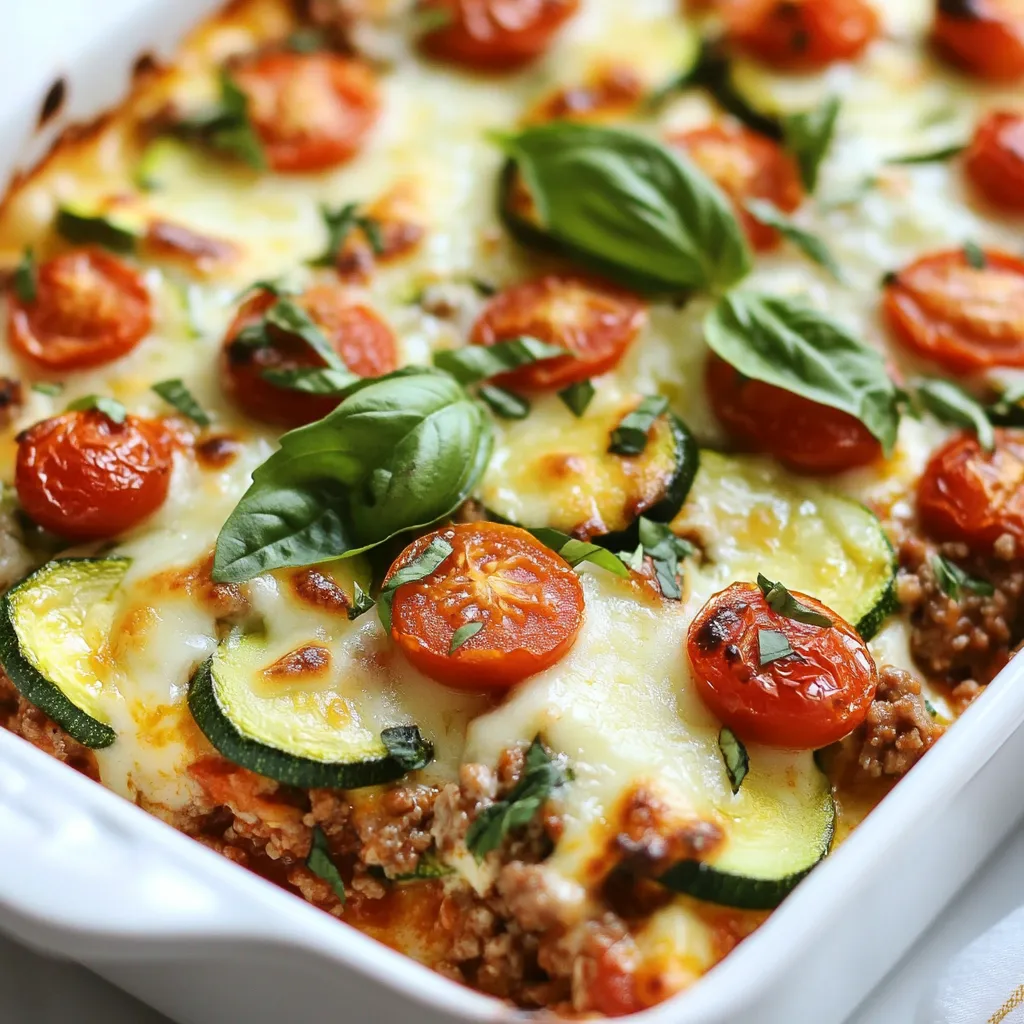
Looking for a simple and tasty dinner option? This Ground Turkey Zucchini Casserole is just the dish you need! Packed

Newer posts
← Previous Page1 … Page110 Page111

dsad

© 2025 recipesstation • Built with GeneratePress

Our Policies

  • Copyright Policy
  • Cookie Policy
  • GDPR Policy
  • Privacy Policy
  • Disclaimer
  • Terms Of Use

More Information

  • Home
  • About
  • Contact
  • Appetizers
  • Dessert
  • Dinner
  • Drinks
©2025, recipesstation About Back To Top