Skip to content
DisclaimerTerms Of UseGDPR PolicyCookie Policy

recipesstation

  • Home
  • Drinks
  • Appetizers
  • Dinner
  • Dessert
  • About
  • Contact
  • Privacy Policy
DisclaimerTerms Of UseGDPR PolicyCookie Policy

Emily

To make the best peppermint fudge, you need simple yet key ingredients. Here’s what you will need: - 2 cups semi-sweet chocolate chips - 1 cup sweetened condensed milk - 1/2 cup white chocolate chips - 1 teaspoon peppermint extract - 1/2 cup crushed peppermint candies (plus extra for topping) - 1/4 teaspoon salt - 1 tablespoon unsalted butter These ingredients combine to create a rich and creamy fudge. The semi-sweet chocolate gives it a deep flavor, while the white chocolate adds a nice contrast. Peppermint extract brings the holiday spirit into each bite. You can make your fudge even more special with some extras. Here are a few ideas: - Whole peppermint candies for garnish - A drizzle of melted chocolate on top - A sprinkle of crushed nuts for crunch - Swirls of colored candy melts for a festive look These toppings add fun textures and flavors. They also make your fudge look more festive, perfect for holiday gatherings. Using high-quality ingredients matters. When you choose good chocolate, your fudge becomes richer and creamier. Sweetened condensed milk adds the right sweetness and texture. Fresh peppermint candies give bursts of minty flavor. Always check your ingredients' freshness. This ensures that every bite of your fudge tastes amazing. Quality matters, especially during the holidays when you want to impress your guests. {{ingredient_image_2}} Start by preparing your baking dish. Use an 8x8 inch square dish. Line it with parchment paper. Leave some paper hanging over the edges. This makes it easy to lift out the fudge later. Set this dish aside while you work on the fudge. Next, grab a medium saucepan. On low heat, combine the semi-sweet chocolate chips, sweetened condensed milk, and unsalted butter. Stir this mix continuously. You want everything to melt smoothly. Make sure it does not boil. Once it melts fully, remove the saucepan from the heat. Now, add the peppermint extract and salt. Stir well to blend these flavors perfectly. Now, it’s time to add some fun! Gently fold in the crushed peppermint candies. Mix them throughout the melted chocolate. This adds delightful bursts of minty flavor. Pour half of this mixture into your lined baking dish. Use a spatula to spread it evenly. In another bowl, melt the white chocolate chips. Microwave them in 30-second bursts. Stir between each round until smooth. Carefully pour this white chocolate over the first fudge layer. Spread it out evenly. Next, add the remaining semi-sweet fudge mixture on top. Smooth it out gently with your spatula. Finally, sprinkle extra crushed peppermint candies on top. This adds a festive crunch! Now, place the dish in the fridge. Let it chill for at least two hours. This helps the fudge set perfectly. Once set, use the parchment paper to lift it out. Cut it into squares and enjoy your delicious holiday treat! To get that creamy fudge texture, keep the heat low when melting. Stir the chocolate slowly until it blends well with the sweetened condensed milk. This step is key to avoiding any graininess. Once melted, let it cool a bit before adding the peppermint extract. This helps keep the flavors bright and fresh. Remember, folding in the crushed peppermint candies gently is crucial. You want them to mix in without breaking too much. If you have fudge left over, store it in an airtight container. Use parchment paper to separate the layers. This helps keep the fudge from sticking together. You can keep it at room temperature for about a week. If you want it to last longer, refrigerate it. Just remember to let it sit at room temp for a few minutes before serving. This way, it softens up nicely. A few mistakes can ruin your fudge. One common error is overheating the chocolate. This can make it seize or burn. Always melt it slowly. Another mistake is not using enough peppermint candies. You want those bursts of flavor in every bite. Lastly, don’t skip the chilling time. Letting the fudge set properly is key to a clean cut. If you rush this step, your fudge may crumble instead of slice. Pro Tips Use High-Quality Chocolate: The quality of chocolate you use will greatly affect the taste of your fudge. Opt for premium semi-sweet and white chocolate chips for the best flavor. Crush Peppermints Efficiently: To easily crush peppermint candies, place them in a zip-top bag and use a rolling pin to break them into small pieces, ensuring they are fine enough to mix well into the fudge. Experiment with Add-ins: Feel free to customize your fudge by adding nuts, dried fruits, or different flavored extracts. Just remember to keep the total volume consistent. Store Properly: Keep your fudge in an airtight container at room temperature for up to a week or in the refrigerator for longer freshness. Just make sure to separate layers with parchment paper to prevent sticking. {{image_4}} For dark chocolate lovers, this fudge is a must-try. You can swap semi-sweet chocolate chips for dark chocolate chips. Use the same amount, about 2 cups. Dark chocolate brings a rich flavor that pairs well with the peppermint. The result is a deeper taste that feels more indulgent. If you want a fun twist, try white chocolate swirl fudge. First, make the base fudge with semi-sweet chocolate. Then, melt 1 cup of white chocolate chips. Swirl it into the top layer of fudge before it sets. This method gives a beautiful marbled look. Plus, it adds a creamy sweetness that contrasts nicely with the peppermint. For a nutty version, add 1/2 cup of chopped nuts. Pecans or walnuts work well. Mix them in right before pouring the fudge into the pan. The nuts add crunch and depth to each bite. You can also sprinkle nuts on top for extra flair. These variations allow you to get creative and personalize your fudge for the holidays! To keep your peppermint Christmas fudge fresh, store it in an airtight container. I suggest using a container with a tight seal. This helps prevent moisture from getting in and keeps the fudge soft. Place parchment paper between layers if you stack the fudge. This prevents them from sticking together. Store the fudge in a cool, dry place, away from heat and light. If you want to save some fudge for later, freezing works great. Cut the fudge into squares first. Wrap each square in plastic wrap tightly. Then, place the wrapped squares in a freezer-safe bag or container. This keeps them fresh for up to three months. When you’re ready to enjoy, thaw the fudge in the fridge overnight. You can also let it sit at room temperature for about 30 minutes before serving. When serving peppermint fudge, present it on a nice platter. A festive look adds to the holiday spirit. Add a sprinkle of powdered sugar or whole peppermint candies on top for a fun touch. This makes the fudge look extra special. Cut the fudge into smaller squares for easy sharing. Your guests will love this sweet treat, and it will look great on your holiday table! The best way to melt chocolate is using low heat. I like to use a double boiler or a microwave. If you use a microwave, melt it in short bursts. Start with 30 seconds, then stir and check. Repeat until the chocolate is smooth. Stirring helps prevent burning. Yes, you can use different chocolate chips! Feel free to swap semi-sweet chips for dark chocolate or milk chocolate. Each type gives a unique taste. White chocolate is great for layers too. Just make sure to adjust the sweetness if needed. Peppermint fudge can last for up to two weeks. Store it in an airtight container at room temperature. For longer storage, keep it in the fridge. If you freeze it, it can last up to two months. Just make sure to wrap it well to avoid freezer burn. Creating peppermint Christmas fudge involves choosing quality ingredients and following clear steps. Remember to prepare your dish well and cook the mixture just right. With tips on texture and storage, you can enjoy your fudge longer. Explore variations like dark chocolate or nutty options to suit your taste. In the end, making fudge is fun and rewarding. Get creative, and enjoy sharing your sweet treats!

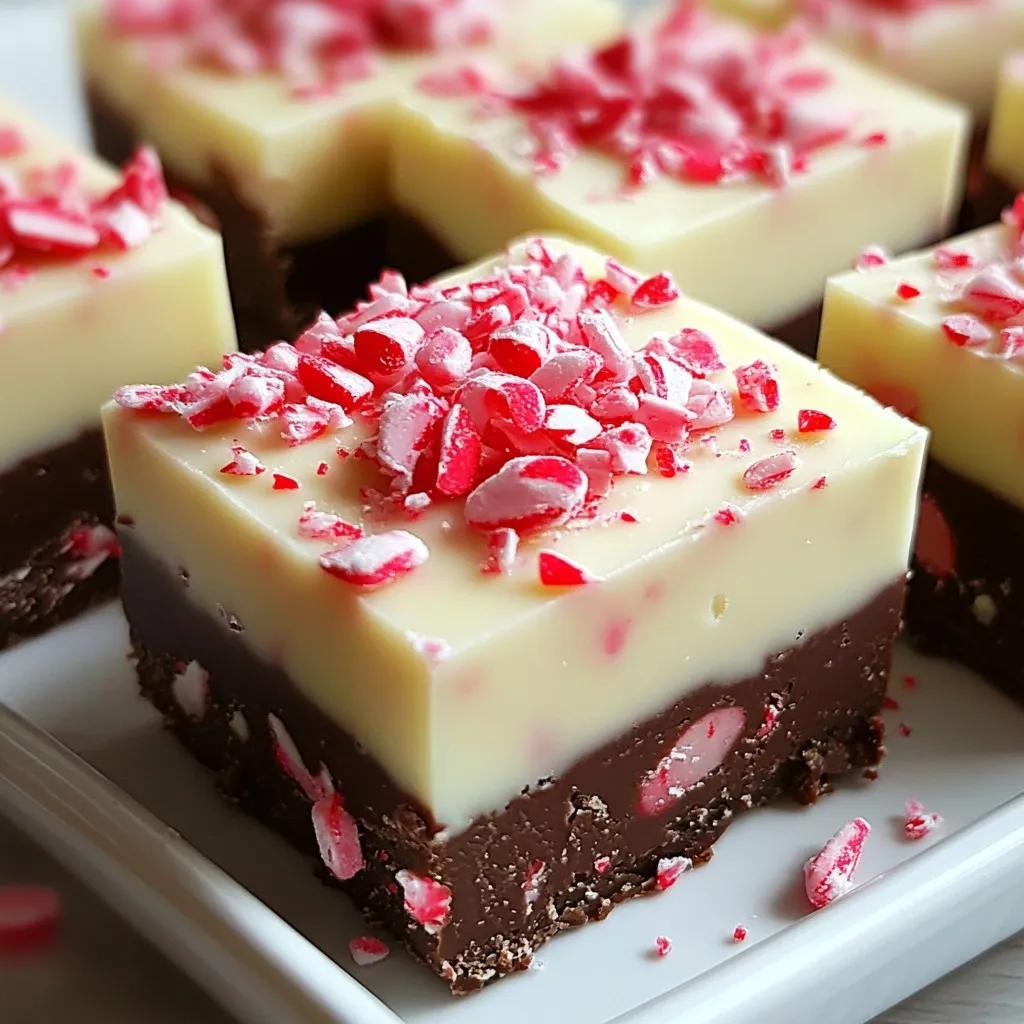
Peppermint Christmas Fudge Flavorful Holiday Treat

Are you ready to make a festive treat that brings holiday cheer? This Peppermint Christmas Fudge is rich, creamy, and

To make Homemade McGriddle Muffins, gather these ingredients: - 2 cups all-purpose flour - 2 tablespoons baking powder - 1 tablespoon granulated sugar - 1/2 teaspoon salt - 1 cup milk (preferably whole or 2%) - 2 large eggs, room temperature - 1/4 cup unsalted butter, melted - 1/4 cup pure maple syrup - 1 cup cooked breakfast sausage, crumbled - 1 cup sharp cheddar cheese, shredded - 4 large eggs (for the egg patties) - Additional maple syrup for drizzling (optional) Choosing fresh ingredients makes a big difference in flavor. Here are some tips: - Flour: Check the expiration date. Fresh flour has a light scent. - Baking Powder: Test it by adding a bit to water. If it fizzes, it’s good. - Milk: Look for cold, unbroken seals. Whole milk offers creaminess. - Eggs: Use large eggs at room temperature for best results. - Butter: Choose unsalted for better control over your dish's salt. - Sausage: Go for high-quality, fully cooked sausage for rich flavor. - Cheese: Sharp cheddar adds great taste. Shred it fresh for best melt. Understanding the nutrition helps you enjoy these muffins fully. Here’s a basic breakdown per muffin: - Calories: About 300 - Protein: 12g - Fat: 18g - Carbohydrates: 24g - Fiber: 1g - Sugar: 4g These muffins offer a hearty start to your day. With protein from eggs and sausage, they keep you full longer. Enjoy them fresh and warm! {{ingredient_image_2}} To start, gather your ingredients. You need flour, baking powder, sugar, salt, milk, eggs, butter, maple syrup, sausage, and cheese. Here’s how to make the batter: 1. In a large bowl, combine 2 cups of all-purpose flour, 2 tablespoons of baking powder, 1 tablespoon of granulated sugar, and 1/2 teaspoon of salt. Mix well. 2. In another bowl, whisk together 1 cup of milk, 1/4 cup of melted butter, 1/4 cup of maple syrup, and 2 large eggs until smooth. 3. Pour the wet mix into the dry ingredients. Stir gently with a spatula until just mixed. Avoid overmixing to keep the muffins fluffy. 4. Fold in 1 cup of crumbled breakfast sausage and 1 cup of shredded sharp cheddar cheese. Now it’s time to cook the muffins! 1. Preheat a non-stick griddle or skillet over medium heat. Lightly grease it with cooking spray or butter. 2. Use a measuring cup to scoop about 1/4 cup of the batter onto the griddle for each muffin. 3. Cook for 3-4 minutes. Look for bubbles forming on the surface. 4. Flip each muffin carefully. Cook for another 2-3 minutes until golden brown on both sides. Keep them warm on a plate covered with a towel. Next, we’ll make the egg patties. 1. Lightly grease a ring mold and place it on the griddle. 2. Crack an egg into the mold. Cook for 2-3 minutes. The whites should be set, and the yolk should be cooked to your liking. Season with salt and pepper. 3. To assemble, place one pancake on a plate. Add a cooked egg patty on top, then place another pancake over it. Drizzle with extra maple syrup if you like. 4. Repeat until all muffins are assembled. Serve warm and enjoy your tasty breakfast treat. To make fluffy muffins, avoid overmixing the batter. Mix until just combined. You want to see a few lumps. This keeps the muffins light and airy. Another tip is to use room temperature eggs and milk. They blend better and help the batter rise well. Also, sift your dry ingredients. This adds air, making your muffins fluffier. One common mistake is using cold ingredients. Cold eggs and milk can lead to dense muffins. Always let them come to room temperature first. Another error is cooking at too high a heat. This can burn the outside while leaving the inside raw. Stick to medium heat for even cooking. Lastly, don’t skip the resting time. Let the batter sit for a few minutes before cooking. This helps the flavors blend nicely. When cooking on a griddle, always preheat it first. This ensures even cooking and nice browning. Use a non-stick spray or a little butter to prevent sticking. Pour the batter in small rounds, about 1/4 cup each. Keep some space between them. Watch for bubbles; that’s your sign to flip. Cook them until golden brown on both sides. This gives you that perfect McGriddle texture. Pro Tips Use Room Temperature Ingredients: Ensuring your eggs and milk are at room temperature will help the batter mix more easily, leading to fluffier muffins. Don’t Overmix the Batter: Stir the batter just until combined. Overmixing can result in dense muffins instead of light and fluffy ones. Customize Your Fillings: Feel free to experiment with other ingredients like diced bell peppers, onions, or different types of cheese for a personal touch. Keep Muffins Warm: After cooking, keep the muffins warm under a towel or in a low oven to ensure they stay fluffy and delicious while you finish cooking the rest. {{image_4}} You can easily change the flavor of your McGriddle muffins. For a vegetarian option, skip the sausage and use sautéed veggies like bell peppers or spinach. If you want a meaty twist, try using bacon or ham. You can also mix in different cheeses. Pepper jack gives a nice kick, while cream cheese adds creaminess. Don’t have all the ingredients? No problem! You can use almond milk or oat milk instead of regular milk. If you need a gluten-free option, swap the all-purpose flour with a 1:1 gluten-free blend. For a sweet touch, honey or agave syrup can replace maple syrup. Always adjust the amount to taste. Serve your muffins with a side of fresh fruit for a bright plate. A dollop of yogurt adds creaminess and tang. You can also stack them with extra toppings like avocado slices or hot sauce for a kick. For a fun twist, turn them into a breakfast sandwich with a slice of cheese and a few crispy bacon strips. Enjoy your tasty creation! To keep your leftover muffins fresh, store them in an airtight container. This helps prevent them from drying out. You can also wrap each muffin in plastic wrap before placing them in the container. If stored this way, they can last for up to three days at room temperature. For longer storage, consider refrigerating them, which keeps them good for about a week. When you are ready to enjoy your muffins again, reheating is key. You can use a microwave for quick results. Place one muffin on a microwave-safe plate and heat it for about 15-20 seconds. If you prefer a crispy texture, use a toaster oven. Heat the muffin at 350°F for 5-7 minutes. This will bring back that fresh, warm taste. Freezing muffins is a great way to save them for later. Place the cooled muffins in a freezer-safe bag or container. Make sure to remove as much air as possible to prevent freezer burn. They can last in the freezer for up to three months. When you are ready to eat, thaw the muffins overnight in the fridge or at room temperature for a few hours. You can also reheat them directly from the freezer; just add a minute or two to your microwave or oven time. Yes, you can make these muffins without eggs. You can use applesauce or mashed bananas as a substitute. Each egg can be replaced with 1/4 cup of applesauce or 1/4 of a mashed banana. This keeps the muffins moist and adds a hint of sweetness. You might need to adjust the liquid in the recipe. Start with less milk and increase as needed. To make these muffins healthier, try these tips: - Use whole wheat flour instead of all-purpose flour. This adds fiber and nutrients. - Replace butter with unsweetened applesauce. This cuts down on fat and calories. - Choose turkey sausage or a plant-based option. This lowers the fat content. - Reduce the amount of maple syrup. You can use honey or agave syrup instead. These changes keep the taste while making the muffins better for you. McGriddle Muffins taste great with many sauces and toppings. Here are some ideas: - Drizzle extra maple syrup on top for sweetness. - Add hot sauce for a spicy kick. - Use a dollop of salsa for a fresh twist. - Serve with avocado slices for creaminess. - Try a dollop of Greek yogurt for a tangy flavor. These options add more flavor and fun to your breakfast treats. This blog post explored making delicious McGriddle Muffins. We covered ingredient selection, cooking steps, and helpful tips. I shared ways to create fluffy muffins and offered delicious variations. Proper storage keeps your muffins fresh for days. Lastly, I answered common questions to guide your cooking. Now you have everything you need to enjoy making these tasty treats. Embrace your creativity and make this recipe your own!

Homemade McGriddle Muffins Flavorful and Simple Treat

Craving a delicious breakfast that’s easy to make? Look no further! My Homemade McGriddle Muffins are not only simple to

For this creamy roasted vegetable soup, I love using fresh, vibrant veggies. Here's my go-to list: - 2 medium carrots, peeled and chopped - 1 large zucchini, chopped into cubes - 1 red bell pepper, diced - 1 onion, cut into quarters - 4 cloves garlic, left unpeeled These veggies add great flavor and nutrition to the soup. Roasting them brings out their natural sweetness, making the soup truly delicious. Creaminess is key in this dish. I often use: - 1 cup heavy cream for a rich taste - 1 cup coconut cream for a dairy-free choice Choosing coconut cream gives the soup a nice, subtle flavor. You can enjoy this dish no matter your dietary needs. Seasonings can make or break a soup. For this recipe, I use: - 2 tablespoons extra-virgin olive oil - 1 teaspoon dried thyme - Salt and freshly ground black pepper to taste These simple ingredients elevate the flavors. The thyme adds an earthy note, while the salt and pepper enhance all the tastes. {{ingredient_image_2}} To start, gather your fresh veggies. You need: - 2 medium carrots, peeled and chopped - 1 large zucchini, chopped into cubes - 1 red bell pepper, diced - 1 onion, quartered - 4 cloves garlic, unpeeled First, wash all vegetables. Then, chop them into bite-sized pieces for even cooking. Place the chopped veggies on a large baking sheet. Drizzle them with 2 tablespoons of extra-virgin olive oil. Add salt, pepper, and 1 teaspoon of dried thyme. Toss everything together so each piece is coated. Now, preheat your oven to 400°F (200°C). This step is key for good roasting. Once your oven is hot, place the baking sheet inside. Roast the veggies for about 25 to 30 minutes. Stir them halfway to ensure they cook evenly. Look for a nice golden brown color and tender texture. This roasting brings out their natural sweetness. When the veggies are done, take out the baking sheet and let it cool for a few minutes. Carefully squeeze the roasted garlic from its skin. Add it to a blender with the roasted vegetables. Pour in 3 cups of vegetable broth, then blend until smooth. If your blender is small, do this in batches. Transfer the mixture to a large pot. Stir in 1 cup of heavy cream or coconut cream for a dairy-free option. Heat the soup on medium for 5 to 10 minutes. Keep stirring until it’s warm and creamy. Taste and adjust salt and pepper as needed. Serve your soup hot, garnished with fresh thyme sprigs for a touch of class. To get that creamy texture, start with fresh ingredients. Roast your veggies until they are tender and caramelized. This adds depth to the flavor. When you blend the vegetables, add the vegetable broth slowly. This way, you can control the creaminess. If you want it creamier, add more heavy cream or coconut cream. Blend until it's smooth. This makes a big difference in texture. Store leftover soup in an airtight container. It will last in the fridge for about three days. If you want to keep it longer, freeze the soup. It can last for up to three months. When you reheat, do it slowly over low heat. This keeps the soup from splitting. Stir often to ensure even heating. If it seems too thick, add a splash of broth or water. For a nice presentation, use bowls that are bright and colorful. Ladle the soup into bowls, leaving some space at the top. Swirl in a bit of cream for a lovely look. Place a sprig of fresh thyme on top. This adds color and flavor. You can also sprinkle some black pepper for extra charm. Serve with warm bread on the side for a complete meal. Pro Tips Choose Fresh Vegetables: Opt for seasonal and fresh vegetables for the best flavor and nutritional value in your soup. Roast for Depth of Flavor: Roasting the vegetables enhances their natural sweetness and adds complexity to the soup’s flavor profile. Blend in Batches if Necessary: If your blender is small, blend the soup in batches to ensure a smooth and creamy texture. Adjust Consistency with Broth: If the soup is too thick for your liking, add more vegetable broth to reach your desired consistency. {{image_4}} You can easily swap out some ingredients. For a gluten-free option, check your broth. Use a low-sodium broth for a healthier choice. If you need a dairy-free soup, replace heavy cream with coconut cream. This change keeps the soup rich and tasty. You can also use almond milk for a lighter version. Want to make your soup heartier? Add some protein or grains! Cooked lentils or chickpeas work well. Add them while blending for a smooth texture. For grains, try quinoa or rice. Add them before you blend, so they mix in nicely. This will give you a filling meal. Spice up your soup with fun flavors! Consider adding a pinch of smoked paprika for a warm taste. A dash of cayenne pepper can give it a kick. You can also add fresh herbs like basil or parsley. These will brighten the flavor. For a sweet touch, try adding a small apple or pear while roasting the veggies. Each of these options makes the soup unique and exciting! One serving of creamy roasted vegetable soup has about 300 calories. It contains around 20 grams of fat, 30 grams of carbs, and 5 grams of protein. The heavy cream adds rich flavor and creaminess. If you choose coconut cream, it remains creamy yet dairy-free. This soup is filling and great for a light meal. - Carrots: High in fiber and vitamin A. They support eye health. - Zucchini: Low in calories and hydrating. It adds bulk with fewer calories. - Red Bell Pepper: Rich in vitamin C. It helps boost your immune system. - Onion: Contains antioxidants. It enhances heart health. - Garlic: Known for its anti-inflammatory properties. It can lower blood pressure. - Olive Oil: Contains healthy fats. It supports heart health and reduces inflammation. - Thyme: Packed with vitamins and minerals. It has antibacterial properties. These ingredients work together to create a soup that is not just tasty but also good for you. This soup recipe makes four servings. Each bowl is perfect for a light meal. If you want a heartier dish, serve it with crusty bread. This adds more fiber and makes it more filling. Enjoy this soup as a starter or a main dish. Yes, you can make this soup ahead of time. Just cool it after cooking, then store it in the fridge. It stays good for up to three days. When you're ready to enjoy it, just heat it on the stove. Stir often to ensure it warms evenly. If you want a dairy-free option, use coconut cream. It adds a nice flavor and keeps the soup creamy. Other options include cashew cream or silken tofu blended until smooth. Each will give a different taste and texture to your soup. To spice things up, add diced jalapeños or red pepper flakes. You can also stir in a bit of hot sauce after blending. Start with a small amount and taste as you go. This way, you can control the heat level to your liking. Yes, you can freeze this soup. Make sure it cools completely before pouring it into freezer-safe containers. Leave some space at the top for expansion. It can last for up to three months. When ready to eat, thaw it overnight in the fridge and reheat on the stove. This blog post covered how to make a creamy roasted vegetable soup. We explored the best vegetables and dairy options. You learned how to prep, roast, and blend the soup. I shared tips for texture, storage, and presentation. Variations let you change ingredients or add proteins. Lastly, we discussed the nutrition and answered common questions. Creating this soup can be fun and rewarding. Enjoy the flavors and health benefits it brings. Don’t hesitate to experiment!

Creamy Roasted Vegetable Soup Easy and Flavorful Dish

If you’re craving a warm, comforting bowl of soup, this Creamy Roasted Vegetable Soup is for you. Packed with rich

To make this delicious dip, gather these simple ingredients: - 8 oz cream cheese, softened to room temperature - 1 cup cranberry sauce (store-bought or homemade) - 1/2 cup shredded mozzarella cheese - 1/4 cup chopped green onions (plus extra for garnish, optional) - 1/2 teaspoon garlic powder - 1/4 teaspoon freshly ground black pepper - 1/2 teaspoon dried thyme For extra crunch and flavor, consider adding: - 1/2 cup chopped walnuts (optional, for added texture) This dip pairs well with a range of items. Try serving it with: - Assorted crackers - Toasted baguette slices {{ingredient_image_2}} First, you need to preheat your oven to 350°F (175°C). This step is key for a good bake. While the oven warms up, gather your ingredients. You will need cream cheese, cranberry sauce, mozzarella cheese, and green onions. Also, get your garlic powder, black pepper, and dried thyme ready. If you want a crunchy twist, have walnuts on hand. In a medium mixing bowl, add the softened cream cheese. Then, pour in the cranberry sauce and add the shredded mozzarella. Next, toss in the chopped green onions. Sprinkle the garlic powder, black pepper, and dried thyme into the bowl. Mix everything until it becomes creamy and smooth. If you choose to add walnuts, fold them in gently at this stage. Now, take a small baking dish and transfer your creamy mixture into it. Spread it out evenly so it cooks well. Place the dish in the preheated oven and let it bake for 25-30 minutes. You will know it’s ready when the dip is bubbly and the top is golden. After taking it out of the oven, let it cool for 5 minutes. This will help you serve it without burning your fingers! Serve the warm dip with assorted crackers or toasted baguette slices. If you like, add extra chopped green onions for a pop of color. Bake your dip at 350°F (175°C). This temperature helps it bake evenly and stay creamy. Set your timer for 25-30 minutes. Look for bubbling edges and a golden top. This tells you it’s ready to serve. To get a smooth texture, use softened cream cheese. Mix it well with the cranberry sauce and cheese. If you want crunch, add chopped walnuts. Fold them in gently to keep the dip creamy. Let it cool for a few minutes after baking. This makes it easier to scoop without burning your fingers. For a great look, use a nice baking dish. A rustic or colorful dish makes the dip pop. Arrange crackers or toasted baguette slices around it. This invites guests to dive in. You can also sprinkle extra green onions on top for color and flavor. Pro Tips Use Room Temperature Cream Cheese: Ensure your cream cheese is softened to room temperature for a smooth and creamy dip. This will help it blend better with the other ingredients. Experiment with Cheese: While mozzarella adds a nice stretch, feel free to mix in other cheeses like cheddar or gouda for a richer flavor profile. Customize Your Garnish: Add a sprinkle of pomegranate seeds or fresh herbs like thyme or parsley on top for a pop of color and freshness. Make Ahead for Convenience: Prepare the dip a day in advance and store it in the refrigerator. Just bake it when you’re ready to serve for a hassle-free appetizer. {{image_4}} You can change the cheese for a new taste. Try using goat cheese for a tangy kick. Feta cheese adds a salty flavor. Creamy ricotta gives a smooth texture. Mix and match to find your favorite blend. Want to spice things up? Add jalapeños for heat. Fresh herbs like basil or rosemary add zest. For a sweet twist, stir in some honey or maple syrup. Each add-in brings a new layer to your dip. If you want a vegetarian dip, skip the walnuts. Replace them with seeds like pumpkin or sunflower. They add crunch without the nuts. You can also use a nut-free cream cheese alternative to keep it safe for everyone. Enjoy your dip without worry! To keep your baked cranberry cream cheese dip fresh, let it cool down first. Then, transfer it to an airtight container. Store it in the fridge for up to three days. This way, you can enjoy it later without losing its rich flavor. When you’re ready to enjoy the dip again, preheat your oven to 350°F (175°C). Place the dip in an oven-safe dish. Heat it for about 15 minutes or until it’s warm and bubbly. You can also use a microwave. Just warm it in short bursts, stirring in between, until it’s hot. If you want to save some dip for later, freezing is a good option. Use a freezer-safe container and store it for up to three months. To thaw, place it in the fridge overnight. When you’re ready, follow the reheating instructions to enjoy it like new. Yes, you can prepare this dip ahead of time. Mix all the ingredients and place them in a baking dish. Cover it and store it in the fridge. When ready to serve, bake it as directed. This makes it easy for parties or gatherings. If you want to swap cream cheese, try using Greek yogurt or ricotta cheese. These options will give a creamy texture. However, the taste will change slightly. If you use Greek yogurt, choose plain to avoid added flavors. The dip is done when it bubbles and has a golden brown top. Bake it for about 25-30 minutes at 350°F (175°C). Keep an eye on it to avoid overcooking. A light golden color means it’s ready to enjoy. This dip is best served warm. Cold, it may not have the same creamy texture. However, if you prefer it cold, you can chill it and serve it as a spread. Just remember, it won’t have that gooey, melty feel. This blog covered all you need for Baked Cranberry Cream Cheese Dip. We explored the key ingredients, baking steps, and great tips. You can customize the dip for added texture and taste. Remember to store leftovers properly and know how to reheat them. Whether you make it ahead of time or change the flavors, this dip is sure to please. Dive into this easy recipe and enjoy every bite!

Baked Cranberry Cream Cheese Dip Rich and Creamy Treat

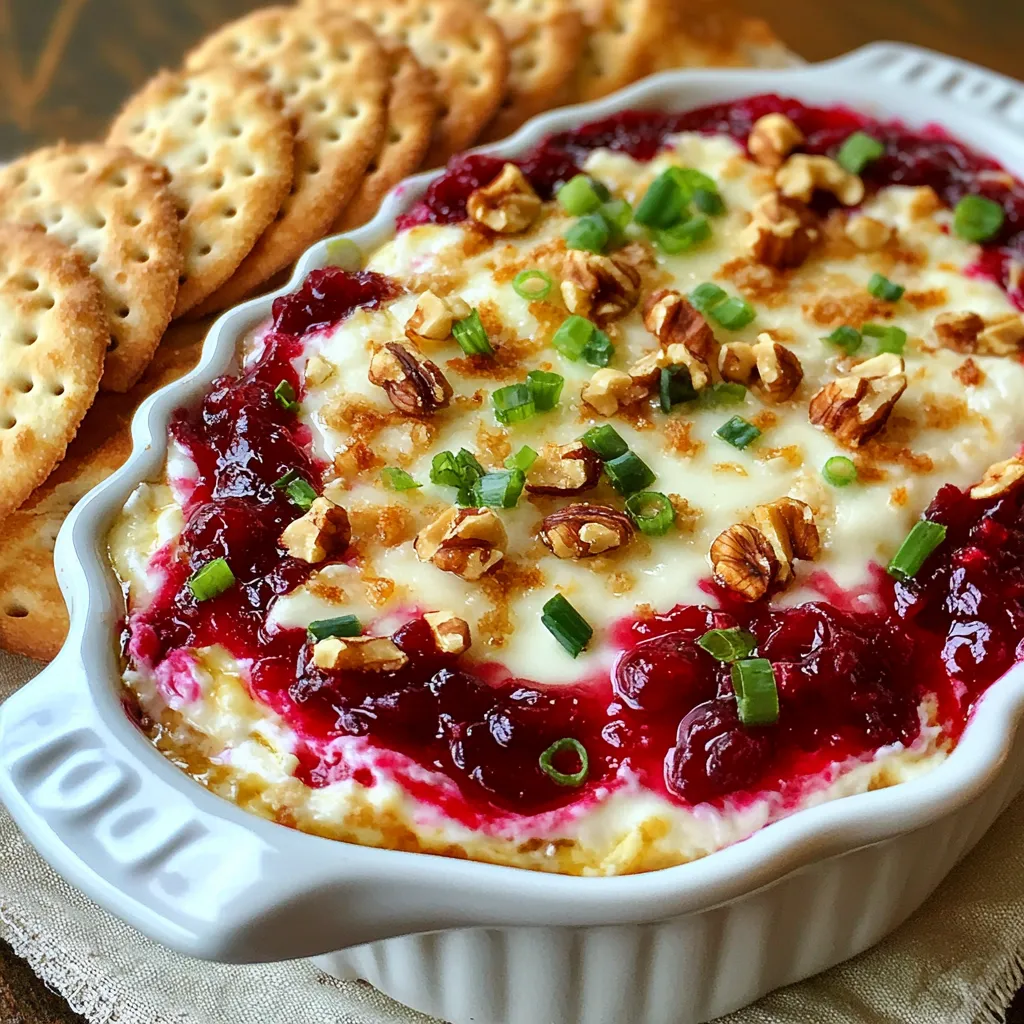
Craving a snack that’s rich and creamy? Look no further! My Baked Cranberry Cream Cheese Dip combines the sweet burst

To make Hobo Ground Beef Casserole, gather these ingredients: - 1 pound of ground beef - 1 cup green bell pepper, diced - 1 cup onion, chopped - 2 cups potatoes, diced (Yukon gold or red potatoes work well) - 1 cup corn (frozen or canned) - 1 can (10.5 oz) cream of mushroom soup - 1 cup shredded cheddar cheese - 1 tablespoon Worcestershire sauce - 1 teaspoon garlic powder - 1 teaspoon onion powder - Salt and pepper to taste - Fresh parsley, chopped (for garnish) If you want to switch things up, try these swaps: - Use ground turkey or chicken instead of beef for a lighter dish. - Swap the green bell pepper for red or yellow for a sweeter taste. - Replace the cream of mushroom soup with cream of chicken or a homemade white sauce. - Add black beans or kidney beans for extra protein and fiber. Choosing fresh ingredients makes a big difference. Here’s how: - Look for ground beef that is bright red with minimal fat. - Select firm, unblemished potatoes free of sprouts. - Pick bell peppers that are shiny and feel heavy in your hand. - Choose onions that are dry and firm, avoiding any soft spots. - If using corn, pick frozen for better taste and texture than canned. {{ingredient_image_2}} Start by preheating your oven to 375°F (190°C). This step helps the casserole cook evenly. In a large skillet, add 1 pound of ground beef over medium heat. As the beef cooks, break it apart into small pieces with a spatula. Cook it for about 6-8 minutes until it turns brown. If you see excess fat, drain it from the skillet. This keeps your meal lean and tasty. After the beef is browned, toss in 1 cup of diced green bell pepper and 1 cup of chopped onion. Sauté these for around 5 minutes. This softens the veggies and brings out their smell. Next, mix in 2 cups of diced potatoes, 1 cup of corn, and 1 can of cream of mushroom soup. Add 1 tablespoon of Worcestershire sauce, 1 teaspoon of garlic powder, and 1 teaspoon of onion powder. Don't forget to season with salt and pepper. Stir everything well until all the ingredients blend together nicely. Pour the mixture into a greased 9x13 inch baking dish. Spread it evenly. Cover the dish with aluminum foil. This keeps moisture in while baking. Place it in your preheated oven and bake for 35 minutes. After that, take off the foil and sprinkle 1 cup of shredded cheddar cheese on top. Return the dish to the oven without the foil. Bake it for another 10-15 minutes until the cheese is melted and bubbly. The potatoes should be soft when poked with a fork. Once done, let the casserole cool for a few minutes. Garnish it with fresh parsley for a lovely touch. To cook your Hobo Ground Beef Casserole evenly, follow these tips: - Cut your vegetables into uniform pieces. This ensures they cook at the same rate. - Sauté the ground beef fully before adding other ingredients. Browned meat adds flavor. - Mix the ingredients well in the baking dish. This helps distribute heat evenly. Enhance the taste of your casserole with these ideas: - Add a pinch of cayenne pepper for warmth. Spice can elevate the dish. - Use fresh herbs like thyme or rosemary. They add depth to the flavor. - Consider adding a splash of hot sauce for some zing. It can really wake up the dish. Make your casserole look as good as it tastes: - Serve in individual bowls for a cozy touch. It feels special and inviting. - Garnish with extra parsley for a bright pop of color. Fresh herbs always enhance dishes. - Pair with a light salad or crusty bread. These sides create a balanced meal. Pro Tips Choose the Right Potatoes: Using Yukon gold or red potatoes will yield a creamier texture, enhancing the overall flavor of the casserole. Brown the Beef Properly: Ensure the ground beef is well browned to develop a rich flavor base for your casserole. Layering Ingredients: For even cooking, layer the ingredients in your baking dish, ensuring that potatoes are spread evenly throughout. Let it Rest: Allow the casserole to sit for a few minutes after baking. This helps the flavors to meld and makes serving easier. {{image_4}} If you want a meat-free dish, there are great options. You can replace the ground beef with lentils or black beans. Both add protein and flavor. Using a mix of mushrooms can also add a nice meaty texture. Just sauté them well, so they release their moisture. You can also use tofu; just press it to remove excess water before cooking. Feel free to get creative with your veggie choices. Carrots, peas, or zucchini are perfect additions. You can also swap the potatoes for sweet potatoes or even butternut squash. If you like more protein, try adding cooked chicken or turkey. These swaps keep the dish exciting and fun. Toppings can make your casserole shine. Instead of just cheese, try adding crushed tortilla chips. This gives a nice crunch on top. You can also add crispy fried onions for extra flavor. For a fresh kick, sprinkle some chopped green onions or fresh herbs before serving. These small touches make a big difference in taste and presentation. After enjoying your hobo ground beef casserole, store leftovers in an airtight container. This keeps the flavors fresh. Let the casserole cool down to room temperature first. Then, cover it tightly to prevent air from entering. You can keep it in the fridge for up to three days. Freezing the hobo casserole is a great way to save meals for later. First, let it cool completely. Then, portion it into smaller containers. This makes it easy to thaw only what you need. Label the containers with the date. You can freeze it for up to three months. When ready to eat, just thaw in the fridge overnight. To reheat your hobo casserole, preheat your oven to 350°F (175°C). Place the casserole in an oven-safe dish. Cover it with foil to keep it moist. Heat for about 20-25 minutes or until it's hot all the way through. You can also microwave individual portions for quick meals. Just make sure to cover them to avoid drying out. Yes, you can use other meats! Ground turkey or chicken works well. You can also try sausage for a spicy kick. Just remember to cook them until browned. Each meat will add its own flavor to the casserole, making it unique. If you don’t want to use cream of mushroom soup, try cream of chicken soup. It has a similar texture and taste. You can also make your own by mixing heavy cream with sautéed mushrooms. This option is fresh and free from preservatives. Every oven heats a bit differently. If your oven runs hot, reduce cooking time by 5-10 minutes. If it runs cool, add a few extra minutes. Always check the potatoes with a fork to see if they are tender. This will help you get the perfect bake every time. You learned about the ingredients needed for a tasty hobo casserole. I shared tips to select fresh items and tricks to make cooking easier. You can even try cool variations, like vegetarian options or creative toppings. Lastly, proper storage will keep your leftovers fresh and tasty. Keep these ideas in mind as you prepare your dish. Enjoy making and sharing your hobo casserole with others!

Hobo Ground Beef Casserole Savory and Hearty Meal

Looking for a warm, tasty meal that’s easy to make? Hobo Ground Beef Casserole is your answer. This dish combines

To make a Loaded Taco Beef Casserole, gather these main ingredients: - 1 lb ground beef - 1 can (15 oz) black beans, drained and rinsed - 1 cup corn, either frozen or canned - 1 packet (1 oz) taco seasoning - 1 cup salsa - 2 cups tortilla chips, crushed - 2 cups shredded cheddar cheese - 1 cup diced tomatoes with green chilies - 1/2 cup sour cream - 1/4 cup sliced green onions - Fresh cilantro, chopped (optional) Each ingredient plays a role in creating the rich, savory layers of flavor that define this dish. The ground beef serves as the hearty base, while black beans add protein and fiber. Corn brings a sweet crunch, and taco seasoning gives the casserole its signature taste. You can add these garnishes and toppings for a personal touch: - Sliced jalapeños for heat - Avocado or guacamole for creaminess - Extra salsa for more flavor - Chopped tomatoes for freshness - Sour cream dollops for added richness These options allow you to customize the casserole to your taste, making it even more delightful. If you need to adjust the recipe, consider these substitutes: - Ground turkey or chicken instead of beef - Canned chickpeas instead of black beans for a vegetarian twist - Greek yogurt in place of sour cream for a healthier option - Tortilla chips can be replaced with crushed cornflakes or tortilla strips These substitutes keep the spirit of the dish while catering to different dietary needs or personal preferences. {{ingredient_image_2}} Start by preheating your oven to 350°F (175°C). This step is key for even cooking. While the oven heats, gather all your ingredients. Make sure to have your ground beef, black beans, corn, taco seasoning, salsa, tortilla chips, cheese, diced tomatoes, sour cream, and green onions ready. This prep keeps the cooking process smooth. In a large skillet, add the ground beef over medium heat. Use a wooden spoon to break it apart. Cook it for about 6-8 minutes until it turns brown. This step adds flavor to your beef. Drain any excess fat. Next, stir in the taco seasoning, black beans, corn, and salsa. Cook this mixture for 5-7 minutes, mixing well until it’s hot and combined. Grab your 9x13-inch baking dish and grease it lightly. Start by spreading half of the crushed tortilla chips at the bottom. This forms a crunchy base. Layer the beef mixture evenly on top of the chips. Then, sprinkle 1 cup of shredded cheddar cheese over the beef. Add the rest of the crushed chips for more texture. Pour the diced tomatoes with green chilies on top, ensuring every bite will be full of flavor. Finish this layer with the remaining cheese and dollops of sour cream for creaminess. Cover the baking dish with aluminum foil to protect the cheese from browning too fast. Place it in the preheated oven and bake for 25 minutes. After this time, take off the foil and bake for another 10-15 minutes. Watch for the cheese to get bubbly and golden brown. Once done, let it sit for 5 minutes before serving. Top each serving with sliced green onions and chopped cilantro for a fresh touch. Enjoy your loaded taco beef casserole! To boost the taste of your casserole, use fresh ingredients. Fresh herbs like cilantro add a burst of flavor. Try adding some lime juice for a zesty kick. You can also mix in diced jalapeños for heat. Consider using a blend of cheeses for deeper flavor. A combination of cheddar and pepper jack works well. If you want more depth, add a splash of Worcestershire sauce to the beef mixture. Having the right tools makes cooking easier. Use a large skillet for browning the beef. A wooden spoon helps break up the meat well. For baking, a 9x13-inch dish is perfect. This size allows for even cooking. Keep aluminum foil handy to cover the dish while baking. A sharp knife is great for chopping vegetables. Measuring cups and spoons will help you get your ingredients just right. Many cooks make simple mistakes. One common error is overcooking the ground beef. Cook it until just browned to keep it juicy. Another mistake is not draining excess fat. This keeps your casserole from being greasy. Make sure to layer ingredients evenly. This ensures every bite is tasty. Don’t skip letting the casserole sit before serving. This helps it set and makes serving easier. Pro Tips Choose Quality Beef: Opt for lean ground beef (90% lean or higher) for a healthier casserole that doesn't compromise on flavor. Layering for Flavor: Make sure to layer ingredients evenly to ensure every bite is packed with flavor and texture. Customize Your Toppings: Feel free to add your favorite toppings such as jalapeños, olives, or avocado for an extra kick and freshness. Rest Before Serving: Let the casserole sit for a few minutes after baking; this helps it set and makes serving easier. {{image_4}} You can easily make a vegetarian version of this casserole. Swap the ground beef for 1 pound of lentils or quinoa. Both options add great texture and protein. Use the same taco seasoning and mix in black beans, corn, and salsa. Layer as directed. This dish stays rich and flavorful. For a gluten-free meal, choose gluten-free tortilla chips. Many brands offer tasty options. Ensure your taco seasoning is also gluten-free. You can find gluten-free varieties in stores. The rest of the ingredients, like beans and cheese, are typically gluten-free. This version keeps all the great taste without the gluten. Want it spicier? Add chopped jalapeños or hot salsa to the beef mix. You can also sprinkle crushed red pepper flakes between the layers. If you prefer it milder, use less salsa or choose a mild variety. Adjusting the spice level makes this dish perfect for everyone at your table. To keep your Loaded Taco Beef Casserole fresh, first let it cool. Then, place it in an airtight container. Make sure to store it in the fridge. This way, it stays tasty for 3 to 4 days. If you want to save it longer, consider freezing it. Reheating is easy. You can use the oven or microwave. For the oven, preheat it to 350°F (175°C). Place the leftover casserole in a baking dish. Cover it with foil to keep it moist. Heat for about 20 minutes or until warm. In the microwave, heat in short bursts. Stir after each burst to ensure even heating. Freezing is a great option. If you want to freeze, do it before baking. Assemble the casserole as usual, but don’t bake it. Wrap the dish tightly with plastic wrap, then foil. This helps prevent freezer burn. When you're ready, thaw in the fridge overnight. Then, bake as directed. Enjoy your meal anytime! You can make this casserole ahead of time. Prepare it fully, but do not bake it. Cover it tightly with foil and store it in the fridge. You can bake it the next day. Just add 10-15 minutes to the baking time. This saves you time during busy days. Yes, you can use other meats. Ground turkey or chicken works well. If you want a beefy flavor, stick with beef. You could even use shredded rotisserie chicken for a quick option. Just make sure to adjust the cooking time as needed. This casserole pairs nicely with many sides. Consider serving it with a fresh salad. Cornbread or Mexican rice also makes a great side. You can offer extra toppings like avocado or jalapeños for a fun twist. These add flavor and texture. Yes, this casserole is great for meal prep. It keeps well in the fridge for 3-4 days. You can reheat individual portions in the microwave. It also freezes well if you want to save some for later. Just ensure it is stored in an airtight container. Loaded taco beef casserole is easy to make and full of flavor. You can customize it with different toppings and ingredients. I shared tips to boost flavor and avoid common mistakes. If you want a vegetarian or gluten-free version, those options are available too. Don't forget to store leftovers properly for later. This dish is great for meal prep and can make delicious meals all week. Enjoy your cooking adventure with this tasty casserole!

Loaded Taco Beef Casserole Flavorful and Satisfying Meal

Looking for a meal that’s packed with flavor and easy to make? You’ve found it! This Loaded Taco Beef Casserole

- 2 boneless, skinless chicken breasts - 1 cup buttermilk - 1 cup breadcrumbs (preferably panko for extra crunch) - 1/2 cup grated Parmesan cheese - 1 teaspoon garlic powder - 1 teaspoon onion powder - Salt and freshly ground black pepper to taste - 4 whole grain sandwich buns - 1 cup romaine lettuce, chopped - 1/2 cup Caesar dressing (store-bought or homemade) - Extra Parmesan shavings for garnish - Olive oil for cooking - Sliced tomatoes for freshness - Crispy bacon for added crunch - Avocado slices for creaminess - Fresh herbs like basil or parsley for extra taste - Calories: 480 - Protein: 35g - Carbohydrates: 40g - Fat: 20g - Fiber: 5g This Chicken Caesar Sandwich packs a punch in flavor and nutrition. The ingredients work together to create a tasty meal that is easy to make. You can add optional ingredients for a fun twist. For example, crispy bacon can take your sandwich to the next level. Each bite will be a mix of crunchy, creamy, and savory notes. Plus, the nutritional info helps you stay on track with your meals. When you make this sandwich, you can feel good about what you eat. Fresh romaine and chicken provide protein and fiber. Enjoy the rich taste of Parmesan without the guilt. This dish is perfect for lunch or dinner. Don't forget to explore different toppings and variations! {{ingredient_image_2}} To start, marinate the chicken. In a shallow dish, mix 1 cup of buttermilk with 1 teaspoon each of garlic and onion powder. Add salt and pepper to taste. Place the chicken breasts in the dish, ensuring they are fully coated. Cover the dish with plastic wrap and refrigerate for at least 30 minutes. You can let it sit for up to 4 hours for a richer flavor. Next, prepare the baking sheet. Preheat your oven to 375°F (190°C). Line a baking sheet with parchment paper. This step helps with easy cleanup and prevents the chicken from sticking. Now, it’s time to coat the chicken. In a separate bowl, combine 1 cup of breadcrumbs with 1/2 cup of grated Parmesan cheese. Mix well to create a tasty crust. Remove the chicken from the marinade, letting the excess drip off. Dredge each piece in the breadcrumb mix, pressing down firmly. This helps the crumbs stick better. Heat a few tablespoons of olive oil in a skillet over medium heat. Once the oil shimmers, add the coated chicken. Cook for 5-7 minutes on each side until golden brown and cooked through. For a healthier option, place the chicken on the prepared baking sheet and bake for 20-25 minutes, until crispy. While the chicken cooks, slice the sandwich buns in half and toast them lightly. Spread Caesar dressing on the cut sides of each half. On the bottom half, layer chopped romaine lettuce. Add a crispy chicken breast on top. Drizzle more Caesar dressing over the chicken. Finish with freshly shaved Parmesan. Place the top half of the bun over the sandwich and enjoy the delightful crunch of the hot chicken! For the best Chicken Caesar Sandwich, I recommend using boneless, skinless chicken breasts. They cook evenly and stay moist. You can also use chicken thighs for a richer flavor. They are juicier than breasts. Just make sure to adjust the cooking time as thighs may take longer. To get that perfect crunch, use panko breadcrumbs. They are light and crispy. You can mix them with Parmesan cheese for added flavor. Make sure to press the breadcrumbs firmly onto the chicken. This helps them stick better and creates a golden crust when cooked. If you bake the chicken, spray it with a little olive oil to enhance crispiness. Making your own Caesar dressing is simple and tasty. Combine mayonnaise, lemon juice, garlic, Worcestershire sauce, and anchovy paste for a classic taste. Adjust the ingredients to your liking. Add some grated Parmesan for extra creaminess. If you want a lighter version, you can use Greek yogurt instead of mayo. This keeps the taste but cuts down on calories. Pro Tips Marinate for Maximum Flavor: The longer you marinate the chicken, the more flavorful it will be. Aim for at least 2 hours, or overnight for the best results. Choose the Right Breadcrumbs: Using panko breadcrumbs will give your chicken an extra crunch, enhancing the texture of your sandwich. Perfectly Crispy Chicken: If baking, ensure the chicken is spaced out on the baking sheet to allow for even cooking and crispiness. Garnish with Style: Finish your sandwich with a sprinkle of freshly cracked black pepper and extra Parmesan shavings for a gourmet touch. {{image_4}} You can make a tasty Chicken Caesar wrap if you want something lighter. Start by using a large tortilla instead of a bun. Spread Caesar dressing on the tortilla. Add chopped romaine, crispy chicken, and a sprinkle of Parmesan. Roll it up tightly. This wrap is fun to eat and easy to take on the go. For a meat-free option, use grilled veggies or chickpeas. Grilled eggplant and zucchini are great choices. You can also use roasted chickpeas for extra crunch. Layer these on your bun with romaine and Caesar dressing. This gives you the same great taste without the chicken. You can switch the Caesar dressing for other sauces. Try a ranch dressing for a creamy twist. A tangy balsamic vinaigrette can add a fresh touch. You could also use a spicy aioli for some heat. Each option brings a new flavor that can change your sandwich experience. To store leftover Chicken Caesar sandwiches, wrap them tightly in plastic wrap or foil. Place them in an airtight container. This keeps them fresh for up to two days in the fridge. If you have extra chicken or dressing, store them separately to avoid sogginess. To reheat your sandwich, use an oven or toaster oven. Preheat the oven to 350°F (175°C). Remove the sandwich from any wrap and place it on a baking sheet. Heat for about 10 minutes. This helps keep the chicken crispy. You can also microwave it, but the bread may get soft. Heat in 30-second intervals until warm. If you want to freeze parts of the sandwich, it’s best to freeze the chicken and buns separately. Allow the cooked chicken to cool completely. Wrap it tightly in plastic wrap, then in foil. Store in a freezer-safe bag. Buns can be frozen in their original packaging or in a freezer-safe bag. They last for up to three months. When ready to use, thaw overnight in the fridge before reheating. The Chicken Caesar Sandwich comes from the classic Caesar salad. The salad was created by Caesar Cardini, an Italian chef, in the 1920s. He made it in Tijuana, Mexico. The sandwich adds crispy chicken to the salad for a hearty meal. This twist became popular in many places. Yes, you can make this recipe gluten-free! Use gluten-free breadcrumbs instead of regular ones. Make sure your sandwich buns are also gluten-free. Many brands offer tasty options. This way, everyone can enjoy a delicious Chicken Caesar Sandwich. You can store the prepared sandwiches for up to two days. Wrap them tightly in plastic wrap or foil. Keep them in the fridge to keep them fresh. The bread may get soggy, so it's best to eat them soon. There are many great sides to serve with a Chicken Caesar Sandwich. Here are some ideas: - Crispy potato chips - Fresh fruit salad - A simple green salad - Veggie sticks with dip - Sweet potato fries These sides add color and flavor to your meal. Enjoy! This blog post covered everything you need for a Chicken Caesar sandwich. We looked at the essential ingredients, step-by-step cooking instructions, and tasty variations. Tips for perfecting your sandwich and storing leftovers will help you keep it fresh and delicious. Remember, you can easily modify this recipe to suit your taste. Enjoy making new flavors and sharing them with friends. Now, get cooking and savor every bite!

Chicken Caesar Sandwich Flavorful and Easy Recipe

If you love a tasty meal that’s quick to make, you’ll adore this Chicken Caesar Sandwich! In this post, I’ll

To make these chicken cutlets, gather these main ingredients: - 2 boneless, skinless chicken breasts - 1/4 cup brown sugar - 2 tablespoons soy sauce - 1 tablespoon olive oil - 2 cloves garlic, minced - 1 teaspoon fresh ginger, grated - 1/2 teaspoon freshly cracked black pepper - 1/2 teaspoon sea salt - 1 tablespoon apple cider vinegar These ingredients come together to create tender, sweet, and savory cutlets. The mix of brown sugar and soy sauce creates a great balance. The brown sugar adds sweetness, while soy sauce gives a rich, salty taste. Garlic and ginger enhance the flavors, making each bite exciting. Black pepper and sea salt add depth to the marinade. The apple cider vinegar brings a tangy note that brightens the dish. For a fresh finish, add chopped green onions. They provide a nice crunch and color. You could also use sesame seeds for a nutty touch. If you want more zing, a squeeze of lime or lemon juice works well too. These garnishes make your dish more appealing and tasty. {{ingredient_image_2}} Start by taking the chicken breasts. Place them between two sheets of plastic wrap. Use a meat mallet or a rolling pin to gently pound the chicken. Aim for an even thickness of about 1/2 inch. This step helps the chicken cook evenly and stay tender. Grab a small mixing bowl. Add the following ingredients: - 1/4 cup brown sugar - 2 tablespoons soy sauce - 1 tablespoon olive oil - 2 cloves garlic, minced - 1 teaspoon fresh ginger, grated - 1/2 teaspoon freshly cracked black pepper - 1/2 teaspoon sea salt - 1 tablespoon apple cider vinegar Whisk these ingredients together until smooth. This marinade packs a lot of flavor and doubles as a sauce for the chicken. Take the pounded chicken cutlets and place them in a resealable plastic bag or a shallow dish. Pour the marinade over the chicken, ensuring it’s well-coated. Seal the bag or cover the dish with plastic wrap. Let it chill in the fridge for at least 15 minutes. For better flavor, let it marinate for up to 1 hour. Next, heat a large skillet over medium-high heat. Add a drizzle of olive oil. When the skillet is hot, take the chicken out of the marinade. Let the excess marinade drip off. Carefully place the chicken cutlets in the pan. Cook for about 3-4 minutes on each side. Your goal is a golden brown color and an internal temperature of 165°F (75°C). Once cooked, transfer the chicken to a plate. Let it rest for about one minute. This helps keep the chicken juicy. If you want to enhance the sauce, pour any remaining marinade into the skillet. Stir it constantly for about a minute until it thickens. Slice the chicken cutlets into strips. Drizzle the sauce over them. Garnish with chopped green onions for a fresh touch. Enjoy your flavorful dish! To get tender chicken cutlets, start by pounding the chicken. Place the breasts between plastic wrap. Use a meat mallet or rolling pin to gently flatten them. Aim for about 1/2 inch thickness. This step helps the chicken cook evenly. It also keeps the meat juicy and soft. You can change the marinade to fit your taste. Try adding lime juice for a zesty kick. You can also mix in honey for extra sweetness. For a spicy twist, add red pepper flakes. Experimenting with flavors makes cooking fun and personal. Cook the chicken in a hot skillet. Use medium-high heat and a little olive oil. This helps to brown the chicken nicely. Cook for about 3-4 minutes on each side. Make sure the chicken reaches 165°F (75°C) inside. Let it rest for a minute after cooking. This makes the chicken juicy and flavorful. Pro Tips Even Thickness: Pounding the chicken to an even thickness ensures that it cooks evenly, resulting in tender and juicy cutlets. Marinate for Flavor: For a deeper flavor, marinate the chicken for up to 1 hour. The longer it sits, the more the flavors develop. Resting Time: Allowing the chicken to rest for a minute after cooking helps retain its juices, making each bite more succulent. Sauce Enhancement: If you like a thicker sauce, simmer the remaining marinade in the skillet for an extra minute before serving. {{image_4}} You can swap chicken for other proteins. Try turkey cutlets or pork chops. These meats will soak up the marinade well. They will also give the dish a new taste. If you prefer seafood, use shrimp or firm fish like salmon. Cook shrimp for just a few minutes until they turn pink. Salmon fillets can be cooked similarly, but check for doneness often. For a vegetarian dish, use tofu or tempeh. Press the tofu to remove extra moisture. Cut it into thick slices for even cooking. Marinate the tofu just like the chicken. Cook it in the skillet until it's golden brown. If you want a vegan option, use soy sauce or coconut aminos. Replace honey with maple syrup for sweetness. These swaps keep the dish flavorful and satisfying. You can change the flavor with different spices and sauces. Try adding chili flakes for heat. A splash of lime juice can give a fresh twist. For an Asian flair, add sesame oil to the marinade. You can also mix in herbs like cilantro or basil for a bright taste. Experimenting with flavors will keep your meal exciting and new every time. After cooking, let the chicken cutlets cool down. Place them in an airtight container. Proper storage helps keep the chicken fresh. Store in the fridge for up to three days. Reheat them gently to enjoy the flavors again. To freeze, first cool the chicken cutlets completely. Wrap each cutlet in plastic wrap. Then, place them in a freezer-safe bag. Remove as much air as possible to avoid freezer burn. The cutlets can last up to three months in the freezer. Thaw overnight in the fridge before reheating. For the best texture, reheat the chicken in a skillet. Heat a splash of oil over medium heat. Add the cutlets and cook for about 3-4 minutes on each side. This method retains moisture and keeps them tender. You can also use an oven set at 350°F (175°C) for about 10-15 minutes. This ensures even heating throughout. You should marinate the chicken for at least 15 minutes. This allows the flavors to soak in. For the best taste, try marinating for up to 1 hour. The longer time helps make the chicken even more tasty and tender. Yes, you can use different types of sugar. White sugar or coconut sugar works well. Each type brings its own unique flavor. However, brown sugar gives the best caramel notes, making the chicken sweet and savory. You can serve these chicken cutlets with many sides. Steamed rice pairs nicely, soaking up the sauce. A crisp salad adds a fresh crunch. You might also try roasted veggies for a colorful plate. Each option complements the chicken well, making a full meal. You learned how to make Minute Brown Sugar Chicken Cutlets with key ingredients, flavors, and tips. Remember to marinate the chicken well and choose cooking methods for the best taste. Explore variations like using other proteins or plant-based options. After cooking, store leftovers properly for later meals. This dish is versatile and easy to adapt. Enjoy your cooking adventure!

Minute Brown Sugar Chicken Cutlets Flavorful Delight

Are you ready to impress your taste buds without spending hours in the kitchen? My Minute Brown Sugar Chicken Cutlets

- 1 cup unsalted butter (2 sticks), melted - 2 cups granulated sugar - 4 large eggs, at room temperature - 1 teaspoon vanilla extract - 1 cup all-purpose flour - 1 cup unsweetened cocoa powder - 1/2 teaspoon baking powder - 1/4 teaspoon fine sea salt The brownie layer is the heart of this dessert. It gives a rich, chocolatey base. The butter melts and blends well with sugar. Eggs add moisture and a fluffy texture. The cocoa powder brings deep chocolate flavor. Make sure to sift the dry ingredients to avoid lumps. - 16 oz (2 packages) cream cheese, softened to room temperature - 1 cup granulated sugar - 3 large eggs, at room temperature - 1 teaspoon vanilla extract - 1/2 cup sour cream The cheesecake layer is creamy and smooth. Softened cream cheese makes mixing easy. The sugar sweetens it just right. Eggs help set the filling. Sour cream adds tanginess, which balances the sweetness. - 1 cup granulated sugar - 6 tablespoons unsalted butter, cut into pieces - 1/2 cup heavy cream, at room temperature - 1/4 teaspoon fine sea salt The caramel sauce adds a sweet, gooey finish. Sugar melts into a golden syrup. Butter adds richness, while heavy cream makes it silky. Salt enhances the flavors and cuts the sweetness. Be careful when making caramel; it can get very hot! {{ingredient_image_2}} Start by preheating your oven to 350°F (175°C). This step is key for even baking. Next, grab a 9-inch springform pan. Lightly grease it and add parchment paper at the bottom. This helps with easy removal after baking. In a medium saucepan, melt 1 cup of unsalted butter over low heat. Stir it until fully liquid. Remove the pan from heat. Whisk in 2 cups of granulated sugar until mixed well. Now add 4 large eggs, one by one, mixing after each. Don’t forget the 1 teaspoon of vanilla extract at this point. In another bowl, sift together 1 cup of all-purpose flour, 1 cup of cocoa powder, 1/2 teaspoon baking powder, and 1/4 teaspoon of fine sea salt. Gradually mix this dry blend into your wet ingredients. Stir until everything is smooth. Pour the brownie batter into your prepared pan and spread it evenly. Place the pan in your preheated oven. Bake the brownie layer for 20 minutes. After baking, take it out and let it cool slightly. This cooling time is important for the next step. In a large bowl, beat 16 oz of softened cream cheese with an electric mixer. Mix on medium speed until it’s creamy and smooth. Gradually add 1 cup of granulated sugar, mixing well each time. Now, add 3 large eggs, one at a time, mixing on low speed until combined. Finally, fold in 1 teaspoon of vanilla extract and 1/2 cup of sour cream. Mix until smooth. Carefully pour the cheesecake batter over the cooled brownie layer. Smooth the top with a spatula to make it even. Now, put the cheesecake in the oven. Bake for 45 to 50 minutes. The edges should be set, but the center can still jiggle a bit. After baking, turn off the oven. Leave the cheesecake inside with the door slightly ajar for 1 hour. This helps prevent cracks. After the hour is up, transfer the cheesecake to the refrigerator. Chill it for at least 4 hours, or better yet, overnight. This sets the cheesecake perfectly. In a medium saucepan over medium heat, add 1 cup of granulated sugar. Stir constantly until it melts into a golden-brown liquid. Carefully add 6 tablespoons of cut butter, stirring until it melts. Gradually pour in 1/2 cup of room-temperature heavy cream while whisking. Expect some bubbling! Stir in 1/4 teaspoon of fine sea salt. Let the caramel cool slightly. Once chilled, remove the cheesecake from the springform pan. Drizzle it with the caramel sauce. Now, slice and serve. Enjoy this delicious treat with friends or family! To get a great brownie texture, start with melted butter. It helps create a fudgy base. Mix the sugar in until it's smooth. Be careful not to overmix the batter after adding flour. This keeps the brownies soft. Bake them just until they are set but still slightly gooey. Let them cool before adding the cheesecake layer. This helps the brownie hold its shape. Cheesecakes can crack if they bake too long. Always check for a gentle jiggle in the center. After baking, turn off the oven and leave the door ajar. This helps the cheesecake cool slowly. Also, let it chill in the fridge for at least four hours. A longer chill time gives it a better texture. Making caramel sauce is easy. Start with sugar in a saucepan over medium heat. Stir constantly until it melts. Once it’s golden brown, add butter. Stir until melted, then pour in heavy cream slowly. It will bubble up, so be careful! Add salt for flavor. Let it cool before drizzling on your cheesecake. Homemade caramel sauce adds a rich, sweet touch. Pro Tips Use Room Temperature Ingredients: Make sure your cream cheese and eggs are at room temperature before mixing. This helps achieve a smoother, creamier cheesecake texture. Don’t Overmix: When adding the eggs to the cheesecake layer, mix just until combined. Overmixing can create air bubbles, leading to cracks in the cheesecake. Cool Gradually: After baking, leave the cheesecake in the oven with the door ajar for an hour. This gradual cooling process helps prevent cracks on the surface. Chill Overnight: For the best flavor and texture, chill the cheesecake overnight before serving. It allows the flavors to meld beautifully and sets the cheesecake perfectly. {{image_4}} You can add nuts to your caramel brownie cheesecake for a fun crunch. Pecans or walnuts work well. Just sprinkle them on top of the brownie layer before adding the cheesecake mix. You can also mix nuts into the brownie batter. This gives the dessert a richer flavor and a delightful texture. For a chocolate chip twist, add mini chocolate chips to the brownie layer. You can stir in about one cup of mini chips after mixing the batter. This will create gooey pockets of chocolate throughout your cheesecake. The extra chocolate pairs perfectly with the caramel sauce. You can change the flavors based on the season. For a pumpkin version, add one cup of pumpkin puree and some pumpkin spice to the cheesecake layer. If you want a peppermint twist, mix in a teaspoon of peppermint extract. Top with crushed candy canes for a festive touch. These variations keep the dessert exciting all year long! To keep your caramel brownie cheesecake fresh, cover it tightly. Use plastic wrap or foil. Place it in the fridge. It can last up to five days. Ensure the cheesecake is cool before wrapping. This keeps it from getting soggy. Freezing this cheesecake is easy. Slice the cheesecake into pieces first. Wrap each slice in plastic wrap. Then place them in a freezer bag. Make sure to remove air to prevent freezer burn. It can stay in the freezer for up to three months. When ready to eat, thaw overnight in the fridge. Store your caramel sauce in an airtight container. Let it cool to room temperature first. Then, seal it tightly and refrigerate. It can last for up to two weeks in the fridge. If it thickens, warm it gently in the microwave. Stir well before drizzling it over your cheesecake. Yes, you can use store-bought caramel sauce. It saves time and tastes great. Just drizzle it over the cheesecake before serving. If you want a homemade touch, try making your own caramel sauce for extra flavor. Check the edges of the cheesecake. They should be set, while the center will have a slight jiggle. This means it will firm up as it cools. Remember, the cheesecake continues to cook while it cools in the oven. You can use plain yogurt or cream cheese as a substitute for sour cream. Both will provide a creamy texture and tangy flavor. If you want a dairy-free option, try coconut cream for a rich taste. You can keep the cheesecake in the fridge for about 5 days. Make sure to cover it well to prevent it from drying out. It tastes even better after chilling, as the flavors meld together. Yes, you can make this recipe gluten-free. Simply replace all-purpose flour with a gluten-free flour blend. Ensure other ingredients, like baking powder, are also gluten-free for best results. Many toppings go well with this cheesecake. Try whipped cream, chocolate shavings, or crushed nuts. Fresh berries add a nice tartness, while extra caramel sauce gives a sweet touch. Choose your favorites for a delicious finish! You learned about making a delicious caramel brownie cheesecake in this post. We covered key ingredients like brownie mix, cream cheese, and caramel sauce. I shared step-by-step instructions to guide you through making this treat. Tips for great texture and cracking prevention can help. Feel free to try variations with nuts or seasonal flavors. Remember, storing leftovers correctly keeps them fresh. Enjoy this dessert and impress your friends and family. Happy baking!

Caramel Brownie Cheesecake Delightful Dessert Recipe

Are you ready to indulge in a rich and creamy treat? This Caramel Brownie Cheesecake is a delightful blend of

- 2 boneless, skinless chicken breasts, thinly sliced - 4 cloves garlic, minced - 1 cup broccoli florets - 1 bell pepper (any color), sliced - 1 medium carrot, julienned - 1 cup snap peas, trimmed - 3 tablespoons low-sodium soy sauce - 1 tablespoon honey - 1 teaspoon freshly grated ginger - Salt and freshly ground black pepper Gathering the right ingredients is key to a great stir fry. I love using fresh, vibrant produce, as it adds life to the dish. Start with two boneless, skinless chicken breasts. Slice them thinly for even cooking. Next, garlic is a must. Using four cloves of minced garlic gives a strong flavor. Garlic not only adds taste but also has health benefits. Broccoli florets add a nice crunch and bright color. For your veggies, pick a bell pepper. Any color works, but I prefer red for sweetness. A medium carrot, julienned, adds a touch of sweetness and crunch. Snap peas give a crisp bite that everyone loves. Now, let's talk sauce. Three tablespoons of low-sodium soy sauce balance the flavors well. One tablespoon of honey adds a hint of sweetness. Freshly grated ginger gives a warm, spicy note. Don’t forget salt and black pepper for seasoning. With these ingredients, you can create a tasty and healthy meal. Each part plays a role in making the stir fry delicious. Enjoy the cooking process and the tasty results! {{ingredient_image_2}} First, heat 2 tablespoons of olive oil in a large skillet or wok over medium-high heat. Once the oil shimmers, add 2 thinly sliced boneless chicken breasts. Season the chicken with salt and freshly ground black pepper. Cook the chicken for 5 to 7 minutes until it is browned and fully cooked. After cooking, transfer the chicken to a plate and set it aside for later. Next, in the same skillet, add the remaining tablespoon of olive oil. Then, add 4 cloves of minced garlic and 1 teaspoon of freshly grated ginger. Sauté these for about 30 seconds, stirring constantly. You want them to become fragrant but be careful not to burn them. Now it's time to add the veggies! Toss in 1 cup of broccoli florets, 1 sliced bell pepper, 1 julienned medium carrot, and 1 cup of trimmed snap peas. Stir-fry these vibrant vegetables for 4 to 5 minutes. You want them to look bright and be tender-crisp. After the vegetables are cooked, return the chicken to the skillet. In a small bowl, mix together 3 tablespoons of low-sodium soy sauce and 1 tablespoon of honey until smooth. Pour this sauce mixture over the chicken and veggies. Stir well to coat everything evenly. Continue to cook the stir-fry for another 2 to 3 minutes. This allows the sauce to thicken and mingle with the ingredients. Once done, serve the stir-fry over fluffy cooked jasmine rice or quinoa. For a finishing touch, garnish with toasted sesame seeds and finely sliced green onions. Enjoy your colorful and healthy meal! For garlic chicken veggie stir fry, use high heat. This method helps to keep the chicken juicy and the veggies crisp. Heat your skillet or wok until it shimmers. Then, add the chicken and let it sear without stirring for a minute. This gives it a nice color and flavor. Do not overcook your vegetables! They should remain vibrant and tender-crisp. Stir-fry them for just a few minutes. This will keep their nutrients and taste fresh. You can boost the flavor with spices. Try adding red pepper flakes for heat. A dash of black sesame seeds adds nutty notes. Fresh herbs like cilantro or basil can brighten the dish. Choose fresh ingredients whenever possible. Fresh garlic and ginger give a much stronger flavor than dried. If you use dried, cut the amount in half. It’s less potent but still adds depth. Presentation is key! Top your stir fry with toasted sesame seeds for crunch. Thinly sliced green onions add a pop of color. You can also sprinkle some chopped cilantro for freshness. To make it look like a restaurant dish, serve it on a white plate. This contrast highlights the vibrant colors. Add a drizzle of soy sauce or honey on top for a glossy finish. Pro Tips Marinate for Extra Flavor: Consider marinating the chicken in soy sauce, garlic, and ginger for at least 30 minutes before cooking to enhance its flavor. Use Fresh Vegetables: Opt for fresh, seasonal vegetables for the best taste and texture. Frozen vegetables can become mushy when stir-fried. High Heat is Key: Make sure your skillet or wok is hot before adding the ingredients. This helps to sear the chicken and maintain the crispness of the vegetables. Customize Your Sauce: Feel free to tweak the sauce with additional ingredients like sesame oil or chili flakes for an extra kick. {{image_4}} You can easily switch the chicken for shrimp or tofu. Shrimp cooks fast and adds a sweet taste. Tofu is great for a plant-based meal and soaks up flavor well. If you want other meats, try beef or pork. Both add a hearty twist to the dish. Feel free to customize the stir fry with seasonal vegetables. Think about what is fresh at the market. You might try zucchini, asparagus, or mushrooms. Adding leafy greens like spinach or kale gives it a healthy boost. These greens cook quickly and add nice color. Experiment with different sauces to find your favorite flavor. Teriyaki sauce gives a sweet and savory taste. Oyster sauce adds depth and richness. If you want a vegan option, swap honey for agave syrup or maple syrup. This keeps the sauce sweet without using animal products. To store leftovers, let the stir-fry cool down first. Place it in a tight container. Make sure to seal it well. This keeps moisture in and air out. Store it in the fridge for up to three days. If you want, you can keep the rice or quinoa separate from the stir-fry. This helps to keep the rice fluffy. If you have extra stir-fry, freezing is a great option. Pack it in a freezer-safe container or bag. Remove as much air as you can before sealing. Label the bag with the date. You can freeze it for up to three months. When you want to eat it, just thaw it in the fridge overnight before reheating. To reheat the stir-fry, use a skillet or a microwave. If using a skillet, heat it over medium heat. Add a splash of water or broth to keep it moist. Stir often until it’s warmed through. In the microwave, use a microwave-safe bowl. Cover it loosely with a lid or a paper towel. Heat it in short bursts, stirring in between. This way, you keep the veggies crisp and the chicken juicy. Garlic chicken veggie stir fry lasts for about 3 to 4 days in the fridge. Store it in an airtight container. This keeps the food fresh and safe. If you notice any strange smell or change in color, it’s best to toss it out. Yes, you can make this recipe ahead of time. Cook the stir fry and let it cool. Then, place it in the fridge for later. You can also prep the ingredients the night before. Slice the chicken and chop your veggies. This makes cooking easier and faster on a busy day. Garlic chicken veggie stir fry pairs well with a few sides. Consider serving it over jasmine rice or quinoa. You can also add a side salad for some crunch. Steamed rice noodles are another tasty option. For a flavorful twist, try it with some fresh spring rolls. This blog post explored a simple and tasty garlic chicken veggie stir-fry. You learned about key ingredients, step-by-step cooking instructions, and helpful tips to enhance your dish. We discussed variations like protein substitutes and alternative sauces to keep your meals exciting. When you try this recipe, you’ll create a flavorful dish that is healthy and satisfying. Enjoy customizing it to meet your tastes. Happy cooking!

Garlic Chicken Veggie Stir Fry Flavorful and Easy Meal

Looking for a quick and tasty dinner idea? Try my Garlic Chicken Veggie Stir Fry! It’s packed with fresh veggies,

Older posts
Newer posts
← Previous Page1 … Page113 Page114 Page115 Next →

dsad

© 2025 recipesstation • Built with GeneratePress

Our Policies

  • Copyright Policy
  • Cookie Policy
  • GDPR Policy
  • Privacy Policy
  • Disclaimer
  • Terms Of Use

More Information

  • Home
  • About
  • Contact
  • Appetizers
  • Dessert
  • Dinner
  • Drinks
©2025, recipesstation About Back To Top