Skip to content
DisclaimerTerms Of UseGDPR PolicyCookie Policy

recipesstation

  • Home
  • Drinks
  • Appetizers
  • Dinner
  • Dessert
  • About
  • Contact
  • Privacy Policy
DisclaimerTerms Of UseGDPR PolicyCookie Policy

Emily

- 2 cups all-purpose flour - 1 cup granulated sugar - 1 tablespoon baking powder - 1 teaspoon ground cinnamon - 1/2 teaspoon salt - 1/2 cup unsalted butter, melted - 1 cup buttermilk - 2 large eggs - 1 teaspoon vanilla extract - 1 medium apple, peeled and finely chopped - 1 cup caramel sauce - Additional cinnamon sugar for coating These ingredients come together to create a delightful treat. The flour serves as the base, while sugar adds sweetness. Baking powder makes the donuts rise, and cinnamon gives a warm flavor. Salt balances the sweetness, and melted butter adds richness. Buttermilk keeps the donuts moist, and eggs give structure. The vanilla extract enhances the taste, while the apple adds freshness. Caramel sauce is the star that ties everything together. Lastly, the cinnamon sugar coating adds a sweet crunch. You can find the full recipe in the next section. Grab your ingredients, and let’s make these delicious caramel apple donuts! 1. First, preheat your oven to 350°F (175°C). This step is key for perfect donuts. 2. Next, grease your donut pan well with non-stick spray or butter. This ensures easy removal later. 3. In a large bowl, mix the dry ingredients: flour, sugar, baking powder, cinnamon, and salt. Stir well to combine. 4. In another bowl, whisk together the wet ingredients. Blend melted butter, buttermilk, eggs, and vanilla until smooth. 1. Now, carefully pour the wet mixture into the dry ingredients. Stir gently until just combined. A few lumps are okay! 2. Fold in the finely chopped apple. This adds nice flavor and texture to the donuts. 1. To fill the donut cavities, use a piping bag or a zip-top bag with a snipped corner. Fill each cavity about two-thirds full. 2. Place the pan in the preheated oven and bake for 10-12 minutes. Check with a toothpick to ensure they are done. 3. After baking, let the donuts cool in the pan for about 5 minutes. Then, move them to a wire rack to cool completely. 4. Once cool, dip each donut in warm caramel sauce. Let the excess drip off for a perfect coating. 5. Finally, roll the donuts in cinnamon sugar for a sweet touch. Enjoy your delicious caramel apple donuts! For the full recipe, check the complete ingredient and instruction list. - Best practices for measuring flour: Always use a spoon to scoop flour into your measuring cup. Do not pack it down. Level off with a knife for accuracy. This ensures you have the right amount for your donuts. - How to achieve fluffy donuts: Mix your wet and dry ingredients gently. Overmixing can create dense donuts. Aim for just combined, with a few lumps still visible. This keeps them light and airy. - Tips for dipping and coating with caramel: Warm the caramel sauce slightly. This helps it stick better to the donuts. Dip each donut fully, then let any extra drip back into the bowl. - Perfecting the cinnamon sugar finish: Prepare your cinnamon sugar mix in advance. After coating in caramel, roll the donuts in the cinnamon sugar while they are still warm. This helps the sugar adhere nicely. - Presentation tips for serving donuts: Use a bright, fun platter to show off your donuts. You can drizzle extra caramel on top for a lovely look. Adding thin slices of apple or chopped nuts around the donuts enhances the display. - Ideal beverages to pair with caramel apple donuts: Enjoy these donuts with hot apple cider or a warm cup of coffee. The flavors blend well and make for a cozy snack time. {{image_4}} You can add nuts or seeds for extra texture. Chopped walnuts or pecans work well. They give a nice crunch. You can also try seeds like sunflower or pumpkin. These add a fun twist. If you want a fruit twist, consider using pears or peaches. They blend well with the caramel. You can even mix in dried fruits like cranberries for a pop of color. Each choice gives your donuts a unique taste. For gluten-free options, swap all-purpose flour with a gluten-free blend. Many blends work well for baking. Just ensure it includes a binding agent like xanthan gum. If you need vegan alternatives, you can use plant-based butter instead of regular butter. Replace the buttermilk with almond or soy milk mixed with a bit of vinegar. For eggs, use flaxseed meal or applesauce. These substitutes keep your donuts delicious and friendly for all diets. For the Full Recipe, refer to the main article. To keep your caramel apple donuts fresh, store them at room temperature. Use an airtight container to block out air. This helps maintain their soft texture. Make sure to eat them within two days for the best taste. If you plan to keep them longer, consider freezing instead. Freezing is a great option for longer storage. Place the cooled donuts in a single layer on a baking sheet. Freeze them for about an hour. Once frozen, wrap each donut in plastic wrap. Then, place the wrapped donuts in a freezer-safe bag. This method helps prevent freezer burn. Donuts can last up to three months in the freezer. To enjoy your caramel apple donuts again, start by letting them thaw at room temperature. After they thaw, preheat your oven to 350°F (175°C). Place the donuts on a baking sheet. Heat them for about 5-10 minutes. This step helps regain their softness. If you want a warm caramel sauce, gently reheat it in a microwave or on the stove. Drizzle it over the donuts before serving for that fresh-baked flavor. Can I use a different type of apple? Yes! You can use any apple you like. Sweet apples like Fuji or Honeycrisp work well. Tart apples, like Granny Smith, add a nice balance to the sweetness. How do I make homemade caramel sauce? To make homemade caramel sauce, melt 1 cup of sugar in a saucepan over medium heat. Stir it until it turns a golden brown. Then, add 1/2 cup of heavy cream and stir until smooth. Be careful, as it can bubble up! How long do caramel apple donuts last? Caramel apple donuts stay fresh for about 2 days at room temperature. If you want them to last longer, store them in the fridge for up to a week. Can I make the batter ahead of time? Yes! You can mix the batter and store it in the fridge for up to 24 hours. Just stir it gently before using, as it may thicken a bit. What to do if the donuts are too dry? If your donuts turn out dry, try adding a bit more buttermilk next time. Also, avoid overmixing the batter. This helps keep them moist and fluffy. How to fix a caramel coating that won’t stick? If the caramel isn't sticking, make sure your donuts are warm. Warm donuts help the caramel adhere better. You can also try dipping them again in slightly heated caramel sauce. Best bakeries or stores that sell caramel apple donuts Look for caramel apple donuts at local bakeries or farmers' markets. Many grocery stores also carry them in the fall. Check out bakeries known for seasonal treats; they often have the best options! In this blog post, I shared a simple recipe for caramel apple donuts. We covered ingredients, step-by-step instructions, and helpful tips for perfect baking. You learned about flavor and dietary variations and how to store your donuts. Remember, baking can be fun and creative. Each donut can be a tasty treat for friends and family. Enjoy experimenting with this recipe, and make it your own! These donuts are sure to delight everyone who tries them. Happy baking!

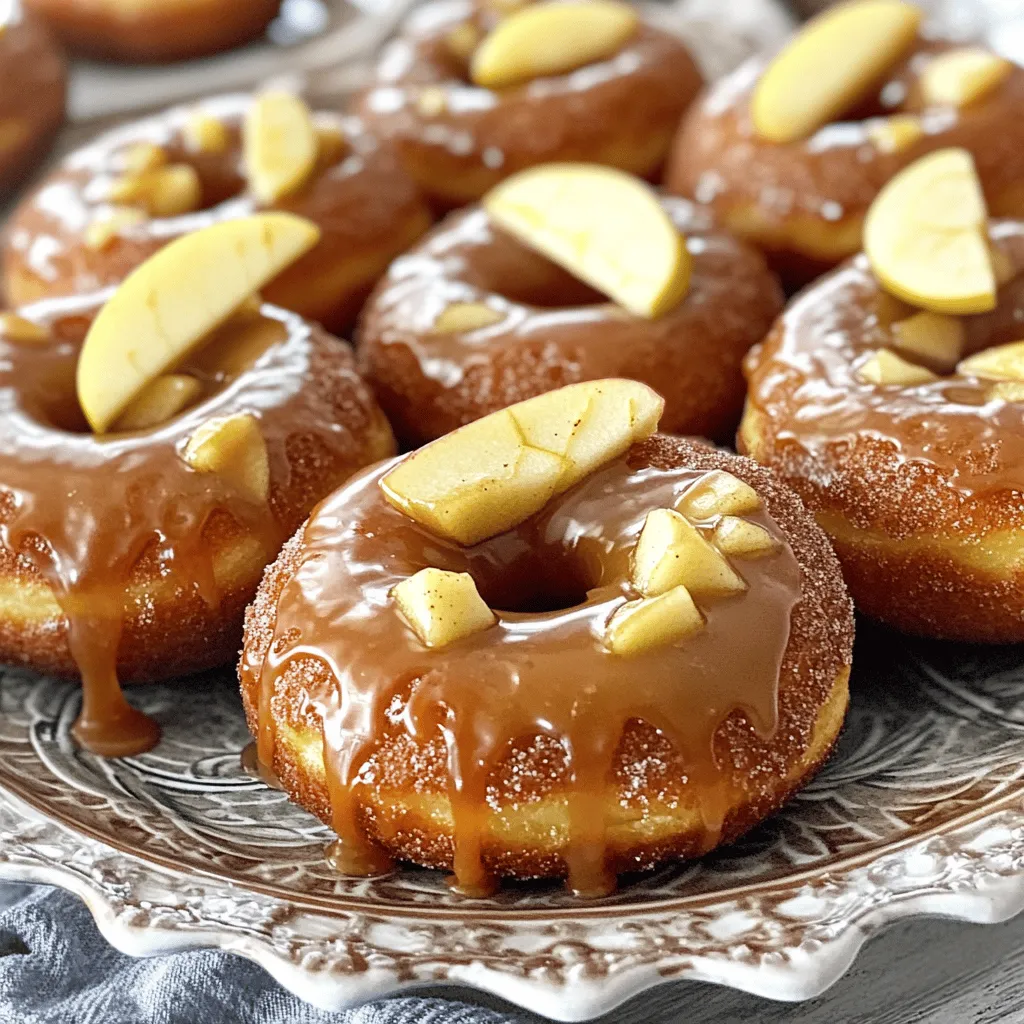
Caramel Apple Donuts Irresistible Fall Dessert

Fall is here, and that means it’s time for warm treats! Imagine biting into a soft donut, bursting with the
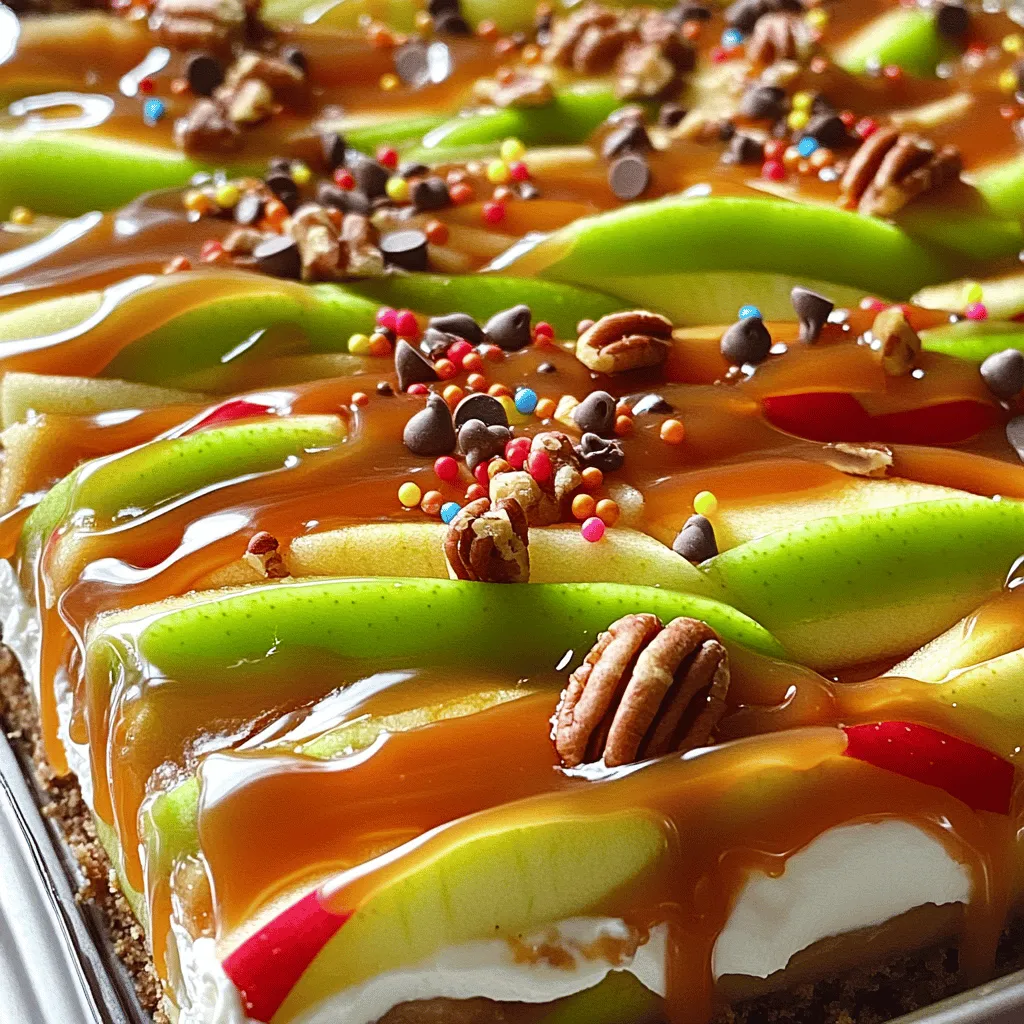
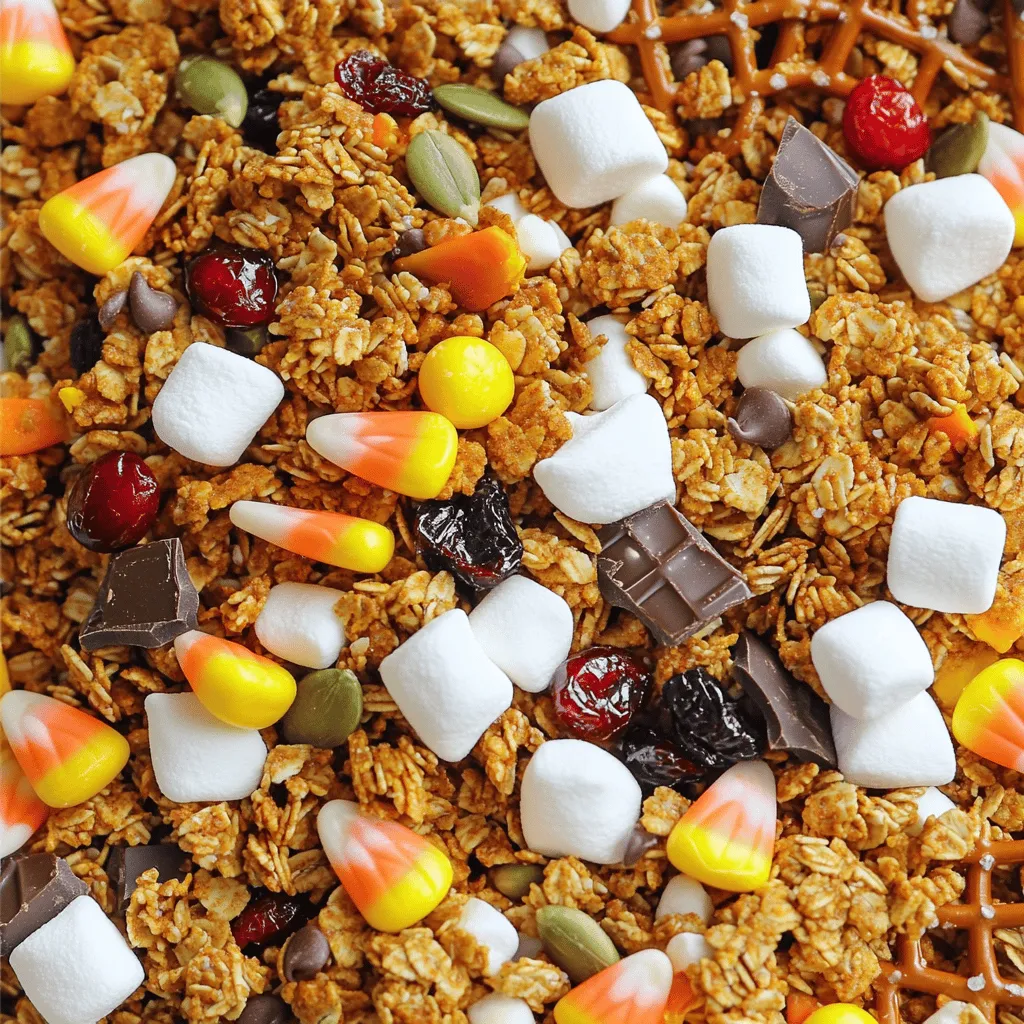
- 2 cups apple cinnamon cereal - 1 cup pretzel sticks - 1 cup mixed nuts - 1 cup popcorn, freshly popped - 1 cup caramel sauce - ½ teaspoon ground cinnamon - ½ teaspoon sea salt - 1 cup diced dried apples - ½ cup mini chocolate chips (optional) Gathering these ingredients is the first step to making this tasty treat. Each component plays a key role in creating the perfect blend of flavors and textures. The apple cinnamon cereal adds a sweet and spiced crunch. Pretzel sticks bring a salty bite, while mixed nuts offer a dose of healthy fats and protein. Freshly popped popcorn contributes a light and airy feel. The caramel sauce binds everything together, adding a rich sweetness. Ground cinnamon and sea salt enhance the flavors, making each bite memorable. Diced dried apples add a chewy texture, reminiscent of fresh apples. If you want to make it even sweeter, consider adding mini chocolate chips. They melt slightly and provide a delightful surprise in each handful. This mix is perfect for sharing, or for keeping all to yourself! For the complete recipe, see the Full Recipe section. - Set oven to 200°F (95°C) - Prepare for baking the snack mix First, you need to preheat your oven. Setting it to 200°F (95°C) will give your snack mix a slow, gentle bake. This low heat helps the caramel coat your mix nicely without burning it. - Combine all dry ingredients in a large mixing bowl - Drizzle caramel sauce evenly over the mix Now, grab a large mixing bowl and combine the apple cinnamon cereal, pretzel sticks, mixed nuts, freshly popped popcorn, and diced dried apples. Stir them gently so everything mixes well. Next, drizzle the caramel sauce over the mix. Make sure each piece gets a bit of that sweet caramel goodness. This step adds that special touch to your treat. - Spread mixture on a lined baking sheet - Bake for 30 minutes, stirring every 10 minutes Line a large baking sheet with parchment paper for easy cleanup. Spread the mixture evenly across the sheet. This helps it bake and caramelize evenly. Place the baking sheet in the preheated oven and bake for 30 minutes. Every 10 minutes, stir the mix to ensure it stays coated and doesn't burn. This stirring is key to achieving that perfect crunch. Once done, let it cool completely on the baking sheet. The caramel hardens as it cools, creating a delightful crunch that makes this snack mix irresistible. For a sweet twist, add mini chocolate chips after it cools. Enjoy your tasty Caramel Apple Snack Mix! For a full recipe, check [Full Recipe]. To get that perfect crunch in your caramel apple snack mix, follow a few simple steps. First, keep your oven heat low. Baking at 200°F (95°C) ensures everything dries gently. This method helps the snack mix stay crisp without burning. Next, stir the mix every 10 minutes while it bakes. This keeps the caramel evenly coated and prevents any soggy spots. To avoid sogginess, let the snack mix cool completely before storing. The caramel firms up as it cools, giving you that delightful crunch. If you notice any soft bits after cooling, simply pop them back in the oven for a few minutes to refresh their texture. Spices can elevate your snack mix. Consider adding a pinch of nutmeg or ginger for warmth. You can also experiment with other flavors like pumpkin spice during fall. For a savory twist, add a sprinkle of garlic powder or even some cheese seasoning. This gives your mix a fun and unique flavor profile. You can create sweet versus savory versions too. Drizzle some chocolate over one batch for a sweet treat. For a savory mix, skip the caramel and add some cayenne pepper for heat. Your options are truly endless! When serving your caramel apple snack mix, choose clear glass jars or colorful bowls. These containers let guests see the vibrant colors and textures of the mix. It makes for a lovely display at parties or family gatherings. For garnish, you can sprinkle some extra nuts or chocolate chips on top. A few slices of dried apples can also add a nice touch. This not only looks appealing but invites people to dig in and enjoy your tasty creation! {{image_4}} To make a lighter version of caramel apple snack mix, you can swap out some ingredients. Look for low-sugar or sugar-free caramel sauce. This option keeps the sweet flavor without too much sugar. You can also try using whole grain cereals or even puffed rice instead of apple cinnamon cereal. These choices give you a crunch without added sugar. For nuts, consider using walnuts or pistachios. They add healthy fats and protein. If you want more crunch, sunflower seeds are a great addition. They are nut-free and perfect for those with allergies. You can change this snack mix for different seasons. For Halloween, add candy corn for a fun touch. Mix in some pumpkin spice to bring in that fall flavor. For Christmas, use red and green M&Ms. You can also add dried cranberries for a festive look. Seasonal fruits like diced pears or fresh apple slices can brighten up the mix. They add a burst of flavor and make it feel fresh. Just make sure to keep the mix dry so it stays crunchy. If you want to boost the crunch, consider adding more ingredients. Granola is a tasty option. It pairs well with the caramel and apples. You can also mix in chocolate-covered pretzels for a sweet and salty flavor. For a fun twist, add popcorn balls or rice cakes. These keep the mix light and airy. If you prefer dark chocolate, swap mini chocolate chips for dark chocolate chunks. This change can add a rich flavor to your snack mix. Try these variations to make your caramel apple snack mix unique! For the full recipe, visit the main section. To keep your caramel apple snack mix fresh, store it in an airtight container. This helps seal in the crunch and flavor. I recommend using glass jars or plastic containers with tight lids. Avoid paper bags as they let air in, which can make the mix stale. You can also line the container with parchment paper for extra protection. When stored correctly, your snack mix will stay fresh for up to one week. After that, you may notice a decline in taste and texture. Signs of spoilage include a soft or chewy texture, loss of flavor, or any unusual odors. If you see any of these signs, it’s best to throw it out. To revive the crunch after storage, spread the mix on a baking sheet. Heat it in the oven at 200°F (95°C) for about 5-10 minutes. This will help restore its crispy texture. You can freeze the snack mix, but keep in mind that some ingredients may not hold up well. If you decide to freeze it, use a vacuum-sealed bag to keep it fresh longer. Yes, you can make this snack mix ahead of time. I recommend preparing it a day or two before you need it. Store it in an airtight container at room temperature. This method keeps it fresh and crunchy. Just remember to let it cool completely before you store it. This step helps maintain the right texture. You can serve this snack mix in many fun ways. Try filling clear glass jars for a cute display. You can also use festive bowls at parties. This mix pairs well with apple cider or hot chocolate. For movie nights, serve it in individual cups for easy snacking. Absolutely! You can swap in other nuts like cashews or pecans. This change can add a different flavor. For cereals, try using vanilla-flavored or even granola. Both options fit the caramel apple theme well. Just keep the apple cinnamon cereal for that sweet touch. Yes, you can make this recipe gluten-free. Just choose gluten-free pretzel sticks and cereal. When picking nuts, ensure they are certified gluten-free. Look for caramel sauce that is gluten-free as well. These steps make it safe for those who avoid gluten. This recipe for caramel apple snack mix is simple and fun. You saw the ingredients needed and learned how to prepare it step by step. Tips helped you make your mix crunchy and tasty. Variations let you customize it for any season. Store it well to keep it fresh. As you enjoy this treat, remember you can change it to fit your taste. Happy snacking!

Caramel Apple Snack Mix Irresistible Crunchy Treat

Get ready to delight your taste buds with my Caramel Apple Snack Mix! This crunchy treat combines sweet and salty

- 1 can refrigerated crescent roll dough - 2 medium apples, peeled, cored, and finely chopped - 1/2 cup packed brown sugar - 1 teaspoon ground cinnamon - 1 tablespoon fresh lemon juice - 1 tablespoon unsalted butter, melted - 1/4 cup chopped walnuts (optional) - 1 egg, beaten (to create an egg wash) - Powdered sugar, for dusting (optional) For the apple pie crescents, I love using crisp apples like Granny Smith or Honeycrisp. They add the right amount of tartness to balance the sweetness. Make sure to peel and chop them finely so they cook evenly. The brown sugar and cinnamon create a warm, cozy flavor. You can adjust these to your taste, adding more cinnamon if you really love that spicy kick. If you want to add more texture, toss in some chopped walnuts. They give a nice crunch. Powdered sugar is optional for dusting but makes the crescents look extra special. You can find the [Full Recipe](#) with all the steps to make these tasty treats! First, preheat your oven to 375°F (190°C). This step is key for getting the crescents nice and golden. Next, grab a baking sheet and line it with parchment paper. This will help keep the crescents from sticking and make cleanup a breeze. In a medium bowl, combine your chopped apples, brown sugar, cinnamon, and melted butter. You can also add a splash of fresh lemon juice for some zing. If you like, toss in chopped walnuts for extra crunch. Mix everything gently until the apple pieces are well coated in that sweet, spiced goodness. Now, carefully unroll the crescent roll dough on a clean surface. You’ll see the perforated edges that make it easy to separate into triangles. Take a spoonful of your apple filling and place it at the wide end of each triangle. Don’t overfill, or the mixture might spill out when baking. Starting from the wide end, roll each triangle tightly over the filling. Be sure to pinch the ends together firmly. This seals in the tasty apple mix. Place each crescent seam-side down on the prepared baking sheet, leaving a little space between them to expand. Using a pastry brush, apply the beaten egg on top of each crescent. This gives them a lovely golden color as they bake. Pop the baking sheet into the preheated oven and bake for about 12 to 15 minutes. You want them puffy and golden brown. After baking, let the crescents cool for a few minutes on the sheet. If you like, dust them lightly with powdered sugar for a sweet touch before serving. Enjoy your Apple Pie Crescents! For the full recipe, check the ingredients and instructions above. To get that flaky texture, handle the crescent dough gently. Don't press it too hard. Keep the dough cold before use. If it warms up, it won’t puff up as well. Roll it out lightly if needed. This helps maintain its texture. You can add more spice to your filling. Try a pinch of nutmeg or allspice for warmth. A splash of orange juice brightens the apples, too. These small tweaks make your apple pie crescents even better. Dust your finished crescents with powdered sugar for a sweet touch. Arrange them on a nice plate to impress your guests. You can also drizzle some caramel sauce on top for extra flair. Serve warm for the best taste! For the full recipe, check out the details above. {{image_4}} You can switch up the apples for other fruits. Pears work well too. They have a sweet flavor that pairs nicely with the spices. You might try peaches for a summer twist. Berries like blueberries or raspberries can add a fun burst of color and taste. Each fruit brings its own charm, so feel free to explore! If you want a vegan version, simple swaps can help. Instead of butter, use coconut oil or vegan butter. Both will keep the richness in your crescents. For the egg wash, you can brush on almond milk or soy milk. This will give your crescents a nice color without using eggs. Get creative with toppings! A drizzle of caramel sauce adds a sweet touch. You could also make a simple icing with powdered sugar and water. This icing can add a nice shine and sweetness. If you want a crunch, sprinkle some chopped nuts on top after baking. These options can make your apple pie crescents even more exciting. To keep your Apple Pie Crescents fresh, store them in an airtight container. Place a piece of parchment paper between layers to prevent sticking. Store them in the fridge for up to three days. If you want to enjoy them later, make sure they cool completely before adding them to the container. You can freeze both uncooked and cooked crescents. To freeze uncooked crescents, prepare them but do not bake. Wrap each one tightly in plastic wrap and place them in a freezer-safe bag. They can last up to two months in the freezer. For cooked crescents, let them cool, then wrap them as well. They also last for about two months. To reheat your crescents and keep them crispy, use the oven. Preheat your oven to 350°F (175°C). Place the crescents on a baking sheet and cover them loosely with foil. This keeps them from getting too brown. Bake for about 10 minutes. For a quicker option, use a toaster oven, but avoid the microwave to keep them crunchy. To stop the crescents from being soggy, I recommend a few easy steps. First, ensure that your apples are not too juicy. Use firm apples and cut them small. You can also drain any excess liquid from the apple mixture. Another tip is to bake the crescents right after you fill them. This helps keep them crisp. Lastly, avoid overfilling the dough. A smaller amount of filling works better. Yes, you can use homemade crescent dough! Making it from scratch can add a personal touch. Just be sure your dough is rolled thin enough for easy handling. You want it to be light and flaky, just like the store-bought kind. Follow your favorite recipe to create a dough that suits your taste. For baking, I love using tart apples. Granny Smith apples are my top choice. They have a nice balance of sweet and sour. Honeycrisp apples are also great for their sweetness and crispness. Other good options include Fuji and Braeburn apples, which hold up well during baking. These varieties give your apple pie crescents a delicious flavor and texture. Apple pie crescents are best enjoyed fresh. However, if you have leftovers, they can last 2 to 3 days in the fridge. Store them in an airtight container to keep them fresh. If you want to keep them longer, consider freezing them. They freeze well for up to 2 months. Just reheat them in the oven to restore their crispiness. For the full recipe, check out the details above. This blog post provided a simple way to make apple pie crescents. We covered the key ingredients, from crescent dough to apples and spices. I also shared step-by-step instructions for easy preparation and assembly. You learned tips for texture, flavor, and presentation. Plus, we explored variations for different tastes and storage methods. In summary, making these treats is fun and rewarding. You can easily customize them to fit your style. Enjoy baking and sharing these delicious apple pie crescents!

Apple Pie Crescents Easy Recipe to Satisfy Cravings

Craving something sweet and easy? Try my Apple Pie Crescents! These delicious treats take just minutes to make and use

- 1 ½ cups graham cracker crumbs - ½ cup unsalted butter, melted - 1/3 cup granulated sugar - 2 (8 oz) packages cream cheese, softened at room temperature - 1 cup powdered sugar - 2 large eggs, at room temperature - 1 teaspoon vanilla extract - 2 large apples, peeled and diced (preferably Granny Smith for tartness) - 1 teaspoon ground cinnamon - ½ cup caramel sauce (store-bought or homemade) - Optional: chopped walnuts or pecans for topping The base of these bars starts with a crunchy graham cracker crust. Mix the crumbs with melted butter and sugar. This mix gives a sweet and buttery flavor to the bottom layer. Next comes the cheesecake filling. Use softened cream cheese for smoothness. The powdered sugar adds sweetness. Eggs help it set while baking. Vanilla extract adds a warm touch. Now, let’s add the apples! Dicing them gives you small bites of fruit in every bar. I like using Granny Smith apples for their tartness. They balance the sweetness of the caramel and cheesecake. Ground cinnamon is a must; it adds warmth and spice. The caramel sauce is the star! It can be homemade or store-bought. Drizzling this on top makes it extra special. You can also sprinkle chopped walnuts or pecans for some crunch. - Baking pan (9x9 inch) - Mixing bowls - Hand mixer or stand mixer - Spatula - Cooking spray or parchment paper To make these bars, you need a few tools. A 9x9 inch baking pan works best for even baking. Mixing bowls are essential for combining your ingredients. A hand mixer or stand mixer helps beat the cream cheese smoothly. You’ll also need a spatula to spread the filling evenly. Lastly, using cooking spray or parchment paper ensures easy removal of the bars after baking. - Calories per serving: Approximately 250 - Macronutrient breakdown: - Fat: 15g - Carbohydrates: 30g - Protein: 4g Knowing the nutritional info can help you enjoy these bars mindfully. Each serving has around 250 calories. The fat comes mostly from the cream cheese and butter. The carbs mainly come from the graham crackers and sugar. While these bars are a treat, they also provide a bit of protein from the eggs and cream cheese. For more details, check the [Full Recipe]. - Preheat the oven to 350°F (175°C). - Combine graham cracker crumbs, melted butter, and sugar. - Press mixture into the prepared baking pan and bake. To start, you need to preheat your oven. This step ensures that your crust bakes evenly. While the oven warms up, grab a medium bowl. Mix graham cracker crumbs, melted butter, and sugar until it looks like wet sand. This mixture is your crust. Next, take a 9x9 inch baking pan and press the crumb mix firmly into the bottom. You want a nice, even layer. Bake this in the oven for about 10 minutes. Once it’s done, let it cool a bit. - Beat cream cheese until smooth and creamy. - Gradually add powdered sugar and mix until silky. - Incorporate eggs and vanilla extract. Now it's time to make the cheesecake filling. In a large mixing bowl, beat the cream cheese with a hand mixer. You want it to be smooth and creamy. Slowly add the powdered sugar while mixing. This step makes the filling silky and sweet. Next, crack in the eggs one at a time. Mix well after each one. Finally, add the vanilla extract and stir until it’s fully combined. - Fold in diced apples and cinnamon. - Pour batter over crust and swirl in caramel sauce. - Bake and cool before refrigerating. For the fun part, fold in your diced apples and cinnamon. This adds a lovely flavor to your bars. Take the cheesecake batter and pour it over your cooled crust. Spread it out evenly. Then, take your caramel sauce and drizzle half of it on top. Use a knife to swirl it gently into the batter. This creates a beautiful marbled look. Bake the entire pan for 30-35 minutes. The edges should be set, but the center can still jiggle a bit. Once baked, let it cool for about an hour at room temperature. Then refrigerate your bars for at least two hours before slicing into them. Using room temperature ingredients is key. When everything is warm, it mixes better. This helps avoid lumps in the batter. Start by letting your cream cheese and eggs sit out for about 30 minutes. Next, be careful not to overmix the cheesecake batter. Mix just until combined. Overmixing can result in a dense texture instead of a light one. For the best look and taste, garnish your cheesecake bars. A drizzle of caramel sauce looks great. Chopped nuts add a nice crunch. You can also add fresh apple slices for a pop of color. When it comes to drinks, coffee pairs well with this dessert. Tea can also complement the flavors nicely. A light dessert wine can add a touch of elegance. One common mistake is not cooling the crust enough. If it is warm, the cheesecake filling can melt into it. Make sure to let it cool completely before adding the filling. Another mistake is cutting the bars too soon. They need time in the fridge to set properly. Wait at least two hours after baking before slicing. This gives you clean edges and a nice presentation. {{image_4}} You can easily make these bars gluten-free. Use gluten-free graham crackers instead of regular ones. Brands like Kinnikinnick or Schär offer great options. To modify the recipe, simply substitute the graham cracker crumbs with the gluten-free crumbs. The rest of the ingredients remain the same. You still get that tasty crust without the gluten. For a vegan version, you can swap cream cheese with a plant-based option. Brands like Tofutti or Kite Hill work well. Instead of eggs, use flax eggs. Mix 1 tablespoon of ground flaxseed with 2.5 tablespoons of water to replace one egg. Use a plant-based caramel sauce, which you can find in stores or make at home. These swaps keep the dessert creamy and delicious. Using different apples can change the taste of your cheesecake bars. Try Fuji or Honeycrisp apples for a sweeter flavor. For extra warmth, add spices like nutmeg or ginger. A pinch of nutmeg can give a cozy feel, while ginger adds a bit of zing. These flavor additions can make your bars even more delightful. For the complete recipe, check out [Full Recipe]. To keep your caramel apple cheesecake bars fresh, store them in the refrigerator. Place them in an airtight container to avoid drying out. If you want to keep them longer, you can freeze them. Wrap each bar tightly in plastic wrap, then place them in a freezer bag. This keeps them safe from freezer burn. You can keep cheesecake bars in the fridge for about five days. If you freeze them, they can last up to three months. Check for signs of spoilage like an off smell or a change in texture. If they look or smell strange, it’s best to throw them out. To reheat, use the oven for the best results. Preheat it to 350°F (175°C). Place the bars on a baking sheet and warm for about 10 minutes. This helps keep the creamy texture. If you use a microwave, heat them in short bursts. Start with 15 seconds to avoid making them too hot or soggy. The cheesecake bars should chill for at least 2 hours. This time helps them set properly. If you want the best texture, chill them longer if possible. The longer they chill, the better the flavors meld together. Yes, you can use other apple types. I recommend Granny Smith for a tart taste. Honeycrisp works well if you prefer a sweeter flavor. Just remember, the type of apple changes the taste and texture. Absolutely! You can prepare the cheesecake bars a day ahead. Store them in the fridge after they cool. Use an airtight container to keep them fresh. This makes them a great make-ahead dessert for any occasion. To cut cheesecake bars, use a sharp knife. Dip the knife in hot water, then wipe it dry. This method gives you clean, even squares. For neat edges, cut them straight down and avoid sawing back and forth. This blog post covered how to make delicious cheesecake bars using simple ingredients. We discussed prepping the crust, making the filling, and avoiding common mistakes. You learned tips for perfect texture and how to store them well. Variations for gluten-free and vegan diets ensure everyone can enjoy these treats. Enjoy making these cheesecake bars and impress your friends and family with your skills! Happy baking!

Caramel Apple Cheesecake Bars Delightfully Creamy Treat

Indulge your taste buds with my Caramel Apple Cheesecake Bars! This treat combines creamy cheesecake, tart apples, and sweet caramel

- 2 large apples (Granny Smith or Honeycrisp) - 1 cup caramel sauce (store-bought or homemade) - 1/2 cup cream cheese - 1 tablespoon brown sugar - 1/2 teaspoon pure vanilla extract - 1/4 teaspoon fine sea salt To make the best caramel apple dip, start with fresh, crisp apples. Granny Smith apples add a nice tartness. Honeycrisp apples bring sweetness and crunch. Both types work great! Next, you need a cup of caramel sauce. You can buy it or make your own. If you want that homemade touch, simply melt sugar until it turns golden brown. Then, add cream and stir until smooth. You will also need cream cheese. This gives the dip a rich and creamy base. Soften it first, so it blends well. Adding brown sugar, vanilla, and sea salt enhances the flavor. - 1/4 cup chopped nuts (pecans, walnuts, or almonds) - Mini chocolate chips - Colorful sprinkles Now, let’s talk toppings! Chopped nuts add a nice crunch. Pecans or walnuts are my favorites. Mini chocolate chips bring sweetness, while colorful sprinkles add fun. They can make your dip look festive! For the full recipe, check out the detailed instructions. Enjoy making your caramel apple dip! - In a medium bowl, combine: - 1/2 cup cream cheese - 1 tablespoon brown sugar - 1/2 teaspoon pure vanilla extract - 1/4 teaspoon fine sea salt - Use a whisk or mixer to blend until smooth and creamy. This step sets the base for your dip. - Place 1 cup of caramel sauce in a microwave-safe bowl. - Microwave for 20-30 seconds. - Stir well until smooth. This helps the caramel flow nicely when you drizzle it. - Spread the cream cheese mixture evenly on a serving platter. - Drizzle half of the warmed caramel sauce over the cream cheese layer. - Arrange apple slices on top. - Drizzle with the remaining caramel sauce. - Sprinkle with nuts or other toppings like mini chocolate chips. - Chill for about 15 minutes before serving to enhance flavors. This recipe makes a fantastic treat that everyone will love. Check the Full Recipe for more details! When you make caramel apple dip, the apple choice is key. I recommend two types: Granny Smith and Honeycrisp. Granny Smith apples are tart and crisp. They contrast well with sweet caramel. Honeycrisp apples are sweet and juicy. They pair nicely with creamy dips. The apple variety matters because it affects the dish's taste. Tart apples add a zing that balances sweetness. Sweet apples bring a delightful flavor that blends with caramel. Try both types to see which you prefer. A great presentation makes your dip shine. Use a large, colorful platter to catch the eye. Arrange apple slices in a circle around the dip. This adds a fun touch to your gathering. You can also create layers for a beautiful look. Swirl caramel on top for an extra treat. Add toppings like mini chocolate chips or colorful sprinkles. These little details make the dip more exciting. Use fresh mint leaves for a pop of green. It adds color and a fresh scent. Want to change the flavor? Try adding spices like cinnamon or nutmeg. These spices make the dip warm and inviting. A splash of almond extract can give a nutty twist. Think outside the box! Mix in peanut butter or a bit of sea salt. These flavors can elevate your dip to new heights. Experiment with different toppings and flavors to find your favorite mix. {{image_4}} You can choose between homemade and store-bought caramel sauces. Homemade caramel sauce tastes fresh and rich. It lets you control the sweetness and thickness. If you're short on time, store-bought sauce works great. Look for brands that use real ingredients. You can also try different flavors. Salted caramel adds a nice twist. The salt balances the sweetness. Chocolate caramel is another fun option. It gives a rich, deep flavor that pairs well with apples. If you're looking for a healthier dip, swap cream cheese for Greek yogurt. Greek yogurt adds creaminess and protein. It cuts down on fat and calories. You can also find low-sugar caramel options. These sauces use natural sweeteners. They keep the taste but reduce sugar intake. Seasonal spices can enhance your caramel apple dip. Adding cinnamon or nutmeg brings warmth and flavor. These spices work well in fall or winter. You might also consider other fruits. Pears or bananas taste great with caramel too. They add variety and fun to your dip. To keep your caramel apple dip fresh, place the leftovers in the fridge. Use an airtight container to seal in flavors. This dip stays good for about three days. If you see any browning on the apples, it's easy to cut that away before serving. Make sure to keep the dip covered to prevent it from drying out. Can you freeze caramel apple dip? Yes, you can freeze it, but the texture may change. To freeze, scoop the dip into a freezer-safe container. Leave some space at the top for expansion. When you're ready to eat, thaw it in the fridge overnight. Stir well before serving to help restore its creamy texture. For the best flavor, I suggest using Granny Smith or Honeycrisp apples. - Granny Smith: These apples are tart and crisp. Their tartness cuts through the sweet caramel. This makes every bite balanced and tasty. - Honeycrisp: These apples are sweet and juicy. They add a nice contrast to the rich caramel. Their crunchiness also gives a great texture. Each apple brings its own charm to the dip. You can even mix both types for a fun flavor twist! Caramel apple dip lasts about 3-4 days in the fridge. - In the fridge: Store it in an airtight container. This keeps it fresh and tasty. - In the freezer: I recommend not freezing it. The texture changes and won't be as good. Always check for any signs of spoilage before serving, just to be safe. Yes, you can make caramel apple dip ahead of time! - Prepare the dip: You can mix the cream cheese and caramel sauce early. - Serve later: Just cover it and keep it in the fridge. Add the apples right before serving to keep them fresh. This way, you can enjoy more time with your guests! For the full recipe, check out the details above. To sum up, making caramel apple dip is easy and fun. Start with fresh apples, creamy cheese, and rich caramel sauce. You can add tasty toppings like nuts or chocolate chips for flair. Use our tips to choose the best apples and make it look great. Don't forget to try variations and store any leftovers properly. This dip is perfect for parties or family gatherings. Enjoy the sweet and tart flavors that make this treat a hit!

Caramel Apple Dip Flavorful and Simple Treat

Craving a tasty and easy treat? This Caramel Apple Dip is your answer! With just a few simple ingredients, like

To make delicious cinnamon sugar apple chips, gather the following ingredients: - 2 large apples (preferably Fuji or Honeycrisp for optimal sweetness) - 1 teaspoon ground cinnamon - 2 tablespoons granulated sugar - 1 teaspoon vanilla extract (optional, but recommended for a fragrant touch) - Pinch of salt Choosing the right apple is key. I recommend using Fuji or Honeycrisp apples. These varieties are sweet and crisp, making them perfect for chips. They hold their shape well during baking. Other great options include Granny Smith for a tart flavor or Gala for sweetness. Use the apples you enjoy most for the best results. Although the basic recipe is tasty, you can add more flavor. Here are some fun ideas: - Nutmeg: A pinch can add warmth and depth. - Cocoa Powder: Mix in for a chocolatey twist. - Chili Powder: A bit of heat can create a unique snack. - Honey or Maple Syrup: Drizzle before baking for extra sweetness. Feel free to experiment! Each add-in gives a new twist to the classic flavor of cinnamon sugar apple chips. Enjoy the process of creating your own tasty snack! For the full recipe, check out the detailed instructions above. First, set your oven to 225°F (110°C). This low heat helps dry the apples gently. While the oven warms, line a baking sheet with parchment paper. This step keeps the chips from sticking. Wash and dry the apples well. You can use a mandoline slicer or a sharp knife. Slice the apples into rounds about 1/8 inch thick. Make sure the slices are even. This helps them cook at the same time. In a small bowl, mix 1 teaspoon of ground cinnamon, 2 tablespoons of granulated sugar, and a pinch of salt. If you want more flavor, drizzle 1 teaspoon of vanilla extract over the apple slices. Then, coat each slice with the cinnamon-sugar mix. Place the apple slices in a single layer on the baking sheet. Make sure they do not overlap. Sprinkle the cinnamon-sugar mixture evenly on each slice. Put the baking sheet in the preheated oven and bake for about 1.5 to 2 hours. Halfway through, flip the slices gently. Watch them closely as they bake. You want them crispy and dried, not burned. When done, cool the chips on the baking sheet for a few minutes. Then, transfer them to a wire rack to cool completely. This step ensures they become perfectly crispy! To get the best crispiness from your apple chips, low heat is key. I recommend baking them at 225°F (110°C). This gentle heat dries the apples slowly, making them crunchy. It’s important to flip the apple slices halfway through baking. This step helps them cook evenly. Keep an eye on them towards the end. They should be dry and crisp, not burnt. When slicing apples, uniform thickness is very important. I suggest using a mandoline slicer if you have one. This tool makes even slices about 1/8 inch thick. If you prefer a knife, just be careful to keep the slices even. Uneven slices will cook at different rates. This can lead to some chips being too soft or even burnt. Feel free to get creative with flavors. Besides cinnamon, consider adding nutmeg or ginger for a warm touch. You can also try adding a little vanilla extract before coating the slices. This gives a nice aroma and extra flavor. If you want a little kick, a dash of cayenne pepper can add a fun twist. Explore different spices to find your favorite mix! {{image_4}} You can switch out granulated sugar for other sweeteners. Try brown sugar for a richer taste. Coconut sugar works well for a more natural option. For a low-calorie choice, consider using stevia or erythritol. Each alternative gives a unique flavor twist to your apple chips. Get creative with your spice blends! Add nutmeg for warmth or ginger for a zingy kick. A hint of allspice can create a lovely autumn flavor. For a fun twist, mix cocoa powder with the cinnamon. This adds a chocolatey richness that pairs well with apples. Apple chips are great, but you can use other fruits too! Try pears for a sweet and tender snack. Bananas also make tasty chips, offering a different texture. Even sweet potatoes can work, giving a savory and sweet mix. Experiment with your favorite fruits to find new flavors! Store your apple chips in an airtight container. This keeps them fresh and crunchy. A glass jar works well, but a plastic bag can also do the job. Be sure to let them cool completely before sealing. This prevents moisture buildup, which can make them soggy. Homemade apple chips last about one week. If stored properly, they can stay fresh for up to ten days. However, I recommend eating them sooner for the best taste and texture. If you want to keep them longer, consider freezing them. Just remember, freezing may change their crispiness. If your apple chips lose their crunch, don't worry! You can easily re-crisp them. Preheat your oven to 200°F (93°C). Spread the chips on a baking sheet in a single layer. Bake for about 10 to 15 minutes. Keep a close eye on them, so they don't burn. This quick fix brings back that delightful crunch! The best apples for making apple chips are Fuji and Honeycrisp. They have great sweetness and crispness. Their texture helps create the perfect chip. Other good options include Granny Smith for a tart flavor or Gala for a milder taste. Choose apples that feel firm and fresh. Yes, you can use a dehydrator instead of an oven. A dehydrator can dry the apples evenly and create a nice crunch. Follow the manufacturer's instructions for temperature and timing. This method might take longer, but it can enhance the apple flavor. You know the apple chips are done when they are dry and crispy. Check for a light golden color. They should snap when you bend them. If they feel soft, give them more time in the oven or dehydrator. Cinnamon sugar apple chips pair well with many things. You can enjoy them with yogurt for a creamy dip. They also taste great with nut butter or cheese for a savory twist. Add them to salads for a sweet crunch. Cinnamon sugar apple chips can be a healthy snack. They are lower in calories than many store-bought snacks. Apples provide fiber, vitamins, and minerals. However, watch the sugar you add. Use less sugar or a sugar substitute to make them even healthier. For the full recipe, check out the earlier section. Making apple chips is easy and fun. We discussed the best ingredients, step-by-step instructions, and helpful tips. You can try different apples and spices to create unique flavors. Storing them correctly keeps them crispy and fresh. Remember, you can adapt this recipe to fit your taste. Enjoy your tasty snacks, and share them with friends. Cooking should always bring joy and flavor to our lives. Now, it’s your turn to make some delicious apple chips!

Cinnamon Sugar Apple Chips Tasty and Simple Snack

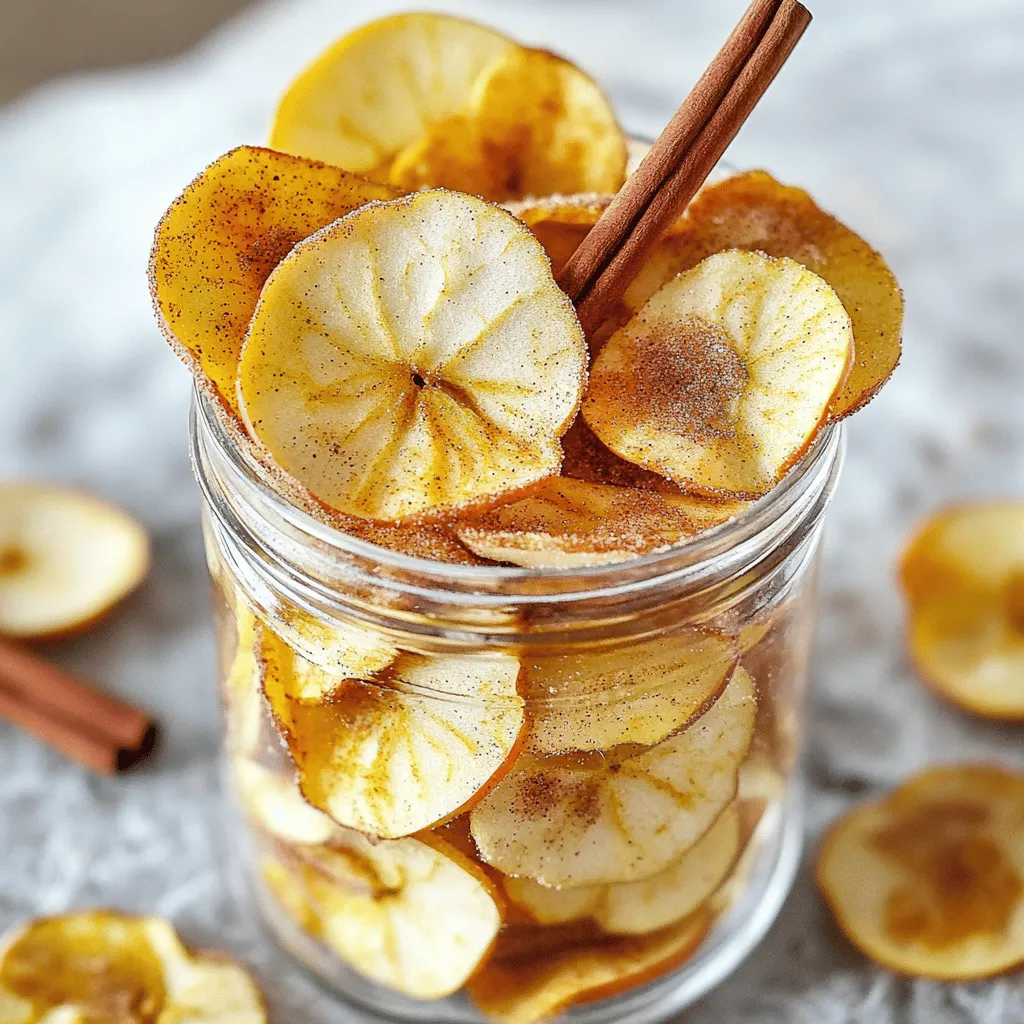
Looking for a tasty snack that’s easy to make? You’ve come to the right place! This guide on Cinnamon Sugar

To start, gather your main ingredients. You will need: - 2 cups lightly salted popcorn - 1 cup pretzel sticks - 1 cup cheddar cheese crackers These ingredients create a great base for your snack mix. The popcorn adds a nice crunch, while the pretzel sticks bring a salty bite. The cheddar cheese crackers give a cheesy flavor that kids love. Next, let's add some sweetness and crunch. You will need: - 1 cup candy corn - 1 cup mini marshmallows - 1/2 cup roasted peanuts The candy corn adds a fun, sweet touch. Mini marshmallows give a soft, chewy texture. Roasted peanuts add a nutty crunch that everyone will enjoy. Finally, we need some fun toppings. Get these: - 1/2 cup chocolate-covered almonds - 1/4 cup colorful rainbow sprinkles - 1/4 cup white chocolate, melted (for drizzling) Chocolate-covered almonds add a sweet crunch. Rainbow sprinkles make everything look festive and fun. The melted white chocolate ties it all together with a sweet drizzle. With all these tasty ingredients, you are ready to make your Monster Munch Snack Mix. Check out the Full Recipe for step-by-step instructions! - Combine dry ingredients Start by grabbing a large mixing bowl. In it, combine the following ingredients: - 2 cups lightly salted popcorn - 1 cup pretzel sticks - 1 cup cheddar cheese crackers - 1 cup candy corn - 1 cup mini marshmallows - 1/2 cup roasted peanuts - 1/2 cup chocolate-covered almonds Mix all these tasty bits together. Make sure every piece gets some love. This step sets the stage for a great snack. - Melting white chocolate Next, you need to melt some white chocolate. Take 1/4 cup of white chocolate and place it in a microwave-safe bowl. Heat it in short bursts of 15 seconds. Stir each time until it’s smooth. You want it drippy but not too hot. This melted chocolate will make your mix extra special. - Gently fold ingredients together Now, it’s time to combine everything. Carefully fold the dry mix together using a spatula. Be gentle so you don’t crush the popcorn or pretzels. Keep folding until all the ingredients are well mixed. This ensures every bite is a flavor explosion. - Drizzle white chocolate and add sprinkles Grab your lined baking sheet. Pour the mixed snack onto it, spreading it out evenly. Now, take your melted white chocolate and drizzle it over the top. Go back and forth in a zigzag pattern. This looks great and adds flavor. While the chocolate is still warm, sprinkle the colorful rainbow sprinkles on top. They will stick nicely to the chocolate. - Cooling and setting the mix Let your snack mix cool at room temperature for about 30 minutes. This time helps the chocolate set. Once it’s cool, break the mix into chunks. You can serve it in a big bowl or pack it in bags for sharing. Enjoy your fun and tasty Monster Munch Snack Mix! For the full recipe, check the complete guide! To achieve a well-mixed Monster Munch Snack Mix, start with a big bowl. Add all your ingredients slowly. Use a gentle folding motion. This keeps the popcorn and marshmallows from breaking. Mix until you see all the colors blend well. Don’t rush it. Take your time to ensure every bite has a bit of everything. Make your snack mix look fun when you serve it. Use Halloween-themed bowls for a festive touch. Clear bags tied with ribbons also add a nice look. You can even use small cups for individual servings. This way, everyone gets their own fun mix. Don’t forget to add a scoop for easy serving. To keep your Monster Munch Snack Mix fresh, use an airtight container. This helps the mix stay crunchy. If you want to keep it longer, zip-lock bags work too. Just make sure to squeeze out the air. Store it in a cool, dry place. Your snack mix will stay tasty for up to a week. If you notice it getting soft, a quick toast in the oven can help. {{image_4}} You can make your Monster Munch Snack Mix a bit healthier. Here are some ideas: - Low-sugar options: Use dark chocolate instead of milk chocolate. You can also replace candy corn with dried fruit. Try raisins or apricots for a sweet touch without too much sugar. - Gluten-free substitutes: Swap pretzel sticks with gluten-free pretzels. You can also choose gluten-free crackers. This way, everyone can enjoy the mix! Want to spice things up? Here are some fun ideas: - Spicy variations: Add chili powder or drizzle hot sauce over the mix for a kick. This will surprise your taste buds! - Chocolate variations: Try mixing in white chocolate chips or dark chocolate chunks. Each type brings a unique taste. You can even layer different chocolates for more fun. You can make your Monster Munch Snack Mix fit any celebration. Here are a few ideas: - Festive versions: For Halloween, add pumpkin-shaped candies or orange and black sprinkles. You can also use ghost-shaped marshmallows for a spooky touch. - Other celebrations: For birthdays, use colorful candies or sprinkles. You can create a rainbow theme for fun! It’s all about making it special for the event. These variations make your Monster Munch Snack Mix fun and exciting. Check out the Full Recipe to start making your own mix today! Store your Monster Munch Snack Mix in an airtight container or zip-lock bag. Airtight containers keep mix fresher longer. They block air and moisture, which can make your mix soggy. Zip-lock bags are great for quick storage and easy grab-and-go. Just press out as much air as you can before sealing. Your snack mix will stay fresh for about one week at room temperature. If you want it to last longer, store it in the fridge. In the fridge, it can last up to two weeks. Just remember to keep it sealed tight to avoid moisture. Yes, you can freeze Monster Munch Snack Mix! Place it in an airtight container or zip-lock bag. Make sure to remove all the air before sealing. It can keep for up to three months in the freezer. When you are ready to eat, let it thaw at room temperature. Enjoy your mix without worry! Yes, you can make Monster Munch Snack Mix ahead of time. It keeps well when stored properly. Best practices for prep ahead of time: - Mix the dry ingredients and store them in an airtight container. - Melt the white chocolate right before you drizzle it on. - Add sprinkles just before serving to keep them crunchy. This way, you can enjoy fresh-tasting snack mix even if you prepare it a day early. If you don’t have certain snacks, there are easy swaps. Alternative snacks and allergen considerations: - Use popcorn without butter for a lower-fat choice. - Try rice cakes instead of pretzels for a gluten-free option. - Swap cheese crackers for veggie chips for a healthier twist. - Peanut-free? Use sunflower seeds instead of peanuts. These simple substitutions make the mix safe and fun for everyone. Definitely! Monster Munch Snack Mix is safe and fun for kids. Nutrition and safety for young children: - It has a mix of sweet and salty flavors that kids love. - Ensure to monitor for choking hazards with nuts and large pieces. - You can adjust sugar by using less candy corn. With a few tweaks, this snack is kid-friendly and perfect for parties or movie nights. Monster Munch Snack Mix is fun to make and enjoy. You mix popcorn, pretzels, and cheese crackers with sweet treats like candy corn and mini marshmallows. Adding white chocolate and sprinkles gives it a fun touch. You can even try healthier options or holiday themes. Store your mix in airtight bags to keep it fresh. Now, get creative and make this snack mix your own! It’s perfect for parties, movie nights, or just to have on hand for a tasty treat. Enjoy every crunchy bite!

Monster Munch Snack Mix Fun and Tasty Recipe Guide

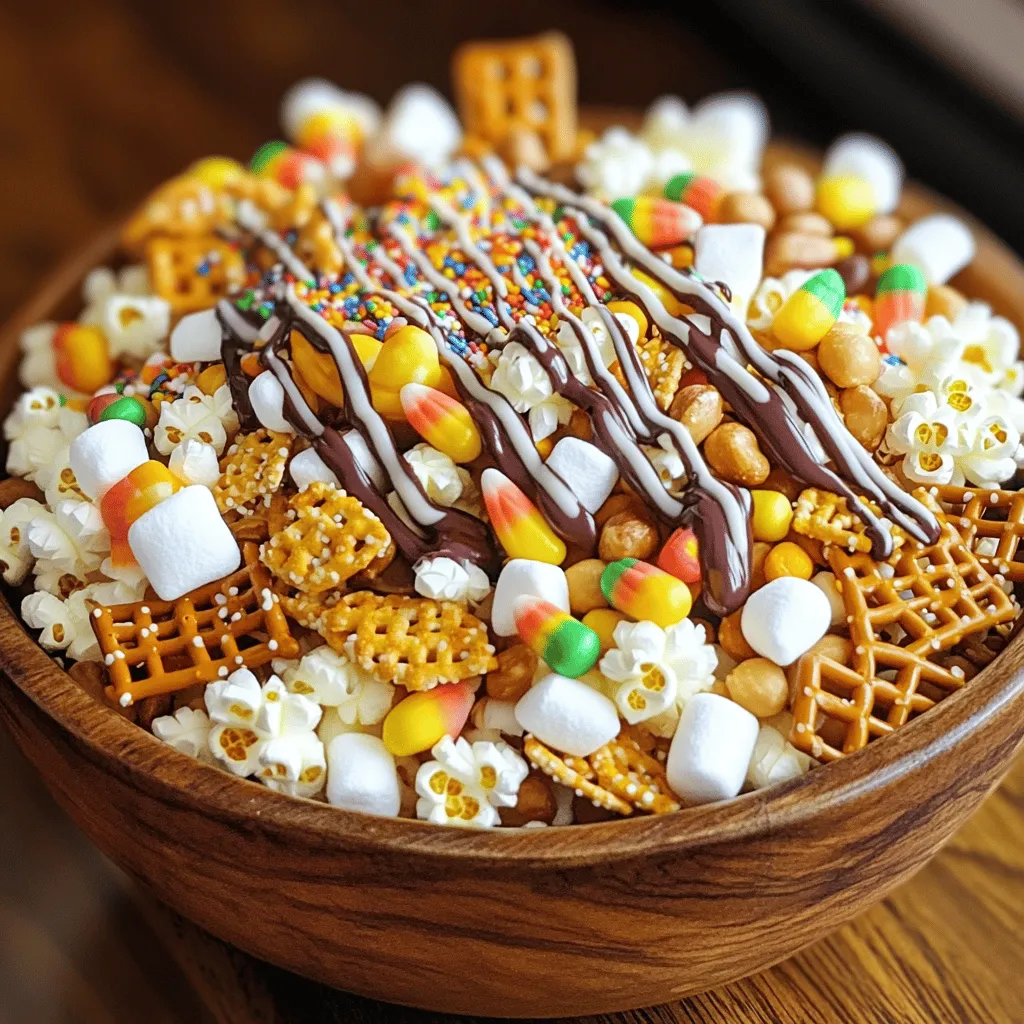
Ready to dive into a fun and tasty treat? My Monster Munch Snack Mix recipe is perfect for parties or

To create the best Halloween trail mix, gather these key ingredients: - 1 cup pumpkin spice granola - 1/2 cup candy corn - 1/2 cup chocolate-covered pretzels - 1/2 cup mini marshmallows - 1/2 cup dried cranberries - 1/2 cup roasted pumpkin seeds - 1/4 cup white chocolate chips - 1/4 cup dark chocolate chunks - 1/2 teaspoon ground cinnamon - A pinch of sea salt These ingredients bring a mix of flavors and textures. The granola gives a crunchy base, while the candy corn adds sweetness. The chocolate-covered pretzels balance salty and sweet. Mini marshmallows add a chewy element, and dried cranberries provide a tart burst. Roasted pumpkin seeds add a nutty flavor, while the white and dark chocolate chips offer rich sweetness. Cinnamon and sea salt enhance all the tastes. You can customize your trail mix with fun add-ins. Consider these: - Sunflower seeds for crunch - Raisins for more sweetness - Coconut flakes for a tropical twist - Pretzel sticks for extra shape - Seasonal candies like gummy worms for fun These add-ins can make your mix more exciting. Choose what you like best to match your taste. Select high-quality ingredients. Here are some tips: - Check expiration dates for freshness. - Choose organic granola for better flavor. - Look for chocolate with high cocoa content. - Buy cranberries without added sugar for a healthier option. - Get seeds that are roasted but unsalted for better control over salt levels. Quality ingredients make your trail mix taste great. Pay attention to details for the best results. Enjoy making this festive snack! For the full recipe, check the details above. To start, grab a large mixing bowl. Add 1 cup of pumpkin spice granola. This will be your tasty base. The granola gives great flavor and crunch. Now, it's time to mix! Pour in 1/2 cup of candy corn. Then, add 1/2 cup of chocolate-covered pretzels. Follow this with 1/2 cup of mini marshmallows, 1/2 cup of dried cranberries, and 1/2 cup of roasted pumpkin seeds. This mix brings a fun texture and color! Next, add 1/4 cup of white chocolate chips and 1/4 cup of dark chocolate chunks. These sweet bites add a creamy twist. Sprinkle in 1/2 teaspoon of ground cinnamon and a pinch of sea salt. Use a spatula to gently toss everything together. Taste your trail mix! If you think it needs more sweetness, add more chocolate. Adjust it to fit your taste buds. Once mixed, spread the trail mix on a baking sheet lined with parchment paper. Let it sit for 10-15 minutes. This helps the flavors blend well. Finally, scoop the mix into Halloween-themed bags or jars. These festive snacks are perfect for sharing! For the full recipe, check out the details above. Mixing trail mix is simple and fun! I like to use a large bowl. Start with your base, like pumpkin spice granola. Then add each ingredient one by one. This way, you can see how it looks as you go. Use a big spoon or spatula to fold the mix. Be gentle, so you don’t break the pretzels or marshmallows. Toss everything well, ensuring even distribution. Taste your mix before serving. If you want more sweetness, add extra chocolate. You can also try more candy corn for a sugary kick. If you prefer less sweet, add more nuts or seeds. These add crunch and balance the flavors. Adjust the texture by mixing in some crispy rice cereal. This adds a light crunch without being too sweet. Presenting your trail mix can be just as fun as making it! Use Halloween-themed bowls or jars for a festive touch. I love filling clear bags with the mix and tying them with spooky ribbons. This makes great party favors! You can also serve it in a big bowl for guests to share. Include scoops or small cups so everyone can grab a portion. {{image_4}} You can make your trail mix fun and exciting with themes. For a spooky mix, add gummy worms and chocolate bats. You could also create a monster mix. Use colorful candies and add popcorn for crunch. Each theme can bring joy to both kids and adults. If you need to swap ingredients, it is easy! Use gluten-free granola for those with gluten issues. For nut allergies, replace pumpkin seeds with sunflower seeds. You can also use dark chocolate for a dairy-free option. This way, everyone can enjoy the mix. You can change your trail mix for any holiday. For Christmas, use red and green candies with peppermint bits. For Easter, add pastel-colored chocolate eggs and dried fruit. Each season brings fresh flavors and colors to your trail mix. Be creative and enjoy making it your own! For the complete recipe, check out the Spooktacular Halloween Trail Mix . To keep your Halloween trail mix fresh, store it in an airtight container. This will prevent moisture and keep the mix crunchy. If you have a lot left, divide it into smaller portions. This way, you can grab a quick snack anytime. Use glass jars or plastic containers with tight-fitting lids. These options seal in flavor and keep out air. If you want something festive, choose Halloween-themed bags. Just make sure they are resealable to maintain freshness. Your trail mix can last up to two weeks at room temperature. If you store it in the fridge, it can last a month. Check for any signs of spoilage, like off smells or changes in texture. Enjoy your mix as a snack or add it to yogurt for a tasty treat. For full recipe details, check out the Spooktacular Halloween Trail Mix recipe! You can make your Halloween trail mix healthier by using whole ingredients. Choose unsweetened dried fruits instead of candy. You can also swap out chocolate for dark chocolate with high cocoa content. Use seeds and nuts for healthy fats. Add more granola and less candy corn for better balance. Yes, you can make this trail mix in advance. It stores well for several days. Just keep it in an airtight container. This way, you can enjoy it fresh for your Halloween party. Making it ahead of time saves you stress on the big day. You can package trail mix in clear cellophane bags or mason jars. Use Halloween-themed ribbons or tags to make them festive. You can also create fun labels with spooky designs. This adds a personal touch and makes the gift feel special. Yes, there is a nut-free version of this recipe. Simply leave out any nuts and add more seeds instead. You can use sunflower seeds or pumpkin seeds for crunch. This way, you keep the mix tasty and safe for those with nut allergies. To customize the recipe, think about flavors your friends enjoy. You can add different candies like gummy worms or chocolate-covered raisins. Swap out dried fruits for favorites like apricots or pineapple. Adjust the spices to suit your taste, too. This makes your trail mix unique and fun! You can create a fun and tasty Halloween trail mix with simple steps. Start with the essential ingredients, then add some optional extras to boost flavor. Mix carefully to ensure a great taste for all. Use these tips to store leftovers and extend freshness. With different variations and dietary swaps, there’s a perfect mix for everyone. Enjoy your Halloween celebrations with your unique blend! This trail mix brings fun and flavor together for all ages. Keep experimenting and make it your own!

Best Halloween Trail Mix for Festive Snacking

Get ready for spooky fun with the best Halloween trail mix! This festive snack combines sweet and salty treats that

- 1 ½ cups graham cracker crumbs - ½ cup unsalted butter, melted - 2 cups cream cheese, softened to room temperature - 1 cup canned pumpkin puree - 1 cup powdered sugar - 1 teaspoon pure vanilla extract - 1 teaspoon pumpkin pie spice - 1 cup heavy whipping cream - Optional: whipped cream and ground cinnamon for garnishing Measuring ingredients accurately is key. Use dry measuring cups for solids like graham crackers. For sticky items like honey, use liquid measuring cups. Level off each cup with a knife for precision. This ensures your cheesecake sets well. You can swap some ingredients if needed. Use gluten-free graham crackers for a gluten-free version. Cream cheese can be replaced with mascarpone cheese for a richer taste. If you want a lighter option, use Greek yogurt instead of cream cheese. For a dairy-free option, use coconut cream in place of heavy cream. These swaps may change the flavor but can still yield a tasty dessert. Start by making the crust. In a medium bowl, mix graham cracker crumbs with melted butter. Stir until it feels like damp sand. Press this mixture firmly into a 9-inch springform pan. Use a measuring cup to press it down evenly. Chill the crust in the fridge while you prepare the filling. Next, beat the softened cream cheese in a large bowl with an electric mixer. Mix on medium speed for about 2-3 minutes. It should be smooth and creamy. Then add pumpkin puree, powdered sugar, vanilla extract, and pumpkin pie spice. Mix until everything is well blended. In another bowl, whip the heavy cream with a hand mixer until stiff peaks form. This takes about 3-4 minutes. Carefully fold this whipped cream into the pumpkin mixture. Use a spatula and be gentle to keep it fluffy. Now, spoon the filling over the chilled crust. Spread it evenly with a spatula. Cover the cheesecake with plastic wrap and put it in the fridge. Chill for at least 4-6 hours or overnight for best results. When mixing, make sure all ingredients are at room temperature. This helps them blend better. As you fold in the whipped cream, do it slowly. This keeps the mixture airy and light. Always scrape the bottom and sides of the bowl to ensure even mixing. Chilling is crucial for this cheesecake. It helps it firm up and develop flavors. The longer it sits, the better it tastes. After chilling, remove it from the springform pan carefully. Serve each slice with whipped cream and a sprinkle of cinnamon. This makes it extra special! For the full recipe, check the detailed instructions above. If your cheesecake is too soft, check the heavy cream. It needs stiff peaks. If it’s too runny, you might not have whipped it enough. If the crust crumbles when you slice, press it down more firmly next time. Try using a measuring cup to compact it. Add a pinch of salt to balance the sweetness. It makes a big difference! For extra flavor, mix in more pumpkin pie spice or a splash of maple syrup. You can also use flavored cream cheese, like cinnamon or vanilla, for a fun twist. Slice the cheesecake into neat wedges for a clean look. Place each slice on a pretty plate. Add a dollop of whipped cream on top and sprinkle with cinnamon. A mint sprig adds a nice touch. For a festive vibe, you can even use cute fall-themed plates. Check the Full Recipe for more serving ideas! {{image_4}} You can change the flavor of your no-bake pumpkin cheesecake easily. Try adding different spices like nutmeg or ginger for a spicy kick. You could also mix in some chocolate chips for a sweet twist. If you want something more citrusy, add a bit of orange zest to brighten the flavor. For a richer taste, consider using maple syrup instead of powdered sugar. The crust can change the whole vibe of your cheesecake. You can stick with the classic graham cracker crust. However, a ginger snap crust gives a fun spice. If you want a nutty flavor, try a crust made from crushed pecans or almonds. For a gluten-free option, use gluten-free cookies or oats. Each crust choice adds its own special touch to your dessert. This cheesecake is great for any season. For autumn, you can add some apple or pear slices on top. At Thanksgiving, consider using a layer of cranberry sauce for a pop of color. For Christmas, sprinkle some crushed candy canes on top for a festive look. You can even switch it up for spring by adding fresh berries. Each season offers a chance to make this cheesecake unique! For the full recipe, check out the detailed steps in the section above. Enjoy your creative journey with this delightful fall dessert! To keep your cheesecake fresh, store it in the fridge. Use an airtight container or cover it tightly with plastic wrap. This prevents it from absorbing strong smells from other foods. Always make sure the cheesecake is fully chilled before covering. This helps maintain its creamy texture. Yes, you can freeze this no-bake pumpkin cheesecake! First, let it cool completely in the fridge. Then, wrap it well in plastic wrap and aluminum foil. This protects it from freezer burn. When you want to eat it, thaw it overnight in the fridge. Never refreeze once thawed. Your cheesecake will last about 3 to 5 days in the fridge. After that, the quality may drop. Always check for any changes in smell or texture before enjoying. For best taste, eat it within the first few days. For the full recipe, make sure to follow the steps for perfect results! To make a no-bake cheesecake firmer, use less heavy cream. You can also add more cream cheese. Another option is to include gelatin. Gelatin helps the cheesecake hold its shape better. Simply dissolve it in warm water and mix it in before chilling. Yes, you can use fresh pumpkin. First, cook the pumpkin until soft, then mash it. Strain it to remove excess water. This helps keep your cheesecake from getting too watery. Canned pumpkin is usually thicker and easier to work with, but fresh adds great flavor. You can use coconut cream or full-fat Greek yogurt. Both options will give a rich texture. If you want a lighter option, try using whipped topping. Each substitute changes the taste slightly, so choose one that fits your flavor goals. The cheesecake needs at least 4 to 6 hours to set. For best results, chill it overnight. This helps all the flavors blend well. A longer chill time makes for a creamier and tastier dessert. Absolutely! You can make this cheesecake up to two days in advance. Just store it covered in the fridge. This gives you more time to enjoy your guests and less time in the kitchen. For the freshest taste, add toppings just before serving. For the full recipe, check out the details above. This blog post covered the key elements of making a no-bake pumpkin cheesecake. We explored the ingredients needed, how to prepare them, and tips for mixing. I shared ways to enhance flavor and texture, along with storage tips. You also learned about variations for different seasons. Remember, experimenting makes this recipe truly yours. With these steps, you can create a delicious cheesecake that wows every guest. Enjoy your baking journey!

No-Bake Pumpkin Cheesecake Delightful Fall Dessert

Are you ready to impress your friends and family this fall? My No-Bake Pumpkin Cheesecake is the perfect dessert for
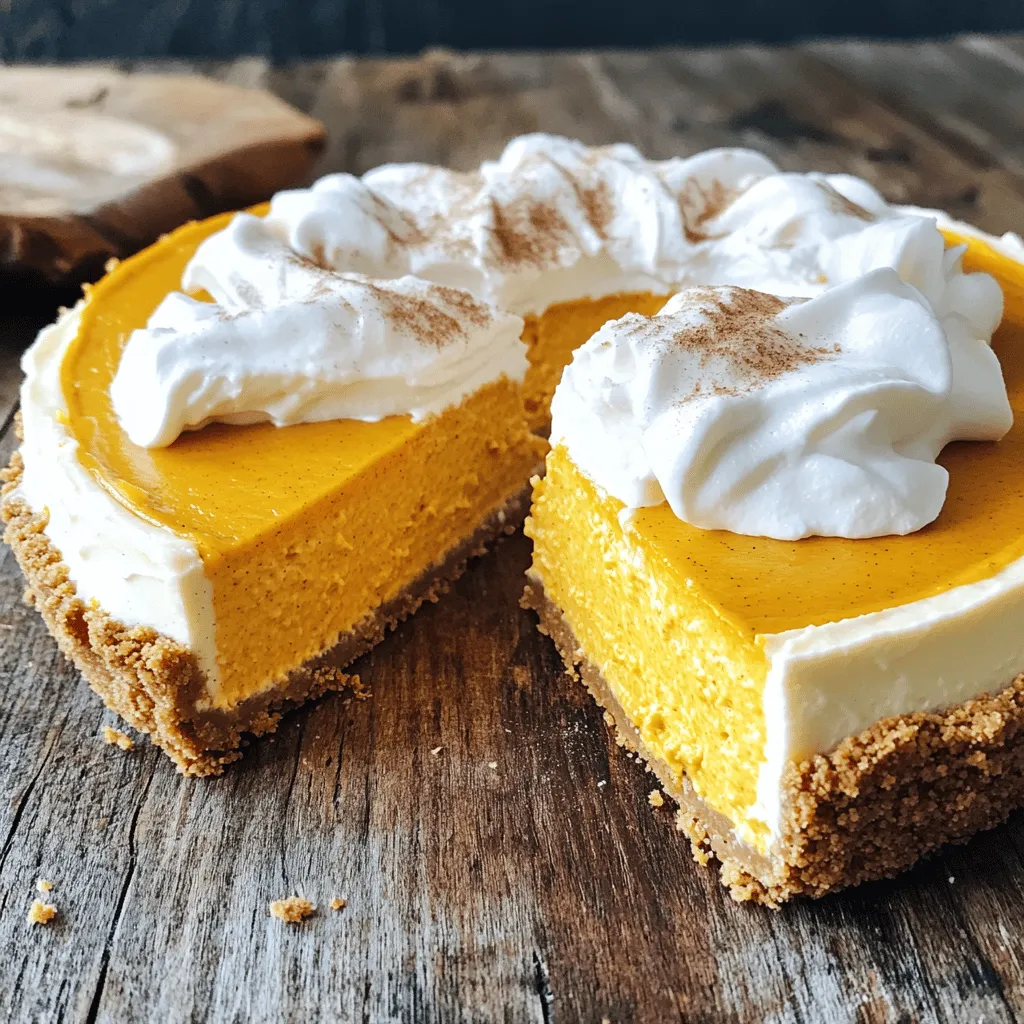
To make these bars, you need some key items: - 1 ½ cups graham cracker crumbs - ½ cup unsalted butter, melted - 1 cup cream cheese, softened at room temperature These ingredients form the base of your dessert. The graham cracker crumbs create a crunchy crust, while the cream cheese gives it a rich, creamy texture. For the delicious pumpkin flavor, gather these items: - 1 cup pumpkin puree (can be canned or freshly made) - 2 large eggs - 1 teaspoon vanilla extract Pumpkin puree is the star of these bars. It adds moisture and a lovely orange hue. The eggs help bind everything together, while vanilla adds a sweet note. Spices bring warmth and depth to your cheesecake bars. You will need: - 1 teaspoon ground cinnamon - ½ teaspoon ground nutmeg - ½ teaspoon ground ginger - ¼ teaspoon salt These spices give your bars that classic fall flavor. They work together to create a cozy, inviting taste. The salt balances the sweetness, making every bite delightful. For the full recipe and instructions, check out the [Full Recipe]. 1. Start by preheating your oven to 350°F (175°C). 2. Line an 8x8 inch baking dish with parchment paper. Leave some overhang for easy lifting. 3. In a bowl, combine 1 ½ cups of graham cracker crumbs with ½ cup of melted unsalted butter. 4. Stir until the mixture looks like wet sand. Then, press it firmly into the bottom of your dish. 1. In a large bowl, beat 1 cup of softened cream cheese until smooth. 2. Gradually mix in ½ cup of granulated sugar. Keep mixing until well blended. 3. Add 1 cup of pumpkin puree, 2 large eggs, 1 teaspoon of vanilla extract, 1 teaspoon of ground cinnamon, ½ teaspoon of ground nutmeg, ½ teaspoon of ground ginger, and ¼ teaspoon of salt. 4. Mix until the filling is smooth and uniform. 1. Pour the pumpkin cheesecake filling over the cooled graham cracker crust. 2. Use a spatula to spread it evenly. 3. Bake for 30-35 minutes. The edges should be set, and the center should jiggle slightly when tapped. 4. After baking, let the bars cool to room temperature. 5. Move them to the fridge for at least 2 hours to chill and set completely. For the full recipe, you can refer to the earlier section. Enjoy these delightful pumpkin cheesecake bars! - Ensuring a smooth filling: Start with room temperature cream cheese. Cold cream cheese makes lumps. Use a hand mixer to blend until creamy. This step helps create a silky texture in your filling. - Tips for a well-formed crust: Mix the graham cracker crumbs and melted butter well. Press this mixture firmly into the pan. Aim for an even layer to make each bite delightful. Bake until just golden. This gives the crust a sturdy base. - Garnishing ideas: Top each bar with whipped cream for a rich touch. A sprinkle of pumpkin seeds adds a nice crunch. You can also drizzle caramel sauce for extra sweetness. - Ideal pairings for the bars: Serve these bars with a cup of hot coffee or spiced chai. The warmth of the drink balances the creamy bars. A scoop of vanilla ice cream also pairs well for a treat. - Overmixing the filling: Mix just until smooth. Overmixing can add air, making the cheesecake puff during baking. This can lead to cracks as it cools, so be gentle. - Not cooling properly: Let the bars cool at room temperature first. Then, chill them in the fridge. This step is key for a firm texture. If you cut them too soon, they may crumble. {{image_4}} You can change the taste of your pumpkin cheesecake bars with a few fun twists. Here are two great ideas: - Chocolate pumpkin cheesecake bars: Add melted chocolate to your filling for a rich, sweet treat. Use about 4 ounces of dark chocolate. Melt it and mix it in with the cream cheese before adding the pumpkin puree. This adds depth and a touch of indulgence. - Maple pumpkin cheesecake bars: Replace granulated sugar with maple syrup. Use ¾ cup of maple syrup instead of the sugar. This gives a lovely caramel-like flavor to the bars. It’s warm and sweet, perfect for fall. If you need to adjust for dietary needs, here are some options: - Gluten-free options for the crust: Use gluten-free graham cracker crumbs or almond flour for the crust. Mix it with melted butter just like in the original recipe. This way, everyone can enjoy these bars. - Vegan substitutions: Swap cream cheese with a vegan cream cheese alternative. For eggs, use flax eggs. Mix 1 tablespoon of ground flaxseed with 2.5 tablespoons of water. Let it sit for a few minutes until it thickens. This works great for binding and adds nutrition. You can also bring in seasonal flavors to your pumpkin cheesecake bars: - Adding cranberry for a festive touch: Toss in some fresh or dried cranberries into the filling. About ½ cup will do. This adds a tart contrast to the sweet pumpkin flavor. It also looks great on a holiday table. - Using a different spice blend: Change up the spices to create a unique taste. Try adding cardamom or allspice along with cinnamon and nutmeg. Just use ½ teaspoon of your chosen spice. This gives a new spin to the classic flavor profile. For the full recipe, check out the recipe section! You can keep pumpkin cheesecake bars at room temperature for a short time. If you plan to eat them within a few hours, store them in a cool, dry place. However, for longer storage, refrigeration is best. Place the bars in an airtight container. This keeps them fresh and prevents them from drying out. When storing in the fridge, cover your cheesecake bars with plastic wrap or foil. This helps maintain their texture and flavor. They will stay fresh for up to five days. Freezing pumpkin cheesecake bars is a great option for longer storage. First, let the bars cool completely. Then, cut them into squares. Wrap each square tightly in plastic wrap. After that, place the wrapped bars in a freezer-safe bag or container. This helps prevent freezer burn. You can freeze the bars for up to three months. When you want to enjoy them, take the bars out of the freezer. Thaw them in the fridge overnight. This keeps them nice and creamy. You can also thaw them at room temperature for a couple of hours. In the fridge, your pumpkin cheesecake bars will last about five days. After that, they may start to lose their flavor and texture. Signs of spoilage include a sour smell, discoloration, or a watery texture. If you notice any of these signs, it’s best to throw the bars away. Always trust your senses when checking for freshness. For a delicious treat that lasts, follow these storage tips. They will help you enjoy your pumpkin cheesecake bars long after baking. For the full recipe, check the earlier sections. Yes, you can use fresh pumpkin. Fresh pumpkin gives a bright flavor. It also has a firmer texture. This can enhance your bars. However, it requires more work. You need to roast and puree the pumpkin first. Canned pumpkin is very convenient. It is ready to use and has a consistent flavor. If you want a richer taste, use fresh. Making these bars ahead is easy. You can prepare them a day before serving. Just follow the recipe and cool them completely. After cooling, cover them tightly. Store them in the fridge. This keeps them fresh and tasty. You can also freeze them. Cut the bars into squares and wrap them well. They can last for about three months in the freezer. Thaw them in the fridge before serving. If you need a substitute for cream cheese, use mascarpone. It has a similar texture and taste. Another option is Greek yogurt. It is lower in fat and adds a bit of tang. For a non-dairy choice, use cashew cream. Soak cashews in water, blend until smooth, and use it in place of cream cheese. Each option will change the flavor slightly, so choose based on your taste! Pumpkin cheesecake bars are a delightful treat with simple ingredients and easy steps. We discussed the elements that make these bars great, like cream cheese and spices. You learned the importance of proper baking and storage methods. Remember, avoid common mistakes like overmixing. Explore the variations and storage tips to match your taste. With these insights, you can create your own delicious bars. Enjoy each bite and make these treats a favorite in your kitchen!

Pumpkin Cheesecake Bars Irresistible Dessert Delight

Get ready to indulge in the rich flavors of fall with my Pumpkin Cheesecake Bars! These bars blend creamy cheesecake

Older posts
Newer posts
← Previous Page1 … Page15 Page16 Page17 … Page91 Next →

dsad

© 2025 recipesstation • Built with GeneratePress

Our Policies

  • Copyright Policy
  • Cookie Policy
  • GDPR Policy
  • Privacy Policy
  • Disclaimer
  • Terms Of Use

More Information

  • Home
  • About
  • Contact
  • Appetizers
  • Dessert
  • Dinner
  • Drinks
©2025, recipesstation About Back To Top