Skip to content
DisclaimerTerms Of UseGDPR PolicyCookie Policy

recipesstation

  • Home
  • Drinks
  • Appetizers
  • Dinner
  • Dessert
  • About
  • Contact
  • Privacy Policy
DisclaimerTerms Of UseGDPR PolicyCookie Policy

Emily

- 1 ½ cups all-purpose flour - 1 teaspoon baking powder - ½ teaspoon baking soda - ½ teaspoon salt - ½ teaspoon ground cinnamon - ¾ cup granulated sugar - ½ cup buttermilk - ¼ cup vegetable oil - 2 large eggs - 1 teaspoon pure vanilla extract - ½ cup maple syrup (for the glaze) - ¼ cup powdered sugar (for the glaze) When measuring flour, spoon it into your measuring cup. Then level it off with a knife. This method helps avoid too much flour, which can make the muffins dry. For liquids, use a clear measuring cup. Check the measurement at eye level for accuracy. If you don’t have buttermilk, mix ½ cup of milk with 1 teaspoon of lemon juice or vinegar. Let it sit for 5 minutes. This will create a similar tangy flavor. For vegetable oil, you can use melted coconut oil or melted butter. Both will work well in this recipe. If you want a dairy-free version, try almond milk instead of buttermilk. Start by preheating your oven to 350°F (175°C). This step is key to getting an even bake. Next, take a standard muffin tin and grease it lightly. You can also use paper liners for easy removal. In a large bowl, mix together the dry ingredients. Combine 1 ½ cups of all-purpose flour, 1 teaspoon baking powder, ½ teaspoon baking soda, ½ teaspoon salt, and ½ teaspoon ground cinnamon. Whisk well to blend these dry ingredients. In another bowl, mix the wet ingredients. Combine ¾ cup granulated sugar, ½ cup buttermilk, ¼ cup vegetable oil, 2 large eggs, and 1 teaspoon pure vanilla extract. Stir until the mixture is smooth. It's okay if there are a few lumps. Now, slowly mix the wet ingredients into the dry ones. Gently fold them together with a spatula until just combined. Distribute the batter evenly into the muffin cups. Fill each cup about two-thirds full to allow for rising. Place the muffin tin in the oven and bake for 18-20 minutes. Check for doneness by inserting a toothpick into the center of a muffin. It should come out clean or with a few moist crumbs. Once baked, let the muffins cool in the tin for about 5 minutes. After cooling, transfer them to a wire rack. This helps them cool evenly. While the muffins cool, prepare the maple glaze. In a small bowl, whisk together ½ cup maple syrup and ¼ cup powdered sugar. Mix until smooth. Once the muffins are warm, dip their tops into the glaze. Make sure to let the excess glaze drip off. Place the glazed muffins back on the wire rack. Allow the glaze to set for about 10 minutes before serving. Now, you have a batch of warm, delightful maple glazed donut muffins ready to enjoy! To make the best maple glazed donut muffins, follow these simple tips. First, measure your flour correctly. Use a spoon to scoop flour into the measuring cup, then level it off with a knife. Too much flour can make your muffins dry. Second, don’t overmix the batter. Stir until just combined. Small lumps are okay! They help keep your muffins light and fluffy. Third, fill each muffin cup two-thirds full. This allows them to rise perfectly without spilling over. One common mistake is using cold eggs. Make sure your eggs are at room temperature. This helps them mix better into the batter. Another mistake is skipping the cooling time. Letting the muffins cool before glazing is key. If you glaze them too soon, the glaze will run off. Lastly, be careful with the baking time. Every oven is different. Check your muffins at 18 minutes. They should be golden brown and a toothpick should come out clean. These muffins shine when served warm. Pair them with a hot cup of coffee or tea for a cozy treat. For a fun twist, add a scoop of ice cream on top for dessert. You can also serve them with fresh fruit or a dollop of whipped cream. For extra flair, sprinkle a bit of cinnamon on top of the glaze. This adds a nice touch and enhances the flavor. Enjoy experimenting with different combinations! {{image_4}} You can make these muffins even tastier with fun add-ins. Try adding chocolate chips or nuts. You can also mix in dried fruit like cranberries or raisins. For a pop of flavor, add a teaspoon of orange zest. Each of these will give your muffins a new twist. If you need gluten-free muffins, swap the all-purpose flour. Use a gluten-free flour blend instead. Just check that the blend has a good binding agent, like xanthan gum. Your muffins will still be fluffy and delicious! You can change these muffins with the seasons. In fall, add pumpkin puree and spices like nutmeg. In spring, try fresh berries for a burst of color and taste. For summer, peach or apricot chunks can brighten up your muffins. Each season brings a chance for new flavors! To keep your maple glazed donut muffins fresh, store them in an airtight container. This method helps retain moisture. Place a paper towel at the bottom of the container to absorb extra moisture. You can store them at room temperature for up to three days. If you want to keep them longer, refrigerate them for up to a week. Just remember, refrigeration can dry them out a bit. Freezing is a great way to save muffins for later. To freeze, let them cool completely first. Then, wrap each muffin tightly in plastic wrap. Next, place the wrapped muffins in a freezer-safe bag or container. They can last up to three months in the freezer. When you're ready to enjoy them, just take out the desired number and let them thaw at room temperature. To reheat your muffins, you have a few options. For a soft and warm muffin, microwave one for about 10-15 seconds. If you prefer a slightly crispy top, place it in a toaster oven at 350°F (175°C) for about 5 minutes. This will bring back some of that fresh-baked taste. Enjoy your muffins warm with a fresh glaze if you like! These muffins stay fresh for about three days at room temperature. To keep them longer, store them in an airtight container. You can also refrigerate them for up to a week. Just remember, they may lose some of their softness. Yes, you can! If you don't have buttermilk, mix one tablespoon of vinegar or lemon juice with milk. Let it sit for five minutes to thicken. This will mimic buttermilk's tangy flavor and texture, making your muffins just as tasty. You have several options! You can use melted coconut oil or melted butter instead of vegetable oil. Both will add a nice flavor. Applesauce is another great choice for a lower-fat option. It keeps the muffins moist and adds a hint of sweetness. We explored how to make delicious maple glazed donut muffins, starting with key ingredients. You learned about measurements and substitutions to make the recipe flexible. I shared step-by-step instructions, from preparation to glazing. Tips and tricks helped you avoid common mistakes and perfect your muffins. You can also try various flavor add-ins and gluten-free options to personalize your baked goods. Finally, I provided storage tips to keep muffins fresh. Enjoy making these muffins and share them with friends and family!

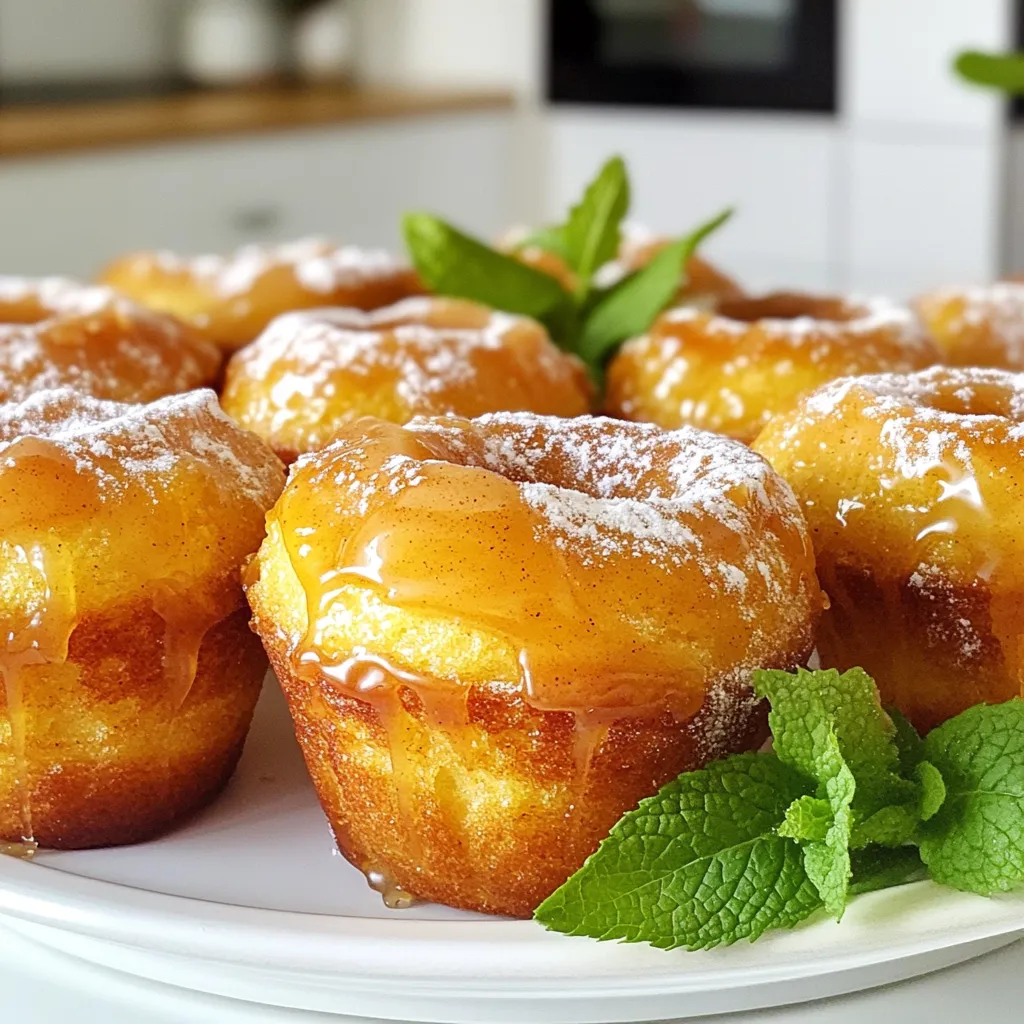
Maple Glazed Donut Muffins Irresistible and Easy Recipe

Craving a sweet treat that’s both easy to make and oh-so-delicious? Look no further! In this post, I’m sharing my

- 1 lb Brussels sprouts, trimmed and halved - 3 tablespoons olive oil - 2 tablespoons pure maple syrup - 1 tablespoon Dijon mustard - 2 cloves garlic, minced - Salt and pepper to taste These main ingredients create a wonderful mix of flavors. The Brussels sprouts are the star, bringing a nice crunch. Olive oil adds richness, while maple syrup offers sweetness. Dijon mustard gives a tangy kick, and garlic adds depth. Salt and pepper round out the taste. - 1/2 teaspoon red pepper flakes (optional for some heat) - 1/4 cup walnuts, chopped - 1/4 cup dried cranberries Adding red pepper flakes gives a spicy touch. Walnuts add crunch and healthy fats. Dried cranberries introduce a sweet and chewy element. These optional ingredients make the dish more exciting and textured. - Olive oil can be replaced with avocado oil. - Maple syrup can be swapped for honey for a different sweetness. - Dijon mustard can be changed to yellow mustard if needed. These substitutions allow you to adjust the recipe based on what you have. Each swap can change the flavor slightly but still keep the dish delicious. Feel free to experiment and make it your own! Start by gathering all your ingredients. You need Brussels sprouts, olive oil, maple syrup, mustard, garlic, salt, pepper, walnuts, and cranberries. Preheat your oven to 425°F (220°C). Lining your baking sheet with parchment paper helps with easy cleanup. 1. In a mixing bowl, blend olive oil, maple syrup, mustard, and minced garlic. 2. Season this mixture with salt and pepper. If you like heat, add red pepper flakes. Whisk until smooth. 3. Add the halved Brussels sprouts. Toss them until they are well-coated with the maple mustard mix. 4. Spread the Brussels sprouts on your baking sheet. Make sure they are in a single layer. 5. Roast them in the oven for 20 minutes. Stir halfway for even cooking. 6. In the last 5 minutes, sprinkle walnuts and cranberries on top. This adds crunch and sweetness. 7. When the sprouts are tender and caramelized, take them out of the oven. Let them cool slightly before serving. To get the best flavor, make sure the sprouts are dry before mixing. This helps them roast well. Space the sprouts out on the pan. If they are too close, they will steam instead of roast. Stir halfway through to keep them from burning. Always check for tenderness; they should be soft and golden. Enjoy the lovely mix of flavors and textures! To cook Brussels sprouts well, always select fresh ones. Look for firm sprouts with bright green color. Trim the ends and cut them in half for even cooking. Make sure to roast them in a single layer. This helps them brown nicely and get a crispy texture. Stir them halfway through cooking for even heat. A smooth glaze makes the dish shine. Combine olive oil, maple syrup, and Dijon mustard for the best flavor. Whisk them together until blended. If the glaze is too thick, add a bit more olive oil. If it’s too thin, add more mustard or syrup. The right glaze should coat the sprouts well but not drench them. Presentation adds joy to your meal. Use a large, colorful platter for serving. After roasting, drizzle any leftover glaze on top. This adds shine and flavor. For extra flair, sprinkle more cranberries and walnuts on top. The mix of colors makes the dish look inviting and tasty. Enjoy your meal with friends or family for an even better experience! {{image_4}} You can change the taste of your Maple Mustard Brussels Sprouts. Here are some fun ideas: - Bacon or Pancetta: Add crispy bits for a smoky flavor. - Cheese: Sprinkle feta or goat cheese for a creamy touch. - Lemon Zest: A hint of zest brightens the overall taste. - Herbs: Fresh thyme or rosemary can add an earthy note. Mix and match these to find your favorite combo! You can adapt this dish to fit the seasons. Here are some ideas: - Fall: Add roasted squash or apples for warmth. - Winter: Include root veggies like carrots or parsnips for heartiness. - Spring: Toss in fresh peas or asparagus for a bright flavor. - Summer: Add cherry tomatoes or zucchini for a fresh twist. Seasonal changes keep the dish exciting and fresh! You can easily make this dish vegetarian or vegan. Here’s how: - Maple Syrup: Ensure it’s pure and vegan-friendly. - Butter: Use vegan butter instead of regular if you want a richer flavor. - Nuts: Substitute walnuts for pecans or almonds for a different crunch. These small changes give you tasty options while keeping it plant-based! To keep your Maple Mustard Brussels Sprouts fresh, let them cool first. After they cool, place them in an airtight container. Store them in the fridge for up to three days. If you want to keep them longer, consider freezing. To reheat, preheat your oven to 350°F (175°C). Spread the sprouts on a baking sheet. Heat them for about 10 minutes or until warm. This keeps them crispy. You can also use a microwave, but the texture may be softer. Yes, you can freeze Brussels sprouts. First, blanch them in boiling water for three minutes. Then, cool them quickly in ice water. Drain and pack them in freezer bags. They can last for up to six months. When ready to use, thaw and roast as needed. You can use frozen Brussels sprouts. However, fresh sprouts work best. Frozen sprouts may lose some crunch. Thaw and drain them first to avoid excess water. This helps keep your dish crispy and tasty. To thicken the glaze, you can simmer it. Heat the maple syrup and mustard mix in a small pot. Cook it on low heat until it reduces and thickens. Another option is to add a bit of cornstarch mixed with water. Stir it in while cooking for a thicker texture. These sprouts pair well with many dishes. Try serving them with roasted chicken or grilled fish. They also go great with quinoa or rice for a vegetarian meal. Add a fresh salad for a balanced plate. This blog post shared the best way to make Maple Mustard Brussels Sprouts. We covered key ingredients, cooking steps, and tips for perfect results. Remember to experiment with flavors and variations to find your favorite mix. Proper storage keeps the sprouts fresh, and simple reheating makes easy meals. Exploring this dish can lead to delicious new ideas for your kitchen. Enjoy crafting this tasty recipe that fits your taste and needs!

Maple Mustard Brussels Sprouts Sheet-Pan Delight

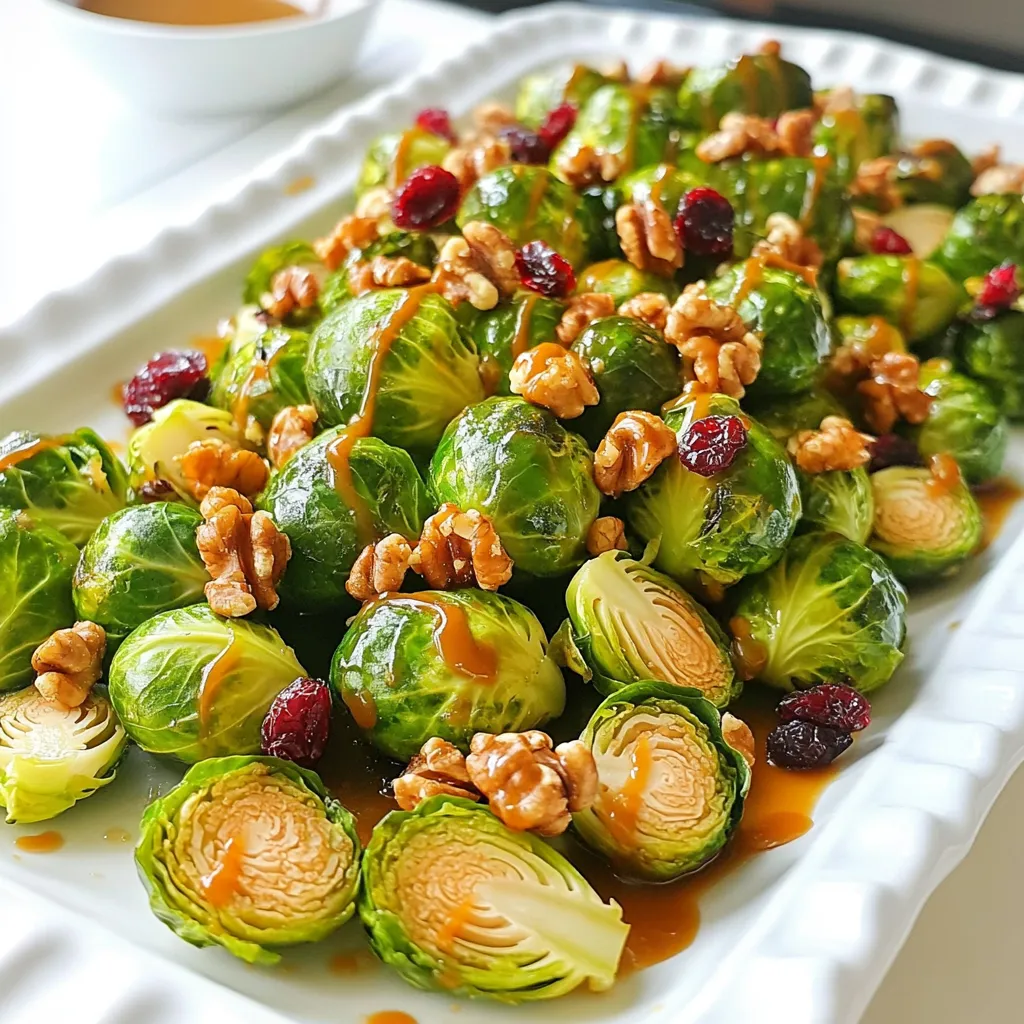
Looking for a delicious side dish that impresses? My Maple Mustard Brussels Sprouts Sheet-Pan Delight is the answer! This recipe

- 1 cup rolled oats - 1 1/2 cups unsweetened almond milk - 1 medium apple, diced - 2 tablespoons caramel sauce - 1 tablespoon chia seeds - 1 teaspoon ground cinnamon - 1 tablespoon maple syrup - A pinch of salt - Chopped nuts Caramel apple overnight oats blend sweet and crunchy flavors. You start with rolled oats, which give a hearty base. They soak up flavors well and keep you full. Next, unsweetened almond milk adds creaminess without extra sugar. Diced apples are the star here. They provide natural sweetness and a crisp bite. Choose a sweet apple like Fuji or Honeycrisp for the best taste. Then, add caramel sauce. This is what makes the oats taste like dessert. Chia seeds are small but mighty. They help thicken the oats and add fiber. Ground cinnamon is key for warmth and spice. A pinch of salt balances all the sweetness. If you want extra sweetness, add maple syrup. Finally, top with chopped nuts. They add crunch and a nutty flavor. Walnuts or pecans work great for this recipe. These ingredients come together for a tasty breakfast. Each bite is sweet, creamy, and satisfying. You can change the milk or nuts as you like. With just a few simple steps, you’ll have a delicious meal ready for the morning. Start by mixing the dry ingredients. In a medium bowl, combine 1 cup of rolled oats, 1 tablespoon of chia seeds, and 1 teaspoon of ground cinnamon. Add a pinch of salt to enhance the flavor. Stir everything well until it is mixed evenly. Next, combine the wet ingredients. Pour in 1 ½ cups of unsweetened almond milk. If you prefer, you can use any milk you like. This will make your oats creamy and delicious. Now, let's fold in the apples and caramel. Dice 1 medium apple and add it to the bowl. I like to use a sweet apple like Fuji or Honeycrisp. Then, drizzle in 2 tablespoons of caramel sauce. If you want extra sweetness, add 1 tablespoon of maple syrup. Gently mix so the apple and caramel coat the oats. After that, divide the oat mixture into two jars or airtight containers. This makes it easy to grab in the morning. Seal each container with a lid. Place them in the refrigerator to chill overnight. This soaking time is important. It allows the oats to absorb the milk and become soft. For overnight soaking tips, make sure to stir the oats in the morning. Taste them to check the sweetness. If you like it sweeter, add a little more maple syrup. Enjoy your tasty and easy breakfast! You can make your caramel apple overnight oats sweeter. Try adding maple syrup for a touch of natural sweetness. One tablespoon is a good start. If you like it sweeter, add more syrup to taste. You can also adjust the caramel amount. Use two tablespoons for a rich flavor. If you prefer a lighter touch, reduce the caramel. Taste your mix before sealing it in jars. This way, you can find your perfect level of sweetness. Adding nuts can give your oats a nice crunch. Chopped walnuts or pecans work well in this recipe. They add flavor and healthy fats. You can also play with milk options. Unsweetened almond milk is great, but you can try oat or coconut milk too. Each milk brings a unique taste. This lets you customize your oats even more. Serving your oats in mason jars is fun and easy. Clear bowls also look nice. These options show off the layers of oats, apples, and caramel. For a pretty touch, garnish with a thin slice of apple. A light dusting of cinnamon on top adds color and flavor. You can drizzle extra caramel sauce for a sweet finish. This makes your breakfast not just tasty but also beautiful! {{image_4}} You can change the fruit in your overnight oats. Try using pears or bananas instead of apples. Both fruits give a nice taste. Pears add sweetness, while bananas create creaminess. You can also mix in dried fruits. Raisins, cranberries, or apricots work well. They add a chewy texture and extra flavor. Want to boost the taste? Add vanilla extract or a pinch of nutmeg. These ingredients make your oats more exciting. You can also switch up the toppings. Instead of nuts, try adding coconut flakes or chocolate chips. Both options create a new twist on your breakfast. If you need gluten-free options, choose certified gluten-free oats. They will work great in this recipe. For vegan modifications, use plant-based milk and ensure your caramel sauce is dairy-free. This way, everyone can enjoy a tasty breakfast. To keep your caramel apple overnight oats fresh, use airtight containers. Glass jars work great for this. They help seal in the flavors and keep the oats soft. In the refrigerator, your oats will stay fresh for up to four days. Just remember to keep the toppings separate until you're ready to eat. You can enjoy your overnight oats cold, but if you like them warm, reheating is easy. Use a microwave for quick heating. Just place your oats in a bowl and heat for about a minute. Stir halfway through for even warmth. You can also heat them on the stovetop. Just place them in a small pot over low heat. Stir until warm. If you want to store your oats for longer, you can freeze them. Pour the mixture into freezer-safe containers. Leave some space at the top, as the oats will expand when frozen. They can last up to three months in the freezer. To thaw, move them to the fridge the night before. You can also microwave them directly from the freezer. Just add a splash of milk to help them soften. You can store caramel apple overnight oats for up to 5 days in the fridge. The oats stay soft, and the flavors blend well over time. Just keep them in airtight containers to ensure freshness. If you notice any change in texture or smell, it's best to toss them. Yes, you can make overnight oats without chia seeds. If you prefer, use flaxseeds or omit them entirely. Chia seeds add fiber and help thicken the oats. If you skip them, just remember to adjust the liquid amount slightly, as they absorb some of it. Overnight oats can be healthier than traditional oatmeal. They often contain more fiber and protein, especially if you add nuts or seeds. The cold soaking method retains nutrients better than cooking. Plus, you get to control the sugar by choosing your sweeteners. Enjoying a variety of toppings can also boost nutrient intake. In this post, we explored how to make delicious caramel apple overnight oats. We covered the key ingredients like oats, almond milk, and caramel sauce. You learned step-by-step instructions for mixing, assembling, and storing your oats. I shared tips to customize sweetness and enhance texture. Finally, consider different fruits or flavors to make your oats unique. Enjoy your tasty creation!

Caramel Apple Overnight Oats Tasty and Easy Breakfast

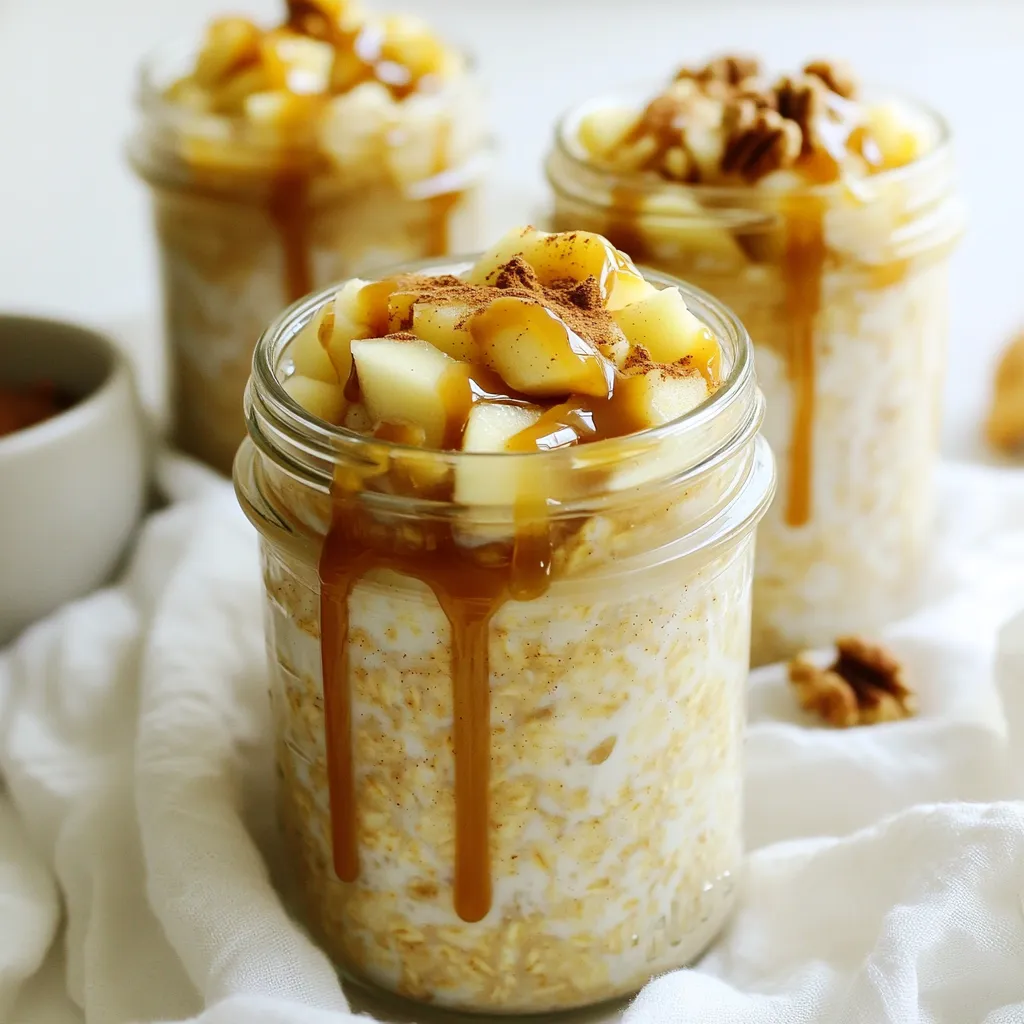
Get ready to enjoy a delicious morning treat with my Caramel Apple Overnight Oats! This easy recipe combines the sweetness

- 1 cup pumpkin puree (canned or homemade) - 1 frozen banana - 1/2 cup Greek yogurt (or a dairy-free alternative) - 1/2 cup almond milk (or your preferred milk) - 1 teaspoon vanilla extract - 1 teaspoon pumpkin pie spice - 1 tablespoon maple syrup (or honey for sweetening) - Toppings: granola, sliced bananas, chia seeds, toasted pecans, a sprinkle of cinnamon, coconut whipped cream (optional) When you measure your ingredients, use standard cups and spoons. If you need to convert, here are some quick tips: - 1 cup equals 240 milliliters. - 1 tablespoon equals 15 milliliters. - 1 teaspoon equals about 5 milliliters. You can use these conversions to ensure you get the right amounts for your cozy pumpkin pie smoothie bowl. If you have dietary restrictions, don’t worry! Here are some alternatives: - For a dairy-free option, use coconut yogurt instead of Greek yogurt. - Swap almond milk with oat milk or soy milk based on your taste preference. - If you avoid added sugars, use mashed dates or a ripe banana instead of maple syrup. These swaps help you enjoy the cozy pumpkin pie smoothie bowl while meeting your needs. To start, gather your ingredients. You need pumpkin puree, a frozen banana, Greek yogurt, almond milk, vanilla extract, pumpkin pie spice, and maple syrup. It’s best to measure each item first. This helps keep your kitchen tidy. Next, take your blender and add the pumpkin puree. Then, toss in the frozen banana. Next, add the Greek yogurt and almond milk. The yogurt makes it creamy. Add the vanilla extract and pumpkin pie spice for flavor. Finally, drizzle in the maple syrup for sweetness. Make sure to blend on high speed. Blend until the mixture is creamy and smooth. It should look thick but pourable. If it seems too thick, add a little more almond milk. Blend again until you reach the right texture. When blending, always start with the liquids at the bottom. This helps the blender mix everything well. Use a tamper if your blender has one. This tool pushes the ingredients down without stopping the blend. If your smoothie bowl is still lumpy, blend longer. You want a silky texture. If needed, pause the blender and scrape down the sides. This ensures all ingredients mix evenly. Once your smoothie is blended, pour it into a bowl. Use a spatula to get every bit out. Now for the fun part: decorating! Start by adding a base layer of granola in the center. This adds crunch. Then, place sliced bananas, chia seeds, and toasted pecans around the edges. Make it look beautiful and colorful. To finish, sprinkle a little cinnamon on top. If you like, add a dollop of coconut whipped cream right in the center. This makes it look extra special. Serve your cozy pumpkin pie smoothie bowl right away with a spoon. Enjoy! To get the right thickness, use a frozen banana. It helps to chill the mix well. If your smoothie is too thick, add more almond milk. Blend until smooth and creamy. You want it to flow easily but not be runny. To boost the taste, try adding a pinch of nutmeg or ginger. These spices give warmth and depth. You can also mix in a dash of cinnamon for extra flavor. Always adjust to your own taste. Remember, it's all about what makes you happy! Use a good blender to ensure a smooth blend. I suggest a high-speed blender for best results. A bowl and a spatula are key for serving. You’ll want good, sharp knives for slicing toppings. A measuring cup helps with accuracy in your ingredients. {{image_4}} To make your cozy pumpkin pie smoothie bowl dairy-free and vegan, swap the Greek yogurt for a dairy-free yogurt. Brands like almond, coconut, or cashew yogurt work well. You can also use coconut milk instead of almond milk. This change keeps the creamy texture while keeping it plant-based. You can enhance the flavor of your smoothie bowl with fun add-ins. For a chocolate twist, blend in a tablespoon of cocoa powder. If you love nutty flavors, add a spoonful of your favorite nut butter. This makes the bowl richer and adds healthy fats. You can also try adding a pinch of nutmeg for extra warmth. In the fall, use fresh pumpkin if you have it. Simply roast and puree it for a fresh taste. In winter, swap the pumpkin for sweet potato for a different flavor. You can also use spices like ginger or cinnamon to match the season. This keeps the recipe exciting all year long! Store any leftover smoothie in an airtight container. Keep it in the fridge for up to two days. The smoothie may separate, so give it a good shake before serving. If you want to keep it longer, freezing is a great option. You can freeze this smoothie bowl for later. Pour the smoothie into freezer-safe containers or bags. Leave some space at the top for expansion. It can last for up to three months in the freezer. When you are ready to enjoy it, take it out and let it thaw in the fridge overnight. To reheat the smoothie, avoid using the microwave. Instead, let it sit at room temperature for about 30 minutes. If it becomes too thick, stir in a little almond milk to reach your desired consistency. Enjoy your cozy pumpkin pie smoothie bowl fresh! Yes, you can use fresh pumpkin. First, roast the pumpkin until soft. Then, scoop out the flesh and blend it until smooth. This option gives a fresh taste to your smoothie bowl. To make it vegan, swap Greek yogurt for a dairy-free yogurt. Use almond milk or any plant-based milk. Maple syrup is already vegan, so you’re good to go! The best toppings are granola, sliced bananas, and chia seeds. You can also add toasted pecans for crunch. A sprinkle of cinnamon makes it warm and cozy. For a treat, add coconut whipped cream! You learned about crafting a great smoothie bowl in this post. We covered key ingredients, step-by-step preparation, and useful tips. You can make it your own with variations and alternatives to fit your diet. Storing leftovers and reheating options keep your meal fresh and easy. Experiment with flavors and enjoy your creations. You now have the tools to make the perfect smoothie bowl that suits your taste and needs. Happy blending!

Cozy Pumpkin Pie Smoothie Bowl Blissful and Simple

Fall is the perfect time for warm flavors, and what better way to embrace the season than with a Cozy

To make these no-bake chocolate peanut butter oat squares, gather your ingredients. Here’s what you’ll need: - 1 cup rolled oats - 1/2 cup natural peanut butter (smooth or crunchy) - 1/4 cup honey or pure maple syrup - 1/2 cup dark chocolate chips (dairy-free if desired) - 1/4 cup milk (dairy or non-dairy alternative) - 1/2 teaspoon pure vanilla extract - A pinch of sea salt - Optional toppings: crushed peanuts, unsweetened shredded coconut, or mini chocolate chips Each ingredient plays a key role. Rolled oats provide a hearty base. Peanut butter adds creaminess and protein. Honey or maple syrup gives natural sweetness. Dark chocolate chips bring rich flavor. Milk helps the chocolate melt smoothly. Vanilla extract adds a nice touch. Sea salt balances the sweetness. You can add toppings for extra crunch and flavor. Now that you have your ingredients, you’re ready to start making these delicious squares! Start by gathering your ingredients. In a medium mixing bowl, add one cup of rolled oats, half a cup of natural peanut butter, and a quarter cup of honey or maple syrup. Don't forget a pinch of sea salt! Use a sturdy spatula or a wooden spoon to mix everything together. Keep stirring until you have a thick paste. This step is key, as you want all the ingredients to blend well. Next, take a small saucepan and place it over low heat. Add half a cup of dark chocolate chips and a quarter cup of milk. Stir the mixture continuously with a spatula. Keep an eye on it until the chocolate melts completely and looks glossy. Once smooth, remove the pan from the heat. Stir in half a teaspoon of pure vanilla extract for an extra kick of flavor. Now it's time to combine the mixtures! Carefully pour the warm chocolate over the oat mixture in your bowl. Mix vigorously until every oat is coated with chocolate. The mixture will be thick, so take your time. Prepare an 8x8 inch baking dish by lining it with parchment paper. This will help you lift the squares out later. Transfer the thick mixture into the dish. Use a spatula or your clean hands to spread it evenly. Firmly press it down to create a compact layer. If you want, sprinkle your choice of toppings, like crushed peanuts or mini chocolate chips, on top. Gently press them down with your fingers. Refrigerate for at least 2 hours, or until firm. When ready, lift the squares out using the parchment paper. Cut them into even squares or bars. Enjoy your delicious no-bake chocolate peanut butter oat squares! To get a great texture, use rolled oats. They give a nice chew. Mix the peanut butter and honey until smooth. This helps the oats stick together well. After you add the chocolate, mix thoroughly. A thick paste is key for a good bite. Press the mixture firmly into the pan. This ensures it holds its shape when cut. If you need to swap ingredients, it’s easy. For a nut-free option, use sun butter. Maple syrup works great if you want to avoid honey. Choose dairy-free chocolate chips for a vegan treat. If you need gluten-free, make sure your oats are certified gluten-free. These simple swaps let everyone enjoy these squares. Presentation makes a dish special. Cut the squares into even pieces for a clean look. Place them on a colorful plate to catch the eye. Dust with cocoa powder for a fancy touch. Adding crushed peanuts or mini chocolate chips on top adds texture. Serve chilled or at room temperature for the best taste. {{image_4}} You can make these squares even tastier with simple flavor boosts. Try adding a dash of cinnamon for warmth. A few drops of almond extract can give a lovely twist. If you want a richer taste, mix in a tablespoon of cocoa powder. These small changes can take your squares to the next level! Do you have dietary needs? You can easily swap ingredients. Use almond butter or sunflower seed butter if you have nut allergies. For a vegan option, replace honey with agave syrup or maple syrup. If you want gluten-free squares, ensure your oats are certified gluten-free. These swaps keep the flavor while fitting your diet! Toppings can add fun and crunch to your squares. Try crushed peanuts for a nutty bite. Unsweetened shredded coconut adds a tropical twist. Mini chocolate chips are always a hit! You can also sprinkle on some chia seeds or hemp seeds for extra nutrition. Mix and match toppings to find your favorite combo! Store your no-bake chocolate peanut butter oat squares in an airtight container. This keeps them fresh and tasty. You can layer parchment paper between the squares to prevent sticking. Remember to keep them cool and dry. These squares can last up to one week in the fridge. If stored properly, they stay fresh and delicious. If you notice any change in texture or smell, it’s best to toss them. For longer storage, freeze the squares. Cut them into individual pieces first. Wrap each piece in plastic wrap and place them in a freezer-safe bag. They can last up to three months in the freezer. When you want one, just thaw it in the fridge overnight. Enjoy your treat whenever you like! Yes, you can! Almond butter, cashew butter, or sunflower seed butter work great. Each nut butter brings a unique taste and texture. Just pick one that you enjoy. If you choose a nut butter that is thicker, you may need to add a bit more milk or sweetener. To cut the squares, use a sharp knife. First, lift the squares out of the baking dish using the parchment paper. Place it on a cutting board. For neat cuts, wipe the knife with a damp cloth after each cut. This helps keep the edges clean. Yes, this recipe can easily be made vegan. Use maple syrup instead of honey. Also, choose dairy-free chocolate chips and non-dairy milk. With these swaps, everyone can enjoy these tasty treats! This article covers a fun and tasty recipe for no-bake chocolate oat squares. You learned about the key ingredients like oats, peanut butter, and dark chocolate. I shared step-by-step instructions for making the oat mixture and melting chocolate. You also discovered great tips for the best texture and fun ways to serve. Keep these ideas in mind to enjoy your own delicious squares. Experiment with flavors and toppings to make them your own. Enjoy every bite!

No-Bake Chocolate Peanut Butter Oat Squares Delight

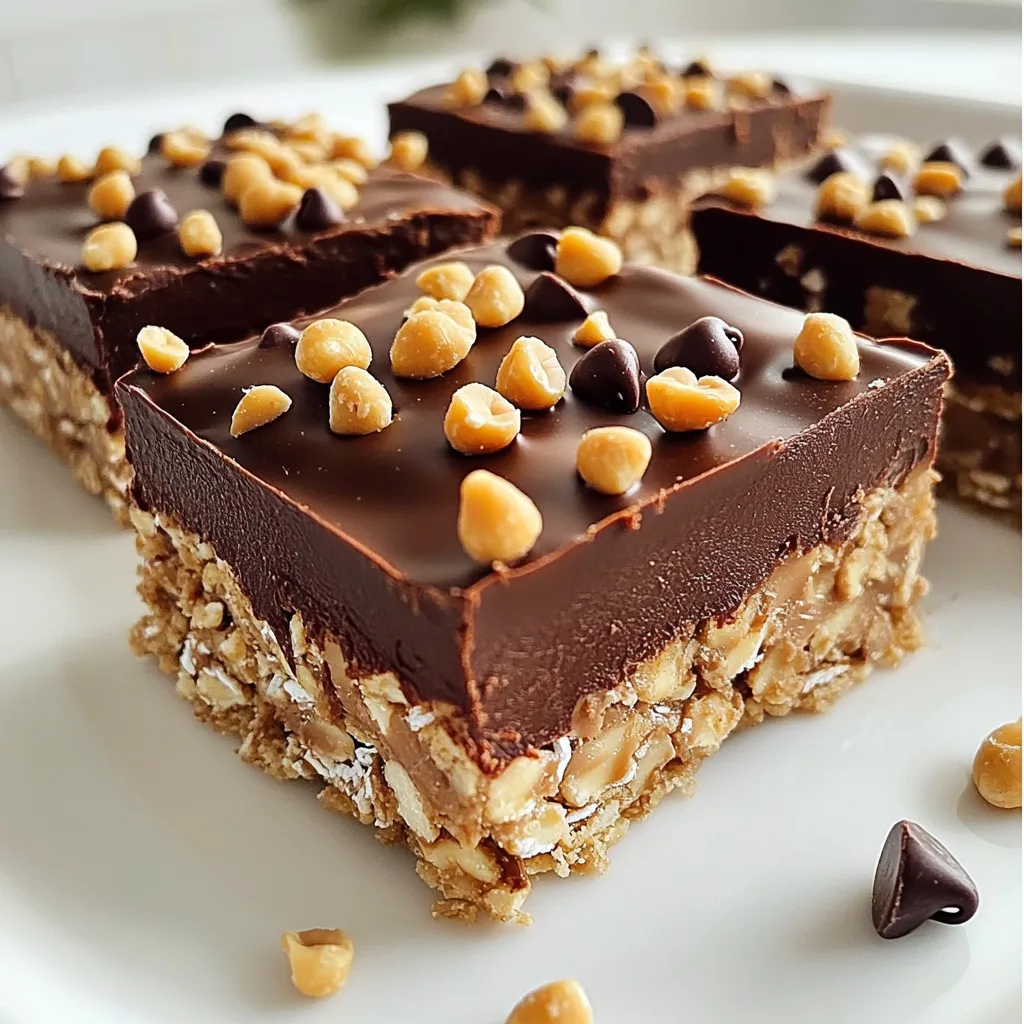
Indulge in a quick, tasty treat with my No-Bake Chocolate Peanut Butter Oat Squares! These squares are packed with flavor

- 2 large apples, peeled, cored, and diced - 1 cup brown sugar - 1 teaspoon ground cinnamon - 2 tablespoons fresh lemon juice - 1 cup caramel sauce - 1 package refrigerated pie crusts - 1 egg (for egg wash) - 1 tablespoon milk - 1 tablespoon granulated sugar - A pinch of nutmeg for warmth - Chopped nuts for crunch - A splash of vanilla extract for sweetness - Sea salt to balance the sweetness - Medium mixing bowl - Medium saucepan - Rolling pin - Cookie cutter or glass for cutting circles - Fork for sealing edges - Whisk for egg wash - Parchment paper for baking sheet - Wire rack for cooling Start by gathering your apples. You need two large apples. Peel, core, and dice them into small pieces. In a medium bowl, mix the diced apples with one cup of brown sugar, one teaspoon of ground cinnamon, and two tablespoons of fresh lemon juice. Stir well to coat the apples. Let the mixture sit for about ten minutes. This waiting time helps the flavors blend together nicely. Next, transfer the apple mixture to a medium saucepan. Set the heat to medium. Cook the apples for about five to seven minutes. Stir occasionally until they soften a bit but still hold their shape. Once they are ready, remove them from the heat and let them cool down to room temperature. While the apples cool, prepare your pie crusts. Roll out the refrigerated pie crusts on a lightly floured surface. Use a cookie cutter or the rim of a glass to cut out circles that are about four inches wide. You should get around eight to ten circles, based on how thick your dough is. Preheat your oven to 400°F (200°C) during this process. On each dough circle, place about one tablespoon of the apple filling in the center. Drizzle a little caramel sauce over the filling for a sweet touch. Now, fold the dough over the filling to create a half-moon shape. Press the edges to seal them well. Use a fork to crimp the edges for a nice look and a secure seal. Repeat this with the rest of the dough and filling. In a small bowl, whisk together one egg and one tablespoon of milk to make an egg wash. Brush this mixture over the tops of the hand pies. Sprinkle some granulated sugar on top for added sweetness and crunch. Arrange the hand pies on a parchment-lined baking sheet, giving them space. Bake them in the preheated oven for about 20 to 25 minutes. They should turn golden brown and the crust should be flaky. Once done, let them cool slightly before serving. Enjoy these delicious treats warm with extra caramel sauce if you like! When making caramel apple hand pies, keep a few things in mind. First, use firm apples like Granny Smith or Honeycrisp. They hold their shape well during cooking. Second, let the apple filling sit for 10 minutes. This step helps the flavors blend and enhances the taste. - Choose a good pie crust. A store-bought crust is fine, but homemade adds a personal touch. - Work with cold dough. Cold dough makes a flakier crust. Chill it in the fridge before rolling it out. - Don’t overfill the pies. Use about 1 tablespoon of filling per pie. This keeps them from leaking during baking. Many home cooks make simple mistakes. Avoid these for the best hand pies. - Skipping the egg wash can lead to pale, unappealing pies. Always brush the tops with it for a golden color. - Not sealing the edges well can cause filling to leak. Press the edges firmly and crimp them with a fork. - Overcooking the apple filling can make it mushy. Cook just until slightly soft. This keeps the apples intact. A flaky crust is key to great hand pies. Here’s how to achieve it: - Use cold butter or shortening. This creates flaky layers as the fat melts during baking. - Don’t overwork the dough. Mix until just combined to avoid tough crusts. - Roll the dough evenly. Aim for about 1/8 inch thick. A consistent thickness ensures even baking. Follow these tips, and your caramel apple hand pies will turn out delicious every time! {{image_4}} You can mix flavors in many fun ways. Try adding spices like nutmeg or ginger to the apple filling. A pinch of vanilla extract can also boost the sweetness. You can even swap apples for pears or peaches. For a nutty twist, add chopped walnuts or pecans to the filling. These changes make each bite exciting and unique. To make these hand pies gluten-free, use a gluten-free pie crust. Many brands offer good options that taste great. For a vegan version, replace the egg wash with a splash of almond milk. You can also use a vegan caramel sauce. Check labels for dairy-free choices. These swaps keep the pies delicious without losing flavor. Seasons bring different fruits. In autumn, try adding cranberries or figs for a tart touch. In summer, fresh berries like blueberries or strawberries work well. In winter, citrus fruits like oranges can add a zing. Each fruit gives you a chance to explore new tastes and textures. Enjoy the flavors of each season with your hand pies! To keep your leftover hand pies fresh, place them in an airtight container. Line the container with paper towels to soak up extra moisture. This step helps keep the crust crispy. Store them at room temperature for up to two days. If you want to keep them longer, refrigeration works too, but the crust may lose some crispiness. Freezing hand pies is a great option for make-ahead snacks. Allow the baked pies to cool completely. Once cool, place them on a baking sheet lined with parchment paper. Freeze them for about one hour or until firm. After that, transfer the pies to a freezer-safe bag or container. They can stay in the freezer for up to three months. When ready to eat, you can bake them straight from the freezer. To reheat hand pies, preheat your oven to 350°F (175°C). Place the pies on a baking sheet lined with parchment paper. Heat them for about 10-15 minutes, or until they are warm and the crust is flaky again. Avoid using the microwave, as it can make the crust soggy. For an extra touch, brush the tops with a bit of melted butter before heating to add flavor. Yes, you can use other apples. I like Granny Smith for their tartness. Honeycrisp apples add sweetness and crunch. Mix and match for the best flavor. Just make sure the apples hold their shape when cooked. Making homemade caramel sauce is simple. You need just three ingredients: sugar, butter, and cream. 1. In a saucepan, heat 1 cup of sugar on medium heat. Stir until it melts and turns golden brown. 2. Add 6 tablespoons of butter and stir until melted. 3. Slowly pour in 1/2 cup of cream while stirring. Be careful; it will bubble! 4. Remove from heat and let it cool. Use it in your hand pies or drizzle on top for extra sweetness. Absolutely! Air frying hand pies gives them a nice, crispy crust. Preheat your air fryer to 375°F (190°C). 1. Place the hand pies in a single layer in the air fryer basket. 2. Cook for about 10-12 minutes, checking for golden brown color. 3. Enjoy them warm! This method saves time and makes cleanup easy. You learned how to make tasty hand pies with a lot of unique flavors. We covered the ingredients, cooking steps, and handy tips to improve your pie-making skills. You can try different fruits and even make them gluten-free or vegan. Remember to store leftovers properly and even freeze them for later. Making these pies is fun and easy. Enjoy your baking adventure and share it with friends!

Caramel Apple Hand Pies Delicious and Easy Treat

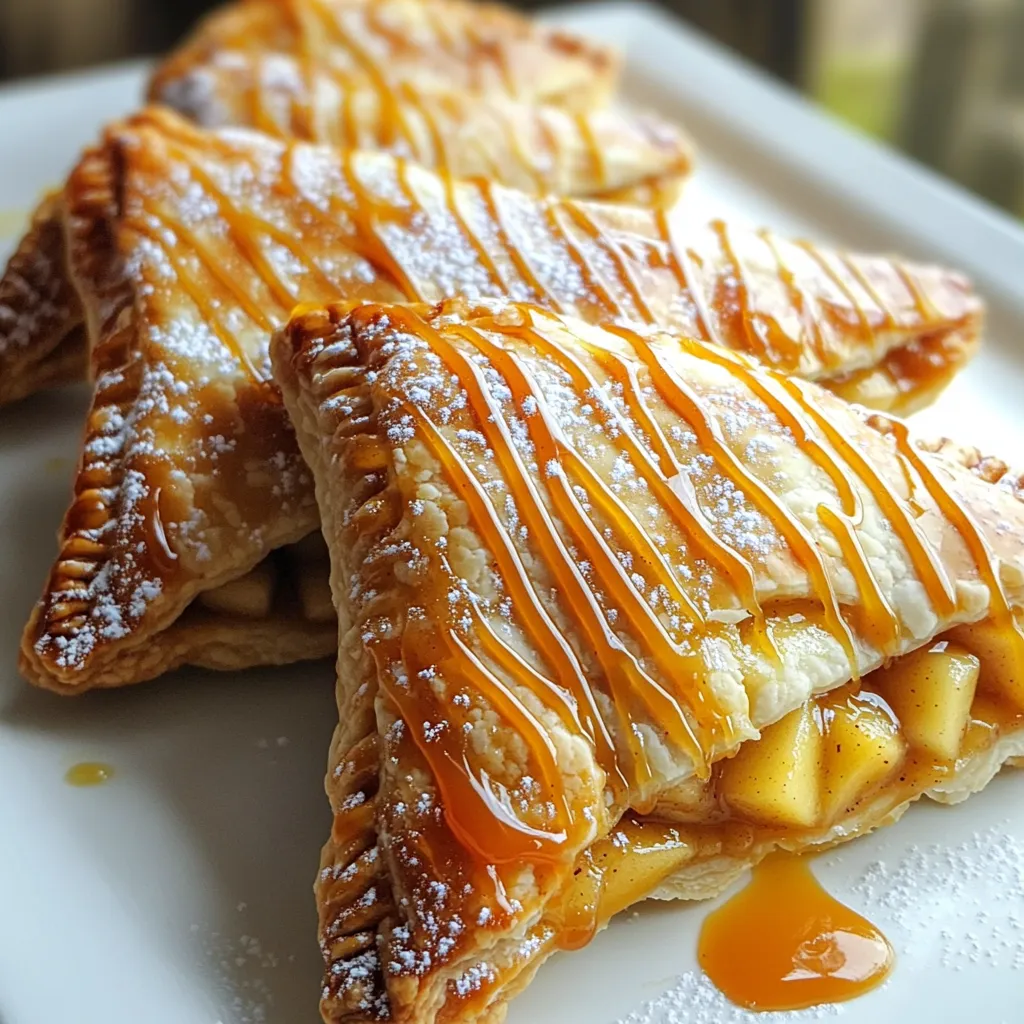
Craving a sweet treat that’s easy to make? Caramel apple hand pies are perfect! These mini delights combine warm apples

- 2 cups all-purpose flour - 1 cup granulated sugar - 1 tablespoon baking powder - ½ teaspoon baking soda - ½ teaspoon salt - 1 large egg - 1 cup buttermilk - ⅓ cup vegetable oil - 1 teaspoon vanilla extract - 1 ½ cups fresh blueberries - ½ cup all-purpose flour - ⅓ cup brown sugar, packed - ¼ cup unsalted butter, softened - ½ teaspoon ground cinnamon When making blueberry streusel muffins, the right ingredients make all the difference. Start with the dry ingredients. They form the muffin's base. Use all-purpose flour for a soft texture. Granulated sugar adds sweetness. Baking powder and baking soda help them rise. Salt rounds out the flavor. Next, we mix the wet ingredients. A large egg binds everything together. Buttermilk gives a rich taste and moistness. Vegetable oil keeps the muffins soft. Vanilla extract adds a lovely aroma. Finally, the fresh blueberries burst with flavor in every bite. For the streusel topping, combine flour, brown sugar, butter, and cinnamon. This mix creates a sweet, crunchy layer on top. It contrasts perfectly with the soft muffin. Each bite is a delightful mix of textures and flavors. First, preheat your oven to 375°F (190°C). This step is key for baking. It ensures even cooking. While the oven heats, prepare your muffin pan. You can use paper liners or grease the cups lightly. In a large bowl, whisk together the dry ingredients. Combine 2 cups of all-purpose flour, 1 cup of sugar, 1 tablespoon of baking powder, ½ teaspoon of baking soda, and ½ teaspoon of salt. Mixing these well helps the muffins rise nicely. In another bowl, crack 1 large egg. Whisk it until slightly frothy. Next, add 1 cup of buttermilk, ⅓ cup of vegetable oil, and 1 teaspoon of vanilla extract. Mix these until smooth and well combined. Now, pour the wet mixture into the bowl with dry ingredients. Use a rubber spatula or wooden spoon to gently fold them together. Be careful not to overmix. We want a slightly lumpy batter for soft muffins. Gently fold in 1 ½ cups of fresh blueberries. Make sure they are evenly spread throughout the batter. Take care not to crush them, as we want them whole for juicy bites. In a small bowl, mix together the streusel topping. Combine ½ cup of all-purpose flour, ⅓ cup of packed brown sugar, ¼ cup of softened butter, and ½ teaspoon of ground cinnamon. Use a fork or your fingers. Blend until you see coarse crumbs. Spoon the batter into your lined muffin cups. Fill each cup about three-quarters full. Generously sprinkle the streusel topping over each muffin. This adds a crunchy layer to your treats. Place the muffin pan in the preheated oven. Bake for 18-20 minutes. Check doneness by inserting a toothpick in the center of a muffin. If it comes out clean, they are ready! Once baked, remove the muffins from the oven. Let them cool in the pan for about 5 minutes. Then, transfer them to a wire rack. Cooling helps keep their texture light and fluffy. To make your blueberry streusel muffins moist, use buttermilk. It adds richness and flavor. Mix the wet and dry ingredients gently. Overmixing can lead to dry muffins. Aim for a slightly lumpy batter; it’s okay if some flour is visible. A great streusel topping makes your muffins shine. Use cold butter for a crumbly texture. Mix flour, brown sugar, and cinnamon well before adding butter. Your mixture should look like coarse crumbs. Don’t be shy; use a generous amount on each muffin. Overmixing your batter is a common mistake. It can make your muffins tough. Once you combine the wet and dry ingredients, use a rubber spatula. Fold gently, just enough to mix. Stop as soon as you see no dry flour. This keeps your muffins light and fluffy. {{image_4}} You can swap blueberries for other fruits. Raspberries or chopped strawberries work well. For a tropical twist, try diced pineapple. Just keep the fruit's moisture in mind. Too much moisture can make your muffins soggy. Nuts and seeds add crunch and flavor. Walnuts or pecans pair perfectly with blueberries. You can also use sunflower seeds or flaxseeds for a healthy boost. Just add about half a cup to the batter. Mixing in spices can elevate your muffins. Try adding a pinch of nutmeg or ginger for warmth. Citrus zest, like lemon or orange, brightens the flavor. You can also use flavored extracts, such as almond or coconut. Experiment with these ideas to find your favorite taste! To keep your muffins fresh, place them in an airtight container. You can also wrap them in plastic wrap. Store them at room temperature for up to three days. If you want them to last longer, consider refrigeration. Just remember, refrigeration can make muffins dry. Freezing is a great option for muffins. First, let them cool completely. Then, wrap each muffin tightly in plastic wrap. Place the wrapped muffins in a freezer bag or container. Label the bag with the date. Muffins can stay frozen for up to three months. To enjoy later, just thaw them at room temperature. Reheating muffins brings back their yummy taste. For the best results, preheat your oven to 350°F (175°C). Place the muffins on a baking sheet. Heat them for about 10 minutes. You can also use a microwave. Heat each muffin for about 15-20 seconds. Enjoy warm muffins with a nice crispy top! Yes, you can use frozen blueberries. They work well in muffins. Just toss them in a bit of flour before adding to the batter. This helps prevent them from sinking. They may make the batter a bit purple, but the taste remains great. To check if the muffins are done, insert a toothpick in the center. If it comes out clean, they are ready. The tops should also look golden brown. Keep an eye on them near the end of baking time. Ovens can vary, so check around 18 minutes. If you don’t have buttermilk, you can make your own. Mix 1 cup of milk with 1 tablespoon of vinegar or lemon juice. Let it sit for about 5 minutes. This will give you a similar tangy flavor that works well in muffins. To prevent sticking, use paper liners or grease the pan well. You can use cooking spray or butter. If using butter, make sure to cover all sides of the cups. This keeps the muffins intact when you take them out. Yes, you can prepare the batter ahead of time. Store it in the fridge for up to 2 hours. Just remember to mix it gently before filling the muffin cups. Baking right after mixing gives the best rise and texture. You now have all the steps to bake delicious muffins. We covered the dry and wet ingredients you need. The process is straightforward from mixing to baking. Remember the tips for moist muffins and perfect streusel topping. Try different flavors and storage ideas to keep your muffins fresh. Enjoy the joy of baking and share with friends and family. Your kitchen will be filled with sweet smells and smiles!

Blueberry Streusel Muffins Bakery Style Delight

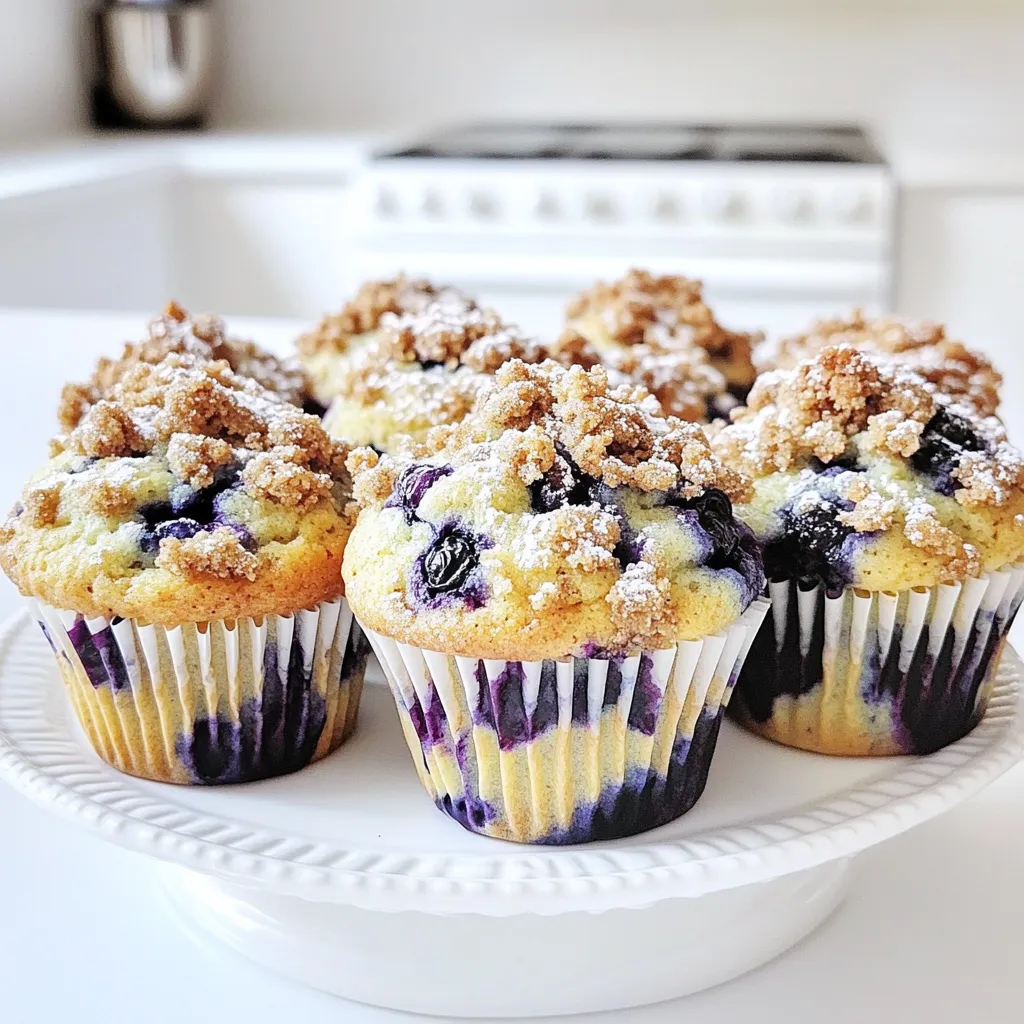
If you crave warm, fluffy muffins that taste like they belong in a bakery, you’re in the right place! My

- 1 pound ground turkey or chicken - 1/2 cup breadcrumbs (preferably Italian-style) - 1/4 cup freshly grated Parmesan cheese - 1 large egg, beaten - 4 cups fresh spinach, roughly chopped - 2 medium carrots, peeled and diced - 2 celery stalks, diced - 1 medium onion, finely chopped For this soup, I love using ground turkey or chicken. They keep the meatballs light and tasty. The breadcrumbs and Parmesan cheese help bind the meatballs together while adding great flavor. I also like to include lots of fresh vegetables like carrots, celery, and onion. They bring sweetness and crunch to the soup. Don't forget the spinach! It adds color and nutrients. - 2 teaspoons garlic powder - 1 teaspoon Italian seasoning blend - Salt and freshly cracked black pepper, to taste - 8 cups low-sodium chicken broth - 1 cup orzo pasta For seasoning, garlic powder and Italian seasoning blend work wonders. They give the soup a nice depth of flavor. I always add salt and pepper to taste, as they can change the dish. Low-sodium chicken broth keeps it light yet flavorful. The orzo pasta makes the soup hearty and filling. - Fresh parsley, chopped, for garnish - Extra Parmesan cheese, for serving Garnishing with fresh parsley brightens the dish. It adds a lovely pop of green. A sprinkle of extra Parmesan cheese enhances the rich flavor. These simple touches make each bowl feel special. To start, mix the meatball ingredients in a large bowl. You need 1 pound of ground turkey or chicken. Add 1/2 cup of breadcrumbs, 1/4 cup of grated Parmesan cheese, and 1 large beaten egg. Don’t forget 2 teaspoons of garlic powder and 1 teaspoon of Italian seasoning. Season with salt and pepper to taste. Once mixed, shape the mixture into small meatballs. Aim for about 1 inch in diameter. This size cooks evenly and fits well in the soup. Now, arrange the meatballs evenly at the bottom of the slow cooker. Pour in 8 cups of low-sodium chicken broth. Next, add 2 diced carrots, 2 diced celery stalks, and 1 finely chopped onion. Stir gently to mix everything without breaking the meatballs. Cover the slow cooker with the lid. You can set it to cook on low for 6 hours or on high for 3 hours. About 30 minutes before you serve, add 1 cup of orzo pasta and 4 cups of roughly chopped fresh spinach. Stir well and taste the soup. You can adjust the seasoning with more salt and pepper if needed. Once the orzo is tender and the spinach has wilted, ladle the hot soup into bowls. Enjoy every comforting bite! To ensure moist meatballs, use ground turkey or chicken. Adding breadcrumbs and Parmesan helps too. These keep the meatballs tender. Always mix but do not overwork the meat. This keeps them light and fluffy. If you want alternative protein options, try ground beef or pork. You can also use plant-based meat for a vegetarian version. Just follow the same mixing and cooking steps. Seasoning your soup is key for great taste. Start with salt and pepper, but taste as you go. If it needs more zing, add extra garlic powder or Italian seasoning. A splash of lemon juice can brighten the flavor too. To enhance broth flavor, consider using homemade broth. If you use store-bought, choose low-sodium options. This gives you more control over the salt level. You can also add a bay leaf during cooking for added depth. Slow cookers and stovetops each have their perks. Slow cookers let flavors meld over hours. Stovetop cooking gives you more control over timing. If you prefer a quicker method, stovetop is best. To prevent overcooking or soggy pasta, add orzo only 30 minutes before serving. Stir gently, and keep an eye on it. If using a stovetop, cook pasta separately and add it just before serving. This keeps it firm and perfect. {{image_4}} You can change the meat in your soup. Use beef or pork if you want a richer taste. Just remember to adjust the seasoning. If you prefer a vegetarian option, try using plant-based meatballs. They add great flavor and keep the dish light. Seasonal veggies can bring new life to your soup. Think about adding zucchini or green beans when they are fresh. Leafy greens like kale or Swiss chard work well, too. Fresh herbs like thyme or basil can add a nice touch. They brighten the taste and give more depth. Using homemade broth gives your soup a rich flavor. Store-bought broth is still a great option if you're short on time. For pasta, orzo is classic, but you can switch it up. Try small shells or ditalini for a fun twist. Adjust the cooking time based on the pasta you choose. To store leftovers, let the soup cool down first. Then, place it in an airtight container. Seal it tightly to keep air out. You can store the soup in the fridge for up to three days. When you reheat the soup, do it slowly. Pour the soup into a pot over low heat. Stir it often to warm it evenly. You can also use the microwave. Heat it in short bursts, stirring in between. If you want to save the soup for longer, freezing is a great option. First, let the soup cool completely. Next, pour it into freezer-safe containers. Leave some space at the top for expansion. You can freeze the soup for up to three months. To thaw the soup, move it to the fridge overnight. For a quick thaw, run the container under cool water. Reheat it on the stove as you would with refrigerated soup. In the fridge, the soup stays fresh for about three days. If you freeze it, it lasts about three months. Always check for signs of spoilage before eating. If it smells bad or looks strange, throw it out. To make this soup vegetarian, you can swap the ground turkey or chicken for a plant-based meat substitute like lentils or chickpeas. You can use vegetable broth instead of chicken broth. For added flavor, include extra herbs like basil or oregano. This way, you still enjoy the rich taste without meat. Yes, frozen vegetables work great in this soup! They save time and add convenience. Choose a mix that includes carrots, peas, and green beans. Just toss them in during the cooking phase. They will cook nicely in the broth and keep their flavor. This soup pairs well with a few simple sides. Try serving crusty bread for dipping. A fresh salad with mixed greens adds a light touch. You can also serve garlic bread for a tasty treat. Each side enhances the cozy feel of the meal. In this blog post, we explored the key ingredients for Slow Cooker Italian Wedding Soup, like ground turkey, vegetables, and spices. I shared step-by-step instructions for making meatballs and assembling the soup. We also discussed tips to perfect the dish, variations for proteins and vegetables, and how to store leftovers. Slow Cooker Italian Wedding Soup is delicious and easy to customize. Enjoy your warm bowl of comfort anytime!

Slow Cooker Italian Wedding Soup Simple Comfort Dish

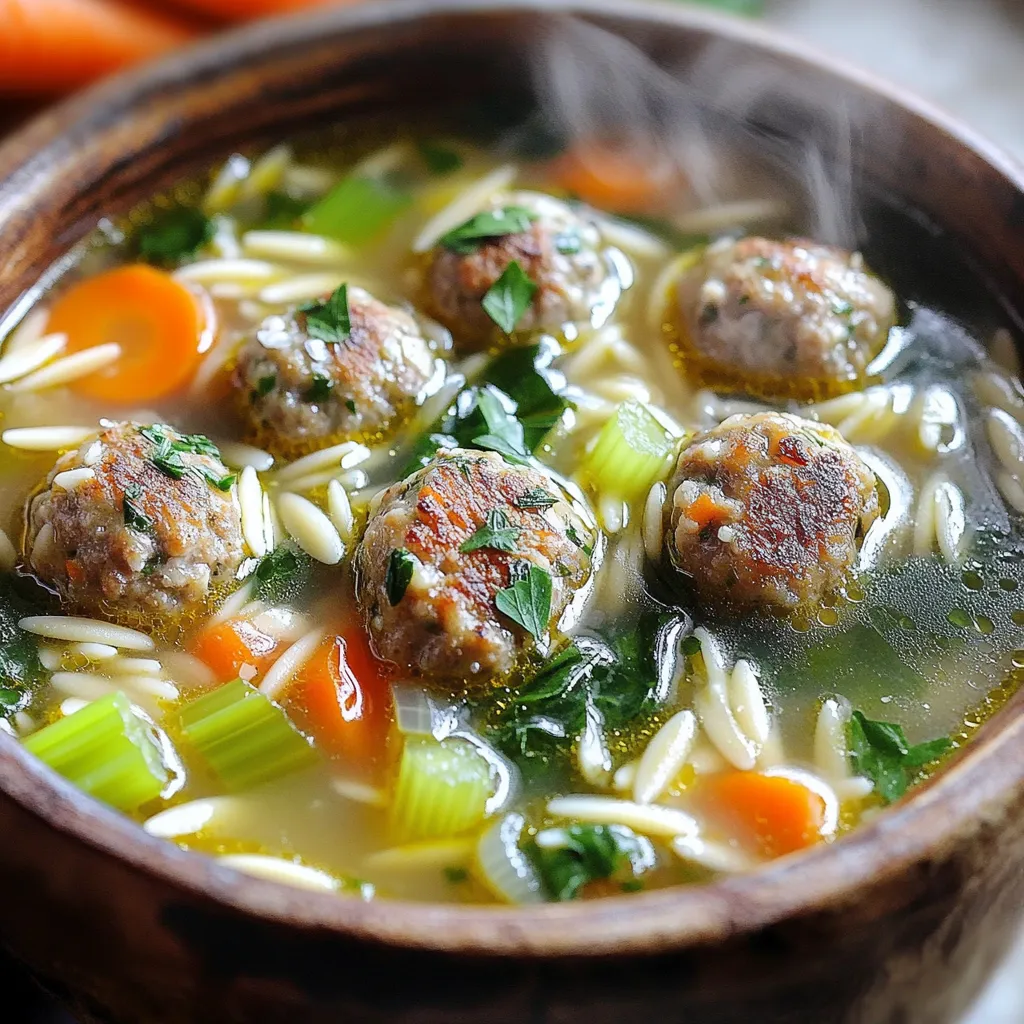
If you crave a warm and filling dish, the Slow Cooker Italian Wedding Soup is the answer. In this cozy

To make Air Fryer Cinnamon Sugar Donut Holes, you need the following ingredients: - 1 cup all-purpose flour - 1/4 cup granulated sugar (for batter) - 1 1/2 teaspoons baking powder - 1/4 teaspoon baking soda - 1/4 teaspoon salt - 1/2 teaspoon ground cinnamon (plus extra for topping) - 1/2 cup buttermilk (room temperature) - 1 large egg (room temperature) - 2 tablespoons unsalted butter, melted - 1/2 teaspoon vanilla extract - 1/4 cup granulated sugar (for coating) - 1 teaspoon ground cinnamon (for coating) Each ingredient plays an important role. The flour gives the donut holes structure. Granulated sugar sweetens the batter and the coating. Baking powder and soda help them rise. Salt enhances flavors, while cinnamon adds warmth. Buttermilk keeps the texture moist. The egg binds everything. Melted butter adds richness, and vanilla brings a lovely aroma. The coating of sugar and cinnamon creates a sweet finish. Gather these ingredients before you start. The process is quick, and you will want everything ready! Enjoy the fun of mixing and tasting. First, grab a large mixing bowl. In this bowl, whisk together these dry items: - 1 cup all-purpose flour - 1/4 cup granulated sugar - 1 1/2 teaspoons baking powder - 1/4 teaspoon baking soda - 1/4 teaspoon salt - 1/2 teaspoon ground cinnamon Make sure everything blends well. This dry mix is the base of our donut holes. Now, take another bowl for the wet ingredients. Blend together: - 1/2 cup buttermilk - 1 large egg - 2 tablespoons melted unsalted butter - 1/2 teaspoon vanilla extract Stir these until they mix into a smooth blend. This mixture gives moisture to our donut holes. Pour the wet mix into the bowl with the dry mix. Gently fold them together with a spatula. Don't overmix; it’s okay to have some lumps. Next, preheat your air fryer to 350°F (175°C). While it heats, lightly grease the basket with cooking spray. Use a small scoop to form the batter into balls about 1 inch wide. Place them in the basket, leaving space between each one. Air fry the donut holes for 8-10 minutes. They should turn golden brown. A toothpick should come out clean when inserted in the center. Cook in batches if needed. While they cook, mix the remaining: - 1/4 cup granulated sugar - 1 teaspoon ground cinnamon Once your donut holes are done, let them cool for a few minutes. Toss them in the cinnamon-sugar mix while they are warm. This coating will make them extra tasty! Enjoy your warm, sweet donut holes right away. Mixing the batter gently is key. If you mix too much, your donut holes will not be fluffy. You want some lumps in the batter. This keeps them light and airy. Remember, a few lumps are okay! Spacing is important when cooking in the air fryer. Place the donut holes about an inch apart. This helps hot air circulate. Good airflow ensures they cook evenly. If they are too close, some may be undercooked. Coating the donut holes while they are warm is best. After you take them out, let them cool for a few minutes. Then toss them in the cinnamon-sugar mix right away. This helps the sugar stick better. Make sure each donut hole gets a nice, sweet layer! {{image_4}} You can switch up the classic cinnamon sugar coating. Try some fun options! - Chocolate: Melt chocolate chips and dip the donut holes in it. - Powdered Sugar: Toss the warm donut holes in powdered sugar for a sweet touch. These options add a new flavor twist that makes every batch exciting. Want to change the taste? There are many ways to add flavor! - Pumpkin Spice: Mix in pumpkin spice for a cozy fall taste. - Nutmeg: Add a little nutmeg for a warm, rich flavor. These add-ins can take your donut holes to the next level! You can also make your donut holes a bit healthier. Here are some ideas: - Sugar Substitutes: Use honey or maple syrup instead of sugar. - Whole Wheat Flour: Swap all-purpose flour for whole wheat flour for more fiber. These swaps keep the taste while adding a healthy twist! To store leftover donut holes, place them in an airtight container. Keep the container in the fridge. They stay fresh for about 2-3 days. If you want them warm, just reheat them in the air fryer for a couple of minutes. This will help them regain their soft texture. For long-term storage, freeze the donut holes. First, let them cool completely. Then, spread them on a baking sheet. Freeze them for about 1 hour until firm. After that, place them in a freezer bag or container. They will last for about 2-3 months in the freezer. When you're ready to enjoy them, let them thaw in the fridge overnight. To reheat your donut holes, use the air fryer. Set it to 350°F (175°C) and heat for 3-5 minutes. This method will keep them fluffy and warm. You can also use a microwave, but they may lose some texture. If you use the microwave, heat them for 10-15 seconds at a time. Enjoy your tasty snack! Yes, you can! If you need gluten-free options, use a gluten-free all-purpose flour mix. This will help keep the texture light and fluffy. For whole wheat flour, you can substitute half of the all-purpose flour. This adds a nutty flavor and increases fiber. Remember, whole wheat may make the donut holes denser, but they will still taste great! If you don’t have buttermilk, don’t worry! You can make a quick substitute. Mix 1/2 cup of milk with 1/2 tablespoon of vinegar or lemon juice. Let it sit for about five minutes until it thickens. This will mimic buttermilk's tangy flavor. You can also use plain yogurt or sour cream, thinning it with a bit of milk to reach the right consistency. Dipping sauces can make your donut holes even more fun! Here are some tasty options: - Chocolate sauce for a rich, sweet dip. - Creamy vanilla glaze adds sweetness and pairs well. - A simple vanilla yogurt dip offers a light touch. - Serve with coffee or milk for a classic match. Enjoy experimenting with your favorite flavors! You now know how to make air-fried cinnamon sugar donut holes. We covered key steps, from mixing ingredients to ensuring they cook perfectly. You learned about fun variations and how to store leftovers too. Whether you stick to the classic recipe or get creative, these treats will impress. Enjoy making them at home and share your tasty results!

Air Fryer Cinnamon Sugar Donut Holes Delightful Snack

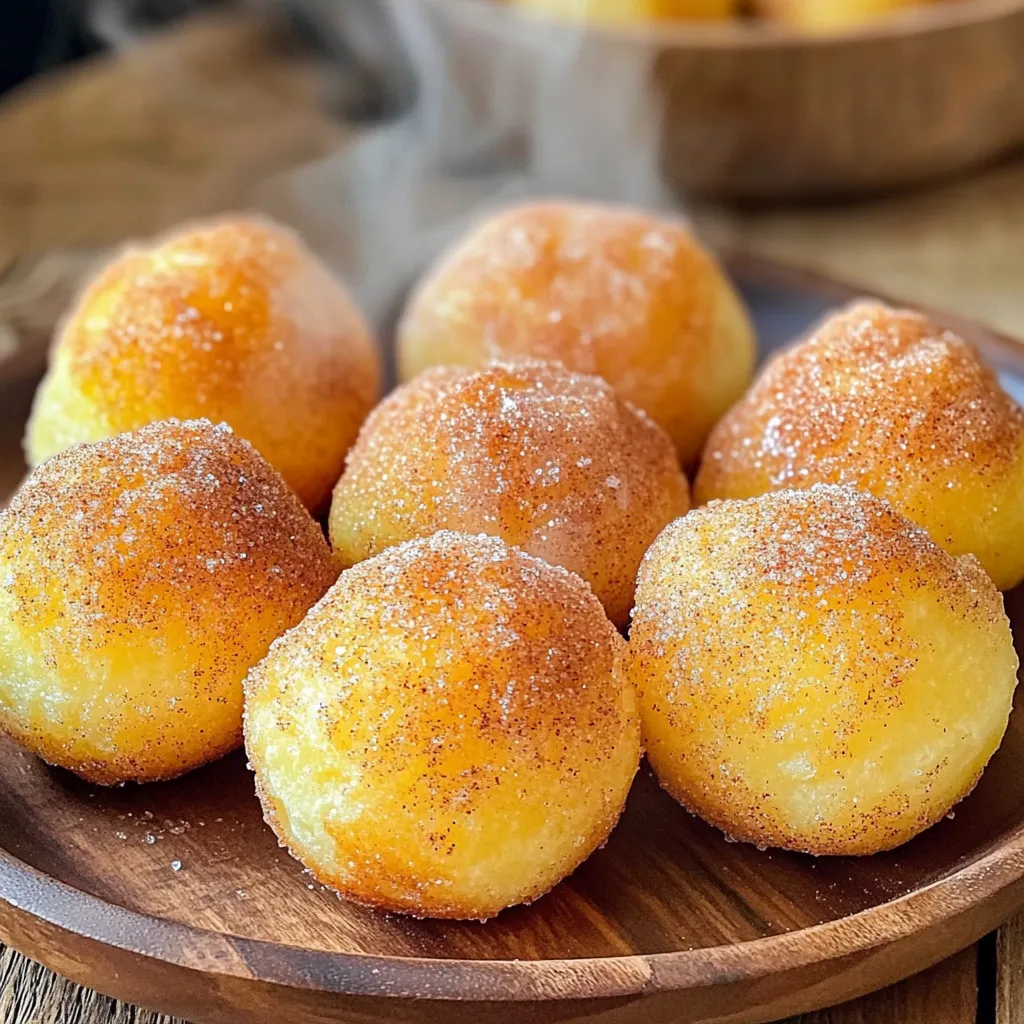
Are you ready to enjoy a tasty treat that’s easy to make? These Air Fryer Cinnamon Sugar Donut Holes will

- Chicken and seasoning - 1 lb (450g) boneless, skinless chicken breast, cut into bite-sized pieces - 1 tablespoon Cajun seasoning (adjust based on spice preference) - 2 tablespoons extra virgin olive oil - Vegetables and rice - 1 medium onion, finely diced - 3 cloves garlic, minced - 1 bell pepper (your choice of red or green), chopped into small pieces - 1 cup long-grain rice (such as basmati or jasmine) - Cream and broth - 2 cups low-sodium chicken broth (to enhance flavor without excess salt) - 1 cup heavy cream (for richness) - 1 cup frozen peas (add color and sweetness) - Optional garnishes - Salt and pepper to taste (always adjust based on preference) - Fresh parsley, finely chopped, for garnish Each ingredient plays a vital role in creating the rich, creamy flavor of this dish. The chicken provides protein, while the Cajun seasoning adds a spicy kick. The veggies bring in freshness and color. The long-grain rice absorbs the broth and cream, making it satisfyingly creamy. Frozen peas add a sweet pop, and parsley gives a fresh touch. Always taste as you go, adjusting salt and pepper to suit your taste. - Seasoning the chicken First, take the chicken breast and cut it into small pieces. In a bowl, mix the chicken with Cajun seasoning. Make sure each piece is covered well. This step adds great flavor to the chicken. - Sautéing vegetables Next, heat olive oil in a large pot over medium heat. Add the seasoned chicken and cook it for about 5-7 minutes. Stir often until it turns brown. Once done, move the chicken to a plate and keep it warm. In the same pot, add diced onion and chopped bell pepper. Cook these for 3-4 minutes until the onion looks clear. - Toasting the rice After the vegetables are soft, add minced garlic. Cook this for about a minute until it smells good. Now, stir in your long-grain rice. Toast the rice for 1-2 minutes. This helps the rice soak up the flavors from the pot. - Combining ingredients Pour in low-sodium chicken broth and turn up the heat until it boils. Once it starts boiling, lower the heat, cover the pot, and let it simmer for 15 minutes. - Simmering to perfection After 15 minutes, add heavy cream and frozen peas to the pot. Then, return the cooked chicken to the pot and mix everything well. Cover the pot again and cook for another 5-7 minutes. The rice should be tender, and the dish should look creamy. If it’s too thick, stir in some broth or water. - Adjusting the seasoning Once cooked, taste your dish. If needed, add salt and pepper to enhance the flavor. - Serving suggestions Serve the dish hot. For a nice touch, sprinkle fresh parsley on top. You can also add a slice of lemon on the side for extra brightness. This makes your dish look and taste special! How to ensure chicken stays tender To keep the chicken tender, do not overcook it. Cook just until it is browned. Remove it from the pot to avoid drying it out. You can also marinate the chicken for 30 minutes with Cajun seasoning to add flavor and moisture. Best rice varieties for this recipe I recommend using long-grain rice like basmati or jasmine. These types cook well and stay fluffy. They absorb flavors nicely, making each bite delicious. Adjusting spice levels You can easily adjust the spice level. Start with one tablespoon of Cajun seasoning. Taste the dish while cooking and add more if you want it spicier. Remember, you can always add more, but you can’t take it out! Serving ideas for a beautiful dish For a stunning presentation, serve the rice in shallow bowls. This way, the creamy texture shows beautifully. Consider adding a slice of lemon on the side. The bright color adds a nice touch. Garnishments that enhance flavor Fresh parsley is a great garnish. It adds color and a fresh taste. You can also sprinkle some extra Cajun seasoning on top for a pop of flavor. These small details make your dish look and taste even better! {{image_4}} You can easily adapt this dish to fit your needs. Here are some ideas: - Dairy-free alternatives: Swap heavy cream with coconut milk or a nut milk. This change keeps the dish creamy while adding a new flavor twist. - Spice level modifications: If you prefer less heat, use mild Cajun seasoning. You can also reduce the amount or skip it altogether for a gentler taste. - Adding vegetables for nutrition: Toss in chopped spinach, zucchini, or carrots. These veggies boost nutrition and add color to your meal. If you want to mix things up, try these variations: - One Pot Creamy Cajun Shrimp Rice: Substitute chicken with shrimp. Cook shrimp until pink, then follow the same steps. This change gives a fresh seafood twist to the dish. - Vegetarian Cajun Rice: Replace chicken with extra veggies or beans. Use vegetable broth instead of chicken broth. This option is hearty and full of flavor. To keep your One Pot Creamy Cajun Chicken Rice fresh, store leftovers in an airtight container. Make sure the dish cools down to room temperature first. Place it in the fridge right away. This dish stays good for about 3 to 4 days in the fridge. Always check for any off-smells or signs of spoilage before eating. When reheating, you want to keep it creamy. Use a saucepan on low heat. Stir in a splash of chicken broth or cream to help with creaminess. You can also use a microwave. Heat in short bursts, stirring in between. This method helps avoid hot spots. Make sure it is heated all the way through before serving. Enjoy your meal just like it was fresh! Can I make this recipe in advance? Yes, you can make this dish ahead of time. It keeps well in the fridge for up to three days. Just reheat it on the stove or in the microwave. The creamy texture will hold up nicely, and the flavors will deepen. How spicy is this dish? The spice level depends on the Cajun seasoning you use. If you prefer mild food, choose a milder blend. You can also reduce the amount of seasoning to suit your taste. Cajun food can be spicy, but you control the heat! Can I use brown rice instead of white rice? You can use brown rice, but it takes longer to cook. Brown rice needs about 40-45 minutes to become tender. Adjust the liquid accordingly, adding more broth as needed. The dish will still be delicious and nutritious! What to serve with One Pot Creamy Cajun Chicken Rice? This dish is a full meal on its own. However, you can pair it with a fresh salad or some crusty bread. A light vegetable side like steamed broccoli or green beans complements it well too. Can I add extra protein to the recipe? Absolutely! Feel free to add shrimp, sausage, or even tofu. Just ensure you adjust the cooking time. Cook the extra protein until it’s done before adding it to the pot. This way, you’ll have a hearty and satisfying meal! This blog post covered how to make One Pot Creamy Cajun Chicken Rice. You learned about key ingredients, preparation steps, cooking tips, and different variations. I shared expert advice for storing leftovers and reheating to keep the dish creamy. You can adapt this meal to fit your taste. With simple swaps, you can make it dairy-free or vegetarian. I hope you feel confident to try this recipe, explore flavors, and enjoy your cooking!

One Pot Creamy Cajun Chicken Rice Delightful Dish

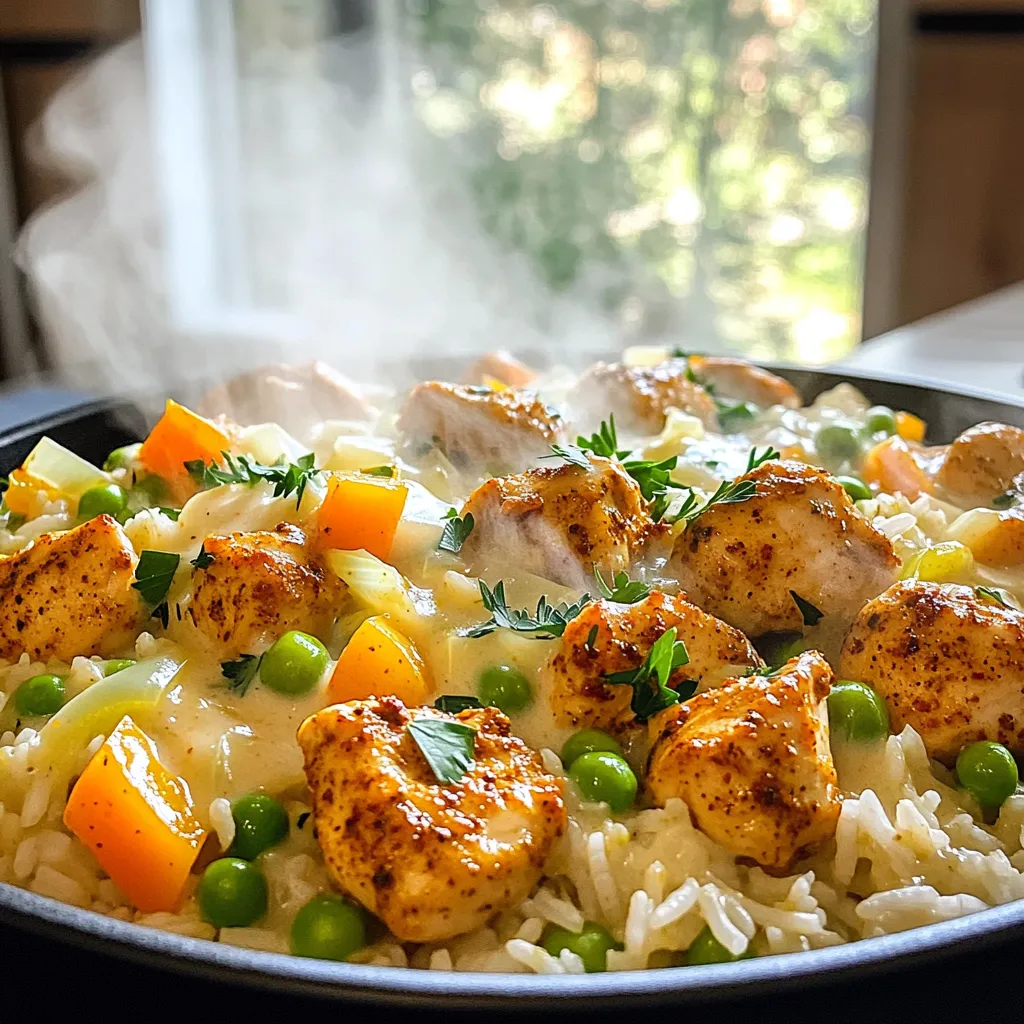
Welcome to my kitchen! Today, you’ll learn how to create a mouthwatering One Pot Creamy Cajun Chicken Rice. This dish

Older posts
Newer posts
← Previous Page1 Page2 Page3 … Page91 Next →

dsad

© 2025 recipesstation • Built with GeneratePress

Our Policies

  • Copyright Policy
  • Cookie Policy
  • GDPR Policy
  • Privacy Policy
  • Disclaimer
  • Terms Of Use

More Information

  • Home
  • About
  • Contact
  • Appetizers
  • Dessert
  • Dinner
  • Drinks
©2025, recipesstation About Back To Top