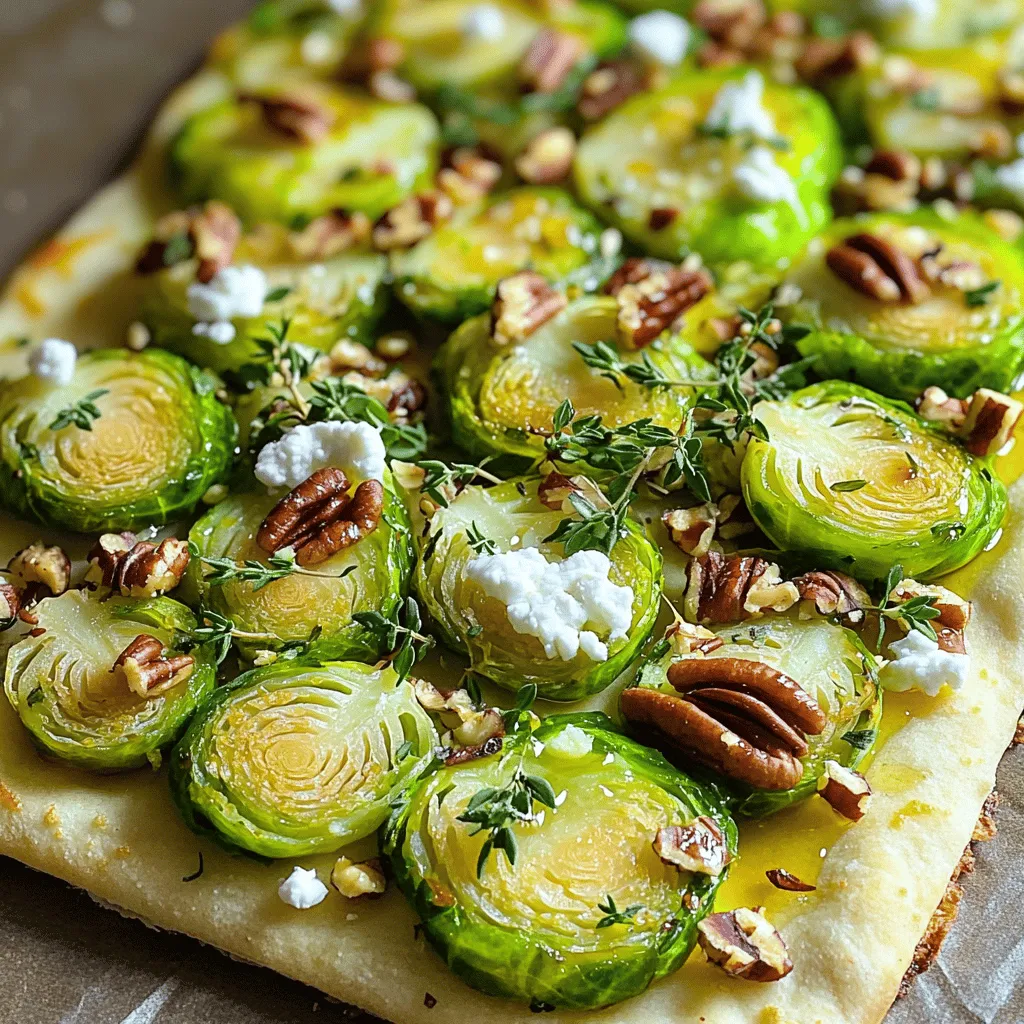
Maple Brussels Sprout Flatbread Flavorful Delight Recipe
Are you ready to impress your taste buds with a unique dish? The Maple Brussels Sprout Flatbread is here to
Are you ready to impress your taste buds with a unique dish? The Maple Brussels Sprout Flatbread is here to
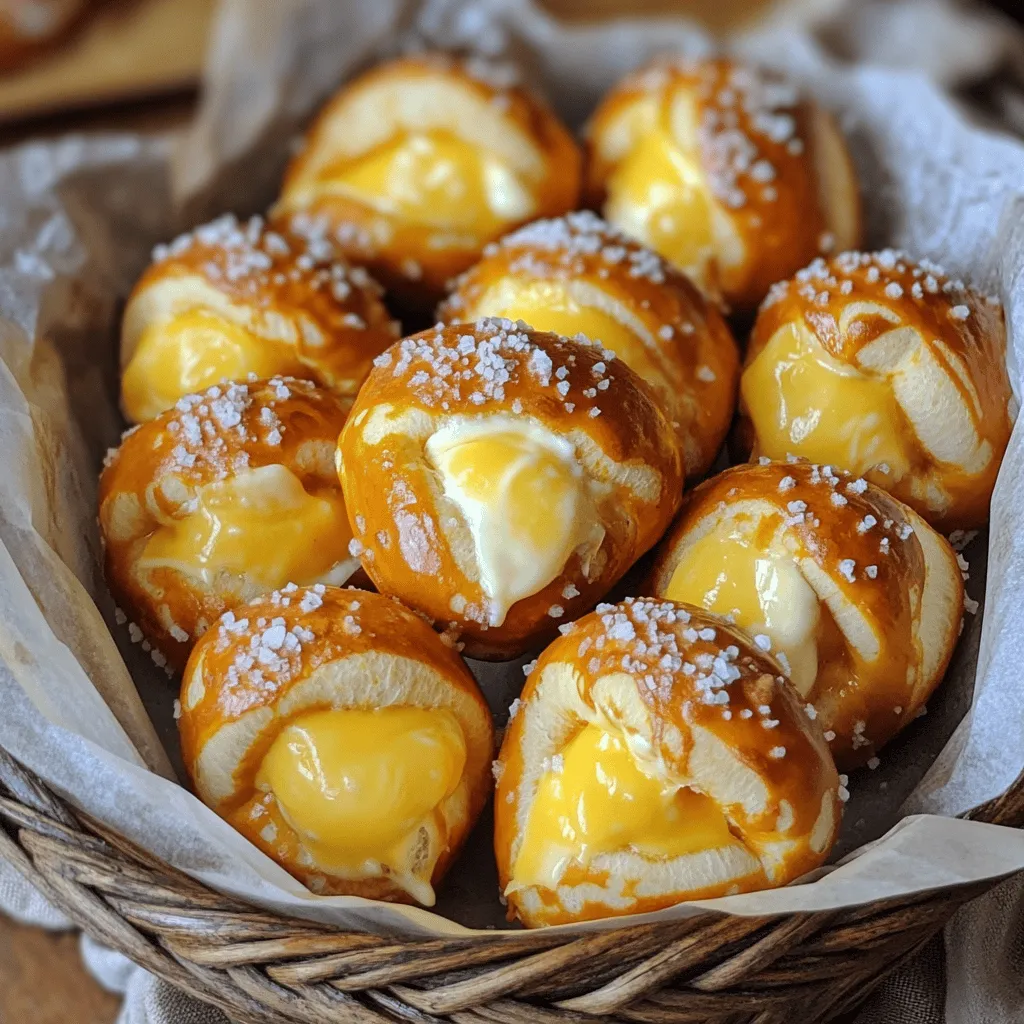
Craving a delicious snack that’s easy to make? My Triple Cheese Stuffed Pretzel Bites are the answer! These bites are
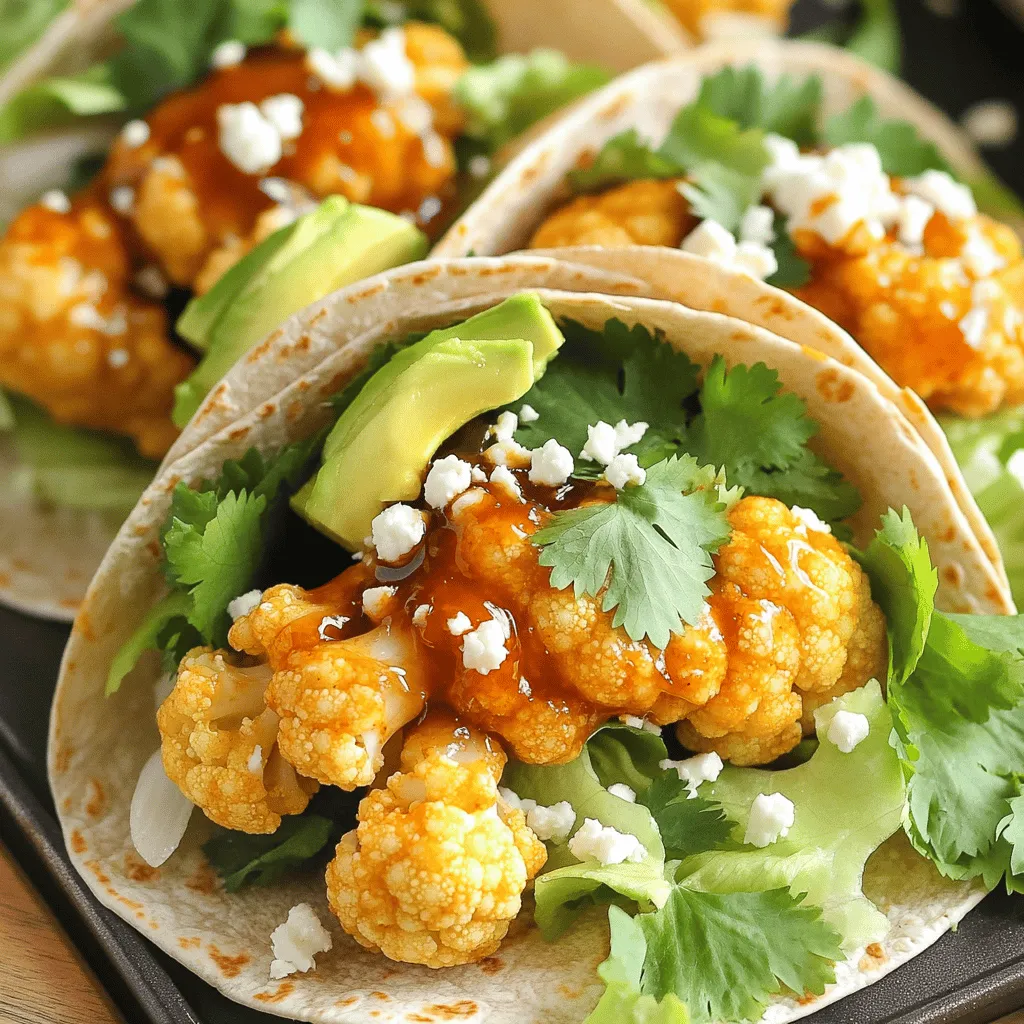
Do you want a tasty twist on your regular snack? Honey Chipotle Cauliflower Wing Wraps combine sweet and spicy flavors
![- 1 cup cream cheese, softened to room temperature - 1/2 cup sour cream - 1/2 cup dill pickles, finely chopped - 1/4 cup pickled jalapeños, finely chopped The base of this dip is a creamy blend of cream cheese and sour cream. Cream cheese gives it a rich taste, while sour cream adds a nice tang. Dill pickles bring a crunchy texture and a burst of flavor. Pickled jalapeños add heat to the dip, making it exciting. - 1 cup cherry tomatoes, halved - 1 cucumber, thinly sliced - An assortment of colorful crackers and crispy breadsticks When you serve the dip, it is fun to add colorful sides. Cherry tomatoes are sweet and juicy. Cucumber slices are cool and crisp. Crackers and crispy breadsticks are perfect for dipping. They add crunch and make it more enjoyable. - 2 tablespoons honey - 1 tablespoon Dijon mustard - 1 teaspoon garlic powder - 1 teaspoon onion powder You can make your dip fancy with some extra touches. Honey adds sweetness, balancing the heat. Dijon mustard gives it a tangy kick. Garlic and onion powder boost the flavor, making it even more delicious. You can mix these in or sprinkle them on top for a nice look. For the full recipe, check out the Sweet and Spicy Pickle Dip Board. Start by mixing the cream cheese and sour cream. Place 1 cup of softened cream cheese and 1/2 cup of sour cream in a bowl. Use a hand mixer or spatula to combine them until smooth. This step is key for a creamy dip. Next, add the chopped ingredients. Stir in 1/2 cup of finely chopped dill pickles and 1/4 cup of finely chopped pickled jalapeños. Don’t forget the seasonings! Add 2 tablespoons of honey, 1 tablespoon of Dijon mustard, 1 teaspoon of garlic powder, and 1 teaspoon of onion powder. Mix well to blend the flavors. Now it's time to taste your dip. Add salt and freshly ground pepper to your liking. If you want more sweetness, add more honey. For extra heat, toss in more jalapeños. Adjust the flavors until they fit your taste buds perfectly. Once your dip is mixed, transfer it to a nice serving bowl. Place it at the center of a large board or platter. This makes it the star of the show! Now, arrange your accompaniments around the dip. Add halved cherry tomatoes and sliced cucumbers for freshness. Finally, surround the dip with colorful crackers and crispy breadsticks. This will give everyone plenty of options for dipping. For the full recipe, you can explore the details that will help you create this snack delight! To make your Sweet and Spicy Pickle Dip Board shine, use colorful crackers and fresh vegetables. Look for artisan crackers in bright hues. They add charm and contrast to your dip. Arrange sliced cucumbers and cherry tomatoes around the dip. This not only adds color but also makes it easy for guests to grab snacks. For a finishing touch, garnish the dip with finely chopped dill pickles and jalapeños. This makes the dip look extra inviting and shows off the key ingredients. Pair the dip with crunchy snacks like pretzels or pita chips. These provide a satisfying crunch and complement the dip's creamy texture. For a unique twist, try serving it with crispy breadsticks. The options are endless! Serve the dip at room temperature for the best flavor. If it sits out too long, just give it a quick stir to refresh the taste. To save time, prep your ingredients in advance. Chop the pickles and jalapeños the day before. Store them in the fridge to keep them fresh. You can also mix the dip ahead of time and chill it. On serving day, just pull everything together. This method keeps your board looking great and your stress level low. Follow the Full Recipe for a quick and delicious snack that everyone will love! {{image_4}} You can change the taste of your Sweet and Spicy Pickle Dip easily. Here are some ideas: - Adding herbs or spices: Fresh dill, chives, or parsley can add brightness. A sprinkle of smoked paprika gives a nice depth. You can also try adding a pinch of cayenne for heat. - Swapping ingredients for different flavors: Instead of dill pickles, try bread-and-butter pickles for sweetness. You could even use green olives for a briny twist. Experiment with these ideas to create your perfect dip. Your dip board can be as creative as you like. Here are some fun ways to customize it: - Including various dips or spreads: Add a spicy hummus or a classic ranch dip. This gives your guests more choices and makes the board look colorful. - Adding meats or cheeses for variety: Slices of smoked turkey or salami can add heartiness. Consider including cubes of cheddar or creamy goat cheese to enhance the flavors. A variety of tastes makes your snack board fun and inviting. It's important to cater to different diets. Here are some easy swaps: - Dairy-free substitutes: Use dairy-free cream cheese and yogurt. These options work well and keep the dip creamy. - Gluten-free accompaniments: Serve with rice crackers, veggie sticks, or corn tortilla chips. They make great gluten-free options that everyone can enjoy. These alternatives ensure that everyone can savor your Sweet and Spicy Pickle Dip Board. To keep your Sweet and Spicy Pickle Dip fresh, store it in an airtight container. This helps keep out air and moisture. If you do this, the dip will stay fresh for about 3 to 5 days in the fridge. Always label your container with the date. This way, you’ll know when to use it. You typically won’t need to heat this dip, as it tastes great cold. If you want to warm it, do so gently. Use a microwave on low power, stirring often to avoid hot spots. Avoid overheating, as this can change the dip's creamy texture. For storage, glass or plastic containers with tight seals work best. They keep the dip safe and fresh while stored. If you want to save your dip for later, freezing is a good option. To freeze, place it in a freezer-safe container. Make sure to leave some space at the top for expansion. When you’re ready to eat it, take it out and thaw it in the fridge overnight. While freezing helps with storage, the texture might change a bit. It may become slightly grainy, but the flavor will still shine. To make this dip from scratch, you need a few key ingredients. Here’s what you need: - 1 cup cream cheese, softened - 1/2 cup sour cream - 1/2 cup dill pickles, finely chopped - 1/4 cup pickled jalapeños, finely chopped - 2 tablespoons honey - 1 tablespoon Dijon mustard - 1 teaspoon garlic powder - 1 teaspoon onion powder - Salt and pepper to taste Start by mixing the cream cheese and sour cream until smooth. Then, add the pickles, jalapeños, honey, mustard, and spices. Mix well and taste. Adjust the seasonings to your liking. Finally, serve it on a board with colorful snacks. For the full recipe, check here: [Full Recipe]. When it comes to snacks, variety is key. Here are some great options to serve with your dip: - Cherry tomatoes, halved - Thinly sliced cucumber - Colorful crackers - Crispy breadsticks These snacks add crunch and freshness. They pair well with the dip’s sweet and spicy flavors. You can also add veggies like bell peppers or carrots for extra options. Yes, you can prepare this dip ahead of time. It saves you effort when hosting. Here are some tips: - Make the dip a day in advance. - Store it in an airtight container in the fridge. - If you want, give it a quick stir before serving. This allows the flavors to meld and can enhance the taste. Just remember to serve it cold for the best experience! To sum up, we explored the easy recipe for Sweet and Spicy Pickle Dip. I shared the main ingredients, the step-by-step process, and tips for serving. You can also try different variations, keeping dietary needs in mind. Whether you are hosting a party or enjoying a snack, this dip adds fun to your table. Enjoy the bright flavors and creamy texture. Preparing this dip is simple and rewarding. I hope you try it soon!](https://recipesstation.com/wp-content/uploads/2025/07/a0ac266f-4c46-464d-8746-be3990ef8b56.webp)
Are you ready to impress your friends with a fun, tasty snack? The Sweet and Spicy Pickle Dip Board is
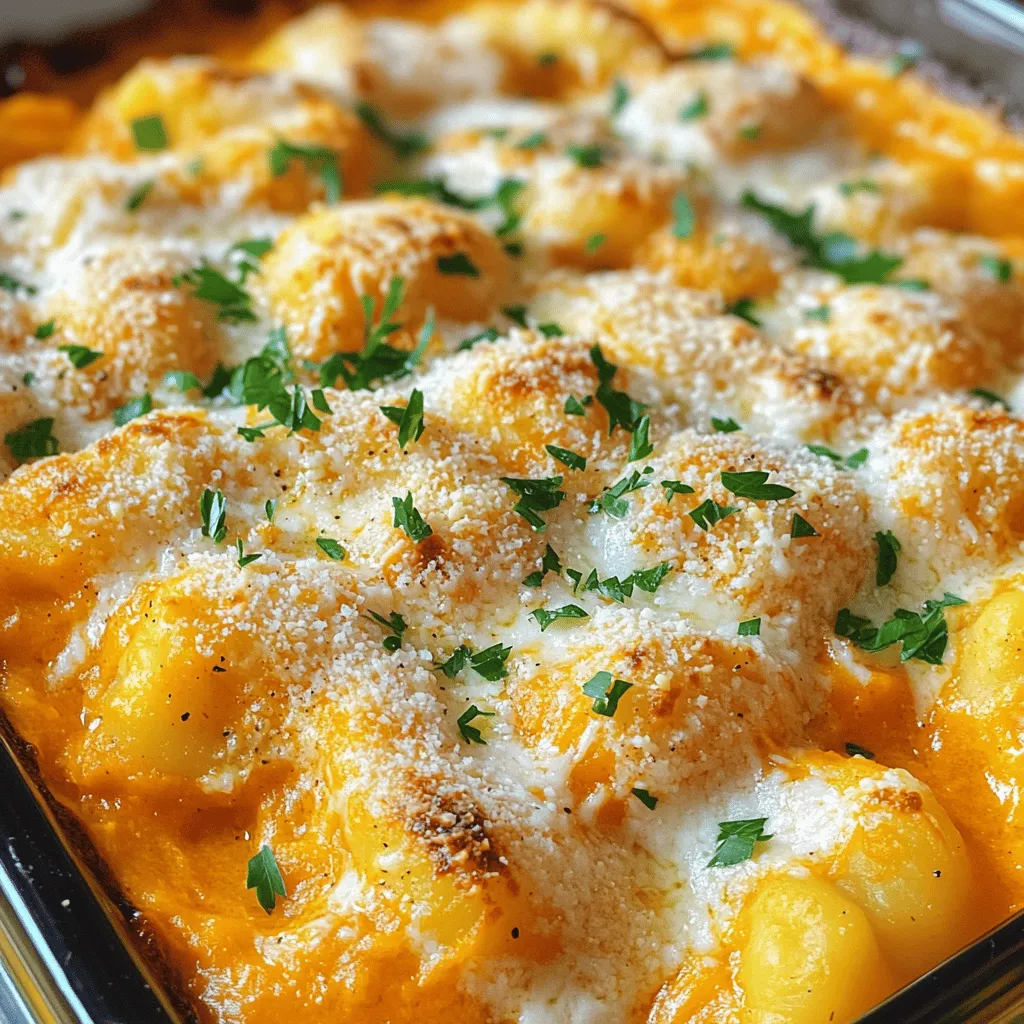
Fall flavors are calling with my Buttery Garlic Parm Pumpkin Gnocchi Bake Delight! This dish combines pillowy gnocchi with creamy
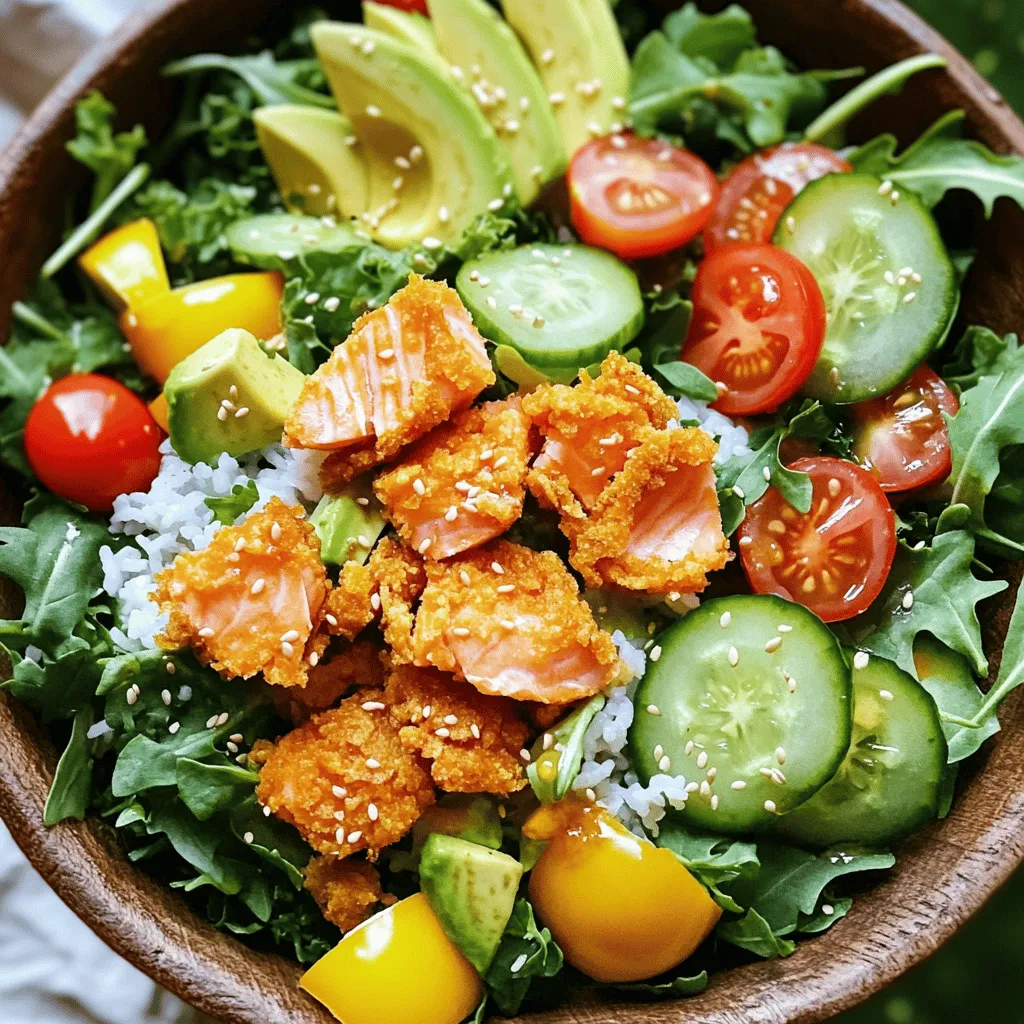
Are you ready for a fresh and vibrant dish that’s packed with flavor? This Crispy Rice Salmon Harvest Salad is
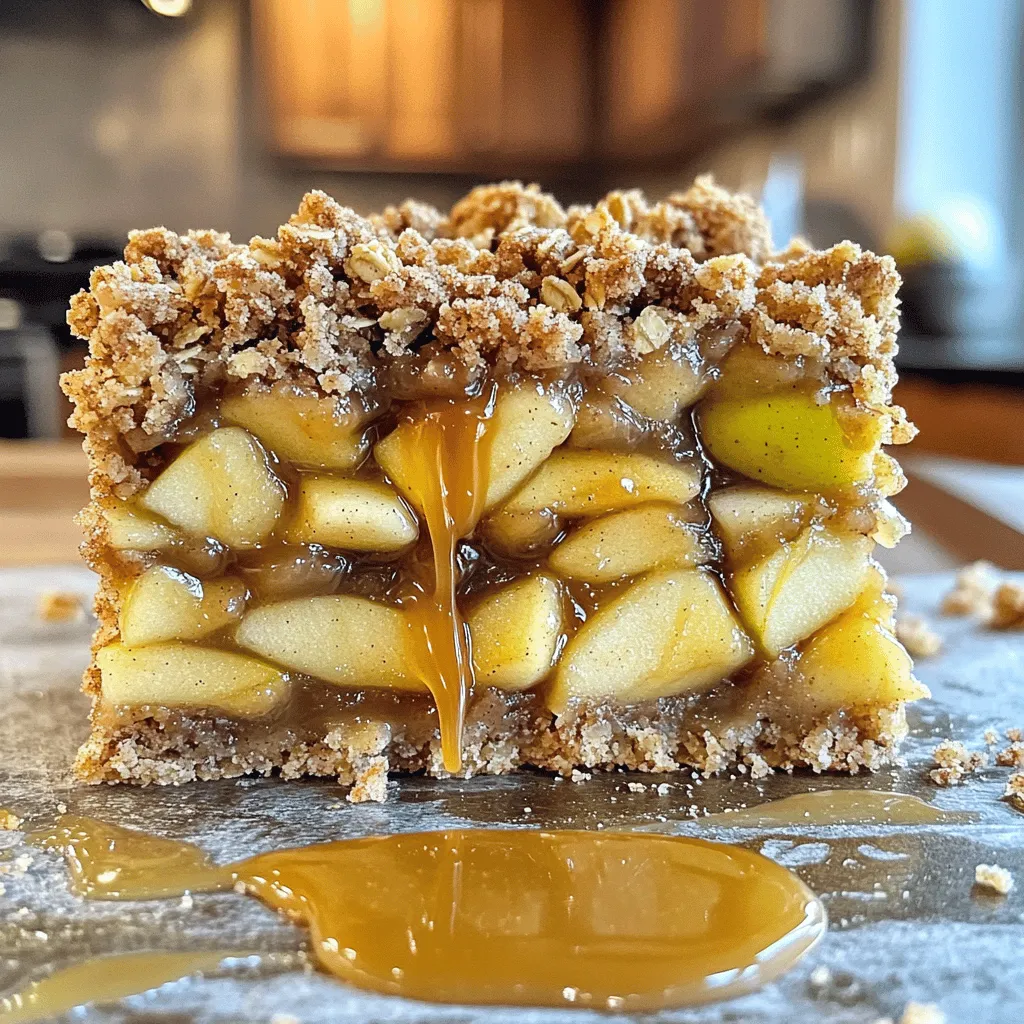
Imagine biting into a warm, sweet dessert that blends the rich flavors of miso caramel and tart apples. My Miso
![- 1 large round sourdough bread loaf - 2 cups elbow macaroni - 1 lb ground beef or turkey - 1 can (15 oz) chili beans, drained and rinsed - 1 can (14 oz) diced tomatoes with green chilies For the main dish, I like to use a large round sourdough bread loaf. It holds everything well. Elbow macaroni gives a nice bite. Ground beef or turkey adds protein and richness. Chili beans bring that hearty flavor. Diced tomatoes with green chilies offer a spicy kick. - 1 cup shredded sharp cheddar cheese - 1 small onion, finely chopped - 2 cloves garlic, minced - 1 tablespoon chili powder - 1 teaspoon ground cumin - 1 teaspoon smoked paprika - Salt and freshly ground black pepper to taste The cheese makes it creamy and dreamy. Onions and garlic add depth to the flavor. Chili powder, cumin, and smoked paprika give warmth and smokiness. Don't forget salt and black pepper to enhance all the tastes. - Chopped green onions - Fresh cilantro To finish, I love adding chopped green onions and fresh cilantro. They add color and freshness to the dish. You can adjust these garnishes to suit your taste. For the full recipe, check out the detailed steps to bring this Tailgate Chili Mac Bread Bowl to life! First, preheat your oven to 350°F (175°C). This step warms your kitchen and helps bake the bread bowl nicely. Next, take your round sourdough loaf. Carefully slice the top off and hollow it out. Leave about a 1-inch thick crust on all sides. This crust holds the chili mac filling well. Save the bread pieces you remove for later use. You can use them for dipping or as crunchy bites. Now, let’s cook the chili mac filling. Boil water in a large pot. Add a pinch of salt, then cook the elbow macaroni. Follow the package directions until it’s al dente. Once cooked, drain the macaroni and set it aside. In a large skillet over medium heat, brown the ground meat, either beef or turkey. Break it apart as it cooks, about 5-7 minutes. Drain any extra fat. Next, add the chopped onion and minced garlic. Sauté them until the onion is soft and clear, which takes about 3-4 minutes. Now it’s time to mix in the good stuff! Add the chili beans, diced tomatoes, and cooked macaroni to the skillet. Sprinkle in the chili powder, cumin, smoked paprika, salt, and pepper. Stir it well and let it simmer for about 5 minutes. This helps blend all the flavors together. With the filling ready, let’s fill the bread bowl. Generously spoon the chili mac mixture into the hollowed-out bread bowl. Let it overflow a bit for a hearty look. Sprinkle the remaining shredded cheese over the top. This makes it melty and delicious. Now, place the bread bowl on a baking sheet. Bake it in the preheated oven for 20-25 minutes. You want the cheese to be bubbly and the bread lightly toasted. Once baked, take out the baking sheet and let it cool for a few minutes. When ready, slice into the bread bowl and serve warm. Enjoy this cozy dish with friends! For the full recipe, check out the detailed instructions earlier. - Ensuring the macaroni is cooked al dente To get the best texture, cook the macaroni just until it’s firm. This means it should still have a slight bite. Follow the package instructions, but check it a minute or two early. Drain it well to avoid extra water in your dish. - How to avoid a soggy bread bowl To keep your bread bowl from getting soggy, hollow it out carefully. Leave at least an inch of crust. Also, don’t overfill it with chili mac. A little overflow looks great, but too much can make it messy. - Best ways to present the dish I love serving the bread bowl on a wooden board. It gives a nice rustic feel. Add the reserved bread pieces around it for dipping. A sprinkle of green onions and cilantro adds a pop of color. - Recommended sides and beverages Pair the dish with a simple side salad for freshness. A cold beer or a fizzy drink works well, too. This meal is hearty, so keep sides light and refreshing. - Tips for perfect seasoning Taste your chili mac before you bake it. Adjust salt, pepper, or spices as needed. Remember, the cheese will add saltiness, so be careful not to over-season. - Preventing overflow during baking To prevent overflow, fill your bread bowl just to the top. If you have a lot of extra filling, save it on the side. You can serve it in small cups for extra fun. For the full recipe, check out the [Full Recipe]. {{image_4}} You can make a meatless version of this dish. Use plant-based ground meat for a great taste. It mimics beef or turkey well. You can also try a vegetarian bean chili. Use a mix of black beans, kidney beans, and pinto beans. This will add protein and flavor. Want it mild? Skip the chili powder, or use less. For heat, add cayenne pepper or red pepper flakes. You can also toss in jalapeños for a fresh kick. Experiment with spices like oregano or thyme for extra flavor. Top with sliced jalapeños or a dash of hot sauce for a bold finish. You can swap the sourdough for other breads. Try a crusty baguette or a soft Italian loaf. They all work well. For gluten-free options, use gluten-free bread. Just ensure it is sturdy enough. This way, you can still enjoy this dish with your crowd. To store your Tailgate Chili Mac Bread Bowl, first, let it cool. Once cooled, wrap it in plastic wrap or aluminum foil. Place it in an airtight container. You can keep it in the fridge for up to three days. After that, the bread may become soggy and less tasty. When you reheat, you want to keep the bread from getting too hard. Preheat your oven to 350°F (175°C). Place the bowl on a baking sheet. Heat for about 10-15 minutes. Check after 10 minutes to see if it’s warm. You can also microwave the chili mac filling if you prefer. Just put it in a bowl, cover it with a paper towel, and heat for 1-2 minutes. Another option is to serve it over nacho chips for a fun twist! To freeze the filled bread bowl, wrap it tightly in plastic wrap. Then put it in a freezer bag. You can freeze it for up to three months. When you’re ready to eat, thaw it in the fridge overnight. To reheat, follow the steps above. If you want to freeze the chili mac separately, let it cool first. Then, place it in a freezer-safe container. It can also last for three months. Just thaw and reheat when you are ready to enjoy it again. You can easily make this dish vegetarian. Simply swap the ground beef or turkey for plant-based meat. You can use lentils or black beans for a hearty texture. Add extra veggies like bell peppers or zucchini for added flavor. Use vegetable broth instead of meat broth to enhance the taste. This way, you keep the dish full of flavor while making it meat-free. Yes, you can prep the filling in advance. Cook the chili mac mix, let it cool, then store it in an airtight container in the fridge. You can keep it for up to three days. When you're ready, just reheat the filling before adding it to the bread bowl. This saves time on game day and keeps your tailgate stress-free. If you can't find sourdough, there are great alternatives. You can use a round baguette, ciabatta, or even a crusty round loaf. Just make sure the bread is sturdy enough to hold the filling. Gluten-free options exist too, like gluten-free bread loaves, for those with dietary needs. You can keep leftovers for about three days in the fridge. Store the filling separately from the bread bowl to prevent sogginess. Use airtight containers to maintain freshness. If you want to keep it longer, you can freeze the filling for up to three months. Just thaw it overnight in the fridge before reheating. Absolutely! While sharp cheddar is fantastic, you can try other cheeses too. Monterey Jack or pepper jack adds a nice kick. You can even mix in some cream cheese for extra creaminess. The cheese blends well with the chili mac and enhances the overall flavor. Use whatever you enjoy most! For the full recipe, check out the Tailgate Chili Mac Bread Bowl. In this post, I covered how to make a Tailgate Chili Mac Bread Bowl, from essential ingredients to serving options. You explored the right techniques for preparing the bread and cooking the chili mac filling. I shared tips to enhance flavor and avoid common mistakes. Remember, you can easily adjust the spice level or make it meatless to fit your taste. This dish brings fun and comfort to any gathering. Enjoy your cooking and impress your friends with this delicious creation.](https://recipesstation.com/wp-content/uploads/2025/07/a118143c-8ee6-473b-aa00-007d4e4300ec.webp)
Get ready for a game-day treat with my Tailgate Chili Mac Bread Bowl! This dish combines rich flavors and cozy
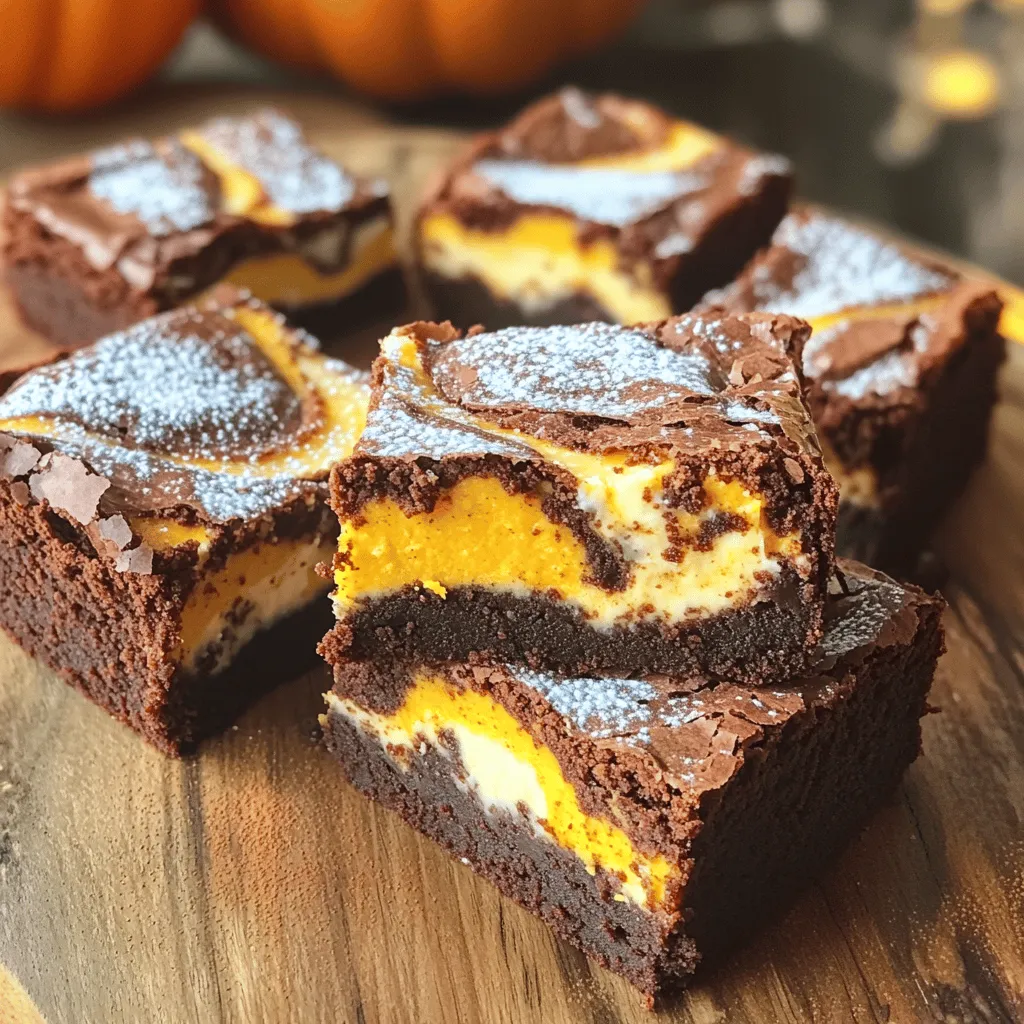
Craving a sweet treat that stands out? Look no further than Pumpkin Cheesecake Swirl Brownies! These delicious brownies mix rich
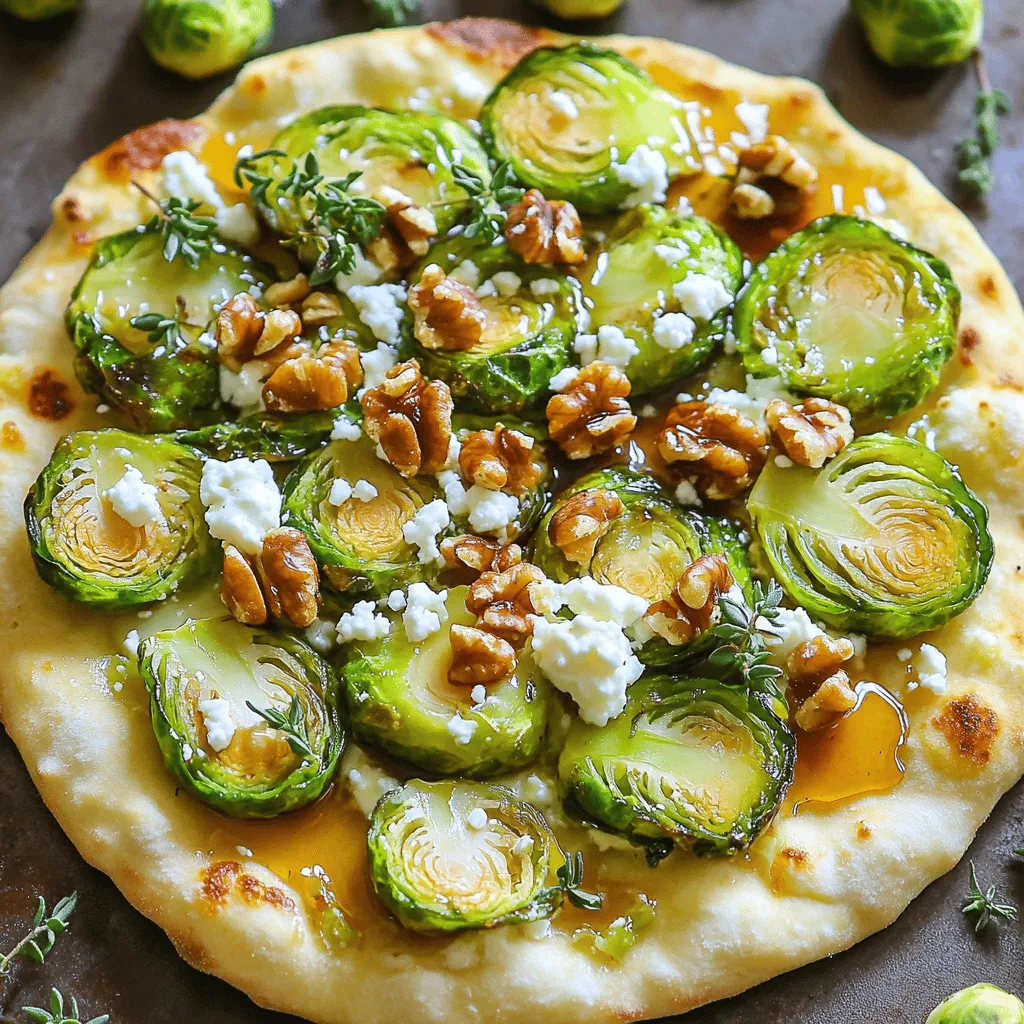
If you’re searching for a new meal idea, look no further! Maple Brussels Sprout Flatbread is the perfect dish to
