
Cheesy Cauliflower Bake Flavorful and Easy Recipe
Are you ready to transform your vegetables into a cheesy delight? This Cheesy Cauliflower Bake is both flavorful and easy
Are you ready to transform your vegetables into a cheesy delight? This Cheesy Cauliflower Bake is both flavorful and easy
![- 2 large sweet potatoes, sliced into thin rounds - 1 cup black beans, rinsed and drained - 1 cup corn kernels (fresh, frozen, or canned) - 1 cup cherry tomatoes, halved - 1 cup shredded cheddar cheese (or plant-based cheese alternative) - 1 ripe avocado, diced - 1 jalapeño, sliced (optional for extra heat) - Fresh cilantro, chopped (for garnish) - Sour cream or Greek yogurt (for drizzling or serving) Sweet potatoes are the star of this dish. They are sweet and creamy. Black beans add a nice protein boost. Corn brings a fresh crunch. Cherry tomatoes give a pop of color and flavor. Cheese melts beautifully over everything. You can use cheddar or a plant-based option. Avocado adds creaminess, while jalapeños offer heat if you like spice. Fresh cilantro brightens every bite. - 1 tablespoon olive oil - 1 teaspoon smoked paprika - 1 teaspoon garlic powder - 1 teaspoon cumin - Salt and black pepper to taste Seasonings make this dish stand out. Olive oil helps everything crisp up nicely. Smoked paprika adds a deep, smoky flavor. Garlic powder gives warmth, while cumin adds earthiness. Don't forget salt and pepper to enhance all the flavors. - Cheese alternatives - Additional garnishes If you want to skip cheese, try a nut-based option. You can also add extra garnishes like lime wedges or hot sauce. This helps you customize each plate. Feel free to mix and match based on your taste! For the full recipe, check out Loaded Sweet Potato Nachos. 1. Start by prepping the sweet potatoes. Wash them well under cold water. Then, slice them into thin rounds. Aim for even slices so they cook well. 2. In a large bowl, mix the sweet potato slices with olive oil, smoked paprika, garlic powder, cumin, salt, and black pepper. Toss them until every slice gets a good coating of flavor. 1. Preheat your oven to 425°F (220°C). This will give the sweet potatoes a nice roast. 2. Spread the seasoned sweet potato slices out on a baking sheet lined with parchment paper. Bake them for 20-25 minutes. Turn the slices halfway through to ensure they crisp up nicely. 3. Once they are baked, remove the sweet potatoes from the oven. Layer them in a single layer on an oven-safe dish or baking tray. 1. Sprinkle the black beans and corn over the sweet potato slices. Next, add the halved cherry tomatoes and a good amount of shredded cheese on top. 2. Place the dish back in the oven. Bake for another 5-7 minutes until the cheese melts and bubbles. 3. When done, take it out of the oven. Add diced avocado, jalapeño slices (if you want extra heat), and fresh cilantro for a burst of flavor. Enjoy this vibrant dish as a tasty snack or meal. For the complete recipe, check out the [Full Recipe]. To get crispy sweet potatoes, slice them thinly. Lay them flat on a baking sheet. Make sure they don’t touch each other. This helps them roast better. Use a good amount of olive oil to coat the slices. The oil helps with crispiness. For melting cheese, choose cheddar or Monterey Jack. They melt well and taste great. If you want a vegan option, try a plant-based cheese. Look for one that melts nicely. For a beautiful presentation, use a large wooden board. Layer the nachos so they look inviting. Add fresh cilantro and lime wedges around them. This adds color and flavor. Pair these nachos with a refreshing drink. A light beer or sparkling water works well. Want to make it vegetarian? Skip the meat and load up on veggies. You can also add beans for protein. If you want more protein, add cooked chicken or turkey. Shred the meat and sprinkle it on top. It adds flavor and makes the dish heartier. For the full recipe, check out the detailed instructions above. {{image_4}} For a spicy kick, try spicy loaded sweet potato nachos. Add diced jalapeños, or a dash of hot sauce. You can mix in chipotle powder for a smoky heat. This twist makes your nachos exciting and bold. Another fun idea is a Southwest-inspired version. Use black beans, corn, and salsa. Top with pepper jack cheese for a creamy finish. Fresh lime juice adds zest and brightness. You can enjoy low-calorie options with loaded sweet potato nachos. Swap cheese for a lighter choice like Greek yogurt. Use less oil when roasting sweet potatoes. This keeps the flavor while cutting calories. If you have dietary needs, substitute ingredients easily. Choose dairy-free cheese for a vegan option. Use quinoa instead of beans for more protein. These changes make the dish fit your lifestyle. Incorporate seasonal vegetables for fresh flavor. In summer, add grilled zucchini or bell peppers. In fall, consider roasted Brussels sprouts or butternut squash. These veggies enhance taste and nutrition. For holiday-inspired nacho ideas, think about festive toppings. Top with cranberry sauce for a unique twist. Add pumpkin spice seasoning for a seasonal flair. These ideas can make your nachos a holiday favorite. Explore the [Full Recipe] for more inspiration and ways to make these variations your own! To keep your loaded sweet potato nachos fresh, store them in an airtight container. Refrigerate them within two hours of making them. This helps prevent bacteria growth. When ready to eat, reheat them in the oven. Set the oven to 350°F (175°C) and heat for about 10-15 minutes. This keeps the sweet potatoes crispy and the cheese melty. Can you freeze loaded sweet potato nachos? Yes, but with some tips. First, it’s best to freeze only the sweet potatoes and toppings separately. This keeps the texture nice. Wrap them tightly in plastic wrap and then in foil. When you want to enjoy them, let them thaw overnight in the fridge. Reheat in the oven at 350°F (175°C) until hot. How long will leftovers last? In the fridge, they stay good for about 3-5 days. Look for signs of spoilage like off smells or mold. If you see these, it’s time to toss them. Enjoy your loaded sweet potato nachos fresh for the best taste! For the full recipe, check out the previous sections. Yes, you can prepare loaded sweet potato nachos ahead. Here are some tips: - Cook the sweet potatoes: Slice and roast them earlier. Store them in the fridge. - Layer ingredients: Keep toppings separate until ready to serve. - Reheat before serving: Bake them again to warm everything up and melt the cheese. This way, you save time and still enjoy a hot, tasty dish. If you don't have sweet potatoes, try these options: - Regular potatoes: Use russet or Yukon gold for a classic taste. - Butternut squash: This adds a sweet, nutty flavor. - Tortilla chips: For a crunchy twist, layer toppings over chips. Each choice brings its own flavor, so feel free to experiment. To add heat, consider these tips: - Jalapeños: Slice fresh jalapeños and add them on top. - Hot sauce: Drizzle your favorite hot sauce before serving. - Spicy cheese: Choose pepper jack cheese for added kick. These methods will boost the heat without masking the delicious flavors. Loaded sweet potato nachos combine tasty ingredients with simple steps. You can use sweet potatoes, black beans, and your favorite toppings. With helpful tips for cooking and serving, you'll impress anyone who tries them. Make these nachos unique with fun variations, from spicy flavors to seasonal twists. Always remember to store leftovers properly for later enjoyment. These nachos are not just a meal; they are a celebration of flavor and creativity. Enjoy making your version of loaded sweet potato nachos!](https://recipesstation.com/wp-content/uploads/2025/07/c19767e4-13ce-4c7b-8ad8-2e7868a4a99b.webp)
If you’re craving a dish that’s both tasty and filling, loaded sweet potato nachos are your answer. These nachos combine
![- 2 ripe bananas, thoroughly mashed - 1 cup rolled oats - 1/2 cup almond milk (or any milk of your choice) For these muffins, ripe bananas are key. They add natural sweetness and moisture. Choose bananas with brown spots for the best flavor. Rolled oats give a hearty base and provide fiber. Almond milk keeps this recipe light and dairy-free, but feel free to use any milk you like. - 1/4 cup honey or maple syrup - 1/4 cup coconut oil, melted and slightly cooled Honey or maple syrup acts as a natural sweetener. They add flavor without being too heavy. Coconut oil gives richness and a subtle taste. Just melt it before adding to the mix. This step ensures it blends well with the other ingredients. - 1 teaspoon baking powder - 1/2 teaspoon baking soda - 1/2 teaspoon ground cinnamon - 1/4 teaspoon sea salt Baking powder and baking soda help the muffins rise. They create a fluffy texture. Ground cinnamon adds warmth and depth to the flavor. A pinch of sea salt balances the sweetness. Each of these ingredients contributes to the final taste and texture of your muffins. For the complete recipe, check out the [Full Recipe]. First, preheat your oven to 350°F (175°C). This helps the muffins bake evenly. Next, line your muffin tin with paper liners or grease it with coconut oil. This step keeps the muffins from sticking. Take two ripe bananas and mash them well in a bowl. You can use a fork or a potato masher for this. Once they are smooth, add in 1 cup of almond milk, 1/4 cup of honey or maple syrup, 1/4 cup of melted coconut oil, and 1 teaspoon of pure vanilla extract. Whisk everything together until it is smooth and mixed well. In a separate bowl, combine 1 cup of rolled oats, 1 teaspoon of baking powder, 1/2 teaspoon of baking soda, 1/2 teaspoon of ground cinnamon, and 1/4 teaspoon of sea salt. Stir these dry ingredients until they blend well. Slowly add the dry mixture into the wet mixture. Use a spatula or wooden spoon to stir gently. Mix just until no dry ingredients are left. Do not overmix, as this can make your muffins tough. If you want to add nuts or chocolate chips, fold them into the batter now. Next, spoon the batter into the prepared muffin tin. Fill each cup about three-quarters full to allow for rising. Place the muffin tin in the preheated oven. Bake for 18-22 minutes. They are done when a toothpick stuck in the center comes out clean or with a few moist crumbs. Let the muffins cool in the tin for about 5 minutes. Then transfer them to a wire rack to cool completely. For serving, enjoy them warm. You can sprinkle some powdered sugar on top or add a dollop of Greek yogurt or almond butter for extra flavor. For the full recipe, check out the details above! To make your muffins tender, avoid overmixing the batter. When you combine wet and dry ingredients, mix just enough to blend them. Overmixing can lead to tough muffins. Using ripe bananas is key for sweetness. The more brown spots on your bananas, the sweeter your muffins will be. They also add moisture, making your muffins soft. Measuring ingredients properly is very important. Use a kitchen scale or measuring cups for accuracy. This helps ensure your muffins rise and bake evenly. To get an even bake, rotate your muffin tin halfway through baking. This helps the muffins cook evenly. Remember, every oven is different, so keep an eye on your muffins toward the end of the baking time. For a tasty treat, serve your muffins with Greek yogurt. It adds creaminess and protein. You can also spread nut butter on top for extra flavor and healthy fats. Enjoy your muffins warm for the best taste! {{image_4}} You can boost flavor and texture by adding nuts or chocolate. I love using walnuts or pecans in my muffins. They add a nice crunch and healthy fats. If you prefer a sweeter touch, try adding chocolate chips. They melt slightly and create little pockets of sweetness. Just fold in about 1/4 cup of these add-ins with the batter. This simple step makes a big difference in taste! If you need a gluten-free option, you can use gluten-free oats. They work just as well in this recipe. Replace almond milk with any dairy-free milk you like, such as coconut or soy milk. Both will keep your muffins moist and tasty. Check labels to ensure your ingredients are certified gluten-free. To take your muffins to the next level, think about adding spices. Ground nutmeg pairs wonderfully with bananas. Just a pinch can elevate the flavor. You can also use a splash of pure vanilla extract for extra depth. Experiment with these flavors until you find your favorite mix. This simple tweak can turn a good muffin into a great one. For the full recipe, check out the details above. To keep your muffins fresh, store them in an airtight container. If you plan to eat them within a few days, place the container in the fridge. This helps maintain their taste and texture. For longer storage, you can freeze them. Wrap each muffin tightly in plastic wrap, then place them in a freezer bag. This way, they stay moist and flavorful for up to three months. To keep your muffins moist, add a slice of bread to the container. The bread helps absorb extra moisture, keeping the muffins soft. Always check for signs of spoilage before eating. If they smell off or look moldy, it’s best to toss them out. Also, avoid storing them near strong-smelling foods, as muffins can absorb those odors. When it’s time to enjoy your muffins again, you have two great options. For a quick fix, use the microwave. Heat one muffin for about 15-20 seconds. This warms it up nicely. For a crispier texture, use the oven. Preheat it to 350°F (175°C) and bake the muffins for 5-10 minutes. This will make them taste freshly baked. Enjoy your Healthy Banana Oat Muffins with a warm cup of tea or coffee! Yes, you can use different types of milk. Almond milk works great, but any milk is fine. You can use cow’s milk, soy milk, or oat milk. Each type gives a unique taste. If you want a creamier muffin, try whole milk. For a lighter muffin, opt for skim milk. Non-dairy milks are perfect for those with allergies. They can also add extra flavor. Experiment to find your favorite! To make these muffins sweeter, add more honey or maple syrup. Start with an extra tablespoon. You can also use ripe bananas for natural sweetness. The riper the banana, the sweeter the muffin. If you like a different flavor, try adding brown sugar. This will give your muffins a deeper taste. For a fun twist, you can mix in chocolate chips or dried fruit. These options make each bite even more enjoyable! Yes, you can easily make this recipe vegan. Swap the honey for maple syrup or agave nectar. Use a plant-based milk like almond or soy. For the egg replacement, you can use flax eggs or applesauce. To make a flax egg, mix one tablespoon of flaxseed meal with three tablespoons of water. Let it sit for a few minutes to thicken. This will help bind your muffins together. These small changes keep the taste delicious while making it vegan-friendly. For the full recipe, check the details provided above! You have all the details to make perfect banana oat muffins. We covered the main ingredients, preparation steps, and tips to enhance flavor and texture. You can even switch things up with variations like nuts or chocolate. Store them well to keep them fresh and tasty. These muffins are easy to make, healthy, and a fun treat. Enjoy them for breakfast or as a snack. Happy baking, and share these delicious muffins with friends!](https://recipesstation.com/wp-content/uploads/2025/07/37602722-0d5b-4c8d-bdfa-c0705ee5ab27.webp)
Are you craving a delicious and healthy snack? Look no further than these Healthy Banana Oat Muffins! Packed with ripe
![- 1 lb fresh Brussels sprouts, trimmed and halved - 2 tablespoons extra virgin olive oil - 1 teaspoon garlic powder - 1 teaspoon onion powder - 1/2 teaspoon smoked paprika - Sea salt and freshly ground black pepper, to taste - 1/4 cup freshly grated Parmesan cheese (optional) - Fresh lemon wedges for serving - Different seasoning blends - Additional toppings like bacon or nuts - Air fryer - Mixing bowl - Knife and cutting board The ingredients for crispy air fryer Brussels sprouts are simple and fresh. I love Brussels sprouts because they are versatile and packed with flavor. Start with one pound of fresh sprouts. Trim off the tough ends and slice them in half. This helps them cook evenly. Next, I drizzle in two tablespoons of extra virgin olive oil. The oil not only adds flavor but also helps achieve that crispy texture we all love. Then, I add one teaspoon each of garlic powder and onion powder. These spices bring warmth and depth to the dish. For a little kick, I sprinkle in half a teaspoon of smoked paprika. This gives the sprouts a nice smoky flavor. Finally, I season with sea salt and freshly ground black pepper to taste. If you want to elevate the dish, add a quarter cup of freshly grated Parmesan cheese during the last minutes of cooking. Don’t forget fresh lemon wedges! They brighten the dish and add a refreshing touch when you serve them. You can customize this recipe with different seasoning blends or toppings. Try adding crispy bacon or nuts for crunch. This makes every bite exciting and unique. To make this dish, you’ll need an air fryer, a mixing bowl, and a sharp knife with a cutting board. These tools help you prepare and cook the Brussels sprouts easily and efficiently. For the full recipe, you can refer to the earlier section. Enjoy cooking! First, you need to trim and halve the Brussels sprouts. Use a sharp knife to cut off the stem ends. Then, slice each sprout in half lengthwise. This helps them cook evenly. Next, preheat the air fryer. Set it to 380°F (190°C) and let it warm up for about 5 minutes. This step is key for making sure your sprouts get crispy. Now it’s time to season the sprouts. In a large mixing bowl, add the halved Brussels sprouts. Drizzle 2 tablespoons of extra virgin olive oil over them. Then, sprinkle in 1 teaspoon each of garlic powder and onion powder, plus 1/2 teaspoon of smoked paprika. Add sea salt and freshly ground black pepper to taste. Mix everything well. Use your hands or a spoon to coat the Brussels sprouts evenly. This ensures every bite is full of flavor. Carefully place the seasoned Brussels sprouts in the air fryer basket. Make sure they’re in a single layer for best results. If you have too many, cook them in batches. Set the air fryer to cook for 15-20 minutes. About halfway through, pause the cooking and shake the basket. This helps the sprouts cook evenly and get that nice crunch. When they’re golden brown and crispy, they’re ready. If you want, sprinkle 1/4 cup of grated Parmesan cheese on top during the last 2 minutes of cooking. This adds a delicious layer of flavor. Once done, transfer the crispy Brussels sprouts to a serving dish. Squeeze some fresh lemon juice over them just before serving. This brightens the dish and enhances the taste. Enjoy your crispy air fryer Brussels sprouts! For more details, check the Full Recipe. To get your Brussels sprouts super crispy, avoid overcrowding the air fryer. If you pack too many in, they will steam instead of crisp. Cook in batches if needed. You also want to adjust the cooking time for different sizes. Larger sprouts may need a bit more time, while smaller ones cook faster. Keep an eye on them for that golden brown look. Adding cheese can make a big difference. During the last few minutes of cooking, sprinkle some Parmesan cheese on top. It melts nicely and adds a great flavor. Another trick is to squeeze fresh lemon juice just before you serve them. This brightens up the dish and adds a fresh taste that pairs well with the crispy texture. When serving, think about presentation. A rustic bowl can showcase your crispy sprouts. Add some lemon wedges on the side for color and flavor. These Brussels sprouts go well with many mains. Try them alongside grilled chicken, steak, or even a hearty grain bowl. They bring a nice crunch and taste to your meal. For the full recipe, visit the [Full Recipe]. {{image_4}} You can easily change the flavor of your Brussels sprouts. For a spicy garlic version, add red pepper flakes or chili powder. This will give them a nice kick. If you prefer fresh herbs, try rosemary or thyme. Mixing these in will add a lovely aroma and taste. Making Brussels sprouts vegan is simple. Just skip the Parmesan cheese or use a vegan alternative. You can find great plant-based cheese at many stores. For gluten-free options, stick to your basic seasonings. All the listed spices are gluten-free and safe to use. If you don’t have an air fryer, don’t worry. You can make these in the oven. Just set it to 425°F (220°C). Spread the sprouts on a baking sheet and cook for about 25-30 minutes. Shake them halfway through for even cooking. You can also sauté them on the stove. Heat a pan over medium heat, add oil, and cook until they are golden and crispy. Each method will give you delicious, crispy Brussels sprouts. To store your crispy Brussels sprouts, let them cool first. Place them in an airtight container. Keep them in the fridge for up to three days. If you want to keep them crispy, avoid stacking them. This helps prevent sogginess. When reheating in the air fryer, set it to 350°F (175°C). Place the sprouts in the basket and heat for about 5-7 minutes. This method keeps them crispy. If you don't have an air fryer, you can use an oven. Set it to 375°F (190°C) and bake for 10 minutes. The microwave is quick, but it may make them soft. If you use a microwave, heat for 1-2 minutes. You can freeze Brussels sprouts, but it’s best to blanch them first. Boil them for 3 minutes, then cool in ice water. Drain and pack them in freezer bags. They can last up to three months. To use, thaw them overnight in the fridge. After that, reheat them in your air fryer or oven. This will help retain their texture and flavor. For the Full Recipe, refer back to the top! Yes, you can! If you don’t have an air fryer, you can roast Brussels sprouts in the oven. Preheat your oven to 425°F (220°C). Toss the halved sprouts with olive oil, salt, and your favorite spices. Spread them on a baking sheet in one layer. Roast for about 25-30 minutes, flipping halfway through. This method gives you a nice crisp too. You can also pan-fry them in a skillet for a quicker option. Brussels sprouts typically take 15-20 minutes in an air fryer. Preheat the air fryer to 380°F (190°C) before cooking. Shake the basket halfway through to ensure even cooking. Look for a golden brown color and a crunchy texture. If your sprouts are larger, they may need a few extra minutes. The best way to season Brussels sprouts is simple. Use olive oil, sea salt, and black pepper. You can add garlic powder, onion powder, or smoked paprika for extra flavor. For a twist, try adding balsamic vinegar or lemon zest. A sprinkle of Parmesan cheese near the end of cooking also adds a tasty touch. Experiment with your favorite spices to find your perfect mix. This blog post covered how to make crispy Brussels sprouts in an air fryer. We discussed essential ingredients, easy steps, and helpful tips. You learned methods for adding flavor and variations for different diets. Storing and reheating leftovers can keep your dish fresh. Enjoy experimenting with this nutritious vegetable. With these simple steps, you can make Brussels sprouts your new favorite dish!](https://recipesstation.com/wp-content/uploads/2025/07/a3f69f90-1c4f-4e5e-90ab-b742b5ff77af.webp)
Are you looking for a way to make Brussels sprouts absolutely irresistible? In this blog post, I’ll show you how

Craving a tasty and healthy breakfast? You’re in the right place! Today, I’ll show you how to make Copycat Starbucks
. Overnight oats offer a simple and tasty way to start your day. We covered the main base ingredients, flavor options, and recommended toppings. You learned step-by-step how to prepare each variation and best practices for creamy texture. I shared some fun recipes, from sweet berry blends to savory delights. Remember to store them properly for freshness. With these tips, you can enjoy nutritious oats every morning. Get creative and try different flavors that excite your taste buds!](https://recipesstation.com/wp-content/uploads/2025/07/4b872205-16e3-4a29-8025-15b7058bbee2.webp)
Are you ready to transform your breakfast game? Overnight oats are not just healthy; they can be delicious too! In
Craving a sweet treat that’s simple and delicious? Let’s make No-Bake Chocolate Oat Bars! With just a few easy ingredients
![- Fresh spinach - Artichoke hearts - Cream cheese - Sour cream - Mayonnaise - Shredded mozzarella cheese - Grated Parmesan cheese - Garlic - Red pepper flakes - Seasoning - Garnish You need fresh spinach for a bright flavor. Use artichoke hearts from a can for ease. Cream cheese gives the dip its smooth base. Sour cream adds tanginess. Mayonnaise makes it rich. Shredded mozzarella cheese melts well, creating that gooey texture. Grated Parmesan cheese enhances the overall flavor. Garlic adds a savory touch. Red pepper flakes bring heat, but they’re optional. Use salt and pepper to season. Finally, fresh parsley makes a lovely garnish. This dip is tasty, but let’s look at its nutrition. One serving has around 180 calories. It has about 14 grams of fat, 6 grams of carbs, and 5 grams of protein. This dip is vegetarian-friendly and can be gluten-free if you check your ingredients. Enjoy knowing you can indulge without too much guilt. For the Full Recipe, check the detailed instructions! - Preheat oven: Start by setting your oven to 350°F (175°C). This step warms the oven for even cooking. - Prepare the cream cheese mixture: In a large bowl, mix 1 cup of softened cream cheese, 1/2 cup of sour cream, and 1/2 cup of mayonnaise. Use a spatula or whisk until the mix is smooth. - Incorporate spinach and artichokes: Add in 1 cup of finely chopped spinach, 1 can of chopped artichoke hearts, and 2 cloves of minced garlic. Mix well. Then, fold in 1 cup of shredded mozzarella and 1/2 cup of grated Parmesan cheese. If you like heat, add 1/2 teaspoon of red pepper flakes. Season with salt and black pepper. - Transfer to baking dish: Carefully pour your mixture into a baking dish. Spread it evenly to help it cook well. - Bake until bubbly and golden: Put the dish in your preheated oven. Bake for 25-30 minutes. Look for a bubbly center and a golden top. - Cooling and garnishing tips: After baking, take it out and let it cool for a few minutes. Just before serving, sprinkle with fresh chopped parsley. This adds color and fresh flavor to your dip. For the full recipe, check [Full Recipe]. To get the best texture, start with the cream cheese. Make sure it is soft. I let it sit out for about 30 minutes. This makes mixing easy and smooth. If it is too cold, lumps will form. You want a creamy dip, not a chunky one. For seasoning, taste as you mix. I like to add a pinch of salt and pepper. If you want a kick, try red pepper flakes. Start small; you can always add more. Fresh herbs, like parsley, can brighten the flavor too. When baking, spread the dip evenly in your dish. This helps it cook uniformly. If the dip is too thick in places, it may bake unevenly. Use a spatula to smooth the top before it goes in the oven. To avoid sogginess, drain the artichoke hearts well. Extra water can make the dip runny. You can pat them dry with a paper towel too. This step ensures a rich, creamy texture that everyone will love. {{image_4}} If you want to change things up, consider these options: - Vegan alternatives: Swap the cream cheese with vegan cream cheese. Use plant-based sour cream and mayonnaise. This keeps the flavor while making it plant-based. - Low-fat options: Choose reduced-fat cream cheese, sour cream, and mayonnaise. These substitutes cut calories but keep the dip creamy and tasty. To make your dip even better, try these ideas: - Adding spices: Toss in some garlic powder or onion powder for extra flavor. A dash of smoked paprika can add a nice twist too. - Incorporating other vegetables: Add chopped bell peppers or mushrooms for more texture. You could even mix in some cooked kale for added nutrients and flavor. Experimenting with these variations can make your spinach artichoke dip unique and fun. For the full recipe, check out the Savory Spinach Artichoke Delight. After you make your spinach artichoke dip, you will want to store any leftovers. Place the dip in an airtight container. This helps keep it fresh. You can store it in the fridge for about 3 to 5 days. If you want it to last longer, consider freezing it. When you’re ready to enjoy the dip again, you can reheat it easily. The best way is to use the oven. Preheat your oven to 350°F (175°C). Place the dip in an oven-safe dish. Cover it with foil to keep it moist. Heat for about 15-20 minutes or until it is hot. To keep the texture nice, avoid using a microwave. Microwaving can make the dip watery. If you need to use a microwave, heat it in short bursts and stir often. This will help keep it creamy. To find the full recipe, check out the delicious steps above! Can I make this dip ahead of time? Yes, you can make this dip ahead. Prepare it and store it in the fridge. Just bake it when you are ready to serve. This dip keeps well for a day or two. What can I serve with Spinach Artichoke Dip? You can serve this dip with many tasty options. Try crunchy vegetables like carrots and bell peppers. Tortilla chips and toasted bread are also great choices. They add a nice crunch! How can I make it spicier? To spice it up, add more red pepper flakes. You can also mix in diced jalapeños or hot sauce. Start with a little and taste as you go. Find the right heat for you! Can I freeze the dip? Freezing is possible but not ideal. If you freeze it, the texture may change. Thaw it overnight in the fridge before baking. Use it within a month for the best taste. What is the best way to mix the ingredients? The best way is to use a large mixing bowl. Start with a spatula for the cream cheese and sour cream. Then, fold in the spinach and artichokes gently. This ensures even mixing without breaking them apart. For the complete details, check out the [Savory Spinach Artichoke Delight recipe](#). This blog post covers how to make a tasty Spinach Artichoke Dip. We discussed key ingredients, including fresh spinach and creamy cheeses. I shared a step-by-step guide to prepare and bake the dip perfectly. You also learned useful tips for better flavor and texture, plus how to store leftovers. In conclusion, making this dip is simple and fun. Try different variations to suit your taste. Enjoy this dish at your next gathering for a crowd-pleasing snack!](https://recipesstation.com/wp-content/uploads/2025/07/012ef793-7082-4a8b-9a53-b1fc81662856.webp)
If you love creamy, savory dips, you’re in for a treat! This Spinach Artichoke Dip is easy to make and
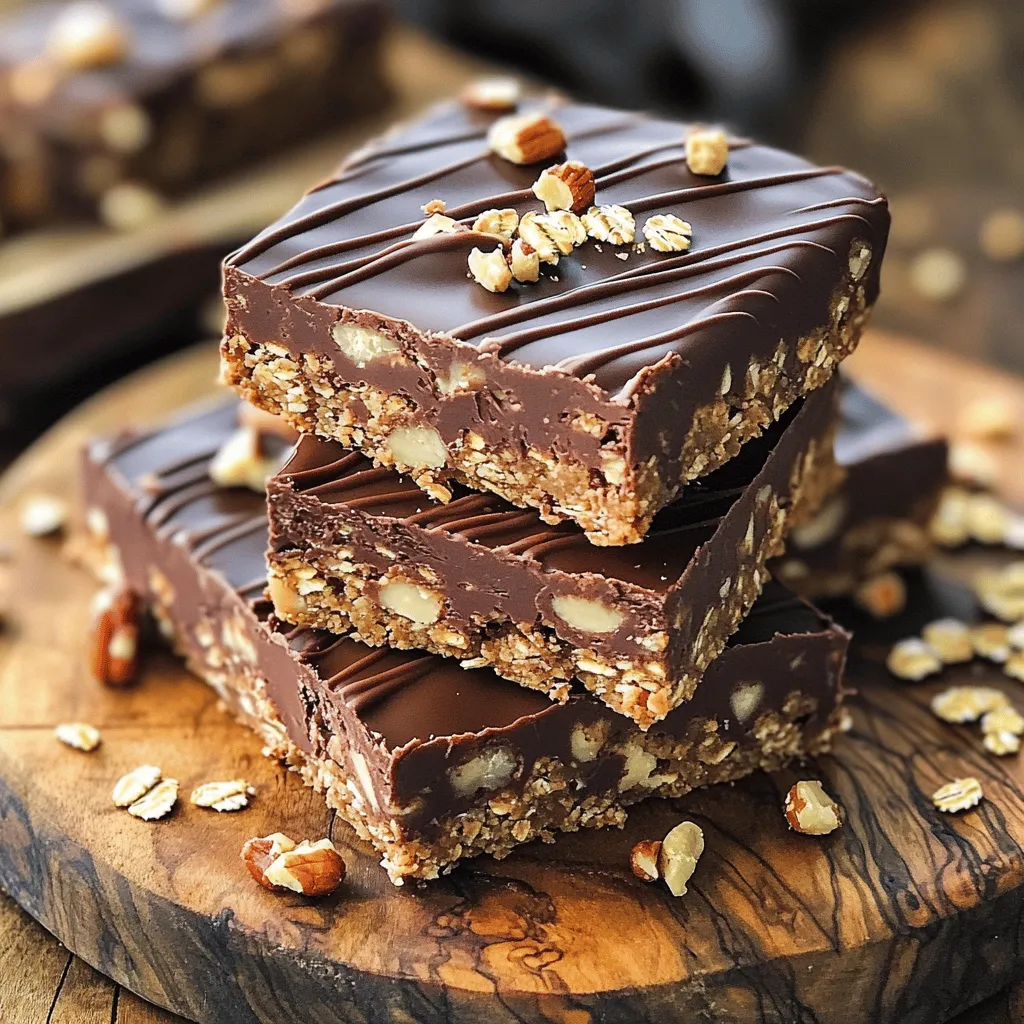
![When making No-Bake Chocolate Oatmeal Bars, you'll need simple and wholesome ingredients. These ingredients blend together to create a treat that is both tasty and nutritious. Here’s what you’ll need: - 2 cups rolled oats - 1/2 cup creamy peanut butter (or almond butter for a nut-free option) - 1/2 cup honey or maple syrup - 1/4 cup unsweetened cocoa powder - 1/2 teaspoon vanilla extract - 1/4 teaspoon salt - 1/2 cup dark chocolate chips (opt for dairy-free if desired) - 1/4 cup chopped nuts (walnuts, almonds, or your favorite variety) - 1/4 cup shredded coconut (optional for added texture) These ingredients work together to give you chewy, chocolatey bars. Each item plays a role. The oats provide a great base, while the peanut butter adds creaminess. Honey or maple syrup gives sweetness, and cocoa powder adds rich chocolate flavor. Don’t forget, you can make this recipe your own. Substitute the nuts or add dried fruits if you like. If you're interested in the full recipe, check out the [Full Recipe]. Mixing the Dry Ingredients Start by grabbing a large mixing bowl. Measure out 2 cups of rolled oats, 1/4 cup of unsweetened cocoa powder, and 1/4 teaspoon of salt. Pour them into the bowl. Use a spoon to stir these dry ingredients together. Mix until they are evenly combined. This step builds the base for your bars. Preparing the Wet Mixture Next, take a microwave-safe bowl. Add 1/2 cup of creamy peanut butter and 1/2 cup of honey or maple syrup. Heat this mix in the microwave for about 30 seconds. When it's warm, take it out and stir until smooth. Then, add 1/2 teaspoon of vanilla extract. Blend it well. This mixture will add sweetness and creaminess to your bars. Combining Both Mixtures Now, pour the warm peanut butter mixture over the dry oats. Use a spatula or wooden spoon to mix everything together. Make sure the oats are fully coated. Then, gently fold in 1/2 cup of dark chocolate chips, 1/4 cup of chopped nuts, and 1/4 cup of shredded coconut if you want extra texture. Mix until these ingredients are evenly spread throughout. Preparing the Baking Dish Grab an 8x8 inch baking dish. Line it with parchment paper. Make sure to leave some parchment hanging over the sides. This overhang will help you lift the bars out later. Packing the Mixture Now, transfer the oat mixture into the lined dish. Use your spatula or hands to press it down firmly. Make sure to pack it tightly. This helps the bars hold their shape when cut. Refrigeration Guidelines Place the baking dish in the refrigerator. Let it chill for at least 2 hours. This step firms up the mixture. Cutting the Bars Once chilled, lift the mixture out using the parchment overhang. Cut it into squares or rectangles. Enjoy your tasty no-bake chocolate oatmeal bars! For the full recipe, check out the earlier section. Key Tips for Texture and Flavor To get the best texture, use rolled oats instead of quick oats. Rolled oats give a chewier bite. If you want a richer chocolate flavor, add a little more cocoa powder. When mixing, make sure to press the mixture firmly into the dish. This helps the bars hold together well. Common Mistakes to Avoid A common mistake is not letting the mixture chill long enough. If you skip this step, the bars may fall apart. Be sure to use a microwave-safe bowl for heating the peanut butter and honey. If you heat them too long, they can burn or become too runny. Lastly, don’t rush mixing the ingredients. Ensure everything is well combined for the best flavor. Presentation Tips for Serving For a nice presentation, cut the bars into neat squares. Place them on a pretty plate. You can drizzle some melted chocolate over the top for extra flair. A sprinkle of nuts or a dusting of cocoa powder adds a nice touch, too. Pairing Options with the Bars These bars pair well with a glass of cold milk, almond milk, or a hot cup of coffee. You can also serve them with fresh fruit like strawberries or bananas. If you want a fun twist, try them with a scoop of vanilla ice cream on the side. Enjoy these tasty treats any time! You can find the full recipe for these delightful no-bake chocolate oatmeal bars above. {{image_4}} You can easily make these bars nut-free. Swap out peanut butter for sunflower seed butter. This keeps the taste rich and smooth without nuts. If you want a creamy spread, almond butter is also a great choice. For a dairy-free version, use dairy-free chocolate chips. They melt beautifully and taste just as good. This way, everyone can enjoy the bars without worry. Get creative with your flavors! You can add dried fruits like raisins or cranberries. They give a sweet bite and chewy texture. Chopped nuts like pecans or cashews also add nice crunch. If you want to switch it up further, try flavoring the bars. A dash of mint extract gives a fresh twist. For coffee lovers, adding instant coffee granules works wonders. You can make these bars fit your taste and mood! For the complete recipe, check out the Full Recipe section. To keep your no-bake chocolate oatmeal bars fresh, use airtight containers. Choose containers that fit your bars without much extra space. This helps prevent air from getting in and making them stale. Store the bars in the fridge to maintain their firm texture. The cool temperature will help hold their shape and keep them tasty. It's best to keep them away from heat and sunlight. These elements can cause the chocolate to melt and make the bars sticky. Avoid places with high humidity, as moisture can ruin the texture. A simple kitchen cabinet is not a great choice for storage. These bars can last up to one week in the fridge. They stay fresh and delicious if stored properly. Check for any signs of spoilage, like an off smell or change in texture. If you want to keep them longer, consider freezing. Wrap the bars tightly in plastic wrap or foil. Place them in a freezer-safe bag. They can last for up to three months in the freezer. To enjoy them later, just thaw them in the fridge overnight before serving. For the full recipe, check out the earlier section. Can I use quick oats instead of rolled oats? Yes, you can use quick oats. They will change the texture a bit. The bars may be softer but still tasty. If you prefer a chewier bite, stick with rolled oats. How can I make these bars vegan? To make these bars vegan, swap honey for maple syrup. Use dairy-free chocolate chips too. The rest of the ingredients are already vegan-friendly. What can I substitute for honey? Maple syrup works well as a honey substitute. Agave syrup is another great option. Both will keep the bars sweet and delicious. Can I add protein powder to the recipe? Yes, you can add protein powder to boost nutrition. Start with a quarter cup and mix it in with the dry ingredients. Adjust the sweetener if needed. Are there gluten-free options for this recipe? Absolutely! Just use gluten-free rolled oats. Make sure your chocolate chips and any added nuts are also gluten-free. This way, everyone can enjoy these bars! You now have a complete guide on making delicious and healthy snack bars. We covered all the key ingredients and step-by-step instructions. Plus, I shared tips to perfect your bars and tasty variations to try. Remember to store them properly for the best shelf life. Feel free to explore different flavors and adjust based on your taste. Making these bars can be fun, and you’ll love the results! Enjoy your cooking!](https://recipesstation.com/wp-content/uploads/2025/07/bddc759c-185b-412a-bba7-3328aea95759.webp)
Craving a sweet treat that’s both easy to make and delicious? Look no further! My No-Bake Chocolate Oatmeal Bars are
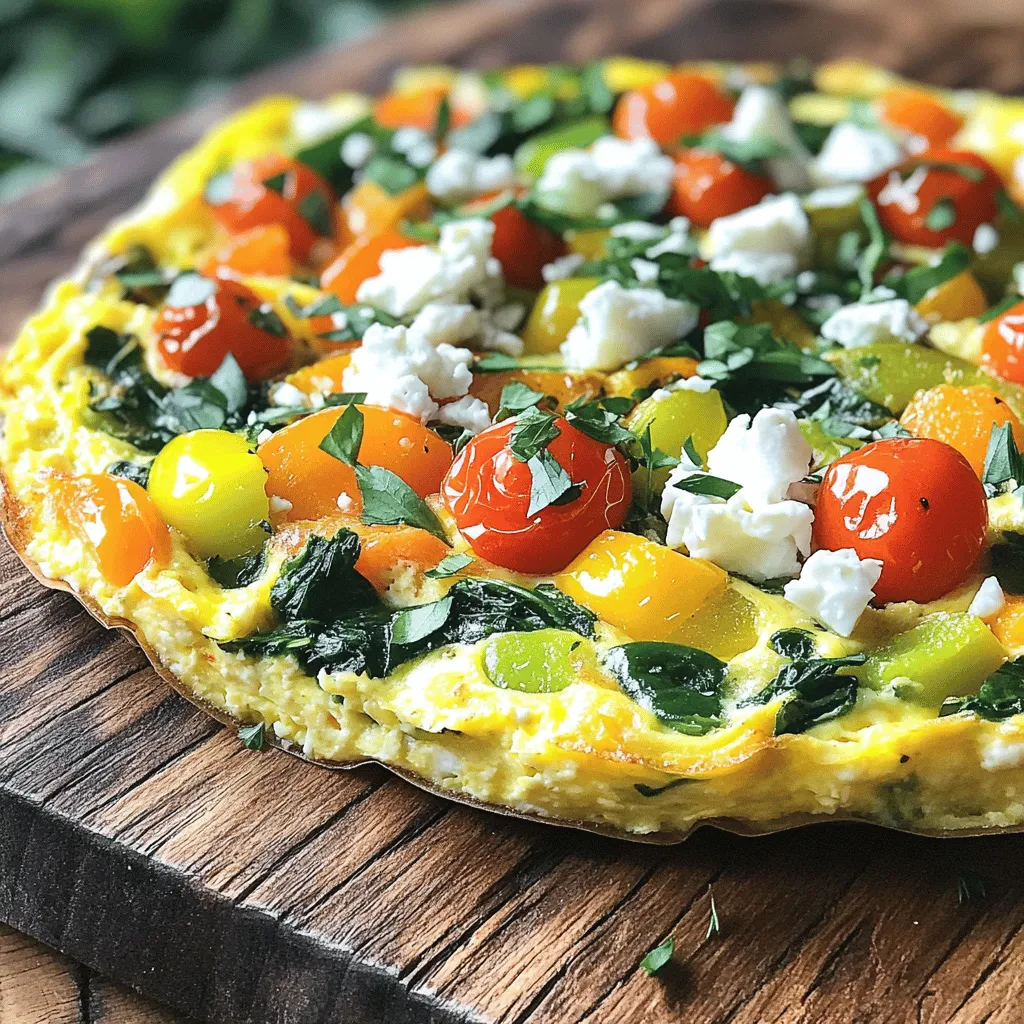
Are you in the mood for a dish that’s both easy to make and packed with flavor? My Fluffy Vegetable
