Skip to content
DisclaimerTerms Of UseGDPR PolicyCookie Policy

recipesstation

  • Home
  • Drinks
  • Appetizers
  • Dinner
  • Dessert
  • About
  • Contact
  • Privacy Policy
DisclaimerTerms Of UseGDPR PolicyCookie Policy

Emily

- 1 medium spaghetti squash - 1 tablespoon coconut oil - 1 yellow onion, finely diced - 2 cloves garlic, minced - 1 tablespoon fresh ginger, grated - 2 tablespoons yellow curry powder - 1 can (400ml) coconut milk - 1 cup vegetable broth - 1 red bell pepper, thinly sliced - 1 cup sugar snap peas, trimmed - 1 tablespoon soy sauce (or tamari for gluten-free) - Salt and pepper, to taste - Fresh cilantro leaves - Lime wedges The main ingredients in this dish create a warm base. The spaghetti squash gives a unique texture. Coconut oil adds richness, while the onion, garlic, and ginger bring depth. Yellow curry powder adds a vibrant color and a warm flavor. Additional ingredients complete the dish. Coconut milk provides creaminess and a hint of sweetness. Vegetable broth adds depth, while red bell pepper and sugar snap peas add crunch and color. Soy sauce enhances the umami flavor. For garnish, fresh cilantro adds brightness. Lime wedges can give a zesty kick. Together, these ingredients make yellow curry spaghetti squash a nourishing and flavorful meal. For the full recipe, check the details above. - Preheat the oven: Start by setting your oven to 400°F (200°C). - Prepare the squash halves: Slice the spaghetti squash in half lengthwise. Scoop out the seeds. Drizzle coconut oil on the cut sides. Sprinkle with salt and pepper. - Roast and check tenderness: Place the squash cut side down on a baking sheet. Roast for about 40 minutes. Check if it's fork-tender. The flesh should easily shred into strands. - Sauté the onion: Heat coconut oil in a skillet over medium heat. Add the diced yellow onion. Sauté for about 5 minutes until soft. - Infuse garlic and ginger: Add minced garlic and grated ginger. Cook for one more minute to release the aromas. - Toast yellow curry powder: Stir in yellow curry powder. Cook for about 30 seconds, stirring constantly. This brings out the flavor. - Add coconut milk and broth: Gradually pour in coconut milk and vegetable broth. Stir well to combine. Bring the mixture to a gentle simmer. - Stir in vegetables: Add sliced red bell pepper and sugar snap peas. Cook for 5-7 minutes. They should be tender but still bright. - Season with soy sauce, salt, and pepper: Stir in soy sauce and season with salt and pepper to taste. You can find the Full Recipe for a complete guide on making this dish. Enjoy your cooking! To get the best spaghetti squash, cook it right. Preheat your oven to 400°F (200°C). Cut the squash in half and scoop out the seeds. Drizzle coconut oil on the cut sides. Then, sprinkle salt and pepper. This helps bring out the flavor. Place the squash cut-side down on a baking sheet. Roast it for about 40 minutes. Check if it's fork-tender. If it is, it's ready to shred. Want to spice things up? Add a pinch of cayenne for heat. A dash of turmeric adds color and health benefits. You can also swap yellow curry powder for red curry paste. This gives a different twist. If you like it creamy, try adding a spoonful of peanut butter. It adds richness and depth to the sauce. Make your dish look inviting. Use a rustic wooden board for a beautiful display. Arrange the spaghetti squash strands nicely. Pour the yellow curry sauce over them. For a fresh touch, add cilantro on top. You can also serve lime wedges on the side. They add a zesty kick. This makes your meal not just tasty but also pretty! Enjoy! {{image_4}} You can make this dish even better by adding protein. Here are three great options: - Tofu: Use firm tofu. Cut it into cubes. Sauté it in the curry sauce until golden. Tofu soaks up the flavors well. - Chickpeas: Canned chickpeas are easy to use. Rinse them first. Add them to the sauce for a hearty boost. They add fiber and protein. - Shrimp: Shrimp cooks quickly. Add them to the curry sauce in the last few minutes. Cook until they turn pink and firm. Adding more veggies can enhance taste and nutrition. Here are some tasty choices: - Broccoli or zucchini: Both add great texture. Chop them into bite-sized pieces. Add them to the sauce with the other veggies. They cook quickly and stay crunchy. - Peas or carrots: Frozen peas are quick and easy. Add them in the last few minutes of cooking. For carrots, slice them thinly. They add sweetness and color. You can change the spice level to fit your taste. Here are ways to adjust it: - Mild to extra spicy options: For milder flavors, use less curry powder. You can also add coconut milk to tone it down. For more heat, add fresh chili or red pepper flakes. - Using different curry blends: Not all curry powders are the same. Try different blends for unique flavors. Some are spicy, while others are more earthy. Experiment to find your favorite! For the full recipe, check the details above. Enjoy customizing your Yellow Curry Spaghetti Squash! After you make this dish, let it cool down before storing it. Place leftovers in airtight containers. You want to keep air out to maintain freshness. Store the curry sauce and spaghetti squash separately. This helps keep the squash from getting mushy. You can freeze the curry sauce. Use freezer-safe containers or bags. Make sure to leave some space for expansion. When ready to enjoy, thaw the sauce overnight in the fridge. Reheat it slowly on the stove or in the microwave. Stir well to ensure even heating. In the fridge, this dish lasts about 3 to 5 days. Always check for signs of spoilage. If you see mold or an off smell, it’s best to toss it. You can tell spaghetti squash is done when it is fork-tender. This usually takes about 40 minutes at 400°F. The skin will look slightly golden. To check, carefully pierce the squash with a fork. If it’s easy to scrape into strands, it’s ready! Yes, you can make yellow curry spaghetti squash in advance. Prepare the sauce and roast the squash ahead of time. Store the squash strands and sauce separately in airtight containers. This helps keep them fresh. Just reheat when you're ready to eat! If you need a substitute for coconut milk, try almond milk or soy milk. You can also use cashew cream for a richer flavor. Just add a bit of extra spice to mimic the coconut taste. This gives your dish a nice twist. Absolutely! Yellow curry spaghetti squash is great for meal prep. It stores well and keeps flavors intact. Portion it into containers for easy lunches or dinners. This dish is healthy and satisfying, perfect for busy days. To spice things up, add red pepper flakes or fresh chili peppers. You can adjust the amount based on your preference. For a milder dish, reduce the yellow curry powder. Taste as you go to achieve your desired heat level. In this blog post, you learned how to make yellow curry spaghetti squash. We covered main and additional ingredients, plus optional garnishes. I shared step-by-step instructions for roasting the squash and making the curry sauce. You also found tips for enhancing flavor and beautiful plating ideas. Several variations were included to help you switch things up. As you explore this dish, remember it’s all about personal taste. Enjoy making it your own!

Yellow Curry Spaghetti Squash Flavorful and Healthy Dish

Get ready to savor a dish that’s nutritious and packed with flavor! Yellow Curry Spaghetti Squash combines the sweetness of

For this Millionaire Peach Salad, gather these fresh ingredients: - 4 ripe peaches, thinly sliced - 1 cup fresh mozzarella balls (bocconcini), drained - 1 cup arugula or a mix of leafy greens These ingredients form the backbone of our salad. The ripe peaches provide sweetness, while the mozzarella adds creaminess. Leafy greens like arugula bring a peppery bite, making the salad fresh and lively. Want to take it up a notch? Consider these optional additions: - ½ cup candied pecans, coarsely chopped - ½ cup feta cheese, crumbled - 2 tablespoons fresh basil, finely chopped Candied pecans give a sweet crunch. Feta cheese adds a salty hit that pairs well with peaches. Fresh basil brings a burst of aroma, enhancing the summer vibe. The dressing is key for flavor. You’ll need: - 1 tablespoon freshly squeezed lemon juice - 2 tablespoons high-quality extra-virgin olive oil - Sea salt and freshly cracked black pepper, to taste The lemon juice adds brightness, cutting through the richness of the cheese. The extra-virgin olive oil provides a smooth finish. Don't forget to season with salt and pepper to balance the flavors. For the full recipe, check out the details to make this delightful dish. To kick off this delicious salad, you need to prepare the base. Start by slicing four ripe peaches. Their sweetness will shine in the salad. Next, grab a bowl. Combine the sliced peaches with one cup of fresh mozzarella balls and one cup of arugula. You can also use mixed leafy greens if you prefer. Make sure to add half a cup of crumbled feta cheese and two tablespoons of finely chopped fresh basil. It is important to evenly distribute the ingredients. This way, each bite is full of flavor and texture. If you skip this step, some bites may taste bland. Now, let’s make the dressing. In a small bowl, whisk together one tablespoon of freshly squeezed lemon juice and two tablespoons of high-quality extra-virgin olive oil. The lemon juice brightens the flavors. Add a pinch of sea salt and a few cracks of black pepper to taste. Mix well until everything is combined. This dressing adds the perfect touch to your salad. Next, it is time to assemble the salad. Drizzle the dressing over the salad base you prepared earlier. Use a gentle tossing motion to combine the ingredients. Make sure every piece is coated in the dressing. Finally, carefully fold in half a cup of coarsely chopped candied pecans. They add a nice crunch and sweetness. Give the salad one last light toss to mix the pecans evenly throughout. Let the salad rest for about five minutes. This allows the flavors to blend perfectly before serving. For the complete recipe, check the Full Recipe. To make a great Millionaire Peach Salad, start with ripe peaches. Look for peaches that are slightly soft when you press them. They should have a sweet smell and a vibrant color. The best varieties for salads are the yellow or white peaches. They have juicy flesh and a great flavor that will shine in your dish. After mixing your salad, let it rest for about 5 minutes. This short wait helps the flavors blend together. It allows the dressing to soak into the peaches and greens, making each bite burst with flavor. You can also add a dash of balsamic glaze or a sprinkle of chili flakes for an extra kick. This small touch can elevate your salad to a whole new level. For a stunning presentation, serve the salad on a large, rustic platter. This gives it a fresh and inviting look. You can also use individual bowls for each guest. To finish, add a sprig of fresh basil on top and sprinkle a few extra candied pecans. This will not only make your salad look beautiful but also add a delightful crunch. For the full recipe, refer to the instructions provided earlier. {{image_4}} You can change the proteins in this salad. Try grilled chicken or shrimp for a tasty twist. Both options add great flavor and texture. If you want a creamy touch, swap mozzarella for goat cheese or burrata. These cheeses melt in your mouth and add a rich taste. Each swap gives the salad a new life while keeping it fresh. Summer is full of fruits. You can add berries or melons to your salad. They bring color and sweetness to each bite. If you want to enjoy this salad in fall or winter, consider using apples or pears instead of peaches. The crunchy texture of these fruits will make the salad satisfying even in colder months. If you want a vegan version, replace cheese with avocado. It gives creaminess while keeping it plant-based. You can also use almond or cashew cheese for a nutty flavor. For a gluten-free option, ensure all your ingredients are certified gluten-free. This way, everyone can enjoy this salad without worry. For the full recipe, check out Summer Fruit & Cheese Delight Salad. To store leftovers, place the salad in an airtight container. This keeps it fresh longer. If you want to keep ingredients fresh, store peaches separately. They can bruise easily. Keep mozzarella in its brine for moisture. Store greens in a damp paper towel to maintain crispness. The prepared salad lasts about 2 days in the fridge. After that, the greens may wilt. For freezing, it's best to avoid it. Freezing changes the texture of many ingredients. If you want to meal prep, store the dressing separately. This way, you can mix it just before serving. You should consume this salad cold. It tastes best when fresh. If you must store it, toss it gently before serving. You can add a little fresh lemon juice to brighten the flavors again. Enjoy your salad as a cool treat on a hot summer day! For the full recipe, check out the Summer Fruit & Cheese Delight Salad. Yes, you can prepare this salad in advance. To keep it fresh, store the salad base and dressing separately. Cut the peaches and mix them with greens and cheeses. Leave out the pecans until just before serving. This way, they stay crunchy. When you are ready to eat, add the dressing and pecans. Toss them together for a fresh taste. If you cannot find mozzarella, there are tasty alternatives. You can use burrata for a creamy texture. Goat cheese adds a tangy flavor. Feta cheese works well too; it pairs nicely with peaches. Just choose the cheese you like best to make this salad your own. This salad is great for meal prep, but with some limits. You can prepare the salad base a few days ahead. However, add the dressing and nuts only when you are ready to eat. This keeps the salad fresh and crunchy. If you follow these tips, you will enjoy a delicious meal throughout the week. This blog post covers how to make a fresh, tasty salad. We started with the right ingredients, like ripe peaches and mozzarella. Then, I detailed how to prepare the salad, make a zesty dressing, and assemble everything. Remember, you can mix in different ingredients for variety. Follow my tips to enhance flavors, and don’t forget about storage for leftovers. This salad is not just easy to make; it's a delight for your palate. Enjoy creating this vibrant dish again and again!

Millionaire Peach Salad Summer Edition Deliciousness

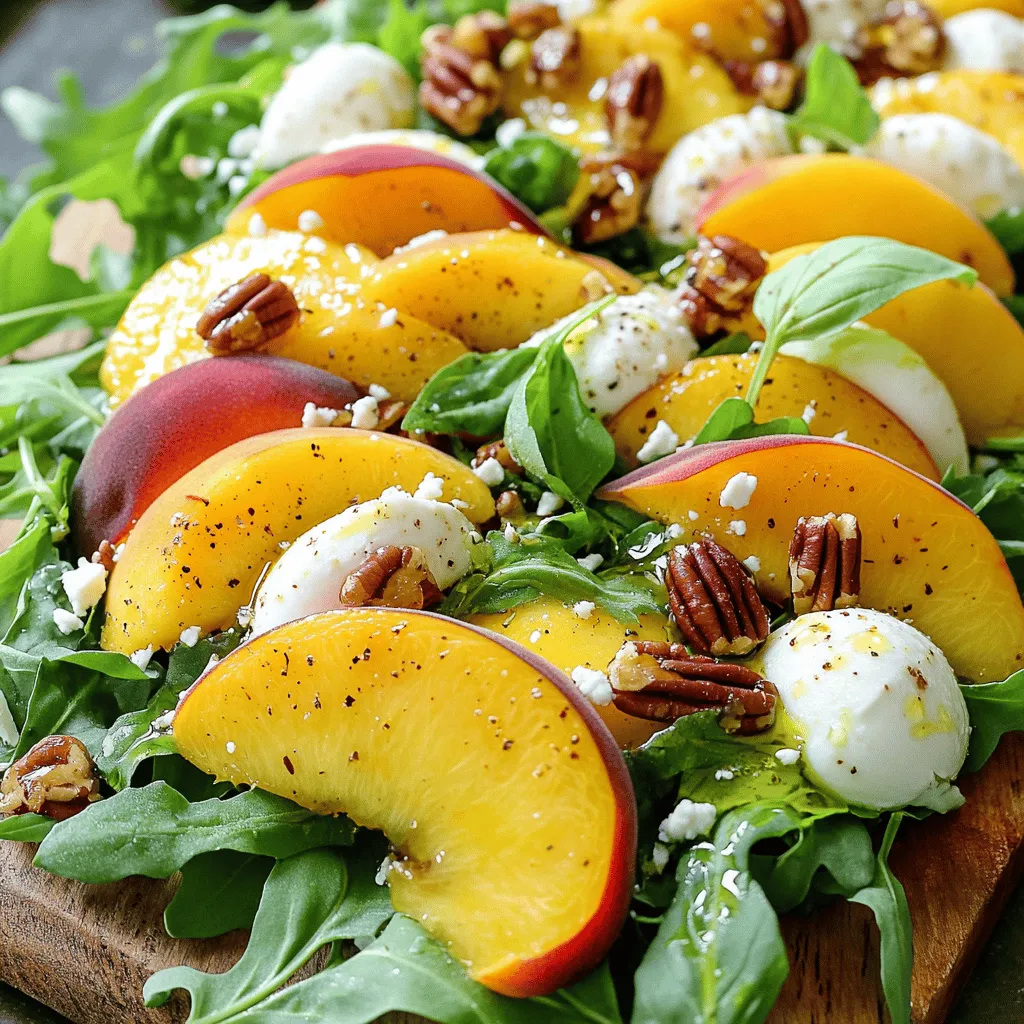
Are you ready for a dish that screams summer? The Millionaire Peach Salad is a burst of fresh flavors that

To make a cheesy veggie frittata, gather these fresh ingredients: - 6 large eggs - 1 cup fresh spinach, roughly chopped - 1 cup mixed bell peppers, diced (red, yellow, and green for color) - 1/2 cup onion, finely chopped - 1/2 cup cherry tomatoes, halved - 1 cup shredded cheese (a blend of sharp cheddar and creamy mozzarella) - 1/4 cup milk (whole or skim) - 2 tablespoons olive oil - Salt and freshly cracked black pepper to taste - Fresh herbs (such as basil or parsley) for garnish These ingredients create a frittata that is both tasty and colorful. Use fresh veggies for the best flavor. The mix of eggs and cheese makes it rich and satisfying. This dish works well for breakfast or a light lunch. You can find the full recipe with instructions later in this article. Start by gathering all your ingredients. This makes cooking smooth and easy. You will need eggs, veggies, milk, cheese, and seasonings. I like to set everything out on the counter. It helps me stay organized and focused. - Preheat oven to 375°F (190°C). This step is key for proper cooking. - In a large bowl, crack the eggs. Add the milk next. Whisk them well until mixed and fluffy. Season with salt and black pepper to taste. Heat two tablespoons of olive oil in an oven-safe skillet over medium heat. Once hot, add the chopped onion and diced bell peppers. Sauté for about 3-4 minutes, stirring often. You want the veggies to soften and smell great. Next, stir in the chopped spinach and halved cherry tomatoes. Cook for another 2-3 minutes. The spinach should wilt, and the tomatoes will soften a bit, but still hold shape. Spread the veggies evenly in the skillet. Carefully pour the egg mixture over them. Make sure it covers everything. Then sprinkle the shredded cheese on top. Let the frittata cook on the stovetop for about 3-4 minutes. You want the edges to start firming up. Now, transfer the skillet to the preheated oven. Bake for 15-20 minutes. The frittata should puff up and turn golden. A toothpick inserted in the center should come out clean. When it's done, carefully take the skillet out of the oven. Let the frittata cool for a few minutes. Slice it into wedges and add fresh herbs for a nice touch. For the complete recipe, check the [Full Recipe]. To make a great frittata, even cooking is key. Use an oven-safe skillet. This way, you can cook on the stovetop and then bake. When cooking, stir the veggies often. This helps them cook evenly. Choosing the right cheese adds flavor and texture. I love a blend of sharp cheddar and creamy mozzarella. Cheddar gives a nice bite, while mozzarella melts beautifully. You can also try feta or goat cheese for a twist. For presentation, serve the frittata warm on a nice plate. Sprinkle fresh herbs on top for color. A side of mixed greens looks great and tastes fresh. You can also add some crusty bread or a light salad. These sides balance the meal and make it feel special. Enjoy your cheesy veggie frittata with family or friends. It’s perfect for brunch or a quick dinner! For the full recipe, check out the earlier section. {{image_4}} You can easily change the veggies in your frittata. Use any veggies you like! Here are a few great options: - Zucchini, sliced thin - Mushrooms, chopped - Broccoli florets - Kale, chopped Mix and match to suit your taste. You can also switch up the cheese. Here are some tasty ideas: - Feta for a tangy bite - Goat cheese for creaminess - Pepper jack for a spicy kick Try these swaps to keep things fresh! If you're looking to make your frittata gluten-free, you’re in luck! This recipe is naturally gluten-free, so you don’t need to change anything. For vegetarian enhancements, add more veggies or use plant-based cheese. This way, you keep all the flavors while making it meat-free. You can even toss in some beans for extra protein! These adaptations let you enjoy a frittata that fits your diet and your cravings. You can find the Full Recipe at the beginning of the article. To store your cheesy veggie frittata, let it cool first. Use an airtight container to keep it fresh. You can also cover the frittata with plastic wrap. This helps keep moisture in and prevents it from drying out. I recommend storing it in the fridge for up to three days. If you want to keep it longer, you can freeze slices. Wrap each slice in foil and place them in a freezer-safe bag. This way, you can enjoy it later! When it's time to reheat, you have a couple of options. The oven is great for even heating. Preheat it to 350°F (175°C), then place the frittata on a baking sheet. Heat for about 10-15 minutes or until warm throughout. If you're in a hurry, use a microwave. Place a slice on a microwave-safe plate and cover it with a damp paper towel. Heat for about 1-2 minutes. Just make sure it’s hot all the way through! Enjoy your tasty meal again! How to make a frittata without eggs? You can use silken tofu or chickpea flour instead of eggs. Blend silken tofu until smooth. For chickpea flour, mix with water to form a batter. Add your veggies and cook as you would with eggs. Can I use frozen vegetables? Yes, you can use frozen vegetables. Just make sure to thaw and drain them first. This prevents extra water from making your frittata soggy. How long does the frittata last in the fridge? A frittata lasts about 3 to 4 days in the fridge. Store it in an airtight container for best results. What pan is best for a frittata? An oven-safe skillet, like cast iron or nonstick, works best. These pans heat evenly and make it easy to transfer to the oven. How do you know when a frittata is done? The frittata is done when it's puffed up and golden. A toothpick should come out clean when you insert it into the center. What is the difference between a frittata and an omelet? A frittata is thicker and has more filling. You cook it slowly and then bake it. An omelet is folded over and cooked quickly on the stovetop. Can I make a frittata ahead of time? Yes, you can make a frittata ahead of time. Just reheat it in the oven or microwave before serving. Check the Full Recipe for more details on preparation. This blog post covered the key elements for making a delicious frittata. You learned about the ingredients, cooking steps, and useful tips. Remember, you can swap ingredients and make it fit your diet. Store leftovers properly to enjoy them later. Don’t hesitate to try new combinations with veggies or cheese. Enjoying a frittata gives you a tasty, healthy meal that’s simple to make. Now, it’s your turn to create and experiment with your own frittata masterpiece. Enjoy cooking!

Cheesy Veggie Frittata Flavorful and Simple Meal

Are you craving a tasty and easy meal? This Cheesy Veggie Frittata is your answer! Packed with vibrant vegetables and

- 250g fresh okra (bhindi), thoroughly washed and completely dried - 3 tablespoons chickpea flour (besan) - 1 teaspoon rice flour (to enhance crispiness) - 1 teaspoon red chili powder - 1/2 teaspoon turmeric powder - 1 teaspoon cumin powder - Salt, to taste - 2 tablespoons oil (for shallow frying) - Fresh coriander leaves, finely chopped (for garnish) For this crispy bhindi okra fry, you need fresh okra. The okra must be dry to get that crunch. Chickpea flour gives a nice layer, while rice flour helps with extra crispiness. The spices add flavor and warmth. You can adjust the salt to your taste. When gathering your ingredients, make sure everything is fresh. This makes a big difference in flavor. Using the right oil is key too. I prefer using oil with a high smoke point. It helps the okra fry evenly without burning. If you want to make this dish even more exciting, you can add your favorite spices. You can play with the amounts until you find what you like best. For the full recipe, feel free to check out the detailed instructions. Enjoy cooking! First, wash the okra under running water. This step cleans the okra and removes dirt. After washing, lay the okra on a kitchen towel. Pat it dry thoroughly. This is key for getting a crispy texture when frying. Next, trim off both ends of each okra pod. Slice the okra into 1-inch pieces. Place these pieces in a mixing bowl and set them aside. Keeping the pieces uniform helps them cook evenly. Now, take a separate mixing bowl. Combine the chickpea flour, rice flour, red chili powder, turmeric powder, cumin powder, and salt. Stir these together well to make a dry spice blend. This blend will give your okra flavor and crunch. Carefully sprinkle the dry mixture over the chopped okra. Gently toss the okra using your hands or a spatula. Make sure each piece is well-coated. This step is important for delicious, flavorful bites. Heat oil in a frying pan over medium-high heat. Make sure the oil is hot before adding the okra. This helps achieve that perfect crispy texture. Once the oil is ready, add the coated okra to the pan in small batches. Avoid overcrowding the pan. Fry the okra until it turns golden brown and crispy. This usually takes about 3-4 minutes per side. Use a slotted spoon to remove the fried okra from the pan. Let excess oil drain by placing them on a paper towel-lined plate. Continue frying the remaining batches until all the okra is crispy and golden brown. Before serving, garnish the crispy bhindi with freshly chopped coriander leaves. This adds a fresh flavor and looks great. For the full recipe, check out the details above. To get that perfect crunch in your bhindi, drying the okra is key. Wet okra turns slimy when cooked, ruining the texture. After washing, lay the okra on a towel. Pat them dry until no moisture remains. This step helps achieve that crispy finish. Rice flour is another secret weapon for crispiness. It absorbs moisture and helps form a crunchy layer. When mixed with chickpea flour, it creates the ideal coating. Use about one teaspoon of rice flour in your mix for best results. The temperature of the oil matters a lot. Heat the oil on medium-high heat. You want it hot enough to fry, but not too hot that it smokes. A good test is to drop a small piece of okra into the oil. If it sizzles right away, the oil is ready. When frying, avoid overcrowding the pan. Fry in small batches to allow hot air to circulate around each piece. This keeps them crispy. Fry each batch for about 3-4 minutes until golden brown. Use a slotted spoon to lift them out. Let excess oil drain on paper towels. For the full recipe, check out the detailed instructions above. {{image_4}} You can change the spice mix to create new flavors. Try adding garam masala for warmth. For a tangy kick, mix in amchur (dried mango powder). You can also use black pepper or chat masala for a unique taste. Each spice adds its own twist, so feel free to experiment! You can make crispy bhindi in different ways. Air frying is a great choice for a healthier option. It uses less oil and still gives a nice crunch. Just toss the coated okra in the air fryer for about 15 minutes. If you prefer traditional frying, make sure the oil is hot. This helps keep the okra crispy. Both methods work well, so pick whichever you like best! If you need a gluten-free option, chickpea flour is your best bet. But you can also use almond flour or rice flour. These substitutes work well in the recipe. They’ll keep the texture nice and help with crispiness. Always check for gluten-free labels when shopping, just to be safe. To keep your crispy bhindi okra fry fresh, store it in an airtight container. Make sure the okra is completely cool before sealing. Place a paper towel inside the container to absorb extra moisture. This step helps maintain its crispness. Store the container in the fridge. You can keep it for up to two days. After that, the okra may lose its crunch. Reheating crispy okra can be tricky. You want to keep it crispy, not soggy. The best way to reheat is in an oven. Preheat your oven to 350°F (175°C). Spread the okra on a baking sheet in a single layer. Bake for about 10 minutes. This method helps restore some crispiness. You can also use an air fryer for a quicker option. Set the air fryer to 375°F (190°C) and cook for 5-7 minutes. This way, your bhindi stays delightful and crispy! For more details on making this dish, check out the Full Recipe. Using frozen okra can change the texture. It may become soft and mushy. Fresh okra gives the best crunch. If you use frozen, thaw it well and pat it dry. This helps to remove excess moisture. To add more heat, try these tips: - Increase the red chili powder. - Add chopped green chilies to the spice mix. - Use cayenne pepper for extra spice. These changes will give your Crispy Bhindi Okra Fry a nice kick. You can enjoy bhindi fry with: - Steamed rice or jeera rice. - Roti or naan for a complete meal. - A side of yogurt or raita to cool it down. These options balance the spiciness and enhance the meal. Look for these signs: - The okra should be golden brown and crispy. - It should feel firm when you touch it. - You can also check if it bends easily without breaking. These indicators show that your okra is cooked perfectly. This blog post covered everything you need to make crispy bhindi fry. We discussed the key ingredients, from fresh okra to spices that add flavor. I shared step-by-step instructions for preparation and cooking, plus tips for getting that perfect texture. In the end, you can customize this dish to suit your taste. Whether you choose to air fry or traditional fry, enjoy this tasty treat!

Crispy Bhindi Okra Fry Delicious and Easy Recipe

Are you ready to enjoy a tasty snack that’s both crispy and easy to make? Look no further! In this

To make a vibrant Avocado Lime Cucumber Salad, you need fresh and tasty ingredients. Here’s what you’ll need: - Avocados - Cucumber - Cherry Tomatoes - Red Onion - Fresh Cilantro - Lime Juice - Extra Virgin Olive Oil - Honey (optional) - Salt and Pepper Each ingredient plays a key role in the dish. Avocados give creaminess, while cucumbers add crunch. Cherry tomatoes bring sweetness, and red onion adds a touch of sharpness. Fresh cilantro brightens the flavor, and lime juice adds zesty tang. Extra virgin olive oil enriches the salad, while honey can balance the acidity, if you choose to use it. Finally, salt and pepper enhance all the flavors. These ingredients blend well together, creating a dish that is both fresh and flavorful. You can find the full recipe to dive deeper into the steps needed to prepare this delightful salad. Combining Ingredients Start with a large mixing bowl. Add the diced avocados, thinly sliced cucumber, halved cherry tomatoes, and finely chopped red onion. Gently mix these ingredients together. You want them to blend well, but be careful! Avoid mashing the avocados. They should stay in nice, chunky pieces for the best texture. Ensuring Avocados Remain Intact To keep avocados from turning mushy, handle them with care. Use a spatula or your hands to mix. This way, you maintain that creamy, rich bite in each forkful. The goal is to preserve the vibrant green color and flavor of the avocados. Whisking Lime Juice and Olive Oil In a small bowl, squeeze fresh lime juice. Add the extra virgin olive oil. Use a whisk to mix them until they blend well. This dressing adds a zesty touch that brightens the salad. Adding Optional Sweetness If you want a hint of sweetness, drop in a teaspoon of honey. Whisk again until fully mixed. This sweet note balances the tangy lime and gives depth to the flavor. Drizzling the Dressing Once your dressing is ready, drizzle it over the salad mixture. This step brings all the ingredients together, enhancing their natural flavors. Gently Tossing Ingredients Now, it’s time to toss everything! Use your hands or a large spoon, and do this gently. You want the ingredients to be coated, but the avocados should stay whole. A light touch is key! Enjoy the vibrant colors as they come together. For the complete steps, check the Full Recipe! Tips for Ripeness When selecting avocados, look for those that feel gently soft when you press them. A ripe avocado will yield slightly but not feel mushy. If it feels hard, it needs more time to ripen on your counter. To speed up ripening, place it in a paper bag with a banana or apple. These fruits give off ethylene gas, which helps avocados ripen faster. Best Avocado Varieties Hass avocados are the most popular type. They have a rich, creamy texture and a dark, bumpy skin. Other varieties include Fuerte and Bacon, which are smoother and have a milder taste. I recommend using Hass for this salad, as they provide the best flavor and texture. Ideal Serving Temperatures This salad shines when served cool. Chill it in the fridge for about 30 minutes before serving. This enhances the flavors and keeps the ingredients fresh. You can enjoy it right away or make it a few hours in advance. Garnishing with Additional Ingredients For a pop of color, add thinly sliced radishes or diced bell peppers. You can also sprinkle some feta cheese or toasted nuts on top for extra flavor and crunch. These additions make your salad more appealing and delicious. Preventing Browning of Avocados To keep your salad looking fresh, avoid cutting avocados too early. Lime juice helps slow browning, so drizzle it over the diced avocados right after cutting. If you have leftovers, store them in an airtight container to limit air exposure. Over-mixing the Salad When combining the ingredients, use a gentle touch. Over-mixing can turn avocados into mush. Instead, fold the ingredients together lightly. This keeps the salad looking vibrant and fresh, ensuring each bite is a delight. For the full recipe, check out the details above and get ready to enjoy a fresh and vibrant dish! {{image_4}} You can make your avocado lime cucumber salad even better by adding more veggies. Here are some ideas: - Radishes: They add a nice crunch and a peppery taste. - Bell Peppers: These bring color and sweetness to the dish. - Carrots: Shredded carrots add color and crunch. - Snap Peas: Their sweetness and crunch make a great addition. For greens, try these: - Spinach: It adds a mild flavor and extra vitamins. - Kale: This adds a hearty texture and great nutrients. - Arugula: It has a peppery flavor that pairs well with lime. If you want to make your salad more filling, add some protein. Here are a few tasty options: - Grilled Chicken: Cooked and sliced, it pairs well with the salad. - Shrimp: Grilled or sautéed shrimp adds a seafood twist. - Chickpeas: These provide a hearty texture and are full of fiber. - Quinoa: This grain adds protein and makes the salad heartier. You can switch up the dressing for more flavor. Here are some variations: - Honey-Lime Vinaigrette: Mix honey, lime juice, and olive oil for a sweet twist. - Yogurt Dressing: Use Greek yogurt for a creamy option. - Spicy Dressing: Add a pinch of chili flakes for some heat. For herbs, try these: - Mint: This brings a fresh and cooling flavor. - Basil: It offers a sweet and aromatic note. - Dill: This adds a unique twist to the salad. These variations keep your salad exciting and tasty. You can find the full recipe for the avocado lime cucumber salad [here](#). - Best Container for Garden Salad: Use an airtight container. This keeps the salad fresh longer. Glass containers work well, but plastic ones are fine too. - Refrigeration Tips: Place the salad in the fridge right away. Cold temperatures help slow spoilage. If possible, keep the dressing separate until ready to serve. This keeps the salad crisp. - How Long It Lasts in the Fridge: The avocado lime cucumber salad stays fresh for about 2 to 3 days. After that, the avocados may turn brown and mushy. - Signs of Spoilage: Look for changes in color or smell. If the salad smells sour, it is best to toss it. Also, if the avocados look very brown or slimy, it is no longer good to eat. For the full recipe, check out the Avocado Lime Cucumber Salad. To keep your avocado salad fresh, use lime juice. Lime juice slows down browning. You can also cover the salad tightly. Use plastic wrap or a lid. Ensure the wrap touches the salad to limit air exposure. If you have extra lime juice, drizzle it on top before storing. Yes, you can make this salad early. Prepare the salad base without the avocados. Store it in the fridge. Add the avocados just before serving. This keeps them fresh and green. If the salad sits too long, it may lose its crunch and taste. Yes, this salad is gluten-free. All ingredients are naturally gluten-free. The avocados, cucumber, and tomatoes are safe for gluten-free diets. If you add anything, check for gluten-free labels. This salad is great for anyone needing to avoid gluten. In this blog post, I shared a fresh avocado salad recipe. You learned about key ingredients, from avocados to lime juice. I have given you clear instructions for prep and mixing. You now know tips for choosing ripe avocados and preventing browning. Consider adding proteins or extra veggies to boost flavor. Store any leftovers properly to keep them fresh. This salad is simple and customizable. Enjoy making a dish that is healthy and delicious!

Avocado Lime Cucumber Salad Fresh and Flavorful Dish

Discover a fresh and vibrant meal with my Avocado Lime Cucumber Salad! This light, tasty dish bursts with flavors that

To make a tasty zucchini banana bread, gather these key ingredients: - 1 cup ripe bananas, mashed (approximately 2 to 3 medium bananas) - 1 cup grated zucchini, with excess water squeezed out - 1/3 cup melted coconut oil - 1/2 cup packed brown sugar - 1/4 cup granulated sugar - 1 large egg, at room temperature - 1 teaspoon pure vanilla extract - 1 1/2 cups all-purpose flour - 1 teaspoon baking soda - 1/2 teaspoon baking powder - 1/2 teaspoon ground cinnamon - 1/4 teaspoon ground nutmeg - 1/4 teaspoon salt These ingredients create a moist and flavorful bread. Ripe bananas provide sweetness. Grated zucchini adds moisture and nutrition. You can enhance this bread with optional add-ins. Consider these choices: - 1/2 cup chopped walnuts or pecans - 1/2 cup chocolate chips - 1/4 cup dried cranberries Adding nuts gives a nice crunch. Chocolate chips add sweetness and fun. Dried cranberries bring a tangy twist. Zucchini banana bread offers several health benefits: - Bananas: High in potassium and vitamin C. - Zucchini: Low in calories and rich in fiber. - Coconut oil: Contains healthy fats. - Nuts: Good source of protein and healthy fats. These ingredients work together to make a nutritious snack. Enjoy this bread without guilt! For the full recipe, check out the complete details above. First, gather your ingredients. You will need ripe bananas, fresh zucchini, coconut oil, and sugars. Make sure to grate the zucchini and squeeze out excess water. This keeps the bread moist but not soggy. Prepare a loaf pan by greasing it or lining it with parchment paper. In a large bowl, mix melted coconut oil, brown sugar, and granulated sugar. Whisk this mixture well until it looks smooth. Next, add the mashed bananas, grated zucchini, egg, and vanilla extract. Stir these together until everything blends into one shiny mixture. In another bowl, whisk together all-purpose flour, baking soda, baking powder, ground cinnamon, nutmeg, and salt. Make sure the dry ingredients are evenly mixed. This step helps the bread rise well and adds great flavor. Now, slowly fold the dry mixture into the wet mixture. Use a spatula or wooden spoon. Mix gently until no dry flour shows. Be careful not to overmix. If you like, add in chopped walnuts or pecans for extra crunch. Pour the batter into your prepared loaf pan. Smooth the top with a spatula for an even finish. Place the pan in the oven set to 350°F (175°C). Bake for 55 to 65 minutes. Check if it’s done by inserting a toothpick in the center. It should come out clean or with a few crumbs. Once baked, take the bread out of the oven. Let it cool in the pan for 10 minutes. Then, move it to a wire rack to cool completely. Slice the bread thickly and serve on a rustic board. For a special touch, sprinkle extra nuts on top. A small dish of honey adds extra flavor and charm to your tasty creation. Enjoy! To get the right amount of zucchini, first wash and dry it. Use a box grater to create fine shreds. After grating, place the zucchini in a clean dish towel. Twist the towel to squeeze out excess water. This step helps prevent a soggy bread. Measure a cup of the squeezed zucchini for your batter. Moisture is key in this bread. The bananas add natural sweetness and moisture. The zucchini also brings in moisture but can be watery. Always squeeze out the extra water before adding it to the mix. If your bananas are very ripe, they will help keep the bread moist. One mistake is overmixing the batter. Mix just until the dry ingredients blend with the wet. Overmixing can lead to tough bread. Another mistake is skipping the cooling stage. Let the bread cool in the pan for ten minutes. This helps it set properly and makes slicing easier. For a light and fluffy texture, use room temperature ingredients. Cold eggs or butter can affect how the batter rises. When folding in the dry ingredients, be gentle. This keeps air in the batter, giving your bread a nice rise. If you like nuts, fold them in last for added crunch. For more tips, check the full recipe. {{image_4}} To make this recipe gluten-free, you can swap the all-purpose flour. Use a 1-to-1 gluten-free flour blend. This blend works well and keeps the bread moist. Check the label for added ingredients that may affect taste. Other options include almond flour or coconut flour for a nutty flavor. Adjust the liquid in the recipe if you use coconut flour, as it absorbs more moisture. You can add spices to change the flavor of your Zucchini Banana Bread. Try adding: - 1 teaspoon of ground ginger for a warm kick - 1 teaspoon of pumpkin spice for a seasonal touch - 1 teaspoon of cocoa powder for a chocolate twist Additionally, you can use different extracts. Almond extract or maple extract can add a unique taste. Just replace some of the vanilla extract with these flavors. Experiment and find what you like best. Mix-ins can add texture and flavor to your bread. Some great options include: - 1/2 cup of chocolate chips for sweetness - 1/2 cup of dried fruit, like raisins or cranberries - 1/2 cup of shredded coconut for a tropical twist For toppings, you can sprinkle extra nuts on top before baking for added crunch. A drizzle of honey or maple syrup after baking enhances the sweetness. You can also serve it with cream cheese or nut butter for a tasty spread. These simple changes can make your Zucchini Banana Bread even more delightful. For the full recipe, check the previous section. Store your Zucchini Banana Bread in an airtight container. This keeps it fresh and moist. You can place a piece of wax paper or parchment paper between slices. This helps keep them from sticking together. Store it at room temperature for up to three days. If you want it to last longer, refrigeration is an option. However, this may change the texture a bit. Freezing is a great way to save Zucchini Banana Bread. Wrap it tightly in plastic wrap. Then, place it in a freezer bag or airtight container. Make sure to remove as much air as possible. You can freeze it for up to three months. Label your bag with the date, so you know when you made it. To refresh your frozen Zucchini Banana Bread, remove it from the freezer. Let it thaw in the fridge overnight or at room temperature for a few hours. Once thawed, you can warm it in the oven. Preheat your oven to 350°F (175°C). Wrap the bread in foil and warm it for about 10 to 15 minutes. This makes it taste fresh again. Enjoy your delicious Zucchini Banana Bread! For the full recipe, check out the earlier section. Zucchini Banana Bread stands out due to its perfect blend of flavors. The bananas add sweetness, while zucchini keeps the bread moist. This combo creates a soft texture that is hard to beat. Plus, zucchini is a secret ingredient that boosts nutrition without changing the taste. You get a delicious treat that also sneaks in some veggies. This is why I love this bread so much! Yes, you can adjust some ingredients in the recipe. If you want a lighter fat, swap coconut oil for applesauce. You can use almond flour instead of all-purpose flour for gluten-free bread. If you don’t have brown sugar, white sugar works too, but it affects the flavor a bit. Feel free to mix in dried fruits or chocolate chips for extra flavor. To check if your bread is done, insert a toothpick into the center. It should come out clean or with a few moist crumbs. If it has wet batter on it, bake for a few more minutes. The top should be golden brown and spring back when touched. Trust me, this test works every time! Yes, Zucchini Banana Bread offers several health benefits. Zucchini is low in calories and high in fiber, which helps digestion. Bananas provide potassium and vitamins, boosting energy. This bread is a great way to enjoy a sweet treat while sneaking in some nutrients. Plus, if you add nuts, you get healthy fats and protein as well. Zucchini Banana Bread stays fresh for about 3 to 5 days at room temperature. If you want it to last longer, store it in the fridge for up to a week. For even more storage, you can freeze it. Wrap it tightly in plastic wrap and then in foil. It can last for up to three months in the freezer. Just let it thaw before you slice it! Zucchini banana bread combines healthy ingredients with delicious flavors. We covered key ingredients, preparation steps, and storage tips. You learned how to enhance taste and avoid common mistakes. Remember to enjoy the process and try variations to keep things exciting. This recipe not only satisfies but can also boost your health. Make this bread today, and share it with friends! You will love how easy and tasty it is.

Zucchini Banana Bread Flavorful and Moist Recipe

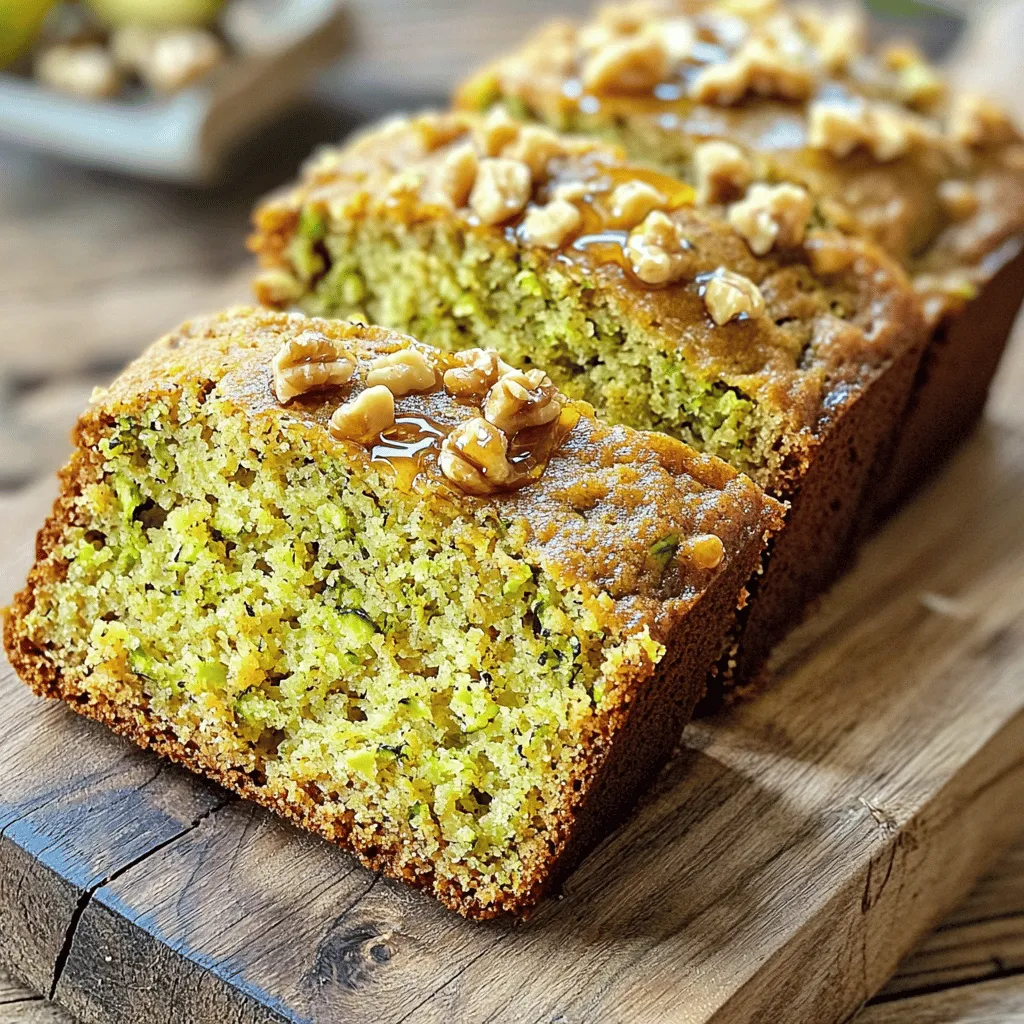
Are you ready to bake something truly delicious? Zucchini banana bread is both flavorful and moist, making it a perfect

- 1 pound fresh okra, rinsed and trimmed - 4 cloves garlic, smashed - 1 whole red chili pepper - Optional: chopped fresh herbs or colorful sliced peppers for presentation - 2 cups water - 1 cup apple cider vinegar - 2 tablespoons sea salt - 2 tablespoons sugar - 1 teaspoon black peppercorns - 1 teaspoon mustard seeds - 1 teaspoon coriander seeds - Optional: 1/2 teaspoon smoked paprika - Medium saucepan - Large pot for sterilizing - Clean jars with lids - Measuring cups and spoons I love using fresh okra for this recipe. The crunch and flavor shine through. When choosing okra, pick bright green pods that are firm. Avoid any that feel soft or look dull. For the brine, apple cider vinegar adds a nice tang. The sugar and salt help create balance. This makes the pickled okra taste amazing. The spices give extra flavor. Black peppercorns and mustard seeds add depth. The optional smoked paprika gives a unique twist. You will need a medium saucepan to make the brine. A large pot helps sterilize the jars too. Clean jars with lids keep the pickled okra fresh. Measuring cups and spoons ensure perfect amounts. For the full recipe, check out the details on how to craft these crunchy delights! First, gather your brine ingredients. You need 2 cups of water, 1 cup of apple cider vinegar, 2 tablespoons of sea salt, and 2 tablespoons of sugar. Combine these in a medium saucepan. Stir well and bring the mixture to a boil over medium-high heat. Keep stirring until the salt and sugar dissolve completely. Once dissolved, take the saucepan off the heat and let the brine cool slightly. While the brine cools, it’s time to prepare your jars. Take a large pot of hot water and boil the jars for about 10 minutes. This step is crucial. Sterilizing your jars helps preserve the pickles and keeps them safe to eat. After you sterilize the jars, they should still be warm. Place the smashed garlic cloves, black peppercorns, mustard seeds, coriander seeds, and the whole red chili pepper at the bottom of each jar. Next, pack the trimmed okra into the jars, standing them upright. This creates a beautiful look and helps the flavors mix well. Now it’s time for the brine. Carefully pour the warm brine over the packed okra in each jar. Make sure the okra is fully submerged in the brine. Leave about 1/2 inch of space at the top of each jar. This headspace is important for sealing. Wipe the rims of the jars with a clean cloth. This step removes any residue that may prevent a good seal. Secure the jars with their lids and let them cool to room temperature. This cooling step helps the flavors meld together nicely. Once the jars cool, place them in the fridge. Let the okra pickle for at least 48 hours. This time allows the flavors to develop fully. When stored properly, pickled okra can last up to 3 months in the fridge. For the full recipe, check out the Crunchy Spiced Pickled Okra guide to enjoy this delightful treat! To get that perfect crunch, always use fresh okra. Look for firm, bright green pods. Fresh okra makes all the difference in taste and texture. After you pack the jars, let the okra pickle for at least 48 hours. This rest time allows flavors to blend well and enhances the crunch. You can spice up your pickled okra with various flavors. Try adding whole mustard seeds or coriander seeds for a zesty kick. Experimenting with different peppers can also change the heat level. Adding a whole red chili gives a nice balance of spice. Fresh herbs, like dill or thyme, can add a unique taste too. Pickled okra shines as a snack or a side. Serve it on charcuterie boards for a colorful touch. It also adds a fun crunch to salads. Use it as a garnish for cocktails or sandwiches. Its bright flavor can elevate any dish. Enjoy your pickled okra straight from the jar or as part of a meal! For the full recipe, check out the Crunchy Spiced Pickled Okra. {{image_4}} To make spicy pickled okra, adjust the chili levels for heat. You can add more dried chili peppers for a stronger kick. You can also try using different types of peppers. Jalapeños or serranos work well. They bring a fun twist to the flavor. You can even mix peppers for more depth. Experiment with the heat until you find your perfect balance. For a sweet and savory twist, add honey or maple syrup to your brine. These sweeteners blend well with the tang of vinegar. They help balance the sweet and sour flavors. You can start with a tablespoon and adjust to taste. If you prefer less sweetness, use less syrup. This version is great for those who enjoy a sweeter pickled snack. For a Mediterranean-style pickled okra, use olive oil and fresh herbs. Rosemary, thyme, and oregano add great flavor. You can also incorporate other vegetables. Carrots or bell peppers create a colorful medley. This version pairs well with Mediterranean dishes. It adds a unique twist to your pickled okra recipe. For a full recipe, check out my Crunchy Spiced Pickled Okra. To keep your pickled okra fresh, store it in the fridge. Use clean, airtight jars to secure the okra. This step prevents air from spoiling your delicious snack. A good seal helps keep the flavors locked in. Pickled okra stays fresh in the fridge for about three months. After this time, the taste may change. Look for signs of spoilage, like off smells or a cloudy brine. If you see mold or the okra looks slimy, it's best to toss it. You can freeze pickled okra, but it may not stay crunchy. If you want to try freezing, pack it tightly in freezer-safe containers. Leave some space at the top for expansion. When you're ready to eat, thaw it in the fridge overnight for the best results. Pickled okra can last up to three months in the fridge. Make sure to keep them sealed well. After opening, enjoy them within a month for the best taste. I do not recommend using frozen okra for pickling. Frozen okra loses its crunch and texture. Fresh okra works best for a crisp bite in your pickles. You can find pickled okra at local grocery stores and farmers' markets. Online retailers also sell various brands of pickled okra. Look for specialty shops that focus on Southern foods. Okra is low in calories and high in fiber. It contains vitamins A and C, which help boost your immune system. Pickled okra still retains many nutrients, but watch for added salt. Yes, you can enjoy pickled okra right from the jar. They make a great snack or garnish for meals. Just ensure the jar has been stored properly for safety. Making pickled okra is easy and fun. We covered all the steps, from fresh ingredients to storage tips. Remember to use crisp okra for the best crunch. Experiment with flavors to find your favorite. Enjoy this tasty treat in salads, as snacks, or on charcuterie boards. With just a bit of effort, you can create a flavorful and colorful addition to your meals. Now, get started and enjoy your homemade pickled okra!

Pickled Okra Crunchy Delights for Your Table

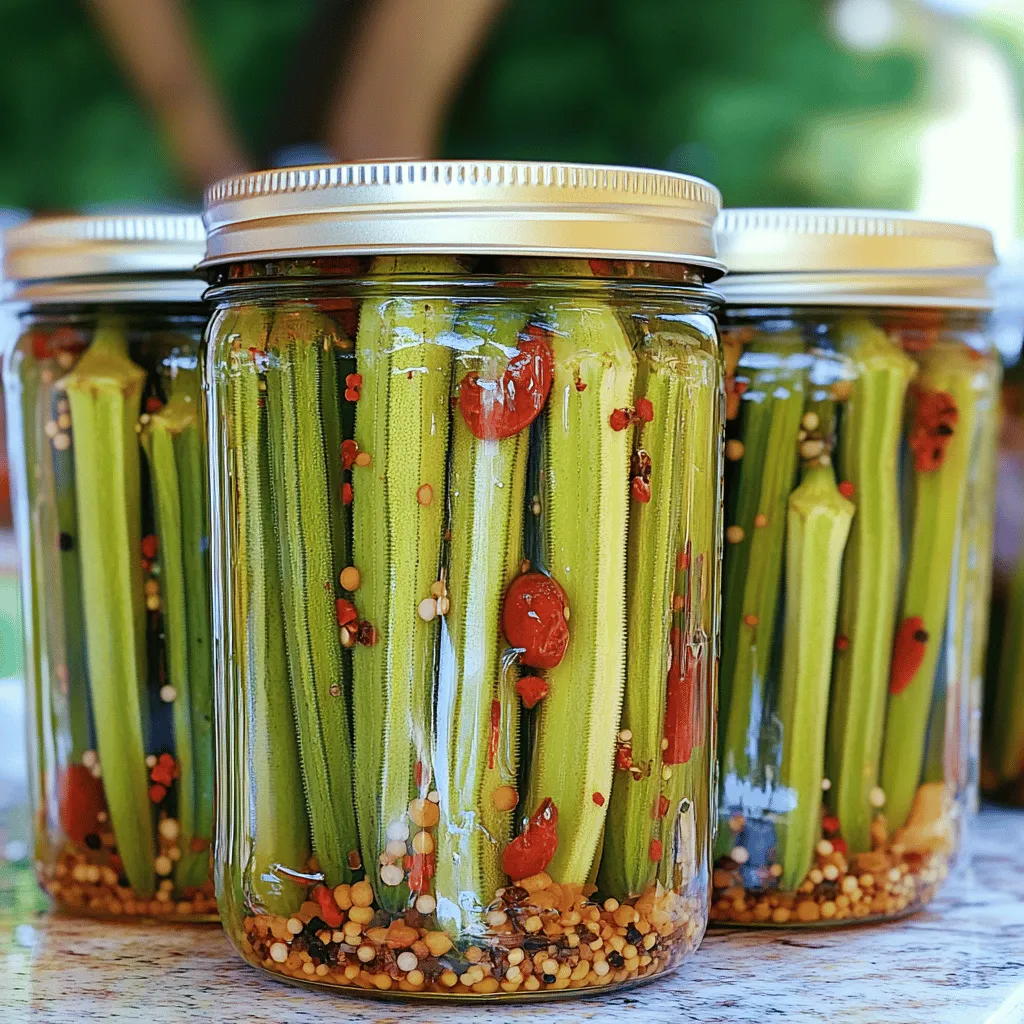
Are you ready to add a burst of flavor to your table? Pickled okra is not just a tasty treat;

- 1 pound fresh okra, sliced into ½ inch rounds - 1 cup buttermilk - 1 cup cornmeal - ½ cup all-purpose flour - 1 teaspoon garlic powder - 1 teaspoon onion powder - ½ teaspoon smoked paprika - ½ teaspoon cayenne pepper (adjust to taste) - Salt and pepper to taste - Vegetable oil for frying Using fresh ingredients makes a big difference. The okra adds a unique flavor and crunch. Soaking it in buttermilk helps the breading stick well. The dry ingredients create a tasty coating. Cornmeal gives that crunchy texture, while flour binds it all together. Use the seasonings to add layers of flavor. Garlic and onion powders give depth. Smoked paprika adds a nice warmth, and cayenne gives a kick. Adjust the cayenne to fit your taste. The vegetable oil is key for frying. It needs to be hot for that perfect golden crisp. I recommend using a deep skillet for even frying. This combination of ingredients makes for a delightful snack. For the full recipe, follow the steps carefully to enjoy crunchy fried okra! Start by slicing 1 pound of fresh okra into ½ inch rounds. Place the sliced okra in a large bowl. Pour 1 cup of buttermilk over the okra. Make sure the okra is fully submerged. Let it soak for at least 30 minutes. This soaking step adds great flavor. It also helps the breading stick better. While the okra soaks, prepare the coating. In a separate mixing bowl, combine 1 cup of cornmeal and ½ cup of all-purpose flour. Add 1 teaspoon of garlic powder, 1 teaspoon of onion powder, ½ teaspoon of smoked paprika, and ½ teaspoon of cayenne pepper. Don't forget to add salt and pepper to taste. Mix all the ingredients well. This ensures even flavor in every bite. Next, heat about 2 inches of vegetable oil in a deep skillet over medium-high heat. To check if the oil is hot enough, drop a small pinch of the coating mixture into the oil. If it sizzles right away, it's ready. Carefully take each piece of okra from the buttermilk. Let any extra liquid drip off. Dredge each okra slice in the cornmeal coating, making sure they're well coated. Shake off any excess coating to prevent clumping. Place the coated okra into the hot oil in small batches. Avoid overcrowding the pan; this keeps the oil temperature steady. Fry the okra for about 3-4 minutes. Look for a golden brown color and a crispy texture. Flip them halfway to cook evenly. Once done, use a slotted spoon to transfer the fried okra to a plate lined with paper towels. This helps drain any extra oil. Sprinkle with salt while hot to boost flavor. Enjoy this crunchy fried okra snack! For more details, check out the Full Recipe. To get that perfect crunch, always use fresh okra. Fresh okra has a better texture and flavor. When frying, keep an eye on your oil temperature. If the oil is too cool, your okra will turn soggy. A good test is to drop a pinch of the coating into the oil. If it sizzles, you are ready to fry! You can boost the flavor of your crunchy fried okra by adding different spices. Try paprika or even garlic salt in your coating mix. Adjust the cayenne pepper to suit your taste. If you like it spicy, add more! If you prefer mild, use less. Serve your crunchy fried okra in a bright, colorful bowl. This makes it more appealing. A nice garnish, like chopped herbs, can add a fresh touch. Pair it with tasty dipping sauces. Ranch dressing, spicy aioli, or even barbecue sauce can really enhance the experience. This will excite your guests and make it memorable! {{image_4}} For a fun twist, you can change the coating. Try using panko breadcrumbs. They add a delightful crunch. You can also mix in flavored coatings. This can make your okra snack even more exciting. Think about using barbecue or ranch-flavored crumbs for a new taste. Want to amp up the flavor? Add herbs! Parsley or cilantro can brighten the coating. Just chop them fine and mix them in. You can also experiment with cheese powder. It gives a tasty, savory kick that everyone will love. If you want a lighter version, you can bake the okra instead of frying. This will cut down on calories and still keep it tasty. Another option is to use an air fryer. It gives you that crunchy finish without all the oil. To keep your crunchy fried okra tasty, let it cool completely. This prevents steam from making it soggy. Once cool, place it in an airtight container. Store it in the refrigerator for up to three days. This way, you can enjoy your snack later without losing its flavor. When you’re ready to eat your leftovers, reheat them in the oven. Set the oven to 375°F (190°C). Spread the okra on a baking sheet. Bake for about 10 minutes until they are hot and crispy again. Avoid using the microwave. It might make your okra soft and less crunchy. If you want to save some for later, freezing is a great option. Freeze the uncooked coated okra before frying. Place the coated okra on a baking sheet and freeze until firm. Then, transfer them to a freezer bag. When you’re ready to fry, thaw the okra completely first. This ensures they cook evenly and stay crispy when fried. You can find the full recipe for crunchy fried okra above. Enjoy! It takes about 3-4 minutes per batch. This time can change based on the oil's heat. If the oil is hot, your okra will turn golden brown fast. Keep an eye on them to avoid burning. Yes, you can make it ahead of time. However, fresh okra tastes best. If you let it sit, it may lose its crispiness. The texture is what makes this snack so great! You can pair fried okra with many sauces. Try ranch dressing, spicy aioli, or classic ketchup. Each sauce adds a fun twist to the flavor. You can also serve it with your favorite dips for extra excitement! In this post, we explored how to make crunchy fried okra. We covered ingredients, preparation steps, tips for the perfect crunch, and variations to enhance flavor. Remember, fresh ingredients and the right cooking techniques are key. Enjoy experimenting with this recipe and make it your own. With these tips, you can serve a delicious dish that everyone will love. Happy cooking!

Crunchy Fried Okra Snack Perfect for Any Occasion

If you crave a tasty snack that’s easy to make and hard to resist, you’re in the right place! Crunchy

- 2 cups fresh tomatoes, thinly sliced - 1 cup shredded mozzarella cheese - ½ cup crumbled feta cheese - 1 cup fresh basil leaves, finely chopped - 1 cup all-purpose flour - ½ cup cornmeal - 1 teaspoon baking powder - ½ teaspoon salt - ½ teaspoon freshly ground black pepper - ¼ cup extra virgin olive oil - ½ cup buttermilk (or non-dairy alternative) - 1 tablespoon garlic powder - Zest of 1 lemon - 1 tablespoon balsamic glaze (for finishing touch) When I make crispy tomato pie, I focus on fresh and simple flavors. Using ripe, juicy tomatoes brings out the best taste. Choose tomatoes that are in season for the best results. Slice them thin to allow even cooking. I love the combination of mozzarella and feta cheese. The mozzarella melts beautifully and adds creaminess. Feta brings a salty bite that balances the dish well. Fresh basil gives a nice aroma and taste. It’s a must-have for this recipe! For the crust, I use a mix of flour and cornmeal. It gives a nice crunch. Baking powder helps the crust rise and stay light. The olive oil and buttermilk make the crust tender and moist. Gather these ingredients before you start cooking. This way, you’ll enjoy the process more. You can find the full recipe for crispy tomato pie in the recipe section. - Preheat oven to 400°F (200°C) - Grease a 9-inch pie dish or cast-iron skillet with olive oil Start by heating your oven. This step is key for a crispy crust. While the oven warms up, grab your pie dish or skillet. Coat it well with olive oil. This helps prevent sticking and adds flavor. - Combine flour, cornmeal, baking powder, salt, black pepper, and garlic powder In a large bowl, mix your dry ingredients. Add the flour, cornmeal, baking powder, salt, black pepper, and garlic powder. Stir them well. You want an even blend. This mix creates a tasty base for your pie. - Whisk together olive oil, buttermilk, and lemon zest Now, take another bowl. Whisk the olive oil, buttermilk, and lemon zest together. This mixture adds moisture and zest to your pie. Make sure it is smooth before moving on. - Gradually add wet mixture to dry ingredients Slowly pour the wet mix into the dry ingredients. Stir gently with a spatula. Stop mixing when it's just combined. A few lumps are okay. This keeps the texture light and fluffy. - Spread batter in the prepared dish and layer tomatoes and cheeses Next, spread the batter evenly into your greased dish. Use the spatula to smooth the top. Then, layer the sliced tomatoes over the batter. Make sure they cover the entire top. Sprinkle shredded mozzarella and crumbled feta on top. Finish with chopped basil for added flavor. - Bake for 25-30 minutes until golden brown and cheese is bubbly Finally, place the pie in the oven. Bake it for 25 to 30 minutes. Keep an eye on it. Your pie is ready when it turns golden brown and the cheese bubbles. The smell will be amazing! For the full recipe, including ingredients and measurements, refer to the section above. To get the best crust, mix your dry ingredients well. This helps the pie rise and stay fluffy. The right texture comes from not overmixing. When you add the wet ingredients, stir gently. Make sure your butter or oil is at room temperature. Cold ingredients can make the crust tough. Spices and herbs can make your pie shine. Try adding fresh thyme or oregano for a nice twist. For heat, a pinch of red pepper flakes works well. When it comes to tomatoes, use ripe, in-season ones. Heirloom tomatoes bring a sweet flavor and beautiful colors to your dish. For a stunning presentation, cut the pie into even slices. Place each slice on a colorful plate. Garnish with fresh basil leaves to add a pop of green. You can serve it with a side salad or grilled veggies. A light balsamic vinaigrette pairs nicely to enhance the meal. For the full experience, serve with crusty bread to soak up the flavors. {{image_4}} You can change the cheese in this pie. Try using cheddar or goat cheese. Each cheese gives a new taste. You can also add more veggies. Zucchini or bell peppers work great. This makes the pie colorful and packed with flavor. If you need a gluten-free pie, use gluten-free flour and cornmeal. This swap keeps the texture nice. You may need to adjust the wet ingredients too. Use a bit more buttermilk to keep the batter moist. Make this pie shine with seasonal veggies or herbs. In summer, use fresh corn or basil. In fall, add squash or sage for a warm touch. You can even turn this into a breakfast dish. Add eggs and serve with a side of fruit for a tasty brunch. To store leftovers of your crispy tomato pie, let it cool completely. Then, slice it into pieces for easy storage. Place the slices in an airtight container. You can also cover the pie with plastic wrap. Store it in the fridge. It stays fresh for up to 3 days. If you want to freeze portions of crispy tomato pie, slice it first. Wrap each piece tightly in plastic wrap. Then, place the wrapped pieces in a freezer bag. This helps keep them fresh and prevents freezer burn. You can freeze the pie for up to 3 months. When you want to enjoy it, take a slice out. Thaw it in the fridge overnight. For reheating, use the oven. Preheat it to 350°F (175°C). Bake the pie for about 15-20 minutes. This warms it up and keeps it crispy. Yes, you can prepare crispy tomato pie in advance. To do this, follow these tips: - Prep and refrigerate: Make the pie, then cover it with plastic wrap. Store it in the fridge for up to 24 hours. - Reheat before serving: Bake the pie at 350°F (175°C) for about 15-20 minutes. This warms it through and keeps it crispy. - Freezing option: You can also freeze the unbaked pie. Wrap it well and store it in the freezer for up to three months. Bake it straight from frozen, adding about 10 minutes to the baking time. Crispy tomato pie pairs well with many sides. Here are a few suggestions: - Fresh salad: A light green salad with vinaigrette adds a fresh touch. - Garlic bread: This pairs nicely with the pie's flavors and adds crunch. - Roasted vegetables: Seasoned and roasted veggies bring color and nutrients to your meal. - Chilled soups: A cold soup, like gazpacho, can balance the warmth of the pie. To check if the crispy tomato pie is done, look for these visual cues: - Golden crust: The crust should be a nice golden brown color. - Bubbly cheese: The cheese on top should be melted and bubbling. - Firm filling: Gently jiggle the pie. The filling should be set, not wobbly. These signs will help ensure you enjoy a perfectly baked pie. For the full recipe, check out the detailed instructions above. In this blog post, we explored how to make a delicious crispy tomato pie. We covered fresh ingredients, pantry staples, and detailed steps to create this tasty dish. You also learned tips for perfecting the crust and enhancing flavors. With options for ingredient swaps and gluten-free versions, there's room to customize. Finally, I shared how to store leftovers and suggestions for serving. Enjoy making this dish, and remember, it’s all about fresh ingredients and your personal touch. You’ll impress everyone at the table!

Crispy Tomato Pie Savory and Flavorful Delight

If you love tomatoes and delicious pies, then you need to try my Crispy Tomato Pie! This savory delight features

To make a delightful fig cake with almond and honey, gather the following ingredients: - 1 cup fresh or dried figs, chopped - 1/2 cup unsalted butter, softened - 1 cup granulated sugar - 1/4 cup honey - 2 large eggs - 1 teaspoon vanilla extract - 1 1/2 cups all-purpose flour - 1 teaspoon baking powder - 1/2 teaspoon baking soda - 1/4 teaspoon salt - 1/2 cup ground almonds (almond flour) - 1/2 cup buttermilk - Garnish options: sliced figs and slivered almonds These ingredients blend together to create a moist and flavorful cake. Fresh figs offer a sweet burst, while honey adds a lovely richness. Ground almonds bring a nutty taste and a unique texture. Using unsalted butter gives you control over the cake's salt levels. This balance of flavors makes the cake simply irresistible. You can find the full recipe and step-by-step instructions to create this treat. Enjoy crafting your fig cake! First, you need to preheat your oven to 350°F (175°C). This is the perfect temperature for baking. While your oven heats up, prepare a 9-inch round cake pan. Grease it with butter and dust it lightly with flour. You can also line the bottom with parchment paper to make the cake easier to take out. Next, let’s get our figs ready. If you are using dried figs, soak them in warm water for about 15 minutes. This will plump them up and make them soft. If you prefer fresh figs, wash them well. Then chop them into small, bite-sized pieces. Make sure the pieces are even so they mix well into the batter. Now we’ll make the cake batter. In a large mixing bowl, cream together the softened butter, granulated sugar, and honey. Use an electric mixer for about 3-4 minutes until it is light and fluffy. Then, add the eggs one at a time. Mix well after each egg. Finally, stir in the vanilla extract until it is fully combined. In a separate bowl, measure and sift together the all-purpose flour, baking powder, baking soda, salt, and ground almonds. Sifting is key for even mixing and helps the cake rise well. Make sure you measure carefully to get the best results. Now it’s time to combine our mixtures. Gradually add the dry ingredients to the wet batter. Do this while alternating with the buttermilk. Start and end with the dry ingredients. Mix gently until everything is just combined. Be careful not to over-mix, as this can make the cake tough. Pour the batter into your prepared cake pan. Smooth the top with a spatula so it’s even. Place the pan in the preheated oven and bake for 30-35 minutes. To check if it’s done, insert a toothpick into the center. If it comes out clean, your cake is ready! After baking, let the cake cool in the pan for about 10 minutes. Then, carefully transfer it to a wire rack to cool completely. For the final touch, top it off with sliced figs and slivered almonds. This makes your cake look stunning and adds extra flavor. Enjoy your Fig Cake with Almond and Honey! Check the [Full Recipe] for more details. To make your cake soft, avoid over-mixing. After you add the dry ingredients, stir just enough. This keeps the cake light. Over-mixing can make it dense. Use a spatula to fold in the figs gently. This way, they stay whole and create nice pockets of flavor. Want to boost the taste? Try adding a pinch of nutmeg or cinnamon. These spices work well with figs. You can also add a splash of orange juice for extra zest. For a nutty twist, mix in chopped walnuts or pecans with the almonds. To make your cake look amazing, garnish it with sliced figs and slivered almonds. Arrange them nicely on top for a beautiful look. You can also drizzle honey over the cake for shine. Serve each slice on a plate with a few almond slivers for a lovely touch. The bright colors will catch everyone’s eye! {{image_4}} If you want to change some ingredients, you have options. For honey, use maple syrup or agave nectar. These sweeteners add a unique taste. If you need a butter substitute, try coconut oil or vegetable oil. Both will keep your cake moist. If you want to avoid eggs, use applesauce or mashed bananas. Each change keeps the cake tasty. You can make the cake even more exciting by adding other fruits or nuts. Try adding chopped apples, pears, or even berries. These fruits will give your cake a fresh twist. For nuts, consider walnuts or pecans. They will add crunch and flavor. Mix these in carefully when you fold in the figs. Each addition changes the flavor and texture. If you need a gluten-free cake, it’s easy to adapt. Just swap all-purpose flour for gluten-free flour. Almond flour is a great choice too. It adds a nice nutty taste. When you use gluten-free flour, keep an eye on the texture. The cake might be a bit different but still delicious. You can enjoy a gluten-free version without missing out! For the complete recipe, check out the [Full Recipe]. To keep your Fig Cake with Almond and Honey fresh, wrap it tightly. Use plastic wrap or aluminum foil. You can also place it in an airtight container. Store it at room temperature for up to three days. If you want to keep it longer, the fridge is a good option, but it may dry out. To freeze the cake, first, let it cool completely. Slice the cake into portions. Wrap each slice in plastic wrap, then in aluminum foil. This keeps the cake moist and tasty. You can freeze it for up to three months. When you're ready to enjoy it, thaw it in the fridge overnight. Reheating is easy! Preheat your oven to 350°F (175°C). Place the slice on a baking sheet. Heat it for about 10 minutes. This warms the cake without drying it out. You can also use a microwave. Heat on low for about 15 seconds. Enjoy it warm for a delightful taste! Yes, you can use frozen figs. Just thaw them first. Pat them dry with a towel. This helps keep the batter from getting too wet. Frozen figs work well and still taste great! To cut the cake, use a sharp knife. Dip it in warm water for easy slicing. Wipe the knife clean between cuts. This keeps each slice neat and pretty. The cake lasts about three days at room temperature. Store it in an airtight container. You can also refrigerate it for about a week. Just remember to let it come to room temp before eating. You can make the cake a day in advance. Just cover it well to keep it fresh. You can also bake and freeze it for up to a month. Thaw it overnight in the fridge when you're ready to eat. Pair your fig cake with tea or coffee. A scoop of vanilla ice cream also works well. For a fruity touch, serve it with fresh berries. This adds color and flavor to your dessert. Yes, you can adapt the recipe. Use plant-based butter and almond milk for a vegan version. You can also make it gluten-free by using almond flour instead of all-purpose flour. Enjoy the same great taste! For the full recipe, check out [Full Recipe]. This blog post explored making a delicious fig cake. We covered essential ingredients, step-by-step baking, and tips for perfect texture and flavor. Remember, you can customize your cake with different fruits or gluten-free options. Proper storage keeps your cake fresh for longer. Whether for a gathering or a simple treat, this recipe can fit any occasion. Now, it’s time to gather your ingredients and begin baking. Enjoy the sweet results of your hard work!

Fig Cake with Almond and Honey Delightful Recipe

Are you ready to indulge in a sweet treat that’s rich in flavor? This Fig Cake with Almond and Honey

Older posts
Newer posts
← Previous Page1 … Page24 Page25 Page26 … Page91 Next →

dsad

© 2025 recipesstation • Built with GeneratePress

Our Policies

  • Copyright Policy
  • Cookie Policy
  • GDPR Policy
  • Privacy Policy
  • Disclaimer
  • Terms Of Use

More Information

  • Home
  • About
  • Contact
  • Appetizers
  • Dessert
  • Dinner
  • Drinks
©2025, recipesstation About Back To Top