Skip to content
DisclaimerTerms Of UseGDPR PolicyCookie Policy

recipesstation

  • Home
  • Drinks
  • Appetizers
  • Dinner
  • Dessert
  • About
  • Contact
  • Privacy Policy
DisclaimerTerms Of UseGDPR PolicyCookie Policy

Emily

- 8 oz whole wheat pasta (fusilli or penne) - 1 can (5 oz) tuna in water, thoroughly drained - 1 cup cherry tomatoes, halved - 1/2 cup cucumber, diced into small cubes - 1/2 cup bell pepper (any color), diced - 1/4 cup red onion, finely chopped - 1/4 cup black olives, sliced - 2 tablespoons freshly squeezed lemon juice - 3 tablespoons extra virgin olive oil - 1 teaspoon Dijon mustard - 1 teaspoon dried oregano - Salt and freshly ground black pepper to taste - Fresh basil leaves for garnish - Additional protein sources like chickpeas or beans - Alternative vegetables, such as spinach or carrots - Suggested herbs and spices, like parsley or red pepper flakes This tuna pasta salad without mayo is simple, fresh, and tasty. You can easily swap out the veggies for what you like best. Want more protein? Add some chickpeas or diced chicken. Feel free to use any herbs or spices to make it your own. Check out the Full Recipe to see exactly how to prepare this dish. Remember, the key to a great salad is balancing flavors and textures! To boil the pasta correctly, fill a large pot with water. Add a good amount of salt. Bring it to a rolling boil before adding the whole wheat pasta. Cook it according to the package directions, usually 8-10 minutes. Stir occasionally to prevent sticking. To achieve an al dente texture, taste a piece a minute or two before the time is up. It should be firm but not hard. Once done, drain the pasta and rinse it under cold water. This stops the cooking and cools it down fast. While the pasta cools, chop your vegetables. For even size, use a sharp knife and a cutting board. Cut the cherry tomatoes in half, dice the cucumber, and chop the bell pepper and red onion. Try to keep all pieces about the same size. This helps with texture and looks nice. To keep veggies fresh, wash them just before you chop. Store any leftover veggies in a sealed container in the fridge. In a small bowl, mix the dressing ingredients. Combine freshly squeezed lemon juice, olive oil, Dijon mustard, dried oregano, salt, and black pepper. Whisk them well until they blend into a smooth mixture. To emulsify, add the oil slowly while whisking. This creates a creamy texture without mayo. If you want more flavor, consider adding herbs like parsley or a pinch of garlic powder. Now it’s time to combine everything. Add the cooled pasta to a large mixing bowl with the chopped vegetables. Gently fold in the drained tuna and sliced black olives. Use a spatula to fold, not stir, to keep the pasta intact. After that, drizzle the dressing over the mixture. Toss it gently until all ingredients are coated evenly. Make sure every bite will have that tasty dressing. Cover your salad and let it chill in the fridge for at least 30 minutes. This chilling time helps the flavors mix well. You will know the salad is ready when it feels cool and all the veggies look vibrant. If you want to serve it later, you can chill it for up to two hours. Just before serving, give it a gentle toss to mix it again. To make this tuna pasta salad ahead of time, cook the pasta and chop the veggies. You can store the pasta and veggies separately in the fridge. This helps keep the pasta firm and the veggies fresh. Mix them together just before serving. It takes only a few minutes to combine everything! Store your ingredients properly. Keep the pasta in an airtight container to avoid drying out. For veggies, use a damp paper towel in the container to keep them crisp. This method works well for cherry tomatoes and cucumbers. You can make this salad gluten-free by using gluten-free pasta. Many brands offer great options that cook well and taste good too. Just check the package for cooking times. For vegan options, switch out the tuna. You can use chickpeas or tofu instead. Both add protein and flavor. Also, use a plant-based dressing for the same tangy taste. To enhance the flavor, try adding more herbs. Fresh parsley, dill, or chives can brighten up the dish. A pinch of crushed red pepper can also give it a nice kick. Pair your tuna pasta salad with crusty bread or a light soup. It makes a delightful meal. You can also serve it alongside a fresh green salad for a well-rounded lunch or dinner. {{image_4}} For a Mediterranean-style salad, you can add some fun ingredients. Consider these: - 1/2 cup artichoke hearts, chopped - 1/4 cup feta cheese, crumbled - 1/4 cup sun-dried tomatoes, sliced This twist brings a nice salty flavor from the feta. The artichokes add a tender bite. Sun-dried tomatoes give a rich sweetness to balance the dish. Together, they create a vibrant and tasty salad. Want more protein? Try adding chickpeas or white beans. Here’s how: - 1 can (15 oz) chickpeas, drained and rinsed - 1 can (15 oz) white beans, drained and rinsed This extra protein makes the salad heartier. Chickpeas offer a nutty taste, while white beans add creaminess. Mixing these beans into the salad gives great texture too. You will feel full longer, and it’s great for a quick meal. Looking to cut some calories? You can swap oil for something lighter. Here are some ideas: - Use 1/4 cup plain Greek yogurt instead of oil. - Try a splash of balsamic vinegar for flavor. These swaps add taste without the extra calories. Greek yogurt keeps things creamy while adding protein. Balsamic vinegar gives a tangy flavor that wakes up the salad. You can enjoy a lighter version without losing great taste. For more details, check out the Full Recipe. Tuna pasta salad without mayo lasts up to three days in the fridge. Store it in an airtight container. This keeps it fresh and prevents any odors from mingling with other foods. For best taste, eat it within two days. If you have leftovers, make sure to check for any signs of spoilage before enjoying them. You can freeze tuna pasta salad, but it may change texture. If you choose to freeze it, do so in a freezer-safe container. Leave some space for expansion. To thaw, place it in the fridge overnight. This keeps the salad’s taste and quality better. Avoid using a microwave, as it can make the pasta mushy. Enjoy it cold, or give it a quick toss after thawing. For more details, check out the Full Recipe. Yes, you can! Canned tuna in oil has a richer flavor. It can add more taste to your salad. The oil also gives a nice texture. However, it may make the salad a bit heavier. If you like a lighter dish, stick to tuna in water. The salad will last about 3 to 5 days in the fridge. To keep it fresh, store it in an airtight container. If you notice any change in smell or color, it's best to toss it. Always check before eating leftovers! Absolutely! You can add many other ingredients. Try adding some chickpeas for more protein. Spinach or arugula can add a fresh touch. Avocado can make it creamy without mayo. Feel free to mix and match based on what you like! This blog post covered key ingredients, cooking steps, and storage tips for your pasta salad. You learned how to make a tasty meal using whole wheat pasta, tuna, and fresh veggies. We discussed ways to customize it with extra protein or different herbs. Lastly, I shared tips for meal prep and storage to keep it fresh. Enjoy creating your pasta salad, and don’t hesitate to experiment!

Tuna Pasta Salad Without Mayo Quick and Easy Recipe

Looking for a quick and easy lunch that packs a flavor punch? My Tuna Pasta Salad Without Mayo is the
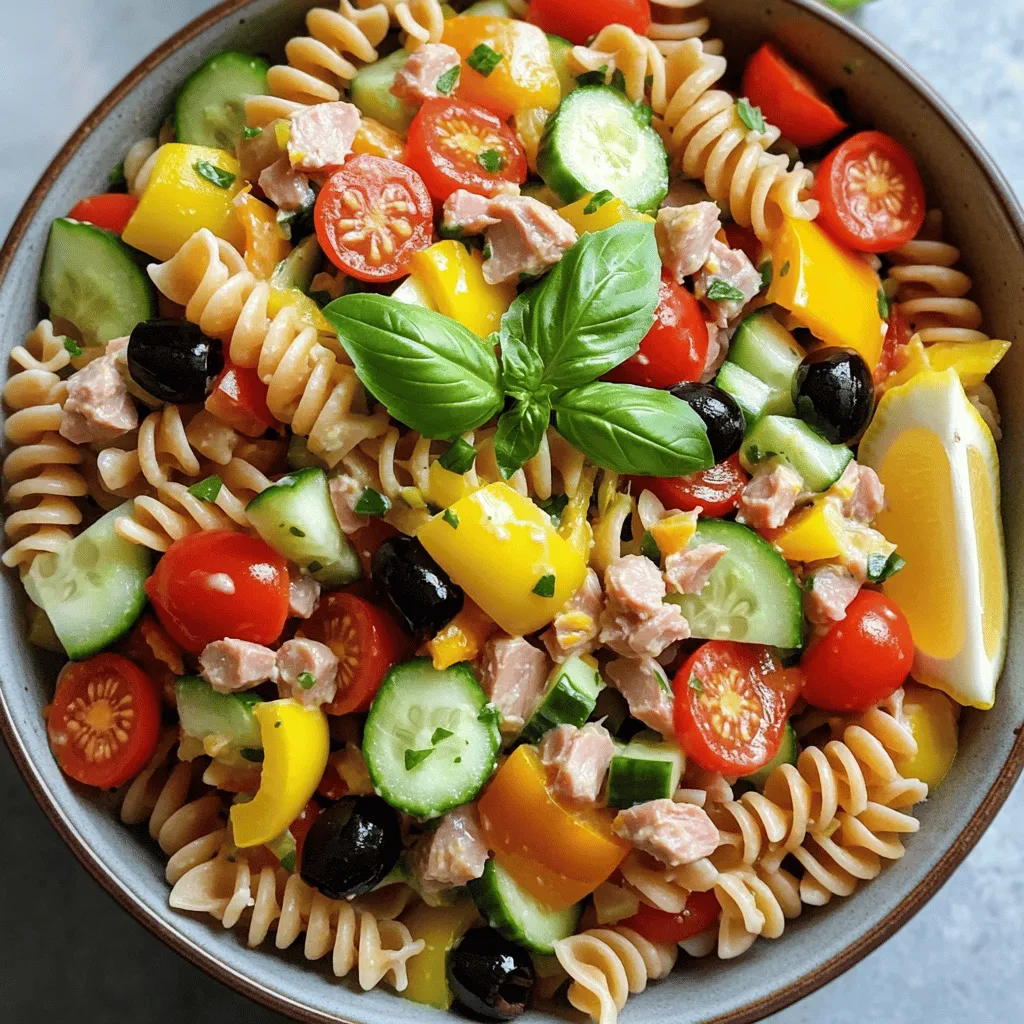
To create this tasty dish, gather these main ingredients: - 1 cup ditalini pasta - 1/2 cup cherry tomatoes, halved - 1/2 cucumber, diced - 1/4 red onion, finely chopped - 1/2 cup frozen peas, thawed - 1/2 cup mozzarella balls, halved - 1/4 cup black olives, sliced These ingredients bring great flavor and texture to your salad. The ditalini pasta has a fun shape that holds the creamy dressing well. The mix of fresh veggies adds crunch and color. For a finishing touch, consider these garnishes: - Fresh basil leaves Basil adds a lovely aroma and bright flavor. You can also use other herbs if you prefer. A sprinkle of crumbled feta or a few slices of avocado can enhance the dish even more. The creamy dressing is key to this salad. Here’s what you will need: - 1/2 cup Greek yogurt - 2 tablespoons mayonnaise - 1 tablespoon Dijon mustard - 1 tablespoon apple cider vinegar - 1 teaspoon dried oregano - Salt and pepper to taste This dressing combines tangy and creamy elements. Greek yogurt gives a healthy twist. You can adjust the seasoning to match your taste. For a unique flavor, try adding a dash of lemon juice or a pinch of garlic powder. For the full recipe, check out the details provided earlier. Enjoy making this delicious creamy ditalini pasta salad! Start by bringing a pot of salted water to a boil. Add 1 cup of ditalini pasta. Cook it according to the package instructions until it is al dente. Once it is done, drain the pasta in a colander. Rinse it under cold water to stop the cooking and cool it down. In a large mixing bowl, combine the cooled ditalini pasta with the following vegetables: - 1/2 cup cherry tomatoes, halved - 1/2 cucumber, diced - 1/4 red onion, finely chopped - 1/2 cup frozen peas, thawed - 1/2 cup mozzarella balls, halved - 1/4 cup black olives, sliced Gently mix these ingredients together to evenly distribute them. In a smaller bowl, whisk together: - 1/2 cup Greek yogurt - 2 tablespoons mayonnaise - 1 tablespoon Dijon mustard - 1 tablespoon apple cider vinegar - 1 teaspoon dried oregano - Salt and pepper to taste Keep whisking until the mixture is smooth and creamy. Pour the creamy dressing over the pasta salad mixture. Using a large spoon, gently toss all the ingredients together. Make sure the pasta and vegetables are fully coated in the dressing. Taste your salad. Adjust the seasoning according to your preference. Add more salt or pepper if desired. For the best flavor, cover the salad and refrigerate it for at least 30 minutes. This chilling time helps meld the flavors beautifully. Once chilled, serve the salad in a large bowl or portion it into individual plates. Garnish each serving with fresh basil leaves for a nice touch. For a finishing touch, drizzle a few extra drops of olive oil on top. Enjoy this fresh and flavorful dish! For the complete recipe, check the [Full Recipe]. To get the best ditalini pasta, cook it just right. Start with salted water. Bring it to a boil before adding the pasta. Follow the package cooking time closely. Aim for al dente, which means tender but still firm. Once done, drain it right away. Rinse under cold water to stop cooking. This keeps the pasta from getting mushy in your salad. You can make this salad your own! Swap in your favorite veggies. Try bell peppers, carrots, or even corn for a twist. You might like adding cooked chicken or chickpeas for extra protein. If you love spice, toss in jalapeños or a dash of hot sauce. The dressing can change too. Use a vinaigrette or a dairy-free option if you wish. There are endless ways to personalize! Avoid overcooking the pasta. It can turn mushy and lose its shape. Don’t skip rinsing it either; this makes a big difference. Also, be careful with seasoning. It’s easy to add too much salt or pepper. Start small and taste as you mix. Lastly, give it time to chill. Letting the salad sit helps flavors blend. Don’t rush this step! For the full recipe, check [Full Recipe]. {{image_4}} You can easily boost the nutrition of your creamy ditalini pasta salad by adding proteins. Grilled chicken adds a savory touch, while chickpeas offer a hearty, plant-based option. Simply dice the cooked chicken or rinse canned chickpeas, and mix them in. This not only makes the dish more filling but also adds interesting textures. If you want to keep it vegetarian, replace mozzarella with a dairy-free cheese or add extra veggies. For a vegan version, swap Greek yogurt and mayonnaise with plant-based alternatives. Silken tofu blended with a bit of lemon juice can work well as a creamy base. You can still enjoy the fresh flavors while adhering to your dietary needs. Get creative with your ingredients to keep things fresh! Instead of cherry tomatoes, try roasted red peppers for a smoky taste. Use quinoa instead of ditalini pasta for a nutritious twist. Fresh herbs like dill or cilantro can also add a new flavor profile. Experimenting with these swaps keeps your pasta salad exciting and delicious. For the complete recipe, check out the Full Recipe. Store your creamy ditalini pasta salad in an airtight container. This keeps it fresh and prevents odors. Always cool the salad before sealing it. If you have leftovers, make sure to use a clean spoon to scoop them out. This avoids any bacteria from spreading. If stored properly, this pasta salad lasts about three to five days in the fridge. The flavors will develop over time, making it even tastier. Check for any signs of spoilage, like off smells or changes in color. If all looks good, enjoy it within that time frame. I don't recommend freezing this pasta salad. The creamy dressing may separate and change texture once thawed. If you must freeze it, do so without the dressing. You can add the dressing once you thaw and reheat the pasta. This keeps the salad fresh and delicious. For the complete recipe, check out the Full Recipe section. Yes, you can make this salad ahead of time. It tastes great after a few hours in the fridge. The flavors mix and become even nicer. Just cover it well to keep it fresh. If you need a substitute, use sour cream or regular yogurt. These options work well and keep the creaminess. You can also try a dairy-free yogurt for a vegan twist. Ditalini pasta is usually made from wheat, so it’s not gluten-free. However, you can find gluten-free ditalini made from rice or corn. Check your local store for options that fit your diet. To keep your pasta firm, rinse it under cold water after cooking. This stops the cooking process and cools it down quickly. Also, don’t let it sit in dressing for too long before serving. Absolutely! Feel free to mix in your favorite veggies. Bell peppers, carrots, or broccoli add great flavor and color. Just make sure to chop them small for easy eating. For leftovers, store the salad in an airtight container. Enjoy it within three days for the best taste. You can also add a bit more dressing to refresh it if needed. Check out the Full Recipe for more tips! Creamy Ditalini Pasta Salad blends tasty ingredients for a simple dish. You learned about key ingredients, step-by-step cooking, and tasty variations. These tips will help you make the salad perfect each time. Remember, you can customize it with proteins or veggies you love. Store leftovers well to keep them fresh. Enjoy making this easy and delicious salad!

Creamy Ditalini Pasta Salad Fresh and Flavorful Dish

Looking for a fresh and tasty side dish? Creamy Ditalini Pasta Salad is the perfect choice! It’s easy to make

- 2 boneless, skinless chicken breasts - 1 cup sweet chili sauce - 1 cup jasmine rice - 1 cup coconut milk - 1 cup mixed bell peppers, sliced (red, yellow, and green) - 1 cup snap peas - 1 tablespoon soy sauce - 1 teaspoon garlic powder - 2 tablespoons fresh lime juice This dish is colorful and packed with flavor. You start with boneless, skinless chicken breasts. They're easy to cook and soak up flavors well. Sweet chili sauce adds a delightful sweetness and a hint of heat. Next, jasmine rice is the perfect base. It’s fragrant and pairs nicely with the chicken. The coconut milk in the rice makes it creamy, adding a tropical vibe. Then, you have the mixed bell peppers. They bring a lovely crunch and vibrant colors. Snap peas add a fresh snap, making the dish even more exciting. For the seasonings, soy sauce adds depth. Garlic powder gives a nice savory note. Fresh lime juice brightens everything up. A drizzle of coconut lime sauce on top rounds it all out. Each ingredient plays a vital role in making this bowl special. You can find the full recipe for Sweet Chili Chicken Bowl with Coconut Lime Drizzle to guide you through the cooking process. Start by gathering your ingredients. In a medium mixing bowl, whisk together these items: - 1 cup sweet chili sauce - 1 tablespoon soy sauce - 1 teaspoon garlic powder - 1/2 teaspoon ginger powder This sauce adds a sweet and tangy taste. After mixing, coat the chicken breasts in the marinade. Ensure they are covered well. The chicken will soak up all that flavor. Next, cover the bowl with plastic wrap. Place it in your fridge. Let the chicken marinate for at least 30 minutes. This step is key to infusing flavor. If you have more time, marinate for 1-2 hours for even better taste. While the chicken marinates, let’s cook the rice. Rinse 1 cup of jasmine rice under cold water. Cook it in a pot with 1 cup of coconut milk. This will make the rice rich and creamy. Follow the package instructions, which should take about 15-20 minutes. Now, it’s time to cook the chicken. Heat a drizzle of oil in a large skillet over medium heat. Take the chicken out of the marinade. Reserve any leftover marinade for later. Place the chicken in the skillet. Cook for about 6-7 minutes on each side. The chicken should be fully cooked. It’s done when the juices run clear. In the last 3 minutes of cooking, add the sliced bell peppers and snap peas to the skillet. Toss them with the chicken. Cook until the veggies are tender but still crisp. This keeps their bright colors and crunch. Enjoy this process! It’s where the magic happens. It's fun to watch your chicken and veggies transform. Once everything is cooked, you can add the reserved marinade mixed with a splash of coconut milk for a glaze. Pour it over the chicken and veggies. Cook for another 2-3 minutes, so all the flavors mix well. This step-by-step guide ensures your Sweet Chili Chicken Bowl with Coconut Lime Drizzle is a hit. Cook the chicken until it reaches 165°F. Use a meat thermometer for accuracy. This ensures it's safe to eat. Marinate the chicken for at least 30 minutes. This helps the flavors soak in well. For more flavor, try marinating overnight. To fluff rice, let it rest after cooking. Use a fork to gently separate the grains. This prevents clumping. For creaminess, replace water with coconut milk. It adds sweetness and rich flavor to your rice. You can add toppings like avocado or chopped nuts for crunch. Fresh herbs like cilantro or basil enhance flavor. Present the bowls on colorful plates for a fun look. Lime wedges on the side add a zesty touch. For the best visual appeal, arrange ingredients neatly. Enjoy your Sweet Chili Chicken Bowl with Coconut Lime Drizzle! If you need the full guide, check the Full Recipe. {{image_4}} You can easily swap the chicken for tofu or shrimp. Tofu gives a nice texture, while shrimp adds a sweet flavor. For vegetables, try zucchini, broccoli, or carrots. These options bring fresh tastes and colors to your bowl. Want some spice? Add sliced jalapeños or a dash of chili flakes. These will give your dish a nice kick. You could also use teriyaki sauce or peanut sauce in place of sweet chili sauce. Each option offers a new twist on the flavor. Pair your bowl with quinoa or brown rice for a healthy twist. You can also serve it in lettuce wraps for a fun, low-carb option. If you meal prep, make extra chicken and veggies. They keep well in the fridge and reheat nicely. To store leftovers correctly, let the food cool down first. Place the chicken and rice in airtight containers. This keeps moisture in and prevents the food from drying out. Store the veggies separately to keep them crispy. For best taste, eat leftovers within three days. You can freeze the chicken and rice. Make sure they cool before putting them in freezer bags. Remove as much air as possible to avoid freezer burn. Reheat by defrosting in the fridge overnight. Use a skillet to warm them up. Add a splash of coconut milk for extra moisture. Store your dish in the fridge for up to three days. If the chicken has a sour smell or the rice is hard, it’s time to toss it. Signs of spoilage include changes in color or texture. Always trust your senses when checking food! You can use several sauces in place of sweet chili sauce. Some options include: - Honey: Adds sweetness and stickiness. - Sriracha: Offers heat with a hint of sweetness. - Teriyaki sauce: Provides a rich flavor with a sweet touch. - Homemade mix: Combine ketchup, sugar, and red pepper flakes for a quick fix. These substitutes will change the taste a bit, but they can still give you a tasty dish. Yes, you can prepare this dish in advance. Here are some tips: - Marinate chicken: You can marinate the chicken up to a day ahead. Just keep it in the fridge. - Cook rice: Prepare the jasmine rice a few hours before serving. - Store veggies: Cut your bell peppers and snap peas ahead of time. Keep them in the fridge. - Reheat: Warm the chicken and veggies quickly in a pan before serving. Doing this makes meal prep easy and saves you time at dinner. To cook jasmine rice perfectly, follow these steps: - Rinse rice: Wash the rice under cold water to remove excess starch. - Water ratio: Use a 1:1 ratio of rice to liquid for fluffy rice. - Cooking time: Bring to a boil, then lower the heat, cover, and simmer for 15-20 minutes. - Fluff rice: Once done, let it sit for 5 minutes. Then fluff it gently with a fork. This method ensures the rice remains light and airy. The dish can be made gluten-free. Here are some tips: - Sweet chili sauce: Check the label or make your own to ensure it’s gluten-free. - Soy sauce: Use a gluten-free soy sauce or tamari. - Other ingredients: Ensure all other ingredients are certified gluten-free. These adjustments let you enjoy the dish without worry. For the complete instructions and ingredients, check out the [Sweet Chili Chicken Bowl with Coconut Lime Drizzle](#). In this blog post, I covered how to make a Sweet Chili Chicken Bowl. You learned about the main and additional ingredients, like coconut milk and bell peppers. I shared step-by-step cooking instructions and valuable tips to ensure your chicken and rice turn out great. Don't forget to explore variations and how to store leftovers. This dish is simple yet flavorful, making it perfect for busy days or meal prep. Enjoy creating your own tasty version at home!

Sweet Chili Chicken Bowl with Coconut Lime Delight

Are you ready to spice up your dinner routine? My Sweet Chili Chicken Bowl with Coconut Lime Delight is a

Cooking a Mediterranean quesadilla is simple. You need fresh and tasty ingredients. Here’s what you need: - 4 large flour tortillas - 1 cup cooked quinoa - 1/2 cup cherry tomatoes, halved - 1 cup fresh spinach, roughly chopped - 1/2 cup Kalamata olives, pitted and sliced - 1/2 cup feta cheese, crumbled - 1/4 cup red onion, thinly sliced - 1 teaspoon dried oregano - 1 teaspoon garlic powder - Olive oil for cooking - Salt and freshly ground black pepper to taste Each ingredient brings a special flavor. The cooked quinoa adds protein. Cherry tomatoes give sweetness. Fresh spinach adds color and nutrients. Kalamata olives add a salty taste. Feta cheese brings creaminess. Red onion adds a bit of bite. The seasonings tie everything together. I find that fresh ingredients make a big difference. They boost the taste and keep the dish light. Using high-quality olive oil helps, too. It enhances all the flavors. To make your quesadilla even better, you can check the [Full Recipe]. This will help with steps and cooking tips. Enjoy your cooking adventure! Mixing the Filling First, grab a large mixing bowl. Add the cooked quinoa to the bowl. Next, toss in the halved cherry tomatoes, chopped spinach, sliced Kalamata olives, crumbled feta cheese, and thinly sliced red onion. Sprinkle in the dried oregano and garlic powder. Season with salt and black pepper. Gently mix everything until well combined. This filling is bright, fresh, and packed with flavor. Preheating the Skillet Now, take a large skillet and place it on medium heat. Drizzle a bit of olive oil into the skillet. You want just enough oil to coat the bottom. This will help the quesadilla get a nice, crispy texture. Layering the Quesadilla Lay one flour tortilla flat in the skillet. Spread half of your quinoa filling evenly across the tortilla. Leave a small gap at the edges. This gap will help keep the filling inside when you fold it over. Cooking Until Golden Brown Carefully place a second tortilla on top of the filling. Let it cook for about 3-4 minutes. Watch the bottom tortilla turn golden brown. It should become crispy and delicious. Once it’s ready, use a spatula to flip the quesadilla over. Cook for another 3-4 minutes on this side. Both sides should be golden, and the cheese should melt. Slicing and Serving When done, remove the quesadilla from the skillet. Let it cool for a minute on a cutting board. Using a sharp knife or pizza cutter, slice it into wedges. Repeat this process for the remaining tortillas and filling mixture. Serve the warm wedges on a vibrant platter. Enjoy with a side of tzatziki sauce for added flavor. To get that perfect crispiness, heat your skillet well. I like to use medium heat. This helps the tortillas cook evenly without burning. Use enough olive oil to coat the pan lightly. You want a nice sizzle when the tortilla hits the skillet. This sound means you are on the right track. Flip the quesadilla only when the bottom is golden brown. This step keeps the filling inside warm and delicious. Be careful not to overstuff your quesadilla. It is tempting to add extra filling, but this can make cooking tricky. Stick to about half of the filling per tortilla. This helps keep everything contained. If you overstuff, the quesadilla may fall apart. No one wants a messy plate. For a burst of flavor, season your filling well. Use dried oregano and garlic powder, as I do in my recipe. A pinch of salt and black pepper adds a nice kick. Feel free to experiment with herbs. Try adding basil or thyme for a twist. Fresh herbs can also brighten the dish. Cheese is key for a great quesadilla. Feta cheese offers a salty kick that pairs well with the Mediterranean flavors. You can mix it with mozzarella or Monterey Jack for gooeyness. This combo melts beautifully and adds depth to each bite. Don't be afraid to play with different cheese blends! For the full recipe, check out the Mediterranean Quesadilla Delight. {{image_4}} You can easily personalize your Mediterranean quesadilla. For vegetarian additions, try adding bell peppers, zucchini, or artichokes. These colorful veggies add crunch and taste. You can also use different greens, like kale or arugula, for a twist. For protein options, grilled chicken or shrimp work well. Simply season and cook them before adding to your filling. You can also add chickpeas for more protein. This makes your quesadilla hearty and satisfying. To give your quesadilla a Mediterranean-style flair, spread hummus on the tortillas before adding the filling. This adds creaminess and a unique flavor. You can also sprinkle on some za'atar spice for a touch of warmth. If you want a Mexican-inspired version, you can swap feta cheese for pepper jack. Add black beans and corn to the filling. This mix offers a fun flavor twist while still keeping that Mediterranean essence. For the full recipe, check out the Mediterranean Quesadilla Delight. Refrigeration Tips After enjoying your Mediterranean quesadilla, store leftovers in the fridge. Place them in an airtight container. They stay fresh for up to three days. Make sure they cool down first. This helps prevent sogginess. Freezing Guidelines For longer storage, freeze your quesadilla. Wrap each one tightly in plastic wrap. Then, place them in a freezer-safe bag. This keeps them good for about three months. To enjoy later, thaw in the fridge overnight. Best Methods for Crispiness To reheat your quesadilla and keep it crispy, use a skillet. Heat it over medium heat. Place the quesadilla in the skillet for about three to five minutes. Flip it halfway through for even heating. If you want, you can use an oven. Preheat it to 350°F (175°C). Bake for ten to fifteen minutes. This gives a nice crisp texture. Enjoy your meal! For more details, check the Full Recipe. What are the key flavors in a Mediterranean Quesadilla? The key flavors come from fresh ingredients and spices. You have the salty taste of feta cheese, the rich flavor of Kalamata olives, and the earthiness of quinoa. Cherry tomatoes add sweetness, while spinach brings a fresh note. Dried oregano and garlic powder tie all these flavors together, making each bite delightful. Can I use different types of cheese? Yes, you can! Feel free to mix and match cheeses. Mozzarella melts well and adds creaminess. Goat cheese gives a tangy flavor. You can even try a spicy pepper jack for some heat. Each cheese will change the quesadilla taste, so choose what you love. How do I make a gluten-free version? To make a gluten-free quesadilla, swap flour tortillas for gluten-free tortillas. Many brands offer good options made from rice or corn. Just check the label to ensure they are gluten-free. The filling stays the same, so you get all the great flavors. Can I prepare the filling in advance? Yes, you can! Preparing the filling in advance saves time. Just mix the cooked quinoa, chopped veggies, and spices in a bowl. Store it in the fridge for up to two days. When you're ready, just assemble and cook your quesadillas. What dips pair well with Mediterranean Quesadillas? Several dips work well! Tzatziki sauce adds a cool, creamy touch. Hummus offers a smooth, rich flavor that complements the quesadilla. A simple yogurt dip with herbs is also tasty. Choose your favorite for a delicious sidekick! For more detailed instructions, check out the Full Recipe. This article covered the tasty Mediterranean quesadilla and its key ingredients, like quinoa, feta, and olives. We discussed step-by-step instructions for preparation and cooking, along with tips for perfecting your dish. You can customize your quesadilla in many ways and store leftovers easily. Remember, you can experiment with flavors and combinations to find what you love most. Enjoy your cooking journey and make it your own!

Mediterranean Quesadilla Flavorful and Simple Dish

Are you ready to spice up your meal time with a simple yet delicious dish? The Mediterranean Quesadilla combines fresh

To make a healthy tuna pasta salad, gather these main ingredients: - 8 oz whole wheat pasta (fusilli or penne) - 1 can (5 oz) tuna in water, drained and flaked - 1 cup cherry tomatoes, halved - 1 cup cucumber, diced into small cubes - 1/2 cup bell pepper (any color), diced - 1/4 cup red onion, finely chopped - 1/4 cup black olives, sliced or halved - 1/4 cup fresh parsley, finely chopped - 3 tablespoons extra virgin olive oil - 2 tablespoons fresh lemon juice - 1 teaspoon Dijon mustard - Sea salt and freshly ground black pepper, to taste These ingredients form a colorful mix of flavors. The whole wheat pasta gives it a hearty base, while the tuna adds protein. The veggies provide crunch and freshness. You can enhance your salad with these optional ingredients: - 1/2 cup corn, canned or frozen - 1/2 avocado, diced - 1/4 cup feta cheese, crumbled - 1 tablespoon capers, rinsed Adding these can increase the nutrients. Avocado brings healthy fats. Feta adds creaminess and a tangy taste. If you have dietary needs, try these substitutes: - For gluten-free, use gluten-free pasta. - For a vegan option, switch tuna for chickpeas or tofu. - If you avoid dairy, skip the feta or use a dairy-free cheese. These swaps ensure everyone can enjoy the salad. Just keep the flavors balanced and tasty. You can find the full recipe for this vibrant dish, guiding you through each step. To start, boil water in a large pot. Add a pinch of salt to flavor the pasta. Once the water is bubbling, toss in 8 oz of whole wheat pasta. Cook it for about 8-10 minutes until it is al dente. This means it should be firm but cooked through. After cooking, drain the pasta in a colander. Rinse it under cold water to stop the cooking. This also cools the pasta for your salad. For the dressing, grab a medium bowl. Combine 3 tablespoons of extra virgin olive oil, 2 tablespoons of fresh lemon juice, and 1 teaspoon of Dijon mustard. Whisk these together until they blend well. Add a pinch of sea salt and freshly ground black pepper to taste. Letting it sit for a moment allows the flavors to mix and deepen. A good dressing makes the salad shine! In a large mixing bowl, add the cooled pasta. Now, fold in the drained and flaked tuna, halved cherry tomatoes, diced cucumber, diced bell pepper, finely chopped red onion, sliced black olives, and chopped parsley. Stir gently, making sure not to break up the tuna too much. This keeps the texture nice. After that, drizzle the dressing over the top. Toss everything together until well coated. The flavors should be balanced and vibrant. Taste and adjust seasoning if needed. For the best flavor, chill the salad for about 30 minutes before serving. This step is key to a tasty dish. To boost the taste of your tuna pasta salad, use fresh ingredients. Fresh herbs like basil or dill add great flavor. You can also try adding a splash of vinegar or a hint of garlic for extra zing. Mixing in a dash of your favorite hot sauce can give it a nice kick. Remember, the key is to balance flavors. Taste as you go, and make adjustments. Meal prep can make the cooking process easier. Cook the pasta and make the dressing a day ahead. Store them separately in your fridge. You can also chop the vegetables in advance. Just keep them in airtight containers. When you're ready to eat, combine everything. This saves time and keeps your salad fresh. Serve your tuna pasta salad chilled. Use colorful bowls for an appealing look. Garnish with lemon wedges and extra herbs for a pop of color. Pair it with crusty bread or a light soup. This makes a lovely meal for lunch or dinner. Enjoy it with friends or family to make it special. If you want the full recipe, check the earlier section for all the details! {{image_4}} You can change the pasta type to suit your taste. Whole wheat pasta offers fiber and nutrients. If you want a gluten-free option, try chickpea or lentil pasta. These pastas add protein and unique flavors. You can also use veggie noodles made from zucchini or carrots. They keep your meal light and fresh. Tuna is great, but you can switch it up. Consider canned salmon for a different taste. If you want plant-based protein, try black beans or chickpeas. These options add texture and nutrition. You can also use grilled chicken or shrimp for a heartier dish. Mixing proteins keeps your salad exciting and flavorful. Fresh herbs can change the whole vibe of your salad. Basil or dill adds a burst of flavor. You can also mix in arugula or spinach for extra greens. Try adding bell peppers or radishes for a crunchy texture. Fresh veggies keep your salad colorful and fun. Feel free to experiment with what you have on hand. Each combination brings a new taste to enjoy. To keep your healthy tuna pasta salad fresh, store it in an airtight container. This helps prevent moisture and air from spoiling the dish. Make sure the salad is cooled before sealing it up. If you have extra dressing, store it separately. This way, you can dress the salad just before serving. This salad is best enjoyed cold. However, if you prefer a warm salad, gently heat it in a pan. Use low heat to avoid overcooking the ingredients. Stir often to ensure even heating. You can also add a splash of olive oil to boost the flavor. When stored properly, your healthy tuna pasta salad lasts about 3 days in the fridge. After that, the flavors start to fade. If you notice any off smells or changes in texture, it’s best to discard it. Always trust your senses when it comes to food safety. Enjoy your delicious creation while it’s fresh! For the complete recipe, check out the Full Recipe section. If you want to swap tuna, try canned chickpeas or beans. These options add protein and fiber. You can also use shredded chicken or cooked shrimp for a different taste. For a plant-based option, consider marinated tofu. Each substitute brings its unique flavor and texture, making your salad fun and tasty. Yes, you can make this salad vegan! Replace the tuna with chickpeas or diced avocado. Use a vegan mayo or tahini in the dressing for creaminess. These swaps keep the salad delicious while fitting a vegan diet. This way, everyone can enjoy a healthy and hearty meal. To make this salad gluten-free, choose gluten-free pasta. Many brands offer tasty options made from rice or lentils. Check the labels to ensure they meet your needs. This way, you can enjoy a safe and healthy meal without gluten. The flavors will still shine through beautifully! This salad packs a lot of nutrition. Whole wheat pasta provides fiber, keeping you full longer. Tuna is rich in omega-3 fatty acids, which are great for heart health. Fresh veggies add vitamins and minerals, boosting your immune system. This salad offers a balanced meal with protein, healthy fats, and carbs. Enjoy it knowing you are nourishing your body! This healthy tuna pasta salad is a fun and colorful dish. It brings together great flavors and textures. You will love how easy it is to make! - 8 oz whole wheat pasta (fusilli or penne) - 1 can (5 oz) tuna in water, drained and flaked - 1 cup cherry tomatoes, halved - 1 cup cucumber, diced into small cubes - 1/2 cup bell pepper (any color), diced - 1/4 cup red onion, finely chopped - 1/4 cup black olives, sliced or halved - 1/4 cup fresh parsley, finely chopped - 3 tablespoons extra virgin olive oil - 2 tablespoons fresh lemon juice - 1 teaspoon Dijon mustard - Sea salt and freshly ground black pepper, to taste This recipe packs a colorful punch. You get bright tomatoes, crunchy cucumbers, and tasty tuna. The whole wheat pasta adds fiber, helping you feel full. To start, you will cook the pasta. Bring water to a boil in a big pot. Add your pasta and cook it for about 8-10 minutes. It should be firm but not hard. Drain the pasta and cool it under running water. Next, make the dressing. In a medium bowl, mix the olive oil, lemon juice, and Dijon mustard. Add a pinch of salt and pepper. Whisk until it blends well. Now, combine all your ingredients in a large bowl. Add the cooled pasta, tuna, tomatoes, cucumber, bell pepper, red onion, olives, and parsley. Mix gently so you do not break the tuna. Pour the dressing over the salad. Toss everything together carefully. Taste it! You can add more salt and pepper if you want. To make the flavors pop, cover the salad and chill it for 30 minutes. This lets the tastes mix together. Serve it cold or at room temperature. Present your salad in pretty bowls. You can add more parsley on top and lemon wedges for a fresh look. Enjoy your vibrant and nutritious tuna pasta salad! This blog post covered how to make a tasty and healthy tuna pasta salad. We explored the main ingredients and add-ins to boost nutrition. I shared step-by-step instructions for cooking, dressing, and mixing everything. You also learned storage tips and variations to fit your taste. Remember, this salad is versatile and easy to customize. Whether you prefer it with whole wheat pasta or fresh herbs, you can make it your own. Enjoy this delightful meal knowing it's good for you too!

Healthy Tuna Pasta Salad Simple and Tasty Recipe

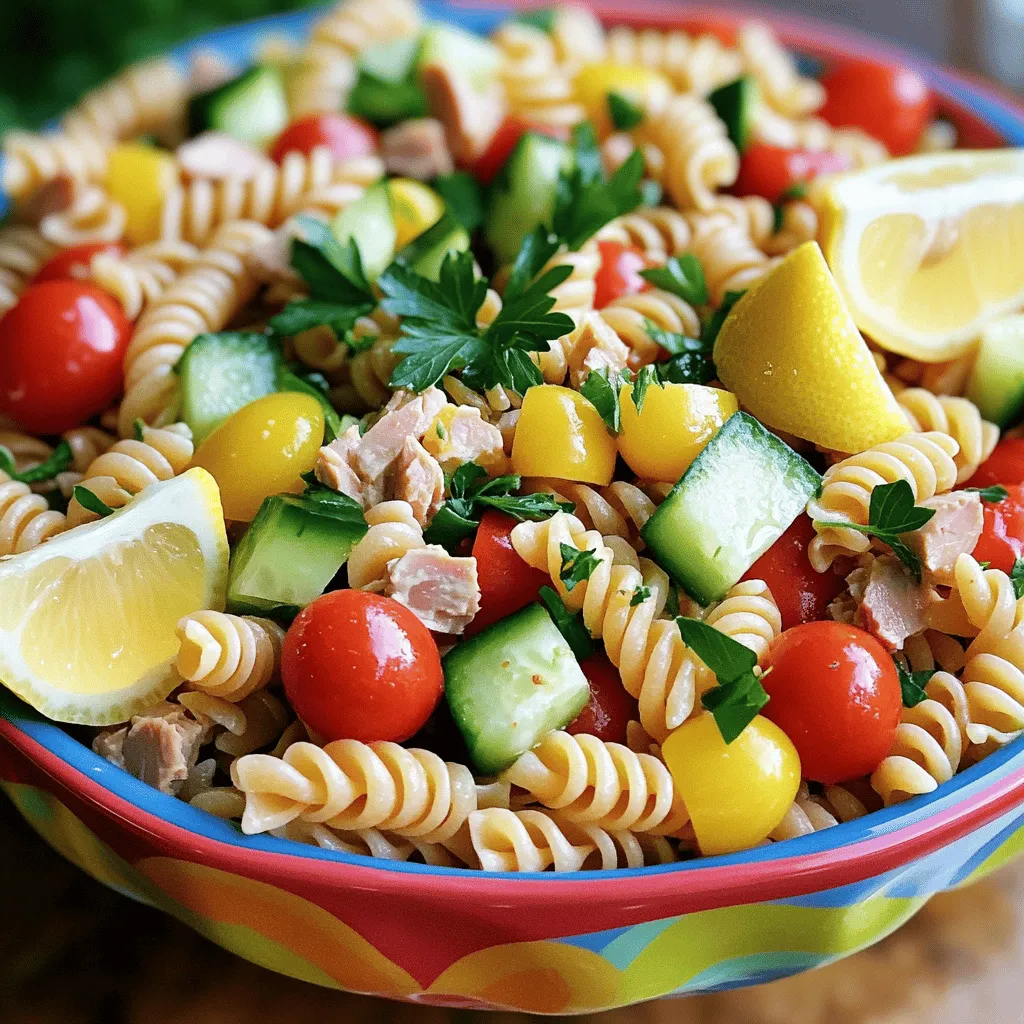
Looking for a quick and nutritious meal? This Healthy Tuna Pasta Salad is simple and bursting with flavor! You can

- 1 cup fresh pineapple, diced into bite-sized pieces - 1 cup ripe mango, diced - 1 cup strawberries, hulled and cut in half - 1 cup juicy blueberries - 1 kiwifruit, peeled and diced - 1 medium banana, sliced into rounds - 2 tablespoons honey - 2 tablespoons fresh lime juice - Zest of 1 lime, finely grated - Fresh mint leaves - Toasted coconut flakes When making a fruit salad, the key is to use fresh, ripe fruits. I love using bright and colorful fruits to make my salad pop. Pineapple adds a sweet and tangy taste. Mango brings a creamy texture. Strawberries offer a juicy burst of flavor, while blueberries add a delightful sweetness. Kiwifruit gives a nice tartness, and banana rounds it out with its smoothness. For the honey lime dressing, I mix honey, fresh lime juice, and lime zest. This blend enhances the fruits and adds a zesty kick. You can adjust the sweetness by adding more or less honey. Don't forget the garnishes! Fresh mint leaves add a lovely aroma. Toasted coconut flakes offer a crunchy texture. These little touches make the salad look and taste amazing. For the full recipe, check out the details above and enjoy creating this delightful treat! Start by washing all your fruits thoroughly. This ensures cleanliness and safety. Next, you will need to dice and slice the fruits. Use a sharp knife for best results. For pineapple, cut off the skin, then chop it into bite-sized pieces. For mango, slice around the pit and cut into cubes. Halve the strawberries and cut the kiwifruit into small pieces. Slice the banana just before mixing to keep it fresh. Once all your fruits are ready, take a large mixing bowl. Carefully combine the diced pineapple, mango, strawberries, blueberries, kiwifruit, and banana. Make sure each fruit is evenly mixed for a colorful and tasty salad. Now, let’s make the honey lime dressing. In a small bowl, whisk together the honey, fresh lime juice, and lime zest. Make sure the honey fully dissolves in the lime juice. You want a smooth and flavorful dressing. The lime adds a nice zing, while the honey brings sweetness. Drizzle the honey-lime dressing over the fruit mixture. Using a gentle motion, toss the salad. Ensure all pieces of fruit are lightly coated with the dressing. Be careful not to mash the fruit. After tossing, let the salad rest for about 10 minutes at room temperature. This resting time helps the flavors blend together, making every bite even better. Serve your fruit salad in a large bowl or individual cups. Right before serving, garnish with fresh mint leaves for a burst of color. Enjoy this delightful treat! For the full recipe, check out the steps outlined above. To make a great fruit salad, choose fruits that are in season. Seasonal fruits taste better and cost less. For example, fresh strawberries and blueberries are sweet in summer. Pineapples and mangoes shine in warmer months. Look for fruits that are firm but yield slightly when pressed. This shows they are ripe and ready to eat. When picking tropical fruits, check for skin color and smell. A ripe mango should have a fruity scent. Pineapples should smell sweet at the base. Avoid fruits with bruises or dark spots. These can mean they are overripe or spoiled. You can adjust the sweetness of your fruit salad to fit your taste. If you like it sweeter, add more honey. Start with a little. You can always add more if needed. You might also mix in a pinch of salt. This can enhance the sweetness of the fruits. For extra flavor, think about adding spices. A sprinkle of cinnamon can add warmth. You might also try a dash of vanilla extract. These simple additions can surprise your taste buds and make the salad unique. How you serve your fruit salad makes a big difference. Use a large clear bowl to show off the colors of the fruits. Consider making individual cups for a fun touch. This way, each guest has their own serving. For garnish, fresh mint leaves add a pop of color and a nice smell. You can also add lime wedges on the side. Toasted coconut flakes sprinkled on top can add a tropical flair. These small touches make your fruit salad look and taste even better! For the full recipe, check out the Tropical Bliss Fruit Salad. {{image_4}} You can add many fruits to your salad. Try papaya for a sweet touch. Coconut gives a creamy texture. Here are more ideas for a colorful mix: - Pineapple - Mango - Strawberries - Blueberries - Kiwifruit - Banana - Papaya - Coconut These fruits not only taste great but also look beautiful together. A mix of colors makes the salad more inviting. If you want to change things up, try different dressings. Yogurt-based dressings are creamy and tangy. They work well with fruits. You can also make a citrus vinaigrette. This gives a zesty flavor that brightens the salad. Here are some options: - Greek yogurt dressing with honey - Citrus vinaigrette with orange juice - Lime and mint yogurt These dressings can add a new twist to your fruit salad. Fruit salad is versatile. You can serve it in many ways. Pair it with grilled meats for a refreshing side dish. It also makes a lovely dessert. You can top it with yogurt for breakfast. This is a great way to start your day. Here are some serving ideas: - Serve alongside grilled chicken or fish - Top with yogurt for a healthy breakfast - Use as a dessert after a meal These options can make your fruit salad even more enjoyable. Want to learn more? Check out the Full Recipe for a complete guide! Your fruit salad stays fresh in the fridge for about three days. After that, it may start to lose its crunch and flavor. Store it in an airtight container to keep it fresh. Glass or plastic containers work well for this purpose. Just ensure they seal tightly. You can make this salad ahead of time. Chop your fruits and mix them in the bowl. But don’t add the dressing until just before serving. This keeps your fruit from getting soggy. If you want to store your salad overnight, keep the dressing in a separate container. Can you freeze fruit salad? You can freeze some fruits, but not all. Fruits like blueberries and strawberries freeze well. But bananas and kiwifruit do not hold up well in the freezer. If you freeze your salad, the texture may change when thawed. Enjoy the fresh flavors instead! You can use canned fruit, but there are some things to think about. Canned fruit is often softer and sweeter than fresh fruit. This can change the taste and texture of your salad. Pros of using canned fruit: - Canned fruit is often easier to find. - It lasts longer and is ready to use. - It can save you time on prep work. Cons of using canned fruit: - Canned fruit may contain added sugars or syrup. - The texture can be mushy or less crisp. - Fresh fruit has more flavor and better nutrients. There are many tasty dressings you can try for your fruit salad. You can mix it up and find what you like best. Here are some ideas: - Yogurt-based dressing for creaminess. - Coconut milk for a tropical twist. - Citrus vinaigrette with orange or lemon juice. - Mint or basil pesto for a fresh herb flavor. - Maple syrup for a sweeter taste. Making your fruit salad vegan is simple. Just swap out honey for a plant-based sweetener. Here are some good options: - Agave syrup for a light flavor. - Maple syrup for a rich sweetness. - Coconut nectar for a unique taste. Using these substitutes keeps your salad delicious and vegan-friendly. Enjoy your tropical delight! If you want to try the full recipe, check out the Tropical Bliss Fruit Salad. This fruit salad combines fresh fruits, a delicious honey lime dressing, and creative garnishes. You can choose seasonal fruits for the best taste and mix in tropical options. Always adjust the sweetness to fit your liking. This salad is great for serving with other meals or as a snack. Store it well to keep it fresh, and remember to prepare the dressing separately when making it in advance. Enjoy experimenting with different fruits and dressings to make it your own!

Fruit Salad with Honey Lime Dressing Delightful Treat

Fruit salad is a simple, tasty treat perfect for any time. Combine fresh fruits with a delightful honey lime dressing

- 1 ½ cups graham cracker crumbs - ½ cup unsalted butter, melted - 2 (8 oz) packages of cream cheese, softened - 1 cup granulated sugar - 2 large eggs, at room temperature - 1 teaspoon pure vanilla extract - 1 cup sour cream, at room temperature - 1 ½ cups fresh blueberries, rinsed and drained - Zest of 1 lemon, finely grated When making blueberry cheesecake bars, it’s key to have fresh and quality ingredients. The graham cracker crumbs form a crunchy base, while the butter adds richness. Cream cheese is the star, giving these bars their creamy texture. I use room temperature cream cheese for a smooth filling. The sugar sweetens the bars, and the eggs help bind everything together. Pure vanilla extract adds depth to the flavor. Sour cream brings a slight tang, balancing the sweetness. Fresh blueberries burst with flavor, making each bite delightful. The lemon zest brightens the entire dish, providing a fresh twist. For the full recipe, check out the details I have provided. Happy baking! 1. Preheat your oven to 325°F (160°C). You want it just right for baking. 2. Grease a 9x13 inch baking dish. You can use cooking spray or butter. 3. In a mixing bowl, combine: - 1 ½ cups graham cracker crumbs - ½ cup unsalted butter, melted - 2 tablespoons granulated sugar 4. Stir the mixture until it looks like wet sand. 5. Press this mixture into the bottom of the baking dish. Use a measuring cup or your hands to make it even. 1. In a large bowl, beat together: - 2 (8 oz) packages of cream cheese, softened - 1 cup granulated sugar 2. Mix until smooth and creamy. This takes about 2-3 minutes. 3. Add the eggs one at a time. Mix for about 30 seconds after each egg. 4. Stir in: - 1 teaspoon pure vanilla extract - 1 cup sour cream 5. Make sure everything is well-blended and creamy. 1. Carefully fold in: - 1 ½ cups fresh blueberries - Zest of 1 lemon 2. Pour this cheesecake mixture over the graham cracker crust. 3. Use a spatula to smooth out the top. 4. Bake in your preheated oven for 35-40 minutes. 5. The cheesecake should be set at the edges and a little jiggly in the center. 6. Once baked, let it cool at room temperature for about 1 hour. 7. Transfer it to the fridge and chill for at least 4 hours, or overnight for the best taste. 8. When ready, cut the chilled cheesecake into bars. Enjoy! For the full recipe, check out the details above. Using room temperature ingredients is key. Cream cheese blends better when it’s not cold. This step helps you avoid lumps in your filling. Take your eggs and sour cream out of the fridge ahead of time. Let them warm up for about 30 minutes. Avoid overmixing your batter to prevent cracks. Mix just until smooth. If you beat it too much, air bubbles form. These bubbles expand while baking, leading to cracks. A smooth batter is your friend here! To tell if your cheesecake is done, look for a slight jiggle in the center. The edges should be set and firm. If it looks too wobbly, give it a bit more time. Every oven is different, so check it after 35 minutes. Cooling is also important. Let your cheesecake cool at room temperature for about an hour. After that, chill it in the fridge for at least 4 hours. This waiting time improves the flavor and texture. If possible, chill it overnight for the best results. Garnishing blueberry cheesecake bars can add a nice touch. Top them with extra fresh blueberries and a sprinkle of powdered sugar. You can also add a sprig of mint for color. For serving, these bars fit many occasions. They are great for parties, picnics, or family dinners. Serve them on a decorative platter for a beautiful display. You can slice them into different sizes depending on your guests’ needs. For the full recipe, be sure to check the section above! {{image_4}} You can easily change the flavor of your blueberry cheesecake bars. Swap out the blueberries for other berries like raspberries or strawberries. Each berry brings its unique taste, making the dessert fun and refreshing. You could also add chocolate chips or white chocolate pieces to the batter for a rich twist. These options elevate the bars, making them a hit at any gathering. If you need gluten-free options, use crushed gluten-free cookies instead of graham cracker crumbs. This keeps your crust delicious while meeting dietary needs. For those who want vegan or dairy-free choices, try using cashew cream or coconut cream cheese. These alternatives work well and keep the rich flavor intact, ensuring everyone can enjoy this treat. Want smaller bites? You can adapt this recipe to make mini cheesecake bars! Use a mini muffin tin instead of a baking dish. Fill each cup about two-thirds full with the cheesecake batter. The baking time will change, so check them after 20-25 minutes. They should be set and slightly jiggly in the center. These mini versions are perfect for parties or snacks! For the full recipe, check out [Full Recipe]. To keep your leftover blueberry cheesecake bars fresh, store them in the fridge. Use an airtight container to prevent them from drying out. If you prefer, you can also cover the dish tightly with plastic wrap. This will keep the bars moist and tasty for days. If you want to keep them longer, freezing is a great option. First, cut the cheesecake into bars. Wrap each piece tightly in plastic wrap, then place them in a freezer-safe bag or container. This helps prevent freezer burn. You can freeze them for up to three months. You can keep blueberry cheesecake bars in the fridge for about five to seven days. Make sure to check for any signs of spoilage before eating. If you want to reheat them, do it gently. Use a microwave and heat in short intervals, about 10-15 seconds. This helps avoid overheating, which can change the texture. You can also enjoy them cold straight from the fridge, as they are just as delicious! Yes, you can make blueberry cheesecake bars ahead of time. After baking, let them cool at room temperature for about one hour. Then, refrigerate them for at least four hours, or better yet, overnight. This chilling time allows the flavors to meld and the texture to set. Making them a day ahead also saves you time on the day you plan to serve them. If you don't have graham cracker crumbs, you can use other options. Crushed cookies like digestive biscuits or vanilla wafers work well. You could also use oats or crushed nuts for a gluten-free option. Just make sure to mix them with melted butter to achieve a similar crust texture. Cracks in cheesecake often come from baking too fast or too hot. To prevent this, bake your bars at a lower temperature. Always use room temperature ingredients, as cold ingredients can cause the batter to mix unevenly. Avoid overmixing the batter, which can add too much air and lead to cracks. You can use frozen blueberries in your cheesecake bars. They are convenient and often just as tasty as fresh ones. However, frozen blueberries can release more juice, making the texture slightly different. If you choose frozen, do not thaw them before adding to the batter. This will help minimize extra moisture and keep your bars firm. In this article, I covered how to make delicious blueberry cheesecake bars. We went through essential ingredients and step-by-step instructions, ensuring your dessert turns out perfectly. I shared tips on texture, baking, and presentation, along with variations for flavor and dietary needs. Proper storage techniques were also included to keep your bars fresh. Embrace these tips for a tasty treat that impresses all. Enjoy making these cheesecake bars, and don't hesitate to be creative with your flavors!

Blueberry Cheesecake Bars Irresistible Dessert Recipe

Are you ready to delight your taste buds? These Blueberry Cheesecake Bars are the perfect blend of creamy, tangy, and

Here is what you need for Spicy Korean Ramen with Grilled Beef: - 2 packs of instant ramen noodles - 200g beef sirloin, thinly sliced - 2 tablespoons gochujang (Korean chili paste) - 1 tablespoon soy sauce - 1 teaspoon sesame oil - 1 tablespoon vegetable oil - 4 cups beef broth - 2 green onions, chopped (white and green parts separated) - 2 garlic cloves, minced - 1 teaspoon fresh ginger, grated - 1 tablespoon rice vinegar - 1 teaspoon sugar - 1 cup bok choy or spinach - 2 boiled eggs, halved (for garnishing) - Sesame seeds, for garnishing These ingredients are key to making a flavorful bowl of ramen. The gochujang gives it a spicy kick, while the beef broth adds depth. Fresh ingredients, like ginger and garlic, bring brightness to the dish. Using quality beef sirloin ensures your grilled beef is tender and juicy. When you gather these ingredients, you set the stage for a delicious meal. Each item plays a role, making your ramen both tasty and satisfying. For the full recipe, check out the detailed instructions that follow. To start, get a medium bowl. Add the sliced beef, gochujang, soy sauce, sesame oil, and minced garlic. Mix everything well until the beef is evenly coated. Cover the bowl with plastic wrap. Let it sit for at least 20 minutes. This allows the flavors to soak into the meat. Next, heat vegetable oil in a skillet over medium-high heat. When the oil is hot, add the marinated beef in a single layer. Grill the beef for 3-4 minutes. Turn it occasionally until it’s nicely browned and cooked how you like it. Once done, remove the beef from the heat and keep it warm. Now, we prepare the broth. In a large pot, pour in the beef broth. Bring it to a gentle boil over medium heat. Stir in the grated ginger, the white parts of the green onions, rice vinegar, and sugar. Let the broth simmer for a few minutes to blend all the flavors together. Once the broth is boiling, add the instant ramen noodles. Cook the noodles according to the package instructions. This usually takes about 3-4 minutes. You want them tender but still firm. With just one minute left for the noodles, toss in the bok choy or spinach. Stir it in and let the vegetables wilt slightly in the hot broth. This adds color and nutrition to your dish. Ladle the hot ramen soup into bowls. Top each bowl with the grilled beef. Add halved boiled eggs for richness. Finish with a sprinkle of sesame seeds and the green parts of the chopped green onions for a fresh touch. Enjoy your delicious bowl of spicy ramen! For the full recipe, check out the earlier section. To make your beef full of flavor, start with the marinade. Combine gochujang, soy sauce, sesame oil, and minced garlic in a bowl. Mix well and add the sliced beef. Let it sit for at least 20 minutes. This time lets the meat soak up all the tasty goodness. If you have time, marinate it longer for even more flavor. You can grill the beef in a skillet or on an outdoor grill. If using a skillet, heat vegetable oil over medium-high heat. Cook the beef in a single layer for about 3-4 minutes. If you prefer an outdoor grill, get it nice and hot. Grill the beef for the same time, flipping occasionally. Both methods give you that perfect char and juicy bite. The beef broth is key to a rich taste. Start with a good quality beef broth. To enhance it, stir in grated ginger and the white parts of the green onions. Add rice vinegar and sugar to balance the spice. Let it simmer to blend all the flavors together. This step makes your broth super tasty. Follow the package instructions for cooking the noodles. Usually, it takes about 3-4 minutes. Keep an eye on them so they don’t get too soft. You want them tender but still with a bit of a bite. Add the noodles to the broth only when it is boiling to get the best texture. Garnishing adds color and texture to your ramen. Top each bowl with grilled beef and halved boiled eggs. Sprinkle sesame seeds on top for crunch. Don’t forget to add the green parts of the chopped green onions. This will make your dish look appealing and inviting. For an authentic touch, serve with a side of kimchi. For the full recipe, check out the entire guide! {{image_4}} You can make a tasty vegetarian version of this dish. Use vegetable broth instead of beef broth. Replace the beef with tofu or tempeh, marinating it the same way. Add plenty of colorful veggies like bell peppers, mushrooms, and carrots for more flavor. This version stays just as spicy and satisfying! If you love seafood, swap the beef for shrimp or scallops. You can still marinate them but for a shorter time. Cook the seafood in your broth for a few minutes. This method keeps the seafood tender and adds a nice ocean flavor to your ramen. You can try other proteins like chicken or pork. Just cut them into thin slices. Marinate as you would the beef and grill them until cooked. Each protein adds its own unique flavor to the broth, giving you different tastes every time. For a low-carb option, skip the noodles. Instead, use zucchini noodles or shirataki noodles. These noodles are lighter and still soak up all the flavor from the broth. You can enjoy the rich taste without the carbs, making it a great choice for a lighter meal. For more details on how to make your spicy ramen, check out the Full Recipe! After a tasty meal, I always save my ramen leftovers. Place the soup and noodles in separate airtight containers. This way, the noodles stay firm and do not get mushy. Store in the fridge for up to three days. Remember, the flavors get better as they sit! Reheating ramen can be tricky. I recommend using a pot on the stove. Pour the broth into the pot and heat it slowly. Add the noodles and any veggies. Stir until warm. You can also use a microwave. Heat in short bursts until hot. Just be careful not to overcook the noodles! Freezing is a great option for long-term storage. I suggest freezing the broth and beef separately from the noodles. Use freezer-safe bags or containers. When ready to eat, thaw overnight in the fridge. Reheat the broth and cook fresh noodles. This keeps your ramen fresh and delicious! To adjust the spice levels, you can vary the gochujang amount. If you like it milder, use less. Adding a bit of sugar can also help tone down the heat. For more spice, try adding some chili flakes or a splash of hot sauce. Taste as you go to find your perfect balance. Yes, you can use different noodles. Instant ramen is quick and easy, but other noodles work well too. Udon or soba noodles give a different texture. Just make sure to cook them according to their package instructions for the best results. Serve your ramen with kimchi for a tangy kick. You can also add pickled vegetables for crunch. A side of steamed dumplings pairs nicely too. These sides will enhance the meal and bring more flavors to your table. Grilling the beef takes about 3 to 4 minutes on medium-high heat. You want it nicely browned but still tender. Cut the beef thinly for faster cooking. Keep an eye on it to avoid overcooking. You can prepare parts of this recipe ahead of time. Marinate the beef a day before. Cook the broth and noodles right before serving for the best taste. Store leftovers in the fridge for up to three days. Reheat them gently when ready to enjoy. For the full recipe, check the section above. This blog post covered how to make a delicious Spicy Korean Ramen. We explored key ingredients like beef and gochujang, plus the step-by-step process. I shared tips to improve your dish and offered variations for different tastes. Remember, cooking is fun! Feel free to adjust spices to match your liking. Try out these ideas, and enjoy your ramen creation. You’ll impress friends and family with your tasty meals. Happy cooking!

Spicy Korean Ramen with Grilled Beef Flavor Boost

Are you craving a bowl of spicy comfort? Let’s make Spicy Korean Ramen with Grilled Beef. This dish combines rich

- 1 pound large shrimp, peeled and deveined - 1 cup fresh pineapple, cut into bite-sized chunks - 1 bell pepper (red or yellow), cut into bite-sized chunks - 1 red onion, cut into uniform chunks - Marinade ingredients: - 1 tablespoon olive oil - 2 tablespoons honey - 1 tablespoon soy sauce - 1 teaspoon sriracha (adjust to your preferred spice level) - 1 teaspoon garlic powder - Salt and pepper, to taste - Wooden skewers, soaked in water for at least 30 minutes Gather these items before you start. Fresh ingredients bring the best taste. Use good shrimp. I like large shrimp for this recipe. They hold up well on the grill. Fresh pineapple adds sweetness. It pairs perfectly with shrimp. Bell peppers and red onions add color and crunch. The marinade is the star. It brings together olive oil, honey, soy sauce, and sriracha. This mix creates a sweet and spicy flavor that you will love. Soak wooden skewers in water. This step helps prevent them from burning. It's a small but important step for grilling. Don't skip it! This full recipe is simple. With these ingredients, you create an amazing dish. Enjoy the vibrant flavors of sweet and spicy pineapple shrimp skewers! Start by gathering your marinade ingredients. In a mixing bowl, combine: - 1 tablespoon olive oil - 2 tablespoons honey - 1 tablespoon soy sauce - 1 teaspoon sriracha - 1 teaspoon garlic powder - Salt and pepper to taste Whisk these ingredients together until smooth. This marinade will give your shrimp a sweet and spicy kick. Now it’s time to marinate the shrimp. Add 1 pound of peeled and deveined shrimp to the bowl. Toss the shrimp gently until they are fully coated in the marinade. Cover the bowl with plastic wrap and refrigerate it for 30 minutes. This allows the shrimp to soak up all the flavors. While the shrimp marinates, prepare your skewers. Soak wooden skewers in water for 30 minutes. This step helps prevent burning on the grill. Once soaked, it’s time to thread the ingredients. Alternate shrimp, 1 cup of fresh pineapple chunks, and 1 bell pepper and 1 red onion cut into bite-sized pieces onto the skewers. This not only looks good but also adds flavor. When you’re ready to cook, preheat your grill to medium-high heat. This is important for a nice sear. Place the assembled skewers on the grill and cook for 2-3 minutes on each side. You’ll know they’re done when the shrimp turn pink and opaque. The veggies should be tender and slightly charred. This method ensures you get juicy shrimp and crisp veggies with every bite. For even more flavor, drizzle any remaining marinade over the skewers right after grilling. Enjoy them hot for the best taste! - Make sure to preheat your grill well. A hot grill gives great results. - Use a grilling mat or foil. This stops small pieces from falling through. - Adjust the sriracha to suit your spice level. More sriracha means more heat! - Add fresh herbs or citrus zest to boost the flavor. Mint or lime can elevate your dish. - Garnish the skewers with fresh cilantro or parsley. It adds color and freshness. - Serve with lime wedges for a tropical touch. A squeeze of lime brightens each bite. These tips will help you create the best Sweet and Spicy Pineapple Shrimp Skewers. For the complete guide, check the Full Recipe. Enjoy your cooking! {{image_4}} You can easily adapt this recipe to fit your needs. If you want a different protein, try using tofu or chicken instead of shrimp. Both options will soak up the sweet and spicy marinade nicely. For those who need gluten-free options, simply swap regular soy sauce for gluten-free soy sauce. Feel free to get creative with your ingredients! Instead of pineapple, try using mango or zucchini. They add a fun twist to the dish. You can also mix in different bell peppers. Red, yellow, or green bell peppers add color and taste to your skewers. If grilling isn’t your style, don’t worry! You can bake the skewers in the oven as an alternative. Preheat your oven to 400°F and place the skewers on a baking sheet. Bake them for about 10-12 minutes, or until the shrimp is fully cooked. Another quick method is broiling. Broil the skewers for about 2-3 minutes on each side. This method cooks them fast while keeping them juicy. For the full recipe, check out the Sweet and Spicy Pineapple Shrimp Skewers. Store your cooked skewers in an airtight container in the refrigerator. They will stay fresh for up to 2 days. This keeps the shrimp and veggies nice and tasty. When it's time to eat those leftovers, reheat them in the oven or on the grill. This helps maintain the texture of the shrimp. Avoid the microwave, as it can make the shrimp rubbery. If you want to save some for later, freeze the uncooked skewers after you assemble them. Just remember to thaw them before grilling. They taste best if used within 2-3 months. This keeps the flavors fresh and delightful. You can enjoy Sweet and Spicy Pineapple Shrimp Skewers anytime! Yes, marinate the shrimp the night before for maximum flavor. This step helps the shrimp soak up all the tasty juices, making each bite more delicious. I find that letting them sit in the marinade overnight really boosts their taste. Just remember to keep them in the fridge to stay fresh. Serve with rice, a fresh salad, or grilled vegetables for a complete meal. Rice soaks up the sauce well and adds a nice touch. A fresh salad adds crunch and color. Grilled veggies bring a smoky taste that pairs perfectly with the shrimp. Shrimp is done when it turns pink and opaque, about 2-3 minutes on each side. Pay attention to the color change as it cooks. Overcooked shrimp can become rubbery, so timing is key. When they look pink and firm, they're ready to eat! Soak wooden skewers before use to prevent burning; handle with tongs for safety. Soaking helps keep them from catching fire. When grilling, use tongs to turn the skewers, keeping your hands safe from the heat. This way, you can enjoy cooking without worry! In this blog post, we explored how to make delicious Sweet and Spicy Pineapple Shrimp Skewers. I shared the ingredients, simple steps for marinating and grilling, and helpful tips for perfecting your dish. Remember, you can swap ingredients or try different cooking methods to suit your taste. These skewers are great for sharing or meal prep. I hope you find these tips useful for your next cookout! Enjoy your tasty creations!

Sweet and Spicy Pineapple Shrimp Skewers Delight

Looking for a fun and tasty dish to impress your friends? Try my Sweet and Spicy Pineapple Shrimp Skewers! Bursting

- 1 lb flank steak - 2 cups cooked jasmine rice - 1/4 cup fresh cilantro, finely chopped - 2 ripe limes (zest and juice) - 2 tablespoons extra-virgin olive oil - 1 teaspoon ground cumin - 1 teaspoon garlic powder - Salt and freshly ground black pepper, to taste - 1 cup cherry tomatoes, halved - 1 ripe avocado, sliced - 1 jalapeño, thinly sliced (optional for spice) - 1/4 cup red onion, thinly sliced - 1/2 cup corn (fresh or canned, drained if canned) Gather these ingredients to make a delicious cilantro lime steak and rice bowl. Each element adds a unique taste and texture. The flank steak is the star, bringing rich flavor. The marinade is easy to make. Just mix lime juice, zest, olive oil, cumin, garlic powder, salt, and pepper. This blend adds a bright kick to the steak. Don't forget the toppings! The cherry tomatoes add sweetness, while the avocado gives creaminess. If you like heat, add jalapeño. Red onion adds a nice crunch, and corn sweetens the mix. These fresh ingredients come together in a beautiful way. You can find the Full Recipe to guide you through the steps to create this flavorful delight. Start by making the marinade. In a bowl, combine the juice and zest of two limes, extra-virgin olive oil, ground cumin, garlic powder, salt, and freshly ground black pepper. Whisk until you blend everything well. Place the flank steak in a resealable plastic bag or a shallow dish. Pour the marinade over the steak, ensuring it coats well. Seal the bag or cover the dish and refrigerate for at least 30 minutes. This step boosts the flavor. While the steak marinates, cook jasmine rice. Follow the package instructions for the best results. Once cooked, fluff the rice using a fork. This keeps the grains separate. Set the rice aside to stay warm. Next, preheat your grill to medium-high heat. Remove the flank steak from the marinade and discard the leftover marinade. Grill the steak for about 4-5 minutes on each side. This timing gives you a perfect medium-rare finish. Adjust the time if you prefer it more cooked. Once done, transfer the steak to a cutting board. Allow it to rest for about 5 minutes before slicing. This resting time helps keep the juices inside. Now it’s time to assemble your bowl. Start with a generous portion of jasmine rice as the base. Then, add the sliced grilled steak on top. Arrange your toppings, including cherry tomatoes, avocado, red onion, corn, and finely chopped cilantro. This creates a colorful and inviting dish. For a zesty kick, drizzle some lime juice over the assembled bowl. You can also garnish with more fresh cilantro for a vibrant finish. This adds brightness and enhances the flavor. For the full recipe, check the details above. To get the best flavor from your steak, follow these grill times based on doneness: - Rare: 3-4 minutes per side - Medium-rare: 4-5 minutes per side - Medium: 5-6 minutes per side - Medium-well: 6-7 minutes per side - Well-done: 7-8 minutes per side Resting your steak after grilling is key. Let it sit for about 5 minutes. This helps the juices stay in the meat. Slicing too soon will let those tasty juices run out. For fluffy jasmine rice, rinse it well before cooking. This removes excess starch and prevents stickiness. Use a ratio of 1 cup of rice to 1.5 cups of water. Let it simmer gently, then fluff with a fork once cooked. If you want variety, try using brown rice or quinoa. Each option adds its unique taste and texture. To boost flavor, consider adding spices like smoked paprika or cayenne pepper. Fresh ingredients like lime juice and herbs will brighten your dish. Using fresh toppings makes a big difference. Fresh cilantro and lime add zest. If you use canned ingredients, drain them well. This helps avoid excess moisture in your bowl. For the full recipe, check out the Cilantro Lime Steak and Rice Bowl. {{image_4}} You can switch up the protein in the bowl. If flank steak isn't your favorite, try chicken or shrimp. For a vegetarian option, use tofu. Each protein changes the taste a bit. When using chicken, marinate it the same way as the steak. Use the same lime juice and spices. For shrimp, you can marinate for just 15 minutes. It cooks quickly, so grill for only 2-3 minutes per side. Tofu also benefits from the marinade. Press it first to remove extra moisture, then cut it into cubes. Marinate for about 30 minutes before grilling. For a plant-based bowl, skip the meat. Instead, add more veggies. You can use black beans, bell peppers, or zucchini. These will give it a hearty feel. Consider mixing in some quinoa or brown rice for extra protein. You can also add roasted sweet potatoes for a sweet touch. For vegan options, make sure to check the marinade. Use agave or maple syrup instead of honey if needed. Get creative with herbs! Try adding parsley or mint to the bowl. These herbs give a fresh taste. You can also spice things up. Add diced jalapeños for heat or a splash of hot sauce. For a tangy twist, squeeze extra lime over the bowl. You can even add a dash of vinegar for a bite. This will brighten up all the flavors. Enjoy mixing and matching to find what you love! Check out the Full Recipe for inspiration. To keep your steak and rice fresh, place the leftovers in an airtight container. This helps avoid spoilage and keeps flavors intact. Always store the steak and rice separately to keep the rice from becoming soggy. Use glass containers or BPA-free plastic ones for safety. Make sure to cool the food to room temperature before sealing. When reheating, it’s best to warm the rice and steak separately. For the rice, add a splash of water and cover it in a microwave-safe bowl. Heat it in short bursts, stirring in between. This helps keep the rice fluffy. For the steak, use a pan on low heat. This ensures the meat stays juicy. Heat it just until warm, avoiding overcooking. If you want to freeze the dish, do it right after cooking. Allow it to cool, then pack the steak and rice into freezer-safe bags. Remove as much air as possible. Label the bags with the date. The steak and rice can stay fresh in the freezer for up to three months. When you're ready to eat, thaw it overnight in the fridge before reheating. You can serve many tasty sides with this bowl. Here are some ideas: - Black beans: They add protein and a creamy texture. - Grilled veggies: Try zucchini, bell peppers, or corn for a colorful touch. - A fresh salad: A simple green salad or a tomato salad pairs well. - Tortilla chips: They add crunch and are great for dipping. - Salsa: Fresh salsa or pico de gallo gives a zesty kick. These sides will enhance the meal and add more flavors. Yes, you can prepare parts of this dish in advance. Here are some tips: - Marinate the steak: You can do this the night before for better flavor. - Cook the rice: Make it a day ahead and store it in the fridge. - Chop toppings: Prepare the tomatoes, cilantro, and onion ahead of time. Keep them in airtight containers. - Assemble before serving: It's best to put the bowl together right before eating for freshness. These steps make meal prep easy and save time. To make the rice gluten-free, choose the right type. Here’s how: - Use jasmine rice: It’s naturally gluten-free and fluffy. - Check labels: Ensure your rice has no added gluten. - Rinse the rice: Rinse it before cooking to remove excess starch. This way, your dish remains gluten-free and delicious. Yes, this recipe works great for meal prep. Here are best practices: - Store portions: Divide the rice, steak, and toppings into separate containers. - Keep toppings fresh: Add avocado and cilantro right before serving to keep them vibrant. - Reheat carefully: Heat rice and steak gently to avoid drying them out. Following these tips ensures you enjoy this dish throughout the week. For the complete recipe, check the Full Recipe section. This blog post covered how to make a tasty Cilantro Lime Steak and Rice Bowl. We discussed the key ingredients, marinade, and toppings. You learned step-by-step cooking instructions, plus tips for perfect rice and steak. I shared variations for proteins and storage practices to keep your meal fresh. Cooking this dish brings bright flavors that everyone will enjoy. Give it a try and customize it to your taste!

Cilantro Lime Steak and Rice Bowl Flavorful Delight

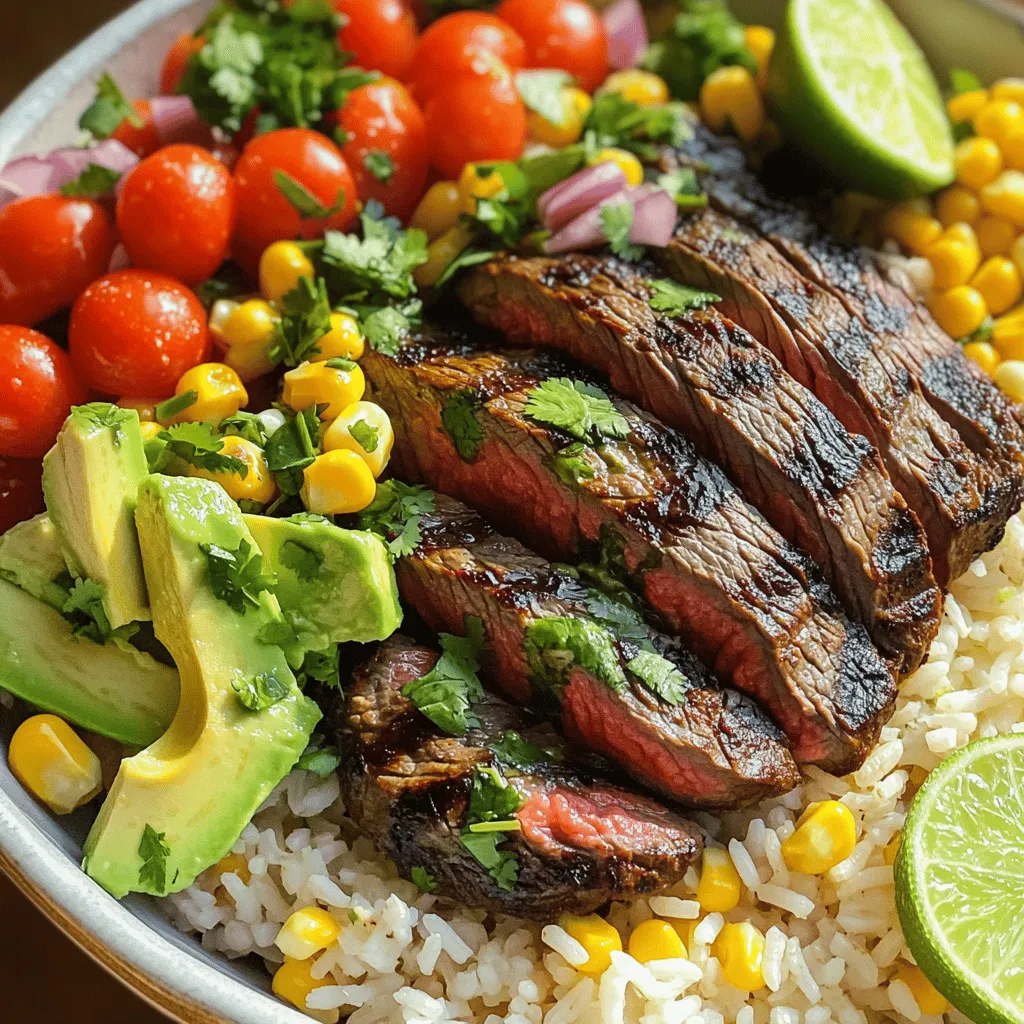
Are you ready to savor a vibrant meal that bursts with flavor? The Cilantro Lime Steak and Rice Bowl is

Older posts
Newer posts
← Previous Page1 … Page26 Page27 Page28 … Page91 Next →

dsad

© 2025 recipesstation • Built with GeneratePress

Our Policies

  • Copyright Policy
  • Cookie Policy
  • GDPR Policy
  • Privacy Policy
  • Disclaimer
  • Terms Of Use

More Information

  • Home
  • About
  • Contact
  • Appetizers
  • Dessert
  • Dinner
  • Drinks
©2025, recipesstation About Back To Top