Skip to content
DisclaimerTerms Of UseGDPR PolicyCookie Policy

recipesstation

  • Home
  • Drinks
  • Appetizers
  • Dinner
  • Dessert
  • About
  • Contact
  • Privacy Policy
DisclaimerTerms Of UseGDPR PolicyCookie Policy

Emily

- 1 cup almond flour - 2 tablespoons coconut oil, melted - 2 tablespoons maple syrup - 1/4 teaspoon salt - 1 cup cashews, soaked for at least 4 hours and drained - 1/2 cup coconut milk - 1/4 cup fresh lemon juice - 1/4 cup maple syrup - 1 tablespoon lemon zest - 1 teaspoon vanilla extract - Fresh berries - Mint leaves The crust forms the base of the tart, giving it a nice crunch. The almond flour adds a nutty flavor and a gluten-free option. The coconut oil binds everything together, while the maple syrup sweetens it just right. A pinch of salt balances the sweetness. For the filling, soaked cashews create a creamy texture. Coconut milk adds richness, while fresh lemon juice gives that tangy zing. Maple syrup sweetens the mixture, and lemon zest boosts the flavor. Vanilla extract rounds it out with a warm note. You can top the tarts with fresh berries or mint leaves for a pop of color. These optional garnishes not only look nice but also add a fresh taste. Ready to dive into the recipe? Check out the Full Recipe for detailed steps! To start, gather your ingredients. You need almond flour, melted coconut oil, maple syrup, and salt. In a large bowl, mix the almond flour, coconut oil, maple syrup, and salt. Use a fork or your hands. Keep mixing until the dough sticks together well. Next, take small pieces of the dough. Press each piece firmly into the bottom and sides of your mini muffin tin. This will create a nice crust. Make sure it’s even all around. Now it's time to bake! Preheat your oven to 350°F (175°C). Once hot, put the muffin tin in the oven. Bake for 10 to 12 minutes. You want the edges to turn a light golden brown. After baking, take the tin out and let it cool on a wire rack. While the crust cools, let’s make the filling. First, soak your cashews in water for at least 4 hours. Drain them well afterward. In a high-speed blender, add the soaked cashews, coconut milk, fresh lemon juice, maple syrup, lemon zest, and vanilla extract. Blend until the mix is smooth and creamy. Once your crusts are cool, it’s time to fill them. Carefully pour the lemon filling into each crust, almost to the top. Use a spatula to smooth the surface for a pretty finish. Now, place the filled tarts in the refrigerator. They need to chill for at least 2 hours. This step is very important for the flavors to mix well and for the filling to set. When your tarts are ready, take them out of the fridge. Gently loosen the edges with a small knife if needed. Carefully remove them from the muffin tin. For a lovely touch, you can garnish with fresh berries and mint leaves. This makes them even more appealing! Enjoy your delicious mini vegan lemon tarts! For the complete recipe, check the Full Recipe. To make a great crust, the dough's consistency matters. It should feel soft but not sticky. If it crumbles, add a little coconut oil. If it's too wet, add more almond flour. Mix until you create a dough that holds together well. Avoid overbaking your crust. You want a light golden color. Keep an eye on them in the oven. Check at the 10-minute mark. If they start to brown too much, take them out. The perfect crust is crunchy outside and tender inside. Soaking cashews is key for a creamy filling. Soak them for at least four hours. This softens them and helps blend smoothly. If you skip this step, your filling may be grainy. Use a high-speed blender for the best results. This will help you achieve a smooth and creamy texture. Blend well to combine all the ingredients. You want a filling that looks rich and luscious. Arrange your mini vegan lemon tarts on a nice platter. This adds to their appeal. Place them neatly, leaving space between each one. A clean look makes a big difference. For garnishing, use fresh berries and mint leaves. This adds color and freshness. A little lemon zest on top can also brighten the dish. Make your tarts look as delightful as they taste! {{image_4}} You can make these lemon tarts even more exciting! Adding lime or orange juice gives a fun twist. A splash of lime makes them tangy and fresh. Orange juice adds a sweet note, balancing the tartness. You can also mix in herbs like basil or mint. These herbs bring a unique flavor that surprises your taste buds. If you want to switch up the sweetness, try different options. Coconut sugar is a great choice. It adds a rich flavor and is less processed. Agave syrup is another sweet option. It blends smoothly into the filling and adds a light sweetness. Looking for a different crust? You can use gluten-free flour to make it suitable for everyone. This flour works well and keeps the tarts tasty. If you like experimenting, try using dates instead of flour. Dates create a chewy and sweet crust that adds depth. To keep your mini vegan lemon tarts fresh, store them in the refrigerator. Place them in an airtight container to avoid moisture. This method helps maintain their creamy filling and crispy crust. If you want to keep the tarts longer, consider freezing them. Wrap each tart in plastic wrap, then put them in a freezer-safe bag. This way, they stay fresh for up to three months. When you're ready to enjoy them, simply take them out and let them thaw in the fridge overnight. In the fridge, these mini vegan lemon tarts last about five days. Look for any signs of spoilage, like off smells or changes in texture. If you notice any dark spots on the filling, it's best to toss them. Storing them properly helps keep their bright flavor and delightful texture intact. These mini vegan lemon tarts can last up to five days in the fridge. Store them in an airtight container to keep them fresh. I recommend eating them within the first three days for the best taste and texture. If you notice any changes in smell or appearance, it's best to discard them. Yes, you can! To make these lemon tarts gluten-free, simply use gluten-free flour. Almond flour is already gluten-free, making it a great choice for the crust. You can also use a gluten-free baking mix if you prefer. Just check the labels to ensure they are certified gluten-free. If you want to avoid cashews, you can use silken tofu or sunflower seeds. Silken tofu will give you a creamy texture, and sunflower seeds blend well for a nut-free option. Just remember to soak sunflower seeds for a few hours before blending for the best results. Yes, you can prepare the filling ahead of time. Just blend the ingredients and store them in the fridge. Make sure to cover the mixture tightly. The filling will stay fresh for about three days. When you're ready, pour it into the cooled crust and chill the tarts as usual. This blog post covered how to make delicious mini vegan lemon tarts. We explored the simple ingredients for both the crust and the filling. Each step, from mixing the dough to chilling the tarts, is key to getting great flavor. I shared tips for a perfect crust and filling. You even have options for variations and storage. With these instructions, you can create a treat that looks good and tastes amazing. Enjoy making and sharing these tarts!

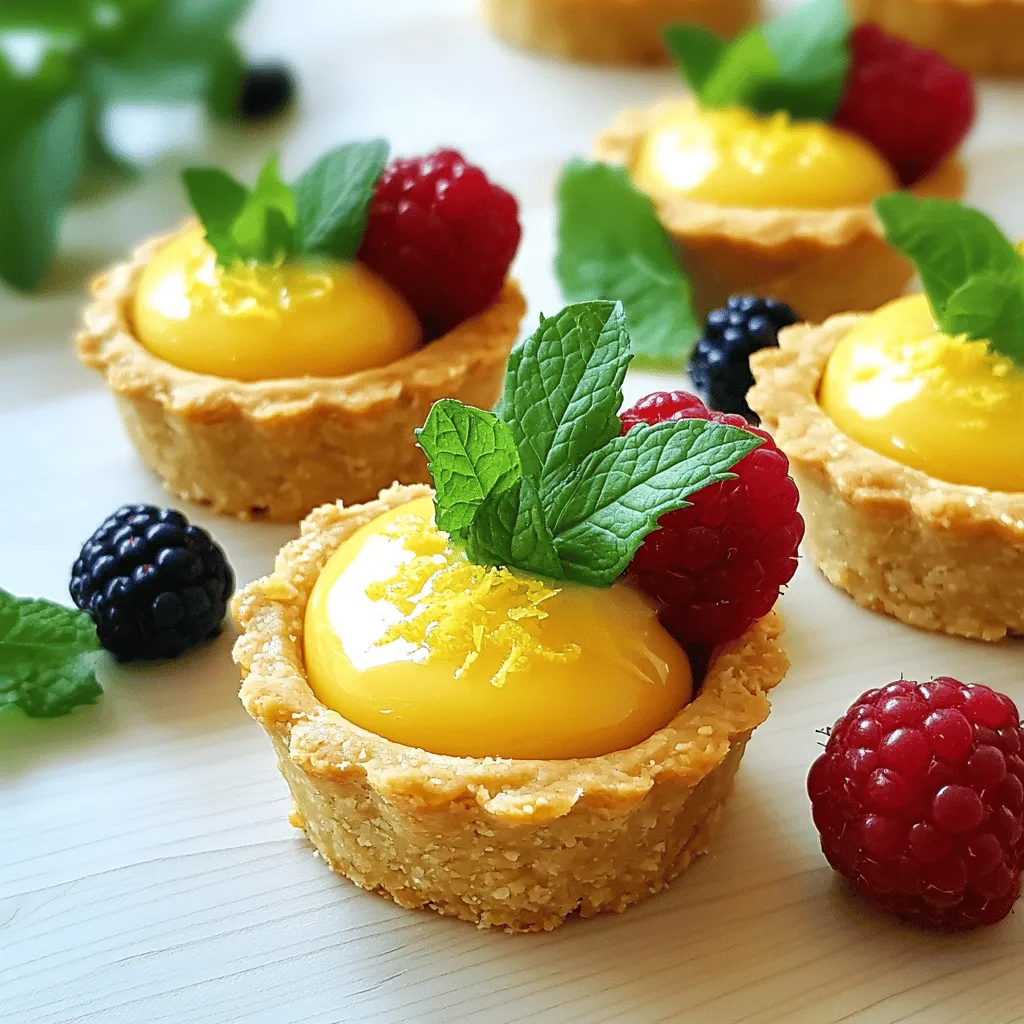
Mini Vegan Lemon Tarts Delightful and Easy Recipe

Are you ready to make a dessert that is both tasty and kind? These Mini Vegan Lemon Tarts are easy

To make the Blue Violet Gradient Drink, gather these items. The vibrant colors and flavors will impress everyone! - 1 cup blue spirulina powder - 1 cup coconut water - 1 cup violet butterfly pea flower tea, cooled - 1 tablespoon honey or agave syrup (optional) - 1 lime, juiced - Ice cubes - Fresh mint leaves for garnish Using blue spirulina adds a beautiful color and boosts nutrition. Coconut water keeps the drink refreshing. The butterfly pea flower tea gives that stunning blue-violet look. You can add honey or agave syrup if you want it sweeter. Squeeze fresh lime juice to brighten the flavors. Don’t forget the ice cubes! They help keep the drink cold and make the layers stand out. Finally, fresh mint leaves will add a lovely touch. For the complete recipe, check out the Full Recipe. Enjoy making this colorful drink! 1. Boil water and steep dried butterfly pea flowers. Start by boiling about two cups of water in a medium pot. Once it reaches a rolling boil, remove it from the heat. Add 1-2 teaspoons of dried butterfly pea flowers to the hot water. This will give your drink its stunning blue color. 2. Strain and cool the tea. Let the flowers steep for about 10 minutes. This allows the water to absorb the vibrant blue color. After steeping, strain the tea into a separate container. Set it aside to cool completely. This tea will be a key part of your drink's gradient. 1. Combine blue spirulina powder, coconut water, and lime juice. In a blender, add 1 cup of blue spirulina powder, 1 cup of coconut water, and the juice of one lime. If you like, add 1 tablespoon of honey or agave syrup for sweetness. 2. Blend until smooth. Blend the mixture on high until it becomes smooth and frothy. This step ensures the spirulina mixes well with the other ingredients, creating a bright, flavorful base for your drink. 1. Fill a glass with ice. Take a tall glass and fill it to the brim with ice cubes. The ice helps keep the layers distinct and prevents them from mixing too quickly. 2. Pour in the spirulina mix. Slowly pour the blended spirulina mixture over the ice until the glass is filled halfway. Be gentle while pouring to keep the ice intact. 3. Create the gradient effect. Now, carefully pour the cooled butterfly pea flower tea over the back of a spoon. This technique allows the tea to float atop the spirulina mixture, forming a beautiful blue-violet gradient. 4. Garnish and serve. Finally, top the drink with fresh mint leaves for a delightful aroma and a pop of color. Your drink is now ready! Enjoy its stunning look and refreshing taste. For the complete recipe, refer to the [Full Recipe]. To make your drink look stunning, focus on your pouring technique. Pour the spirulina mix slowly over the ice. This helps keep the layers separate. Use the back of a spoon to pour the butterfly pea tea gently. It will create a nice float on top. Ice is key here. It holds the drink layers in place. If you skip the ice, the colors will mix too quickly. You can change how sweet your drink is. If it is too tart, add honey or agave syrup. These sweeteners mix well and enhance the taste. You can also add other fruits or citrus. Try lemon or orange juice for a new twist. Each addition brings a unique flavor to your drink. Garnishing makes your drink even more appealing. Fresh mint leaves add color and a lovely aroma. Place a sprig on top before serving. For events, consider using fun straws or colorful glasses. This adds flair and makes your drink pop. Your guests will love the look and taste! For the full recipe, check out the Blue Violet Gradient Drink section. {{image_4}} You can switch up the sweeteners in your Blue Violet Gradient Drink. Maple syrup or stevia are great options. They add unique flavors and cater to different diets. If you want to change the base, try flavored sparkling water instead of coconut water. This adds a fun twist and a fizzy texture. Experiment with what you like best! You can enjoy this drink in two ways: non-alcoholic and alcoholic. For a mocktail version, simply follow the recipe without any alcohol. It's refreshing and perfect for any occasion. If you want to make it boozy, add a splash of vodka or rum. This will give your drink an adult twist while keeping the vibrant look. Seasonal fruits can add a fresh taste to your drink. In summer, try adding strawberries or blueberries. In autumn, consider using slices of pear or apple. You can also get creative with color layering for holidays. For Halloween, think about adding orange juice for a spooky twist. The drink can fit any festive theme! The Blue Violet Gradient Drink stays fresh for about 24 hours in the fridge. After that, the flavors may fade. Make sure to seal it well in a container to keep it fresh. If you have leftover ingredients, store them separately. Keep the coconut water and spirulina mix in airtight containers. This method helps maintain their quality and taste. You can prepare the tea and spirulina mix ahead of time. Brew the butterfly pea flower tea and let it cool completely. Store it in the fridge for up to three days. The spirulina mix can also be made in advance. Blend the spirulina, coconut water, and lime juice, then store it in a container. Keep these components separate until you are ready to assemble your drink. This way, you'll ensure your Blue Violet Gradient Drink remains fresh and vibrant! The Blue Violet Gradient Drink is a stunning, layered beverage. It features a bright blue layer from blue spirulina and a rich violet layer from butterfly pea flower tea. When you look at it, the colors blend beautifully, creating a gradient effect. The taste is refreshing and slightly sweet, with a hint of lime. You will love how it tastes and looks! Yes, you can! If you want to skip spirulina, try using blue food coloring. You will still get a nice blue hue. Another option is to blend blueberries for a natural color. Both choices give you the vibrant look without losing flavor. You might miss some health benefits, but the drink will still be delicious. Yes, it is! The ingredients in this drink are all plant-based. Coconut water, butterfly pea flower tea, and lime are vegan. If you choose to use honey, it won't be vegan. You can easily swap honey for agave syrup. This way, the drink stays vegan and just as tasty. To reduce the sweetness, simply cut back on the sweetener. If you use honey or agave, try using only half the amount. You can also add more lime juice for a tangy taste. This will balance the sweetness and keep the drink refreshing. Adjusting the sweetness makes it perfect for your taste buds. This blog post detailed how to create a stunning blue violet gradient drink. You learned about each ingredient, from blue spirulina to butterfly pea flower tea. I shared steps for preparation and tips for perfect layering. You can even customize the drink to your taste or the season. Enjoy making this vibrant drink for yourself or your guests. It’s a fun and healthy way to impress everyone with your skills. Remember, your creativity can make each glass unique!

Blue Violet Gradient Drink for Refreshing Flavor

Looking for a fun, colorful drink to impress your friends? The Blue Violet Gradient Drink is your answer! This refreshing

- 4 boneless, skinless chicken thighs - 1 cup long-grain rice - 2 cups low-sodium chicken broth - 1 cup BBQ sauce (your favorite) - 1 tablespoon honey - 1 tablespoon olive oil - 1 red bell pepper, diced - 1 cup frozen peas - 2 cloves garlic, minced - 1 teaspoon paprika - Salt and pepper to taste When I make One-Pan Honey BBQ Chicken Rice, I always start with quality chicken thighs. They stay juicy and tender, which makes a big difference in flavor. I use long-grain rice for a fluffy texture. Low-sodium chicken broth gives the rice a rich taste without too much salt. Next, I add my flavor enhancers. BBQ sauce is key. It brings a sweet and tangy kick. Honey adds a touch of sweetness that pairs well with the BBQ. I use olive oil to help cook the chicken and veggies. The vegetables are just as important. I love the crunch of a fresh red bell pepper. Frozen peas are great for a pop of color and nutrition. Garlic brings a warm, savory aroma, while paprika, salt, and pepper elevate all the flavors. For the full recipe, check out the details above. This dish is not just easy to make; it's also a delight to share with family and friends! To start, season the chicken thighs. Use salt, pepper, and paprika. Coat both sides well. This will add great flavor to the meat. Next, heat olive oil in a large pan over medium-high heat. Once the oil shimmers, add the chicken. Sear each thigh for about five minutes. Look for a nice golden crust. When they are browned, take them out and set them aside. In the same pan, add minced garlic and diced red bell pepper. This step brings out the sweet and savory notes. Sauté for 2-3 minutes, stirring often. You want the bell pepper to soften and the garlic to become fragrant. This creates a flavor base for the rice. Now, add uncooked long-grain rice. Stir well to coat the rice in the oil and flavors. Cook for 1-2 minutes until the rice looks slightly translucent. This helps enhance the rice's flavor. Next, pour in the low-sodium chicken broth. Increase the heat to bring it to a gentle boil. In a small bowl, whisk together your BBQ sauce and honey. Mix until it is smooth. Once combined, return the seared chicken to the pan. Place it right on top of the rice. Spoon the honey BBQ mixture over the chicken generously. This will create a tasty glaze as it cooks. Lower the heat to low and cover the pan with a lid. Let it simmer for about 20 minutes. This allows the rice to cook and absorb the broth. In the last five minutes, sprinkle frozen peas on top. Do not stir them in; just cover the pan again. The steam will warm the peas perfectly. Once cooking is done, take the pan off the heat. Let it sit covered for another five minutes. This resting time keeps all the flavors locked in. After resting, fluff the rice gently with a fork. Finally, garnish the dish with chopped green onions. This adds a fresh touch. You can serve it warm, enjoying the sweet and tangy flavor of the honey BBQ chicken rice. For the full recipe, check the previous section. To ensure your chicken is thoroughly cooked, use a meat thermometer. The internal temperature should reach 165 degrees Fahrenheit. This step keeps your meal safe and juicy. Always let the chicken rest for a few minutes after cooking. This helps seal in moisture. To achieve fluffy rice, rinse the rice under cold water before cooking. This step removes excess starch and prevents stickiness. Stir the rice gently during cooking to keep it from clumping. Lastly, let the rice sit covered for a bit after cooking. This will help it fluff up nicely. You can adjust the BBQ sauce to suit your taste. Try adding a splash of hot sauce for some heat or a squeeze of lemon for brightness. Feel free to mix in some mustard or Worcestershire sauce for depth. These simple tweaks can elevate your dish. For alternative seasonings, consider adding smoked paprika for a richer flavor. Herbs like thyme or rosemary can also enhance the dish. Experiment with different spices to find your perfect blend. For serving styles, you can dish the chicken and rice directly from the skillet. This gives a warm, cozy feel. If you want a more polished look, plate the rice first and then top it with the chicken. For visual appeal, add garnishes like fresh parsley or cilantro. Chopped green onions also add a nice crunch. A drizzle of additional BBQ sauce can make the dish extra tempting. Enjoy your beautiful creation! {{image_4}} You can switch out chicken thighs for chicken breasts if you prefer. Breasts cook faster and are leaner. Thighs offer more flavor and juiciness. You can also use quinoa or brown rice instead of long-grain rice. Quinoa adds protein and a nutty flavor, while brown rice gives a chewier texture. Try different BBQ sauce flavors to change the taste. Use honey BBQ for sweetness or a smoky sauce for depth. If you want heat, add hot sauce or diced jalapeños. These spicy additions can give your dish an exciting kick. To make it gluten-free, choose a gluten-free BBQ sauce. You can also swap out traditional rice for cauliflower rice. For vegetarians, use plant-based proteins like tofu or tempeh. Cook them in the same way as the chicken for similar flavors. These swaps keep the meal tasty and inclusive for everyone. For the full recipe, check out the one-pan honey BBQ chicken rice. To store your One-Pan Honey BBQ Chicken Rice, let it cool to room temperature. Place the leftovers in an airtight container. This helps keep the dish fresh. Use a container that seals well, like glass or plastic. Store it in the fridge for up to three days. This way, you can enjoy your meal later. When you’re ready to eat, reheat your chicken and rice safely. You can use the microwave or a skillet. For the microwave, place the dish in for about two minutes. Stir halfway for even heating. If you use a skillet, add a splash of water. This helps keep the rice moist. Heat on low until warm. If you want to save some for later, freezing is a great option. Portion the chicken and rice into small containers. This makes it easy to thaw later. Label each container with the date. To thaw, move it to the fridge overnight. Reheat in the microwave or on the stove. Just be sure to check that it’s hot all the way through. Yes, you can use various types of rice. Long-grain rice works best for this dish, but you can also use jasmine or basmati rice. If you prefer brown rice, add an extra cup of broth and increase the cooking time by about 10-15 minutes. Just make sure to adjust the liquid based on the type of rice you choose. To ensure the chicken is safe to eat, check its internal temperature. It should reach at least 165°F (75°C). Use a meat thermometer for accurate readings. The chicken should look white and no pink should show. If you cut into it, the juices should run clear. Yes, you can save time by using pre-cooked chicken. You can also choose instant rice, which cooks faster. Another tip is to chop the veggies in advance. This way, you can just toss them in the pan when you start cooking. This dish pairs well with simple side salads. You can also serve it with steamed broccoli or corn on the cob. For a crunchy option, try coleslaw or pickles. These sides help balance the sweet and savory flavors of the chicken. Yes, you can double the recipe. Just make sure your pan is large enough. You may need to cook it a bit longer to ensure the chicken and rice cook evenly. Keep an eye on the liquid level, adding a bit more broth if needed. To adjust the spice level, you can add hot sauce or cayenne pepper. If you like it milder, skip the paprika or use less. Consider using sweet BBQ sauce for a softer taste. You can also add jalapeños for a kick without overwhelming heat. This recipe for One-Pan Honey BBQ Chicken Rice blends savory chicken, fragrant rice, and vibrant veggies. You learned to season, sear, and combine flavors for a tasty meal. With tips on storage and variations, you can adapt this dish to fit your taste. Cook it your way, and enjoy each bite. Perfect for busy nights, this dish will impress your family and friends. Try it out, and savor the delicious results!

One-Pan Honey BBQ Chicken Rice Simple and Tasty Meal

Looking for a simple and tasty meal? My One-Pan Honey BBQ Chicken Rice fits the bill! This dish combines juicy

To make Thai Cashew Chicken Stir Fry, gather these key items: - 1 lb (450g) chicken breast, thinly sliced - 1 cup raw cashews - 1 red bell pepper, sliced - 1 green bell pepper, sliced - 1 small onion, sliced - 3 cloves garlic, minced - 1 tablespoon grated ginger - 1 cup broccoli florets - 3 tablespoons soy sauce - 1 tablespoon oyster sauce (or mushroom sauce for a vegetarian option) - 1 tablespoon fish sauce (optional) - 2 teaspoons sesame oil - 1 tablespoon cornstarch - 2 tablespoons vegetable oil - Salt and pepper to taste - Cooked jasmine rice for serving Feel free to add your twist to this dish with these options: - Additional vegetables like snap peas or carrots - Fresh herbs like cilantro or basil - A splash of lime juice for brightness - Chili flakes or fresh chili for heat Choosing fresh ingredients is key for great taste. Here are some tips: - Chicken: Look for bright pink meat without any gray spots. - Vegetables: Pick firm, vibrant peppers and broccoli. They should feel crisp. - Cashews: Choose raw cashews for the best flavor. They should smell nutty, not stale. - Garlic and Ginger: Look for firm garlic bulbs and fresh ginger root. Avoid any that feel soft or shriveled. Using fresh ingredients makes all the difference in flavor for your Thai Cashew Chicken Stir Fry. For the Full Recipe, be sure to refer back for step-by-step instructions! Start by making the cornstarch mix. In a small bowl, combine 1 tablespoon of cornstarch with 1 tablespoon of water. Stir until it’s smooth. This mix helps thicken the sauce later. Set it aside for now. Next, heat 1 tablespoon of vegetable oil in a large skillet or wok over medium-high heat. Once the oil is hot, add 1 cup of raw cashews. Toast them for 2-3 minutes, stirring often. You want them to be golden brown. When they are ready, take them out of the pan and set them aside. In the same skillet, add the remaining tablespoon of vegetable oil. When it’s hot, add 1 lb of thinly sliced chicken breast. Season it with salt and pepper to taste. Stir-fry the chicken for about 5-7 minutes. Make sure it’s cooked through and no longer pink. Once done, remove the chicken from the pan. Now, add 1 sliced onion, 3 minced garlic cloves, and 1 tablespoon of grated ginger to the skillet. Stir-fry for 1 minute until you smell the great aroma. Next, toss in 1 cup of broccoli florets and 1 sliced red and 1 sliced green bell pepper. Stir-fry the veggies for 3-4 minutes. They should stay crisp and bright. Return the cooked chicken to the skillet. Add 3 tablespoons of soy sauce, 1 tablespoon of oyster sauce, and 2 teaspoons of sesame oil. Stir well and cook for another 2 minutes. Gradually pour in your cornstarch mixture while stirring. Cook for 1 more minute until the sauce thickens. Finally, add the toasted cashews and mix everything gently. Serve this vibrant dish over cooked jasmine rice. For a nice touch, garnish with extra toasted cashews and finely chopped green onions. Enjoy your meal! For the complete recipe, check out the Full Recipe. When making Thai Cashew Chicken Stir Fry, a few errors can ruin your dish. Here are some to watch out for: - Overcrowding the Pan: If you add too many ingredients at once, they will steam instead of fry. This leads to a soggy stir fry. - Not Prepping Ingredients: Chop all your veggies and chicken before cooking. This keeps things quick and smooth. - Ignoring Heat Levels: Use medium-high heat for a perfect stir fry. Too low and the food cooks slowly; too high and it burns. Stir frying is all about speed and technique. Here’s how to master it: - Cut Uniformly: Slice chicken and veggies into similar sizes for even cooking. - Use the Right Oil: Choose oils with high smoke points, like vegetable or peanut oil. This helps prevent burning. - Keep it Moving: Stir continuously to cook everything evenly. This also helps develop those delicious flavors. Serving your Thai Cashew Chicken is just as important as cooking it. Here are some ideas: - Serve Over Jasmine Rice: This fluffy rice soaks up the sauce and balances flavors. - Garnish with Fresh Herbs: Top with cilantro or green onions for a fresh touch. - Pair with a Light Salad: A cucumber salad can add a crispy, refreshing contrast to the warm stir fry. For the full recipe, check out the details above. {{image_4}} To make this dish vegetarian or vegan, swap the chicken for tofu. Use firm tofu for the best texture. Press it to remove extra water, then cut it into cubes. You can also replace the oyster sauce with mushroom sauce to keep the umami flavor. This keeps the recipe rich and satisfying without meat. If you like heat, add sliced Thai chilies or a spoon of chili paste. You can also try adding a splash of lime juice for zing. Incorporate fresh basil or cilantro for herbal notes. These additions will take your stir fry to the next level, making it exciting and packed with flavor. You can also use shrimp, beef, or pork as protein choices. Cook shrimp for just a few minutes until they turn pink. For beef or pork, slice it thin like chicken and stir-fry until cooked through. Each protein brings a unique taste and texture. Feel free to mix and match proteins to suit your taste. Check out the Full Recipe to explore more variations! To keep your Thai Cashew Chicken Stir Fry fresh, first let it cool. Place the stir fry in an airtight container. You can store it in the fridge for up to three days. If you want to keep it longer, freeze it. Use a freezer-safe container for freeze storage. The stir fry can last up to three months in the freezer. When it's time to eat your leftovers, reheat gently. Use a skillet over medium heat for the best result. Add a splash of water or broth to keep it moist. Stir occasionally to heat it evenly. You can also use a microwave. Heat in short intervals, stirring in between. This helps keep the flavor fresh. Meal prep is a great way to save time. Prepare the chicken and veggies ahead of time. Cut them and store them in separate containers. When you're ready to cook, just stir-fry everything together. You can also make a big batch of the sauce. Store it in the fridge for quick use during the week. This way, you can enjoy fresh stir fry with little effort! You can use tamari or coconut aminos as a soy sauce substitute. Both have a similar taste. Tamari is a gluten-free option. Coconut aminos are sweeter and lower in sodium. You can also mix liquid aminos with a bit of water for a lighter flavor. To make this dish gluten-free, use tamari instead of regular soy sauce. Check your oyster sauce for gluten-free options or use mushroom sauce. Always read labels to ensure all ingredients are safe for your diet. You can add snap peas, carrots, or zucchini. Cauliflower and baby corn work well too. Feel free to mix and match based on what you have. This dish is flexible and lets you use seasonal veggies. Yes, you can prep the ingredients ahead. Chop the veggies and slice the chicken. Keep everything in the fridge until you're ready to cook. You can also cook the dish and store leftovers. Just reheat it gently for the best taste. To enhance flavor, use fresh garlic and ginger. Toast the cashews for a nutty flavor. Don’t skip the fish sauce; it adds depth. Stir-frying on high heat locks in flavors and keeps veggies crisp. Follow the Full Recipe for best results. You learned how to make delicious Thai Cashew Chicken Stir Fry. We covered key ingredients, preparation steps, and tips to avoid common mistakes. Customization options let you make it your own. Storing leftovers and reheating methods ensure you enjoy it later. Cook this dish for a tasty meal that satisfies. Explore variations and have fun with the recipe. Enjoy the flavors and impress your friends and family with your cooking skills.

Thai Cashew Chicken Stir Fry Flavorful and Simple Recipe

Are you ready to whip up a dish that’s bursting with flavor and super simple? Thai Cashew Chicken Stir Fry

To make these delightful cookies, gather the following ingredients: - 1 cup all-purpose flour - 1/2 cup matcha powder - 1/2 cup unsalted butter, softened - 1 cup granulated sugar - 1 large egg - 1/2 teaspoon pure vanilla extract - 1/4 teaspoon baking soda - 1/4 teaspoon fine sea salt - 1/2 cup freeze-dried strawberries, crushed - 1 tablespoon cornstarch You will need a few items to bake these cookies: - Mixing bowls - Hand mixer or stand mixer - Spatula or wooden spoon - Baking sheet - Parchment paper - Wire rack If you have allergies or dietary needs, consider these swaps: - Use gluten-free flour for a gluten-free option. - Replace the egg with a flax egg (1 tablespoon flaxseed meal + 2.5 tablespoons water). - For dairy-free cookies, try vegan butter or coconut oil. - Use another fruit powder instead of matcha, like cacao powder for a chocolate twist. These options ensure everyone can enjoy your sweet treats. For the full recipe, check out the complete instructions and enjoy baking! First, set your oven to 350°F (175°C). This temperature is key for baking these cookies well. While the oven heats, grab a baking sheet. Line it with parchment paper. This keeps cookies from sticking. Plus, it helps them bake evenly. In a large mixing bowl, cream the softened butter and granulated sugar. I use a hand mixer for about 3-4 minutes. You want it light and fluffy. Next, add one large egg and vanilla extract. Mix until everything is smooth. Now, take a separate bowl. Whisk together the flour, matcha powder, baking soda, cornstarch, and sea salt. Mix these dry ingredients well. Gradually add the dry mix to your wet mix. Stir gently with a spatula until the dough comes together. Don’t overmix, or the cookies might be tough! Divide the dough into two equal parts. In one half, fold in the crushed freeze-dried strawberries. This adds a fruity twist. The other half stays matcha-flavored. To form the cookies, take about 1 tablespoon of each dough. Roll them together to create a swirled look. Press them slightly flat before placing them on the baking sheet. Make sure to leave space between the cookies. They will expand while baking. Now, place the baking sheet in the oven. Bake for 10-12 minutes. The edges should be set, but the centers may look soft. Don’t worry; they will firm up as they cool. Let the cookies cool on the sheet for about 5 minutes. Then, transfer them to a wire rack to cool completely. For the full recipe, check the section above. Enjoy the delicious blend of flavors in your delightful cookies! To make the best swirl in your cookies, follow these tips. First, use equal parts of the matcha and strawberry dough. This helps keep the colors vibrant. When you roll the dough, don’t overwork it. Gently combine the two to keep the swirls visible. You want to see both colors! Press the dough lightly when flattening. This preserves the pretty swirl shape during baking. After baking, let the cookies cool completely. Store them in an airtight container. They’ll stay fresh for up to five days. If you want to keep them longer, freeze them. Wrap each cookie in plastic wrap, then place them in a freezer bag. To reheat, pop them in a warm oven for a few minutes. This restores their chewy texture. Get creative by adding fun flavors! Consider mixing in chopped nuts, like almonds or walnuts. You could also stir in mini chocolate chips for a sweet twist. For a zesty touch, add a bit of lemon zest to the matcha dough. This brightens the flavor and complements the strawberries well. Use the Full Recipe as a base, then make it your own! {{image_4}} You can easily make these cookies gluten-free. Just swap the all-purpose flour for a gluten-free blend. Look for a blend that works well in baking. Make sure it has xantham gum, which helps with texture. This way, you can enjoy the same great taste without gluten. To create a vegan version, replace the egg with a flax egg. Mix one tablespoon of ground flaxseed with two and a half tablespoons of water. Let it sit for five minutes until it thickens. Use vegan butter instead of regular butter. This keeps the delicious flavor while making the cookies vegan-friendly. Feel free to get creative with flavors. Add lemon zest for a bright and zesty twist. The fresh citrus flavor pairs well with both strawberry and matcha. If you love chocolate, mix in some chocolate chips. Dark chocolate or white chocolate adds a rich flavor. Experiment with different combinations to find your favorite blend. For the full recipe, check the beginning of this article. To keep your swirled strawberry matcha cookies fresh, place them in an airtight container. This will help maintain their soft texture and prevent them from drying out. You can layer the cookies with parchment paper. This protects them and keeps them from sticking together. Store them at room temperature for up to a week. If you want them to last longer, refrigerate them for up to two weeks. If you want to save some cookie dough for later, freezing is simple. First, scoop the dough into balls. Place them on a baking sheet and freeze until firm. Once they are solid, transfer the dough balls into a freezer-safe bag. Remove as much air as possible before sealing. You can freeze the dough for up to three months. When you're ready to bake, just let them thaw in the fridge overnight. Bake as usual! The shelf life of these cookies depends on how you store them. At room temperature, they stay fresh for about a week. In the fridge, they can last up to two weeks. If you freeze them, they last for about three months. Always check for any signs of spoilage before enjoying them, especially if stored for a long time. Follow the full recipe for the best results! If you don’t have matcha powder, you can use green tea powder. It gives a nice flavor and color. However, the taste will be less strong. You can also try spirulina for a different color. Both options work well in this cookie recipe. You can use fresh strawberries, but the result may change. Fresh berries add moisture to the dough. This can make your cookies too soft. If you use fresh strawberries, chop them finely and reduce the butter a little. This helps balance the moisture. Watch for the edges of the cookies. They should look set and slightly golden. The centers may still seem soft, but that’s okay. They will firm up as they cool. If you want a firmer cookie, bake them a minute longer. Enjoy the process of baking these cookies and savor the delicious swirls! Swirled Strawberry Matcha Cookies are a fun treat you can easily make at home. You learned about the key ingredients, equipment, and simple steps to prepare them. I shared tips for perfect swirls and how to store your cookies. You can even try gluten-free or vegan options. Baking these cookies brings joy and flavors together. Enjoy your baking adventure, and don't be afraid to experiment with flavors!

Swirled Strawberry Matcha Cookies Delightful Treat

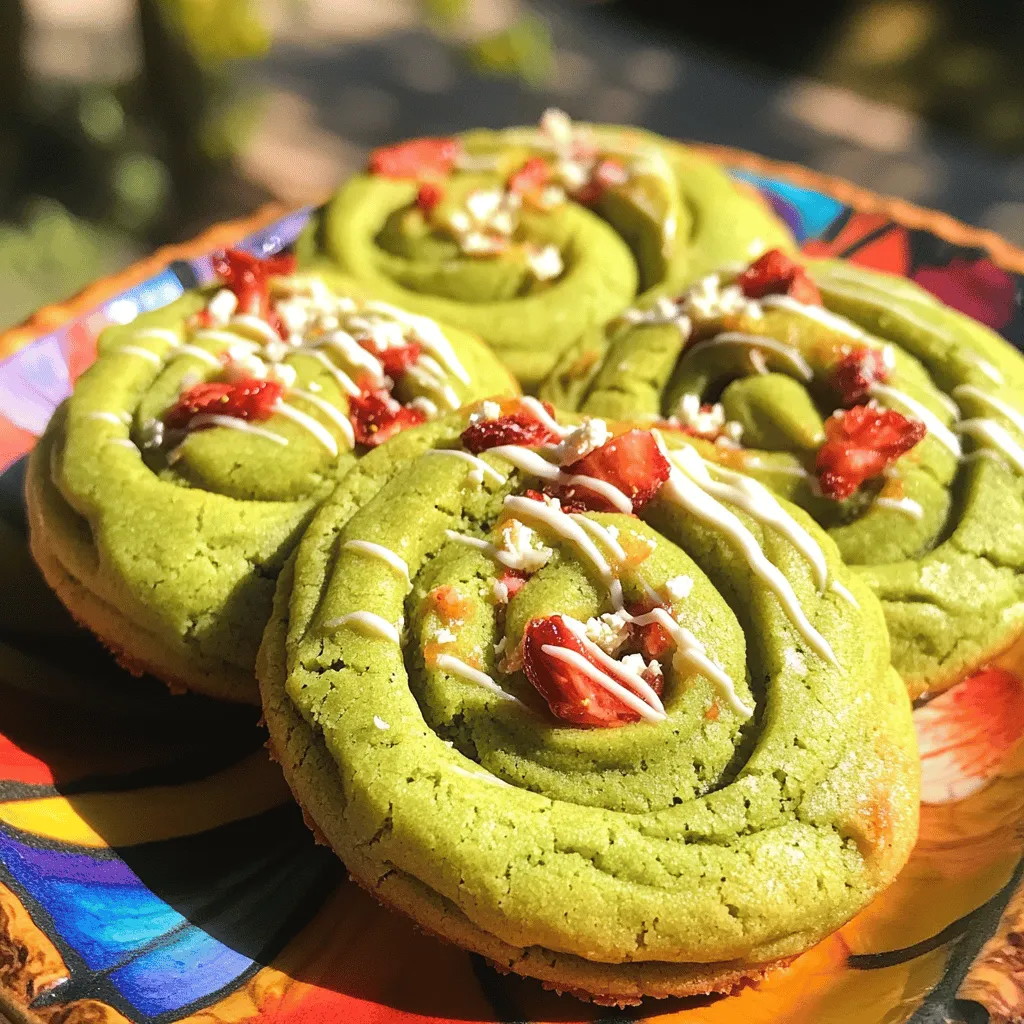
Get ready to indulge in the delightful world of Swirled Strawberry Matcha Cookies! These tasty treats combine the sweet flavor

- 1 ripe pineapple, peeled, cored, and diced - 1 large cucumber, diced - 1 red bell pepper, diced - 1 small red onion, finely chopped - 1 jalapeño, minced (optional) - 1/4 cup fresh cilantro, chopped - Juice of 2 fresh limes - 1 tablespoon honey or maple syrup - Salt and pepper to taste The ingredients in pineapple cucumber salad create a lively mix of colors and flavors. The pineapple adds sweetness and a tropical touch. Cucumber brings a refreshing crunch. The red bell pepper adds a pop of color and a mild taste. Red onion gives the salad a slight sharpness. If you like some heat, add the minced jalapeño. Fresh cilantro adds a burst of herbal flavor. Lime juice balances the sweetness and adds brightness. Honey or maple syrup adds a touch of sweetness, while salt and pepper enhance all the flavors. This combination makes the salad not only tasty but also visually appealing. You can find the full recipe for this delightful dish in the article. This salad is light, fresh, and packed with essential nutrients. Here’s a quick look at its nutritional value per serving: - Calories: Approximately 120 - Protein: 2 grams - Fats: 0.5 grams - Carbohydrates: 30 grams - Vitamins: High in vitamin C and antioxidants Pineapple and cucumber offer many health benefits. Pineapple is rich in vitamin C and bromelain, which may aid digestion. Cucumber is low in calories and high in water content, making it great for hydration. Using fresh ingredients means you get the best nutrients. They also taste better! Eating fresh foods can improve your mood and energy. This salad is a perfect way to enjoy these health benefits while savoring a delicious dish. - Peel and dice the pineapple. - Dice cucumber and bell pepper. - Finely chop red onion and jalapeño. Begin by preparing your fresh ingredients. Take a ripe pineapple and carefully peel it. Cut the pineapple into small, bite-sized pieces. Next, grab a large cucumber. Dice it into even cubes. For some color, use a red bell pepper. Dice it into small pieces as well. Now, finely chop a small red onion. If you like some heat, mince a jalapeño. Remember to remove the seeds to control the spice level. - Combine ingredients in a large bowl. - Prepare lime-honey dressing in a separate bowl. - Drizzle dressing over salad and toss. Once all your ingredients are ready, mix them in a large bowl. Add the diced pineapple, cucumber, bell pepper, red onion, and jalapeño. In another bowl, make the dressing. Squeeze the juice of two fresh limes into it. Add one tablespoon of honey or maple syrup if you prefer. Whisk the lime juice and honey until smooth. Now, drizzle this dressing over your salad. Gently toss the salad to coat everything evenly. - Add cilantro and season with salt & pepper. - Let the flavors meld before serving. Next, add about a quarter cup of roughly chopped cilantro to your salad. Season it with salt and freshly cracked black pepper. Toss everything one last time. Now, let your salad sit for about 10 to 15 minutes. This resting time helps the flavors blend together beautifully. Enjoy your fresh and flavorful pineapple cucumber salad! For the complete recipe, be sure to check out the Full Recipe section. - Let your salad rest for 10-15 minutes. This helps the flavors blend well. - Taste the salad and adjust the sweetness or acidity. You can add more lime juice or honey. - Serve the salad in a clear glass bowl. This shows off the bright colors. - Add lime wedges and cilantro on top for a pretty finish. - Don't overmix the salad. This can make the ingredients mushy. - Always use a ripe pineapple. Unripe pineapple can taste too sour and hard. {{image_4}} You can easily swap out ingredients in this salad. If you want a vegan option, try using maple syrup instead of honey. This gives a sweet touch without animal products. You can also add other veggies like bell peppers or carrots. Fruits like strawberries or oranges work well too. These changes can add new flavors and make the salad even more fun. Want to make it special? Try adding fresh herbs like mint. Mint adds a cool flavor that pairs well with pineapple. You can also toss in some nuts or seeds. Chopped walnuts or sunflower seeds add a nice crunch. This extra texture makes each bite exciting. To change things up, think tropical! Adding mango or kiwi gives a sweet twist. These fruits mix well with pineapple. For an Asian-inspired version, try a dressing with soy sauce and sesame oil. This adds a savory depth that will surprise your taste buds. You can find many ways to enjoy this salad. Each twist makes it unique and tasty. Store your leftover pineapple cucumber salad in the fridge. Use a tight lid to keep it fresh. The best way is to place it in a glass or plastic container. This helps keep all the flavors locked in. Try to eat it within 2 to 3 days for the best taste. After that, the cucumber may get soggy, and the flavors may fade. You should not freeze pineapple cucumber salad. Freezing changes the texture of the cucumber and pineapple. If you want to freeze, try freezing the pineapple and cucumber separately. Cut them into small pieces first. Use freezer bags or containers with airtight seals to prevent freezer burn. Use glass or BPA-free plastic containers for storage. Glass is great as it does not hold odors. Make sure your containers have airtight seals. This helps keep your salad fresh and tasty. If you use bags, squeeze out all the air before sealing. Proper storage keeps your salad vibrant and ready to enjoy! Yes, you can make Pineapple Cucumber Salad ahead of time. I recommend prepping the ingredients a few hours before serving. Keep the dressing separate until you're ready to serve. This keeps the salad fresh and crisp. If you make it the day before, store it in the fridge. Just remember to add the dressing right before serving. This salad pairs well with many dishes. You can enjoy it with grilled chicken or fish for a light meal. It also complements tacos or sandwiches nicely. If you want a vegetarian option, serve it with quinoa or rice bowls. This salad adds a refreshing touch to any meal. Yes, Pineapple Cucumber Salad is healthy! It is low in calories and high in vitamins. Pineapple has vitamin C and antioxidants. Cucumbers provide hydration and fiber. The salad is light and refreshing, perfect for a healthy snack or side dish. Absolutely! Adding protein makes this salad even better. You can mix in grilled chicken or shrimp for a tasty boost. If you prefer a plant-based option, try adding black beans or chickpeas. These options add flavor and make it a filling meal. For the full recipe, click here. This article covered how to make a fresh and tasty Pineapple Cucumber Salad. We explored the simple ingredients, step-by-step instructions, and useful tips to enhance flavor. Fresh, healthy ingredients bring great benefits and nutrition. The salad is versatile and easy to adjust to your tastes. In the end, enjoy making this salad your own. It's perfect for any meal and packed with flavor. Start mixing today, and savor the refreshing goodness!

Pineapple Cucumber Salad Fresh and Flavorful Delight

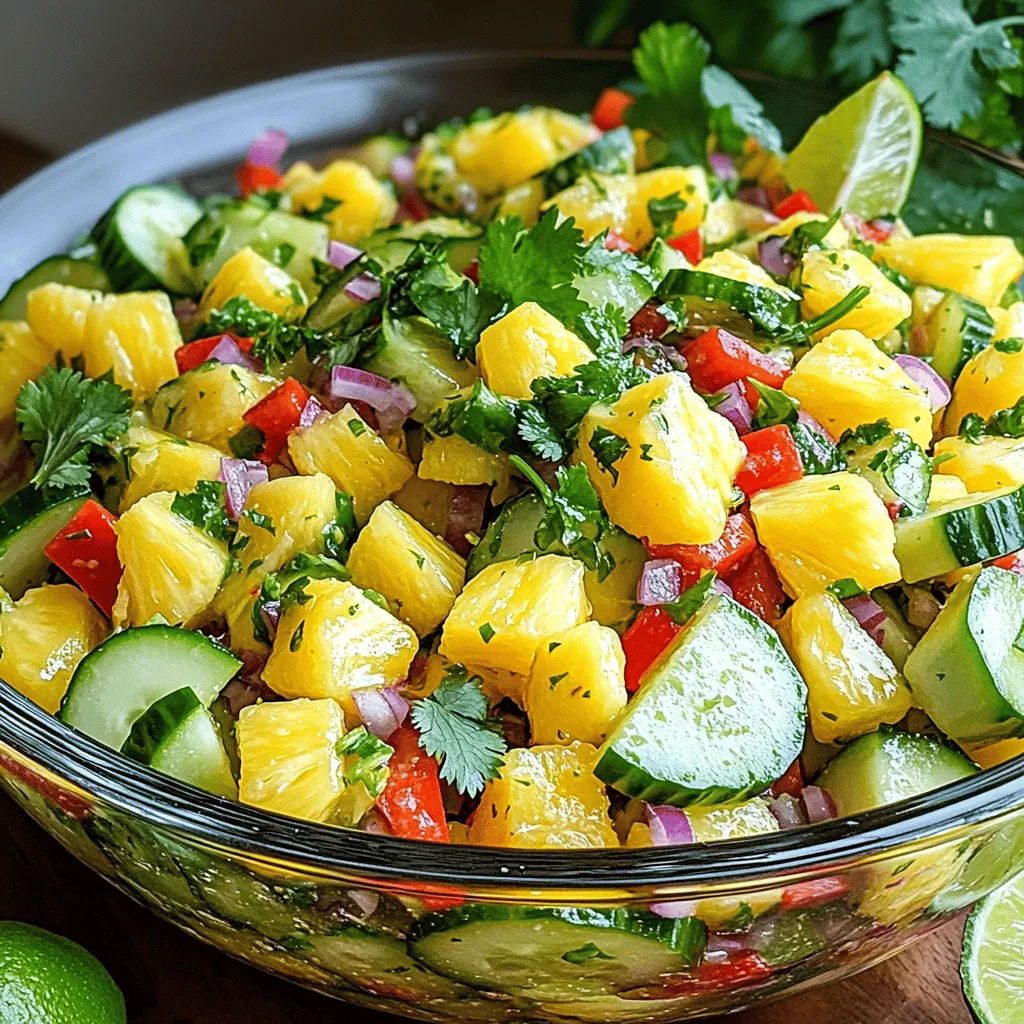
Looking for a refreshing dish that packs flavor and health benefits? Try my Pineapple Cucumber Salad! This vibrant blend of

To make a tasty Bow Tie Pasta Salad, you will need these key ingredients: - 2 cups bow tie pasta - 1 cup cherry tomatoes, halved - 1 cup cucumber, diced - 1 bell pepper (any color), chopped - 1/2 red onion, finely chopped - 1/2 cup feta cheese, crumbled - 1/4 cup black olives, sliced - 1/4 cup fresh basil, chopped - 1/4 cup olive oil - 3 tablespoons balsamic vinegar - Salt and pepper to taste You can make this salad your own by adding some optional ingredients: - 1 cup cooked chicken, diced - 1/2 cup corn, cooked - 1/4 cup artichoke hearts, chopped - 1/4 cup sun-dried tomatoes, sliced These options let you change the flavor and texture to suit your taste. If you can't find something on the list, don't worry! Here are some easy swaps: - Use farfalle or rotini pasta instead of bow tie pasta. - Swap feta cheese for goat cheese or mozzarella. - Try red wine vinegar in place of balsamic vinegar. - Substitute any fresh herbs like parsley or oregano for basil. These substitutions keep the dish fresh and delicious while making it fit your needs. For more, check out the Full Recipe. To cook bow tie pasta, start with a large pot. Fill it with about 4 quarts of salted water and bring it to a boil. Once the water bubbles, add 2 cups of bow tie pasta. Cook it according to the package instructions, usually 8 to 10 minutes for al dente. After cooking, drain the pasta in a colander. Rinse it under cold water to stop the cooking process and cool it down. While the pasta cooks, prepare your veggies. Start with 1 cup of cherry tomatoes. Slice them in half. Next, take 1 cup of cucumber and dice it into small pieces. Chop 1 bell pepper into bite-sized bits. Finally, finely chop 1/2 of a red onion. Gather all the chopped vegetables in a large mixing bowl for easy access. Once the pasta is cool, add it to your bowl of chopped veggies. Now, add the flavor! Toss in 1/2 cup of crumbled feta cheese, 1/4 cup of sliced black olives, and 1/4 cup of fresh basil. For the dressing, whisk together 1/4 cup of olive oil, 3 tablespoons of balsamic vinegar, and a pinch of salt and pepper in a small bowl. Pour the dressing over the pasta and veggies. Gently mix everything with a large spoon. Make sure the dressing coats all the ingredients evenly. To finish, cover the bowl and chill it in the fridge for at least 30 minutes. This lets all the flavors come together. Enjoy your fresh and flavorful bow tie pasta salad! For a detailed recipe, check the Full Recipe. When cooking bow tie pasta, always use plenty of water. This helps the pasta cook evenly. Add a pinch of salt to the water for flavor. Cook the pasta until it is al dente; this means it should be firm but not hard. Drain it right away and rinse with cold water to stop the cooking process. To make your pasta salad pop, use fresh herbs. Basil, parsley, or even dill can add a burst of taste. Don’t shy away from adding a squeeze of lemon juice for brightness. You can also mix in spices like garlic powder or red pepper flakes for extra zest. A good dressing is key; olive oil and balsamic vinegar work well together. Serve your pasta salad in a large, bright bowl. This showcases the vibrant colors of the vegetables. For a nice touch, sprinkle some extra feta cheese on top. Garnish with whole basil leaves for freshness. If you want to impress, add a drizzle of balsamic glaze over the top before serving. Try these tips to elevate your Bow Tie Pasta Salad Delight! For the full recipe, check out the earlier section. {{image_4}} You can easily make your bow tie pasta salad gluten-free. Use gluten-free pasta made from rice or quinoa. Whole wheat pasta is another good choice. It adds fiber and a nutty flavor. Just cook it like regular pasta, following the package directions. Both options keep the salad tasty and satisfying. Want to add some protein? Grilled chicken or shrimp works well. Cook the chicken until it is golden. For shrimp, sauté until they are pink and opaque. Chop them into bite-sized pieces and mix them into the salad. You can also use canned chickpeas for a veggie option. They add protein and a nice texture. In summer, use fresh veggies like zucchini or corn. They add a crisp bite and bright color. For winter, try roasted vegetables like sweet potatoes or Brussels sprouts. They give warmth and depth to the salad. Mix and match based on what is in season. This keeps your salad fresh and exciting all year long. For more ideas, check the Full Recipe. Storing leftover bow tie pasta salad is easy. First, let it cool down. Once it is cool, transfer it to a clean container. Make sure to seal it tightly. This keeps the salad fresh. You can store it in the fridge for up to three days. If you want to keep it longer, freeze it. However, freezing may change the texture. For best results, use glass or plastic containers with tight lids. Glass containers help keep the salad fresh and do not stain. Plastic containers are light and easy to handle. If you have smaller portions, use smaller containers. This makes it easy to grab a quick snack. Always label your containers with the date. This way, you know how long the salad has been stored. Bow tie pasta salad is best enjoyed cold. If you prefer it warm, you can gently reheat it. First, add a little olive oil to a pan. Heat it on low. Then, add the salad and stir it for a few minutes. Make sure not to overheat it. This can make the pasta mushy. After warming, serve it right away. Enjoy your meal! For the full recipe, check out Bow Tie Pasta Salad Delight. Yes, you can make Bow Tie Pasta Salad in advance. I often prepare it a day before. This way, the flavors blend well. Just store it in the fridge until you’re ready to serve. Remember to toss it lightly before serving to mix the ingredients again. Bow Tie Pasta Salad stays fresh for about 3 to 5 days in the fridge. Make sure to keep it in an airtight container. If you notice any changes in smell or texture, it's best to discard it. Enjoy it cold or at room temperature throughout the week. Bow Tie Pasta Salad pairs well with many dishes. You can serve it with grilled chicken or shrimp for protein. It also works great alongside garlic bread or a light soup. For a fresh touch, add a side of mixed greens or fruit salad. This mix creates a balanced meal that is both tasty and satisfying. We covered all the steps to make a great bow tie pasta salad. You learned about ingredients, cooking, and fun variations. Remember to play with flavors and adjust to your taste. Storing it right keeps it fresh longer. Whether you’re serving it for a party or a simple dinner, this dish shines. Now, go ahead and enjoy making your own tasty pasta salad!

Bow Tie Pasta Salad Fresh and Flavorful Delight

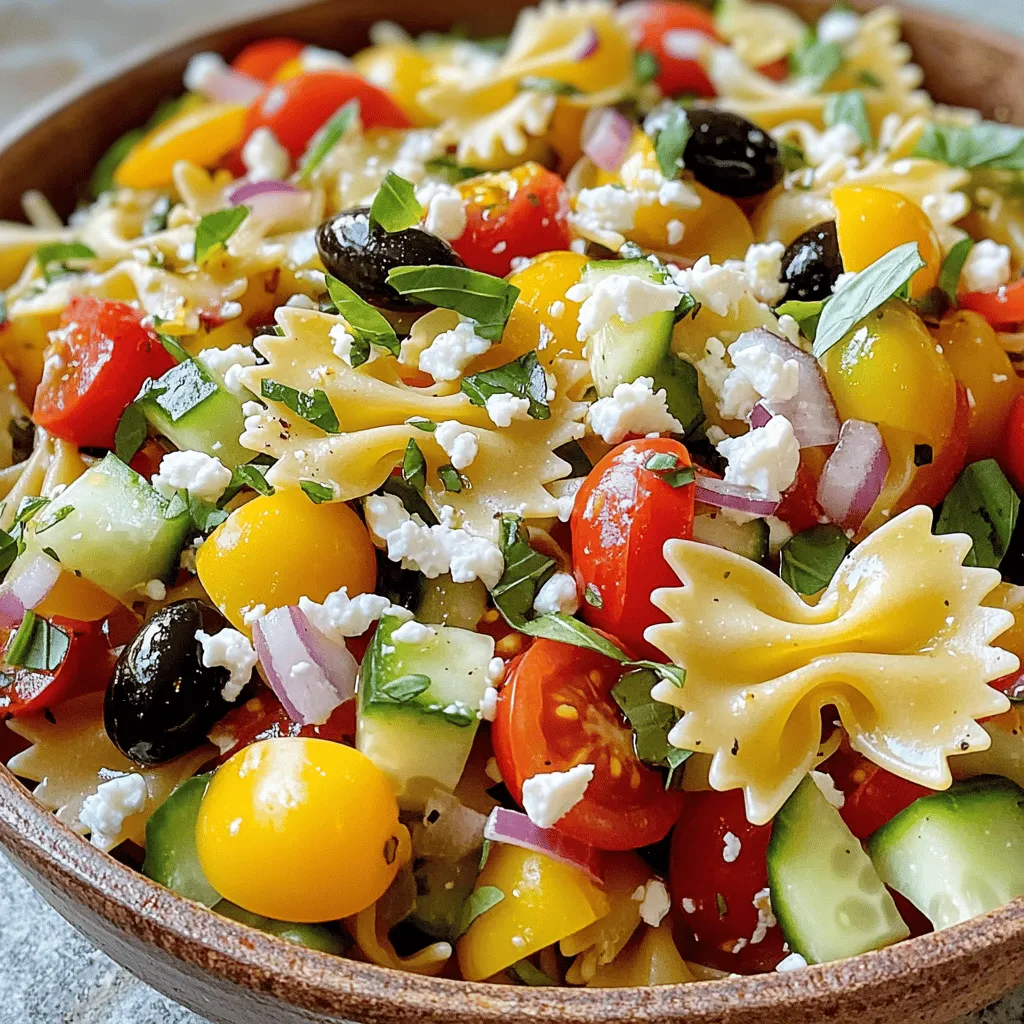
Looking for a fresh and tasty dish? Bow Tie Pasta Salad is the perfect choice. It combines vibrant veggies with

Let’s dive into the key elements that make this Peach Burrata Salad a true delight. The right mix of fresh ingredients creates bursts of flavor and texture. Here’s what you need: - 2 ripe peaches, sliced into thin wedges - 200g fresh burrata cheese, at room temperature - 4 cups arugula or a mix of your favorite greens - 1/4 cup walnuts, toasted and roughly chopped - 1/4 cup balsamic glaze, for drizzling - 2 tablespoons high-quality olive oil - Sea salt and freshly cracked black pepper, to taste - Fresh basil leaves, for garnish Each ingredient plays a crucial role. The ripe peaches add sweetness, while the burrata brings a creamy richness. Arugula offers a peppery crunch, and toasted walnuts provide a satisfying bite. The balsamic glaze ties everything together with its tangy sweetness. Using high-quality olive oil enhances the salad's depth. Don’t forget the seasoning! A sprinkle of sea salt and cracked pepper makes all the flavors pop. Lastly, fresh basil gives a lovely aroma and beautiful color. For the full recipe, check out the complete steps to create this vibrant dish. - Wash and slice the peaches. - Prepare the greens base. - Arrange the peaches and burrata. First, I wash the peaches under cool water. This step is key to remove any dirt. Next, I slice the peaches into thin wedges. Set them aside to let their sweet juices flow. Then, I take a large bowl and add the arugula or your favorite greens. This green base gives the salad a nice peppery taste. Spread it out evenly in the bowl. After that, I artfully arrange the peach slices over the greens. Make sure each bite gets some peach goodness. I gently tear the burrata cheese into bite-sized pieces. I scatter these creamy bits over the salad. This adds a rich texture that makes the dish special. - Sprinkle walnuts over the salad. - Drizzle olive oil and balsamic glaze. - Season with salt and pepper. Now, I sprinkle the toasted walnuts across the top. This adds a delightful crunch that pairs well with the creamy burrata. Next, I drizzle high-quality olive oil and balsamic glaze over the salad. This step enhances the flavor and brings everything together. Finally, I season with sea salt and freshly cracked black pepper. Then, I gently toss the salad to mix all the ingredients. Be careful to keep the burrata intact. For extra flair, I finish with fresh basil leaves. They not only look great but also add a lovely aroma. For the full recipe, refer to the earlier section. Enjoy your beautiful Peach Burrata Salad! - Choose ripe peaches for the best flavor: Look for peaches that are slightly soft and fragrant. This means they are ripe and sweet. A ripe peach will enhance the salad's taste. - Alternatives to burrata if unavailable: If you can't find burrata, try fresh mozzarella or goat cheese. Both will still give you that creamy texture you crave. - How to properly toast walnuts: To toast walnuts, heat a dry skillet over medium heat. Add the walnuts and stir often. Toast them until they are golden brown and fragrant, about 5 minutes. This step adds a lovely crunch and flavor. - Serving suggestions for gatherings: Serve your salad on a large, shallow platter. This makes it easy for guests to share. You can also place it in individual bowls for a personal touch. - Tips for an eye-catching display: Layer your ingredients. Start with the greens, then add peaches, burrata, and walnuts. This creates a colorful and inviting look. - Garnishing for added flair: Finish with fresh basil leaves. They add a pop of color and a fresh scent. A drizzle of extra balsamic glaze on top can also enhance the salad's appeal. For more details, check out the Full Recipe. {{image_4}} If you want to switch things up, try using nectarines or plums instead of peaches. They both provide a sweet and juicy flavor. You can also mix in seasonal fruits like berries or figs. These fruits add a fun twist and a pop of color. A homemade balsamic vinaigrette is easy to make. Just mix balsamic vinegar, olive oil, salt, and pepper. Shake it well for a fresh dressing. You can also try a honey mustard or citrus dressing. These options make the salad even more exciting. For the full recipe, check out the Peach Burrata Bliss Salad. To keep your Peach Burrata Salad fresh, store it in an airtight container. This helps keep moisture in and air out. If you have extra salad, it's best to separate the dressing and toppings from the greens. This way, your salad stays crisp and delicious. The salad lasts about 1 to 2 days in the refrigerator. However, the burrata will lose its creamy texture over time. You can assemble the salad in advance, but wait to add the burrata and dressing until serving time. This keeps everything fresh. Prepare the peaches, walnuts, and greens a day ahead. When ready to eat, just layer everything and drizzle the balsamic glaze. It’s easy and saves time! You can find the full recipe for this delightful salad in the earlier sections. Can I make this salad vegan? Yes, you can make this salad vegan. Simply replace burrata cheese with a vegan cheese alternative. You can also try using avocado for creaminess. This keeps the salad rich and flavorful. How can I add protein to the salad? To add protein, try grilled chicken or shrimp. You can also use chickpeas or lentils for a plant-based option. These additions will make the salad heartier and more satisfying. Is it possible to prepare this salad in advance? Yes, you can prepare some parts in advance. Wash and slice the peaches and store them in the fridge. Keep the greens and burrata separate until serving. This way, everything stays fresh and crisp. Where did the Peach Burrata Salad originate? This salad hails from Italy, where fresh ingredients shine. It combines local peaches with creamy burrata, celebrating the summer harvest. The dish showcases the Italian love for fresh produce and simple flavors. What can I serve with this salad? Serve this salad with grilled meats or seafood for a complete meal. It also pairs well with crusty bread or a light soup. The bright flavors complement many dishes, making it versatile. How do I make homemade balsamic glaze? To make balsamic glaze, simmer balsamic vinegar in a saucepan. Cook it until it thickens, about 15-20 minutes. This makes a sweet and tangy drizzle perfect for salads. You can store the glaze in the fridge for up to a month. For the full recipe, check out the section on Peach Burrata Bliss Salad. This blog post shared a simple and tasty peach burrata salad recipe. You learned the ingredients, preparation steps, and how to add your personal touch. I also provided tips on storage and meal prep to keep your salad fresh. This salad is easy, fun, and great for any meal or gathering. Explore different fruits and dressings to make it your own. Enjoy this bright, delicious dish that highlights fresh flavors!

Peach Burrata Salad with Balsamic Drizzle Delight

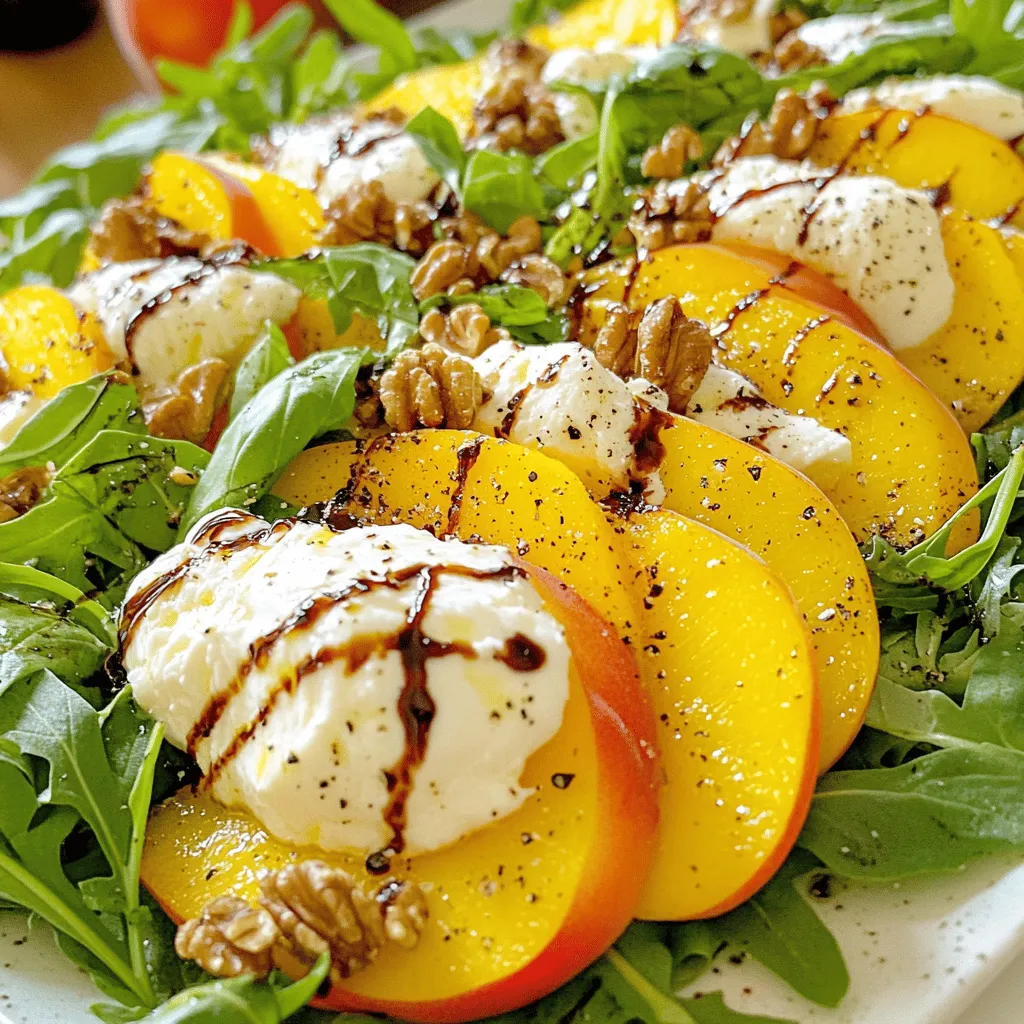
Craving a fresh, vibrant salad that bursts with flavor? Meet the Peach Burrata Salad with Balsamic Drizzle! This delightful dish

When making Lemon Impossible Pie, you need a few simple ingredients. Each one plays a key role in the pie’s delightful flavor and texture. Here’s the list you will need: - 1 cup all-purpose flour - 1 cup granulated sugar - 1/2 cup unsalted butter, melted (plus extra for greasing) - 3 large eggs - 2 cups whole milk - 1 tablespoon freshly grated lemon zest - 1/4 cup freshly squeezed lemon juice - 1 teaspoon baking powder - 1/2 teaspoon salt - Powdered sugar for dusting (optional) These ingredients come together to create a unique pie. You’ll see the magic happen as it bakes. The batter will separate while baking, forming layers. The creamy custard base pairs perfectly with the light, airy top. You can find the full recipe above. Enjoy the process! - Preheat the oven to 350°F (175°C) and grease the pie dish. - In a bowl, combine melted butter and granulated sugar. - Add the eggs one at a time, whisking until smooth. - Incorporate milk, lemon zest, and lemon juice into the mix. - Sift and fold in the dry ingredients gently. - Pour the batter into the greased dish and bake. - Bake for about 45-50 minutes until golden. - Let the pie cool completely in the dish. - Serve chilled or at room temperature. Dust with powdered sugar if you like. For the complete recipe, check the Full Recipe section. To make the best Lemon Impossible Pie, start with the right temperature. Use eggs and milk at room temperature. This helps the batter mix well. Cold ingredients can lead to clumps. Next, prevent over-mixing. When you combine the dry and wet ingredients, stir gently. Stop mixing as soon as no dry flour shows. Over-mixing can ruin the pie’s texture. Check for doneness by using a toothpick. Insert it into the center of the pie. If it comes out clean, the pie is ready. The top should be golden brown and slightly puffed. You can add more zest or juice for a stronger lemon taste. Try using lime juice or orange zest for a twist. These alternatives can change the flavor profile while keeping it fresh. If you want a less sweet pie, consider alternative sweeteners. Natural options like honey or maple syrup work well. Adjust the amount based on your taste. This pie shines when served with ice cream or whipped cream. These creamy sides balance the tartness of the lemon. They also add a lovely texture. Pair your Lemon Impossible Pie with a refreshing drink. I recommend iced tea or homemade lemonade. These drinks enhance the citrus taste and make your dessert feel special. {{image_4}} You can easily change the taste of your Lemon Impossible Pie. Try using other citrus fruits like lime or orange for a different zing. They add a fresh twist. You can also mix in berries or other fruits. Blueberries, raspberries, and strawberries create a fun color and taste. They pair well with lemon and make each slice pop with flavor. If you need gluten-free options, use almond flour or oat flour instead of all-purpose flour. These flours work well and keep the pie light. For those who want a dairy-free version, use coconut milk or almond milk. These options still give a creamy texture while being friendly to your diet. You can make your lemon pie festive for holidays. Add spices like nutmeg or cinnamon for a warm flavor during fall and winter. In the summer, try topping your pie with fresh seasonal fruits. Sliced strawberries or peaches look beautiful and add sweetness. These small changes keep the pie exciting all year long. Check out the Full Recipe for more ideas! To keep your Lemon Impossible Pie fresh, store leftovers in the fridge. Use an airtight container to prevent drying out. You can also wrap it tightly in plastic wrap. This helps keep the pie moist and tasty. The pie stays fresh in the fridge for about 3 to 4 days. If you want to keep it longer, you can freeze it. Wrap it well in plastic wrap and aluminum foil. This way, it can last for up to 2 months in the freezer. When it’s time to enjoy your pie again, use a safe method to reheat it. Preheat your oven to 350°F (175°C). Place the pie on a baking sheet and warm it for about 15-20 minutes. This helps to restore its lovely texture without making it soggy. Enjoy your Lemon Impossible Pie chilled or warm! For the full recipe, check out the complete instructions. Lemon Impossible Pie is a unique dessert. It has a creamy base and a fluffy top. As it bakes, the layers separate. The bottom becomes custard-like, and the top is light and airy. This pie has a bright lemon flavor, making it refreshing. It’s easy to make and perfect for any gathering. Yes, you can make Lemon Impossible Pie ahead of time. I suggest baking it the day before. Once it cools, store it in the fridge. This allows the flavors to meld together. Just remember to dust it with powdered sugar before serving. To check if your pie is done, look for a light golden color on top. Insert a toothpick into the center. If it comes out clean, your pie is ready. The edges should be firm, but the center may still jiggle slightly. Absolutely! You can use almond milk, coconut milk, or oat milk. Each will give a different flavor. Just make sure the substitute is unsweetened for the best results. Adjust the recipe slightly if needed to match the milk's consistency. This article covered how to make a delicious Lemon Impossible Pie. You learned about the key ingredients and step-by-step instructions. I also shared tips to enhance flavor and suggested variations to try. Storage info ensures your pie stays fresh and tasty. Feel free to experiment with different flavors and substitutions. Baking should be fun, so enjoy every moment. Happy baking!

Lemon Impossible Pies Delightful and Simple Treat

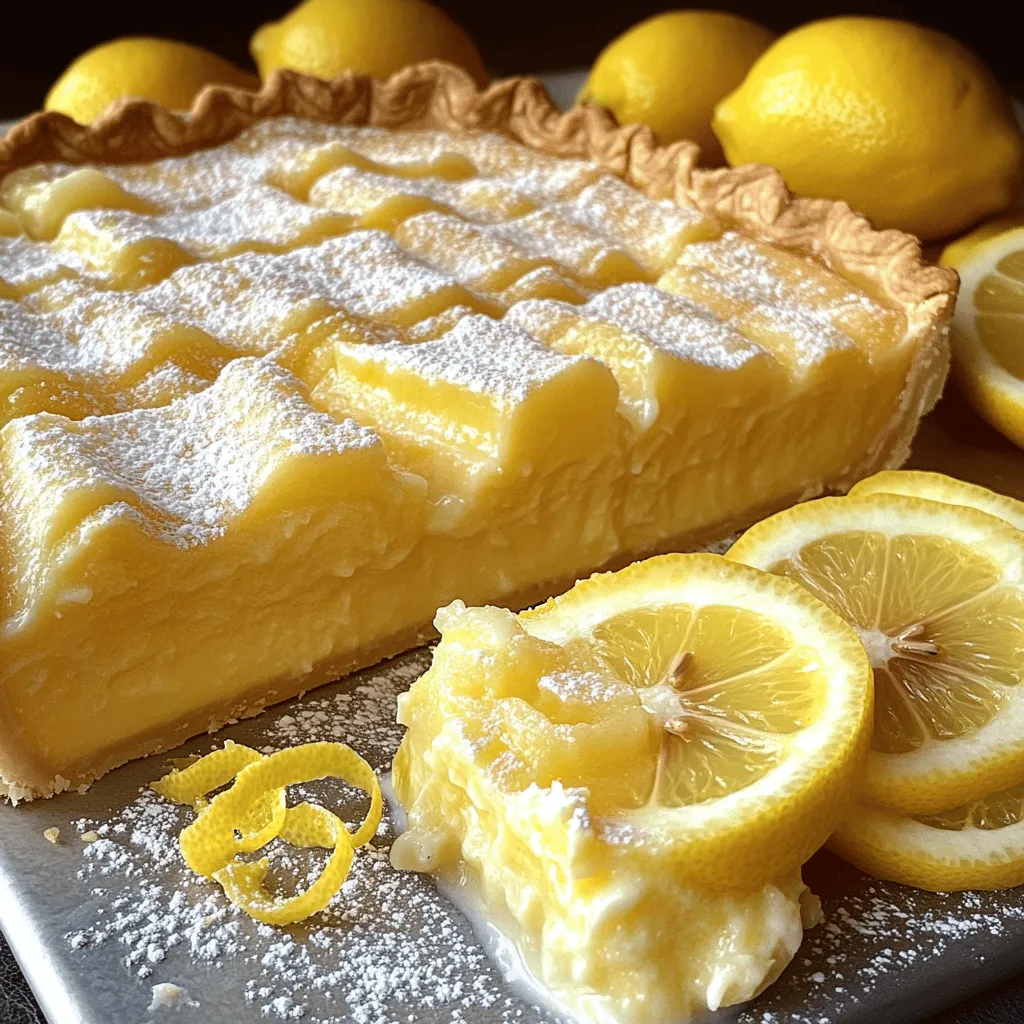
Looking for a simple and zesty dessert? Let me introduce you to Lemon Impossible Pie! This delightful treat is easy

To make these fun treats, you need: - 2 cups of vibrant fruit juice - 1 cup of hydrating coconut water - 1 tablespoon of honey or agave syrup (optional) - 1 cup of diced fresh fruit - Small paper cups or reusable ice pop molds You can use many tasty juices for your otter pops. Here are some great choices: - Fresh orange juice for a zesty kick - Rich grape juice for a sweet treat - Mixed berry juice for a fruity blend - Pineapple juice for a tropical flavor - Apple juice for a classic taste Adding fruit makes your otter pops extra special. Try these fresh fruits: - Strawberries for a sweet burst - Kiwi for a unique tang - Mango for a tropical touch - Blueberries for a pop of color - Raspberries for a tart contrast Using the right ingredients makes all the difference. The blend of juice and fresh fruit creates a tasty and refreshing treat. For the full recipe, follow the steps to enjoy your homemade otter pops! First, grab a large mixing bowl. Pour in 2 cups of your choice of fruit juice. You can use fresh orange juice, rich grape juice, or even a mix of berries. Then, add 1 cup of coconut water for hydration. If you like your pops sweet, mix in 1 tablespoon of honey or agave syrup. Now, use a whisk or spoon to stir everything together until it blends well. Taste the mixture. If you want it sweeter, add more honey or syrup. Stir after each addition until you reach your perfect sweet spot. Next, it's time to fill your molds. Take small paper cups or ice pop molds and carefully pour in the juice mixture. Leave about a quarter of space at the top for expansion as it freezes. Now, grab your fresh fruit. Dice up some strawberries, kiwi, or mango. Add the diced fruit into each cup or mold. Use a spoon to gently push the fruit down so it gets covered in the juice. This gives your otter pops a fun fruity surprise! If you're using molds, insert popsicle sticks into the center. Make sure they are stable and centered in the mixture. Now, it’s time to freeze! Place your filled cups or molds in the freezer. Let them freeze for at least 4-6 hours. You want them to be solid before enjoying. When you’re ready to serve, remove the pops. If they’re stuck, run warm water over the outside of the cups or molds for a few seconds. This helps loosen them so they pop out easily. Now, you can enjoy your refreshing homemade otter pops, perfect for a hot summer day! For the full recipe, refer to the earlier section. To adjust sweetness in your otter pops, taste the juice mix first. If it needs more sweetness, add honey or agave syrup. Stir well after each addition. This way, you control the taste. Remember, some fruits are sweeter than others. Use those for a natural boost. If you want to avoid sugar, try other sweeteners. Stevia or maple syrup are great options. They add sweetness without extra calories. Always start with a small amount. Taste as you go to find the right balance for your otter pops. Freezer burn can ruin your pops. To avoid this, use airtight containers or wraps. Make sure the containers are tightly sealed. Leave some space in the cups for liquid expansion. This helps keep your otter pops fresh and tasty! {{image_4}} You can make otter pops with many flavors. Mix different fruit juices for fun. Here are some tasty combos: - Orange and Pineapple: A sweet and tangy mix. - Berry Medley: Combine strawberries, blueberries, and raspberries for a burst of flavor. - Grape and Lemonade: This mix gives a sweet and sour taste. - Watermelon and Mint: A refreshing twist for hot days. Feel free to get creative! Try your favorite juices to find new tastes. Making otter pops that fit everyone’s needs is easy. Use fruit juices and coconut water for a vegan base. Instead of honey, try agave syrup or maple syrup. This keeps it vegan and sweet. Check for allergies by choosing fruits that are safe for everyone. Always read labels on store-bought juices and syrups to avoid allergens. You can add unique flavors to your otter pops. Try these fun add-ins: - Basil: This herb adds a fresh taste, especially with berries. - Ginger: A little ginger gives a spicy kick to any fruit mix. - Cinnamon: Sprinkle some cinnamon for a warm flavor, great with apples or pears. - Chili Powder: For those who love heat, a pinch of chili powder can spice things up. These add-ins make your pops unique and exciting. Enjoy exploring different flavors! To store your homemade otter pops, keep them in the freezer. Place them in a sealed container, or wrap them in plastic wrap. This helps prevent ice crystals from forming. If you use paper cups, stack them gently. Make sure they are upright to avoid spills. Homemade otter pops can last up to three months in the freezer. After that, they may lose flavor and texture. Always check for freezer burn before enjoying them. If they look odd or have ice crystals, it’s best to toss them. If your otter pops thaw out, you can refreeze them. Just make sure they are still safe to eat. Check for any signs of spoilage. To refreeze, place them back in the molds or cups and put them in the freezer right away. Remember, repeated thawing and refreezing can change their texture. Enjoy them fresh for the best taste! Homemade Otter Pops need at least 4 to 6 hours to freeze. This time lets them become solid and icy. If you want them ready sooner, you can freeze them for a bit longer. Just check them after 6 hours. If they feel hard, they are ready to eat! Yes, you can use small paper cups or any freezer-safe container. Just make sure they can hold liquid. If you use cups, remember to add popsicle sticks before freezing. This way, you can easily pull them out when they are ready. For a fun texture, try using strawberries, kiwi, or mango. These fruits add color and flavor. You can also mix in blueberries or raspberries for more variety. Make sure to cut the fruit into small pieces. This helps them fit well in the pops and makes each bite tasty! Homemade Otter Pops are fun and easy to make. We covered the ingredients, from juice to fresh fruits. You learned how to prepare and freeze them well. I shared tips on sweetness and storage. You can try different flavors and add-ins for fun variations. These treats are perfect for hot days. Now, you can create your own tasty Otter Pops at home. Enjoy the process, and share your ideas with friends!

Homemade Otter Pops Refreshing Summer Treat Recipe

Looking for a fun way to beat the summer heat? Homemade Otter Pops are the perfect solution! These tasty frozen

Older posts
Newer posts
← Previous Page1 … Page30 Page31 Page32 … Page91 Next →

dsad

© 2025 recipesstation • Built with GeneratePress

Our Policies

  • Copyright Policy
  • Cookie Policy
  • GDPR Policy
  • Privacy Policy
  • Disclaimer
  • Terms Of Use

More Information

  • Home
  • About
  • Contact
  • Appetizers
  • Dessert
  • Dinner
  • Drinks
©2025, recipesstation About Back To Top