Skip to content
DisclaimerTerms Of UseGDPR PolicyCookie Policy

recipesstation

  • Home
  • Drinks
  • Appetizers
  • Dinner
  • Dessert
  • About
  • Contact
  • Privacy Policy
DisclaimerTerms Of UseGDPR PolicyCookie Policy

Emily

- 4 cups seedless watermelon, cut into bite-sized cubes - 1 large cucumber, diced into half-moon slices - 1 cup creamy crumbled feta cheese - 1/4 cup fresh mint leaves, finely chopped - 1/4 cup red onion, thinly sliced into rings - Sea salt and freshly cracked black pepper, to taste - 2 tablespoons premium extra-virgin olive oil - 1 tablespoon freshly squeezed lime juice This salad is bright and tasty. The main ingredients give it a fun mix of flavors. The watermelon is sweet and juicy, and the cucumber adds a cool crunch. I love how the feta cheese brings creaminess to each bite. For the aromatics and seasoning, fresh mint adds a burst of flavor. It makes the salad smell amazing! Using red onion gives it a sharp taste, and the salt and pepper bring everything together. The dressing is simple but packs a punch. Extra-virgin olive oil adds richness, while lime juice brings a zesty kick. You can find the full recipe to make this salad and impress your friends. - Cut the seedless watermelon into bite-sized cubes. - Place the cubes in a mixing bowl. Start by cutting your watermelon. This juicy fruit adds sweetness to our salad. Make sure the cubes are about one inch. This size helps them mix well with other ingredients. - Dice cucumber into half-moon shapes. - Gently fold into the bowl. Next, grab a large cucumber. Cut it into half-moon shapes. These shapes give a nice crunch. Gently fold the cucumber into the bowl with watermelon. This mix already looks colorful! - Add finely chopped mint and thinly sliced red onion. - Stir to combine. Now, we add fresh flavors! Chop up some mint leaves finely. Also, slice red onion into thin rings. Add both to your bowl. Stir everything gently. The mint gives a fresh taste, while the onion adds a bit of zing. - Whisk together olive oil, lime juice, salt, and pepper. For our dressing, take a small bowl. Whisk together olive oil and lime juice. Add a pinch of salt and some cracked black pepper. This mixture will add a burst of flavor. - Drizzle dressing over the salad mixture. - Toss gently to coat. Next, drizzle your dressing over the salad. Toss gently. You want every piece to get some dressing without smashing the watermelon. This will keep the salad fresh and bright. - Sprinkle feta cheese on top. - Lightly toss without breaking the cheese. Finally, sprinkle crumbled feta cheese on top of the salad. This cheese adds a creamy touch. Toss lightly, careful not to break the feta too much. This way, you get creamy bites with every scoop. For the full recipe, including ingredients and detailed steps, check out the Full Recipe. Enjoy your fresh and flavorful watermelon cucumber feta salad! - Serve in a large, shallow bowl or individual plates. - Garnish with whole mint leaves for color. For a stunning look, use a wide bowl. The bright colors will pop. Whole mint leaves add a fresh touch and aroma. You want your guests to feel excited before they even take a bite. - Allow salad to chill for 30 minutes before serving. - Adjust salt and pepper to taste. Chilling the salad helps the flavors mix well. The watermelon and cucumber absorb the dressing. Taste it before serving. You may want a bit more salt or pepper for a kick. - Use firm watermelon for the best texture. - Ensure cucumber is fresh for crunch. Choose a watermelon that feels heavy and firm. It should have a nice, sweet smell. Fresh cucumber adds a satisfying crunch. Avoid soft or mushy cucumbers to keep your salad crisp. For the full recipe, check it out [here](#). {{image_4}} Adding a twist to your Watermelon Cucumber Feta Salad keeps it fresh and fun. Here are some great ideas to change things up. - Add sliced avocados for creaminess. Avocados make the salad rich and smooth. - Incorporate cherry tomatoes for color and taste. They bring a juicy burst to every bite. - Try goat cheese for a different flavor profile. Goat cheese adds a tangy taste that contrasts well. - Use dairy-free feta for a vegan option. This keeps the salad plant-based and just as tasty. - Swap lime juice for lemon juice for a zestier taste. Lemon brightens the flavors while still being refreshing. - Experiment with balsamic vinegar for a sweet twist. Balsamic adds depth and a hint of sweetness. These variations let you customize your salad based on what you have at home or your taste. Feel free to mix and match! For the full recipe, check out the Watermelon Cucumber Feta Delight 🥒. Keep your watermelon cucumber feta salad in the fridge. Use an airtight container. It stays fresh for up to 1 day. I do not recommend long-term storage. The watermelon and cucumber can get soggy. This makes the salad less enjoyable. You can cut the watermelon and cucumber a few hours ahead. But dress the salad just before serving. This keeps the flavors bright and fresh. You want that crunch from the cucumber and the juiciness from the watermelon. For the full recipe, visit the Watermelon Cucumber Feta Delight section. Yes, but it's best to dress the salad just before serving to maintain freshness. The watermelon and cucumber taste best when they are crisp. If you dress it early, the salad may become soggy. Goat cheese or a dairy-free feta are good alternatives. Both options keep the salad creamy and flavorful. Goat cheese offers a tangy taste, while dairy-free feta is perfect for vegan diets. Not ideal for meal prep due to watermelon’s high water content, which can make it soggy. If you want to prep, keep the ingredients separate. Combine them just before eating for the best texture. Absolutely! Grilled chicken, shrimp, or chickpeas can be added for extra protein. These additions make the salad more filling and nutritious. You can customize it based on what you like! In summary, this watermelon salad blends juicy fruit, crisp veggies, and creamy feta. You learned to prepare it step by step, using fresh ingredients and simple dressing. Add mint and red onion for flavor, and consider tasty variations. Chilling before serving boosts taste. Keep it fresh for the best texture. Enjoy creating a colorful dish that delights at any meal!

Watermelon Cucumber Feta Salad Fresh and Flavorful Treat

Looking for a light and refreshing dish? This Watermelon Cucumber Feta Salad is just what you need! Juicy watermelon, crisp

- Fresh lemon juice - Blue butterfly pea flower tea - Sweetener options (honey or agave syrup) - Additional ingredients for garnishing To create a great Limonada Azul, you need fresh lemon juice. This gives the drink its bright, tangy taste. Use about 1 cup, which comes from about 4 to 6 medium lemons. Squeeze them right before you make the drink for the best flavor. Next, blue butterfly pea flower tea is key. It adds a stunning blue color. Brew 2 cups of this tea and let it cool. You can find it at specialty tea shops or online. For sweetness, you have options. Use honey or agave syrup, about ½ cup. You can adjust this to your taste. If you like it sweeter, add more, but start with this amount. Lastly, think about garnishing. Lemon slices and fresh mint leaves elevate the drink. These add color and a fresh scent. They also make your Limonada Azul look fancy! These ingredients combine to create a refreshing drink. You can find the full recipe above for the precise amounts and instructions. Enjoy your colorful summer drink! 1. Important steeping tips: Start with 1 cup of dried blue butterfly pea flowers. Use 2 cups of boiling water. Pour the hot water over the flowers. Let them steep for 10 minutes. This gives the tea its rich color. 2. Cooling the tea: After steeping, you need to strain the tea. Use a fine mesh strainer to separate the flowers. Allow the tea to cool to room temperature. If you want it chilled faster, place it in the fridge. 3. Straining the tea properly: Make sure to press the flowers gently while straining. This helps extract every bit of color and flavor. You want a smooth tea, free of any bits. 1. Tips for juicing lemons: You will need about 4 to 6 medium lemons for 1 cup of juice. Roll the lemons on the counter to loosen the juice. Cut them in half and squeeze. Use a strainer to catch seeds. 2. Dissolving sweeteners effectively: In a large pitcher, combine the fresh lemon juice and ½ cup of honey or agave syrup. Stir well. Use a whisk or spoon to ensure the sweetener dissolves completely. This creates a smooth and sweet lemon base. 1. Pouring techniques for visual appeal: Once your blue tea is cool, gently pour it into the lemon mix. As you pour, watch the colors blend. It creates a stunning blue hue against the yellow. 2. Balancing flavors after mixing: Add 4 cups of cold water to the pitcher. Stir gently to mix everything. Taste your limonada. If it needs more sweetness, add extra honey. If it's too tart, add a bit more water. To get the right sweetness, I suggest starting with half a cup of honey or agave syrup. Taste your limonada after mixing. If you want it sweeter, add more syrup. Remember, you can always add, but you can’t take away! Chilling time is very important. I recommend letting your limonada sit in the fridge for at least 30 minutes. This helps the flavors blend perfectly. If you are in a hurry, you can use ice, but chilling gives it a better taste. For serving, clear glasses work best. They show off the bright blue color of your limonada. You can also use tall glasses to make it look fancy. Garnishing adds a nice touch. I like to use lemon slices and fresh mint leaves. Drop a lemon slice on the rim of the glass. Add a sprig of mint in the drink. This makes your limonada look elegant and inviting! {{image_4}} You can add fresh fruit to your Limonada Azul for a burst of flavor. I recommend using: - Strawberries - Raspberries - Blueberries - Pineapple To add fruit, simply mash or blend the fruit into a puree. Then, strain it to remove any seeds or pulp. Mix the puree into your limonada for a fruity twist. Herbs can make your Limonada Azul even better. Here are some ideas for herbal infusions: - Fresh mint - Basil leaves To infuse herbs, muddle them in the pitcher before adding the other ingredients. This releases their oils and adds great flavor. You can also use flavored syrups, like lavender or ginger, for a fun twist. For a fun non-alcoholic drink, try pairing Limonada Azul with sparkling water. This adds fizz and refreshment. You can also create a creative mocktail version. Mix equal parts Limonada Azul and tonic water. Garnish with fruit slices or herbs for style. Enjoy these refreshing options! To keep your limonada azul fresh, store it in the fridge. Use a tightly sealed pitcher or jar. This helps keep the flavors bright and delicious. You can enjoy it for up to three days. After that, the taste may fade. You can freeze limonada azul for future enjoyment. Pour it into ice cube trays to create fun ice cubes. This way, you can add a refreshing touch to other drinks. When you're ready to use them, just pop out the cubes. To defrost, place the cubes in a bowl at room temperature. You can also use them in a drink straight from the freezer. This adds instant chill and flavor to your summer beverages. Limonada Azul is a colorful drink made from simple ingredients. Here are the main components: - 1 cup fresh lemon juice - 2 cups blue butterfly pea flower tea - ½ cup honey or agave syrup - 4 cups cold water - Ice cubes for serving - Lemon slices and fresh mint leaves for garnish The fresh lemon juice gives it a zesty kick. The blue butterfly pea flower tea adds a stunning blue color. Honey or agave syrup sweetens the drink. Cold water makes it refreshing and perfect for summer. Yes, you can easily adjust the sweetness of Limonada Azul. If you want it sweeter, add more honey or agave syrup. Start with a small amount, stir well, and taste. You can keep adding until it’s just right for you. If it's too sweet, add more cold water to balance it out. Absolutely! Limonada Azul is a great choice for parties. Its vibrant color will catch everyone's eye. You can serve it in large pitchers for easy sharing. Add ice and garnish with lemon slices and mint leaves for an elegant touch. Guests will love this refreshing drink! To make Limonada Azul vegan, simply swap the honey for agave syrup. Agave syrup is a plant-based sweetener, making it a perfect choice. You can also use maple syrup for a different flavor. Both options keep the drink sweet and delicious without any animal products. Limonada Azul has roots in Southeast Asia. The blue butterfly pea flower tea comes from that region. This flower has a long history in local drinks. It is known for its stunning blue hue and health benefits. Over time, it spread to other cultures and became popular in summer drinks. Limonada Azul combines fresh lemon juice, blue butterfly tea, and sweeteners. You can customize it with fruity additions or herbs. Follow the steps to brew, mix, and present this drink beautifully. Remember to chill before serving for the best taste. In our busy lives, Limonada Azul offers a refreshing twist that's easy to make. It's perfect for gatherings or a quiet moment. Enjoy exploring this colorful drink, and have fun making it your own!

Limonada Azul Refreshing Summer Drink Recipe

Looking for a fun and refreshing drink this summer? Limonada Azul is your answer! This vibrant drink blends zesty lemon

- 2 cups ripe strawberries, hulled and sliced - 1 cup juicy fresh pineapple chunks - 1 cup creamy coconut milk - 1 cup crushed ice - 1 tablespoon honey or agave syrup (optional) - Fresh mint leaves for garnish How to select ripe strawberries When picking strawberries, look for bright red color and a sweet smell. Firm berries are best. Avoid any with bruises or mold. Fresh strawberries should feel heavy for their size. Choosing the best coconut milk Look for coconut milk in a can for creaminess. Check the label for high coconut content. Avoid brands with many additives. You want pure coconut milk for the best flavor. Each serving of this Virgin Strawberry Pina Colada packs about 200 calories. It has important nutrients like vitamin C from strawberries and pineapple. Coconut milk adds healthy fats, making this drink both tasty and nutritious. Enjoying this drink gives you a sweet burst of tropical goodness! - Step 1: Combining ingredients in the blender Start by placing your fresh ingredients in the blender. Add 2 cups of ripe strawberries, 1 cup of juicy pineapple chunks, and 1 cup of creamy coconut milk. Toss in 1 cup of crushed ice too. If you want it sweeter, drizzle in 1 tablespoon of honey or agave syrup. - Step 2: Blending to desired consistency Blend everything on high speed for about 30 to 45 seconds. Watch for a smooth and creamy texture. If it is too thick, add a little more coconut milk. Taste your drink and adjust sweetness if needed. - Tips on chilling glasses before serving Chill your glasses in the freezer for a few minutes. This keeps the drink cold and refreshing. - Creative garnish ideas To make it pretty, garnish with fresh mint leaves. You can also add a slice of strawberry on the rim. It looks fancy and inviting. - Blending tips for a smooth texture Blend in short bursts if you like a thicker drink. This helps mix smoothly without overdoing it. - How to avoid over-blending Stop blending as soon as it’s creamy. Over-blending can make it too thin. You want a nice, thick mocktail that holds its shape. For the complete method, check out the Full Recipe. Enjoy your Virgin Strawberry Pina Colada! Using fresh fruit makes your drink taste bright and lively. Fresh strawberries and pineapples bring out the best flavors. If you use frozen fruit, your drink will be colder and thicker. This is great on hot days! You can also mix fresh and frozen fruit to get the best of both worlds. Sweetness is key for your Virgin Strawberry Pina Colada. Start with one tablespoon of honey or agave syrup. Blend it in and taste. If it needs more sweetness, add a little more. Remember, everyone's taste is different, so adjust it to what you like! Glassware adds fun to your drink. Use tall glasses or coconut shells for a tropical look. You can even use mason jars for a rustic vibe. The right glass makes your drink pop! Garnishes make a drink special. Add fresh mint leaves on top for a splash of green. A slice of strawberry on the rim looks fancy. You might even add a colorful straw for a fun touch! One mistake is overloading the blender. If you put in too many ingredients at once, it won't blend well. Blend in batches if needed. This keeps the texture smooth and creamy. Chilling your glasses is a step you shouldn’t skip. Warm glasses can make your drink warm too fast. Pop them in the fridge or freezer for a few minutes before pouring your drink. This little trick keeps your Virgin Strawberry Pina Colada cold and refreshing longer. {{image_4}} You can change up the fruit in your Virgin Strawberry Pina Colada. Try using mango or banana instead of strawberries. Mango gives a sweet and tropical flavor, while banana adds creaminess. You can also mix in other berries, like blueberries or raspberries. This adds a fun twist to your drink and makes it a bit different each time. To make your drink even better, try adding citrus fruits. A splash of lemon or lime juice can give your drink a zesty touch. This brightens the flavors and adds a nice contrast to the sweetness. You can also use orange juice for a sweeter, citrusy note. If you want a spiked version of your drink, add rum or vodka. Start with a small amount, about one ounce, and blend it in with the other ingredients. This gives a fun kick to your Virgin Strawberry Pina Colada. Just remember to keep it light, so you can still enjoy the fresh fruit flavors. For the full recipe, check out the complete instructions for making this delightful mocktail! To keep your Virgin Strawberry Pina Colada fresh, use a clean glass jar. This jar should have a tight lid. Fill it with the leftover drink. Make sure to leave some space at the top. This allows for any expansion if the drink freezes. Always store it in the fridge. Use it within two days for the best taste. If you want to save some for later, freezing is a great choice. Pour the mocktail into ice cube trays for easy storage. Once frozen, pop the cubes into a bag. This way, you can use just what you need later. Add the cubes to smoothies or blend them back into a drink for a frosty treat. In the fridge, your Virgin Strawberry Pina Colada stays good for about two days. After that, the flavors may change. Look for signs like a sour smell or strange color. If you notice any of these, it’s best to toss it. Stay safe and enjoy your fresh drink! To make a Virgin Strawberry Pina Colada, gather your ingredients first. You will need: - 2 cups ripe strawberries, hulled and sliced - 1 cup juicy fresh pineapple chunks - 1 cup creamy coconut milk - 1 cup crushed ice - 1 tablespoon honey or agave syrup (optional) - Fresh mint leaves for garnish Start by blending the strawberries, pineapple, coconut milk, and ice together. If you like it sweeter, add honey or agave syrup. Blend until smooth, which takes about 30 to 45 seconds. Taste it and adjust the sweetness if needed. Pour the drink into chilled glasses and add fresh mint leaves for a nice touch. This mocktail pairs well with sunny days! Yes, you can prepare this drink in advance! Blend the ingredients as usual, but do not add ice until serving. Store the blended mixture in the fridge in a sealed container. When ready to serve, add crushed ice and stir well. This keeps your drink fresh and creamy without losing its texture. Enjoy it cold for the best taste! Coconut milk pairs well with many fruits. Here are some great options: - Mango adds sweetness and a tropical feel. - Banana creates a creamy texture. - Blueberries give a burst of flavor and color. - Kiwi adds a tangy twist. - Peaches offer a juicy, sweet taste. These fruits enhance the flavor and make your Virgin Strawberry Pina Colada even better. Feel free to mix and match! This blog post covered everything you need to make a delicious mocktail. We started with the key ingredients, emphasizing fresh fruits like strawberries and pineapple. You learned to blend and serve for the best taste and presentation. I shared tips to enhance flavors, avoid common mistakes, and even offered variations. Lastly, we discussed how to store and freeze leftovers for later enjoyment. Enjoying this refreshing drink can be fun and easy, perfect for any occasion. Try it out, and savor each sip!

Virgin Strawberry Pina Colada Refreshing Summer Drink

Craving a cool drink this summer? Let’s whip up a Virgin Strawberry Pina Colada that’s both fruity and refreshing. With

- Cucumbers, tomatoes, red onion, feta cheese - Kalamata olives, bell pepper, fresh parsley - Extra virgin olive oil, red wine vinegar, dried oregano - Salt and black pepper For this salad, use: - 2 large cucumbers, diced - 3 ripe tomatoes, diced - 1/2 red onion, thinly sliced - 1 cup feta cheese, crumbled - 1/2 cup Kalamata olives, pitted and halved - 1 bell pepper, diced - 2 tablespoons fresh parsley, chopped - 3 tablespoons extra virgin olive oil - 2 tablespoons red wine vinegar - 1 teaspoon dried oregano - Salt and black pepper to taste Using fresh ingredients is key. Fresh cucumbers and tomatoes add crunch and flavor. Good feta cheese enhances the dish with a creamy texture. The olives give a salty bite, while parsley adds a pop of color. This salad is low in calories, about 150 per serving. It has healthy fats from olive oil and feta. The cucumbers and tomatoes provide fiber and vitamins. You'll find good carbs in the vegetables, too. Eating this salad supports heart health. Cucumbers hydrate you, and tomatoes are rich in antioxidants. Feta and olives offer protein and calcium. Enjoy this healthy dish as part of a balanced meal. For the full recipe, check the detailed instructions provided. Start with the cucumbers. Dice them into bite-sized pieces. Next, take the tomatoes and dice them as well. Now, grab your bell pepper. Dice it too, aiming for similar sizes as your cucumber and tomato. This helps the salad look and taste great. For the red onion, slice it thinly. You want nice, even slices. Finally, take the Kalamata olives, pit them if needed, and cut them in half. All these veggies and olives will bring color and crunch to your salad. Now it’s time to mix! Take a large bowl and add all your diced veggies. Toss them together gently. This helps to evenly distribute the flavors. Next, crumble your feta cheese over the top. Spread it out as evenly as you can. This way, every bite has that creamy, salty goodness. The feta adds a rich taste that blends well with the fresh vegetables. For the dressing, grab a small bowl. Whisk together the extra virgin olive oil, red wine vinegar, and dried oregano. Add a pinch of salt and freshly cracked black pepper. This mix will bring the salad to life. Once well combined, drizzle the dressing over your salad. Use a large spoon or salad tongs to toss everything gently. Make sure the veggies and feta are evenly coated. If you let it sit for a bit, the flavors will deepen. Enjoy your fresh Greek Cucumber Tomato Feta Salad! You can check the [Full Recipe] for more details. To cut your vegetables, use a sharp knife. This gives you clean cuts. Start with cucumbers. Cut them in half lengthwise, then slice into bite-sized pieces. For tomatoes, remove the core first. Then, dice them into similar-sized chunks. This ensures even bites. When slicing the red onion, make thin, even slices to keep flavors balanced. To keep your salad fresh, prep the veggies just before serving. If you need to prepare early, store veggies in ice water. This keeps them crisp. Another tip is to mix the dressing separately. Add it just before serving to avoid sogginess. Serve your salad chilled. It tastes best when fresh. If you want to serve it later, place it in the fridge for about 15 minutes before serving. This allows the flavors to mingle. Pair your salad with grilled chicken or fish for a complete meal. You can also enjoy it with warm pita bread. This adds a nice touch to your dining experience. Consider adding fresh herbs for more flavor. Basil, dill, or mint work well. Just chop them finely and mix them in. If you want a kick, add a pinch of red pepper flakes. To adjust acidity, change the red wine vinegar. Use less for a milder taste. If you prefer more tang, add a splash of lemon juice. This brighten the dish and makes it even more refreshing. For the full recipe, check out the details above to make this delightful dish! {{image_4}} For a vegetarian version, you can keep the feta cheese. If you're vegan, try using a plant-based feta. You can find many brands that offer tasty options. You can also make your own with blended nuts or tofu. Adding chickpeas or quinoa boosts the protein in your salad. Fresh herbs like basil or mint can add unique flavors, too. Feel free to swap the olives for capers if you want a different taste. You can also change the tomatoes to cherry tomatoes for a sweeter crunch. Adding seasonal veggies like zucchini or bell peppers can make your salad even fresher. This dish is flexible and can adapt to what you have at home. While the classic olive oil and vinegar dressing is great, you can try a lemon vinaigrette. A yogurt-based dressing is another option that adds creaminess without the cheese. Homemade dressings often taste better than store-bought ones. But if you’re short on time, a quality store-bought dressing can work in a pinch. To keep your Greek Cucumber Tomato Feta Salad fresh, always store it in the fridge. Use an airtight container to seal in flavors and moisture. If you have leftover salad, try to separate the dressing from the veggies. This helps maintain crispness. You can mix the dressing in just before serving. To keep ingredients fresh longer, store cucumbers and tomatoes separately at room temperature. Avoid cutting them until you're ready to use them. Any cut vegetables should go in the fridge in a sealed bag or container. The salad stays fresh for about three days in the fridge. After that, the veggies can get soggy. Always check for signs of spoilage. If you see any mold or a strange smell, it’s best to toss it. Wilted greens or mushy tomatoes mean the salad is past its prime. You can prep this salad ahead of time for parties or a busy week. Chop all the veggies and store them in the fridge for up to two days. Keep the feta and olives in separate containers until you’re ready to serve. For the best storage, use glass containers. They keep your salad fresh and are easy to clean. Make sure to label containers with dates, so you know when it's time to eat or toss. To make Greek Cucumber Tomato Feta Salad, you first need to gather your ingredients. For detailed steps, you can check the [Full Recipe]. Start by dicing cucumbers and tomatoes. Slice the red onion and bell pepper. Mix all these veggies in a bowl. Then, add olives and feta cheese. Finally, whisk together olive oil, vinegar, oregano, salt, and pepper for the dressing. Pour it over the salad and mix gently. Yes, you can use different cheeses! Feta adds a salty flavor, but you can try goat cheese for a creamy taste. Mozzarella works too, giving a milder flavor. Just keep in mind that each cheese will change the salad's overall taste. So choose one that you love. You can serve this salad with grilled chicken or fish for a healthy meal. It pairs well with pita bread and hummus too. A nice slice of crusty bread is always a good fit. Balance is key! You want a meal that feels light yet filling. In this blog post, we explored the refreshing Greek Cucumber Tomato Feta Salad. We highlighted key ingredients and the right measurements. I shared tips for preparing and mixing vegetables. You also got serving suggestions and flavor enhancements. In closing, this salad is easy to make and packed with nutrients. Its fresh ingredients provide many health benefits. So enjoy this dish as a delightful part of your meals!

Greek Cucumber Tomato Feta Salad Easy Fresh Dish

Are you looking for a fresh and vibrant dish to brighten up your meals? This Greek Cucumber Tomato Feta Salad

- 1 ¼ cups all-purpose flour - ½ cup unsalted butter, softened to room temperature - ¼ cup powdered sugar - 1 large egg yolk - 2 tablespoons cold water - 2 ripe mangoes, pureed (approximately 1 cup) - 1 cup granulated sugar - 3 large eggs - ½ cup freshly squeezed lime juice (roughly from 4 limes) - 1 tablespoon freshly grated lime zest - ¼ cup unsalted butter, cut into small cubes - 1 teaspoon gelatin (optional, for a firmer curd) - Fresh mint leaves, for garnish This list covers all you need to make a delicious mango curd tart. Start with the crust. Combine all-purpose flour, butter, and powdered sugar in a bowl. These basics create a lovely base for the tart. Next, ripe mangoes bring the sweet flavor. Puree them until smooth, and you have the star of the show! Fresh lime juice adds a tangy kick that pairs well with mango. The zest adds even more lime goodness. You can add gelatin if you want a firmer curd. It helps the filling hold its shape better. For a garnish, fresh mint leaves add color and a hint of freshness when you serve the tart. Gather these ingredients, and you're ready to create a delightful dessert that impresses! For the full recipe, check out the detailed instructions. To start, you need to combine the dry ingredients and butter. In a mixing bowl, mix 1 ¼ cups of all-purpose flour, ½ cup of softened butter, and ¼ cup of powdered sugar. Use your fingers or a pastry cutter to blend until it looks like coarse crumbs. Then, add 1 large egg yolk and 2 tablespoons of cold water. Mix just until a dough forms. Next, chill the dough for optimal texture. Shape it into a disk and wrap it tightly in plastic wrap. Place the dough in the fridge for at least 30 minutes. This step helps the dough firm up, making it easier to roll out later. Now, it’s time to bake the tart shell. Preheat your oven to 350°F (175°C). This will ensure even baking once you put the crust in. After the dough has chilled, lightly flour a clean surface. Roll out the dough to about 12 inches wide. Carefully transfer it to a 10-inch tart pan. Press it gently into the corners and trim any excess. Use a fork to prick the bottom of the crust. This prevents bubbling during baking. To achieve perfect results, use the blind baking technique. Line the tart shell with parchment paper and fill it with pie weights or dried beans. Bake for 15 minutes, then remove the weights and parchment. Continue baking for an additional 10 minutes until the crust is lightly golden and crisp. Allow it to cool completely. Now we’ll make the mango curd. Start by preparing the mixture. In a medium saucepan, combine 1 cup of mango puree, 1 cup of granulated sugar, 3 large eggs, ½ cup of freshly squeezed lime juice, and 1 tablespoon of lime zest. Whisk these ingredients together until smooth. Next, cook the curd. Place the saucepan over medium heat. Stir constantly until the mixture thickens and coats the back of a spoon. This should take about 10-12 minutes. If you want a firmer curd, dissolve 1 teaspoon of gelatin in a tablespoon of warm water. Add it to the thickened curd mixture. Finish the curd by removing the saucepan from the heat. Add ¼ cup of small cubes of butter and stir until fully melted. The mixture will become smooth and glossy. Now, pour the luscious mango curd into the cooled tart shell, smoothing the surface with a spatula. For the complete process, refer to the Full Recipe. - Achieving the ideal crust texture: To get a great crust, use cold butter. It helps the crust stay flaky. When mixing, do not overwork the dough. Just blend until it forms a ball. This keeps it tender. - Ensuring the curd is smooth and creamy: For a smooth curd, whisk the ingredients well before cooking. Stir constantly while cooking to avoid lumps. If you notice any lumps, strain the curd through a fine sieve. This ensures a silky texture. - Overcooking the curd: Cooking the curd too long can make it grainy. Keep an eye on it. Once it thickens and coats the back of a spoon, take it off the heat. - Improper chilling techniques: Chilling is key for the tart. If you skip this step, the curd may not set right. Wrap the tart well and let it chill for at least two hours. This helps the flavors meld and the texture firm up. {{image_4}} You can easily change the flavor of your mango curd tart. Adding spices can make it special. Try ginger for warmth or cardamom for a unique twist. These spices add depth and make each bite exciting. You can also swap mango for other fruits. Passion fruit or pineapple can work well. Each fruit brings its own taste. This lets you explore new flavors while making the tart. If you need a gluten-free tart, you have options. Use almond flour or gluten-free all-purpose flour. These flours create a tasty crust without gluten. Just follow the same steps from the Full Recipe. For a vegan mango curd, replace eggs with silken tofu or cornstarch. Blend the tofu until smooth and mix it in. This keeps the curd creamy and rich without eggs. You can also use coconut milk for added flavor. Experimenting with these variations can help you find your favorite version of the mango curd tart. To keep your Mango Curd Tart fresh, refrigerate it promptly. Wrap the tart in plastic wrap or place it in an airtight container. This helps to keep moisture in and prevents it from absorbing other odors from the fridge. You can store it this way for up to three days. After this, the quality may decline, but it will still be safe to eat. You can freeze the tart if you have leftovers. Start by slicing the tart into individual pieces. Wrap each slice in plastic wrap, then place them in a freezer-safe bag or container. This prevents freezer burn and preserves flavor. To thaw, simply move the slices to the fridge for several hours or overnight. When ready to eat, avoid using the microwave, as it can ruin the texture. Instead, let them sit at room temperature for a bit. This helps maintain the creamy feel of the mango curd. Remember, freezing may change the texture slightly, but the taste will still delight your palate. Serve the Mango Curd Tart on a nice plate. I like to use a cake stand. It adds height and beauty. Place fresh mint leaves around it for color. You can also add sliced mango on the side. This gives a fresh look. For a fun touch, serve with whipped cream. Everyone loves a little cream! You can use store-bought mango puree. It saves time and works well. Just check the label for added sugar. Too much sugar can change the taste. Homemade puree tastes fresher and brighter. If you have ripe mangoes, go for it! Blend them until smooth. This gives you the best flavor. The tart can last about 3 days in the fridge. Keep it covered to avoid drying out. The curd stays creamy and delicious. After 3 days, the texture may change. It’s best to enjoy it fresh. I recommend sharing with friends or family. They will love it! For lime juice, you can use lemon juice. It gives a nice tang. You can also try orange juice for a sweeter flavor. Another option is vinegar, but use it sparingly. These substitutes will keep the tart tasty. Adjust the amount to your liking. Gelatin helps the curd set firmer. It makes the texture smooth and nice. If you skip it, the curd will still taste great. It might be a bit softer. You can use cornstarch as a thickener if you like. Just mix it with a bit of water before adding it to the curd. Making a mango curd tart involves simple steps that yield delicious results. You start with essential ingredients like flour and butter, then create a smooth, creamy mango curd. Remember the expert tips to avoid common mistakes while preparing. Think about variations for flavor and dietary needs to personalize your tart. Finally, store it right for lasting freshness. This tart is not just a dessert; it’s a delightful treat you can customize and share. Enjoy this tasty journey into mango curd tarts!

Mango Curd Tart Delightful and Easy Dessert Recipe

Dive into the world of desserts with my delightful Mango Curd Tart recipe! This sweet treat combines vibrant mango flavors

- Cucumber - Strawberries - Red Onion - Feta Cheese - Fresh Mint Leaves - Extra Virgin Olive Oil - Balsamic Vinegar - Salt and Black Pepper Choosing the right ingredients makes a big difference. For cucumbers, look for smooth skin and no soft spots. The color should be bright green. Fresh strawberries should be plump and fragrant, with no signs of mold. Always check for freshness in your herbs. Fresh mint adds a bright flavor that dried herbs just can’t match. When scaling the recipe, keep the ratios in mind. For every large cucumber, use about one cup of strawberries. This balance keeps the salad fresh and tasty. You can adjust the feta to your liking, but a quarter cup works well. Remember, measuring helps maintain the flavors you love in this dish. To start, you need to slice the cucumbers and strawberries. For the cucumbers, use a sharp knife and slice them thinly. Aim for 1/8-inch thickness. Thin slices help the cucumber stay crisp and absorb the dressing well. For the strawberries, remove the green tops first. Then, slice them evenly. Aim for similar thickness as the cucumbers. This helps the salad look nice and makes mixing easier. Uniform sizes make sure every bite has the same great taste. In a big bowl, mix the sliced cucumbers, strawberries, and red onion. Use a gentle motion to avoid squishing the strawberries. After that, fold in the crumbled feta cheese and chopped mint leaves. This step adds creaminess and fresh flavor. Be careful when folding. You want the salad to stay light and airy. If you mix too hard, you might end up with mushy fruit. In a small bowl, whisk together the olive oil and balsamic vinegar. Make sure to blend them well until they form a smooth dressing. The key here is to find the right balance. A little salt and cracked black pepper will enhance the flavors. Taste it and adjust if needed. Drizzle this dressing over the salad mixture. Toss gently to coat all the ingredients. Allow the salad to rest for about ten minutes before serving. This lets the flavors blend beautifully. You can find the full recipe for more details on the process. To boost the taste of your cucumber strawberry salad, consider adding fresh herbs. Basil or cilantro can add a unique twist. You could also sprinkle in a pinch of chili flakes for some heat. If you want more flavor, taste the salad as you mix. Adjust the salt and pepper to suit your liking. Make your salad pop on the table! Use a clear glass bowl to show off the colors. You can also layer the cucumber and strawberries for a beautiful effect. For garnish, add an extra sprig of mint and a few whole strawberries on top. This makes the dish look fresh and inviting. This salad shines as a side dish. It pairs well with grilled chicken or fish. You can also enjoy it during a summer picnic or barbecue. For a light lunch, serve it with crusty bread. Enjoy this salad on warm days or whenever you crave something fresh. For the full recipe, check out the complete instructions. {{image_4}} You can change up your cucumber strawberry salad easily. Try adding other fruits like blueberries, kiwi, or even mango. These fruits bring new flavors and colors. For cheese, consider using goat cheese or even mozzarella. Both add a nice twist to the dish. If you want a vegetarian version, just skip the feta cheese. You can replace it with avocado for creaminess. For a vegan option, use a plant-based cheese or leave it out entirely. You can still enjoy all the flavors! If you are watching calories, use less olive oil or swap it with lemon juice. This keeps the taste light and fresh. You can adapt this recipe with the seasons. In spring, add peas or radishes for crunch. In fall, try using apples or pears for sweetness. Always look for local produce to make your salad fresh and vibrant. It’s fun to mix things up based on what’s available! To keep leftover Cucumber Strawberry Salad fresh, store it in an airtight container. Place it in the fridge right after serving. It stays fresh for about 2 days. After that, the flavors may dull, and the ingredients can become soggy. I do not recommend freezing the whole salad, as it can lose texture. You can, however, freeze the cucumber and strawberries separately. Cut them into slices and pack them in freezer bags. When you want to use them, thaw in the fridge for a few hours. Mix with fresh ingredients after thawing for the best taste. If you have extra strawberries or cucumbers, think about using them in smoothies or yogurt bowls. You can also add them to oatmeal for a fresh twist. Keep the flavors bright by adding fresh herbs or a squeeze of lemon. This helps maintain that tasty freshness even when using leftovers. A Cucumber Strawberry Salad will last about 2 to 3 days in the fridge. To check the quality, look for signs like wilted greens or soggy strawberries. If the salad looks fresh and smells good, it is still safe to eat. However, the texture may change after a day or two, so enjoy it soon after making. Yes, you can make this salad ahead of time. I recommend preparing it no more than 24 hours in advance. To keep the salad fresh, mix the cucumbers, strawberries, and onions. Add the dressing just before serving. This way, your salad stays crisp and bright. You can try several dressings to add your twist. Here are some ideas: - Honey mustard dressing for a sweet touch. - Lemon vinaigrette for a zesty flavor. - Yogurt-based dressing for creaminess. These options can enhance your salad and bring new flavors to your table. In this post, we explored the vibrant Cucumber Strawberry Salad. We covered essential ingredients and their quality, along with precise measurements for scaling the recipe. I shared step-by-step instructions for preparation, combining, and dressing, plus tips for enhancing flavors and presentation. Variations allow you to adapt for different diets and seasons, while storage info ensures freshness. Remember, using fresh ingredients elevates your dish. Stick to these guidelines, and you’ll enjoy a delicious salad every time. Your creativity in the kitchen will shine through!

Cucumber Strawberry Salad Light and Refreshing Treat

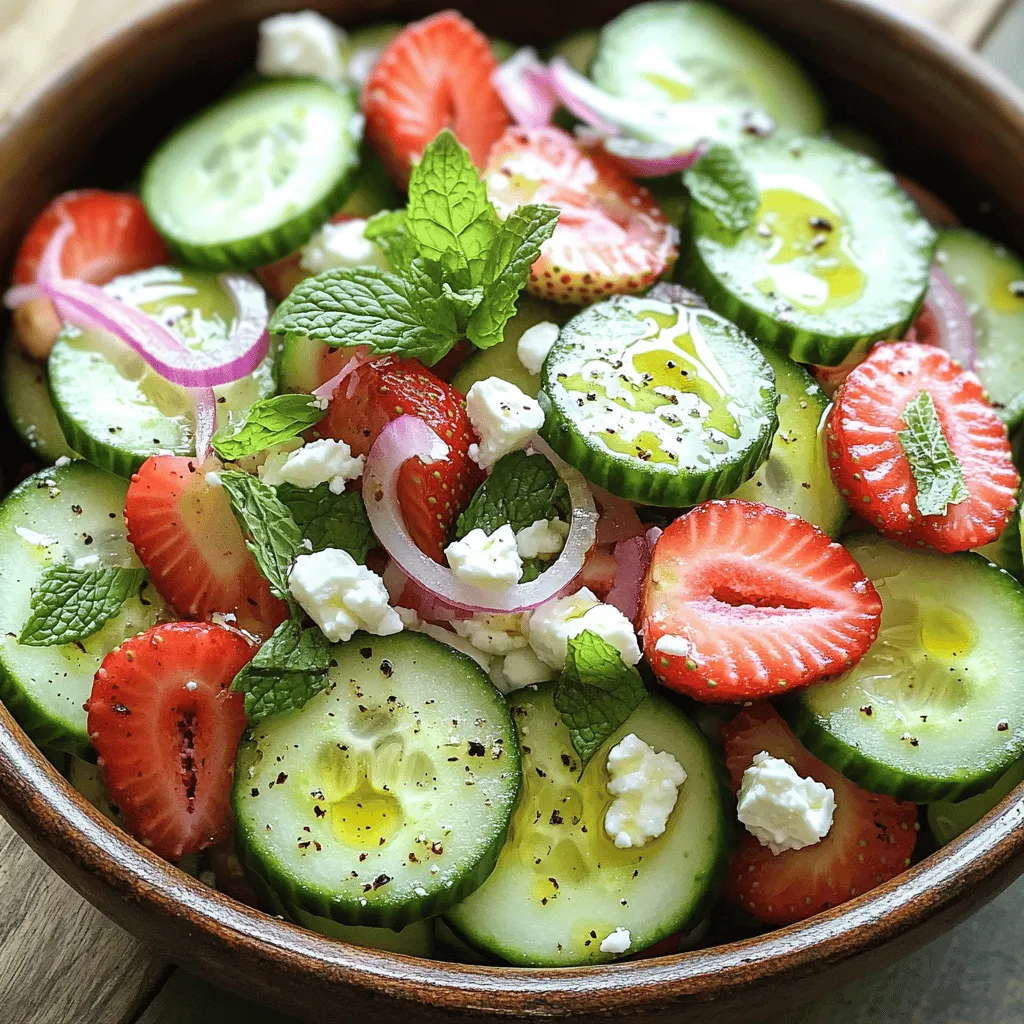
Looking for a refreshing dish that screams summer? A Cucumber Strawberry Salad is the answer! This light and zesty treat

To make creamy Cajun sausage pasta, gather these ingredients: - 12 oz penne pasta - 1 lb smoked sausage, sliced into rounds - 1 tablespoon olive oil - 1 medium onion, diced - 3 cloves garlic, minced - 1 red bell pepper, diced - 1 green bell pepper, diced - 1 tablespoon Cajun seasoning - 1 teaspoon smoked paprika - 1 cup heavy cream - 1 cup chicken broth - Salt and pepper, to taste - 1 cup grated Parmesan cheese - Fresh parsley, chopped (for garnish) To cook this dish, you will need: - A large pot for boiling pasta - A large skillet for sautéing - A cutting board and knife for prepping - A measuring cup and spoons for accuracy - A serving spoon to mix and serve Here are some key measurements to keep in mind: - 12 oz of pasta is about three cups dry. - One pound of sausage equals about four links. - A tablespoon is three teaspoons. - One cup is 8 ounces, so use a measuring cup for liquids. - For fresh parsley, one small bunch is enough for garnish. These tips will help you gather everything you need for your creamy Cajun sausage pasta dish. Enjoy the cooking process and the tasty meal that follows! 1. Cook the Pasta: Start by boiling a large pot of salted water. Add the penne pasta and cook it for 9-11 minutes. Check it frequently until it is al dente. Drain the pasta and set it aside. Do not rinse it. This keeps the starch, which helps the sauce cling. 2. Sauté the Sausage: Heat olive oil in a large skillet over medium heat. When the oil shimmers, add the sliced smoked sausage. Cook for 5-7 minutes. Stir it often until it gets brown and heated through. Once done, take the sausage out and set it on a plate. 3. Sauté the Vegetables: In the same skillet, add the diced onion, red bell pepper, and green bell pepper. Cook for about 5 minutes, stirring often. The onion should become soft and clear. Add minced garlic and cook for 1-2 more minutes. Make sure the garlic doesn’t burn. 4. Add Seasonings: Mix in the Cajun seasoning and smoked paprika. Let the spices cook for about a minute. This brings out their taste and helps coat the veggies. 5. Make the Sauce: Pour in the chicken broth and heavy cream. Stir to mix well, then let it simmer gently. Cook for 3-5 minutes until the sauce thickens a bit and becomes creamy. 6. Combine Ingredients: Lower the heat. Add the cooked sausage and drained pasta back into the skillet. Toss everything together. Make sure the pasta is well coated in the sauce. Gradually stir in the grated Parmesan cheese. Mix until it melts and blends in. Taste and add salt and pepper if needed. 7. Serve: Divide the creamy Cajun sausage pasta into bowls. Top with freshly chopped parsley for extra flavor and color. Enjoy your tasty dish! - Always cook the pasta al dente. This keeps it firm and prevents it from becoming mushy in the sauce. - Let the sauce simmer long enough to thicken. This gives it a rich and creamy feel. - Stir the pasta gently when mixing. This prevents it from breaking apart. - Large Pot: For boiling the pasta. - Large Skillet: For sautéing and making the sauce. - Wooden Spoon: For stirring the ingredients and mixing the sauce. - Measuring Cups and Spoons: For accurate measurement of ingredients. - Colander: For draining the pasta easily. You can find the Full Recipe for more details. To boost the taste of your creamy Cajun sausage pasta, try these tips: - Use fresh herbs: Fresh parsley adds a bright touch. Consider basil or thyme for more depth. - Add heat: If you like spice, add some crushed red pepper flakes. It elevates the dish. - Experiment with cheese: Swap Parmesan for smoked Gouda or pepper jack for a twist. - Finish with lemon: A squeeze of lemon juice brightens the flavors and balances the creaminess. Avoid these common pitfalls to ensure your pasta shines: - Overcooking the pasta: Follow package directions to keep it al dente. - Not seasoning enough: Don’t forget salt and pepper during cooking. Taste as you go. - Burning garlic: Add garlic last and cook it on low heat to keep it from burning. - Skipping the sauce simmer: Let the sauce thicken to achieve that creamy texture. Make your dish pop with these simple ideas: - Use a large bowl: Serve the pasta in a big, shallow bowl for an inviting look. - Garnish generously: Sprinkle chopped parsley on top for color and freshness. - Add a sprinkle of cheese: A little extra Parmesan makes it look gourmet. - Serve with bread: Pair with crusty bread for a complete meal. For the full recipe, check out the detailed instructions above. {{image_4}} You can switch up the protein in this creamy Cajun sausage pasta. Try chicken or shrimp for a tasty twist. Cook the chicken until golden, just like the sausage. For shrimp, add them in during the last few minutes of cooking. This keeps them tender and juicy. If you want a meat-free version, use plant-based sausage or mushrooms. Mushrooms add a great texture and earthy flavor. For a vegan dish, replace heavy cream with coconut milk or cashew cream. Use vegetable broth instead of chicken broth for a full flavor. You can easily customize this recipe with different veggies. Zucchini, spinach, or even cherry tomatoes work well. If you don’t have Cajun seasoning, mix paprika, garlic powder, and cayenne pepper. This keeps the dish flavorful. Parmesan cheese can be swapped with a dairy-free option for a vegan meal. Check out the Full Recipe for more details. After enjoying your creamy Cajun sausage pasta, store leftovers in an airtight container. Make sure to let the dish cool down to room temperature first. This helps keep it fresh. Place the container in the fridge. It will last for up to three days. If you want to save the pasta for later, freezing works great. Divide the pasta into portions and place them in freezer-safe bags or containers. Be sure to remove as much air as possible. Label the bags with the date. The pasta can stay in the freezer for up to three months. To reheat your creamy Cajun sausage pasta, use a microwave or stovetop. If using the microwave, place the pasta in a bowl and add a splash of water or cream. Cover it to keep moisture in. Heat in short bursts, stirring in between. If using the stovetop, warm it over low heat in a skillet. Stir often and add a bit of cream if it looks dry. Enjoy your meal just like the first time! You can use whole milk or a mix of milk and butter. For a lighter option, try half-and-half. Coconut milk is also great if you want a dairy-free choice. Each will change the taste slightly but will still create a creamy sauce. Yes! You can use gluten-free penne pasta. Many brands offer alternatives made from rice or corn. Just cook it according to the package instructions. The flavor will still shine through. Creamy Cajun sausage pasta lasts for about three to four days in the fridge. Store it in an airtight container. Make sure to let it cool before putting it in the fridge to keep it fresh. Absolutely! You can cook the dish and store it in the fridge. Just reheat it on the stove or in the microwave. Add a splash of chicken broth to help the sauce regain its creaminess. For the full recipe, check out the ingredients and instructions listed above. It serves 4-6 people and takes about 30 minutes to prepare. Each serving packs a punch of flavor while providing a balanced meal with protein and veggies. This blog post covered essential ingredients and equipment for your dish. I provided detailed steps for cooking, along with tips for the best texture. I also shared tricks to enhance flavor and avoid common mistakes. Variations allow for personal touches, whether with proteins or vegetarian swaps. Lastly, I gave storage methods to keep leftovers fresh. With these tools and tips, you can create a tasty dish every time. Enjoy your cooking journey!

Creamy Cajun Sausage Pasta Quick and Flavorful Dish

Are you craving a dish that bursts with flavor and can be made in a snap? Look no further! My

- Fresh baby spinach - Ripe strawberries - Feta cheese - Walnuts - Red onion - Balsamic vinaigrette - Honey - Salt and black pepper To make a great strawberry spinach salad, you need fresh ingredients. Start with fresh baby spinach. It should be bright green and crisp. Next, pick ripe strawberries. Look for ones that are red and smell sweet. They bring a fruity burst to your salad. Next, gather feta cheese. Feta adds a creamy and salty flavor. Walnuts add a nice crunch. Choose walnuts that are fresh and lightly toasted for the best taste. Red onion gives a mild bite, enhancing the salad's flavor. For the dressing, balsamic vinaigrette works well. It adds tanginess. Honey brings sweetness to balance the flavors. Lastly, add salt and black pepper to taste. This mix of ingredients makes the salad fresh and delightful. - Salad bowl - Mixing bowl - Whisk - Serving spoons You will need some key equipment to prepare your salad. A salad bowl is essential for mixing everything together. A mixing bowl helps when you make the dressing. Use a whisk to blend the balsamic vinaigrette and honey. Finally, have serving spoons ready. They help when you serve the salad. With these tools, you can create a beautiful and tasty strawberry spinach salad. For the complete method, check the Full Recipe. To make a great strawberry spinach salad, start by washing the spinach. Rinse it under cold water in a bowl or sink. Make sure to remove any dirt or sand. After washing, gently dry the spinach with a clean towel or use a salad spinner. This helps keep the leaves crisp. Next, slice the strawberries. Use a sharp knife to hull the strawberries first. This means removing the green tops. After hulling, slice them into thin pieces. Thin slices show off their bright color and sweet flavor. Now, it’s time to combine the spinach and strawberries. In a large salad bowl, add the washed baby spinach. Then, layer the sliced strawberries on top. Gently toss them together to mix. You want to keep the spinach leaves whole and not bruised. Next, add the feta cheese. Crumble it into small chunks and sprinkle it over the salad. Then toss in the toasted walnuts and finely sliced red onion. Each adds a different texture and taste to the salad. For the dressing, take a small bowl. Whisk together the balsamic vinaigrette and honey until smooth. This dressing balances the sweet strawberries with a tangy flavor. Drizzle the dressing over the salad mix. Use a large serving spoon to toss everything together. Make sure all the ingredients get coated well but remain intact. Finally, season your salad with salt and freshly ground black pepper. Adjust it to your taste for the best flavor. Enjoy this fresh and flavorful delight! For the full recipe, check the details above. Choosing the freshest spinach and strawberries makes a big difference. Look for vibrant green spinach with no wilting or browning. For strawberries, pick ones that are bright red and firm. They should smell sweet and have no bruises. When it comes to feta cheese, opt for quality. Crumbled feta is easy to use, but block feta offers better taste. Look for creamy-textured cheese that is not too dry. It should have a nice tang that complements the salad. For plating, use a large, shallow bowl or platter. This allows you to display the salad beautifully. Spread the spinach evenly and layer the strawberries on top. Add feta and walnuts last for a lovely look. Garnishing adds visual appeal. Use whole strawberries and walnut halves to create a pop of color. You can also sprinkle fresh herbs like mint or basil for an extra touch. Dressing alternatives can elevate your salad. Try a honey mustard dressing for a sweet kick. A lemon vinaigrette can add brightness too. Both pair well with the spinach and strawberries. Adding protein makes the salad more filling. Grilled chicken or shrimp works well. You can also use chickpeas for a vegetarian option. Each adds a nice texture and enhances the dish. Don't forget to check the [Full Recipe] for more details. {{image_4}} You can change your strawberry spinach salad by adding other fruits. Blueberries, oranges, and even peaches add color and flavor. They also bring unique health benefits. Each fruit pairs well with spinach and strawberries. You can also mix in seasonal veggies. Avocado adds creaminess and healthy fats. It makes your salad more filling and adds a rich taste. If you want a vegan-friendly dish, skip the feta cheese. You can use avocado or chickpeas instead. They add protein and texture. For gluten-free options, ensure your dressing is gluten-free. Most vinaigrettes are safe, but check labels. You want to enjoy your meal without worries. Experimenting with different dressings can change your salad's taste. Try a citrus vinaigrette for a zesty twist. A poppy seed dressing can add sweetness. You can also use nuts or seeds as substitutes for walnuts. Almonds or sunflower seeds work well. They give a nice crunch and different flavors. For the full recipe, check out Strawberry Spinach Bliss Salad. To store leftovers, place the salad in an airtight container. This keeps it fresh longer. Use a container that fits the salad snugly to prevent wilting. The salad is best eaten within 1-2 days. After that, the spinach may get soggy. You can prepare ingredients in advance to save time. Wash and dry spinach early in the day. Slice strawberries and store them in a separate container. Keep the nuts and cheese separate too. Assemble everything just before serving. This ensures all flavors stay bright and fresh. Freezing is not ideal for this salad. Fresh spinach and strawberries do not freeze well. They lose texture and taste. However, you can freeze the nuts. Store them in a freezer bag. When ready, just toast them again before adding to the salad. This keeps the crunch! You can easily swap feta cheese for other tasty options. Goat cheese works well, offering a creamy texture and tangy flavor. If you want a dairy-free choice, try nutritional yeast. It adds a cheesy flavor and is great for a vegan diet. Both options blend nicely in a strawberry spinach salad. Absolutely! You can try many dressings with this salad. Honey mustard dressing adds a sweet and tangy twist. A light vinaigrette with lemon juice brightens the flavors. Even a creamy dressing can work well, making every bite rich and satisfying. Choose based on your taste preferences. To make your salad heartier, add some protein. Grilled chicken or shrimp are great choices. You can also mix in beans or chickpeas for a plant-based option. If you want grains, try quinoa or farro. These ingredients boost nutrition and keep you full longer. To recap, we explored a fresh salad filled with baby spinach, strawberries, and feta cheese. You learned about the key ingredients and equipment needed to make this dish. We discussed how to prepare, mix, and dress the salad, along with tips for serving and storing it. Remember, feel free to play with seasonal additions and alternatives based on your taste. This salad is versatile and healthy, perfect for any occasion. Enjoy making and sharing it with others!

Strawberry Spinach Salad Fresh and Flavorful Delight

Are you ready to brighten up your meal with a Strawberry Spinach Salad? This fresh and flavorful dish combines sweet

- 2 ripe avocados: Choose avocados that yield slightly to gentle pressure. They should feel soft, but not mushy. This creaminess adds richness to your salad. - 2 large ripe tomatoes: Look for juicy, firm tomatoes like beefsteak or heirloom. Their taste and texture make a big difference in flavor. - 1 ball of fresh mozzarella cheese: Select mozzarella that is soft and moist. This cheese brings a nice balance to the tanginess of the tomatoes. - A handful of fresh basil leaves: Fresh basil adds a sweet and fragrant note. Look for vibrant green leaves without any brown spots. - 2 tablespoons balsamic reduction: You can buy this or make your own. It adds a sweet, tangy kick that brightens the dish. - 1 tablespoon extra virgin olive oil: Use high-quality olive oil for the best flavor. It enriches the salad and enhances all the ingredients. - Salt and freshly cracked black pepper: These simple seasonings bring out the natural flavors. Use them sparingly, adjusting to your taste. This simple list of ingredients combines to create a fresh and satisfying dish. You can find the Full Recipe above for more details on how to put it all together. - Tips for slicing avocados, tomatoes, and mozzarella: Use a sharp knife for clean cuts. For avocados, cut around the pit and twist to remove it. Scoop out the flesh with a spoon and slice it evenly. For tomatoes, slice them into thick rounds. Slice mozzarella into similar thickness for uniformity. - Arranging the foundation of the salad: Start on a large, flat plate. Place your first slice of avocado in the center. This acts as the base. Next, add a slice of tomato, followed by mozzarella. Keep layering in this order to build your salad. - Layering technique for aesthetic appeal: Alternate the ingredients in a circular pattern or straight line for an eye-catching look. This way, every bite has a bit of each ingredient. Aim for balance in colors and shapes as you layer. - Best practices for layering ingredients: Keep your layers neat and even. This helps with both presentation and taste. Make sure to use fresh ingredients for the best flavor and look. - Incorporating basil for flavor and color: Tuck whole basil leaves between the layers. This adds a bright green color and a fresh taste. You can also sprinkle some chopped basil on top for extra flavor. - Drizzling oils for enhanced taste: After your salad is layered, drizzle balsamic reduction over it. This adds a sweet and tangy flavor. Follow with a touch of extra virgin olive oil for richness. - Importance of seasoning with salt and pepper: Lightly sprinkle salt and freshly cracked black pepper over the top. This step enhances the flavors in each layer. Be careful not to overdo it; a little goes a long way. - Resting period for flavor melding: Let the salad sit for a few minutes before serving. This allows the flavors to blend together. You’ll find that the taste improves significantly after a short rest. Choosing ripe avocados and tomatoes is key to your salad. Look for avocados that feel slightly soft but not mushy. For tomatoes, use large, juicy ones that give a little when you press them. Vine-ripened or heirloom tomatoes work best for flavor. For a vibrant presentation, slice your ingredients evenly. This will help with layering and make your dish look appealing. You can arrange the slices in a circle or a straight line. I love to add whole basil leaves on top for a pop of color. To enhance flavors, consider adding a pinch of crushed red pepper for heat. You can also mix in a splash of lemon juice for freshness. Experiment with other fresh herbs like parsley or mint for a twist. One common mistake is over-slicing or making uneven cuts. This affects how the salad looks and tastes. Aim for uniform slices of all ingredients for balance. Another pitfall is over-seasoning or under-seasoning. Start with a little salt and pepper. You can always add more later if needed. Taste as you go! Storing the salad after assembly can lead to sogginess. If you plan to save leftovers, keep the dressing separate. This keeps everything fresh and prevents browning. Enjoy your salad at its best! {{image_4}} To make your avocado Caprese salad even more fun, try adding fruits like mango or peaches. Their sweetness brightens the dish. You can also swap in different cheeses. Feta or goat cheese adds a tangy kick that works well with the creamy avocado. Different dressings can change the whole flavor. A citrus vinaigrette can bring a fresh zing. A creamy dressing can add richness. Explore what you like best! If you want a vegan-friendly salad, just skip the mozzarella cheese. You can use cashew cheese or even a simple avocado spread to keep it creamy. For gluten-free needs, this salad is perfect as is. It naturally has no gluten. You can enjoy it without worry! If you’re looking for low-carb or keto options, keep the tomatoes and avocados. They fit well into those diets. Just focus on healthy fats and fresh veggies. For the full recipe, check out Avocado Caprese Salad Delight 🥑! To store your Avocado Caprese Salad, follow these steps: - Refrigeration: Place the salad in an airtight container. This keeps it fresh and prevents odors from other foods. - Preventing browning: To stop the avocados from browning, sprinkle lemon juice over them. This simple trick slows down oxidation and keeps your salad looking fresh. How long does the salad last in the fridge? When stored properly, the salad can last about 1 to 2 days. The avocados will start to brown after that, which may affect the look and taste. Signs of spoilage include: - Discoloration: If the salad turns a dark brown color, it’s time to toss it. - Unpleasant smell: If it smells sour or off, it’s best to discard it. With proper storage, you can enjoy your salad for a couple of days. Just remember, fresh is best! For the full recipe, check the details above. To pick ripe avocados, look for a few key signs. First, gently squeeze the avocado. It should feel firm but yield slightly under your fingers. Next, check the color. Ripe avocados often have a dark green or near-black skin. Finally, look at the stem. If it comes off easily and reveals green underneath, your avocado is ready to use. Avoid avocados that feel mushy or have dark spots. Yes, you can swap balsamic reduction with other flavors. A simple balsamic vinegar can work, but it will be more acidic. You can also try a honey or maple syrup drizzle for sweetness. Lemon juice adds a zesty touch, while pesto offers a fresh twist. Choose what fits your taste best! To prep the salad ahead, slice the avocados, tomatoes, and mozzarella. Store them in separate containers to keep them fresh. You can also prepare the basil by washing it and placing it in a damp paper towel. Keep everything in the fridge. To keep the salad fresh, avoid adding the balsamic reduction and olive oil until you're ready to serve. This way, your salad stays crisp and tasty. This blog post detailed how to create a delicious avocado Caprese salad. We covered the best ingredients, like ripe avocados, fresh tomatoes, and mozzarella. I shared step-by-step instructions on preparing and assembling the salad for a beautiful presentation. Best practices for avoiding common mistakes were highlighted, along with tasty variations to try. Finally, storing leftovers was discussed to keep your salad fresh. I hope you feel inspired to make this dish your own! Enjoy experimenting with flavors and creating your perfect salad.

Satisfying Avocado Caprese Salad Simple and Fresh

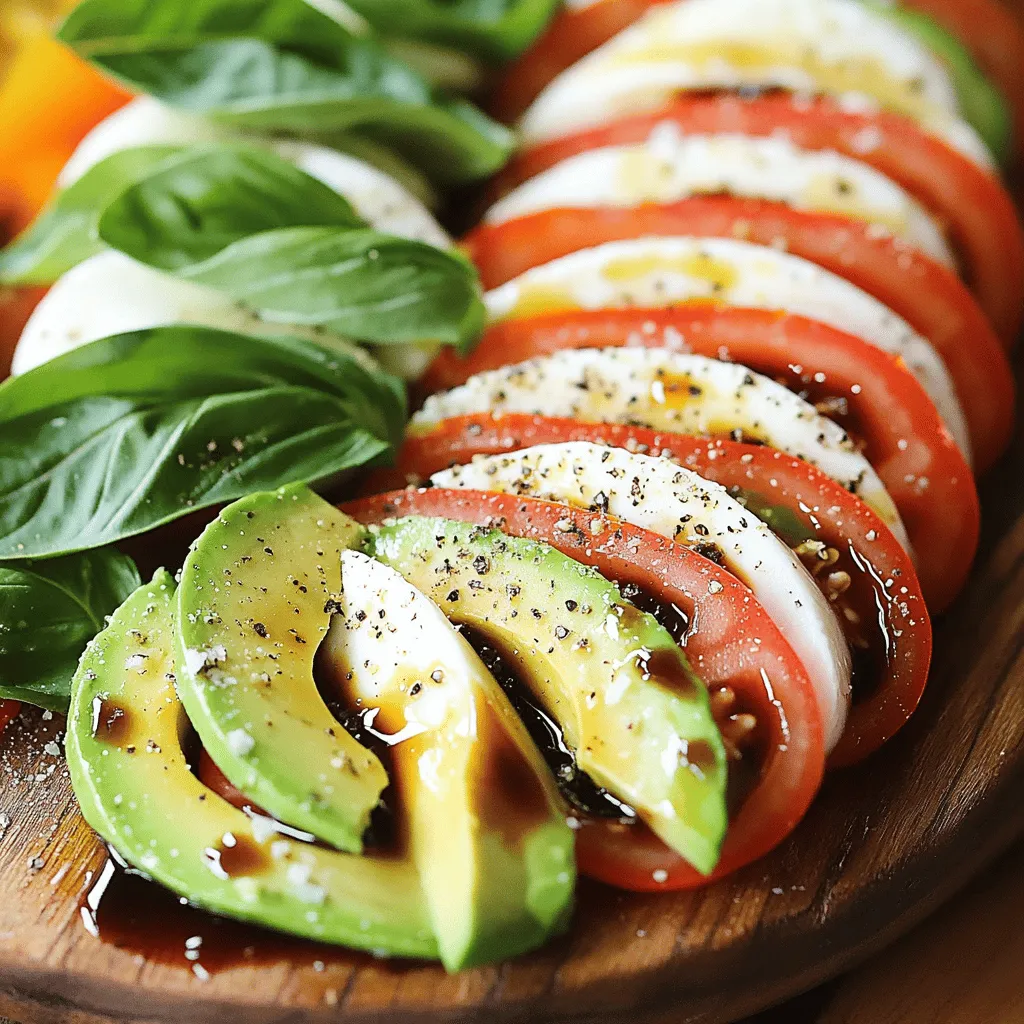
Looking for a fresh and simple dish that bursts with flavor? This Avocado Caprese Salad combines creamy avocados, juicy tomatoes,

- Red bell pepper - Yellow bell pepper - Zucchini - Red onion - Cherry tomatoes - Mushrooms - Extra virgin olive oil - Balsamic vinegar - Garlic powder - Smoked paprika - Salt and pepper - Fresh basil leaves - Additional balsamic drizzle The key to great grilled vegetable skewers is using fresh, colorful vegetables. Start with red and yellow bell peppers. They add sweetness and bright colors. Next, include zucchini for a nice crunch. Red onion gives a bold flavor. Cherry tomatoes burst with juice when grilled. Lastly, mushrooms add a savory touch. To bring everything together, make a simple marinade. Use extra virgin olive oil for richness. Balsamic vinegar adds tang. Garlic powder and smoked paprika give depth of flavor. Don’t forget salt and pepper for seasoning. This marinade elevates the taste of the veggies. If you want to make your skewers even more appealing, consider garnishes. Fresh basil leaves add a lovely aroma and color. A drizzle of balsamic vinegar on top enhances flavor. For the complete recipe, check out the Full Recipe section. - Preheat the grill to medium-high. This helps to cook the skewers evenly. - Clean the grates. A clean grill prevents sticking and gives a nice char. - Whisk the marinade ingredients together. Combine olive oil, balsamic vinegar, garlic powder, smoked paprika, salt, and pepper in a bowl. - This mix adds deep flavor to the vegetables. - Toss vegetables in the marinade. Add red bell pepper, yellow bell pepper, zucchini, red onion, cherry tomatoes, and mushrooms. - Ensure each piece is well-coated for better taste. - Allow marination time. Let them sit for about 15 minutes. This step enhances the flavors. - Thread vegetables onto skewers. Alternate colors and shapes to make them look fun. - Fill each skewer but avoid overcrowding. This helps them cook evenly. - Grill skewers and turn periodically. Cook for 10-12 minutes, turning with tongs. - Check for doneness and grill marks. The veggies should be tender and have nice char marks. Follow these steps for a delicious dish. For more detailed instructions, check the Full Recipe. - Best grill temperatures for vegetables I recommend grilling vegetables at medium-high heat, around 400°F to 450°F. This heat cooks veggies evenly, giving them nice char marks. Make sure to preheat your grill properly for the best results. - How to prevent sticking To stop veggies from sticking, oil your grill grates before cooking. You can also brush the vegetables with olive oil. This simple trick creates a barrier, helping them slide right off when done. - Adding herbs and spices to marinade Adding herbs and spices can boost flavor. I love fresh basil, oregano, or thyme. You can mix them into your marinade for a tasty touch. Try adding a pinch of red pepper flakes for some heat. - Suggestions for infusing more flavor You can infuse more flavor by letting the veggies sit in the marinade longer. Aim for at least 30 minutes. If you want a smoky taste, try using smoked salt or adding a dash of liquid smoke to your marinade. - Plating ideas for serving When serving, arrange skewers on a large platter. A colorful display makes your dish appealing. Alternate colors and shapes to catch the eye. - Drizzling and garnishing suggestions Drizzle extra balsamic vinegar over the skewers for added flavor. You can also sprinkle fresh herbs on top. Fresh basil leaves add color and flavor. This simple touch makes your dish look gourmet. {{image_4}} You can mix in many seasonal vegetables. Try adding asparagus, eggplant, or squash. Each brings its own taste and texture. You can also swap out any vegetable. If you dislike mushrooms, use broccoli instead. If you love spice, add jalapeños for a kick. These skewers are already vegan-friendly. Just stick to the vegetable base. For gluten-free options, ensure your marinade has no gluten. Most balsamic vinegars are safe, but check the label. You can enjoy these skewers without worry about dietary needs. Let’s explore fun themes! For Mediterranean skewers, add olives and feta cheese. This adds great flavor. Try drizzling with lemon juice for a bright touch. For Tex-Mex skewers, use corn and black beans. A sprinkle of taco seasoning can enhance the taste. You can create fun and diverse meals with just a few tweaks. Check out the Full Recipe for more details on making these delicious grilled vegetable skewers! To keep your grilled vegetable skewers fresh, store them in an airtight container. Place them in the fridge if you have leftover skewers. They will stay good for about 3 to 4 days. If you want to save the skewers for longer, you can freeze them. Just remember to wrap them tightly in plastic wrap or foil before putting them in a freezer bag. To store the marinade, pour it into a jar or container with a lid. You can keep it in the fridge for about a week. This way, you can use it again later for more skewers or other dishes. Reheating grilled vegetable skewers is easy. You can use a microwave for quick heating. Just place them on a plate and cover them with a damp paper towel. Heat for 30 seconds at a time until warm. If you want to keep that grill flavor, use an oven or a skillet. Preheat the oven to 350°F (175°C) and place the skewers on a baking tray for about 10 minutes. For a skillet, heat a little olive oil in a pan and cook the skewers over medium heat for 3 to 5 minutes. To retain flavor and texture, avoid overcooking them. Heat just until warm, and enjoy! Grill vegetable skewers for about 10 to 12 minutes. This time allows the veggies to become tender. You should turn them every few minutes. Look for nice grill marks as a sign they are done. Each type of veggie cooks at a different rate, so keep an eye on them. Bell peppers should be soft, while zucchini needs to be tender but not mushy. You can use frozen vegetables, but they may not grill the same way. Thaw them first and pat them dry. This step helps them cook better on the grill. Frozen veggies often lose some texture and flavor. Fresh vegetables usually taste better and have a nice crunch. If possible, choose fresh for the best results. Both metal and bamboo skewers have their pros. Metal skewers are reusable and heat up well. They help cook the veggies evenly. Bamboo skewers are great for one-time use and are easy to find. Just soak them in water for 30 minutes before grilling. This soaking helps prevent burning. Choose based on your needs and what you have. Yes, you can prepare skewers ahead of time. Just marinate the veggies and thread them onto skewers. Store them in the fridge for a few hours or even overnight. This allows the flavors to deepen. When ready to grill, just take them out and cook! This method saves time and makes grilling easier. Check the Full Recipe for more tips. Grilling vegetable skewers is simple and fun. You learned about essential veggies, marinades, and tips for grilling. Each step builds tasty, colorful skewers for any meal. Explore variations to match your taste and dietary needs. Store leftovers right and reheat for full flavor. Enjoy grilling! Your next backyard meal will impress everyone. Take these ideas and make your skewers unique. Enjoy fresh flavors and colorful presentations!

Grilled Vegetable Skewers Flavorful and Easy Recipe

Looking for a fresh, easy dish that packs a punch? Grilled vegetable skewers are the answer! Bursting with flavor and

Older posts
Newer posts
← Previous Page1 … Page31 Page32 Page33 … Page91 Next →

dsad

© 2025 recipesstation • Built with GeneratePress

Our Policies

  • Copyright Policy
  • Cookie Policy
  • GDPR Policy
  • Privacy Policy
  • Disclaimer
  • Terms Of Use

More Information

  • Home
  • About
  • Contact
  • Appetizers
  • Dessert
  • Dinner
  • Drinks
©2025, recipesstation About Back To Top