Skip to content
DisclaimerTerms Of UseGDPR PolicyCookie Policy

recipesstation

  • Home
  • Drinks
  • Appetizers
  • Dinner
  • Dessert
  • About
  • Contact
  • Privacy Policy
DisclaimerTerms Of UseGDPR PolicyCookie Policy

Emily

- ½ cup unsalted butter - 1 cup granulated sugar - 2 large eggs - 1 teaspoon vanilla extract - ¾ cup all-purpose flour - ¼ cup unsweetened cocoa powder - 1 teaspoon baking powder - ½ teaspoon salt - 1 cup strong brewed coffee, cooled - 1 cup mascarpone cheese - ½ cup powdered sugar - 2 tablespoons cocoa powder for dusting The magic of Tiramisu brownies starts with the right ingredients. Each one plays a special role. Unsalted butter gives a rich base. Granulated sugar adds sweetness and moisture. Large eggs bind everything together. Vanilla extract brings warmth and depth. All-purpose flour offers structure. Unsweetened cocoa powder provides that deep, chocolatey flavor. Baking powder helps the brownies rise, while salt enhances all the flavors. Brewed coffee is key; it infuses the brownies with a lovely coffee taste. Mascarpone cheese gives a creamy layer that makes these brownies special. Powdered sugar sweetens the mascarpone mix, while cocoa powder adds a final touch of elegance when dusted on top. This blend of ingredients creates a dessert that balances chocolate with coffee and cream. You can find the complete recipe above. 1. Preheating the oven: First, set your oven to 350°F (175°C). This step is key for even baking. 2. Melting the butter: In a medium saucepan, melt ½ cup of unsalted butter over low heat. Stir slowly to avoid burning. 3. Blending the sugar and eggs: Once melted, mix in 1 cup of granulated sugar. Then add 2 large eggs one at a time. Beat well after each egg to create a smooth batter. Add 1 teaspoon of vanilla extract for extra flavor. 4. Combining dry ingredients: In a separate bowl, sift together ¾ cup of all-purpose flour, ¼ cup of cocoa powder, 1 teaspoon of baking powder, and ½ teaspoon of salt. Gradually mix this dry blend into the wet batter. Stir gently to keep the brownies fudgy. 1. Pouring the batter into the pan: Pour the brownie batter into a greased 8x8 inch baking pan. Spread it evenly with a spatula. 2. Baking time and doneness check: Place the pan in the preheated oven. Bake for 20 to 25 minutes. Check doneness with a toothpick; it should come out with a few moist crumbs. 1. Whisking mascarpone, sugar, and vanilla: While the brownies bake, in a bowl, whisk together 1 cup of mascarpone cheese, ½ cup of powdered sugar, and 1 teaspoon of vanilla extract. Mix until smooth. 2. Spreading the mascarpone mixture over brownies: Once the brownies cool for about 10 minutes, spread the mascarpone layer on top. Make sure it covers the brownies evenly. 1. Poking holes in baked brownies: After spreading the mascarpone, take a toothpick and poke holes all over the brownies. This allows the coffee to soak in. 2. Pouring coffee over the brownies: Slowly pour 1 cup of cooled brewed coffee over the brownies. Make sure it seeps into the holes for rich flavor. For the complete recipe, check out the Full Recipe section. To make fudgy brownies, mix your ingredients gently. Over-mixing can make them cake-like. Stir until just combined for the best texture. For baking time, check them at 20 minutes. If a toothpick comes out with moist crumbs, they are done. If not, add a few more minutes but watch closely. You can boost flavor by adding espresso powder. Just one teaspoon can elevate the coffee taste. If you want to try something fun, use flavored liqueurs like coffee or hazelnut. This adds a unique twist to your brownies. For garnishing, try chocolate shavings or a dusting of cocoa powder. This adds a nice touch to your brownies. When serving, cut them into neat squares. Place them on a chilled plate for a fancy look. If you're feeling creative, add fresh berries for color and flavor. For the complete recipe, check the Full Recipe section! {{image_4}} For a gluten-free version, you can swap the all-purpose flour. Here are some great options: - Almond flour - Coconut flour - Gluten-free all-purpose blend These alternatives work well, but adjust the amount. Each flour has different moisture needs. To make these brownies vegan, you need to replace the eggs. Here are some ideas: - 1/4 cup unsweetened applesauce per egg - 1/4 cup mashed banana per egg - 1 tablespoon ground flaxseed mixed with 2.5 tablespoons water (let sit for 5 minutes) For the mascarpone, try these vegan options: - Cashew cream - Silken tofu blended with lemon juice and sugar - Store-bought vegan mascarpone Want to mix it up? Here are some fun ideas: - Add 1 cup of chocolate chips to the batter. They melt and create pockets of gooey chocolate. - Experiment with spices like cinnamon or nutmeg. Just a pinch can add warmth and depth. You can get creative while keeping the delicious coffee and mascarpone flavors in mind. Enjoy the process! For the full recipe, check out the full recipe. To keep your tiramisu brownies fresh, use an airtight container. Glass containers work best. They prevent moisture loss and keep flavors intact. If you don't have one, plastic wrap will do. Store them in the fridge if you plan to eat them later. Room temperature is fine for a day or two. Just cover them well to keep them moist. Freezing is a great option for long-term storage. First, let the brownies cool completely. Then, cut them into squares. Wrap each square tightly in plastic wrap. Place the wrapped brownies in a freezer-safe bag. They will stay fresh for up to three months. To thaw, move them to the fridge overnight. For best texture, avoid thawing in the microwave. Tiramisu brownies are best enjoyed fresh. They will last about 3 to 4 days in the fridge. For maximum freshness, keep them sealed. If you see any signs of mold or off smells, it's best to discard them. Enjoying your brownies quickly ensures the best taste and texture. Yes, you can use instant coffee. However, the flavor will change. Brewed coffee gives a rich taste. Instant coffee can taste weaker and less complex. If you want a bold flavor, stick with brewed coffee. To check if the brownies are done, use a toothpick. Insert it into the center of the brownies. If it comes out with a few moist crumbs, they are ready. If it comes out wet, bake them a bit longer. This simple test helps avoid overbaking. Serve Tiramisu brownies chilled for the best taste. Cut them into squares and place them on a chilled plate. You can add chocolate shavings or a dusting of cocoa powder for a nice touch. Pair them with a scoop of vanilla ice cream or a dollop of whipped cream for extra delight. Yes, you can make the brownies ahead of time. Bake and cool them, then add the coffee and mascarpone layer. Cover and store them in the fridge for up to two days. This makes them a great dessert for gatherings. Each brownie has about 200 calories. They contain sugar, butter, and mascarpone cheese, which adds to the calorie count. The protein comes mainly from the eggs and mascarpone. Check the full recipe for a detailed breakdown of all ingredients and their amounts. Tiramisu brownies are a delicious blend of flavors and textures. We covered key ingredients, step-by-step instructions, and helpful tips to make them perfect. You learned about variations, storage methods, and answered common questions. To enjoy these brownies, follow the recipe closely. Get creative with flavors or serve them in new ways. Tiramisu brownies are not just treats; they're also a fun baking project. Enjoy making and sharing them!

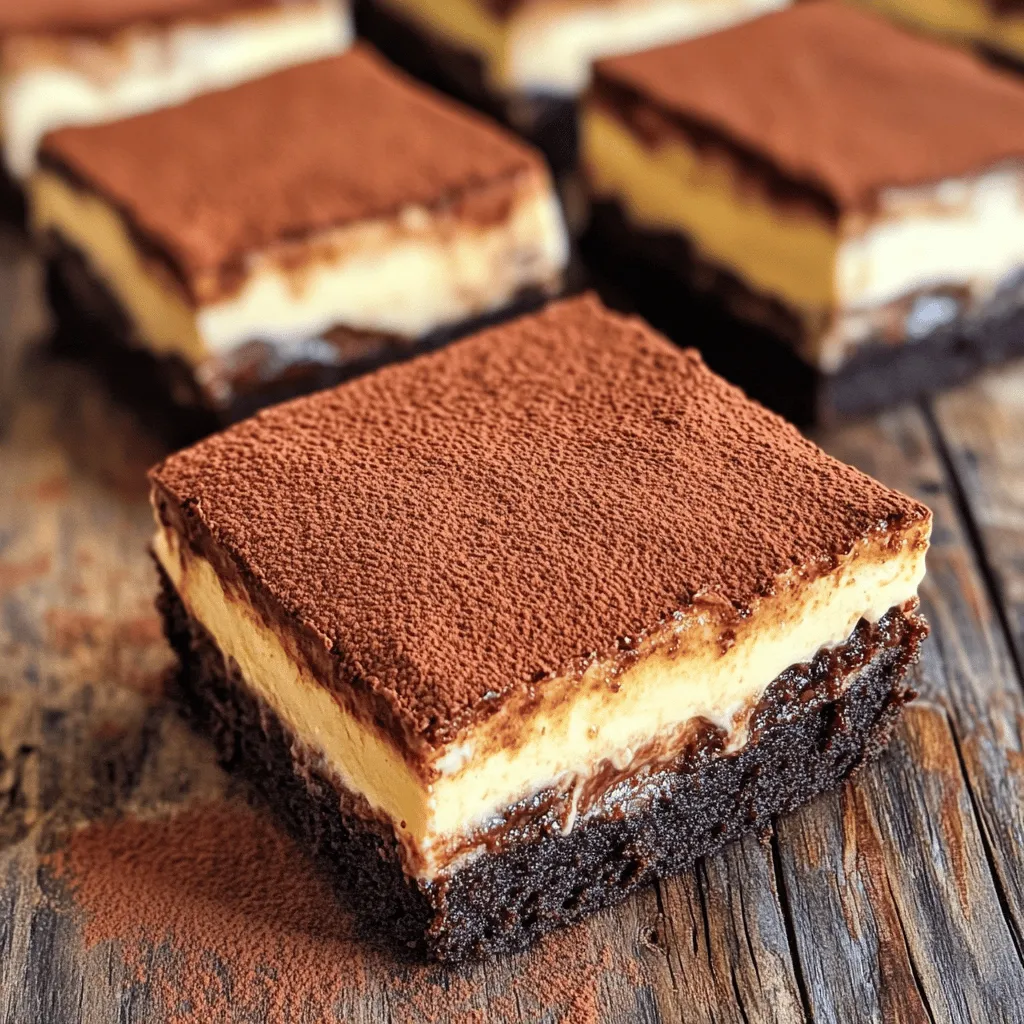
Tiramisu Brownies Delightful Coffee Blooming Treat

Get ready to indulge in a sweet twist on a classic favorite with my Tiramisu Brownies! These coffee-infused, fudgy treats

This easy cherry pie uses simple ingredients. You can make it with fresh or frozen cherries. The pie has a sweet and tart filling that pairs well with a flaky crust. You will love how easy it is to prepare. - 2 cups fresh or frozen cherries, pitted - 1 cup granulated sugar - 2 tablespoons cornstarch - 1 teaspoon pure vanilla extract - 1 tablespoon fresh lemon juice - 1 tablespoon unsalted butter, cut into small pieces - 1 pre-made pie crust (store-bought or homemade) - 1 large egg, beaten (for egg wash) - 1 tablespoon coarse sugar (for topping) You can make this cherry pie gluten-free. Just use a gluten-free pie crust. For a vegan option, swap the butter for a plant-based butter. Skip the egg wash and use a splash of plant milk instead for shine. This way, everyone can enjoy this tasty treat! Start by preheating your oven to 425°F (220°C). A hot oven helps make the crust flaky and golden. This step is key for a tasty pie. In a medium saucepan, mix the pitted cherries, sugar, cornstarch, vanilla, and lemon juice. Heat this mixture over medium heat. Stir gently as it warms up. Cook for about 5-7 minutes or until it thickens and bubbles. Once thick, take it off the heat. Let it cool for a few minutes before using it. If you make your own crust, roll it out on a floured surface. Aim for about 1/8 inch thick. If you use a store-bought crust, press it into a 9-inch pie dish. Make sure it fits snugly against the bottom and sides. Pour the cooled cherry filling into the crust. Spread the filling evenly. For extra flavor, add small pieces of butter on top of the cherries. If you have extra dough, create a lattice or add another layer over the filling. Press the edges together to seal. Crimp the edges with a fork or fingers. Cut 3-4 small slits in the top to allow steam to escape. Place the pie in your hot oven. Bake for 25-30 minutes. Watch it closely so it doesn’t over-brown. The crust should be golden, and the filling should bubble. Once baked, take the pie out of the oven. Allow it to cool for at least 30 minutes. This helps the filling set. Serve the pie warm or at room temperature for the best taste. Enjoy your delightful cherry bliss pie! To get a flaky crust, chill your butter before using it. Cold fat creates pockets in the dough. This leads to a light, flaky texture. Use ice-cold water when mixing your dough. This keeps it cool and prevents it from becoming tough. Roll the dough gently on a floured surface. Don't overwork it; just mix until combined. Having the right tools makes baking easier. Here’s what I recommend: - Rolling pin - 9-inch pie dish - Mixing bowls - Pastry cutter or fork - Sharp knife for cutting slits - Brush for the egg wash These tools help you create the perfect cherry pie with ease. Sometimes things don’t go as planned. Here are a few fixes: - Crust too tough? You may have overmixed the dough. Try mixing less next time. - Filling too runny? Use more cornstarch to thicken it. - Crust burning? Cover the edges with foil if it browns too quickly. With these tips, you can avoid common pitfalls and enjoy a delicious cherry pie. For the full recipe, check out the [Full Recipe]. {{image_4}} If you love cherry pie, you might enjoy other fruit pies too. You can try making a blueberry pie. Blueberries burst with sweet flavor. Another great choice is apple pie. The tartness of apples pairs well with spices. You can also use peaches or raspberries. Each fruit brings its own unique taste. Feel free to swap out the cherries in the Full Recipe with your favorite fruits. To take your cherry pie to the next level, think about adding unique flavors. A touch of almond extract can give a nice nutty twist. You can also mix in a bit of cinnamon for warmth. If you want some zest, add lemon or orange peel. These flavors blend well with cherries. They can make your pie stand out at any gathering. The crust can change the pie's look and taste. A lattice crust is a fun option. It lets the filling peek through and looks pretty. A crumble topping adds a nice, crunchy texture. You can mix oats and brown sugar for the crumble. If you want something different, try a cookie crust. Just crush your favorite cookies and press them into the pie dish. Each crust type can give your cherry pie a new flair. To keep your pie fresh, cover it with plastic wrap or aluminum foil. You can also place it in an airtight container. Store it in the fridge for up to four days. This keeps the crust from getting soggy while keeping the cherries tasty. If you want to enjoy it longer, freezing is a good option. You can freeze cherry pie for up to three months. Make sure the pie is completely cool before freezing. Wrap it tightly in plastic wrap, then aluminum foil. This double layer keeps out air and prevents freezer burn. You can also freeze slices if you want to enjoy them one at a time. To reheat, preheat your oven to 350°F (175°C). Place the pie on a baking sheet to catch drips. Heat for about 15-20 minutes if it's whole. For slices, heat for 10-15 minutes. You want the filling to be warm and the crust to be crispy again. Enjoy your warm pie just like fresh! Yes, you can use frozen cherries. Frozen cherries work well in this pie. They save time and still taste great. Just make sure to thaw and drain them before use. This helps keep your pie from getting too watery. Making pie crust is simple. You need a few basic ingredients. Combine 1 ½ cups of flour, ½ cup of cold butter, and a pinch of salt. Mix until it looks like crumbs. Then, add ice water, one tablespoon at a time. Form the dough into a ball and chill for 30 minutes. Roll it out, and you have a perfect crust! Cherry pie pairs well with many toppings. You can serve it with whipped cream for a sweet touch. Ice cream makes it extra special. Try vanilla or even a scoop of chocolate! Fresh mint leaves can add a nice pop of color and flavor too. Cherry pie lasts about 2 to 3 days at room temperature. Cover it with plastic wrap or foil. If you keep it in the fridge, it can last up to a week. You can also freeze it for longer storage. Just wrap it well and it can last for about 2 months. In this blog post, we explored how to make a delicious cherry pie. We covered the ingredients needed, step-by-step directions, and helpful tips. You learned about dietary options, variations, and storage tricks for leftovers. Cherry pie is easy and fun to make at home. Use this guide to create your perfect pie, share it, and enjoy every bite!

Easy Cherry Pie Simple and Delicious Homemade Treat

Are you ready to bake a pie that’s easy and delicious? This Easy Cherry Pie will make your taste buds

- 2 ripe mangoes, diced into bite-sized pieces - 1 crisp cucumber, diced - 1 colorful red bell pepper, diced - 1/2 of a medium red onion, finely chopped - 1 jalapeño pepper, seeded and minced (optional for an added kick) The main ingredients bring a burst of color and flavor. Ripe mangoes are sweet and juicy. The cucumber adds a nice crunch. The red bell pepper gives a fresh taste and bright color. Red onions add a bit of sharpness, while jalapeños can spice things up if you want. - Juice of 2 fresh limes - 2 tablespoons honey (or substitute with agave syrup for a vegan alternative) - 2 tablespoons extra-virgin olive oil - Sea salt and freshly cracked black pepper to taste This dressing is zesty and bright. Fresh lime juice gives it a tangy kick. Honey adds sweetness, but you can use agave syrup for a vegan option. Olive oil makes it smooth, while salt and pepper enhance all the flavors. This recipe serves 4. If you have more guests, just double the amounts. You can swap ingredients if needed. Try using pineapple instead of mango for a tropical twist. You can also use a different oil or sweetener based on your taste. If you want a creamier dressing, add yogurt or avocado. For more details, check the Full Recipe. Start with the mangoes. Choose ripe mangoes; they will be sweet and juicy. Hold the mango upright and slice off the cheeks, avoiding the pit. Dice the mango into bite-sized pieces. Next, grab a cucumber. Peel it if you like, then cut it into small cubes. For color, dice a red bell pepper. Follow this by chopping half a red onion finely. If you want a kick, chop a jalapeño pepper. Remove the seeds first. Lastly, roughly chop fresh cilantro leaves. Combine all these vibrant ingredients in a large mixing bowl. In a small bowl, squeeze the juice of two fresh limes. You need about a half cup of juice. Add two tablespoons of honey or agave syrup. This adds sweetness to balance the lime's tartness. Next, pour in two tablespoons of extra-virgin olive oil. This gives the dressing a rich flavor. Season with sea salt and cracked black pepper to taste. Whisk all the ingredients together vigorously. You want a smooth, glossy dressing that coats well. Now it’s time to mix! Drizzle the lime dressing over the salad mixture. Use a spatula or salad tongs to gently toss the salad. Be careful not to mash the mango pieces. They should stay intact for a beautiful look. Taste the salad and adjust the seasoning if needed. Wait about ten minutes for the flavors to blend. Just before serving, sprinkle chopped cilantro over the top. This adds a fresh aroma and bright color. For the complete recipe, check out the Full Recipe section. To boost the taste of your mango salad, try these ideas: - Add more lime juice for a zesty kick. - Use fresh herbs like mint or basil for added freshness. - Include diced avocado for creaminess and healthy fats. - Toss in some chopped nuts for crunch. These changes can make your salad unique and tasty. Don’t hesitate to play with flavors until you find your perfect mix. This salad shines at summer picnics or casual dinners. Here are some great times to serve it: - Serve it at barbecues alongside grilled meats. - It works well for taco night or as a side for fish. - Bring it to potlucks for a vibrant and fresh option. Garnish with lime wedges or extra herbs to make it pop on the table. Make your salad visually appealing with these tips: - Use a large, shallow bowl to let the colors stand out. - Layer the ingredients instead of mixing them all together. - Add a few lime slices on top for a bright touch. These simple tricks will impress your guests and make your salad a centerpiece. For the full recipe, check out the Tropical Mango Fusion Salad with Zesty Lime Drizzle. {{image_4}} You can easily swap fruits or veggies in this salad. If mangoes are not available, try ripe peaches or juicy pineapples. They add a sweet burst to the dish. You could also use diced avocado for creaminess. For crunch, consider adding radishes or shredded carrots. These options keep your salad fresh and fun. While the lime dressing shines, feel free to experiment with other dressings. A simple balsamic vinaigrette works well, bringing a tangy note. You could try a creamy yogurt dressing for a different twist. Even a chili-lime sauce can add heat and zest. These dressings can change the whole flavor of your mango salad. Want to spice things up? Add cooked shrimp or grilled chicken for protein. You can also toss in roasted chickpeas for a hearty touch. For more heat, include diced serrano peppers. These additions give your salad unique flavors and textures. Feel free to get creative and make it your own! To keep your mango salad fresh, store it in an airtight container. Place it in the fridge. This helps to keep the flavors intact and the ingredients crisp. If you can, consume the salad within a day or two for the best taste. Avoid mixing in the dressing until you are ready to eat. This will prevent the salad from getting soggy. Mangoes stay fresh for about 2-3 days after cutting. Cucumbers and bell peppers can last 3-5 days when stored properly. Red onions usually stay good for a week if kept cool. If you use jalapeños, they should be eaten within a few days for the best flavor. Check for any signs of spoilage before using. This salad is best served cold. If you need to revive it, mix in a splash of fresh lime juice. This will brighten up the flavors. You can also add fresh cilantro just before serving. Avoid reheating the salad, as it may change the texture and taste. Enjoy it as a refreshing snack or side dish! For the complete recipe, check out the Full Recipe. Yes, you can make the salad ahead of time! To prep in advance, chop the mangoes and veggies. Store them in an airtight container in the fridge. Keep the dressing separate until you're ready to eat. This keeps the salad fresh and crunchy. This salad pairs well with many dishes. You can serve it alongside grilled chicken or fish for a tasty meal. It also works great with tacos or rice dishes. The bright flavors of the salad complement spicy foods very well. Yes, this recipe can easily be vegan! You can swap honey for agave syrup. All other ingredients are naturally vegan. This way, everyone can enjoy the refreshing flavors of the salad. It's a great option for plant-based meals. For the full recipe, check out the Tropical Mango Fusion Salad with Zesty Lime Drizzle. In this article, we explored making a refreshing mango salad. You learned about the key ingredients, from ripe mangoes to spicy jalapeños. We shared step-by-step instructions for preparing and mixing the salad. You found tips on enhancing flavors and ideas for presentation. We also discussed variations, storage tips, and FAQs. With these insights, you can easily create a tasty, colorful dish. Enjoy trying new flavors and impressing your guests. Your creativity with this salad will shine!

Refreshing Mango Salad with Lime Dressing Delight

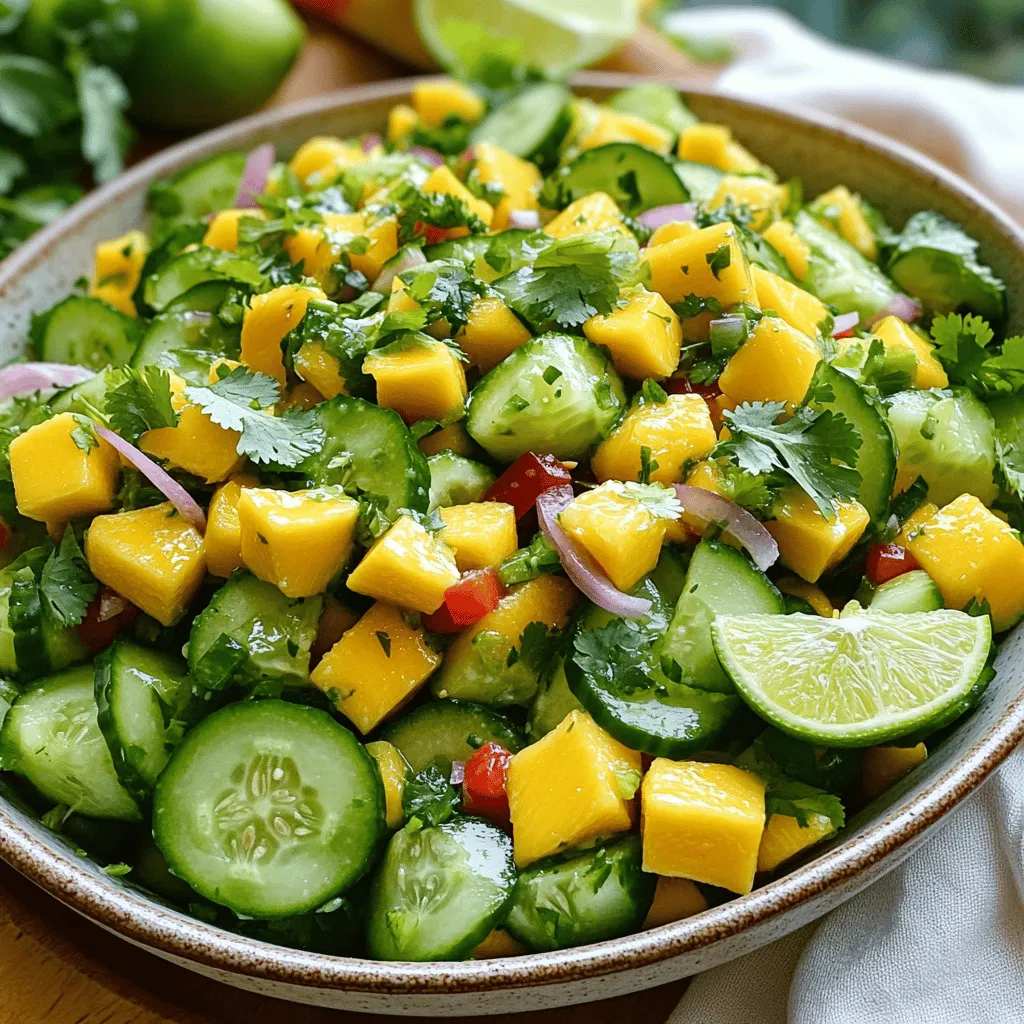
Welcome to my kitchen, where I’m excited to share a vibrant and tasty dish: Refreshing Mango Salad with Lime Dressing!

Creating a layered fruit salad is fun and easy! Here’s what you will need: - 1 cup fresh strawberries, diced - 1 cup ripe pineapple, diced - 1 cup sweet mango, diced - 1 cup juicy blueberries - 1 ripe banana, sliced - 1/2 cup creamy Greek yogurt (optional for extra richness) - 1 tablespoon honey (adjust based on sweetness preference) - Juice of 1 orange - Juice of 1 lemon - Fresh mint leaves for garnish When choosing your fruits, go for ripe and colorful options. Fresh fruits not only taste better but also look more appealing. If you can, pick seasonal fruits. They often have the best flavor and sweetness. You can also adjust the quantities based on what you have or love. Adding Greek yogurt gives the salad a creamy touch. If you want a sweeter salad, add more honey. The citrus juices from the orange and lemon add a refreshing zing. Don’t forget to garnish with mint leaves for a pop of color! This fruit salad is perfect for warm days, picnics, or as a light dessert. For the complete recipe, check out the Full Recipe section. - Rinse all berries under cool water. - Dice strawberries, pineapple, and mango into small pieces. - Slice the banana into round pieces and pat blueberries dry. Preparing the fruits is key to a great salad. Start by rinsing the berries under cool water. This helps remove any dirt or pesticides. Next, cut the strawberries, pineapple, and mango into small, bite-sized pieces. This way, they mix well and are easy to eat. For the banana, slice it into rounds. Lastly, pat the blueberries dry with a paper towel. This keeps them from getting mushy. - Combine honey, orange juice, and lemon juice in a bowl. - Whisk until honey is dissolved. Next, let’s make the citrus dressing. In a small bowl, combine honey, freshly squeezed orange juice, and lemon juice. Use a whisk to mix the ingredients until the honey fully dissolves. This dressing adds a zesty and sweet flavor to your fruit. It’s simple but so effective! - Layer strawberries, pineapple, mango, and blueberries in a bowl. - Add dollops of Greek yogurt on top (optional). - Drizzle citrus dressing over everything. Now comes the fun part: assembling your fruit salad! Grab a large glass bowl or smaller cups. Start by layering the strawberries at the bottom. Then add the diced pineapple, followed by the mango, and finally, finish with blueberries on top. If you want, add a dollop of Greek yogurt after each layer for creaminess. This step is optional, but I highly recommend it! Once you finish layering, drizzle the citrus dressing over the top. This adds flavor and makes it look pretty. Enjoy your beautiful creation! For the full recipe, check out the details above. - Use a clear trifle bowl or glass cups for layering. - Garnish with mint leaves for added color. When serving a layered fruit salad, the way it looks is key. A clear trifle bowl lets you show off the beautiful fruit layers. If you don't have one, use glass cups. Each layer will be a treat for the eyes. Mint leaves add a pop of green and make your dish look even fresher. - Opt for ripe and seasonal fruits for best flavor. - Adjust fruit quantities based on availability. Fresh fruit makes all the difference. I always pick ripe, seasonal fruits. They taste better and are often cheaper. If you can’t find a specific fruit, feel free to swap it out. Use what’s in season or what you love. This salad is flexible and fun! - Prepare fruits a few hours in advance to save time. - Keep dressing separate until serving to maintain freshness. You can save time by prepping fruits a few hours ahead. Just store them in the fridge. But wait to add the dressing until it's time to serve. This keeps the fruit fresh and prevents it from getting soggy. Enjoy your beautiful Layered Fruit Salad with Citrus Dressing! For the complete recipe, check the Full Recipe section. {{image_4}} You can mix things up with a tropical fruit twist. This means swapping fruits. Try using kiwi or papaya. These fruits add a nice touch. You can also add shredded coconut. This gives the salad extra texture. The coconut adds a fun crunch and taste. It creates a beachy vibe. If you love berries, try a berry blast version. Use mixed berries like raspberries and blackberries. They bring a tangy flavor. You can even switch the dressing. A berry vinaigrette works great instead of citrus. This change gives a unique taste. It makes the salad bold and vibrant. For a creamy delight, change up your layers. Instead of Greek yogurt, use whipped cream. It makes the salad rich and fluffy. To add some crunch, layer in granola. This gives a nice contrast to the soft fruits. Together, they create a wonderful mix of flavors and textures. Feel free to explore these variations and make your layered fruit salad truly your own. Check out the Full Recipe for more details! To keep your fruit salad fresh, place it in an airtight container. This helps protect the flavors and keeps the fruits crisp. Try to eat the salad within 1-2 days for the best taste and texture. After that, the fruits may start to lose their charm. Always store your fruit salad in the refrigerator. This keeps the fruits cool and fresh. If you plan to store it for more than a few hours, keep the citrus dressing separate. Mixing the dressing too early can make the fruits soggy. Freezing fruit salad is not a great idea. It changes the texture and taste of the fruits. To enjoy the best flavors and appearance, savor your salad fresh. For the full recipe, check out the instructions above. Fresh fruit is preferred for texture and flavor. However, thawed frozen fruit can be used in a pinch. Just make sure to drain excess water for the best results. You can reduce the amount of honey or add more citrus juice to balance sweetness. This will keep the dressing bright and tangy, which is great for the fruit. It's best to prepare the dressing ahead of time. Assemble the salad closer to serving for freshness. This way, your fruits stay vibrant and crisp. Choose colorful seasonal fruits for the best visual appeal and flavor. Think strawberries, mangoes, and blueberries. They create a lovely mix that looks great in layers. For the full recipe, check the details above. This fruit salad is fresh, vibrant, and simple to make. We outlined the ingredients you need, including ripe fruits and optional yogurt. Step-by-step instructions showed you how to prepare, dress, and assemble the salad. Remember to use seasonal fruits for the best taste. Try different variations to keep things exciting. Overall, this salad makes a great treat for any occasion. Enjoy your tasty creation!

Layered Fruit Salad with Citrus Dressing Delight

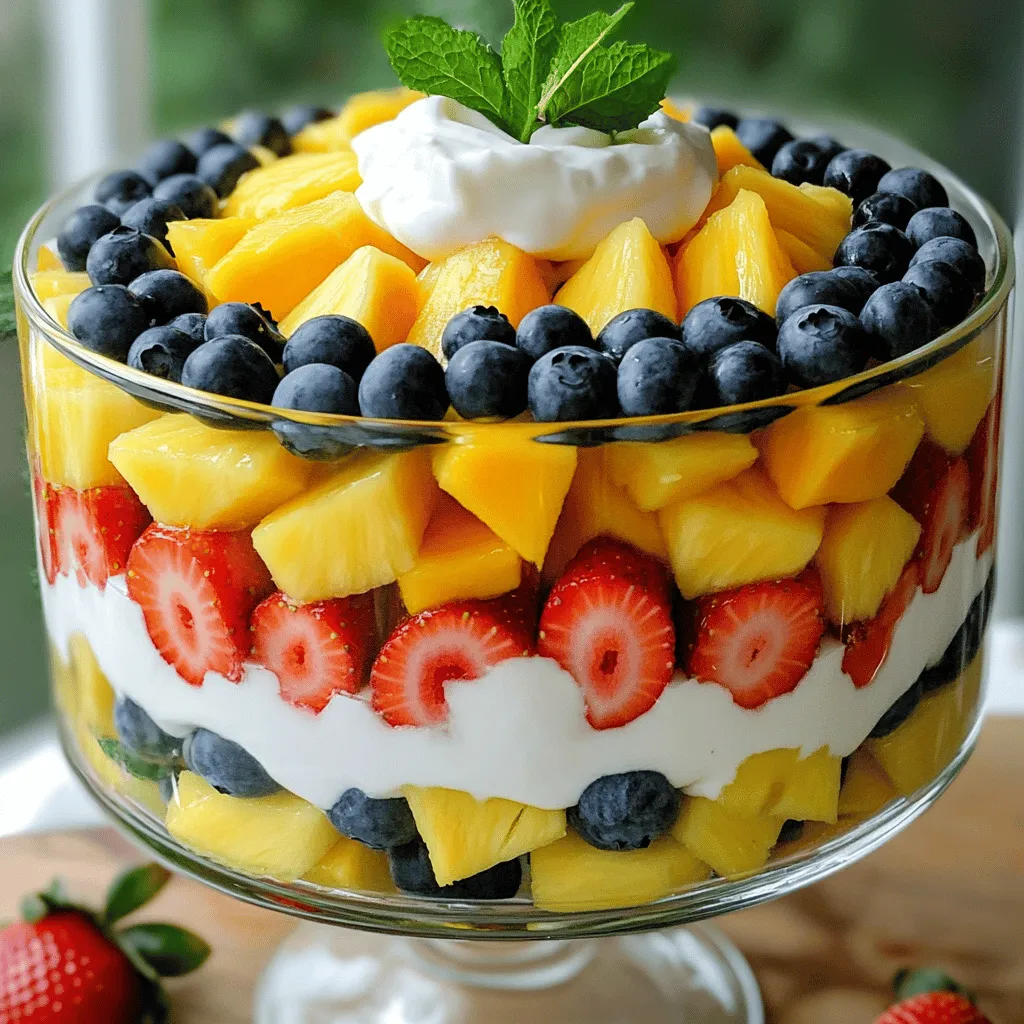
Dive into a refreshing burst of flavors with my Layered Fruit Salad with Citrus Dressing Delight! This simple recipe brings

- 1 ripe mango, diced - 1 red bell pepper, diced - ½ red onion, finely chopped - 1 cup cherry tomatoes, halved - 1 ripe avocado, diced - ¼ cup fresh cilantro, finely chopped - 1 can (15 oz) chickpeas, drained and rinsed - 2 tablespoons extra virgin olive oil - 1 tablespoon fresh lime juice - 1 teaspoon ground cumin - Salt and freshly cracked black pepper to taste This salad serves four people. Each serving is low in calories but rich in nutrients. You get about 200 calories per serving. The fresh mango adds vitamin C and vitamin A. Chickpeas give you fiber and protein. Avocado provides healthy fats. Together, these ingredients create a balanced dish that supports your health. Mango Chickpea Salad is not just tasty; it’s also good for you. Enjoy this fresh and colorful delight! You can find the full recipe in the article. - Dice 1 ripe mango into small cubes. - Dice 1 red bell pepper into small pieces. - Halve 1 cup of cherry tomatoes. - Chop ½ red onion finely. - Dice 1 ripe avocado into bite-sized pieces. This step is key for a colorful salad. You want each piece to fit well with the others. Use a sharp knife to make clean cuts. It makes your salad look better and taste great. - Combine all fresh ingredients in a large salad bowl. - Add the drained chickpeas and fresh cilantro. Mixing all the fresh ingredients brings out their flavors. The chickpeas add protein and a nice texture. The cilantro gives a bright, fresh taste that lifts everything. - Whisk together 2 tablespoons of olive oil. - Add 1 tablespoon of fresh lime juice, 1 teaspoon of ground cumin, salt, and pepper. This dressing is simple but full of flavor. The lime juice adds a zesty kick, while cumin gives a warm spice. It pulls all the salad flavors together. - Allow the salad to chill in the refrigerator for 15 minutes. - Adjust seasoning to taste before serving. Chilling helps the flavors blend. You can taste and add more salt or lime juice if needed. This is your chance to make it just right. For the full recipe, check out the complete instructions in the Full Recipe section. Enjoy making this Mango Chickpea Salad! To make your Mango Chickpea Salad shine, start with the lime juice. If you want more zing, add a splash more. For a softer taste, dial it back. Adjusting salt and pepper can also elevate the flavors. Start with a pinch, then taste and tweak. Chilling the salad is key too. When you let it sit in the fridge for about 15 minutes, the flavors blend better. This time allows the chickpeas and mango to soak up the dressing. The result is a more vibrant and delicious dish. Serving your salad beautifully makes it even more appealing. Use a wide, shallow bowl to show off the bright colors. The reds from the bell pepper and the yellows from the mango make it pop! For garnishing, sprinkle extra cilantro on top. This adds a fresh touch. Place lime wedges on the side. They give a fun option for a zesty squeeze right before eating. You don’t need fancy tools for this salad. A large mixing bowl is essential for combining all the fresh ingredients. A good knife is needed for dicing the mango and bell pepper. Use two large utensils for mixing. These help toss the salad without mashing the avocado. A small bowl will work well for whisking the dressing. Mixing bowls with a non-slip base can make your prep easier too. For the full recipe, check the complete details provided. {{image_4}} You can switch out mango for other fruits. Pineapple adds a sweet and tangy taste. Peaches offer a soft, juicy texture. If you want a different legume, try black beans or lentils. They add a hearty touch and protein. For dressings, you can get creative! Tahini gives a nutty flavor that pairs well. A yogurt-based dressing adds creaminess without being heavy. As seasons change, adjust your dressings based on what is fresh. A lemon vinaigrette can brighten the salad in summer. This salad is easy to adapt. It’s vegan as is and gluten-free too. For low-sodium diets, rinse the chickpeas well. Use fresh herbs and spices instead of salt. Making these small changes keeps the salad tasty and healthy. To keep your Mango Chickpea Salad fresh, use airtight containers. Glass or plastic containers work well. Seal them tightly to avoid air exposure. This helps maintain the salad's taste and crunch. In the fridge, this salad lasts about 3 days. After that, the ingredients may lose their texture and flavor. Can you freeze Mango Chickpea Salad? It’s not the best idea. The fresh ingredients can get mushy once frozen. If you want to freeze it, try only freezing the chickpeas. To freeze, place them in a sturdy freezer bag. Remove as much air as possible. When ready to use, thaw them in the fridge overnight. For enjoying leftovers, eat the salad cold. This keeps the flavors bright and fresh. If you prefer warmth, heat the chickpeas separately. Use a pan over low heat. Stir often to prevent burning. Once warm, combine them back into the salad. This way, you keep the fresh taste intact. Yes, you can make this salad ahead of time. To prep in advance, cut the mango and avocado just before serving to keep them fresh. You can mix the chickpeas, bell pepper, onion, tomatoes, and cilantro earlier. Store these ingredients in a bowl. Keep the dressing in a separate container. When ready to serve, toss everything together for the best taste. Mangoes are rich in vitamins A and C. They also have antioxidants that boost your immune system. Chickpeas are high in protein and fiber. They help with digestion and keep you full longer. Together, they make a healthy meal that promotes overall well-being. You can serve this salad as a main dish or side. It pairs well with grilled chicken or fish. You can also serve it with tacos for a fun twist. For a light lunch, enjoy it on its own. This salad is versatile and perfect for any occasion. Yes, this recipe is great for meal prep. You can make a larger batch and store it in the fridge. Divide it into individual containers for easy meals. Just remember to keep the avocado and dressing separate until serving to maintain freshness. Enjoy a delicious meal all week long with this tasty salad! This blog post shares a fresh mango chickpea salad recipe packed with vibrant ingredients and essential nutrition. You learned how to prepare, assemble, and season your salad for the best flavor. I also shared storage tips and variations to keep it exciting. Remember to chill it for enhanced taste. Feel free to swap ingredients based on what you have. This salad not only tastes great but also offers many health benefits. Enjoy making it, and don't hesitate to get creative with your own twists!

Mango Chickpea Salad Fresh and Flavorful Delight

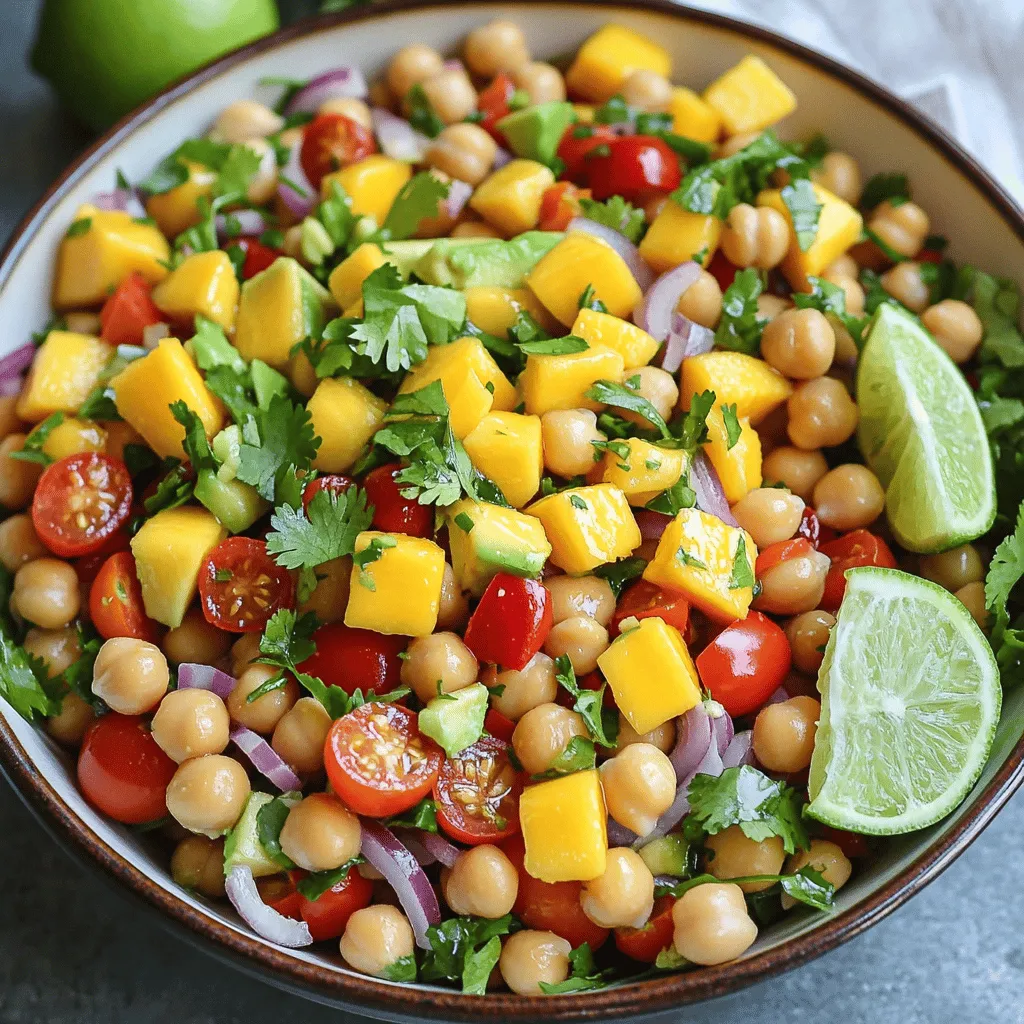
Welcome to a burst of flavor with my Mango Chickpea Salad! This vibrant dish combines juicy mango, crunchy veggies, and

To make a refreshing Lemon Iced Tea, you will need: - 4 cups of water - 4 black tea bags (or green tea bags for a lighter taste) - 1/2 cup freshly squeezed lemon juice (about 3-4 medium lemons) - 1/4 cup honey or agave syrup (sweeten to your liking) - 1/4 cup fresh basil leaves, lightly crushed - Lemon slices for garnishing - Ice cubes for serving Each ingredient in this drink offers health benefits: - Lemon juice is high in vitamin C. This vitamin boosts your immune system. It also aids digestion and adds a bright flavor. - Tea contains antioxidants. These help fight free radicals in your body, promoting overall health. - Basil has anti-inflammatory properties. It can help reduce stress and improve digestion. - Honey or agave syrup can provide quick energy. They also offer natural sweetness without refined sugars. If you want to switch things up, here are some alternatives: - Tea types: You can use green or herbal teas instead of black tea. Each will change the flavor slightly. - Sweeteners: Use stevia or maple syrup if you want a different sweetness. You can also skip sweeteners for an unsweetened tea. - Herbs: Mint or rosemary can replace basil for a unique twist. They can add a fresh scent and taste. These ideas can help you customize your Lemon Iced Tea while keeping it delicious. For the full recipe, check out the Zesty Lemon Basil Iced Tea section. Making lemon iced tea is simple and fun. First, you brew the tea. Then, mix in lemon juice and honey. Next, add fresh basil for flavor. Finally, chill it and serve over ice. This drink is perfect for hot summer days. To start, bring 4 cups of water to a boil in a pot. Once boiling, remove it from heat. Add 4 tea bags and let them steep for 5 to 7 minutes. The longer you steep, the stronger the tea. While it steeps, squeeze the juice from 3 to 4 lemons into a bowl. Add 1/4 cup of honey or agave syrup to the lemon juice. Stir until the sweetener dissolves completely. After steeping, remove the tea bags. Mix the lemon juice and honey blend into the brewed tea. Finally, add 1/4 cup of crushed basil leaves and let it sit for 10 minutes. Next, strain the tea to remove the basil. Pour it into a pitcher and chill it in the fridge for at least 1 hour. When serving, fill glasses with ice cubes. Pour the chilled tea over the ice. For a nice touch, garnish with lemon slices and fresh basil. Enjoy your refreshing drink! If you want the full recipe, check out the Zesty Lemon Basil Iced Tea. To get the right sweetness, start with honey or agave syrup. Use about 1/4 cup for a nice balance. Adjust to your taste. If you want it sweeter, add a little more. If you prefer less sugar, use less. Always mix it well with lemon juice before adding to the tea. This way, the sweetness blends perfectly with the tartness of the lemon. One common mistake is steeping the tea for too long. If you steep black tea over 7 minutes, it can become bitter. Green tea should steep for even less time, around 3-5 minutes. Another mistake is not cooling the tea properly. Rushing this step can make your drink warm instead of refreshing. Lastly, avoid using too much lemon juice. It can overpower the flavor. Stick to the 1/2 cup as listed in the Full Recipe. Adding fresh herbs and fruits can elevate your iced tea. Basil is a great choice, as it pairs well with lemon. Crush the leaves slightly to release their oils before adding. You can also try mint for a cooling effect. For fruits, consider adding berries or slices of peaches. They add a subtle sweetness and nice color. Let the tea sit for a bit after adding these ingredients. This allows the flavors to blend well into your drink. {{image_4}} When you make lemon iced tea, you can choose to sweeten it. Sweetened tea uses sugar, honey, or agave. Unsweetened tea shows off the lemon's bright flavor. Start with the recipe and adjust to your taste. If you like it sweet, add more honey or sugar. For less sweetness, skip the sugar altogether. You can also try different sweeteners to find your favorite. Adding fruits can make lemon iced tea even better. Fresh fruits like strawberries, peaches, or raspberries can add a fun twist. Just slice them and toss them in the pitcher. Let the fruits sit in the tea for a while. This allows the flavors to mix. You can also freeze the fruit into ice cubes. This keeps your drink cold and tasty. Want a fizzy version? Try this sparkling lemon iced tea. First, make your iced tea as in the full recipe. After it cools, mix in sparkling water. Use a 1:1 ratio for a bubbly drink. You can add fresh lemon slices or mint leaves for extra flavor. This drink is perfect for hot summer days and parties. Enjoy the refreshing fizz! Store your lemon iced tea in a clean pitcher. Use a tight lid to keep it fresh. If you have leftovers, put them in the fridge right away. This keeps the tea cool and tasty. Avoid leaving it out at room temperature. The longer it sits out, the more its taste changes. Homemade lemon iced tea stays fresh for about 3 to 5 days in the fridge. After that, it loses flavor and freshness. Check for any changes in smell or taste before drinking. If it smells off, it’s best to toss it. You can use leftover lemon iced tea in fun ways. Try making lemon popsicles by freezing it in molds. You can also mix it with sparkling water for a fizzy drink. Add it to cocktails for a refreshing twist. This way, you enjoy every drop without waste! For the full recipe, check out the Zesty Lemon Basil Iced Tea . The best tea for Lemon Iced Tea is black tea. It gives a strong taste that pairs well with lemon. You can also use green tea for a lighter flavor. Both options work great. Black tea has a robust flavor, while green tea offers a fresh taste. Choose whichever you prefer! Yes, you can make Lemon Iced Tea ahead of time! It actually tastes better after chilling in the fridge. You can prepare it the day before your event. Just store it in a pitcher and keep it cold. When you're ready to serve, pour it over ice for a refreshing drink. To adjust the sweetness, simply change the amount of honey or agave syrup. Start with a quarter cup, then taste it. Add more if you like it sweeter. You can also try using other sweeteners like sugar or stevia. Remember, you can always add more, but you can't take it out! - Full Recipe for Zesty Lemon Basil Iced Tea We covered how to make delicious lemon iced tea using fresh ingredients. I shared health benefits and alternatives for sweeteners and tea types. I also provided step-by-step instructions to brew it just right and tips for perfect flavor. Remember to experiment with variations, like adding fruits or bubbly water. Proper storage will keep your tea fresh longer. Making this drink can be fun and tasty! Enjoy the process and your refreshing homemade lemon iced tea!

Lemon Iced Tea Refreshing and Easy Summer Drink

There’s nothing quite like a glass of Lemon Iced Tea on a hot summer day. It’s refreshing, simple to make,

- 1 pound large shrimp, peeled and deveined - 4 tablespoons unsalted butter - 2 tablespoons olive oil - 4 cloves garlic, finely minced - 1 teaspoon red pepper flakes (optional) - Zest and juice of 2 fresh lemons - Salt and freshly ground black pepper, to taste - Fresh parsley, chopped, for garnish - 8 oz linguine or spaghetti - Grated Parmesan cheese, for serving When making Lemon Garlic Shrimp Scampi, you want fresh, tasty ingredients. Fresh shrimp gives the best flavor. Look for shrimp that smell like the ocean and have a firm texture. If you can't find fresh shrimp, frozen shrimp works fine. Just make sure to thaw it properly. You can change things up if needed. For a protein swap, try chicken or tofu. Both work well with the lemon and garlic flavors. If you want a vegan option, use mushrooms or chickpeas. For a gluten-free option, choose gluten-free pasta. It cooks just like regular pasta. Fresh shrimp is great for taste. It cooks quickly and has a nice texture. If you use frozen shrimp, make sure to thaw it right. Place it in the fridge overnight or run it under cold water. This keeps the shrimp juicy. Avoid using hot water, as it can cook the shrimp unevenly. Want the full recipe? Check out the [Full Recipe] for details. To cook linguine or spaghetti perfectly, start with a large pot. Fill it with water and add a generous pinch of salt. Bring the water to a rolling boil. Add the pasta and cook according to the package instructions. This usually takes about 8-10 minutes for al dente. To check, taste a piece; it should be firm but not hard. Once cooked, drain the pasta in a colander. Be sure to save about 1 cup of the starchy pasta water. This water will help bring your dish together later. For sautéing, use medium heat. Begin by melting the butter and olive oil in a large skillet. Wait until it foams and bubbles. Then, add the minced garlic and red pepper flakes if you want some heat. Sauté for about 1 minute. You want the garlic to be fragrant but not brown. Next, add the shrimp in a single layer. Make sure they are not crowded; this helps them cook evenly. Season with salt and pepper. Cook for 2-3 minutes on one side, then flip and cook for another 2-3 minutes. The shrimp are done when they turn pink and opaque. Now, it’s time for the fun part! Pour in the lemon zest and juice. Stir gently to coat the shrimp in the sauce. Next, add the reserved pasta to the skillet. Toss it all together, letting the pasta soak up the flavors. If it looks too dry, add a bit of the reserved pasta water. This will give you a nice, creamy texture. When serving, transfer the shrimp scampi to bowls or plates. Top with fresh parsley and a sprinkle of grated Parmesan cheese for flavor. Enjoy your Lemon Garlic Shrimp Scampi with crusty bread to soak up that amazing sauce. For the complete recipe, check the Full Recipe. To get the best flavor balance, use fresh ingredients. Fresh shrimp and lemons shine in this dish. When cooking garlic, don't let it burn. A gentle heat brings out its sweet taste. Mix the lemon juice in just before serving. This keeps the flavor bright and zesty. - Avoiding overcooked shrimp: Shrimp cook fast. Watch them closely! Cook for 2-3 minutes on each side. They should be pink and opaque. If you cook them too long, they turn tough. - Ensuring garlic doesn't burn: Sauté garlic over medium heat. Stir often while it cooks. It should smell great, not burnt. If it burns, the flavor turns bitter. Pair your Lemon Garlic Shrimp Scampi with a side salad. A fresh green salad adds crunch and freshness. You can also serve it with crusty bread. This is perfect for soaking up the sauce. For wine, a chilled white like Sauvignon Blanc works well. It complements the shrimp and lemon flavors. Consider a light red too, like Pinot Noir, if you prefer. Enjoy your meal with these tips, and don't forget to check the Full Recipe for more details! {{image_4}} To give your scampi some heat, add more red pepper flakes. Start with one teaspoon and taste as you go. If you like it hot, add more. You can also use fresh chili peppers for a punch. Slice them thin and toss them in with the garlic. This adds a fresh flavor along with the heat. For a Mediterranean touch, add veggies. Spinach and cherry tomatoes work great. Add them after the garlic but before the shrimp. The tomatoes will soften and sweeten. The spinach will wilt down nicely. Both add color and nutrition. You can even toss in some olives or artichokes for more flavor. If you prefer a creamy sauce, add heavy cream. After cooking the shrimp, pour in half a cup of cream. Stir it in and let it simmer for a few minutes. This will create a rich, velvety sauce. You can also mix in some grated cheese for extra creaminess. Serve this version over rice or with crusty bread to soak up the sauce. For a complete recipe and detailed steps, check the Full Recipe for Lemon Garlic Shrimp Scampi. To keep your Lemon Garlic Shrimp Scampi fresh, store it properly. Place leftovers in an airtight container. This helps keep the shrimp and pasta from drying out. You can keep it in the fridge for up to three days. Make sure to let it cool to room temperature first. This step prevents moisture buildup in the container. If you want to save some for later, you can freeze the scampi. Use a freezer-safe container or a heavy-duty freezer bag. Make sure to remove as much air as possible. This helps prevent freezer burn. You can freeze it for up to two months. When you’re ready to eat, defrost it in the fridge overnight. Reheating your shrimp scampi requires care. You want to keep the shrimp tender and the pasta tasty. The best way is to use the stovetop. Add a splash of water or broth in a skillet. Heat over low to medium heat. Stir gently until warm. You can also use the microwave, but do it in short bursts. This way, you avoid overcooking the shrimp. Keeping the texture and flavor intact makes all the difference! I always choose large shrimp for scampi. They have a nice texture and cook well. Fresh shrimp taste the best, but frozen shrimp can work too. When using frozen shrimp, thaw them in the fridge overnight. This keeps them safe and tasty. Look for shrimp that are firm and have a mild sea smell. Yes, you can prep Lemon Garlic Shrimp Scampi ahead. Cook the shrimp and sauce early, then store them in the fridge. To reheat, warm them gently in a skillet. Add a splash of water or broth to keep the sauce from drying out. It's best to cook the pasta fresh before serving. This keeps it al dente and delicious. Lemon Garlic Shrimp Scampi pairs well with many sides. You can serve it with crusty bread to soak up the sauce. A fresh green salad adds a nice crunch. My favorite side is garlic bread, which complements the dish well. You can also serve it with steamed vegetables for a healthy touch. Lemon Garlic Shrimp Scampi can be gluten-free. Simply use gluten-free pasta instead of regular pasta. Many brands offer tasty gluten-free options. Always check labels for hidden gluten in sauces. If you want to skip the pasta, serve it over zucchini noodles for a low-carb meal. Enjoy your meal without worry! In this blog post, we explored making Lemon Garlic Shrimp Scampi, from key ingredients to cooking tips. You learned about the right type of shrimp, cooking pasta, and best practices for flavor. Remember, fresh shrimp gives the best taste, but frozen can work too if thawed properly. Always avoid overcooking shrimp for the perfect bite. With these tips, you can enjoy a delicious meal that impresses. Get creative with variations and don’t forget the sides. Happy cooking!

Lemon Garlic Shrimp Scampi Simple and Tasty Meal

Looking for a quick and tasty meal? Lemon Garlic Shrimp Scampi is your best bet! This dish is easy to

First, take your chicken strips and coat them in buttermilk. This helps the chicken stay moist and adds flavor. Place the coated strips in a bowl, cover it, and refrigerate for at least 30 minutes. This marinating time allows the flavors to soak in and tenderizes the chicken. While the chicken marinates, you can prepare the coating. In a large bowl, mix together the flour, cornmeal, garlic powder, onion powder, paprika, black pepper, salt, and cayenne pepper. This mix gives the chicken a tasty crust. To ensure a crispy coating, press the chicken strips into the flour mixture firmly. Next, heat oil in a deep skillet or frying pan. Pour enough oil to cover the bottom, about 1-2 inches deep. Heat the oil to around 350°F (175°C). You can test the heat by dropping a pinch of the flour mix into the oil. If it sizzles, you are ready. Carefully add the chicken tenders in batches to avoid crowding. Fry them for about 4-5 minutes on each side until golden brown. Use a slotted spoon to transfer them to a plate lined with paper towels. While the chicken cooks, let’s make the honey sauce. In a small saucepan, combine 1/4 cup of honey and 2 tablespoons of soy sauce. Heat this over low heat. Stir until everything blends and is warm. Make sure it does not boil, as this can change the texture. Once your chicken tenders are fried, it’s time to glaze them. You can either drizzle the honey-soy mixture over the chicken or toss the tenders in the saucepan. If you toss, you get a nice even coating. For a pretty presentation, arrange the tenders on a large platter. You can garnish with chopped parsley for color. Enjoy this crispy honey chicken tenders dish! For more details, check the full recipe. To get those chicken tenders super crispy, marination is key. Soak your chicken strips in buttermilk for at least 30 minutes. This step makes the chicken juicy and helps the coating stick better. Next, frying temperature matters. Heat your oil to about 350°F (175°C). You can test the oil by dropping a bit of the flour mix into it. If it sizzles, you're good to go. Frying at the right temperature ensures a crunchy outside and tender inside. When serving your crispy honey chicken tenders, pair them with sides that complement their flavor. Fresh coleslaw, crispy fries, or roasted veggies work great. For dipping sauces, ranch and honey mustard are classic choices. You can also try spicy aioli or sweet chili sauce for a fun twist. These sauces add more flavor and make each bite exciting. Want to mix things up? You can add spice to the coating. Try using cayenne pepper for heat or smoked paprika for a smoky twist. For marinades, consider adding lemon juice or hot sauce to the buttermilk. This gives your chicken a zesty kick. You can also experiment with different glazes. Teriyaki sauce or a spicy barbecue sauce can create fun flavors. For the full recipe, check out the details above. Enjoy making these tenders your own! {{image_4}} You can bake crispy honey chicken tenders for a lighter version. Start by preheating your oven to 400°F (200°C). Instead of frying, line a baking sheet with parchment paper. Place the coated chicken strips on the sheet without crowding them. Spray the chicken lightly with oil for a nice crisp. Bake for about 20-25 minutes, flipping halfway through. This way, you keep the flavor while cutting down on oil. Get creative with flavors! You can add different spices to the flour mixture. Try using oregano, thyme, or even lemon zest for a fresh twist. For glaze options, consider adding chili sauce or balsamic vinegar. These changes can give your chicken tenders a whole new taste. If you need gluten-free options, substitute all-purpose flour with almond flour or a gluten-free blend. For those on low-sodium diets, use low-sodium soy sauce. You can also skip the salt in the coating mix and enjoy a tasty meal without the extra sodium. For the full recipe, check out the main section! To keep your crispy honey chicken tenders fresh, follow these tips. First, let them cool to room temperature. This step helps prevent moisture build-up. Once cooled, place the tenders in an airtight container. A glass or plastic container works well. Make sure to separate layers with parchment paper to avoid sticking. Store the container in the fridge. They should stay good for about three days. When you want to enjoy your leftovers, reheating them properly is key. For the best crispiness, use an oven. Preheat the oven to 375°F (190°C). Place the tenders on a baking sheet. Bake them for about 10-12 minutes. This method keeps them crispy and tasty. If you need to use the microwave, here’s a quick trick. Place a paper towel on a microwave-safe plate. Arrange the chicken tenders on top. Cover them with another paper towel to trap steam. Heat them for about 1-2 minutes. Check if they are warm enough. You might need to heat them a little longer. Enjoy your meal with the flavor intact! Yes, you can use frozen chicken. However, you must thaw it first. To do this, place the chicken in the fridge overnight. If you're short on time, use the cold water method. Seal the chicken in a bag and submerge it in cold water for about an hour. Change the water every 30 minutes. Once thawed, pat it dry. This helps the chicken absorb the buttermilk better. To check if the chicken is done, use a meat thermometer. Insert it into the thickest part of a tender. The safe internal temperature for chicken is 165°F (75°C). If the chicken reaches this temperature, it is safe to eat. If you don't have a thermometer, cut into one tender. The meat should be white and juices should run clear. If you don't have buttermilk, you can make a quick substitute. Mix 1 cup of milk with 1 tablespoon of vinegar or lemon juice. Let it sit for about 5-10 minutes. This will create a tangy milk that works well in the recipe. You can also use plain yogurt thinned with a bit of water. Yes, you can prepare the chicken tenders ahead. Marinate the chicken in buttermilk and store it in the fridge for up to 24 hours. You can also coat the chicken in the flour mixture and keep it in the fridge. Just make sure to fry them fresh when you’re ready. This ensures they stay crispy. In this post, we covered how to make delicious chicken tenders. You learned about key ingredients, marinating tips, and achieving maximum crispiness. We also explored baking options and flavor variations, along with how to store leftovers. By following these steps, you can create a meal that's both tasty and fun to make. Remember, you can always adjust the recipe to match your taste. Enjoy your cooking adventure with these chicken tenders!

Crispy Honey Chicken Tenders Flavorful and Easy Dish

Are you ready to make a dinner that will impress? My Crispy Honey Chicken Tenders are easy and bursting with

To make a great Strawberry Dirty Sprite, you need fresh strawberries. Choose ripe, juicy berries for the best taste. You will need about 2 cups. Start by hulling and chopping them. This step helps bring out their sweet flavor. Next, you need something bubbly. You can use sparkling water or a citrus-flavored soda. I recommend lemon-lime soda for a zesty kick. You will need 1 cup of this bubbly drink. It adds a refreshing sparkle to your mix. Lastly, if you like your drink sweeter, consider adding a sweetener. Honey or agave syrup works well. Use about 1 tablespoon, but this is optional. A splash of freshly squeezed lime juice adds a nice tang too! For the full recipe, check the details above. Enjoy making this tasty drink! Start by washing the fresh strawberries. Remove the green tops and chop them. Place the chopped strawberries in a blender. Blend on high until smooth. If you like some bits in your drink, pulse until you reach your desired texture. Grab a fine mesh sieve and set it over a mixing bowl. Carefully pour the strawberry puree into the sieve. Use the back of a spoon to press the puree through. This helps separate the juice from the seeds. Discard the seeds left in the sieve. In a large pitcher, combine the fresh strawberry puree with sparkling water or citrus soda. Add in the Sprite and lime juice. If you want a sweeter drink, add honey or agave syrup. Stir gently to mix all the ingredients well. Take your serving glasses and fill each with ice cubes. Pour the strawberry mixture over the ice. Fill each glass to your liking. To make it look great, add a sprig of fresh mint to each glass. For extra flair, you can place a whole strawberry on the rim. Serve right away to enjoy this fizzy, fruity drink. For the full recipe, check out the detailed guide above! When picking strawberries, look for bright red color. They should feel firm and plump. Avoid any berries with white or green spots. Fresh strawberries should smell sweet and fragrant. You can also check for a shiny surface. This means they are juicy and fresh. Local farmers' markets often have the best options. Sweetness is key in this drink. If you prefer it sweeter, add more honey or agave syrup. Start with one tablespoon and taste it. You can always add more if needed. If you want less sugar, skip the sweeteners. The natural sweetness of strawberries can be enough. Lime juice adds a nice tang, balancing the flavors. Serve Strawberry Dirty Sprite in tall glasses for a nice look. Use ice cubes to keep the drink cold and refreshing. Garnishing with mint leaves adds a pop of color. You can also add a whole strawberry on the glass rim. This makes it look fancy and inviting. Enjoy this drink at summer parties or casual gatherings. It’s perfect for cooling off on hot days! For the full recipe, check the main section. {{image_4}} You can turn your drink into a Strawberry Lemonade Dirty Sprite. Just add some lemonade to the mix. Use one cup of lemonade instead of some sparkling water. It adds a nice tartness that pairs well with strawberries. This mix makes it extra refreshing on hot days. Feeling like a fun twist? Try adding vodka to your drink! Mix in one ounce of vodka per glass. This makes it a perfect drink for parties or gatherings. The vodka adds a kick without overpowering the strawberry flavor. It’s easy to enjoy on a summer evening! Want a sugar-free drink? You have options! Use a sugar-free soda in place of Sprite. You can also skip the honey or agave syrup. Instead, try a sugar substitute like stevia. This way, you can enjoy a tasty drink without added sugar. For the full recipe, check out the details above. You can store Strawberry Dirty Sprite in the fridge for up to two days. Use a tight lid to keep it fresh. If you leave it out, the fizz will go away. This drink tastes best when fresh. You can freeze the drink if you want to keep it longer. Pour it into ice cube trays. Once frozen, pop them out and store in a bag. Use these cubes in smoothies or drinks later. This way, you can enjoy the flavor even after some time. To keep your Strawberry Dirty Sprite fresh, avoid mixing too much at once. Make only what you need. If you have leftover strawberries, store them in a sealed bag in the fridge. This will help them last longer. Always check for signs of spoilage before using any ingredients. If you don’t have Sprite, you can use any lemon-lime soda. You can also try ginger ale for a different flavor. Both options give a nice fizz and sweetness. Yes, frozen strawberries work well. Thaw them first and drain any extra liquid. This way, you can still enjoy a fruity taste. Fresh strawberries are great, but frozen ones will still make a lovely drink. You can store Strawberry Dirty Sprite for up to 24 hours in the fridge. Keep it in a sealed container to maintain its fizz. The drink tastes best when fresh, so drink it soon after making it. Dirty Sprite began in the hip-hop culture of the South. It mixes soda with other flavors for a fun twist. While the classic version uses soda and cough syrup, this recipe is a tasty, non-alcoholic spin. You can enjoy the fizzy, fruity delight without worry. For the full recipe, check out the details above! We covered how to make a delicious Strawberry Dirty Sprite. Fresh strawberries bring the best flavor. Mixing them with sparkling water or soda makes for a fun drink. Remember to adjust sweetness to your taste. Use the tips for choosing strawberries and serving suggestions to impress your friends. You can try different variations, even an alcoholic spin. Don’t forget the storage tips to keep your drink fresh. Enjoy creating and sharing this tasty treat!

Strawberry Dirty Sprite Refreshing Drink Recipe

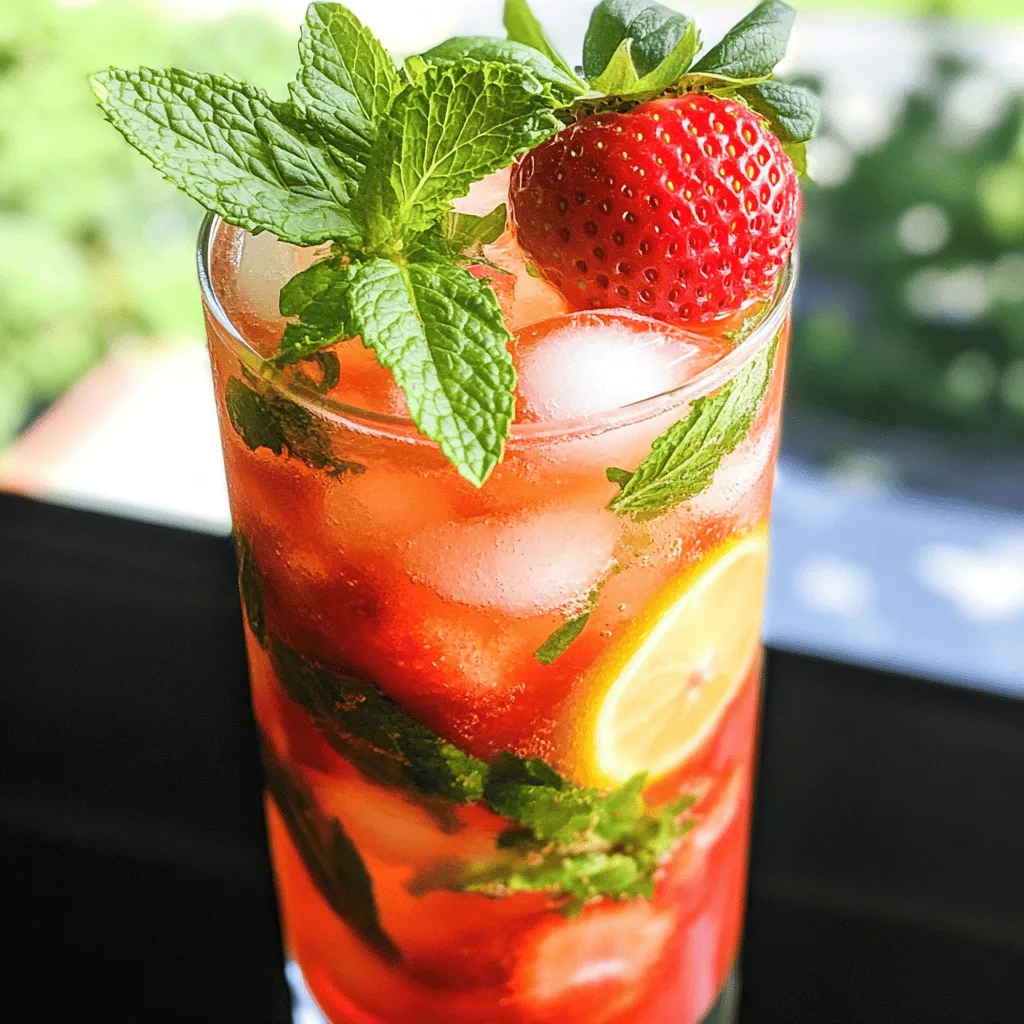
Want a fun and tasty drink that’s great for any occasion? I’ve got just the thing for you! This Strawberry

- 1 lb (450g) chicken breast, cut into bite-sized pieces - 4 cloves garlic, minced - 4 tablespoons unsalted butter, divided - 1 teaspoon Italian seasoning - Salt and freshly ground black pepper, to taste - 8 oz (225g) fettuccine pasta - 1 cup heavy cream - 1/2 cup grated Parmesan cheese - 1/4 cup fresh parsley, chopped - Zest of 1 lemon You can swap chicken breast with chicken thighs for more juiciness. If you want a lighter dish, use zucchini noodles instead of fettuccine. For a dairy-free option, try coconut milk in place of heavy cream. You can use nutritional yeast instead of Parmesan for a vegan twist. If you don't have fresh parsley, dried parsley works well too. These substitutions keep the dish tasty and flexible! For the full recipe, check the details above. Start by melting 2 tablespoons of unsalted butter in a large skillet over medium heat. Once the butter is melted, add the minced garlic. Stir it for about one minute. You want the garlic to smell great, but not brown. This stage is key for rich flavor in your dish. Raise the heat to medium-high and add the bite-sized chicken pieces next. Season them with salt, pepper, and Italian seasoning. Cook the chicken for about 5 to 7 minutes. Keep stirring to ensure even cooking. The chicken should turn golden brown and be fully cooked. After cooking the chicken, set it aside on a plate. In the same skillet, add the remaining 2 tablespoons of butter. Let it melt and scrape up any brown bits from the bottom. This adds depth to your sauce. Then, pour in the heavy cream and bring it to a gentle simmer. Stir in the grated Parmesan cheese for creaminess. Cook for 2 to 3 minutes until it thickens. Combine the drained fettuccine and chicken in the skillet, tossing to coat. Finally, add lemon zest and parsley for a fresh finish. For a detailed cooking experience, refer to the Full Recipe for Garlic Butter Chicken Bites with Creamy Pasta. To get perfect chicken bites, start with fresh chicken. Cut it into even, bite-sized pieces. This helps them cook evenly. I recommend using a cast-iron skillet. It heats well and gives a nice brown crust. Heat the skillet over medium-high heat. Add butter and let it melt. Then, add the chicken. Don't overcrowd the pan; cook in batches if needed. This keeps the heat high and helps the chicken brown. Stir occasionally for even cooking. Cook until golden brown, about 5-7 minutes. For creamy pasta, choose fettuccine or a similar noodle. Bring a large pot of salted water to boil. This adds flavor to the pasta. Cook the pasta according to the package instructions. Check it a minute early for the perfect al dente texture. Once done, drain it, but save a bit of pasta water. If your sauce is too thick, this water can help loosen it. Toss the pasta with the sauce while it's still warm. This helps the pasta soak up the flavor. Seasoning makes all the difference in this dish. Use fresh garlic for a strong flavor. Don’t skip the Italian seasoning—it's a great mix of herbs. Add salt and pepper to taste. For a fresh twist, try lemon zest at the end. It brightens the dish and adds a nice aroma. Fresh parsley also adds color and a hint of freshness. Feel free to experiment with other herbs, too. Basil or thyme can add fun new flavors! {{image_4}} You can easily swap chicken for other proteins. Shrimp works great in this dish. Just cook shrimp until they turn pink, about 3-4 minutes. You can also use diced pork or turkey for a different flavor. Each option gives a unique twist to the creamy pasta. If you prefer a vegetarian dish, replace the chicken with veggies. Try mushrooms, bell peppers, and broccoli. Sauté these in garlic butter until they are tender. This change keeps the dish rich and tasty. You still get the creamy goodness of the sauce, making it a delightful meal. Fettuccine is classic, but you can use other pasta shapes. Penne, farfalle, or even spaghetti work well. Each shape holds the creamy sauce differently. Choose based on your preference or what you have at home. This flexibility keeps the dish exciting and fun to make. For a complete recipe, check the Full Recipe section. To keep your garlic butter chicken bites fresh, store them in an airtight container. Make sure to let them cool first before sealing the container. This helps prevent steam from building up, which can make the chicken soggy. Place the container in the fridge. Properly stored, these bites can last for up to three days. When you’re ready to enjoy your leftovers, the best way to reheat them is in a skillet. Add a splash of water or chicken broth to keep the chicken moist. Heat over medium-low heat to warm them evenly. Stir occasionally to avoid sticking. You can also use a microwave, but be sure to cover the dish to keep moisture in. Heat in short intervals, checking often to avoid overcooking. If you want to freeze your garlic butter chicken bites, place them in a freezer-safe bag or container. Remove as much air as possible to prevent freezer burn. They can be frozen for up to three months. When you're ready to eat, thaw them in the fridge overnight. Reheat in a skillet for the best results. This way, you can enjoy a quick, tasty meal anytime! You can serve Garlic Butter Chicken Bites with a green salad or garlic bread. A simple side of steamed veggies also pairs well. If you want some crunch, try serving it with crispy roasted potatoes. These sides add flavor and balance to your meal. Yes, you can prepare Garlic Butter Chicken Bites ahead of time. Cook the chicken and sauce, then store them in separate containers. You can cook the pasta just before serving. This keeps everything fresh and tasty. Garlic Butter Chicken Bites can last up to three days in the fridge. Just make sure to store them in an airtight container. When you reheat, add a splash of cream to keep the sauce creamy. Enjoy your meal later without losing flavor. For the full recipe, check out the [Full Recipe]. This blog post covered all you need for Garlic Butter Chicken Bites and creamy pasta. You learned about key ingredients, cooking steps, and expert tips. We explored tasty variations and how to store leftovers. In closing, you can create a delicious meal using these easy methods. Try new flavors and enjoy cooking at home! Your kitchen can become a fun place with these recipes.

Garlic Butter Chicken Bites with Creamy Pasta Delight

Looking for a meal that’s simple yet delicious? My Garlic Butter Chicken Bites with Creamy Pasta is just the dish

Older posts
Newer posts
← Previous Page1 … Page32 Page33 Page34 … Page91 Next →

dsad

© 2025 recipesstation • Built with GeneratePress

Our Policies

  • Copyright Policy
  • Cookie Policy
  • GDPR Policy
  • Privacy Policy
  • Disclaimer
  • Terms Of Use

More Information

  • Home
  • About
  • Contact
  • Appetizers
  • Dessert
  • Dinner
  • Drinks
©2025, recipesstation About Back To Top