Skip to content
DisclaimerTerms Of UseGDPR PolicyCookie Policy

recipesstation

  • Home
  • Drinks
  • Appetizers
  • Dinner
  • Dessert
  • About
  • Contact
  • Privacy Policy
DisclaimerTerms Of UseGDPR PolicyCookie Policy

Emily

- Fresh or frozen raspberries - Brewed and chilled hibiscus tea - Rose water - Honey or agave syrup - Frozen ripe banana - Ice cubes - Optional toppings The Raspberry Hibiscus Rose Frappe is a delight for the senses. Each ingredient plays a key role in creating a balanced flavor. You start with fresh or frozen raspberries. They add a burst of tartness and vibrant color. Next, you brew and chill hibiscus tea. This tea gives the drink a floral note and a pretty pink hue. Rose water is your next ingredient. It brings a lovely aroma that elevates the drink. For sweetness, you can use honey or agave syrup. Adjust the amount based on your taste. A frozen ripe banana adds creaminess and natural sweetness. Ice cubes help create that refreshing texture we all love. Lastly, consider optional toppings. Whipped cream adds richness, while edible rose petals offer a fancy touch. Each ingredient comes together to make this drink a summer favorite. - Alternative sweeteners: You can try maple syrup or coconut sugar. Both add unique flavors. - Different types of tea: Green tea or chamomile tea can be used if hibiscus isn't available. - Variations in fruit: You might swap raspberries for strawberries or blueberries for a twist. These substitutions allow you to customize your frappe. Enjoy mixing and matching to find your perfect blend. To make the hibiscus tea, start by boiling water. Use one cup of water for this step. Place one or two hibiscus tea bags in the hot water. Let it steep for five to seven minutes. After steeping, take out the tea bags. Now, let the tea cool down to room temperature. Once cool, put it in the fridge to chill. When it's time to blend, gather all your ingredients. In a high-speed blender, add the chilled hibiscus tea first. Next, add one cup of fresh or frozen raspberries. Then, pour in one tablespoon of rose water. After that, include one tablespoon of honey or agave syrup. Add the frozen banana slices and one cup of ice cubes last. For a smooth texture, blend on high speed. Make sure to secure the lid tightly. Keep blending until the mix is creamy and smooth. You should not see any ice chunks. Now, it's time to taste your frappe. Take a small spoonful to check the sweetness. If you want it sweeter, add more honey or agave syrup. Blend again for a few seconds to mix it well. This step ensures your drink is just right for your taste. For the full recipe, check the instructions above. Enjoy making this delightful drink! To get a smooth and creamy texture, use a high-speed blender. This type of blender breaks down ice and fruit quickly. If you don’t have one, a regular blender works too, but it may take longer. For ice and frozen banana ratios, I suggest using one cup of ice and one frozen banana. The banana adds creaminess, while the ice keeps it refreshing. Adjust the ice if you want a thicker drink. Glassware can enhance your drink's look. Use tall glasses to show off the vibrant pink color. Clear glasses let the layers shine through, making it more appealing. For garnishing, consider using whipped cream on top. Add a sprinkle of edible rose petals for a chic finish. You can also use a slice of fresh raspberry on the rim for a pop of color. You can prepare the ingredients in advance. Brew the hibiscus tea and chill it the night before. Slice and freeze your banana a few hours ahead. This way, you save time when you’re ready to blend. For storing, keep any leftover frappe in an airtight container in the fridge. It’s best enjoyed within a day. If you want to store it longer, freeze it for later enjoyment. Just remember to thaw it before blending again! {{image_4}} You can add other fruits to the Raspberry Hibiscus Rose Frappe. Strawberries or blueberries work great. If you want a tropical twist, try mango or pineapple. These fruits bring new flavors and colors. Experimenting with spices can also enhance your drink. A pinch of cinnamon or nutmeg adds warmth. You can even try adding fresh mint for a cool touch. These simple changes make your frappe feel new and exciting. To make a fun non-alcoholic cocktail, add soda or sparkling water. This adds bubbles and makes your frappe more festive. Mixing in a splash of lemon-lime soda can brighten the flavors. Using a cocktail shaker is another great idea. Combine the frappe ingredients in the shaker. Shake it well to mix everything. Pour it into a glass, and enjoy a refreshing drink that feels special. You can create holiday or themed variations of this drink. For Halloween, add a splash of orange juice for a spooky hue. During winter, try using chai tea instead of hibiscus for a warm treat. Consider ingredients for seasonal flavors too. In spring, add fresh herbs like basil or mint. In summer, berries are at their peak, so use a mix of your favorites. Each season brings new tastes that can make your frappe shine. For the complete recipe, check out the Full Recipe. To store your leftover Raspberry Hibiscus Rose Frappe, use an airtight container. Glass jars or plastic containers work best. Make sure to seal them tightly to keep the drink fresh. Place the container in the fridge. The frappe stays good for about two days. If you want to save your frappe for later, freezing is a great choice. Pour the leftover frappe into ice cube trays. Once frozen, transfer the cubes to a freezer bag. This way, you can enjoy the drink later. When you want to enjoy it again, take out the cubes. Let them thaw in the fridge for a few hours. You can also blend them again for a fresh taste. If you don’t have rose water, you can use other options. Here are some potential substitutes: - Orange blossom water - Almond extract (use sparingly) - A splash of vanilla extract These options can add a nice flavor without the rose notes. Just remember to test each one, as they can change the taste a bit. Yes, you can easily make this frappe vegan! Here are some vegan ingredient options: - Use agave syrup instead of honey - Choose a non-dairy milk like almond or oat milk - Make sure your whipped cream is plant-based These swaps keep the drink delicious while fitting a vegan diet. You can find this delightful drink at many places. Popular cafes and stores that often offer it include: - Local coffee shops - Specialty tea houses - Health-focused cafes Check their menus or ask staff if they serve this refreshing drink. Making this frappe non-dairy is simple. Here are some dairy-free alternatives for creaminess: - Use coconut cream for a rich texture - Swap regular whipped cream for a vegan version - Try adding non-dairy yogurt for a creamy consistency These options ensure you still enjoy a rich and creamy drink without dairy. This blog post guided you through making a delicious Raspberry Hibiscus Rose Frappe. We explored key ingredients, including hibiscus tea and fresh fruit. You learned simple steps to prepare, blend, and adjust sweetness. We discussed tips for texture, presentation, and ahead-of-time prep. Don't forget to try variations like seasonal twists or non-alcoholic cocktails. Feel free to experiment with different fruits and sweeteners based on your taste. Enjoy crafting your unique frappe creation!

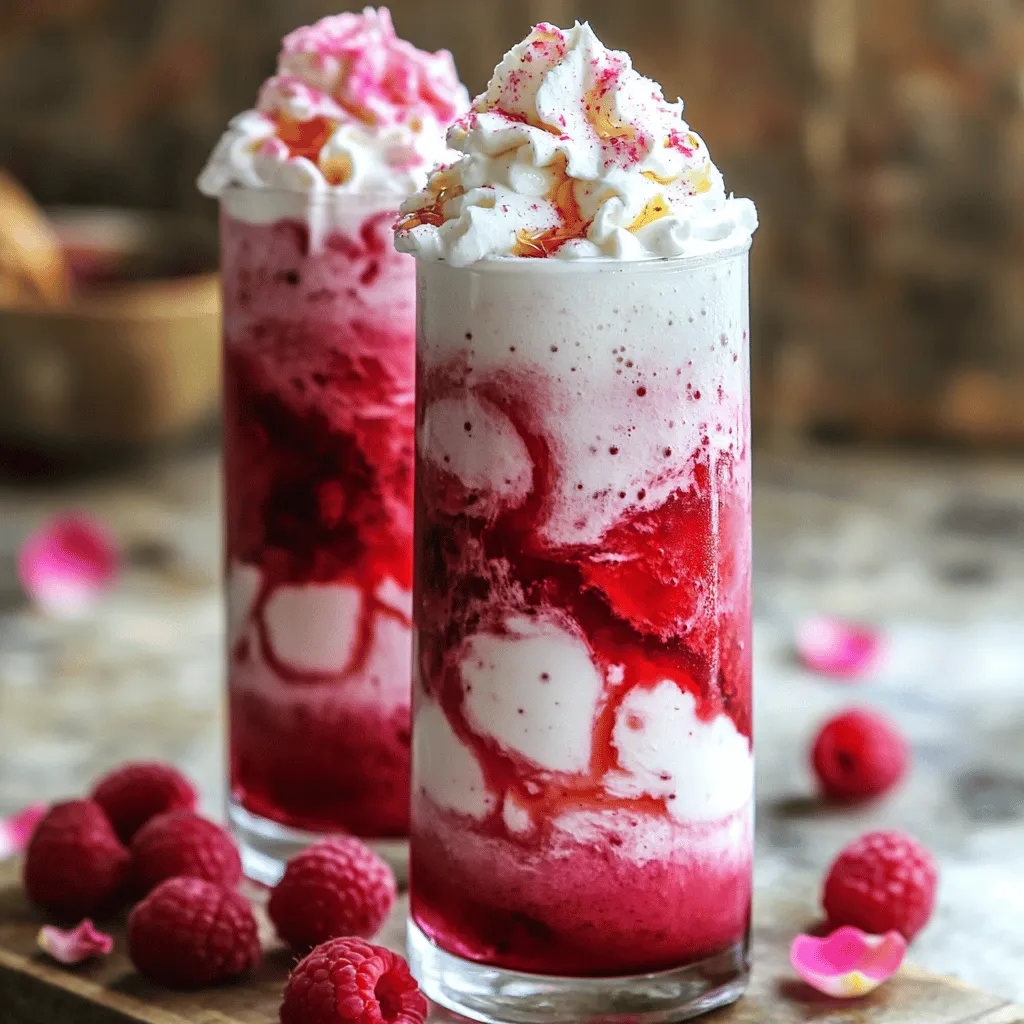
Raspberry Hibiscus Rose Frappe Refreshing Summer Drink

Looking for a cool drink to beat the summer heat? The Raspberry Hibiscus Rose Frappe is perfect for you! With

To make a delicious Banana Caramel Horchata, you need the following ingredients: - 1 cup long-grain white rice - 4 cups water - 1 ripe banana, plus an additional banana for garnish - 1 cup milk (or nut milk for a delightful vegan option) - 1/2 cup sugar (adjust based on sweetness preference) - 1 teaspoon ground cinnamon - 1 teaspoon pure vanilla extract - 1/4 cup caramel sauce (store-bought or homemade) - A pinch of sea salt These ingredients come together to create a creamy, sweet drink that will refresh you. The rice gives a smooth base, while the banana and caramel add a nice twist. You can easily adjust the sugar to fit your taste. If you want a vegan version, just swap the milk for nut milk. For a fun touch, save a banana slice for garnish. This drink looks great in tall glasses filled with ice, topped with a drizzle of caramel. You can find the full recipe for a detailed guide on preparing this delightful treat. - Rinse the long-grain white rice under cold water. - Blend rinsed rice with 4 cups of water. - Transfer to a bowl and soak for 3-4 hours or overnight. Rinsing the rice is key. It removes excess starch, giving the drink a smoother texture. After rinsing, blend the rice with water until it looks milky. This creates a base for our horchata. Soaking lets the rice absorb flavors. If you have time, soak it overnight for the best taste. - Blend the soaked mixture to break up clumps. - Strain through a fine mesh sieve or cheesecloth. Once the rice mixture has soaked, blend it again. This helps break up any clumps. Next, strain the mixture. Use a fine mesh sieve or cheesecloth to get rid of the solids. You want a smooth liquid for the horchata. - Add banana, milk, sugar, cinnamon, vanilla, and salt. - Blend until smooth. - Stir in caramel sauce for visual appeal. Now, it’s time to add flavor! Mix in a ripe banana, milk, sugar, cinnamon, vanilla, and a pinch of salt. Blend until everything is smooth. Then, add caramel sauce. Stir it in gently to create beautiful swirls. This makes the drink look fancy and taste amazing. You can find the full recipe for Banana Caramel Horchata at the beginning of this article. Enjoy making this delightful drink! - Adjust sweetness to taste. Start with 1/2 cup of sugar, then add more if needed. - Experiment with different types of milk. Try whole, almond, or coconut milk for a twist. - Serve over ice for a refreshing drink. Ice makes it chilled and fun to sip. - Garnish with banana slices and extra caramel. A pretty touch that adds flavor too. - Properly rinse the rice before blending. Rinsing removes excess starch, making it creamy. - Let the mixture soak for optimal flavor. Soaking for 3-4 hours or overnight deepens the taste. {{image_4}} For those who want a dairy-free drink, simply swap out the regular milk. You can use almond or oat milk instead. Both options add a nice flavor, and they keep the drink light. You can also use plant-based caramel sauces. They work well and keep your drink vegan-friendly. Want to spice things up? Add some ground cinnamon or a pinch of nutmeg to your horchata. These spices give it warmth and depth. If you like a tropical taste, splash in some coconut milk. It enhances the sweetness and makes it taste like a vacation in a glass. If you want to change how sweet your drink is, consider using honey or maple syrup. These natural sweeteners add a unique flavor. You can also try adding chocolate or mocha flavoring for a fun twist. This variation can turn your Banana Caramel Horchata into a dessert drink! Feel free to explore these options while making the Full Recipe, and tailor it to your taste. Enjoy the process of creating a drink that's just right for you! To keep your Banana Caramel Horchata fresh, store it in an airtight container. This method helps to lock in flavor and prevents odors. You can keep it in the refrigerator for up to 3 days. After that, the taste may change. You can freeze Banana Caramel Horchata in ice cube trays. This is great for later use in smoothies or drinks. When you want to enjoy it again, simply thaw the cubes in the fridge before consumption. This keeps the flavor intact and makes it easy to use. If your horchata is chilled, gently stir it before serving. This helps mix the ingredients evenly. Avoid microwaving it, as heat can change the drink's texture. A cold, refreshing drink is best, so serve it over ice for the perfect experience. Yes, it can be made 1-2 days in advance. This makes it perfect for parties or picnics. Just store it in the fridge and shake before serving. Yes, by using nut milk and vegan caramel. Almond, cashew, or oat milk work great. You can find vegan caramel in stores or make your own at home. Horchata has origins in Latin America dating back to the Spanish colonial period. It started as a drink made from nuts and seeds, evolving over time into the sweet drink we enjoy today. Yes, adjusting the amount of milk or adding more water can change the thickness. For a creamier drink, use less water. If you prefer it lighter, add more water. Drizzle it in while mixing, allowing for swirls. This keeps the caramel from settling at the bottom and gives a beautiful look to your drink. This blog post shares everything you need to make Banana Caramel Horchata. You learned about the easy ingredients, step-by-step instructions, and helpful tips. You can customize this drink to your taste with different milks or sweeteners. Remember to store it properly for the best flavor. Make it ahead, serve it cold, and enjoy! Use the ideas here to impress your friends with a tasty twist on a classic drink. Enjoy making and sipping your own delicious horchata!

Banana Caramel Horchata Refreshing and Flavorful Drink

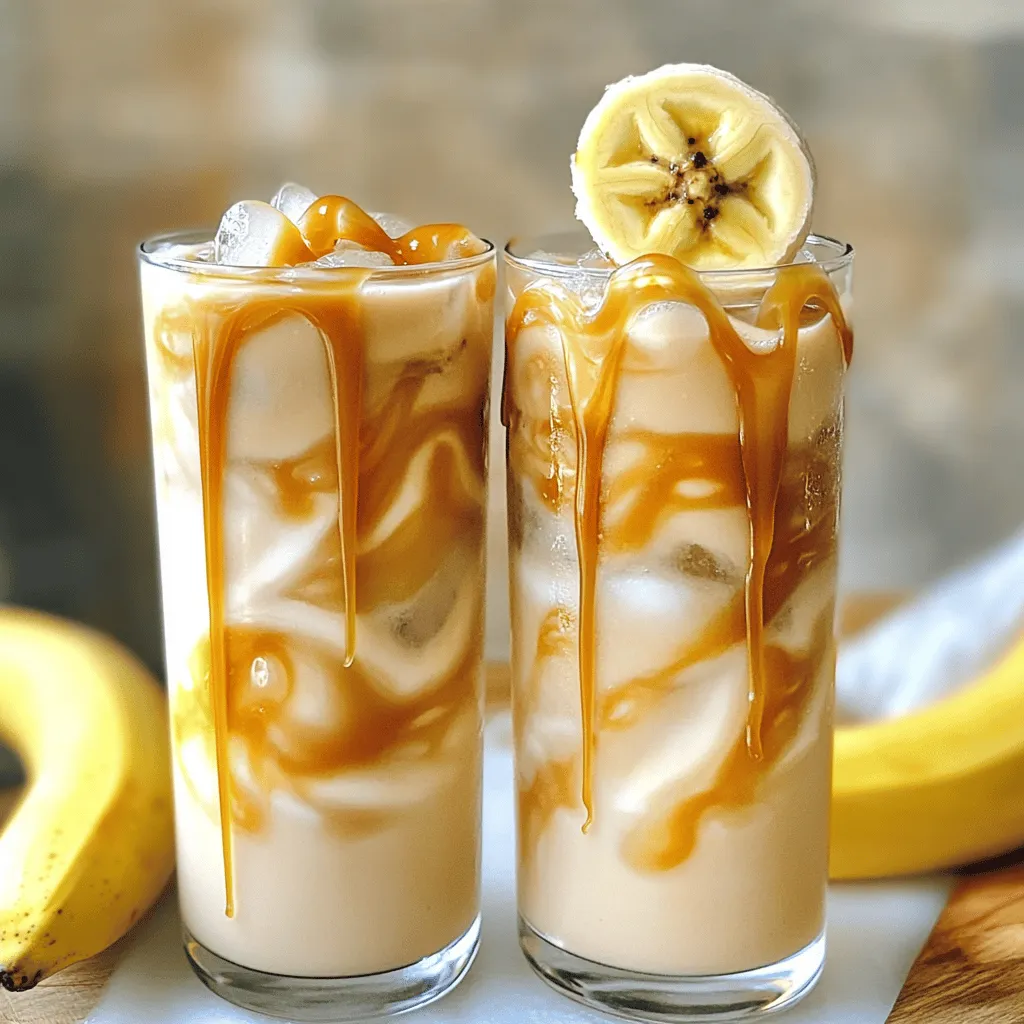
Looking for a deliciously unique drink? Try Banana Caramel Horchata, a tasty twist on a classic. This refreshing beverage combines

To make this tasty drink, gather these ingredients: - 2 cups brewed kombucha (either store-bought or made at home) - 1 cup ripe plums, pitted and finely chopped - 1 tablespoon fresh ginger, finely grated - 2 tablespoons honey or maple syrup (adjust based on your preference) - Juice of 1 fresh lime - Sparkling water (optional, to add extra fizz) - Fresh mint leaves for garnish These items create a blend of sweet, tart, and spicy flavors. The kombucha gives it a refreshing zing. Plums add natural sweetness, and ginger brings warmth. If you can't find plums, try ripe peaches or apricots. They will still bring a lovely taste. Instead of honey, you can use agave syrup or even stevia. The lime juice adds brightness, but you could swap it for lemon juice if needed. This drink is not just tasty; it's also good for you. Kombucha is full of probiotics, which help your gut health. Plums are packed with vitamins and antioxidants. They support your immune system and keep your skin healthy. Ginger helps with digestion and can reduce inflammation. This drink is a delightful way to enjoy health benefits! Start by gathering your ingredients. You need ripe plums, fresh ginger, honey, and lime juice. First, pit and chop the plums finely. Next, grate the ginger until you have one tablespoon. Add the plums, ginger, honey, and lime juice into a blender. Blend on high until smooth. This creates a sweet and tangy base for your drink. After blending, you must strain the mixture. Use a fine mesh sieve to separate the liquid from the pulp. Press down with a spoon to get all the juice. This step is key for a smooth drink. Now, take your freshly brewed kombucha. You can use store-bought or homemade. Pour the strained plum-ginger liquid into a mixing bowl. Gently add the kombucha and stir slowly. Be careful not to lose the bubbles in the kombucha. The fizz adds a fun touch to your drink. If you want more fizz, add a splash of sparkling water. This is optional but tasty! Taste the mixture and see if it needs more sweetness. If so, add a bit more honey or syrup and mix again. To serve, fill each glass with ice cubes. Pour the kombucha mixture over the ice. This keeps your drink cold and refreshing. For a lovely garnish, add fresh mint leaves on top. You can also add a slice of lime or a cherry for a pop of color. This drink is perfect for hot days or gatherings. It’s tasty, healthy, and looks great on the table. Enjoy your homemade Plum Ginger Kombucha Pop! For the complete recipe, check the Full Recipe section above. To make your Plum Ginger Kombucha Pop truly refreshing, focus on carbonation. Start with cold kombucha. The colder it is, the better the bubbles will hold. When mixing, stir gently. This helps keep the fizz alive. If you want more bubbles, add sparkling water just before serving. It gives an extra pop. Sweetness can change the whole drink. Taste your mixture before serving. If it’s too tart, add more honey or maple syrup. Start with a little, then taste again. You can mix in more if needed. Remember, the plums and ginger already bring natural sweetness. So, balance is key here. You can make your drink unique by adding flavors. Fresh herbs like mint or basil can elevate your drink. Try adding a slice of lime or lemon for extra zing. You could also add a hint of cinnamon for warmth. Experiment with the ingredients to suit your taste! This is your drink, so have fun with it. For the full recipe, check out the [Full Recipe]. {{image_4}} You can mix things up by using different fruits. Instead of plums, try peaches or cherries. These fruits add new flavors and colors. You can also blend berries like strawberries or blueberries for a sweet twist. Each fruit offers unique taste and health benefits. Experiment with what you have at home or what’s in season. You might create a new favorite! Sweeteners play a big role in your drink. If you want less sugar, consider using stevia or agave. Honey and maple syrup are great for a natural touch, but they can add more sugar. You can also try fruit juice for a hint of sweetness without added sugar. Taste as you go to find your perfect balance. For a fun twist, you can make an alcoholic version. Just add a splash of vodka or gin to your kombucha pop. It adds a new layer of flavor and makes it perfect for parties. Make sure to serve it responsibly and enjoy in moderation. This variation is a hit for gatherings or celebrations. For the full recipe, check out the Plum Ginger Kombucha Pop section! If you have extra Plum Ginger Kombucha Pop, store it in the fridge. Use a glass jar with a tight lid. This keeps the fizz and flavor fresh. Try to drink it within three days for the best taste. Make sure your brewing area is clean. Use sanitized jars and utensils. Allow your kombucha to ferment for the right amount of time. Too long can make it too sour. Check your kombucha daily and taste it to see if it’s ready. Homemade kombucha can last about one month in the fridge. Look for signs of spoilage. If you see mold or a strange smell, do not drink it. It should have a fizzy, tangy scent. If it smells off, it's best to toss it out. Always trust your senses! Kombucha is a fizzy drink made from sweetened tea and a special culture. This drink is loaded with probiotics. Probiotics are good for your gut health. They help balance your digestive system. Kombucha also has antioxidants. These help fight off free radicals in your body. Many people say it boosts energy and improves mood. Enjoying kombucha can also help with hydration. Yes, you can use store-bought kombucha. It is a great option if you are short on time. Just make sure to choose a brand that has live cultures. This way, you still get the health benefits. Store-bought kombucha works well in your Plum Ginger Kombucha Pop. You can find it in most grocery stores. You might find pre-made Plum Ginger Kombucha Pop at health food stores. Some cafes and juice bars sell it too. Check local markets that focus on fresh and healthy drinks. If you can’t find it, try making it at home. The [Full Recipe] I shared is simple and fun to make! Homemade kombucha lasts about one month in the fridge. After that, it may lose its fizz and flavor. Always check for any strange smells or signs of spoilage. If it tastes off, it’s best to throw it away. Keep it in a clean glass jar with a tight lid. This helps keep it fresh longer. Yes, you can ferment your Plum Ginger Kombucha Pop more if you want! This will give it a stronger taste. Just let it sit at room temperature for another day or two. Be careful, as it may build up more carbonation. Always check it to avoid overflow. Enjoy experimenting with flavor and fizz! In this blog post, we explored how to make Plum Ginger Kombucha Pop, from the essential ingredients to tasty variations. We covered tips for perfect carbonation and adjusting sweetness for your taste. Remember, this drink not only hits the spot but offers health benefits too. Keep experimenting with fruits and flavors to make it your own. Store leftovers properly to enjoy them later. Enjoy your homemade treat and share your creations with friends!

Plum Ginger Kombucha Pop Refreshing and Healthy Drink

Are you ready to sip on something refreshing and healthy? Plum Ginger Kombucha Pop is the perfect drink for you!

- Butterfly Pea Flower Tea - Blue Curacao Syrup - Fresh Lime Juice - Sparkling Water - Optional Sweeteners - Garnishes The Blue Curacao Butterfly Pea Spritz shines with its vibrant colors and refreshing taste. You’ll love how simple it is to create this drink. Each ingredient plays a key role in the flavor and visual appeal. Butterfly Pea Flower Tea is the star of this recipe. It gives the drink its stunning blue hue. The tea is made from dried flowers and has a mild, earthy taste. You can brew the tea easily at home. Just steep the flowers in hot water until it turns deep blue. Blue Curacao Syrup adds sweetness and a hint of orange flavor. This syrup is non-alcoholic, making it perfect for all ages. It enhances the color and makes the drink even more inviting. Fresh Lime Juice brings a zesty twist. The acidity brightens the drink and balances the sweetness. Always use fresh lime for the best taste. Sparkling Water adds a bubbly texture. The fizz makes the drink lively and refreshing. Choose plain or flavored sparkling water to suit your taste. You can also use optional sweeteners like agave syrup if you prefer a sweeter drink. This allows you to control the sweetness level. Don’t forget the garnishes! Lime slices and edible flowers not only look pretty but also add to the flavor. They elevate your spritz into a beautiful presentation. Each ingredient in this recipe works together to make a delightful drink. For the full recipe, check out the Blue Curacao Butterfly Pea Spritz! To make the butterfly pea flower tea, begin by boiling 1 cup of water in a small saucepan. Once the water boils, add 1 tablespoon of dried butterfly pea flowers. Remove the pan from heat and steep the flowers for 5 to 7 minutes. This process will change the water to a deep blue color. After steeping, strain the tea through a fine mesh sieve into a heatproof container. Let the tea cool to room temperature before using it. In a large glass or pitcher, combine the cooled butterfly pea flower tea with 2 tablespoons of blue curaçao syrup. Stir gently to mix the colors well. The drink should look vibrant and inviting. Next, add 1 tablespoon of fresh lime juice to the mixture. This adds a zesty flavor that brightens the drink. Taste the blend and if it needs more sweetness, mix in 1 teaspoon of agave syrup. Stir well to ensure everything blends evenly. Prepare your glasses by filling each one halfway with ice cubes. This helps chill the drink and keeps it refreshing. Carefully pour the butterfly pea mixture into each glass until they are about three-quarters full. Now, top each glass with 1 cup of sparkling water. This will create a lovely fizz. Using a long spoon, gently stir the contents to combine without losing the bubbles. Finally, garnish each drink with slices of fresh lime and a few edible flowers. This gives each glass a beautiful, eye-catching finish. Suggested Adjustments To make your Blue Curacao Butterfly Pea Spritz even better, try a few tweaks. You can add a dash of mint or basil for a fresh twist. A splash of pineapple juice can add a fruity kick. Just remember to balance flavors well. Balancing Sweet and Sour Finding the right balance is key. If your drink is too sweet, add more lime juice. If it’s too sour, a little agave syrup can help. Always taste as you mix, so you get it just right. Garnishing Ideas Garnishes make your drink pop. Use lime slices on the rim of the glass. Edible flowers add color and beauty, making your drink look special. Consider using a sprig of mint for that extra touch. Serving Suggestions Serve your spritz in tall glasses to showcase the colors. You can add ice cubes to keep it chilled. A colorful straw can make it fun to drink. This drink is perfect for parties and gatherings. Best Glassware Choices I recommend using clear highball glasses. They show off the drink's vibrant color well. You can also use mason jars for a rustic feel. Choose what fits your style. Tools for Mixing You’ll need a good mixing spoon to stir. A fine mesh sieve helps strain the tea without particles. A citrus juicer makes squeezing limes easy. Having these tools will make your drink-making smooth and quick. This section builds on the [Full Recipe], helping you create a beautiful and tasty Blue Curacao Butterfly Pea Spritz. {{image_4}} You can easily add spirits to your Blue Curacao Butterfly Pea Spritz. This twist gives it an adult flair. A good choice is vodka. It blends well without overpowering the flavors. You might also try gin, which adds an herbal note. - How to Add Spirits: Mix one ounce of your chosen spirit into the drink after adding lime juice. Stir gently before topping with sparkling water. - Recommended Alcohol Pairings: - Vodka - Gin - Rum Feel free to get creative with flavors. Other herbs and fruits can brighten your drink. Mint adds a refreshing touch. Basil can bring a unique twist. Fruits like berries or oranges can also enhance the taste. - Other Herbs and Fruits to Experiment With: - Fresh mint - Basil - Raspberries - Orange slices - Seasonal Variations: In spring, add fresh strawberries. In summer, try peaches. Autumn calls for apple slices. Winter can include pomegranate seeds for color and taste. If you want a family-friendly version, there are fun adjustments to make. You can skip the alcohol entirely. This drink still shines without it. - Non-Alcoholic Adjustments: Just use the non-alcoholic blue curaçao syrup in your recipe. - Family-Friendly Alternatives: Add a splash of fruit juice for extra flavor. Try cranberry juice or pineapple juice for a sweet twist. This keeps the drink tasty for all ages. You can prepare the Blue Curacao Butterfly Pea Spritz in advance. Brew the butterfly pea flower tea ahead of time and let it cool. Store it in the fridge for up to three days. The syrup and lime juice can also be mixed and stored together. They stay fresh for about a week in the fridge. If you have leftover mixtures, store them in a sealed container. Keep it in the fridge. Try to use it within two days for the best taste. Freezing is not ideal for this drink. The sparkling water loses its fizz when thawed. This drink is best enjoyed cold, so reheating is not necessary. If you need to warm the tea, do it gently on the stove. Avoid boiling it, as that can change the flavor. Always serve it chilled to keep the refreshing taste intact. Butterfly pea flower tea is a vibrant blue drink made from the petals of the butterfly pea plant. It has a mild, earthy taste, which many describe as slightly sweet. This tea is rich in antioxidants. It supports skin health and may help reduce stress. Some studies suggest it might improve brain function and boost memory. The flavor is subtle and not too strong. It pairs well with citrus and sweet flavors, making it a great base for drinks. Yes, you can use regular blue curaçao. Just be aware it's an alcoholic liqueur. If you prefer a non-alcoholic option, use blue curaçao syrup instead. This gives you the same color and sweetness without the alcohol kick. Regular blue curaçao adds more depth and complexity. If you use syrup, the drink stays lighter and sweeter. You can easily make this drink your own. Try different fruits or herbs for added flavor. Add fresh mint or basil for a refreshing twist. You could also use different citrus fruits like orange or grapefruit. In summer, add berries for a fruity touch. In fall, a hint of cinnamon can create a cozy vibe. Yes, this drink can be kid-friendly. Just make sure to use non-alcoholic syrup. Swap out blue curaçao for blue curaçao syrup. This keeps the fun color without the alcohol. Use fresh fruit and sparkling water for a bubbly treat. This drink is perfect for family gatherings and parties. This blog post covered how to create a vibrant drink using butterfly pea flower tea and blue curacao. You learned about the ingredients, step-by-step instructions, and tips for perfecting your drink. Remember, you can customize flavors and make both alcoholic and non-alcoholic versions. Experiment with garnishes and presentation to impress your guests. Enjoy your delicious drink crafted with care and creativity. Cheers to your new favorite refreshment!

Blue Curacao Butterfly Pea Spritz Refreshing Blend

Get ready to cool off with a stunning Blue Curacao Butterfly Pea Spritz! This refreshing drink blends vibrant floral flavor

- 1 cup rolled oats - 3 cups water - 1 teaspoon ground cardamom - 1 vanilla bean (or 1 teaspoon pure vanilla extract) To make a great Cardamom Vanilla Oat Latte, you need the right base. Rolled oats give your latte a creamy texture. The oats blend well with water to create homemade oat milk. Ground cardamom adds a warm, spicy note. It lifts the flavor and gives a lovely aroma. A vanilla bean or pure vanilla extract brings sweetness and depth. These ingredients blend together to create a delightful drink. - 2 tablespoons maple syrup (adjust to taste) - A pinch of sea salt - Ground cinnamon for garnish These add-ins can enhance your latte. Maple syrup adds natural sweetness. Adjust it to your taste for the perfect balance. A pinch of sea salt brightens the flavors. Ground cinnamon on top adds a hint of spice and looks great, too. You can mix and match these options based on what you enjoy. - High-speed blender - Nut milk bag or fine mesh sieve - Small saucepan - Milk frother or whisk Gather your tools to make the process easier. A high-speed blender helps create smooth oat milk. A nut milk bag or fine mesh sieve will strain the mixture well. Use a small saucepan to warm your oat milk. A milk frother or whisk is key for that frothy finish. With the right equipment, your latte will look and taste amazing. For the full recipe, check out the details above. Enjoy making your Cardamom Vanilla Oat Latte! To start, gather your ingredients. Use rolled oats, water, cardamom, and sea salt. - Blending Oats with Water and Spices: In a high-speed blender, add 1 cup of rolled oats and 3 cups of water. Then, include 1 teaspoon of ground cardamom and a pinch of sea salt. Blend on high for about 30 seconds until smooth. - Straining the Mixture for Creaminess: Next, pour the blended mixture through a nut milk bag or fine mesh sieve into a bowl. Squeeze or press to get all the liquid out. This step gives you a creamy oat milk base. Now it's time to add more taste. - Incorporating Vanilla and Sweeteners: If using a vanilla bean, slice it open and scrape out the seeds. Mix these seeds or 1 teaspoon of pure vanilla extract into the strained oat milk. Add 2 tablespoons of maple syrup. - Blending for an Even Consistency: Blend this mixture for a few seconds. This helps the flavors mix well, making your oat milk even tastier. Time to warm up your oat milk! - Gentle Heating Techniques: Use a small saucepan to heat the oat milk over medium-low heat. Stir it gently to avoid boiling. - Achieving the Perfect Foam: For a light and frothy texture, use a milk frother or whisk. Whisk vigorously until it looks airy and fluffy. Now, let's put it all together. - Pouring Espresso and Oat Milk: In a large mug, pour in 1 cup of freshly brewed espresso or strong coffee. - Stirring for a Creamy Finish: Slowly add the warm oat milk. Use a spoon to stir gently, mixing everything into a creamy delight. Finish your latte with some flair. - Adding Garnish: Sprinkle a light dusting of ground cinnamon on top for added flavor and aroma. - Presentation Tips for the Latte: Serve your latte in clear glass mugs. This way, you can show off the beautiful layers. A cinnamon stick on the side adds a charming touch. For the complete recipe, check out the Full Recipe section. Blending Duration To make great oat milk, blend oats with water for just 30 seconds. This short time gives a smooth texture without making it slimy. A high-speed blender works best for this task. If you blend too long, your oat milk may become gritty. Straining Techniques Straining is crucial to get the best texture. Use a nut milk bag or fine mesh sieve for the best results. Pour the blended mixture slowly into the sieve. Press down with a spoon or your hands to extract all the liquid. This method leaves the oat pulp behind, ensuring a creamy drink. Adjusting Sweetness to Taste You can change the sweetness of your latte easily. Start with two tablespoons of maple syrup. Taste it, then add more if you like it sweeter. Sweeteners can change based on your mood or diet. Try honey or agave syrup as alternatives. Other Flavor Enhancements Feel free to add your favorite flavors. A dash of cocoa powder gives a chocolatey twist. You can also try adding a touch of nutmeg or ginger for some spice. Experiment with different extracts, like almond or hazelnut, to find your favorite mix. Best Mugs for Latte Presentation The right mug can make your latte look fancy. Clear glass mugs show off the layers of your drink. You can also use colorful ceramic mugs for a fun touch. Choose a mug that feels good in your hands for the best experience. Pairing with Complementary Snacks Pair your latte with a tasty snack for a complete treat. Cookies, muffins, or scones work well. A cinnamon roll is also a great choice! These snacks bring out the flavors of the cardamom and vanilla in your drink. Enjoy your latte with a little something sweet on the side. {{image_4}} For a vegan or dairy-free Cardamom Vanilla Oat Latte, the base is already perfect with oat milk. However, you can explore other plant-based milk options. Almond milk, coconut milk, or soy milk all work well. Each alternative brings its own unique flavor to the drink. When choosing non-dairy coffee, try cold brew or espresso made from high-quality beans. This enhances the overall taste. If you want a creamier texture, consider using barista blends designed for frothing. They create a rich, velvety foam. If you want a sugar-free version, skip the maple syrup. Instead, use natural sweeteners like stevia or monk fruit. These options provide sweetness without extra calories. You can also play with flavors without adding sugars. Try adding a dash of nutmeg or a hint of almond extract. Both enhance the latte's flavor profile without the need for sugar. For an iced version, brew your espresso or coffee in advance and let it cool. Pour it over ice and then add your oat milk mixture. To make it visually appealing, layer the oat milk gently over the coffee. This creates a beautiful gradient effect. Garnish with a sprinkle of ground cinnamon or a cinnamon stick for a lovely touch. Enjoy this refreshing drink on a hot day! To keep your oat milk fresh, store it in a sealed container. Glass jars work best. Always refrigerate it right after you make it. Oat milk can last up to four days in the fridge. However, if you notice any changes in smell or texture, it’s best to toss it out. When warming oat milk, do it slowly. Use a small saucepan over low heat. Stir it often to prevent boiling. If you want to froth it, use a milk frother or whisk. This method keeps the texture smooth and creamy while preserving flavor. You can make oat milk in batches. This saves time on busy mornings. Blend your oats and water, then strain it. Store the leftover oat milk in the fridge for up to four days. On hectic days, just grab it, warm it up, and enjoy your Cardamom Vanilla Oat Latte. For the [Full Recipe], check the earlier section. To make this latte, follow these simple steps: 1. Blend Oats: Mix 1 cup of rolled oats with 3 cups of water and 1 teaspoon of ground cardamom in a high-speed blender. 2. Strain: Pour the mixture through a nut milk bag or fine mesh sieve into a bowl. 3. Add Vanilla: If using a vanilla bean, slice it and scrape the seeds into the oat milk. If not, add 1 teaspoon of pure vanilla extract. 4. Sweeten: Stir in 2 tablespoons of maple syrup and a pinch of sea salt. 5. Heat: Warm the oat milk gently over medium-low heat. 6. Froth: Froth the milk using a milk frother or whisk until light and airy. 7. Combine: In a mug, add 1 cup of brewed espresso or strong coffee, then pour in the oat milk. 8. Garnish: Top with ground cinnamon for extra flavor. This method makes a rich, creamy drink perfect for any time of day. Cardamom offers many health benefits: - Rich in Antioxidants: It helps fight free radicals in the body. - Supports Digestion: Cardamom can ease stomach issues. - Anti-Inflammatory: It may reduce inflammation in the body. - Boosts Oral Health: Cardamom can help freshen breath. Including cardamom in your diet adds flavor and health perks to your meals. Yes, you can use instant coffee. Just mix 1-2 teaspoons of instant coffee granules with hot water to your taste. This option is quick and easy. - Tip: Adjust the amount based on how strong you like your coffee. Instant coffee works well in this latte, and it makes a great drink in no time. You can find Cardamom Vanilla Oat Latte at many coffee shops. Look for local cafes that focus on specialty drinks. - Brands: Some brands offer pre-made versions in stores or online. Check places like Amazon or specialty grocery stores. To make a low-calorie Cardamom Vanilla Oat Latte, consider these tips: - Use Less Sweetener: Reduce maple syrup to 1 tablespoon or use a no-calorie sweetener. - Choose Low-Fat Oat Milk: If available, use a lighter oat milk. - Skip the Frothing: Frothing adds air and volume, making the drink feel richer without the added calories. These tweaks keep the flavor while cutting down on calories. Yes, this latte is kid-friendly with a few adjustments: - Less Cardamom: Use half the amount of cardamom for a milder taste. - Skip the Coffee: Replace espresso with hot chocolate or warm milk for a delightful treat. - Adjust Sweetness: Make sure it's sweet enough for kids' tastes. This way, kids can enjoy a warm, tasty drink that feels special. You now have all the tools to make a delicious Cardamom Vanilla Oat Latte. We covered essential ingredients, step-by-step instructions, and tips for perfecting your drink. Remember, you can customize this latte to suit your taste and diet. Explore the variations and enjoy experimenting. Whether hot or cold, this latte delights. Make it your own and share it with friends. Enjoy the journey of creating your perfect cup!

Cardamom Vanilla Oat Latte Invigorating Flavor Boost

Are you ready to elevate your morning routine? The Cardamom Vanilla Oat Latte is a deliciously cozy drink that packs

- 2 cups freshly squeezed tangerine juice - 1 teaspoon ground turmeric - 1 tablespoon raw honey (or substitute with maple syrup for a vegan option) - 1 tablespoon freshly grated ginger - 1 cup coconut water - 1/2 teaspoon freshly cracked black pepper - Fresh mint leaves, for garnish - Ice cubes (optional) Each ingredient in tangerine turmeric tonic adds great health benefits: - Tangerine Juice: Packed with vitamin C, it boosts your immune system. - Turmeric: Contains curcumin, which fights inflammation and supports joint health. - Raw Honey: Offers natural sweetness and has antibacterial properties. - Ginger: Helps with digestion and reduces nausea. - Coconut Water: Rehydrates and replenishes electrolytes. - Black Pepper: Increases the absorption of turmeric, making it more effective. - Mint Leaves: Freshens breath and aids digestion. To enjoy the best tangerine turmeric tonic, focus on fresh ingredients: - Tangerines: Look for firm, bright ones with a sweet scent. - Turmeric: Choose high-quality ground turmeric; organic is best. - Honey: Opt for raw honey from local sources for better flavor. - Ginger: Select fresh ginger with smooth skin for a stronger taste. - Coconut Water: Pick pure coconut water with no added sugars. - Black Pepper: Use freshly cracked pepper for the best flavor. - Mint: Choose vibrant green leaves without browning. These tips will help you make the best version of this refreshing tonic. For the full recipe, check out the details above! To make your tangerine turmeric tonic, start with fresh tangerines. Squeeze them to get about two cups of juice. This juice gives your tonic a bright and refreshing taste. Next, gather the other ingredients: ground turmeric, raw honey, freshly grated ginger, coconut water, black pepper, mint leaves, and ice cubes if you like it cold. Place the tangerine juice, turmeric, honey, and ginger in a blender. Blend it on high speed. This step mixes all the flavors together. You want it smooth and well-combined. After blending, pour the coconut water into a large pitcher. Add the blended mixture and stir gently. This helps the flavors mix evenly. Next, add the black pepper. It helps your body absorb the turmeric better. Stir once more to ensure everything is well mixed. You can taste your tonic at this point. If you want it sweeter, add more honey or maple syrup and blend again briefly. When you're ready to serve, pour the tonic over ice cubes. This makes it a cool drink. Garnish each glass with fresh mint leaves. Not only does this look nice, but it also adds a pleasant aroma. For a fun touch, use clear glasses to show off the vibrant color of the tonic. This drink is perfect for sharing, and you can keep the recipe handy for later. For the full recipe, check out the complete steps and ingredients. To make your tangerine turmeric tonic even better, try adding a pinch of salt. This small step brightens the flavors. You can also experiment with herbs like basil or rosemary. These herbs add depth and a fresh twist. If you want to change the sweetness, try different options. Maple syrup is a great vegan choice. Agave nectar adds a mild sweetness too. For a low-calorie option, use stevia or monk fruit sweetener. Each sweetener gives a unique taste. When serving at a party, make it fun! Use clear glasses to show off the bright color. Add ice cubes for a refreshing chill. Garnish with fresh mint leaves for a beautiful touch. You can even rim the glasses with sugar for a sweet surprise. To learn how to make this drink, check the Full Recipe. {{image_4}} You can change the tangerine turmeric tonic by using other citrus fruits. Try oranges, grapefruits, or lemons. Each fruit adds a unique taste that can brighten the drink. Use fresh juice for the best flavor. Mix different juices for a fun tropical twist. For example, a blend of orange and lemon makes a zesty tonic that wakes up your senses. For a warming touch, swap the tangerine juice with lemon juice. Add more ginger for a stronger kick. This version is great for cold days. The lemon gives a tart taste, while ginger warms your belly. You can also add a pinch of cayenne pepper. This adds heat and boosts the health benefits even more. You can also mix the tonic with iced tea for a refreshing drink. Brew a strong herbal tea, like chamomile or mint. Let it cool, then mix it with your tangerine turmeric base. This adds a different flavor and makes it a lovely summer drink. Pour it over ice and garnish with mint leaves for a fancy feel. For full details on making the tonic, check the Full Recipe. Store your tangerine turmeric tonic in an airtight container. This keeps it fresh and safe. Glass jars work well for this. Make sure to seal tightly. Always label your container with the date. This helps you keep track of how long it lasts. Your tonic stays good in the fridge for about three days. After that, the flavors may fade. The fresh juice can lose its zing over time. Always give it a good shake before serving. This helps mix the ingredients again. If you want to keep it longer, freezing is a good option. Pour the tonic into ice cube trays. This way, you can use small amounts later. When you need it, just pop a cube into your drink. Let it thaw in the fridge or at room temperature. Enjoy the vibrant taste any time! For the complete recipe, check out the Full Recipe section. This tonic packs a punch of health benefits. Tangerine juice is rich in vitamin C. It boosts your immune system and helps fight colds. Turmeric contains curcumin, known for its anti-inflammatory properties. This helps reduce swelling and pain in your body. Ginger adds warmth and aids digestion. Coconut water hydrates and replenishes electrolytes. Together, these ingredients create a refreshing drink that supports overall health. Plus, the black pepper helps your body absorb turmeric better. Yes, you can make this tonic ahead of time! Prepare the drink and store it in the fridge. It keeps well for up to three days. Just remember to give it a good stir before serving. If you want to keep it fresh, add ice just before drinking. Making it ahead saves time on busy days and lets you enjoy a tasty health boost whenever you want. Turmeric is safe for most people when used in food. However, some may experience stomach upset or nausea. It can thin the blood, so those on blood thinners should be careful. If you're pregnant or nursing, consult a doctor before using it in large amounts. In moderation, turmeric is a great addition to your diet. Enjoy your tangerine turmeric tonic for a tasty and healthy drink! In this post, we explored the key ingredients and their health perks. I shared tips for picking the best items and offered a clear prep process. You learned how to enhance flavors and serve it as a fun party drink. Variations like the ginger-lemon twist keep it exciting. Lastly, I covered smart storage to keep your drink fresh. Healthy drinks can transform your day. Try these steps and enjoy the benefits!

Tangerine Turmeric Tonic Powerful Health Boost

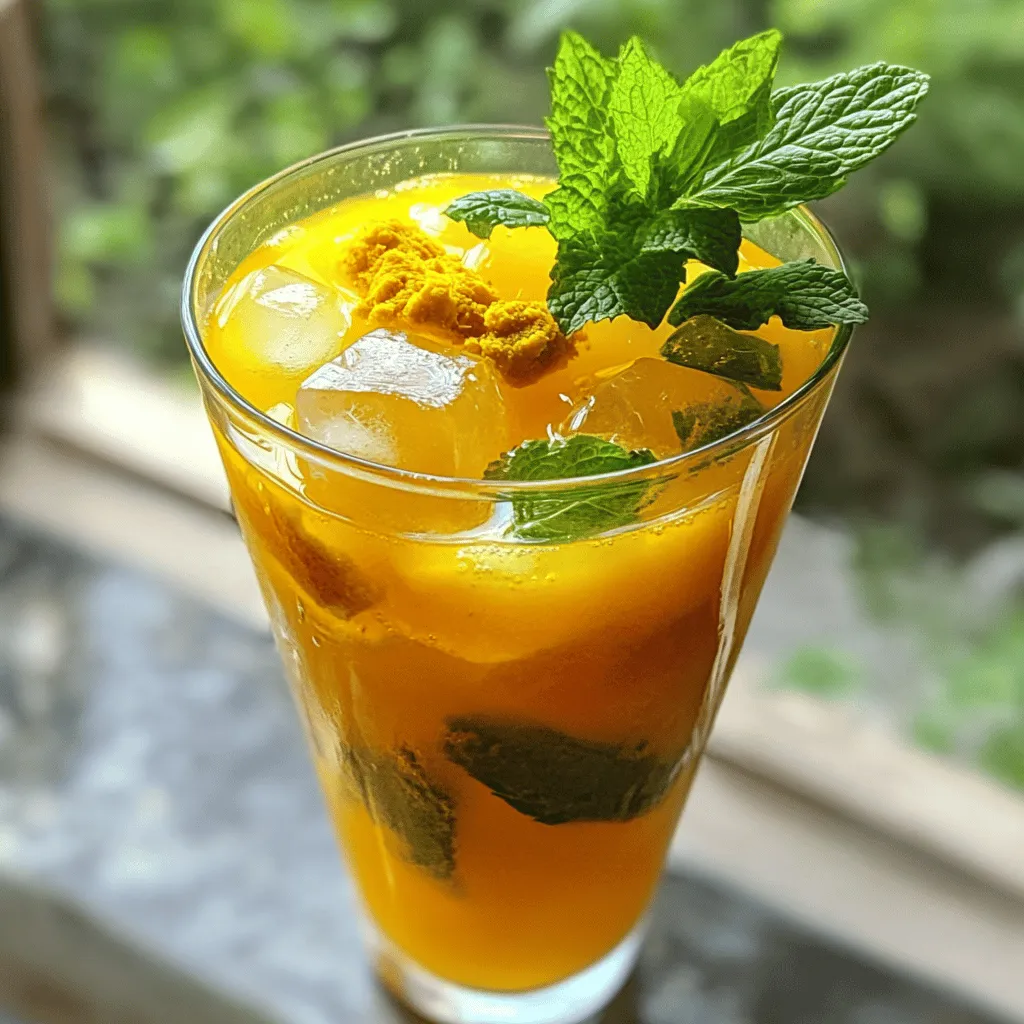
Are you ready to boost your health with a delicious drink? The Tangerine Turmeric Tonic combines zingy tangerines and powerful

To make a tasty Chocolate Cherry Almond Milkshake, gather these key ingredients: - 2 cups vanilla almond milk - 1 cup frozen cherries - 1 ripe banana - 2 tablespoons unsweetened cocoa powder - 2 tablespoons almond butter - 1/2 teaspoon vanilla extract - Ice cubes (optional for a thicker shake) These main ingredients blend together to create a rich and creamy milkshake. The almond milk gives it a nutty flavor, while the cherries add sweetness and tartness. The banana makes it thick and smooth, while the cocoa powder brings a deep chocolate taste. You can add some extra sweetness or toppings if you like: - 1 tablespoon honey or maple syrup (optional) - Whipped coconut cream (for topping) - Chopped almonds (for crunch) - Whole cherries (for garnish) If you want your shake sweeter, try adding honey or maple syrup. The whipped coconut cream on top makes it even more special. Chopped almonds also add a nice crunch to each sip. Each ingredient in this milkshake brings its own benefits: - Almond milk: Low in calories, rich in vitamins. - Cherries: Packed with antioxidants and vitamin C. - Banana: Good source of potassium and fiber. - Cocoa powder: Contains antioxidants and can boost mood. - Almond butter: Provides healthy fats and protein. Together, these ingredients create a milkshake that is not just tasty but also nutritious. You can enjoy this drink without feeling guilty! For the full recipe, check out the complete instructions. To make this milkshake, start by gathering your ingredients. You will need: - 2 cups vanilla almond milk - 1 cup frozen cherries - 1 ripe banana - 2 tablespoons unsweetened cocoa powder - 2 tablespoons almond butter - 1 tablespoon honey or maple syrup (optional) - 1/2 teaspoon vanilla extract - Ice cubes (optional) - Whipped coconut cream (for topping) - Chopped almonds and a few whole cherries (for garnish) Now, grab your blender. Add the almond milk, frozen cherries, banana, cocoa powder, almond butter, and vanilla extract. If you like it sweeter, add honey or maple syrup. Blend everything on high for 30 to 60 seconds. The goal is a smooth mix. If you want it thicker, toss in some ice cubes and blend again. After blending, taste your milkshake. If you want more sweetness, add a bit more honey and blend again. Pour the mixture into tall glasses. Top each glass with whipped coconut cream. Finish by sprinkling chopped almonds and adding a whole cherry for a fun touch. To get a creamy milkshake, use frozen cherries. They give a nice chill and thickness. The banana helps too. If your milkshake is too thin, blend in more ice cubes or a little extra almond butter. If it's too thick, add a splash of almond milk. Always taste before serving! Serve your milkshake in tall, clear glasses. Use colorful striped straws for a fun look. Adding a cherry on top makes it extra special. You can also serve it with a side of cookies or a slice of cake for a sweet treat. This milkshake is perfect for a hot day or a fun dessert for friends. Enjoy the rich flavors of chocolate, cherry, and almond in each sip! To boost the taste of your Chocolate Cherry Almond Milkshake, try adding a pinch of sea salt. This small touch can bring out the rich flavors of chocolate and cherries. You can also mix in a bit of almond extract for a stronger almond taste. If you love spice, add a dash of cinnamon or nutmeg for warmth. These flavors will create a delightful twist. If you need a dairy-free option, almond milk is perfect. You can also use oat or coconut milk. For those who avoid nuts, swap almond butter with sunflower seed butter. If you want a lower-calorie drink, skip the sweeteners or use a sugar substitute like stevia. This milkshake is easy to adapt for any diet, making it fun for everyone. You will need a good blender for this recipe. A high-speed blender will make sure everything blends smoothly. If you want it icy, add ice cubes before blending. A tall glass works best for serving this shake. You may also want a whisk for whipping coconut cream. Lastly, grab some colorful straws to make your drink even more inviting. For the complete recipe, check out the [Full Recipe]. {{image_4}} You can switch up the fruit in this milkshake. Try using frozen strawberries or raspberries for a new flavor. You can also mix in some banana for extra creaminess. If you want a tropical twist, add pineapple chunks. Each fruit adds its own unique taste and fun color. This milkshake is already dairy-free thanks to almond milk. You can make it vegan by using maple syrup instead of honey. If you want extra creaminess, try cashew milk or coconut milk. Both options blend well and keep it dairy-free. You can even use almond yogurt for added texture. You have many choices for sweetening your milkshake. Besides honey and maple syrup, you can use agave nectar or brown sugar. For a low-calorie option, try stevia or monk fruit. Each sweetener brings its own taste, so experiment and find what you like best. For the full recipe, check the earlier section. Enjoy your tasty creations! If you have extra milkshake, store it in a sealed container. Keep it in the fridge. Enjoy it within two days for the best taste. The shake may separate a bit. Just stir it before drinking. You can freeze your milkshake if you want to save it longer. Pour the milkshake into ice cube trays or freezer-safe bags. Leave some space in the container. This helps the shake expand when it freezes. To use, thaw it in the fridge or blend it frozen for a cold treat. I recommend drinking this milkshake cold. If you want to warm it, do it gently. Use a microwave at low power, stirring often. Heat it just enough to take the chill off. Avoid overheating, as it will change the flavor and texture. You can use oat milk, soy milk, or coconut milk. Each option brings its own unique flavor. Oat milk is creamy and sweet. Soy milk has a rich texture and adds protein. Coconut milk gives a tropical twist to your shake. Yes, you can make this milkshake ahead of time. Just store it in the fridge. The milkshake is best enjoyed fresh, but it can last up to 24 hours. If it separates, just stir it well before serving. Yes, you can use fresh cherries instead of frozen ones. Just pit and chop the cherries. You may want to add some ice to keep the shake cold and thick. Fresh cherries will give a bright, juicy flavor to your milkshake. This blog shared how to make a tasty Chocolate Cherry Almond Milkshake. We discussed the main ingredients and optional toppings, focusing on nutrition. I gave clear steps for preparation and shared tips for the best texture. You learned ways to enhance flavors and customize your milkshake for dietary needs. Lastly, we covered storage tips and answered common questions. Enjoy creating your delicious milkshake, and remember to try different variations to find your favorite!

Chocolate Cherry Almond Milkshake Tasty and Creamy

Craving something delicious? Get ready for a Chocolate Cherry Almond Milkshake that’s both tasty and creamy! With rich chocolate, sweet

- Fresh blackberries - Fresh mint leaves - Sweetener options (honey or agave syrup) - Sparkling water or club soda - Fresh lime juice - Crushed ice - Lime wedges for garnish The Blackberry Mint Julep Mocktail is a refreshing drink perfect for any occasion. You need simple ingredients to create this tasty treat. First, gather fresh blackberries. They give the drink a sweet and tart flavor. Next, add fresh mint leaves. Mint adds a cool twist to the drink. For sweetness, you can use honey or agave syrup. Both options work well. You will also need sparkling water or club soda. This makes the mocktail fizzy and fun. Fresh lime juice is key too. It brightens the drink and adds a zesty punch. Don't forget crushed ice. It keeps your drink chilly and enjoyable. Lastly, prepare lime wedges for garnish. They make the drink look appealing and add extra flavor. This list makes it easy to create the Blackberry Mint Julep Mocktail at home. If you want to see the full recipe, just check the section above. For this mocktail, you need a cocktail shaker or a sturdy jar. Start by adding one cup of fresh blackberries and ten fresh mint leaves to your shaker. The key to great flavor lies in muddling. Use a muddler or the back of a spoon to press down gently. Crush the blackberries until they break open and release their juices. This step also helps the mint let out its fragrant oils, which enhance the drink's flavor. After muddling, add two tablespoons of honey or agave syrup to the shaker. This will sweeten your drink, but taste-test to find what you like best. Next, squeeze in two tablespoons of fresh lime juice for a zesty kick. Stir the mixture well to blend everything together. Then, fill the shaker with crushed ice. Finally, pour in one cup of sparkling water or club soda over the ice. This creates a fizzy and refreshing mix. Give it a gentle stir with a long spoon or straw to keep those bubbles intact. Now, it’s time to serve your delicious mocktail! Fill two highball glasses with more crushed ice. Pour the blackberry mint mixture over the ice, allowing it to flow and create a lovely layered look. For that perfect finishing touch, garnish each glass with a sprig of mint on top and a lime wedge on the rim. This not only makes your drink look great but adds extra aroma as you sip. Enjoy your refreshing Blackberry Mint Julep Mocktail! To make your mocktail just right, adjust the sweetness. You can use honey or agave syrup. Start with two tablespoons, then taste. Add more if you want it sweeter. Fresh mint is key to this drink. Look for bright green, fragrant leaves. Wilting mint can dull your drink's flavor. Use clear glassware to show off your drink's colors. The dark purple of the blackberries paired with green mint looks stunning. Colorful straws add fun and charm. They also help you sip without getting mint bits in your mouth. Chill all your ingredients before mixing. Cold ingredients make your drink even more refreshing. You can also add extra ice. This gives your mocktail a slushier texture. It feels like summer in a glass. For the full recipe, check out the complete list of ingredients and instructions above. {{image_4}} You can switch up the blackberries in your mocktail for other fruits. Raspberries work well, adding a nice tart flavor. Strawberries are another great choice, bringing sweetness and a bright color. You can also mix different fruits together. A blend of blackberries and strawberries creates a fun twist. This variety keeps your drink fresh and exciting. Not a fan of honey or agave? You have other options! Maple syrup adds a unique flavor and sweetness. Coconut sugar is another great choice, giving a hint of caramel. You can even use stevia or monk fruit for a low-calorie option. Each sweetener changes the drink's taste slightly, so feel free to experiment. If you want to make an alcoholic version, bourbon is the classic choice. It pairs perfectly with the blackberries and mint. Start with 1.5 ounces of bourbon per drink. This keeps your drink balanced without overpowering the fresh flavors. You can also try rum for a sweeter taste. Just remember to adjust the sweetener to keep it delicious! To store your Blackberry Mint Julep Mocktail, keep it safe and fresh. Pour any leftovers into a clean, airtight container. A glass jar works great for this. Make sure the lid seals tightly. This helps keep out air and light, which can spoil the drink. In the fridge, your mocktail can last about 2 days. After that, it may lose its nice taste and fizz. Look for signs it is no longer fresh. If the colors dull or it smells off, it’s time to toss it. Always trust your senses. Enjoy it while it’s still vibrant and tasty! A Blackberry Mint Julep Mocktail is a tasty, non-alcoholic drink. It blends fresh blackberries, mint, and lime juice. You get all the flavor of a classic mint julep without the alcohol. This drink is great for warm days or any festive gathering. The sweetness from the honey or agave syrup balances the tartness of the lime. Plus, the fizz from sparkling water makes it a refreshing treat. Yes, you can prepare this mocktail ahead of time. Start by muddling the blackberries and mint leaves. Mix in the honey and lime juice, then store this mix in the fridge. Just before serving, add the crushed ice and sparkling water. This keeps the drink fizzy and fresh. If you want to save time, you can also pre-make the blackberry-mint mixture. Assemble it right before your guests arrive for the best results. If you don’t have mint, you can try other herbs. Basil adds a sweet twist, while rosemary gives a strong flavor. You might also enjoy using lemon balm for a citrusy note. Each herb brings a unique taste, so feel free to experiment. Just remember, the key is to muddle the herb to release its oils, just like with mint. This gives your mocktail a fresh and vibrant flavor. This blog post covered how to make a refreshing Blackberry Mint Julep Mocktail. We explored the key ingredients, from blackberries to fresh mint leaves. I shared step-by-step instructions for muddling and combining the flavors. You learned tips for enhancing taste and great presentation ideas. I also offered variations and important storage info. Enjoy crafting your own mocktail. With these tips, you’re set to impress!

Blackberry Mint Julep Mocktail Refreshing and Easy Drink

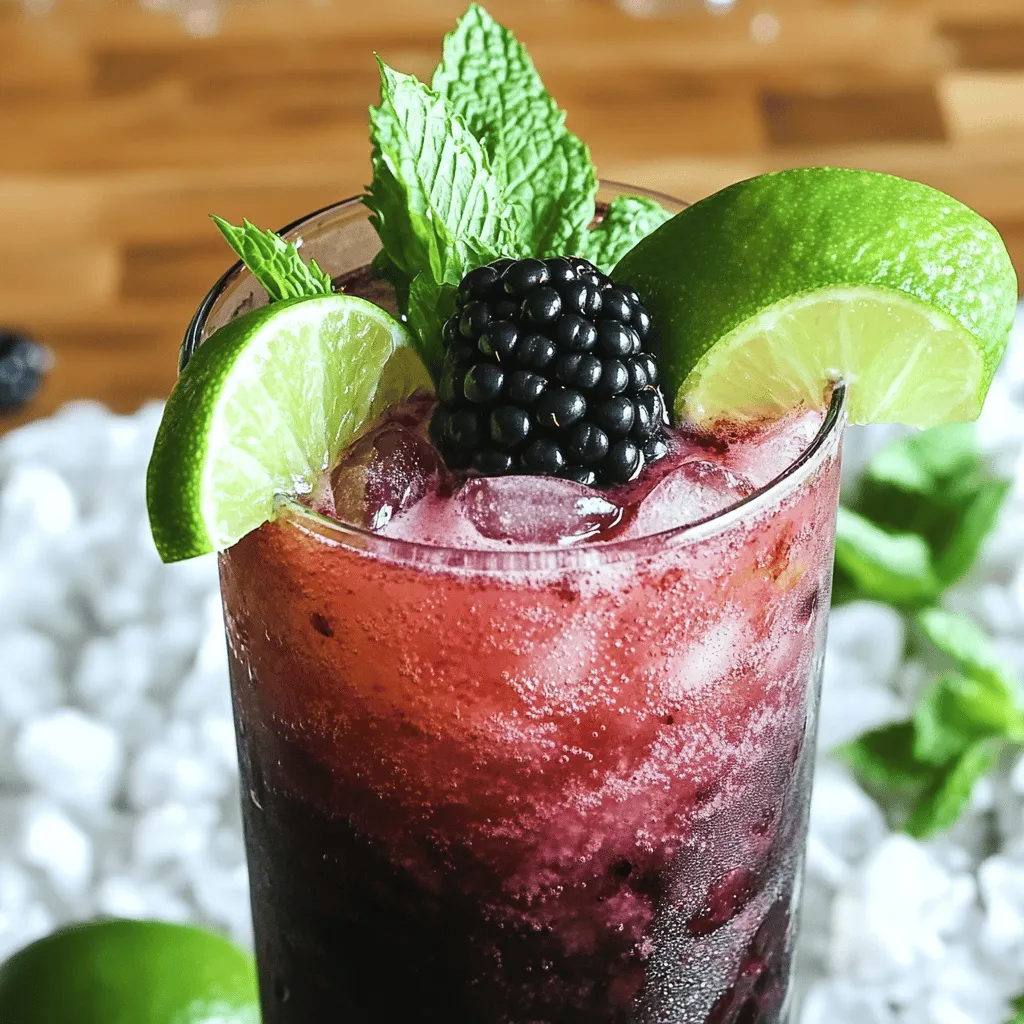
Craving a refreshing drink that’s easy to make and full of flavor? The Blackberry Mint Julep Mocktail is a perfect

- 1 cup fresh strawberries, hulled and halved - 2 ripe kiwis, peeled and sliced - 1 ripe banana, frozen - 1 cup plain Greek yogurt - 1 tablespoon honey or agave syrup - 1 tablespoon chia seeds - 1 cup almond milk (or any dairy/non-dairy milk of your choice) - Ice cubes (for a colder and thicker smoothie) For this Strawberry Kiwi Yogurt Smoothie, I love using fresh fruit. Strawberries and kiwis bring bright colors and a sweet taste. The banana adds creaminess while the Greek yogurt boosts protein. If you like it sweeter, add honey or agave syrup. Chia seeds are a great addition for extra nutrients. They help thicken your smoothie and give it a nice texture. The almond milk acts as a smooth base. You can swap it with any milk you prefer. If you want a colder drink, throw in some ice cubes. This will make your smoothie thick and refreshing. For the full recipe, check out the detailed instructions to create this delicious smoothie. Enjoy the bright flavors and creamy texture! To start, gather your fresh ingredients. First, you need hulled and halved strawberries. These sweet gems will be the base of your smoothie. Next, peel and slice the kiwis. Their tangy flavor pairs perfectly with strawberries. Finally, get a ripe banana and freeze it. A frozen banana adds creaminess and sweetness to the mix. Now, let’s blend! Add the hulled strawberries, sliced kiwis, and frozen banana to your blender. Pour in one cup of plain Greek yogurt. This yogurt gives your smoothie a thick and creamy texture. Next, add one cup of almond milk, or any milk you like. The milk helps everything blend smoothly. Turn on the blender. Blend until the mixture is smooth and well combined. You want a nice, creamy texture. After blending, taste your smoothie. If you want it sweeter, add one tablespoon of honey or agave syrup. This is optional, so adjust based on your taste. For extra nutrition, add one tablespoon of chia seeds. They are small but pack a big health punch! If you like your smoothie thicker or colder, toss in some ice cubes. Blend again until everything is mixed well. You can keep tasting and adjusting until you love the flavor. Once you are happy, pour your smoothie into glasses and enjoy right away. To make your smoothie stand out, try different fruits. You can mix in mango, pineapple, or even spinach for a healthy boost. Each fruit brings its own taste and vitamins. I love using flavored Greek yogurt too. It adds a creamy texture and a fun twist to your drink. Presentation matters! Garnish your smoothie with kiwi slices and strawberries. This not only looks pretty but also makes it more appetizing. You can add a fresh mint leaf on top for a pop of color. Serve it with a colorful straw to make it festive and fun! Want a thicker smoothie? Use less liquid or add more frozen fruit. If you like it thinner, add more almond milk. The ratio of fresh to frozen fruit can change the texture as well. A good mix makes for a delicious drink. {{image_4}} You can change the flavors of your smoothie by mixing in other fruits. For a tropical twist, try adding pineapple or mango. These fruits add a sweet and juicy punch. You can also make a berry medley. Combine strawberries, blueberries, and raspberries for a berry blast. Each fruit adds its unique taste and nutrition. If you want a dairy-free or vegan smoothie, you can swap the Greek yogurt. Use plant-based yogurt made from nuts or soy. This keeps the creaminess without dairy. For liquid, try coconut milk instead of almond milk. Coconut milk gives a rich flavor and works well with fruits. To make your smoothie a protein powerhouse, add protein powder or nut butter. A scoop of protein powder boosts the nutrition. Nut butter adds healthy fats and taste. You can also mix in greens like spinach or kale. These greens are mild in flavor but give extra vitamins. This way, your smoothie is tasty and healthy! To keep your strawberry kiwi yogurt smoothie fresh, store it in the refrigerator. Use an airtight container for best results. Smoothies stay good for about 24 hours in the fridge. If you want to store it longer, freeze it. A frozen smoothie can last for about a month. Just remember to leave some space in the container as it expands when frozen. When you take the smoothie out of the fridge or freezer, it might separate. To fix this, just stir it well. If it’s frozen, let it thaw for a bit. You can also re-blend it. This brings back the smooth texture. Make sure to blend until it’s creamy again before serving. Fruits like strawberries and kiwis can brown over time. To keep them fresh, use lemon juice. A little lemon juice helps prevent oxidation. It keeps the color bright and the taste fresh. Just a splash in the smoothie will do. This is an easy way to make your smoothie look and taste great longer. Yes, you can use frozen strawberries and kiwis. They add a nice chill and thickness to your smoothie. Frozen fruits are often picked at peak ripeness, which keeps their taste and nutrients. This makes them a great option when fresh fruits are not in season. Plus, using frozen fruits means you don’t need to add ice, which can water down your smoothie. This recipe yields two servings. Each serving is about one cup. You can easily double the recipe for more people or if you want extra for yourself. Just remember to adjust the blend time to make sure everything mixes well. This smoothie is packed with health benefits. Strawberries are rich in vitamin C and antioxidants. They help boost your immune system. Kiwis are high in fiber and vitamin E, which is great for your skin. Greek yogurt adds protein and probiotics, which aid digestion. Together, they create a balanced snack or meal that gives you energy and keeps you full. Yes, you can prep this smoothie in advance. Just blend it and store it in the fridge. However, for the best taste and texture, drink it within 24 hours. If you want to store it longer, pour it into a freezer-safe container. When ready to enjoy, simply thaw and blend again to restore the smooth texture. Absolutely! To make it gluten-free, ensure your yogurt and milk are certified gluten-free. For a dairy-free option, use coconut yogurt and non-dairy milk, like almond or oat milk. If you're watching your sugar, skip the honey or agave syrup. You can add a sweetener like stevia instead. This recipe is flexible to fit your needs. For the complete instructions and ingredients, check out the full recipe for the Strawberry Kiwi Bliss Smoothie. This smoothie combines fresh strawberries, kiwis, and bananas for a tasty drink. You can customize it with honey, chia seeds, or different fruits. Use almond milk for a smooth base, and adjust the thickness with ice. Remember, smoothies are easy to make, fun to create, and healthy to drink. Experiment with flavors, and don’t hesitate to try new ingredients. Enjoy making and sharing this delicious Strawberry Kiwi Bliss Smoothie!

Strawberry Kiwi Yogurt Smoothie Simple and Tasty Recipe

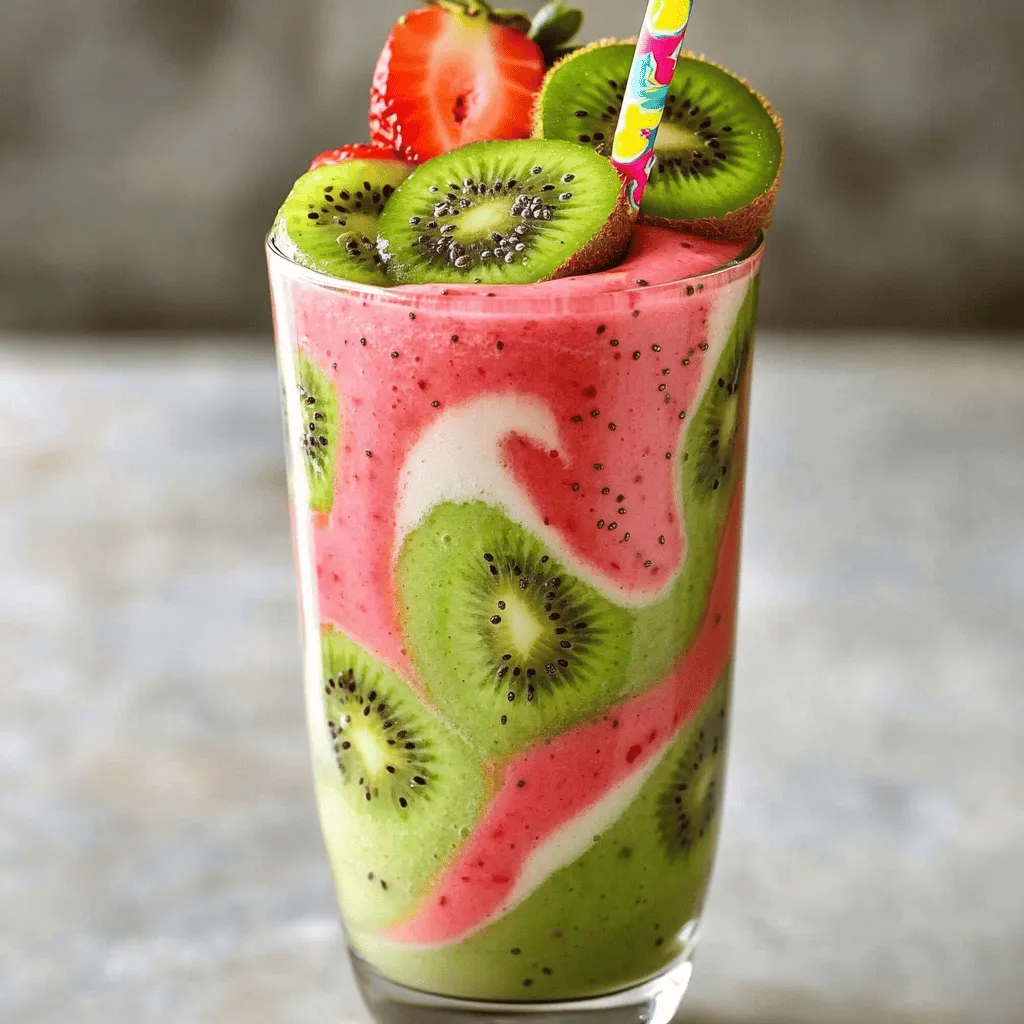
Are you ready to whip up a delicious and healthy treat? This Strawberry Kiwi Yogurt Smoothie is easy to make

- 1 cup freshly brewed espresso, cooled to room temperature - 1 cup milk (choose dairy or your favorite non-dairy alternative) - 2 tablespoons pure maple syrup for sweetness The base of this shake is simple but rich. First, use freshly brewed espresso. This gives your shake its deep coffee flavor. You can choose any milk you like. Dairy milk works well, but non-dairy options like almond or oat milk are great too. Finally, add pure maple syrup. It adds a sweet touch and pairs beautifully with espresso. - 1 generous scoop of vanilla ice cream or a scoop of vegan ice cream - 1/2 teaspoon finely ground sea salt (plus extra for garnish) - 1/2 teaspoon pure vanilla extract for flavor depth For the creamy texture, add a scoop of vanilla ice cream. If you prefer a dairy-free treat, use a vegan ice cream. The sea salt is key; it enhances the sweet and bitter notes of the espresso. Lastly, pure vanilla extract adds a warm flavor that brings everything together. - Ice cubes for thickness - Additional toppings If you want a thicker shake, toss in some ice cubes. This extra chill makes the shake even more refreshing. You can also get creative with toppings. Consider whipped cream, chocolate shavings, or a sprinkle of cinnamon for extra flair. This is just a glimpse into making the perfect Espresso Salted Maple Shake. For the complete process, check out the Full Recipe! To start, brew a cup of espresso using your machine. Use fresh beans for the best taste. Once brewed, let the espresso cool to room temperature. This step is key. It stops the ice cream from melting too fast when you blend. Next, grab your high-powered blender. Add the cooled espresso to the blender. Then, pour in one cup of milk. This can be dairy or your favorite non-dairy type. Next, add two tablespoons of pure maple syrup for sweetness. Toss in one generous scoop of vanilla ice cream. Don’t forget the sea salt and vanilla extract! Blend on high speed until everything is smooth and creamy. If you want a thicker shake, add some ice cubes. Blend again until the ice is mixed in. Taste your shake. If it needs more sweetness, add extra maple syrup. Now it’s time to serve! Carefully pour the shake into two tall glasses. Watch the creamy texture flow into the glass. For a nice touch, sprinkle a little sea salt on top. This adds a great flavor contrast. For a fun presentation, use colorful straws or a mint leaf garnish. Clear glasses help show off those delicious layers. Enjoy your Espresso Salted Maple Shake! For the full recipe, check out the detailed instructions provided earlier. To make your Espresso Salted Maple Shake really shine, you can tweak the sweetness and flavor. If you want it sweeter, add more maple syrup. Taste as you go. Adjust the flavor by adding more vanilla extract too. For the perfect thickness, I suggest adding ice cubes. Blend them in for a thicker shake. If you prefer a lighter version, skip the ice. The shake should be creamy but not too runny. A strong blender makes a big difference for this recipe. Look for one with high power. Brands like Vitamix or Ninja work well. They blend everything to a smooth finish. For serving, I love using tall glasses. Clear glasses show off the shake's beautiful layers. You can even use mason jars for a fun twist. Garnishing adds charm to your shake. A light sprinkle of sea salt on top adds a nice flair. You can also use whipped cream for a creamy finish. For a fun touch, add a colorful straw. A mint leaf on top looks fresh and inviting. Serve your shake right away for the best flavor and texture. Enjoy the delightful mix of espresso and maple! {{image_4}} You can change the taste of your Espresso Salted Maple Shake in fun ways. Adding chocolate or caramel can make it richer. Just blend in a tablespoon of chocolate syrup or a drizzle of caramel sauce. You can also try different ice cream flavors. Imagine a hazelnut ice cream or a coffee-flavored one. These swaps can create a whole new treat! If you want a vegan or dairy-free shake, it's easy. Use almond milk or oat milk instead of regular milk. For ice cream, you can pick a coconut or almond-based option. This keeps all the creamy goodness while being plant-based. You can also make a low-calorie shake. Use skim milk and a sugar-free syrup. This lets everyone enjoy the shake without worry. Changing the ingredients with the seasons can be exciting! In the fall, you could add pumpkin spice for a warm twist. Mix in a hint of cinnamon or nutmeg for that cozy feel. In summer, consider adding fresh fruits like strawberries or bananas. They bring a burst of flavor and a nice touch of sweetness. It’s fun to adapt your shake for any season! To keep your leftover Espresso Salted Maple Shake fresh, store it in an airtight container. This helps to keep out air and moisture. You can place it in the fridge for up to two days. If you want to freeze parts of the shake, pour the mixture into ice cube trays. Freeze it until solid. This way, you can blend it later for a quick treat! Each ingredient in your shake has its own shelf life. Freshly brewed espresso lasts about 24 hours in the fridge. Milk can stay fresh for about a week, while pure maple syrup can last for months if stored correctly. Ice cream can last in the freezer for several months. Always check for signs of spoilage, like off smells or strange textures. If your shake smells sour or has separated, it’s best to toss it. To refresh a stored shake, simply blend it again. You may want to add a splash of milk to restore its creaminess. If you have leftovers, get creative! Use the shake as a topping for pancakes or waffles. Pour it over yogurt or blend it into a smoothie bowl for a tasty twist. The options are endless! An Espresso Salted Maple Shake is a creamy drink that mixes strong coffee flavor with sweet maple. It has a rich, smooth taste with hints of vanilla and a touch of salt. This shake works well as a breakfast treat or a dessert. You can enjoy it anytime you crave something sweet and refreshing. The unique blend of espresso and maple syrup makes this shake stand out. Yes, you can prepare this shake ahead of time. To do this, blend all the ingredients and store them in the fridge. Just keep in mind that the shake may separate. Before serving, give it a good stir or blend it again. This shake tastes best when fresh, but you can store it for up to a day. If you prefer non-dairy options, there are many great choices. Almond milk, oat milk, and coconut milk all work well. Each adds a unique flavor. Almond milk is light, while oat milk has a creamy texture. Coconut milk adds a tropical twist. Choose what suits your taste and dietary needs. You can easily adjust the sweetness of your shake. If you want it sweeter, add more maple syrup. You can also try honey or agave syrup as alternatives. For a different flavor, consider adding a dash of cinnamon or nutmeg. This can enhance the taste without adding extra sweetness. To make an Espresso Salted Maple Shake, start with your main ingredients: espresso, milk, and maple syrup. Blend these with vanilla ice cream and sea salt. Follow the steps to brew and chill your espresso, then blend to your desired thickness. Remember to serve it right. For extra flair, try different flavors or toppings. This shake is easy to store and versatile, so enjoy experimenting! I hope you’re excited to make your own and share it with friends and family. Trust me, it will be a hit!

Espresso Salted Maple Shake Tasty and Creamy Treat

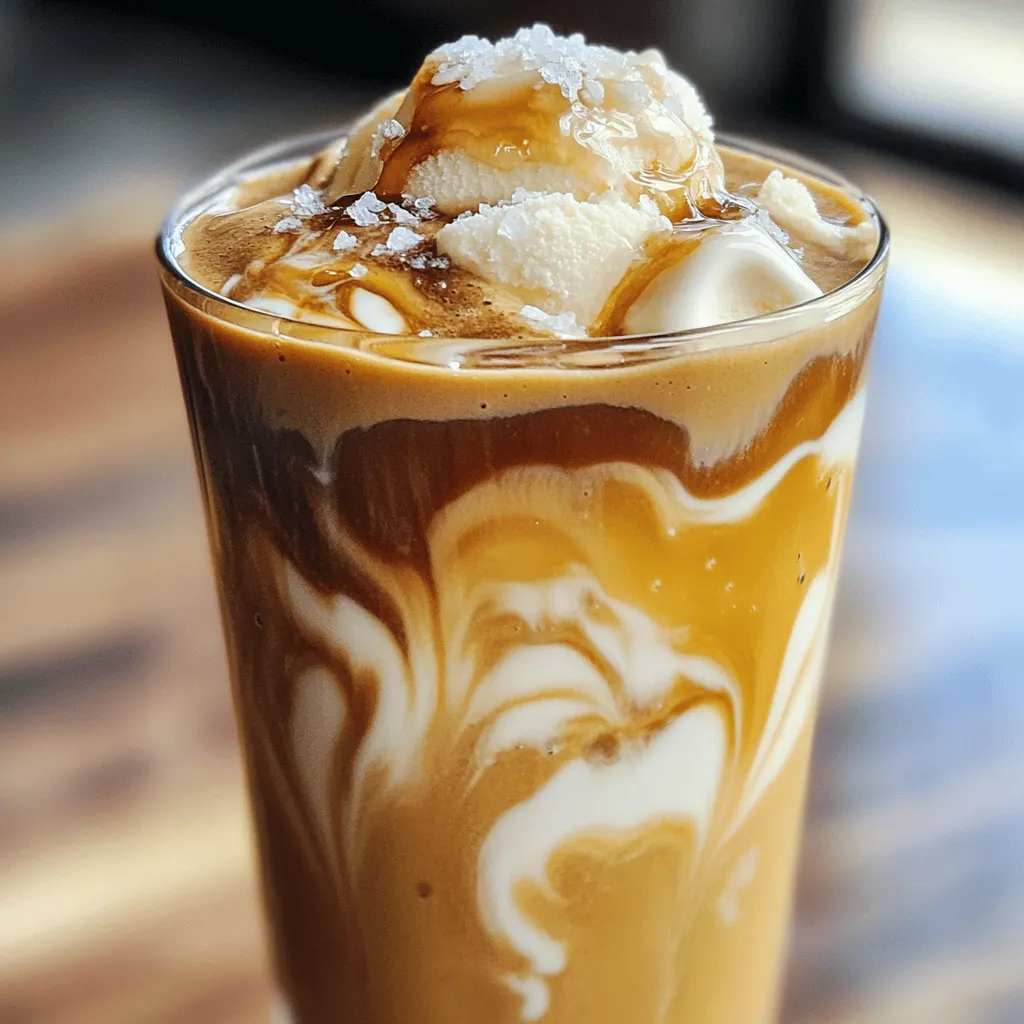
Looking for a tasty treat that combines rich espresso and sweet maple? You’ll love this Espresso Salted Maple Shake! It’s

Older posts
Newer posts
← Previous Page1 … Page35 Page36 Page37 … Page91 Next →

dsad

© 2025 recipesstation • Built with GeneratePress

Our Policies

  • Copyright Policy
  • Cookie Policy
  • GDPR Policy
  • Privacy Policy
  • Disclaimer
  • Terms Of Use

More Information

  • Home
  • About
  • Contact
  • Appetizers
  • Dessert
  • Dinner
  • Drinks
©2025, recipesstation About Back To Top