Skip to content
DisclaimerTerms Of UseGDPR PolicyCookie Policy

recipesstation

  • Home
  • Drinks
  • Appetizers
  • Dinner
  • Dessert
  • About
  • Contact
  • Privacy Policy
DisclaimerTerms Of UseGDPR PolicyCookie Policy

Emily

For a tasty Spinach and Cheese Frittata, you need: - 6 large eggs - 1 cup fresh spinach, chopped - 1 cup shredded cheese (choose your favorite: cheddar, feta, or a delightful mix) - 1/2 cup whole milk - 1/4 cup onion, finely diced - 2 cloves garlic, minced - 2 tablespoons extra virgin olive oil - Salt and black pepper, to taste - Optional: a pinch of ground nutmeg for a warm flavor boost You can swap some ingredients if you need to. Try these options: - Use egg whites instead of whole eggs for a lower-fat version. - Swap whole milk for almond milk if you want a dairy-free option. - Use any cheese you like, such as mozzarella or goat cheese. - Replace fresh spinach with kale or Swiss chard for a different taste. Each ingredient in your frittata brings great benefits: - Eggs are packed with protein, which helps build muscles. - Spinach is rich in iron and vitamins, great for your health. - Cheese adds calcium, which is good for your bones. - Onions and garlic boost flavor and have health benefits too. - Olive oil is full of healthy fats and can help your heart. This frittata is not just delicious; it’s a colorful dish full of nutrition. If you want to explore more, check out the Full Recipe to get started! To start, gather all your ingredients. You will need: - 6 large eggs - 1 cup fresh spinach, chopped - 1 cup shredded cheese (choose your favorite: cheddar, feta, or a delightful mix) - 1/2 cup whole milk - 1/4 cup onion, finely diced - 2 cloves garlic, minced - 2 tablespoons extra virgin olive oil - Salt and black pepper, to taste - Optional: a pinch of ground nutmeg for a warm flavor boost Next, wash the spinach. Chop it into small pieces. Dice the onion finely and mince the garlic. This will help the flavors blend well in your frittata. Heat an oven-safe skillet over medium heat. Add the olive oil and let it warm. Once hot, toss in the diced onion. Sauté for about 3-4 minutes until it softens. Stir often to avoid burning. Now, add the minced garlic. Cook for about 1 minute until fragrant. Then, stir in the chopped spinach. Cook for 2-3 minutes until the spinach wilts and shrinks down. In a bowl, whisk together the eggs, milk, salt, black pepper, and nutmeg if you’re using it. Make sure the mixture is light and frothy. Pour this over the sautéed veggies in the skillet. Use a spatula to mix gently, spreading the spinach and onions evenly. Sprinkle the shredded cheese over the top of the egg mixture. Let it cook on the stovetop for about 2-3 minutes. You’ll see the edges start to set. Carefully move the skillet to your preheated oven. Bake for 15-20 minutes until the frittata puffs up and turns golden brown. To check if it’s done, insert a toothpick in the center. It should come out clean. Once baked, take the skillet out of the oven. Let the frittata cool for a few minutes before slicing it into wedges. Enjoy this tasty, nutritious dish as a meal or snack. For the full recipe, refer to the earlier section. To get that light and fluffy texture, use fresh eggs. Whisking the eggs well adds air, making them puff up. Add milk for creaminess. Don't skip the cheese; it helps with fluffiness too. Cook on medium heat, so the edges set without overcooking the center. Prep all your ingredients before you start. Chop the spinach, onion, and garlic ahead of time. You can even whisk the egg mixture a day in advance and store it in the fridge. Using pre-shredded cheese can also cut down on prep time. Avoid using too many ingredients; it can weigh down your frittata. Don't rush the cooking process. If the heat is too high, the bottom may burn before the top cooks. Lastly, resist the urge to open the oven door too soon. Let it bake without peeking for best results. For more details, check the Full Recipe! {{image_4}} You can make your frittata even more colorful and tasty by adding different veggies. Try bell peppers, mushrooms, or zucchini. Just chop them up small. Sauté them along with the onion and garlic. This will add flavor and nutrition to your dish. You can mix and match veggies based on what’s in season or what you have at home. Cheese is key in a frittata. If you want to switch it up, consider using goat cheese or mozzarella. Each type brings a unique taste. Goat cheese adds a tangy flavor, while mozzarella gives a creamy texture. You can also blend cheeses for a richer taste. Just remember to keep the total cheese amount the same as in the full recipe. Adding proteins makes your frittata heartier. You can include diced ham, cooked bacon, or even turkey sausage. Cook the meat first, then mix it with the veggies before adding the eggs. This adds depth to your dish and makes it a filling meal. Just be sure to cut the meat into small pieces so it mixes well. After enjoying your Spinach and Cheese Frittata, you may have leftovers. To store them, let the frittata cool completely. Then, slice it into wedges. Place the wedges in an airtight container. This helps keep them fresh. You can store the container in the fridge for up to three days. Make sure to label it with the date. Reheating your frittata can be easy and quick. You can use the microwave or the oven. For the microwave, place a slice on a plate. Heat it for 30 seconds to 1 minute. Keep an eye on it to avoid overcooking. If you prefer the oven, preheat it to 350°F (175°C). Place the frittata slice on a baking sheet and heat for about 10-15 minutes. This method keeps the texture nice and fluffy. If you want to save your frittata for later, freezing is a great option. Wrap each slice tightly in plastic wrap. Then, place the wrapped slices in a freezer-safe bag. You can freeze the frittata for up to three months. When you are ready to eat it, thaw it in the fridge overnight. Then, reheat it using the oven or microwave. This helps keep the flavor and texture intact. For more details, check the Full Recipe. Yes, you can make a Spinach and Cheese Frittata ahead of time. It holds well in the fridge for up to three days. To do this, cook the frittata as usual, then let it cool. Once cooled, cover it with plastic wrap or foil. When you are ready to eat, simply heat it in the oven at 350°F until warm. This makes it great for busy mornings. I recommend serving a frittata warm or at room temperature. Slice it into wedges for easy serving. You can add fresh herbs like parsley or basil on top for a pop of color. Pair it with a light salad or some fresh fruit for a balanced meal. This makes for a lovely brunch dish or a quick weeknight dinner. Yes, frozen spinach works well in a frittata. Thaw the spinach and squeeze out excess water before using it. This prevents your frittata from becoming too watery. Frozen spinach is just as nutritious and saves time. It’s a great option when fresh spinach isn't available. To know if your frittata is cooked, look for a puffed-up and golden top. You can also insert a toothpick into the center. If it comes out clean, your frittata is ready. The edges should be set while the center may still jiggle slightly. It will continue to cook as it cools. For the complete recipe, check out the Full Recipe section. We covered the key ingredients and step-by-step instructions for a tasty spinach and cheese frittata. You learned tips for a fluffy texture and ways to save time. Explore variations and find ways to store leftovers efficiently. This dish is easy to adapt and full of flavor. Enjoy the cooking process and have fun customizing it. Make it your own, and savor each bite.

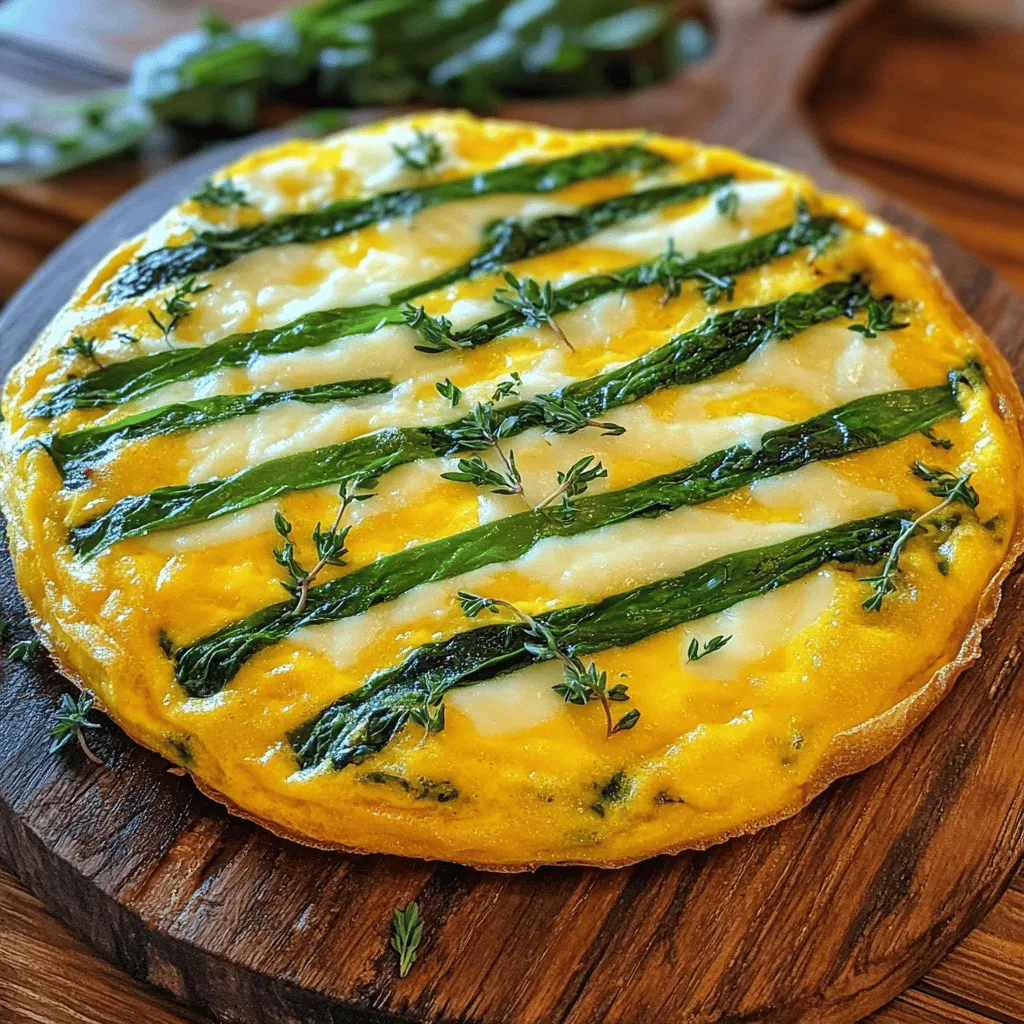
Spinach and Cheese Frittata Full of Flavor and Nutrition

Are you ready to enjoy a dish that’s both tasty and good for you? The Spinach and Cheese Frittata is

To make this old-fashioned squash and onions dish, you need a few simple ingredients. Each one plays a key role in creating that comforting flavor you crave. Here’s what you will need: - 2 medium yellow squash, sliced into half-moons - 2 medium zucchini, sliced into half-moons - 1 large onion, thinly sliced - 2 tablespoons olive oil - 1 teaspoon garlic powder - 1 teaspoon dried thyme - Salt and pepper to taste - ½ cup vegetable broth - 1 tablespoon balsamic vinegar - Fresh parsley for garnish Gather all these ingredients before you start cooking. Fresh squash and zucchini bring great taste. The onion adds a sweet depth. Olive oil helps to cook the veggies just right. Garlic powder and thyme give it a warm flavor. Season with salt and pepper to fit your taste. The vegetable broth keeps it moist, while balsamic vinegar adds a nice tang. Finish with parsley for a fresh look. This medley is not just easy; it’s also full of goodness. For the full recipe, check out the Cozy Squash & Onion Medley. Heat the olive oil in a large skillet over medium heat. Once the oil is hot, add the thinly sliced onions. Sauté them for about 5 minutes. Stir them often until they turn soft and slightly clear. Next, add the sliced yellow squash and zucchini to the skillet. Mix them well with the onions. Cook this blend for 6 to 8 minutes. This will help the veggies soften and gain a lovely color. Now it's time to season! Sprinkle the garlic powder, dried thyme, and a bit of salt and pepper over the mix. Stir everything together so the spices coat each vegetable piece evenly. Pour in the vegetable broth and balsamic vinegar. Lower the heat to a gentle simmer. Cover the skillet with a lid. Let this medley cook for about 10 to 12 minutes. The squash should become tender and soak in all the tasty flavors. After cooking, taste the dish. If needed, add more salt, pepper, or herbs to suit your taste. Adjustments can make a big difference in the final flavor. Take the skillet off the heat. Carefully transfer the squash and onion mix to a serving dish. For a fresh touch, sprinkle chopped parsley on top before serving. This will add color and flavor to your meal. Enjoy your cozy squash and onion medley! You can check out the Full Recipe for more details. Serve the cozy squash and onion medley in a warm cast iron skillet. This choice adds charm and keeps the dish warm. You can also use a rustic wooden bowl for a homely feel. Drizzle a little olive oil on top before adding the parsley. This simple step makes the dish look fresh and colorful. Always choose fresh squash and onions for the best flavor. Look for squash with smooth skin and bright color. Onions should feel firm and have a strong scent. Fresh herbs like parsley enhance the dish’s taste and color. Using fresh ingredients makes your meal more vibrant and delicious. Taste your dish before serving. You can adjust the salt and pepper based on your preference. If you like it spicy, add a pinch of red pepper flakes. Want more flavor? Try adding a bit more garlic powder or thyme. Each tweak lets you make the dish your own. {{image_4}} You can easily add protein to this dish. Try cooked chicken or turkey for a hearty meal. If you prefer seafood, shrimp or scallops work well too. For plant-based options, add cooked lentils or chickpeas. These choices will make this dish more filling and nutritious. This recipe is already vegetarian. To make it vegan, just skip any cheese toppings. You can add nuts like walnuts or almonds for a crunchy texture. These will give your dish a nice boost of flavor and nutrients. Feel free to experiment with herbs and spices. Swap dried thyme for fresh basil or oregano. You can also add a pinch of red pepper flakes for heat. Try a sprinkle of smoked paprika for a deeper flavor. These small changes can create a new twist on the classic dish. For the full recipe, check out the Cozy Squash & Onion Medley. After making the cozy squash and onion medley, let it cool down. Then, store it in an airtight container. It will keep in the fridge for about three days. If you want to eat it later, make sure to label the container with the date. You can freeze this dish too! Allow it to cool completely. Then, use a freezer-safe container or bag. The squash and onions can stay fresh in the freezer for up to three months. When ready to eat, just thaw it in the fridge overnight. To reheat, use the stovetop for the best results. Place the dish in a skillet over medium heat. Add a splash of water or broth to avoid sticking. Stir occasionally until warmed through. You can also use the microwave if you're short on time. Heat it in short bursts, stirring in between, until hot. Old-Fashioned Squash and Onions is a simple, cozy dish. It features tender squash and sweet onions. You can enjoy its warm, comforting flavors any time of the year. This dish blends yellow squash and zucchini, sautéed with onions and herbs. It pairs well with many meals. It is a perfect side dish for family dinners or holiday feasts. Yes, you can use different types of squash. While yellow squash and zucchini work best, feel free to experiment. Butternut squash, acorn squash, or pattypan squash can add unique flavors. Just remember to adjust cooking times based on the type of squash you choose. All squash varieties will bring a lovely taste to the dish. Making Old-Fashioned Squash and Onions gluten-free is easy. This dish is naturally gluten-free, as it does not contain any wheat or gluten products. Just make sure to check the broth you use. Some vegetable broths may contain gluten. Choose a certified gluten-free broth for the best results. You can serve Old-Fashioned Squash and Onions in many ways. Enjoy it warm alongside roasted chicken or grilled fish. For a vegetarian meal, pair it with quinoa or rice. This dish can also be a great topping for baked potatoes. Garnish with fresh parsley for added flavor and color. For the full recipe, check out the Cozy Squash & Onion Medley. This blog post covered a simple, tasty dish using squash and onions. We discussed the key ingredients and shared step-by-step instructions that anyone can follow. I shared tips for presentation, variations to mix things up, and how to store leftovers. In my view, this dish is easy and full of flavor. You can adjust it to fit your taste. Try it, enjoy it, and add your twist!

Old-Fashioned Squash and Onions Comfort Dish Delight

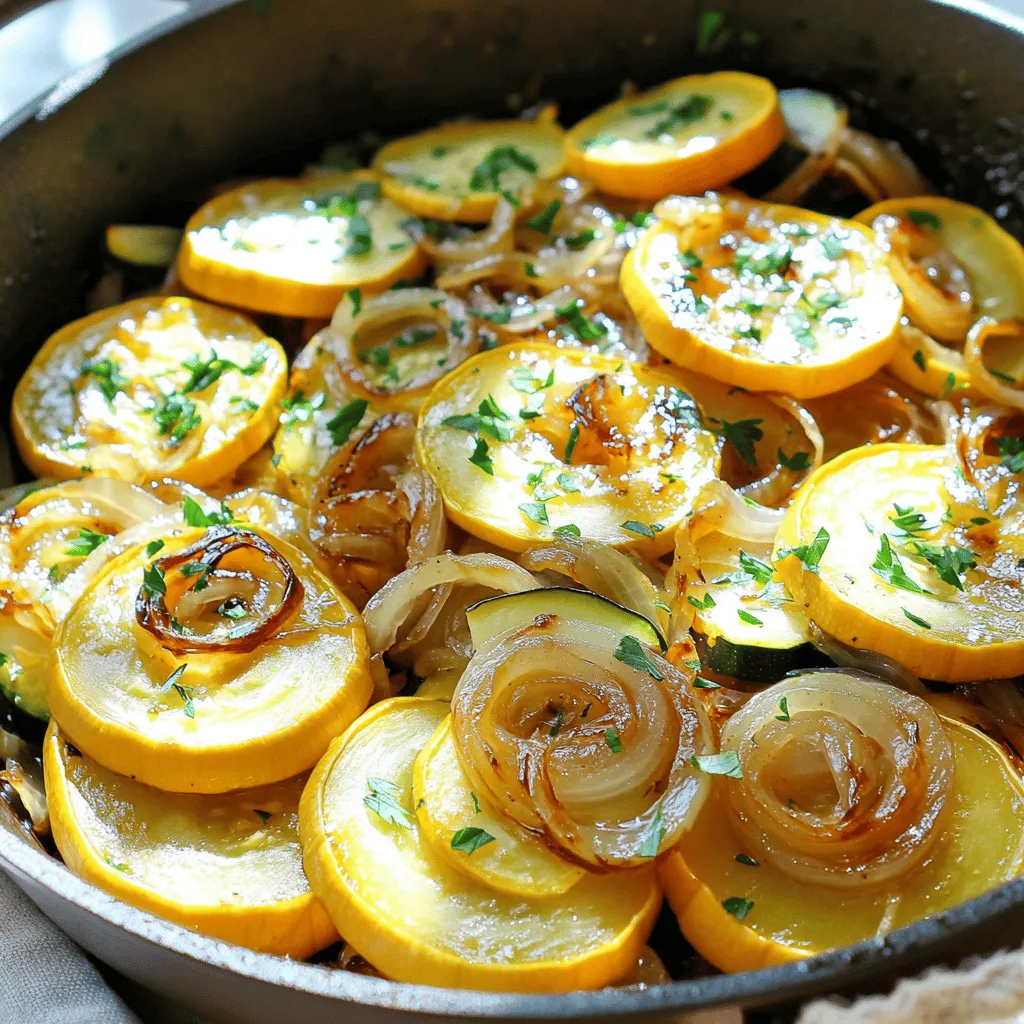
Looking for a comforting dish that’s simple and tasty? You’ve found it! Old-Fashioned Squash and Onions brings warm flavors to

To make tasty Buffalo Cauliflower Bites, gather these ingredients: - 1 medium head of cauliflower, cut into bite-sized florets - 1 cup all-purpose flour (or chickpea flour for gluten-free) - 1 cup water - 1 teaspoon garlic powder - 1 teaspoon onion powder - 1 teaspoon smoked paprika - ½ teaspoon salt - ½ teaspoon black pepper - 1 cup hot sauce (like Frank's RedHot) - 2 tablespoons melted vegan butter (or regular butter) - Fresh parsley, finely chopped (for garnish) - Celery sticks (for serving) - Blue cheese or ranch dressing (for dipping) These simple ingredients create a bold flavor. The cauliflower gives a nice crunch. The spices add warmth. The hot sauce brings the heat. You can use different flours if needed. I love how versatile this recipe is. For serving, I suggest pairing these bites with celery sticks. They add a nice crunch and balance the heat. Blue cheese or ranch dressing makes a perfect dip. You can also try other dips for fun! For the full recipe, check the section above. 1. Preheat your oven to 450°F. This high heat will help the bites become crispy. 2. Line a baking sheet with parchment paper. This step helps prevent sticking and makes cleanup easier. 1. In a large bowl, mix the flour, garlic powder, onion powder, smoked paprika, salt, and black pepper. 2. Gradually add water while whisking. Keep going until you have a smooth batter. 1. Take each cauliflower floret and dip it into the batter. Make sure it is fully coated. 2. Shake off any extra batter and place the florets on the baking sheet in a single layer. This helps them cook evenly. 3. Bake for about 20 minutes. Look for a crispy, golden-brown color around the edges. 1. While the cauliflower bakes, mix the hot sauce and melted butter in a bowl. Stir well until it blends smoothly. 1. After the first bake, take out the cauliflower. Place it in the bowl with the buffalo sauce. Toss gently to coat each piece. 2. Return the coated bites to the baking sheet. Bake again for 10-15 minutes. This step makes them even crispier. Enjoy these flavorful and crispy treats with your favorite dipping sauce! For the complete recipe, check the Full Recipe section. To get your buffalo cauliflower bites really crispy, use a few simple methods. First, ensure your oven is fully preheated to 450°F. This helps create that crunchy texture. Second, spread the florets out on the baking sheet. They should not touch each other. This allows hot air to circulate around each piece, making them crispier. If your oven runs hot or cool, check the bites at 15 minutes. Adjust the time as needed to get that golden-brown color. Adding spices can take your bites to the next level. Try adding cayenne pepper for heat or smoked paprika for a smoky flavor. You can also mix some cumin for a warm taste. Marinating the cauliflower in hot sauce before coating it can deepen the flavor. Let it sit for about 30 minutes. This extra step makes each bite pack a punch. Buffalo cauliflower bites shine when paired with fresh sides. Celery sticks are classic, but carrot sticks work great too. For a fun platter, add cucumber slices and cherry tomatoes. When plating, use a large, colorful dish. This makes the bright orange bites pop. Serve with blue cheese or ranch dressing in small bowls for dipping. Keep portion sizes small so guests can return for more! {{image_4}} You can easily make buffalo cauliflower bites gluten-free. Just swap out all-purpose flour for chickpea flour. Chickpea flour gives a nice texture and flavor. It works well in the batter. You still follow the same steps in the Full Recipe. Make sure to check the hot sauce too. Some brands may contain gluten, so read the label. To make these bites vegan, choose plant-based butter. Many brands offer great options. You can also use almond or cashew milk instead of water. For dipping sauces, consider using dairy-free ranch. Coconut yogurt mixed with spices makes a tasty dip too. You can also blend avocado for a creamy sauce. Experiment with various hot sauces to change the heat level. For a milder flavor, try a sweet chili sauce. You can also mix in different seasonings. Adding smoked paprika or cumin gives a unique taste. If you love garlic, toss in extra garlic powder. The more you play with flavors, the more fun the bites become! To store leftover buffalo cauliflower bites, let them cool first. Place them in an airtight container. This keeps them fresh for up to three days. I recommend using glass containers. They seal tightly and prevent odors from mixing. If you have a lot, use a larger container. Keep the bites in a single layer to avoid crushing. To reheat and keep them crispy, use an oven or air fryer. Avoid the microwave; it makes them soggy. Preheat your oven to 400°F (200°C). Spread the cauliflower bites on a baking sheet. Heat for about 10 minutes. If using an air fryer, set it to 350°F (175°C) and cook for about 5-7 minutes. Check them often to avoid burning. Enjoy your buffalo cauliflower bites just like when they were fresh! Buffalo cauliflower bites can last about 3 to 5 days in the fridge. Store them in an airtight container. This keeps them fresh and tasty for your next snack! Yes, you can prepare buffalo cauliflower bites ahead of time! Just make the batter and coat the florets. Store them in the fridge until you are ready to bake. This saves time when you want a quick treat. If you want a milder flavor, you can use BBQ sauce or sweet chili sauce. These options add a different taste while still being delicious. Just adjust the amount to fit your spice level. Buffalo cauliflower bites are a healthier snack choice than regular buffalo wings. They are lower in calories and fat. Cauliflower is rich in vitamins and fiber, making this a tasty and nutritious option. Yes, baking is a great option! It makes the bites crispy without all the oil from frying. Follow the baking instructions in the full recipe for the best results. Buffalo cauliflower bites taste amazing with blue cheese or ranch dressing. You can also try dairy-free options for a vegan twist. Celery sticks are a nice crunchy addition for dipping too! Check out the full recipe for buffalo cauliflower bites to make this flavorful snack at home. Buffalo cauliflower bites are a fun and tasty snack. We covered the ingredients, from spices to serving ideas. Then, we walked through the steps to bake these bites perfectly. Don't forget the tips for crispiness and flavor twists. You can even make gluten-free and vegan variations! Store leftovers right to keep them fresh. Now, enjoy experimenting with this recipe. Make it your own and share with friends. Try these bites for your next party or movie night!

Buffalo Cauliflower Bites Flavorful and Crispy Treat

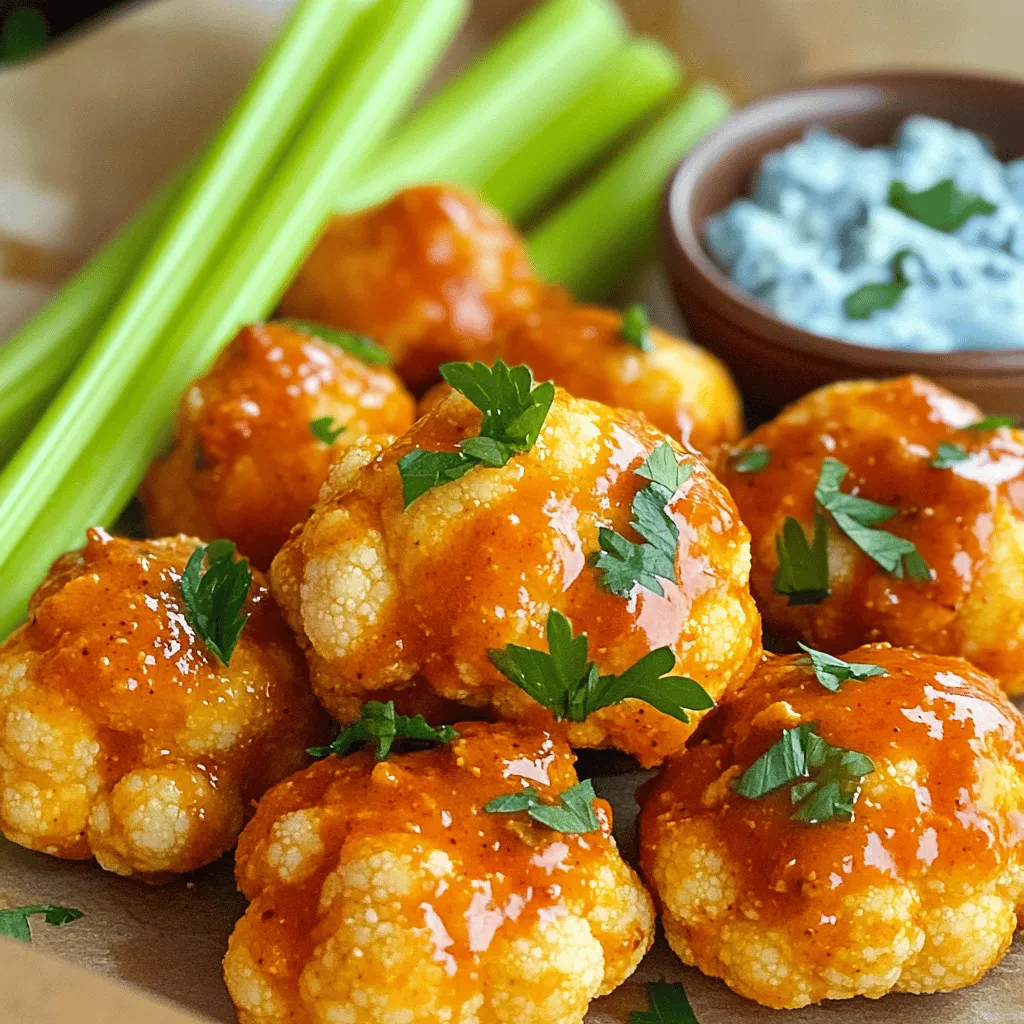
Are you ready to spice up your snacking? These Buffalo Cauliflower Bites are your new favorite treat! They’re crispy, flavorful,

- 24 Oreo cookies, finely crushed - 1/4 cup unsalted butter, melted - 16 oz cream cheese, softened to room temperature - 1 cup powdered sugar - 1 teaspoon pure vanilla extract - 1 cup heavy whipping cream - 8 Oreo cookies, roughly chopped (for filling) - Additional crushed Oreos for topping - 9-inch springform pan - Mixing bowls - Electric mixer or whisk - Spatula - Measuring cups and spoons The ingredients for a No-Bake Oreo Cheesecake are simple but key to its taste. You need 24 Oreo cookies to create a nice, rich crust. I always crush them finely for a smoother texture. Mix these crumbs with melted unsalted butter. This combination helps hold the crust together. Next, for the filling, you’ll need 16 ounces of cream cheese. It should be soft and at room temperature. This makes it easy to mix. Add 1 cup of powdered sugar for sweetness and 1 teaspoon of pure vanilla extract for flavor. These ingredients create a creamy and sweet base. To make it even creamier, use 1 cup of heavy whipping cream. Whip it until stiff peaks form. This step makes your cheesecake light and fluffy. Fold in 8 roughly chopped Oreo cookies to give it that signature cookie taste. Don't forget to have extra crushed Oreos ready for topping. They add a nice crunch and look beautiful on the cheesecake. For equipment, a 9-inch springform pan is best. It helps you easily remove the cheesecake after it sets. You’ll also need mixing bowls, measuring cups, and a spatula. An electric mixer or whisk will speed up your mixing and whipping. These ingredients and tools make your No-Bake Oreo Cheesecake a quick delight. For the complete preparation steps, check the Full Recipe. 1. Mix crushed Oreos with melted butter: In a medium bowl, take 24 finely crushed Oreo cookies. Add 1/4 cup of melted unsalted butter. Mix until it looks like damp sand. 2. Press mixture into the springform pan: Grab a 9-inch springform pan. Press the Oreo mixture firmly into the bottom. Make sure it is even. Use the back of a measuring cup to pack it tightly. Set it aside to firm up. 1. Beat softened cream cheese until smooth: In a large bowl, add 16 ounces of softened cream cheese. Use an electric mixer to beat it until creamy and smooth. No lumps should remain. 2. Add powdered sugar and vanilla extract: Slowly add 1 cup of powdered sugar and 1 teaspoon of pure vanilla extract. Mix until fully blended and silky. 3. Whip heavy cream to stiff peaks and fold into mixture: In another bowl, whip 1 cup of heavy whipping cream. Beat until stiff peaks form. This adds lightness to your cheesecake. 4. Fold in roughly chopped Oreos: Gently fold in 8 roughly chopped Oreo cookies. This gives more Oreo flavor throughout your filling. 1. Pour filling over chilled crust: Slowly pour the creamy cheesecake filling over the prepared Oreo crust. 2. Smooth the top with a spatula: Use a spatula to smooth the top of the filling evenly. 3. Refrigerate for a minimum of 4 hours: Cover the springform pan with plastic wrap. Chill in the fridge for at least 4 hours. For best results, let it sit overnight. For the full recipe, check out the details above. Enjoy making this creamy and quick delight! To get the best texture, ensure your cream cheese is at room temperature. This helps it blend smoothly. If it's cold, your cheesecake may be lumpy. Gently fold the whipped cream into the cream cheese mixture. This keeps the lightness and airiness. Be careful not to stir too hard or fast. Serve your cheesecake chilled for a fresh taste. Top each slice with whipped cream and crushed Oreos. This adds a crunchy texture. You can also add chocolate shavings or a drizzle of chocolate sauce on top. This extra touch makes your dessert look fancy and delicious. If your cheesecake doesn't set properly, check the whipping cream. It should be whipped to stiff peaks. If it is too soft, the cheesecake may stay runny. For a perfect crust, press the Oreo mixture firmly into the pan. This helps it hold together well when sliced. Follow these tips for a smooth and tasty cheesecake. {{image_4}} You can change the taste of your cheesecake easily. Try adding peanut butter for a nutty twist. Just mix in about half a cup of creamy peanut butter with your cream cheese. If you prefer a fresh taste, add mint extract. A teaspoon will do. You can also switch up the cookies in the crust. Use chocolate wafer cookies or even graham crackers for a unique flavor. Some friends may need special diets. For a gluten-free option, use gluten-free Oreos instead of regular ones. This makes the crust safe for everyone to enjoy. If you're looking for dairy-free choices, find plant-based cream cheese and whipped cream. These swaps keep the cheesecake creamy without dairy. Toppings can make your cheesecake stand out. Fresh fruit like strawberries or raspberries adds color and taste. Just slice the fruit and place it on top before serving. You can also drizzle caramel or chocolate sauce over your cheesecake. This adds a rich, sweet flavor that everyone loves. For extra crunch, sprinkle some crushed Oreos on top. For the full recipe, check out No-Bake Oreo Cheesecake Delight. Once your cheesecake is ready, keep it in the fridge. Cover it well with plastic wrap. This helps keep it fresh and tasty. The cheesecake stays good for about 5 days in the fridge. After that, the texture may change, and it might not taste as good. If you want to save it for later, you can freeze the cheesecake. First, let it cool in the fridge for a few hours. Then, wrap it tightly in plastic wrap and aluminum foil. This keeps out air and prevents freezer burn. You can keep it frozen for up to 3 months. When you want to eat it, move it to the fridge to thaw overnight. Avoid microwaving it, as this can change the texture. Got leftovers? Don’t throw them away! You can use pieces of cheesecake in new desserts. Crumble it over ice cream or mix it into a milkshake. You could even layer it in a parfait with fruit and whipped cream. This way, you can enjoy your cheesecake in different ways! Enjoy more ideas on how to make the best out of your no-bake Oreo cheesecake with the Full Recipe. A No-Bake Oreo Cheesecake is a creamy dessert made without baking. It uses crushed Oreo cookies for the crust and a rich filling made of cream cheese and whipped cream. You mix the ingredients and chill the cheesecake until it sets. This recipe is simple and quick, perfect for any occasion. You can easily impress your friends and family with this treat. The cheesecake needs to chill in the fridge for at least 4 hours. For firmer results, you can leave it overnight. The time allows the filling to thicken and hold its shape. If you cut it too soon, it may fall apart. So, patience is key for a perfect slice! Yes, you can use low-fat cream cheese. It will change the texture and taste slightly. The cheesecake may not be as rich, but it still tastes great. If you want a lighter version, this swap works well. Just make sure it's softened to mix smoothly. Absolutely! You can make this cheesecake a day or two in advance. Just store it in the fridge, covered with plastic wrap. This way, the flavors can blend nicely. Plus, it saves you time on the day of your gathering. Just remember to add any toppings right before serving. No-bake Oreo cheesecake is an easy and tasty treat. With just a few simple ingredients, you can impress your friends and family. Remember to use room-temperature cream cheese for a creamy texture. This dessert is versatile; feel free to experiment with flavors, toppings, and dietary needs. Store it well and enjoy leftovers in new desserts. Making this cheesecake is fun, and it always satisfies. Try it out and enjoy a rich, delicious slice anytime!

No-Bake Oreo Cheesecake Creamy and Quick Delight

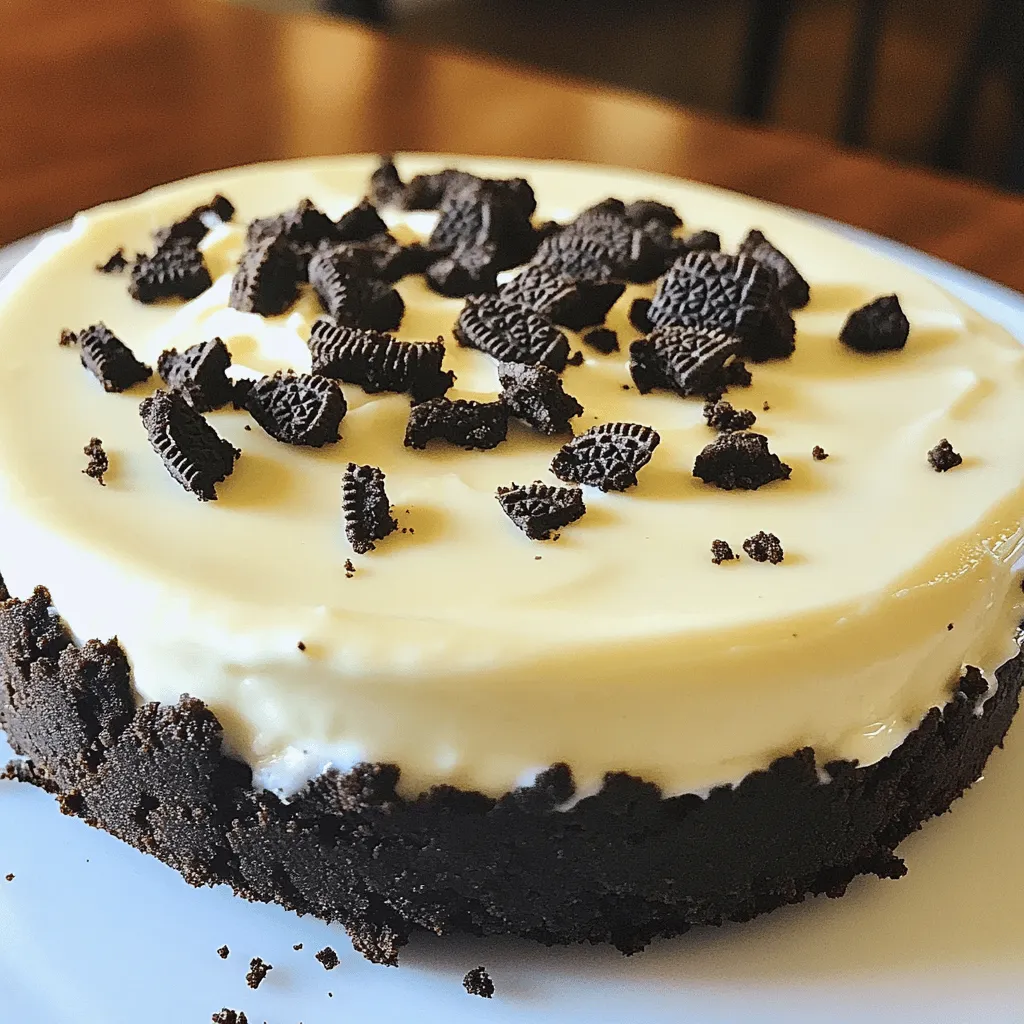
Are you ready to indulge in a rich, creamy dessert without turning on your oven? This No-Bake Oreo Cheesecake is

- 2 boneless, skinless chicken breasts, diced into bite-sized pieces - 1 tablespoon extra virgin olive oil - 1 cup heavy cream - 1 cup freshly grated Parmesan cheese - 8 ounces fettuccine pasta - 3 cups low-sodium chicken broth - 2 cloves garlic, finely minced - 1 teaspoon dried Italian seasoning - Salt and freshly ground black pepper, to taste - Fresh parsley, finely chopped (for garnish) When I make One-Pot Chicken Alfredo, I love using fresh ingredients. The chicken adds protein, while the heavy cream gives a rich taste. Fettuccine pasta cooks right in the broth. This helps it soak up all the flavors. Garlic and Italian seasoning make the dish aromatic and tasty. Don't forget salt and pepper to enhance all the flavors. Finally, fresh parsley adds color and freshness. This mix of ingredients makes a quick and tasty dinner. For the full recipe, check out the details above. Heating the Oil Start by choosing a large pot or deep skillet. Place it over medium heat. Add one tablespoon of extra virgin olive oil. Wait until the oil is hot and shimmering. Cooking the Chicken Now, add the diced chicken breasts. Season them with salt and pepper. Cook the chicken for about 5 to 7 minutes. Stir often until the chicken turns golden brown and is cooked through. Once done, take the chicken out and place it on a plate. Sautéing Garlic In the same pot, add two cloves of minced garlic. Sauté the garlic for about 30 seconds. You want it to smell great but not burn. Adding Chicken Broth and Fettuccine Next, pour in 3 cups of low-sodium chicken broth. Bring this mixture to a gentle simmer. After that, add 8 ounces of fettuccine pasta. Sprinkle in one teaspoon of dried Italian seasoning. Stir often and cook for 8 to 10 minutes, or until the pasta is al dente and has absorbed most of the broth. Incorporating Heavy Cream and Parmesan Once the pasta is ready, reduce the heat to low. Stir in one cup of heavy cream and one cup of freshly grated Parmesan cheese. Mix until the cheese melts and the sauce gets creamy. Combining All Ingredients Finally, return the cooked chicken to the pot. Mix everything well until combined. Taste the dish and adjust the seasoning with salt and pepper if needed. Let the dish sit for a few minutes to thicken the sauce slightly. Serve it up and enjoy your creamy One-Pot Chicken Alfredo! For the full recipe, check out the detailed instructions above. For the best taste, I love using freshly grated Parmesan cheese. It melts well and gives a rich flavor. Avoid pre-grated cheese; it often has additives that can affect the sauce. You can also mix in some Romano cheese for a sharper bite. This combo makes your One-Pot Chicken Alfredo truly special. Seasoning is key! Start with salt and freshly ground black pepper. Taste as you cook; you can always add more later. Dried Italian seasoning adds depth. If you want a kick, sprinkle in some red pepper flakes. Fresh herbs like parsley or basil can brighten up the dish. Always season in layers for the best flavor. To cook perfect pasta, use a large pot of simmering broth. Stir the pasta often, so it doesn’t stick. Follow the package instructions for timing. Taste the pasta a minute or two early to ensure it’s al dente. Remember, it will continue to cook slightly in the sauce. To achieve a creamy sauce, reduce the heat before adding heavy cream and cheese. Stir gently to combine, allowing the cheese to melt evenly. If the sauce gets too thick, add a splash of chicken broth to loosen it up. Let the dish sit for a few minutes after cooking; this helps the sauce thicken just right. These tips will ensure your One-Pot Chicken Alfredo shines at the dinner table. For a detailed guide, check out the Full Recipe. {{image_4}} You can easily change the protein in this dish. Instead of chicken, try shrimp or diced turkey. If you like meatless meals, use mushrooms or tofu. Each protein adds its own flavor and texture. Fettuccine is a classic, but other pasta shapes work too. You can use penne, rotini, or even whole wheat pasta. Each shape will soak up the sauce well. Just remember to adjust cooking times based on the pasta you choose. Cooking on the stovetop is simple and quick. You can keep an eye on the pasta and sauce. If you use an Instant Pot, it saves time and energy. Just set it and let it work while you relax. It makes the dish creamy and delicious as well. Need a fast meal? Use pre-cooked chicken or rotisserie chicken. This cuts cooking time in half. You can also use jarred Alfredo sauce as a base. Just add your choice of protein and pasta, and you’ll have dinner ready in no time. For the full recipe, check out the complete instructions. To keep your One-Pot Chicken Alfredo fresh, use proper storage containers. Glass or plastic containers with tight lids work best. First, let the dish cool down to room temperature. Then, transfer it to the container, ensuring it is airtight. Store it in the fridge for up to three days. When reheating, you have a few good options. You can use the microwave or the stovetop. For the microwave, place the dish in a safe bowl. Heat in short bursts, stirring in between until warm. On the stovetop, add a splash of chicken broth to the pot. Heat over low heat, stirring gently until hot and creamy. If you want to prepare meals for the future, consider freezing the leftovers. First, let the dish cool completely. Then, divide it into portions and place them in freezer-safe bags or containers. Remove as much air as possible before sealing. You can freeze it for up to three months. To thaw, move the container to the fridge for about 24 hours. Once thawed, reheat using the same methods as above. If it seems too thick, stir in a little chicken broth or cream to regain that creamy texture. Enjoy your delicious meal anytime! For the Full Recipe, check the main article. How do I make One-Pot Chicken Alfredo creamier? To make your One-Pot Chicken Alfredo creamier, add more heavy cream. You can also increase the Parmesan cheese. Stir these in slowly over low heat. This helps the cheese melt smoothly. Another tip is to let the dish sit for a few minutes after cooking. This allows the sauce to thicken and become richer. Can I make this recipe gluten-free? Yes, you can make this recipe gluten-free. Use gluten-free pasta instead of traditional fettuccine. Ensure that your chicken broth is also gluten-free. This way, you can enjoy a tasty meal without gluten. How long can I store leftovers? You can store leftovers in the fridge for up to three days. Keep the dish in an airtight container. Make sure it cools down before sealing. This helps maintain freshness and flavor. What can I serve with One-Pot Chicken Alfredo? One-Pot Chicken Alfredo pairs well with a simple green salad. Garlic bread is another great option. You might also enjoy it with steamed vegetables for a healthy touch. Each option adds balance and flavor to your meal. This blog post covered everything you need for a delicious One-Pot Chicken Alfredo. We explored key ingredients, step-by-step cooking instructions, and helpful tips. You learned how to enhance flavor, cook pasta right, and make the sauce creamy. We even discussed variations and storage for leftovers. In closing, enjoy making this meal your own. With these ideas, you can create a dish that's perfect for any time. Keep experimenting and have fun cooking!

One-Pot Chicken Alfredo Quick and Tasty Dinner

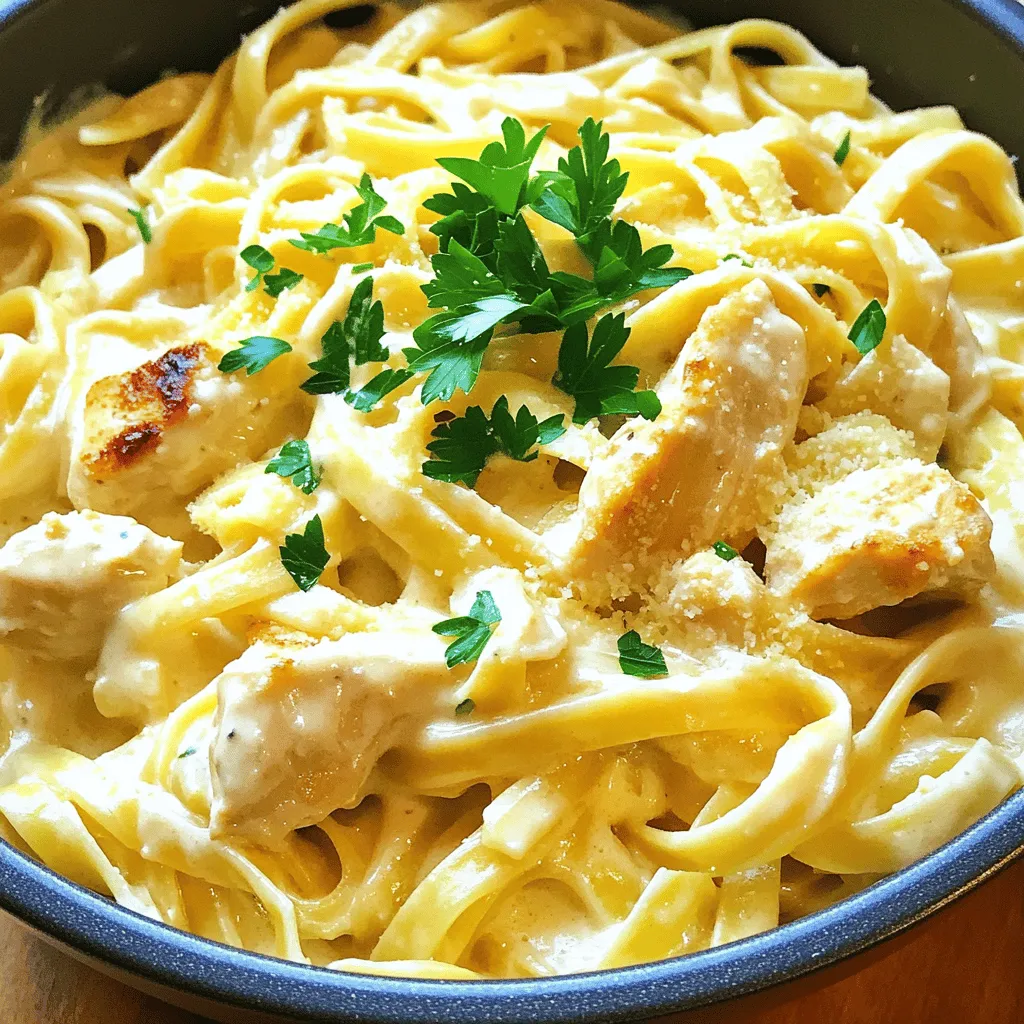
If you’re craving a simple yet delicious meal, this One-Pot Chicken Alfredo is for you. It combines tender chicken, creamy

- 1 pound baby carrots, washed and trimmed - 4 tablespoons unsalted butter, melted until lightly browned - 4 cloves of garlic, finely minced - 1 teaspoon fresh thyme leaves (or ½ teaspoon dried thyme) - 1 tablespoon honey - Salt and freshly ground black pepper to taste - Fresh parsley for garnish These ingredients create a truly delightful side dish. The baby carrots shine when roasted, bringing out their natural sweetness. The garlic butter adds rich flavor, making the dish hard to resist. I like to use unsalted butter because it gives you control over the salt. The garlic, when finely minced, releases its bold flavor, mixing perfectly with the butter. Fresh thyme adds an earthy note that balances the sweetness of the carrots. Honey gives a touch of sweetness that enhances the dish. Make sure to season with salt and pepper to taste. A sprinkle of fresh parsley at the end brightens up the plate. For the full details on how to prepare this dish, refer to the Full Recipe. Enjoy the process and the fantastic aroma that fills your kitchen! To start, preheat your oven to 400°F (200°C). This temperature works best for roasting. While the oven heats, grab a large mixing bowl. In this bowl, whisk together the melted butter, minced garlic, thyme, honey, salt, and pepper. You want to mix it well. This garlic butter mixture adds rich flavor to the carrots. Next, add the washed and trimmed baby carrots into the bowl. Toss them gently in the garlic butter mixture. Make sure each carrot gets a good coat. This step is key for flavor. After coating, spread the carrots out on a baking sheet lined with parchment paper. This helps with easy cleanup and prevents sticking. Now, place the baking sheet in the preheated oven. Roast the carrots for 25 to 30 minutes. Halfway through, stir the carrots gently. This ensures even cooking and helps them caramelize beautifully. When they finish roasting, they should be tender and have a lovely golden color. They are now ready to serve. For the full recipe, check out the complete details. To get the best caramelization, start with fresh, young carrots. Their natural sugars will caramelize nicely. Cut them into even sizes. This helps them cook at the same rate. Spacing on the baking sheet is key. If carrots are too close, they will steam instead of roast. Leave space between each carrot. This allows hot air to circulate and create that beautiful golden-brown color. You can customize the garlic butter to your taste. If you love garlic, add an extra clove. For a milder flavor, reduce the amount. Want to enhance sweetness? Honey works great, but you can also use maple syrup. Both options add a delightful touch. For plating, arrange the roasted carrots on a large serving dish. Drizzle any leftover garlic butter from the baking sheet over them. This adds both flavor and visual appeal. These carrots pair well with many dishes. Serve them alongside roasted chicken or grilled fish. They also complement grains like quinoa or rice. Try them with a fresh green salad for a well-rounded meal. For the full recipe, check out the Garlic Butter Roasted Carrots section above. {{image_4}} You can easily change the taste of garlic butter roasted carrots. Adding spices like paprika or cumin gives them a warm kick. These spices blend well with the sweet flavor of the carrots. If you want a fresh touch, try using herbs like rosemary or oregano. Fresh herbs brighten the dish and add depth. Don’t feel tied to just carrots! You can swap them for other root veggies. Try using parsnips or sweet potatoes for a new twist. Mixing carrots with potatoes creates a colorful and tasty blend. Each vegetable brings its own flavor, making the dish even more exciting. Want to make this recipe vegan? Just switch the butter with a plant-based option. Coconut oil or vegan butter works well and keeps the flavor intact. For those with gluten issues, this recipe is naturally gluten-free. You can enjoy these garlic butter roasted carrots without worry! For the full recipe, check out the Garlic Butter Roasted Carrots section above. Once you've enjoyed your garlic butter roasted carrots, let them cool. This keeps them fresh. Place the carrots in an airtight container. Glass or plastic containers work great. You can keep them in the fridge for about three to five days. If you want, you can also wrap them tightly in plastic wrap. Reheating roasted carrots can be quick and easy. The best way is to use the oven. Preheat your oven to 350°F (175°C). Spread the carrots on a baking sheet. Heat them for about 10 to 15 minutes. This will help keep them tender and tasty. You can also use a microwave. Just place the carrots in a microwave-safe dish. Heat them for 1 to 2 minutes, stirring halfway through. If you want to save some for later, freezing works well. First, let the carrots cool completely. Spread them in a single layer on a baking sheet. Freeze them for about an hour. This helps each piece stay separate. Once frozen, transfer the carrots to a freezer bag. Remove as much air as possible before sealing. They can last for up to three months in the freezer. When you’re ready to enjoy them, thaw them in the fridge overnight. Reheat them as described above for the best taste. Garlic butter roasted carrots last about 3 to 5 days in the fridge. Keep them in an airtight container to stay fresh. This way, you can enjoy their rich flavor for a few days after cooking. Yes, you can make these carrots ahead of time. Roast them, then cool and store them in the fridge. To reheat, place them in a 350°F (175°C) oven for about 10-15 minutes. This method helps keep the carrots tender and tasty. Garlic butter roasted carrots pair well with many dishes. Here are some great options: - Grilled chicken or steak for protein - Quinoa or rice for a hearty grain - A fresh salad for added crunch These sides complement the sweet and savory flavors of the carrots. For a full recipe, check the details above. Roasting baby carrots with garlic butter is simple and rewarding. You only need a few ingredients, like baby carrots, butter, and honey. The step-by-step guide makes preparation easy, ensuring great flavor and texture. Try tips for better caramelization and adjustments to suit your taste. Remember, you can enjoy different variations and even store extras for later. This dish pairs well with many meals, making it a flexible side. Overall, garlic butter roasted carrots are a delicious addition to any table. Enjoy your cooking!

Garlic Butter Roasted Carrots Flavorful Side Dish

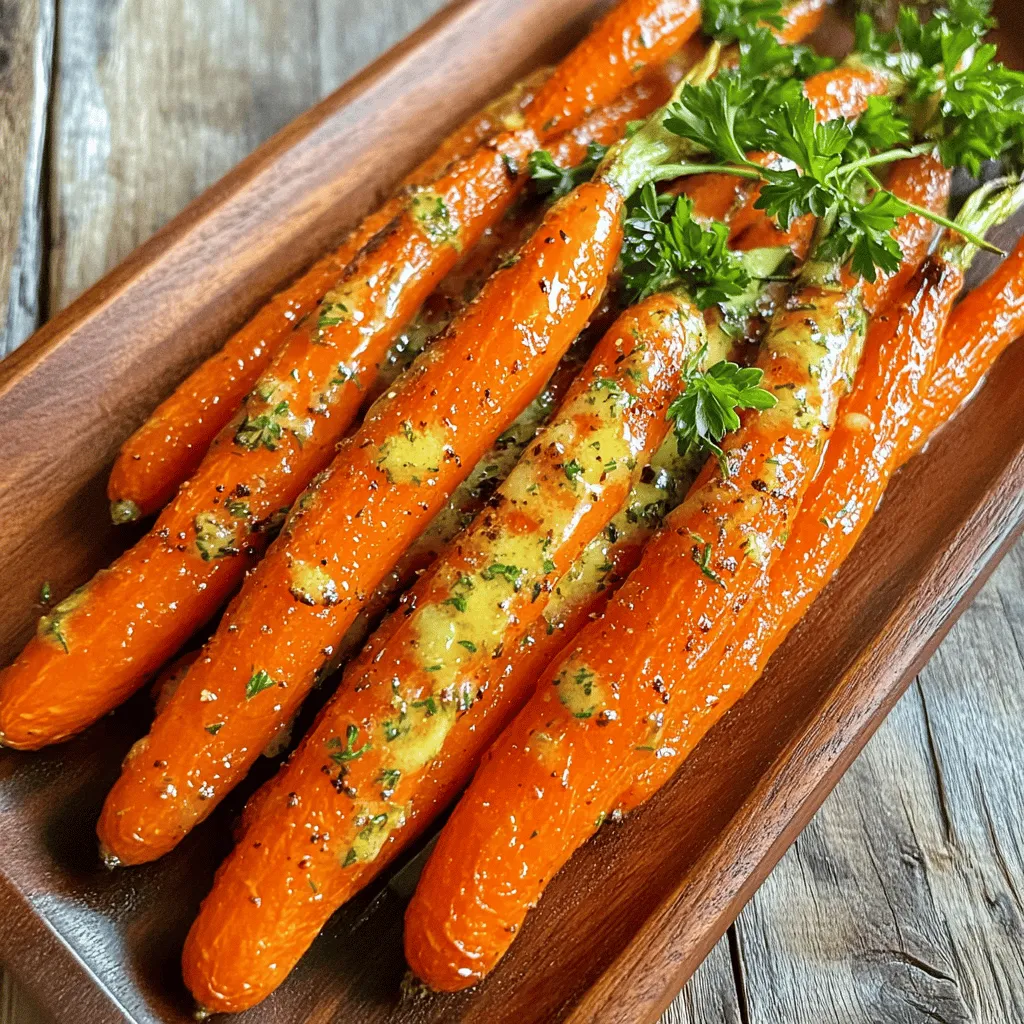
Looking for a tasty side dish that’s quick and easy? Garlic Butter Roasted Carrots are here to save your meal!

To make a tasty Cheesy Broccoli Casserole, gather these fresh and simple ingredients: - 4 cups fresh broccoli florets - 2 cups cooked white rice - 1 cup sharp cheddar cheese, grated - 1 cup cream of mushroom soup - ½ cup milk - 1 small onion, finely chopped - 2 cloves garlic, minced - ½ teaspoon black pepper - ½ teaspoon salt - ½ teaspoon smoked paprika - 1 cup panko bread crumbs - 2 tablespoons unsalted butter, melted These ingredients create a creamy and cheesy base that brings out the flavors of broccoli. The rice adds heartiness, while the spices give it a nice kick. Don't forget the panko bread crumbs! They make the top crunchy and golden. When choosing your broccoli, look for bright green florets. This ensures freshness. I prefer sharp cheddar for its strong flavor. You can use other cheeses if you want, but cheddar works best. The cream of mushroom soup adds creaminess without needing extra steps. Once you collect all these ingredients, you're ready to dive into the fun part—cooking! Check out the Full Recipe for detailed steps to create this delightful dish. 1. Preheat your oven to 350°F (175°C) to get it ready for baking. 2. Fill a large pot with water and bring it to a boil. Add a pinch of salt. Blanch the broccoli florets for about 3 minutes. They should be bright green and a little tender. Quickly drain and place them in an ice bath. This stops the cooking. Once they cool, drain them again and set aside. 3. In a big mixing bowl, combine the cooked white rice, blanched broccoli, grated cheddar cheese, cream of mushroom soup, milk, finely chopped onion, minced garlic, black pepper, salt, and smoked paprika. Mix well until everything is blended. 1. Grease a 9x13 inch baking dish with butter or cooking spray. 2. Spoon the cheesy broccoli mixture into the dish. Spread it out evenly for a uniform layer. 3. In a small bowl, mix the panko bread crumbs with melted butter. Make sure all crumbs get coated. Gently sprinkle this mixture over the casserole for a crispy topping. 1. Place the baking dish in your preheated oven. Bake for 25-30 minutes. The surface should turn golden brown, and the edges should bubble. 2. When it's done, carefully take the casserole out of the oven. Let it cool for about 5-10 minutes before serving. This cooling step helps the flavors meld and makes it easier to serve. For more details, check the Full Recipe. Blanching broccoli is key for this dish. Follow these steps for the best results: - Bring a large pot of water to a boil. - Add a pinch of salt to the water. - Place the broccoli florets in the boiling water for about 3 minutes. - This will keep the broccoli bright green and tender. - Quickly drain the broccoli and place it in an ice bath. - This stops the cooking and keeps it crisp. For the cheese to melt perfectly, shred it fresh. Pre-shredded cheese has additives that can affect melting. Mix the cheese well with the other ingredients to help it melt evenly. Serve the Cheesy Broccoli Delight warm. You can keep it in the baking dish for a cozy feel. To make it look pretty, try garnishing with fresh parsley or chives. This adds color and flavor to the dish. For an extra touch, consider serving it with a side salad or crusty bread. These will complement the rich flavors of the casserole nicely. If you want a change from the cream of mushroom soup, you can use cream of chicken or a homemade white sauce. This can give a different taste while keeping the dish creamy. For gluten-free options, swap panko bread crumbs with gluten-free crumbs or crushed cornflakes. These will give you a crunchy topping without gluten. Enjoy your cooking adventure! {{image_4}} You can easily adapt Cheesy Broccoli Casserole to fit your needs. For a vegetarian version, skip the meat. Use vegetable broth instead of chicken broth. This keeps it rich and tasty. To make it low-carb, swap rice for cauliflower rice. This change keeps the dish light and healthy. Want to change the flavor? You can add proteins like chicken or bacon. Chicken adds heartiness, while bacon gives a nice crunch. Both pair well with broccoli. You can also switch up the cheese. Try mozzarella for a milder taste or gouda for something smokier. Mixing different cheeses creates a unique flavor. Pair your casserole with sides like a fresh salad or roasted veggies. They balance the rich, cheesy dish well. If you have leftovers, try them in a wrap or on a baked potato. You can also reheat it for an easy lunch. For the full recipe, check out the Cheesy Broccoli Delight. To keep your cheesy broccoli casserole fresh, follow these steps: - Refrigerating: Let the casserole cool completely. Cover it tightly with plastic wrap or foil. It can stay in the fridge for up to 3 days. This way, it stays tasty and safe to eat. - Freezing: For longer storage, freeze the casserole. Wrap it well in plastic wrap, then in aluminum foil. It can last up to 3 months in the freezer. When ready to eat, thaw it in the fridge overnight before reheating. When you want to enjoy your casserole again, here’s how to do it right: - Best practices: Preheat your oven to 350°F (175°C). Place the casserole in an oven-safe dish. Cover it with foil to keep moisture in. Heat for about 20-25 minutes. - Maintaining texture: To keep the top crispy, remove the foil for the last 5-10 minutes of reheating. This will help the panko crumbs get nice and crunchy again. Enjoy your cheesy broccoli delight! How long does Cheesy Broccoli Casserole last? Cheesy Broccoli Casserole lasts about 3 to 5 days in the fridge. Make sure to store it in an airtight container. If you want to keep it longer, you can freeze it. Just wrap it well to avoid freezer burn. Can I make this recipe ahead of time? Yes, you can make this casserole ahead of time. Prepare it up to the baking step, cover it, and store it in the fridge. When you're ready to bake, let it sit at room temperature for about 30 minutes. Then, bake as directed. What can I serve with Cheesy Broccoli Casserole? This casserole pairs well with many sides. You can serve it with grilled chicken, a fresh salad, or even some crusty bread. It adds a nice touch to any meal. Can I use frozen broccoli instead of fresh? Yes, you can use frozen broccoli. Just thaw it and drain any excess water before mixing it in. It will still taste great in this dish. What can I substitute for cheddar cheese? If you want a different flavor, you can use mozzarella or Monterey Jack cheese. These options melt well and add a creamy texture to your casserole. Is this casserole gluten-free? The traditional recipe is not gluten-free due to the panko bread crumbs. However, you can easily swap them for gluten-free bread crumbs to make it suitable for a gluten-free diet. How can I make this recipe dairy-free? To make this casserole dairy-free, use dairy-free cheese and a plant-based milk. You can find many options in stores now, making it easier than ever to enjoy this dish. For the full recipe, check out the details above. This blog post covered how to make a tasty Cheesy Broccoli Casserole. We discussed the key ingredients, step-by-step cooking steps, and tips for the best results. I shared ways to vary the flavors and accommodate different diets. Storing and reheating the casserole was also important for enjoying leftovers. Ultimately, this recipe is versatile and perfect for any meal. Try making it your own with different flavors or ingredients. You will find it easy and delightful to serve. Enjoy the warm, creamy goodness!

Cheesy Broccoli Casserole Tasty and Simple Delight

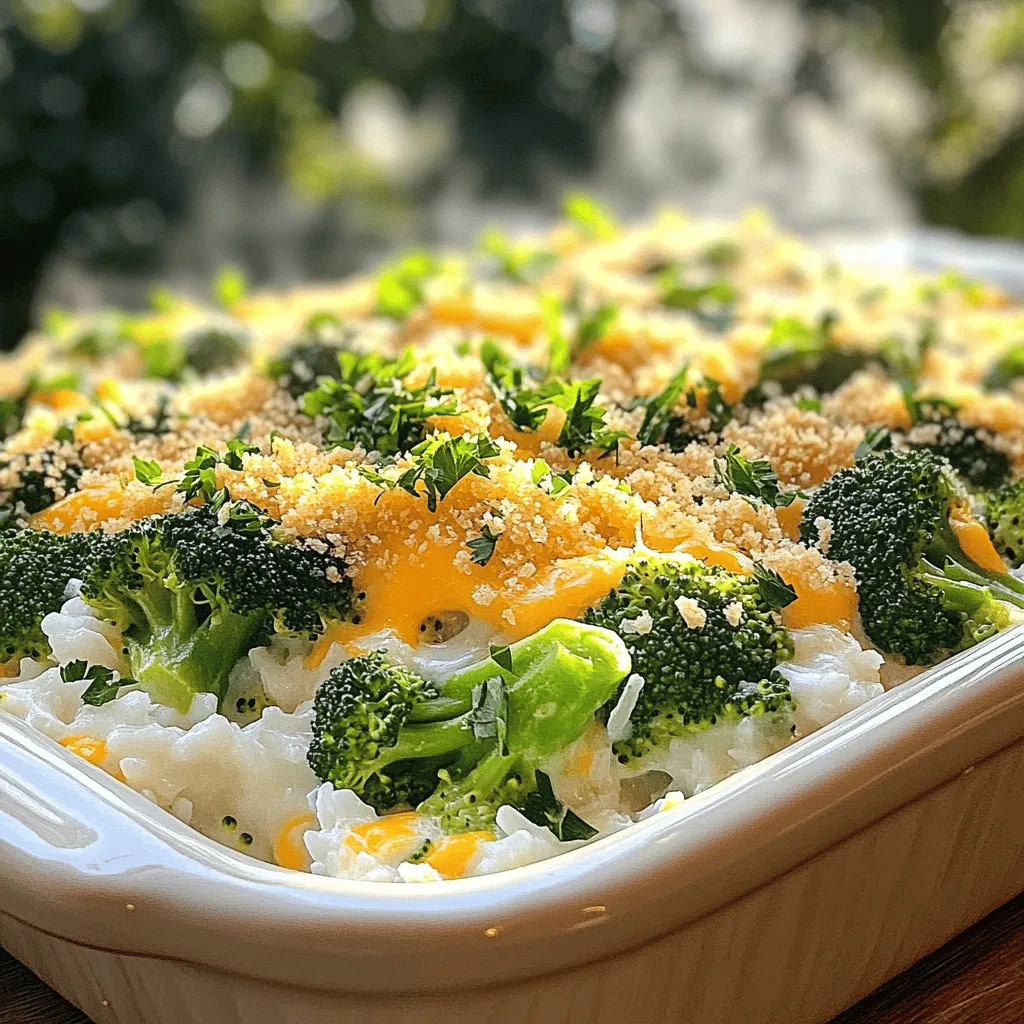
Looking for a dish that is both simple and delicious? You’re in for a treat! This cheesy broccoli casserole combines

- Fresh blueberries - All-purpose flour - Baking powder and baking soda - Unsalted butter and granulated sugar - Eggs, vanilla extract, and lemon components - Buttermilk (or substitute) When making Lemon Blueberry Bread, fresh blueberries are key. They add sweetness and a burst of flavor. You can use frozen blueberries, but make sure to thaw and drain them first. All-purpose flour is the base of this bread, giving it structure. Baking powder and baking soda are the leavening agents that help the bread rise. Unsalted butter provides richness, while granulated sugar adds sweetness. Eggs hold everything together. They also help with the bread's texture. Pure vanilla extract enhances the flavor. Zest and juice from a lemon give the bread its signature tang. Buttermilk, or a milk and vinegar mix, keeps the bread moist and tender. You can adjust some ingredients based on your needs. For a gluten-free option, use a gluten-free flour blend. If you want to lower sugar, try using a sugar substitute. You can swap buttermilk with regular milk mixed with vinegar. If you have no lemons, lemon extract is a good alternative. To bake this bread, you need a few tools: - Loaf pan and mixer - Measuring cups and spoons - Parchment paper and mixing bowls A loaf pan is essential for shaping the bread. An electric mixer makes creaming butter and sugar easy. Measuring cups and spoons ensure accurate ingredient amounts. Parchment paper helps with easy bread removal. Mixing bowls are needed for combining all the ingredients. For the full recipe, refer to the section above. 1. First, preheat your oven to 350°F (175°C). This helps the bread bake evenly. 2. Grease a 9x5-inch loaf pan with butter or cooking spray. Line it with parchment paper. 3. Measure out your dry ingredients: 1 ½ cups all-purpose flour, 1 teaspoon baking powder, ½ teaspoon baking soda, and ½ teaspoon salt. Set this dry mix aside for later. 1. In a large bowl, cream together ½ cup unsalted butter and 1 cup granulated sugar. Use an electric mixer for about 3-4 minutes. This makes the mix light and fluffy. 2. Add 2 large eggs, one at a time. Mix well after each egg to blend them in. 3. Next, add 1 teaspoon pure vanilla extract, the zest of 1 lemon, and 2 tablespoons of freshly squeezed lemon juice. Mix until everything is combined well. 1. Now, slowly add your dry ingredients to the wet mix. Alternate with ½ cup buttermilk. Start with a third of the dry mix, then add half the buttermilk. Repeat this until all is mixed together. 2. Be careful not to overmix. You want a tender bread. 3. Gently fold in 1 cup of fresh blueberries with a spatula. Make sure not to smash the berries. 1. Pour the batter into your prepared loaf pan. Smooth the top with a spatula. 2. For decoration, scatter extra blueberries and a sprinkle of lemon zest on top. It looks great! 3. Bake the bread for 55-65 minutes. Check doneness by inserting a toothpick into the center. It should come out clean or with a few moist crumbs. 4. Once it’s done, let it cool in the pan for about 10 minutes. Lift it out using the parchment paper. Transfer it to a wire rack to cool completely. For the full recipe, check the section above. Enjoy your baking! To get the best lemon blueberry bread, avoid overmixing your batter. Overmixing can lead to tough bread. Mix just until everything is combined. This keeps it light and fluffy. Next, ensure your bread has the right texture and moisture. Use room temperature ingredients like eggs and butter. They blend better and help the bread rise evenly. Adding buttermilk also gives a soft crumb, making each slice tender. When it comes to blueberries, fresh is often best. Fresh blueberries burst with juice and flavor. However, frozen blueberries can work too. Just remember to thaw and drain them first. This prevents excess moisture in your batter. For an extra lemon kick, add more zest. Zest brings bright flavor without adding liquid. You can also squeeze in a bit more lemon juice for tang. These simple tweaks make your bread taste even better! The oven temperature is key for perfect baking. Set your oven to 350°F (175°C). This heat allows the bread to rise and bake evenly. If you live at a high altitude, you may need to adjust your recipe. Reduce the baking time and increase the oven temperature slightly. This helps counteract the lower air pressure. Keep an eye on your bread as it bakes. Check for doneness with a toothpick. For the full recipe, check out the full recipe section. {{image_4}} You can change the flavor of your Lemon Blueberry Bread in fun ways. Adding nuts gives a nice crunch. Try using walnuts or pecans for a rich taste. Spices like cinnamon or nutmeg can also enhance the bread's warmth. You may also swap out blueberries for other fruits. Raspberries or strawberries work well too. They add a different sweetness and color. Mix and match to find your favorite combo! If you follow a vegan diet, you can still enjoy this bread. Replace the eggs with flaxseed meal or applesauce. Use a plant-based butter for a creamy texture. For gluten-free options, try a gluten-free flour blend. Make sure it has a binding agent like xanthan gum. You can also create a low-sugar version by using a sugar substitute. This helps keep it sweet but lower in calories. Lemon Blueberry Bread makes a great breakfast or dessert. Serve it warm with a pat of butter. You can also add a dollop of whipped cream or yogurt on top for a treat. Pair the bread with beverages for a complete meal. A cup of tea or coffee complements the flavors nicely. For a refreshing twist, try it with lemonade or iced tea. Enjoy this versatile bread any time of day! After you bake your Lemon Blueberry Bread, you'll want to keep it fresh. You can store it at room temperature for a few days. Just wrap it in plastic wrap or foil. This keeps it moist and tasty. If you live in a warm area, the fridge is better. It helps prevent mold but may dry out the bread. To keep the bread fresh, always ensure it’s cool before wrapping. This prevents steam build-up, which can make the bread soggy. A slice of bread tastes best fresh, but a good wrap can help it last longer. If you want to save your Lemon Blueberry Bread for later, freezing works great. First, let the bread cool completely. Then, wrap it tightly in plastic wrap. You can also use aluminum foil for added protection. This keeps out air and prevents freezer burn. When you’re ready to enjoy it, take it out of the freezer. Let it thaw in the fridge overnight or at room temperature for a few hours. To reheat, slice what you need and pop it in the microwave for a few seconds. You can also warm slices in the oven at 350°F for about 10 minutes. This will make the bread taste fresh again! For the Full Recipe, check the earlier sections. To check if your Lemon Blueberry Bread is done, insert a toothpick into the center. If it comes out clean, the bread is ready. You can also press the top gently; it should spring back. A golden brown color is another good sign of doneness. The bread may take 55 to 65 minutes to bake, but ovens vary. Yes, you can use other fruits. Raspberries, blackberries, or strawberries work well. Just make sure to adjust the amount to match the blueberries. For a twist, try mixing fruits together. This adds a fun flavor mix to your bread. If you don’t have buttermilk, you can make a quick substitute. Mix ½ cup of milk with 1½ teaspoons of vinegar or lemon juice. Let it sit for five minutes before using. This gives your bread the same tangy flavor and moisture. Lemon Blueberry Bread lasts about three days at room temperature. Keep it wrapped in plastic wrap or in an airtight container. If you want to store it longer, freeze it. Wrapped well, it can last up to three months. Just thaw it in the fridge when you're ready to enjoy it again. This blog post gives you a simple guide to making lemon blueberry bread. We covered all key ingredients needed, individual measurements, and helpful substitutes. I walked you through each step, from prepping to baking. Plus, I shared tips to get the best texture. You learned how to adjust for diets and create fun variations. Enjoying this bread means you'll have a treat for any time. Keep these tips in mind to make your baking successful and flavorful. Happy baking!

Lemon Blueberry Bread Fresh and Flavorful Delight

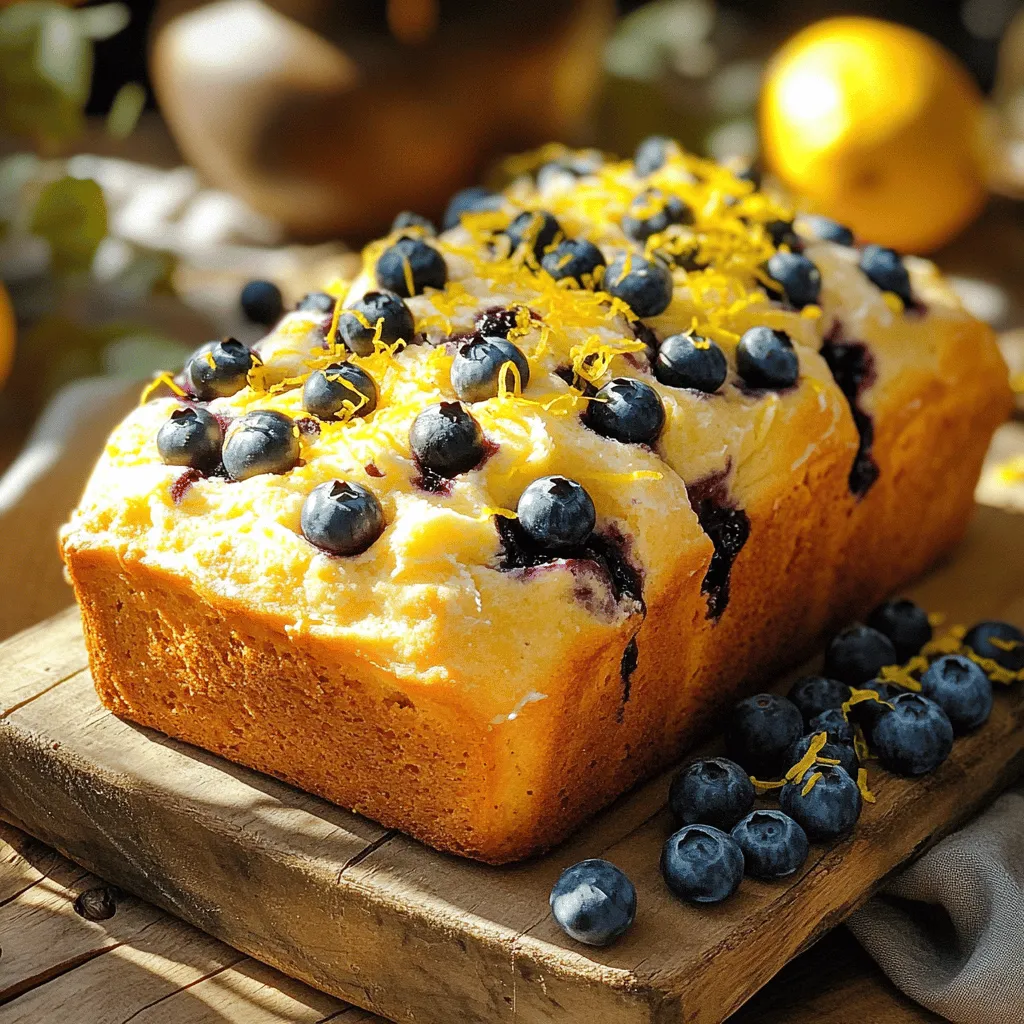
If you love fresh flavors, then my Lemon Blueberry Bread is for you! This delightful treat balances zesty lemon with

To make a delicious Peach Cobbler Cheesecake, gather these ingredients: - 1 ½ cups graham cracker crumbs - ⅓ cup granulated sugar - ½ cup unsalted butter, melted - 2 packages (8 ounces each) cream cheese, softened at room temperature - ¾ cup granulated sugar - 2 large eggs, at room temperature - 1 teaspoon vanilla extract - 1 cup sour cream - 1 teaspoon ground cinnamon - 2 cups fresh peaches, peeled and thinly sliced - ¼ cup packed brown sugar - 1 tablespoon freshly squeezed lemon juice - 2 tablespoons cornstarch When picking peaches, look for ones that are ripe and fragrant. Firm peaches are great, but they should yield slightly to gentle pressure. Avoid peaches with blemishes or soft spots. You can swap fresh peaches for canned ones in syrup, but drain them well. Frozen peaches work too; just thaw and drain them first. When choosing granulated sugar, any brand works, but organic options can add a nice touch. You can also use coconut sugar for a different flavor. If you don’t have sour cream, plain yogurt is a good substitute. This recipe allows you to mix and match based on what you have. For the crust, graham cracker crumbs are best, but you can use crushed cookies like Oreos or vanilla wafers for a fun twist. Remember, the right ingredients set the base for a great cheesecake. Trust your taste buds, and enjoy the process! 1. Preheat your oven to 350°F (175°C). This step is key for even baking. 2. In a medium bowl, mix 1 ½ cups graham cracker crumbs, ⅓ cup sugar, and ½ cup melted butter. Stir until it looks like wet sand. 3. Press this crumb mixture into a 9-inch springform pan. Make sure it's even. Bake for 10 minutes, then let it cool completely. 4. In a large bowl, beat 2 packages of softened cream cheese with ¾ cup sugar until smooth. Use an electric mixer for the best results. 5. Add 2 eggs, one at a time. Mix well after each egg. Then, add 1 teaspoon of vanilla and 1 cup sour cream. Blend until smooth. 6. Pour this cream cheese mixture over the cooled crust, spreading it evenly. 7. In a separate bowl, mix 2 cups sliced peaches with ¼ cup brown sugar, 1 tablespoon lemon juice, and 2 tablespoons cornstarch. Toss gently until the peaches are well coated. 8. Layer the peach mixture on top of the cream cheese layer. Spread it out evenly. 9. Sprinkle ground cinnamon on top of the peaches to add great flavor. 1. Place the cheesecake in the oven. Bake for 45-50 minutes. It should be set but still jiggle slightly in the center. 2. When baking is done, turn off the oven and crack the door open. Let the cheesecake cool in the oven for 1 hour. This helps prevent cracks. 3. After one hour, move the cheesecake to the fridge. Chill for at least 4 hours, but overnight is best. 4. When ready to serve, use a thin knife to run around the edge of the cake. This loosens it from the pan, making it easy to remove the sides. This method gives you a delicious and creamy peach cobbler cheesecake. For the full recipe, check out the previous section! To get your cheesecake just right, keep your cheese and eggs at room temperature. Cold ingredients can lead to lumps. Softened cream cheese mixes smoothly and blends well with eggs. Cracks on the surface can ruin your cheesecake’s look. To avoid this, let your cheesecake cool slowly in the oven. After baking, crack the oven door open. Chill the cheesecake for a few hours in the fridge. This helps it set without cracks. For a stunning presentation, slice the cheesecake and place it on individual plates. Add fresh peach slices on top for color. A dollop of whipped cream adds a creamy touch. When it comes to drinks, pair your cheesecake with sweet tea or a light dessert wine. The fruity flavors in the cheesecake blend well with these beverages. Enjoy your delicious creation! If you need the full recipe, check out the Full Recipe section. {{image_4}} You can change this peach cobbler cheesecake in fun ways. Try using other fruits for the topping. Fresh blueberries, strawberries, or cherries work well too. Each fruit brings its own flavor, making your cheesecake unique. You can also add spices to the mix. A pinch of nutmeg or allspice gives a warm touch. You might like using vanilla bean for a richer taste. Experimenting with flavors keeps every bite interesting. If you need a gluten-free option, use almond flour or gluten-free cookies. Both work great in place of graham crackers. This makes it easy for everyone to enjoy the dessert. You can also swap out the cookie base. Try using chocolate cookies for a richer crust. Or, use oat cookies for a chewy texture. Each choice can change the whole feel of the cheesecake. For the full recipe, check out the details above. To keep your Peach Cobbler Cheesecake fresh, use the right containers. A springform pan is great for storing since it lets you keep the shape. If you want to use another type of container, a glass or plastic airtight container works well, too. Make sure the cheesecake is cool before you cover it to avoid condensation. In the refrigerator, this cheesecake lasts about 5 to 7 days. If you want to save it longer, place it in the freezer. Properly wrapped in plastic wrap and foil, it can last up to 3 months. When you're ready to enjoy it, just take it out and let it thaw in the fridge overnight. Reheating a slice of cheesecake can be tricky. The best way is to let it sit at room temperature for about 30 minutes. This helps it regain its smooth texture. If you want to warm it up a little, you can microwave it for 10 to 15 seconds. Be careful not to overheat, as it can lose its creamy goodness. Serve your leftovers with a fresh slice of peach or a dollop of whipped cream for a delightful treat. What can I substitute for sour cream? You can use Greek yogurt instead of sour cream. It gives a similar tangy taste. You can also use cream cheese mixed with a little milk. This mix will keep the texture creamy. Can I make this cheesecake ahead of time? Yes, you can make this cheesecake one to two days ahead. Just store it in the fridge. This will help the flavors blend and taste even better. How do I prevent the cheesecake from cracking? To avoid cracks, bake the cheesecake gently. Keep the oven door slightly open after baking. This cools it slowly. Also, make sure your cream cheese and eggs are at room temperature. This helps blend them better, reducing the chance of cracks. Check out the Full Recipe to make your own delicious Peach Cobbler Cheesecake! This blog post explored making a delicious peach cobbler cheesecake. We covered ingredients, preparation steps, and baking tips. It’s key to choose ripe peaches and manage the baking time for best results. Remember, temperature is crucial to avoid cracks. Try various toppings and crust combinations for fun flavors. Store your cheesecake properly so it stays fresh. With these tips, you can confidently enjoy your cheesecake. Happy baking!

Peach Cobbler Cheesecake Flavorful and Simple Recipe

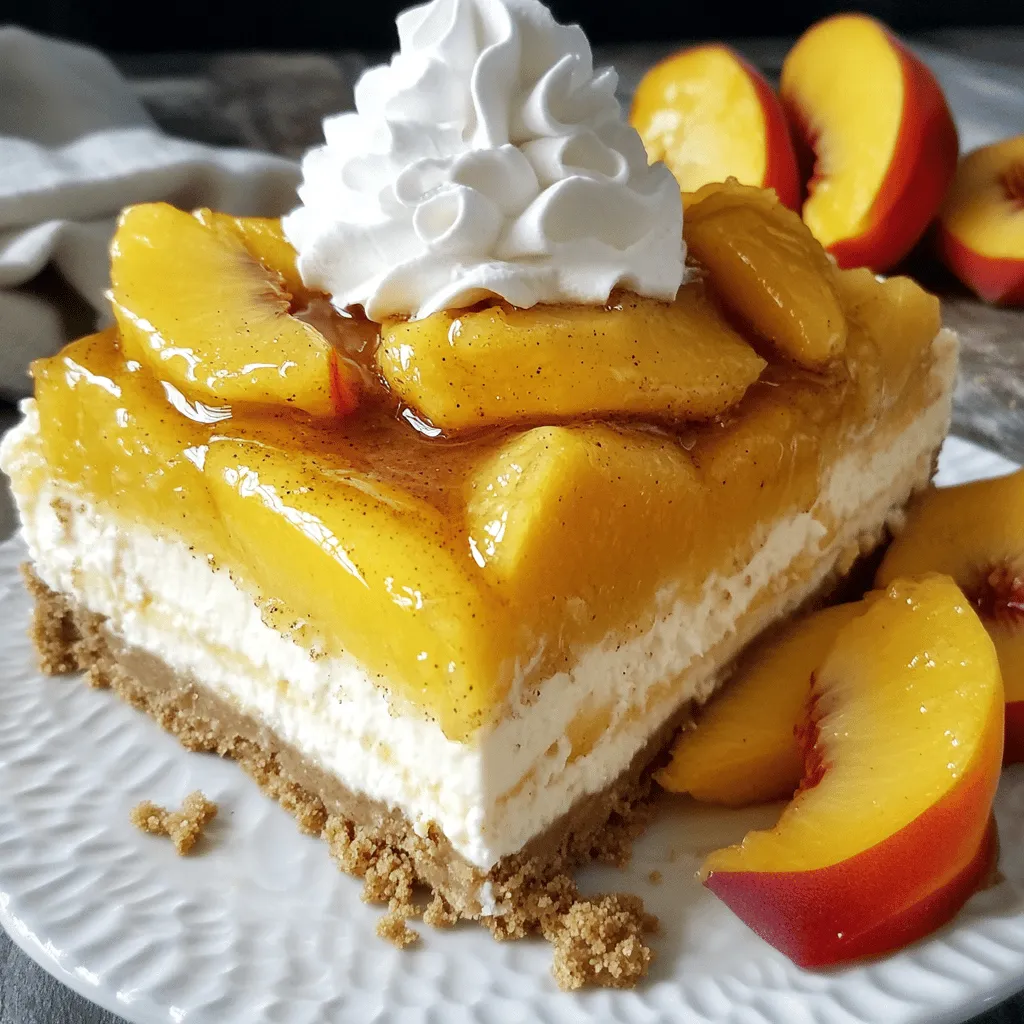
Are you ready to indulge in the ultimate dessert blend? This Peach Cobbler Cheesecake recipe is both flavorful and simple!

- 1 cup grated zucchini (squeeze out excess moisture) - 1 cup almond flour - ½ cup unsweetened cocoa powder - ½ cup maple syrup or honey - ¼ cup unsweetened applesauce - 2 large eggs - 1 teaspoon vanilla extract - ½ teaspoon baking soda - ½ teaspoon baking powder - ¼ teaspoon salt - ½ cup dark chocolate chips (optional) - ½ cup chopped walnuts (optional) - Zucchini: Low in calories and high in fiber. It adds moisture and nutrients. - Almond flour: Rich in healthy fats and protein. It is great for gluten-free diets. - Cocoa powder: Packed with antioxidants. It boosts heart health and mood. - Maple syrup or honey: Natural sweeteners that provide vitamins and minerals. - Applesauce: Adds moisture and a hint of sweetness while reducing fat. - Eggs: Full of protein and vital nutrients. They help bind the brownies. - Vanilla extract: Enhances flavor and can help reduce sugar needs. - Baking soda and baking powder: Help the brownies rise and create a soft texture. - Salt: Balances the sweetness and enhances flavors. - Dark chocolate chips: Offer rich flavor and antioxidants (optional). - Chopped walnuts: Provide healthy fats and a nice crunch (optional). - Almond flour: Use oat flour or coconut flour if needed. - Maple syrup: Agave syrup or brown sugar can work in a pinch. - Eggs: Flax eggs or applesauce can replace eggs for a vegan option. - Cocoa powder: Carob powder is a good alternative for a different taste. - Walnuts: You can swap them for pecans or leave them out if desired. For the full recipe, check out the complete guide! 1. Preheat the Oven: Start by heating your oven to 350°F (175°C). Prepare an 8x8-inch baking pan. You can grease it lightly or use parchment paper. This helps later when you lift out the brownies. 2. Prepare the Zucchini: Grate one medium zucchini. Use a box grater for this. Place the grated zucchini in a clean towel. Squeeze tightly to remove excess moisture. This step is key for perfect brownies. 3. Mix Wet Ingredients: In a large bowl, add the squeezed zucchini, eggs, maple syrup (or honey), applesauce, and vanilla extract. Whisk until everything blends well. You want a smooth mixture. 4. Combine Dry Ingredients: In another bowl, whisk together almond flour, cocoa powder, baking soda, baking powder, and salt. This keeps your brownies light and fluffy. 5. Combine Mixtures: Pour the dry mixture into the wet mixture. Stir gently with a spatula until just mixed. Be careful not to overmix; this keeps your brownies nice and soft. 6. Add Mix-ins: If you like, fold in dark chocolate chips and chopped walnuts. These add great texture and flavor to your brownies. 7. Bake: Spread the batter evenly in your prepared pan. Bake in the oven for 25-30 minutes. 8. Check for Doneness: To check if the brownies are done, insert a toothpick into the center. It should come out clean but slightly moist. This gives you the best fudgy texture. 9. Cool Down: After baking, let the brownies cool in the pan for about 10 minutes. Then transfer them to a wire rack to cool completely. This helps the flavors settle. Enjoy these wonderful Healthy Zucchini Brownies as a tasty and guilt-free treat! Don't forget to check the Full Recipe for more details. Squeezing zucchini is key for great brownies. Start with a box grater to shred the zucchini. Take the grated zucchini and place it in a clean kitchen towel or cheesecloth. Twist the towel tightly to squeeze out the moisture. Aim to get as much liquid out as you can. This step ensures the brownies will not be too wet or soggy. Mixing the batter carefully leads to the best texture. Start with wet ingredients first. Combine the squeezed zucchini, eggs, maple syrup, applesauce, and vanilla in a large bowl. Whisk until smooth. In another bowl, mix the dry ingredients well. Slowly add the dry mix to the wet mix. Stir gently until just combined. Overmixing can make brownies dense, so stop as soon as you see no dry flour. You can easily boost the flavor and texture of your brownies. Add dark chocolate chips for a richer taste. Chopped walnuts add a nice crunch. Try spices like cinnamon or nutmeg for warmth. If you want a sweeter treat, increase the maple syrup slightly. Experiment with different add-ins to find your favorite combination. These small tweaks can take your healthy zucchini brownies to the next level. {{image_4}} You can easily make these brownies gluten-free. Use almond flour, which is already in the recipe. If you want to try other gluten-free flours, coconut flour or oat flour work well too. Make sure the cocoa powder is also gluten-free. This way, everyone can enjoy your brownies! To make these brownies vegan, replace the eggs with flax eggs. Mix one tablespoon of flaxseed meal with three tablespoons of water for each egg. Let it sit for a few minutes until it thickens. You can also swap maple syrup for agave syrup. Both will keep your brownies sweet and moist! Adding spices can give your brownies a new twist. Try a pinch of cinnamon or nutmeg for warmth. You can also add a splash of coffee or espresso powder to boost the chocolate flavor. Want some crunch? Toss in some chopped nuts or seeds. These small changes can make your brownies unique and fun! For the complete recipe, check out the Full Recipe. To keep your healthy zucchini brownies fresh, store them in an airtight container. Place a piece of parchment paper between layers to avoid sticking. Keep them in a cool, dry place like your pantry. They will stay fresh for about 3 to 5 days. If you want them to last longer, refrigeration is a great option. Just make sure your container seals tightly. Freezing these brownies is simple and effective. Cut them into squares before freezing. Wrap each piece in plastic wrap or foil. Then, place them in a freezer-safe bag or container. Label it with the date for easy reference. Your brownies can last for up to three months in the freezer. When you’re ready to enjoy them, simply thaw them in the fridge or at room temperature. To bring back that fresh-from-the-oven taste, reheat your brownies in the oven. Preheat it to 350°F (175°C). Place the brownies on a baking sheet and warm them for about 5-10 minutes. You can also use the microwave. Heat each brownie for 10-15 seconds. Check to avoid overheating, as this can make them dry. Enjoy your delicious brownies warm, topped with a scoop of ice cream or a dollop of yogurt for extra delight! These brownies get their health boost from zucchini and almond flour. Zucchini adds moisture without extra sugar. Almond flour is lower in carbs and high in healthy fats. Using maple syrup or honey for sweetness keeps them natural. You also avoid refined sugars and unhealthy fats. Together, these ingredients create a guilt-free treat. Yes, you can use other flours, but results may vary. If you want a gluten-free option, try coconut flour. It absorbs more moisture, so use less. You can also use regular all-purpose flour, but it will change the texture. Almond flour keeps the brownies moist and soft, which is ideal. These brownies can last for about 4 to 5 days when stored properly. Keep them in an airtight container at room temperature. If you refrigerate them, they may last up to a week. Just make sure they cool completely before storing. Absolutely! Adding nuts or seeds can enhance texture and flavor. Chopped walnuts or pecans work great. You can also mix in seeds like chia or flax for extra nutrition. Just fold them in at the end for a wonderful crunch. To store leftovers, place them in an airtight container. You can keep them at room temperature for a few days. If you want to keep them longer, wrap them tightly and freeze. Just remember to thaw them before enjoying again. This blog post covered all you need to know about healthy zucchini brownies. We explored key ingredients, their health benefits, and useful substitutions. I shared step-by-step instructions for prep and baking, along with tips to check if they’re done. You learned ways to enhance your brownies' flavor and texture, plus gluten-free and vegan options. Don’t forget to use the best storage practices to keep them fresh. Healthy brownies can be tasty and fun. Enjoy making them your way!

Healthy Zucchini Brownies Tasty and Guilt-Free Treat

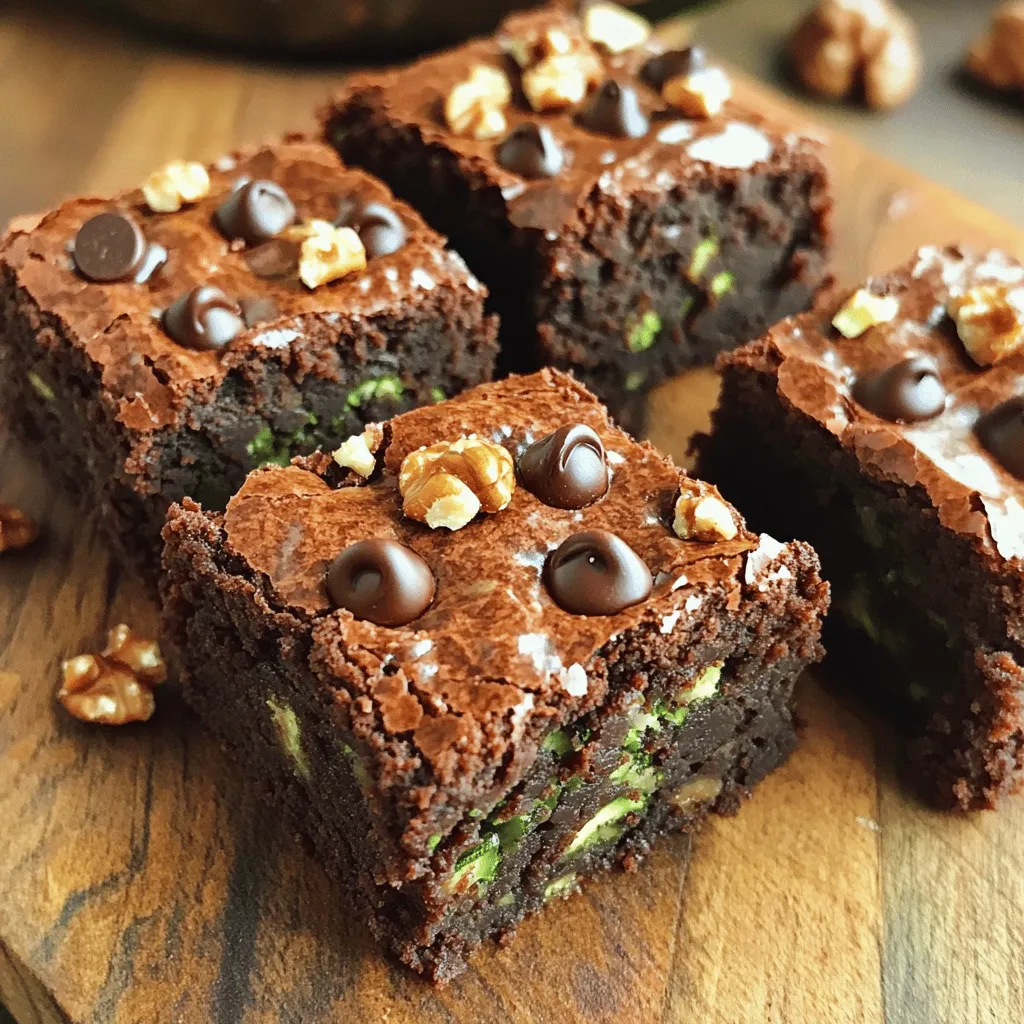
Craving a sweet treat without the guilt? I’ve got you covered with my healthy zucchini brownies! These tasty bites use

Older posts
Newer posts
← Previous Page1 … Page38 Page39 Page40 … Page91 Next →

dsad

© 2025 recipesstation • Built with GeneratePress

Our Policies

  • Copyright Policy
  • Cookie Policy
  • GDPR Policy
  • Privacy Policy
  • Disclaimer
  • Terms Of Use

More Information

  • Home
  • About
  • Contact
  • Appetizers
  • Dessert
  • Dinner
  • Drinks
©2025, recipesstation About Back To Top