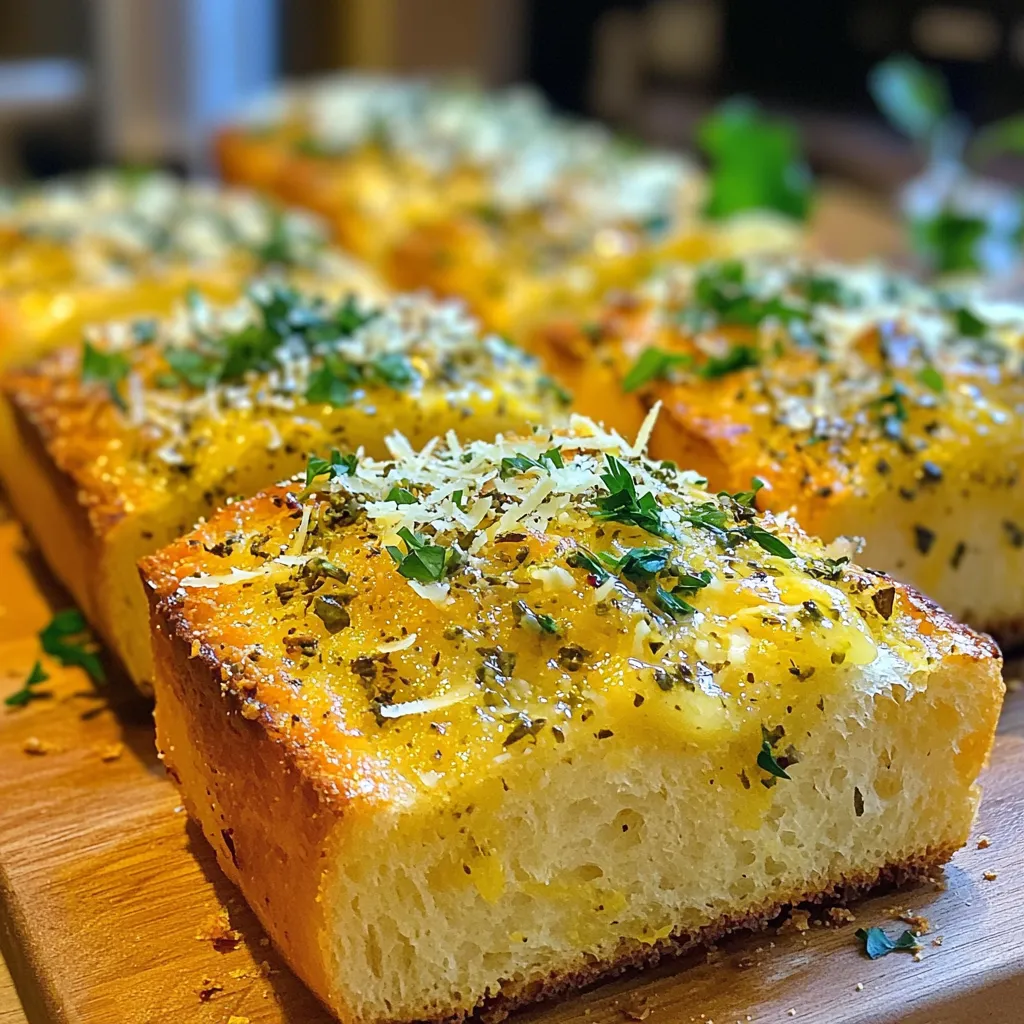
Air Fryer Parmesan Herb Garlic Bread Recipe Delight
Are you ready to elevate your garlic bread game? In my latest recipe, I’ll show you how to make Air
Are you ready to elevate your garlic bread game? In my latest recipe, I’ll show you how to make Air
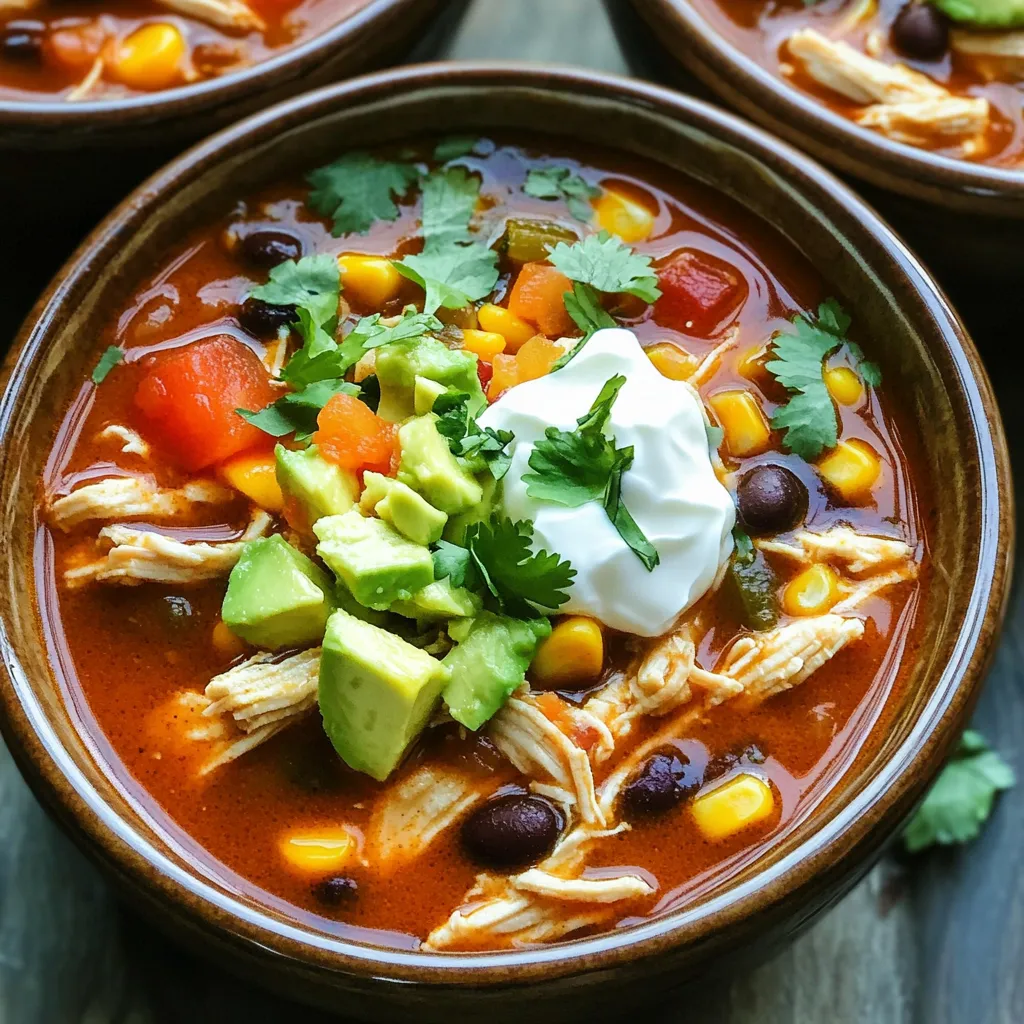
Looking for a warm, tasty dish that’s easy to make? My Slow Cooker Chicken Enchilada Soup is the answer. Packed
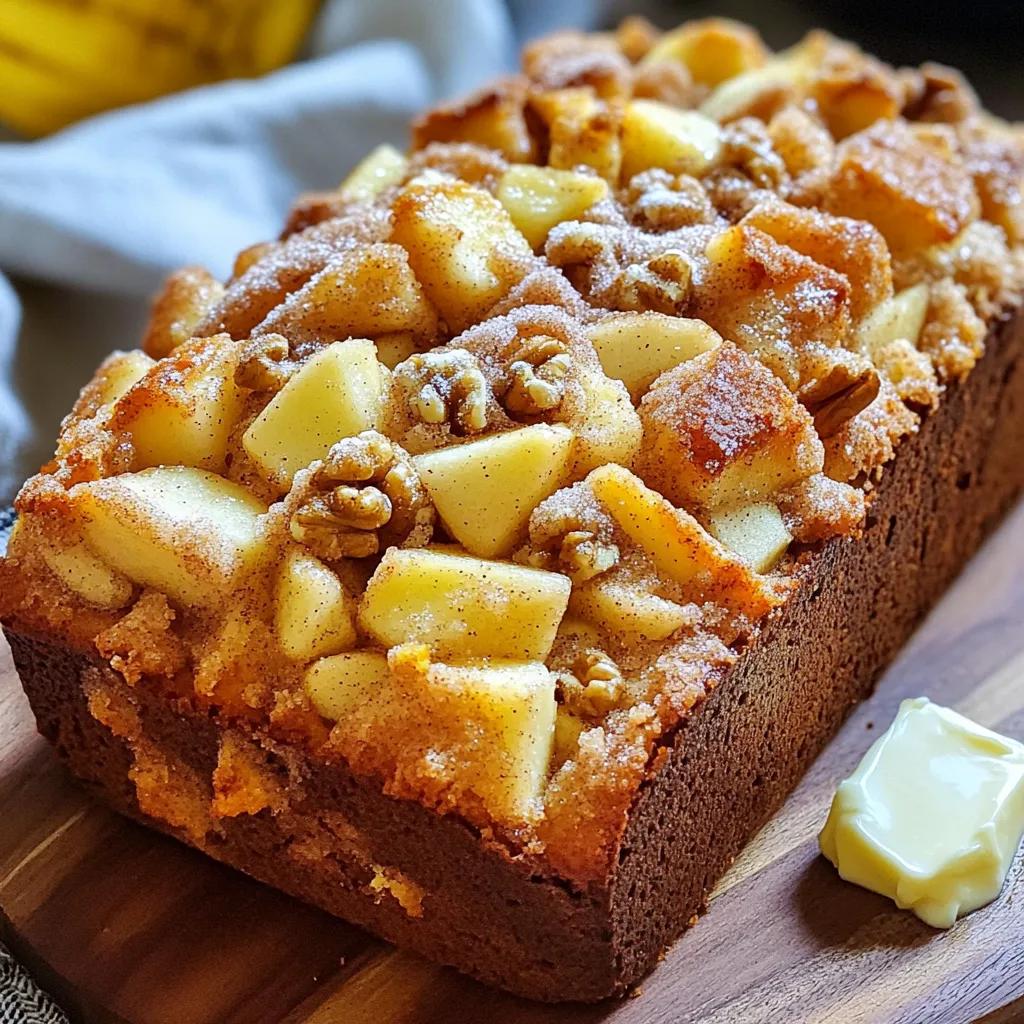
Are you ready to bake something that fills your kitchen with the scent of fall? This delicious Apple Cinnamon Bakery
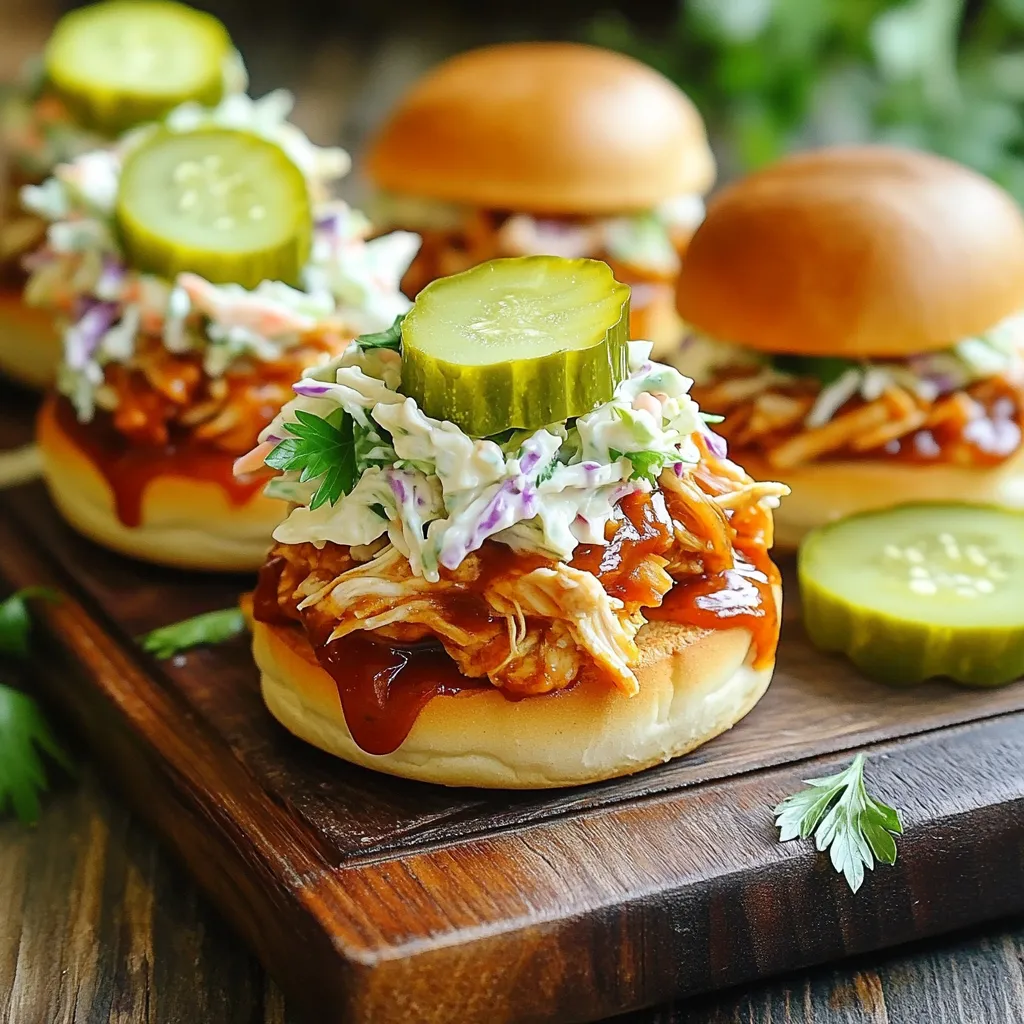
Ready to elevate your party snacks? These BBQ Chicken Sliders with Pickles pack a flavor punch! In this post, I’ll
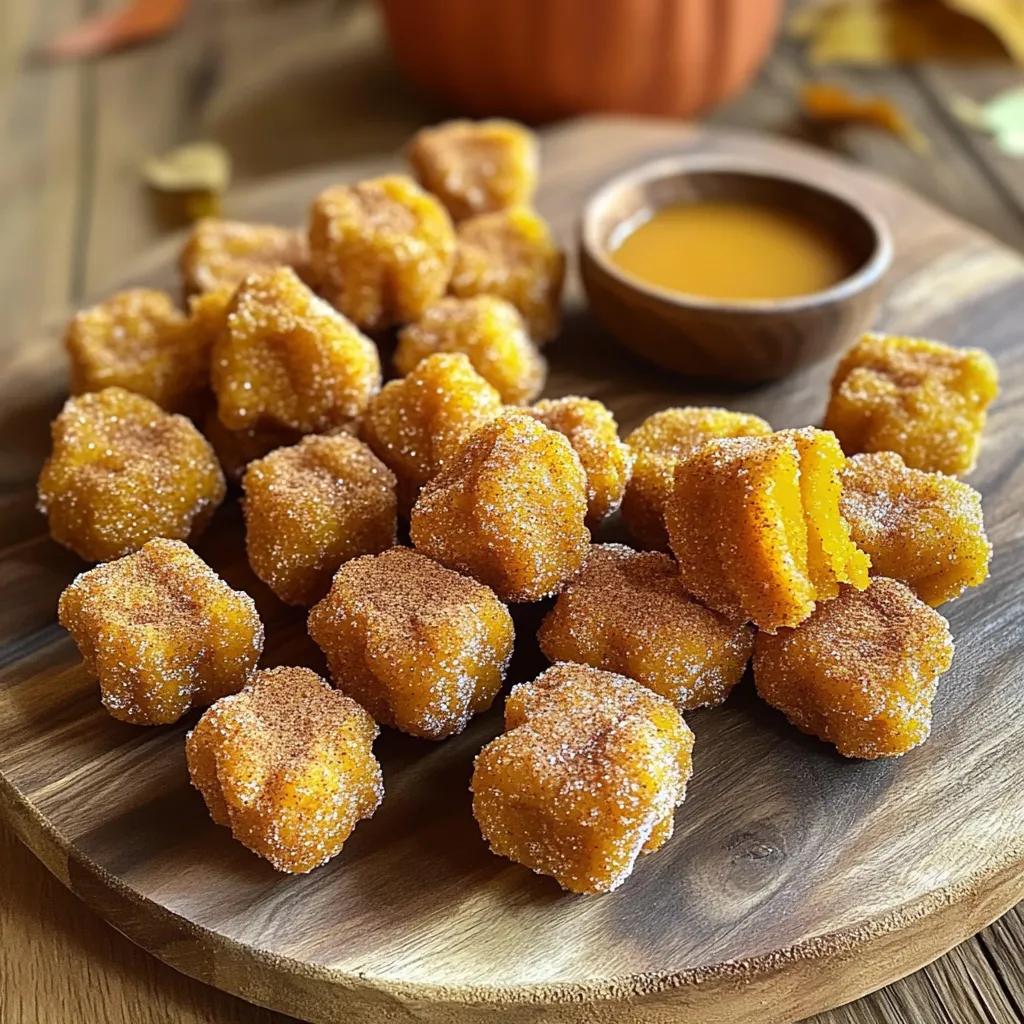
Get ready to indulge in a seasonal delight! Pumpkin Spice Churro Bites combine the cozy flavors of fall with a

Get ready to indulge in a seasonal delight! Pumpkin Spice Churro Bites combine the cozy flavors of fall with a
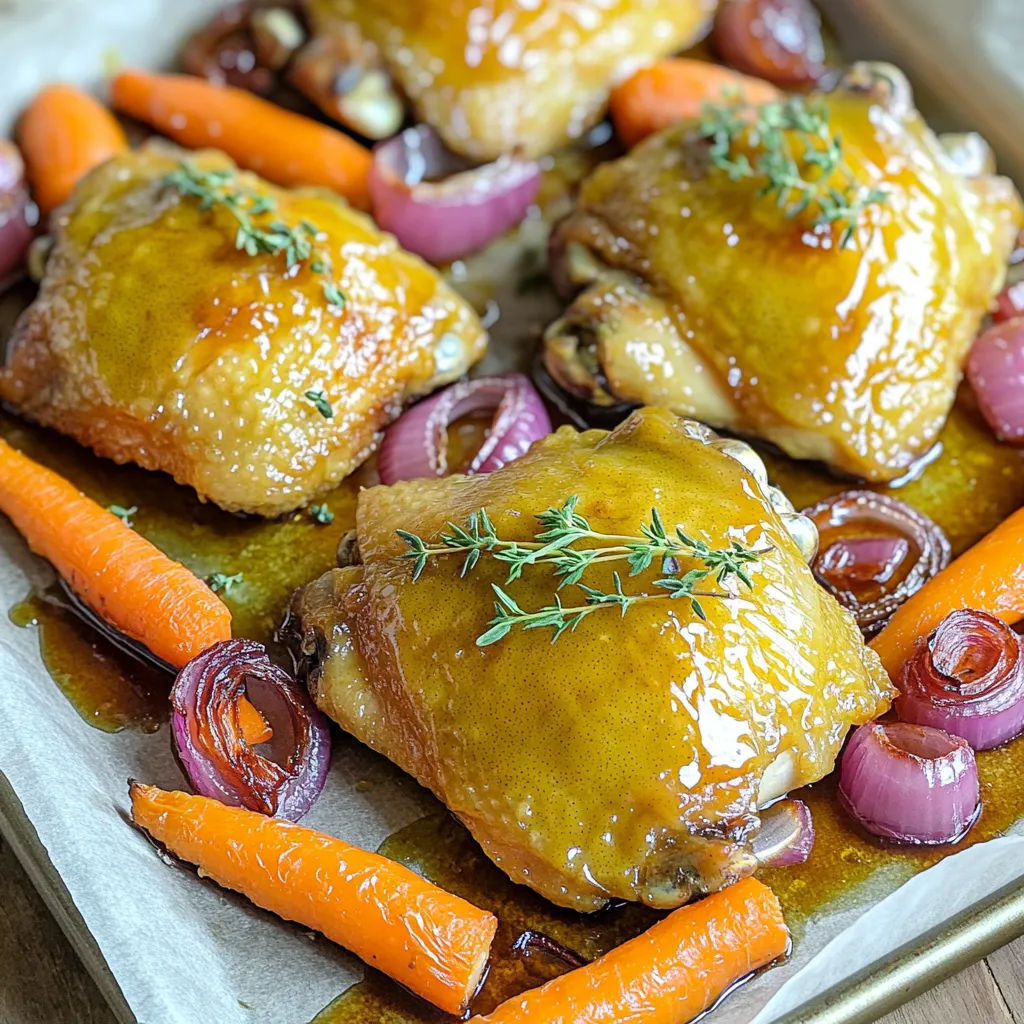
If you’re craving a one-pan meal that bursts with flavor, look no further! This Maple Dijon Chicken & Carrots Sheet
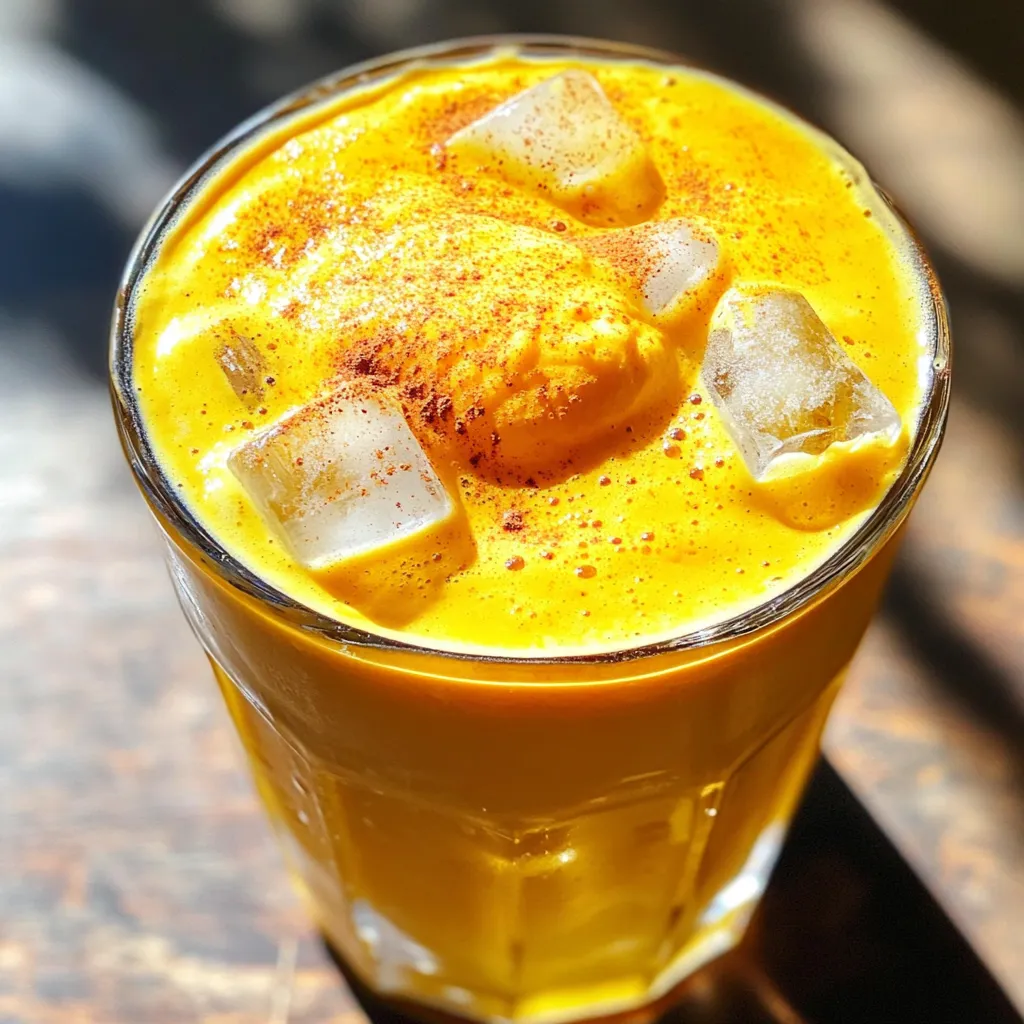
Are you ready to elevate your coffee game? Let’s make a Pumpkin Cream Cold Foam Iced Coffee that’s bursting with
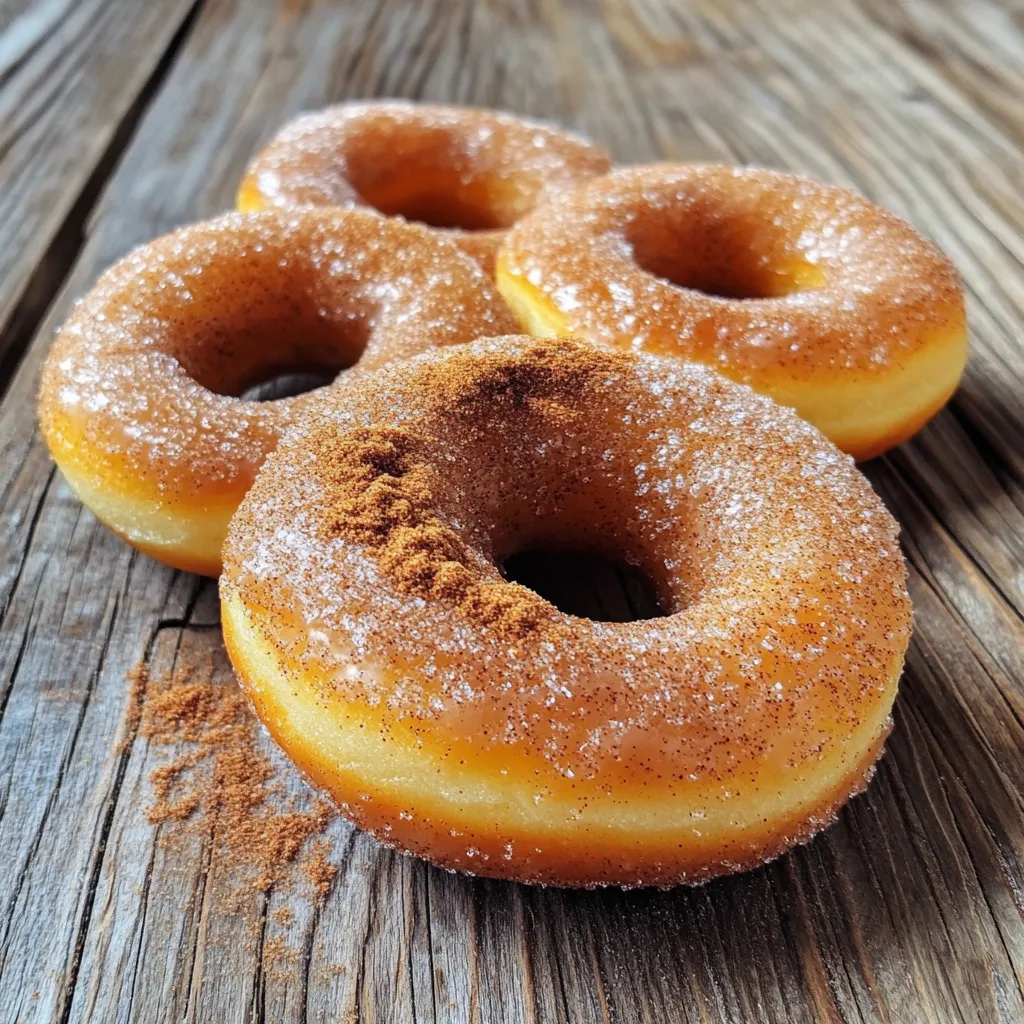
Imagine biting into a warm, soft donut bursting with rich apple flavor. Bakery-style apple cider donuts are a sweet treat
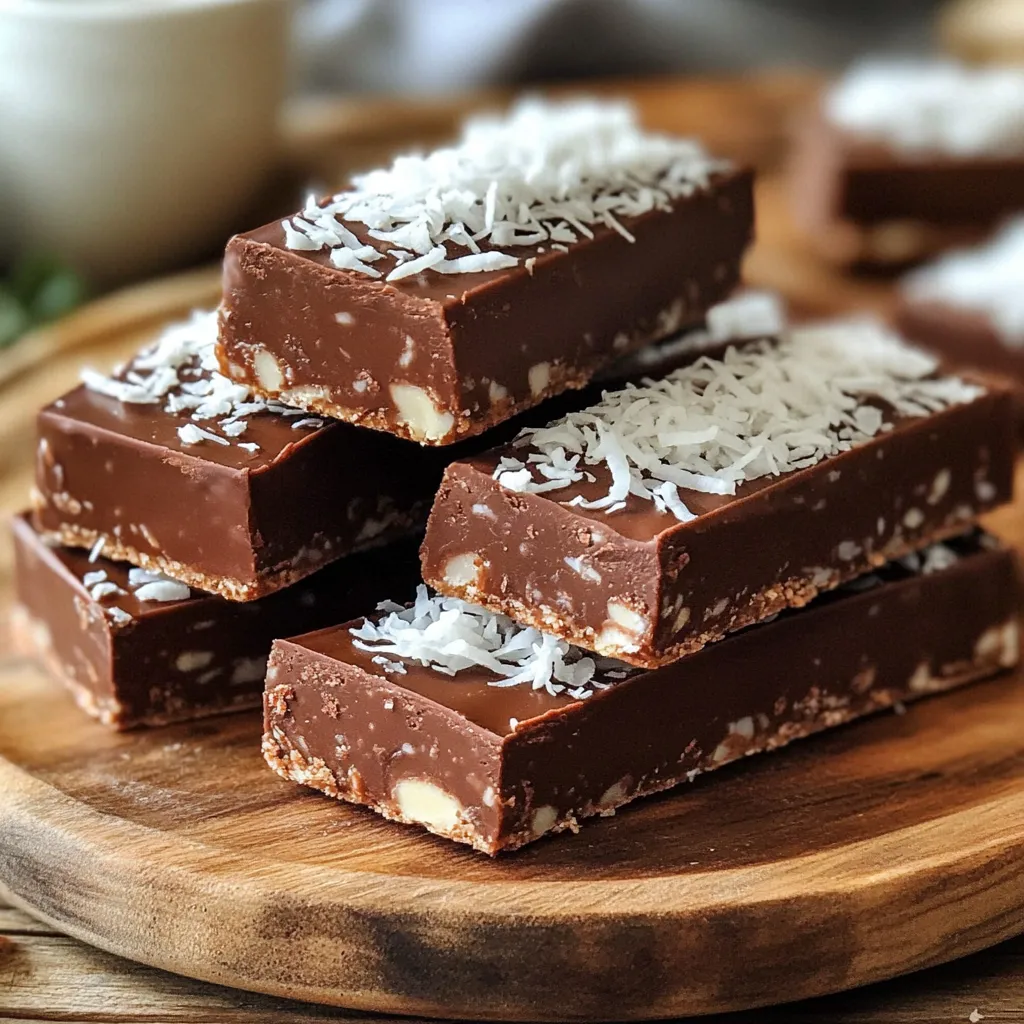
Craving a sweet treat? Try these No-Bake Chocolate Coconut Almond Bars! They’re quick, simple, and packed with flavor. You only
