Skip to content
DisclaimerTerms Of UseGDPR PolicyCookie Policy

recipesstation

  • Home
  • Drinks
  • Appetizers
  • Dinner
  • Dessert
  • About
  • Contact
  • Privacy Policy
DisclaimerTerms Of UseGDPR PolicyCookie Policy

Emily

To make a delicious Peach Cobbler Cheesecake, gather these ingredients: - 1 ½ cups graham cracker crumbs - ⅓ cup granulated sugar - ½ cup unsalted butter, melted - 2 packages (8 ounces each) cream cheese, softened at room temperature - ¾ cup granulated sugar - 2 large eggs, at room temperature - 1 teaspoon vanilla extract - 1 cup sour cream - 1 teaspoon ground cinnamon - 2 cups fresh peaches, peeled and thinly sliced - ¼ cup packed brown sugar - 1 tablespoon freshly squeezed lemon juice - 2 tablespoons cornstarch When picking peaches, look for ones that are ripe and fragrant. Firm peaches are great, but they should yield slightly to gentle pressure. Avoid peaches with blemishes or soft spots. You can swap fresh peaches for canned ones in syrup, but drain them well. Frozen peaches work too; just thaw and drain them first. When choosing granulated sugar, any brand works, but organic options can add a nice touch. You can also use coconut sugar for a different flavor. If you don’t have sour cream, plain yogurt is a good substitute. This recipe allows you to mix and match based on what you have. For the crust, graham cracker crumbs are best, but you can use crushed cookies like Oreos or vanilla wafers for a fun twist. Remember, the right ingredients set the base for a great cheesecake. Trust your taste buds, and enjoy the process! 1. Preheat your oven to 350°F (175°C). This step is key for even baking. 2. In a medium bowl, mix 1 ½ cups graham cracker crumbs, ⅓ cup sugar, and ½ cup melted butter. Stir until it looks like wet sand. 3. Press this crumb mixture into a 9-inch springform pan. Make sure it's even. Bake for 10 minutes, then let it cool completely. 4. In a large bowl, beat 2 packages of softened cream cheese with ¾ cup sugar until smooth. Use an electric mixer for the best results. 5. Add 2 eggs, one at a time. Mix well after each egg. Then, add 1 teaspoon of vanilla and 1 cup sour cream. Blend until smooth. 6. Pour this cream cheese mixture over the cooled crust, spreading it evenly. 7. In a separate bowl, mix 2 cups sliced peaches with ¼ cup brown sugar, 1 tablespoon lemon juice, and 2 tablespoons cornstarch. Toss gently until the peaches are well coated. 8. Layer the peach mixture on top of the cream cheese layer. Spread it out evenly. 9. Sprinkle ground cinnamon on top of the peaches to add great flavor. 1. Place the cheesecake in the oven. Bake for 45-50 minutes. It should be set but still jiggle slightly in the center. 2. When baking is done, turn off the oven and crack the door open. Let the cheesecake cool in the oven for 1 hour. This helps prevent cracks. 3. After one hour, move the cheesecake to the fridge. Chill for at least 4 hours, but overnight is best. 4. When ready to serve, use a thin knife to run around the edge of the cake. This loosens it from the pan, making it easy to remove the sides. This method gives you a delicious and creamy peach cobbler cheesecake. For the full recipe, check out the previous section! To get your cheesecake just right, keep your cheese and eggs at room temperature. Cold ingredients can lead to lumps. Softened cream cheese mixes smoothly and blends well with eggs. Cracks on the surface can ruin your cheesecake’s look. To avoid this, let your cheesecake cool slowly in the oven. After baking, crack the oven door open. Chill the cheesecake for a few hours in the fridge. This helps it set without cracks. For a stunning presentation, slice the cheesecake and place it on individual plates. Add fresh peach slices on top for color. A dollop of whipped cream adds a creamy touch. When it comes to drinks, pair your cheesecake with sweet tea or a light dessert wine. The fruity flavors in the cheesecake blend well with these beverages. Enjoy your delicious creation! If you need the full recipe, check out the Full Recipe section. {{image_4}} You can change this peach cobbler cheesecake in fun ways. Try using other fruits for the topping. Fresh blueberries, strawberries, or cherries work well too. Each fruit brings its own flavor, making your cheesecake unique. You can also add spices to the mix. A pinch of nutmeg or allspice gives a warm touch. You might like using vanilla bean for a richer taste. Experimenting with flavors keeps every bite interesting. If you need a gluten-free option, use almond flour or gluten-free cookies. Both work great in place of graham crackers. This makes it easy for everyone to enjoy the dessert. You can also swap out the cookie base. Try using chocolate cookies for a richer crust. Or, use oat cookies for a chewy texture. Each choice can change the whole feel of the cheesecake. For the full recipe, check out the details above. To keep your Peach Cobbler Cheesecake fresh, use the right containers. A springform pan is great for storing since it lets you keep the shape. If you want to use another type of container, a glass or plastic airtight container works well, too. Make sure the cheesecake is cool before you cover it to avoid condensation. In the refrigerator, this cheesecake lasts about 5 to 7 days. If you want to save it longer, place it in the freezer. Properly wrapped in plastic wrap and foil, it can last up to 3 months. When you're ready to enjoy it, just take it out and let it thaw in the fridge overnight. Reheating a slice of cheesecake can be tricky. The best way is to let it sit at room temperature for about 30 minutes. This helps it regain its smooth texture. If you want to warm it up a little, you can microwave it for 10 to 15 seconds. Be careful not to overheat, as it can lose its creamy goodness. Serve your leftovers with a fresh slice of peach or a dollop of whipped cream for a delightful treat. What can I substitute for sour cream? You can use Greek yogurt instead of sour cream. It gives a similar tangy taste. You can also use cream cheese mixed with a little milk. This mix will keep the texture creamy. Can I make this cheesecake ahead of time? Yes, you can make this cheesecake one to two days ahead. Just store it in the fridge. This will help the flavors blend and taste even better. How do I prevent the cheesecake from cracking? To avoid cracks, bake the cheesecake gently. Keep the oven door slightly open after baking. This cools it slowly. Also, make sure your cream cheese and eggs are at room temperature. This helps blend them better, reducing the chance of cracks. Check out the Full Recipe to make your own delicious Peach Cobbler Cheesecake! This blog post explored making a delicious peach cobbler cheesecake. We covered ingredients, preparation steps, and baking tips. It’s key to choose ripe peaches and manage the baking time for best results. Remember, temperature is crucial to avoid cracks. Try various toppings and crust combinations for fun flavors. Store your cheesecake properly so it stays fresh. With these tips, you can confidently enjoy your cheesecake. Happy baking!

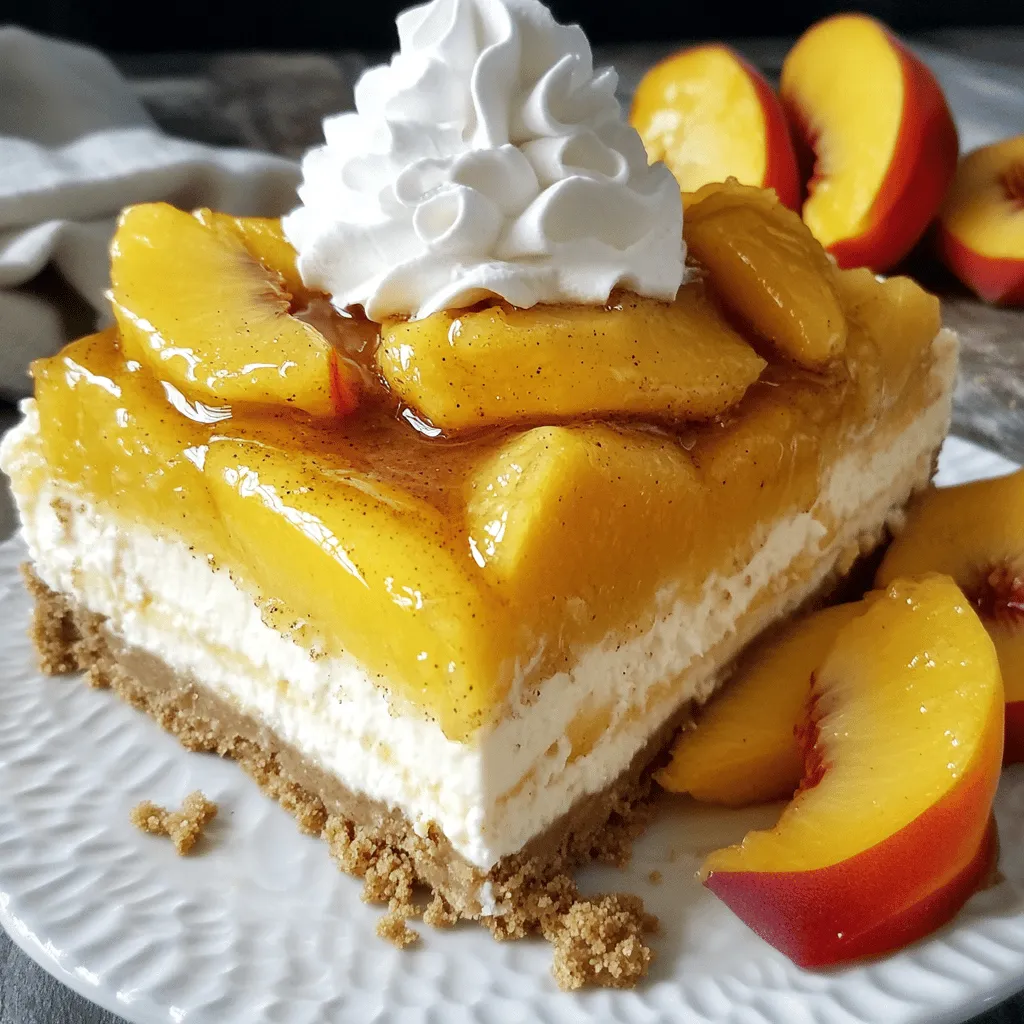
Peach Cobbler Cheesecake Flavorful and Simple Recipe

Are you ready to indulge in the ultimate dessert blend? This Peach Cobbler Cheesecake recipe is both flavorful and simple!

- 1 cup grated zucchini (squeeze out excess moisture) - 1 cup almond flour - ½ cup unsweetened cocoa powder - ½ cup maple syrup or honey - ¼ cup unsweetened applesauce - 2 large eggs - 1 teaspoon vanilla extract - ½ teaspoon baking soda - ½ teaspoon baking powder - ¼ teaspoon salt - ½ cup dark chocolate chips (optional) - ½ cup chopped walnuts (optional) - Zucchini: Low in calories and high in fiber. It adds moisture and nutrients. - Almond flour: Rich in healthy fats and protein. It is great for gluten-free diets. - Cocoa powder: Packed with antioxidants. It boosts heart health and mood. - Maple syrup or honey: Natural sweeteners that provide vitamins and minerals. - Applesauce: Adds moisture and a hint of sweetness while reducing fat. - Eggs: Full of protein and vital nutrients. They help bind the brownies. - Vanilla extract: Enhances flavor and can help reduce sugar needs. - Baking soda and baking powder: Help the brownies rise and create a soft texture. - Salt: Balances the sweetness and enhances flavors. - Dark chocolate chips: Offer rich flavor and antioxidants (optional). - Chopped walnuts: Provide healthy fats and a nice crunch (optional). - Almond flour: Use oat flour or coconut flour if needed. - Maple syrup: Agave syrup or brown sugar can work in a pinch. - Eggs: Flax eggs or applesauce can replace eggs for a vegan option. - Cocoa powder: Carob powder is a good alternative for a different taste. - Walnuts: You can swap them for pecans or leave them out if desired. For the full recipe, check out the complete guide! 1. Preheat the Oven: Start by heating your oven to 350°F (175°C). Prepare an 8x8-inch baking pan. You can grease it lightly or use parchment paper. This helps later when you lift out the brownies. 2. Prepare the Zucchini: Grate one medium zucchini. Use a box grater for this. Place the grated zucchini in a clean towel. Squeeze tightly to remove excess moisture. This step is key for perfect brownies. 3. Mix Wet Ingredients: In a large bowl, add the squeezed zucchini, eggs, maple syrup (or honey), applesauce, and vanilla extract. Whisk until everything blends well. You want a smooth mixture. 4. Combine Dry Ingredients: In another bowl, whisk together almond flour, cocoa powder, baking soda, baking powder, and salt. This keeps your brownies light and fluffy. 5. Combine Mixtures: Pour the dry mixture into the wet mixture. Stir gently with a spatula until just mixed. Be careful not to overmix; this keeps your brownies nice and soft. 6. Add Mix-ins: If you like, fold in dark chocolate chips and chopped walnuts. These add great texture and flavor to your brownies. 7. Bake: Spread the batter evenly in your prepared pan. Bake in the oven for 25-30 minutes. 8. Check for Doneness: To check if the brownies are done, insert a toothpick into the center. It should come out clean but slightly moist. This gives you the best fudgy texture. 9. Cool Down: After baking, let the brownies cool in the pan for about 10 minutes. Then transfer them to a wire rack to cool completely. This helps the flavors settle. Enjoy these wonderful Healthy Zucchini Brownies as a tasty and guilt-free treat! Don't forget to check the Full Recipe for more details. Squeezing zucchini is key for great brownies. Start with a box grater to shred the zucchini. Take the grated zucchini and place it in a clean kitchen towel or cheesecloth. Twist the towel tightly to squeeze out the moisture. Aim to get as much liquid out as you can. This step ensures the brownies will not be too wet or soggy. Mixing the batter carefully leads to the best texture. Start with wet ingredients first. Combine the squeezed zucchini, eggs, maple syrup, applesauce, and vanilla in a large bowl. Whisk until smooth. In another bowl, mix the dry ingredients well. Slowly add the dry mix to the wet mix. Stir gently until just combined. Overmixing can make brownies dense, so stop as soon as you see no dry flour. You can easily boost the flavor and texture of your brownies. Add dark chocolate chips for a richer taste. Chopped walnuts add a nice crunch. Try spices like cinnamon or nutmeg for warmth. If you want a sweeter treat, increase the maple syrup slightly. Experiment with different add-ins to find your favorite combination. These small tweaks can take your healthy zucchini brownies to the next level. {{image_4}} You can easily make these brownies gluten-free. Use almond flour, which is already in the recipe. If you want to try other gluten-free flours, coconut flour or oat flour work well too. Make sure the cocoa powder is also gluten-free. This way, everyone can enjoy your brownies! To make these brownies vegan, replace the eggs with flax eggs. Mix one tablespoon of flaxseed meal with three tablespoons of water for each egg. Let it sit for a few minutes until it thickens. You can also swap maple syrup for agave syrup. Both will keep your brownies sweet and moist! Adding spices can give your brownies a new twist. Try a pinch of cinnamon or nutmeg for warmth. You can also add a splash of coffee or espresso powder to boost the chocolate flavor. Want some crunch? Toss in some chopped nuts or seeds. These small changes can make your brownies unique and fun! For the complete recipe, check out the Full Recipe. To keep your healthy zucchini brownies fresh, store them in an airtight container. Place a piece of parchment paper between layers to avoid sticking. Keep them in a cool, dry place like your pantry. They will stay fresh for about 3 to 5 days. If you want them to last longer, refrigeration is a great option. Just make sure your container seals tightly. Freezing these brownies is simple and effective. Cut them into squares before freezing. Wrap each piece in plastic wrap or foil. Then, place them in a freezer-safe bag or container. Label it with the date for easy reference. Your brownies can last for up to three months in the freezer. When you’re ready to enjoy them, simply thaw them in the fridge or at room temperature. To bring back that fresh-from-the-oven taste, reheat your brownies in the oven. Preheat it to 350°F (175°C). Place the brownies on a baking sheet and warm them for about 5-10 minutes. You can also use the microwave. Heat each brownie for 10-15 seconds. Check to avoid overheating, as this can make them dry. Enjoy your delicious brownies warm, topped with a scoop of ice cream or a dollop of yogurt for extra delight! These brownies get their health boost from zucchini and almond flour. Zucchini adds moisture without extra sugar. Almond flour is lower in carbs and high in healthy fats. Using maple syrup or honey for sweetness keeps them natural. You also avoid refined sugars and unhealthy fats. Together, these ingredients create a guilt-free treat. Yes, you can use other flours, but results may vary. If you want a gluten-free option, try coconut flour. It absorbs more moisture, so use less. You can also use regular all-purpose flour, but it will change the texture. Almond flour keeps the brownies moist and soft, which is ideal. These brownies can last for about 4 to 5 days when stored properly. Keep them in an airtight container at room temperature. If you refrigerate them, they may last up to a week. Just make sure they cool completely before storing. Absolutely! Adding nuts or seeds can enhance texture and flavor. Chopped walnuts or pecans work great. You can also mix in seeds like chia or flax for extra nutrition. Just fold them in at the end for a wonderful crunch. To store leftovers, place them in an airtight container. You can keep them at room temperature for a few days. If you want to keep them longer, wrap them tightly and freeze. Just remember to thaw them before enjoying again. This blog post covered all you need to know about healthy zucchini brownies. We explored key ingredients, their health benefits, and useful substitutions. I shared step-by-step instructions for prep and baking, along with tips to check if they’re done. You learned ways to enhance your brownies' flavor and texture, plus gluten-free and vegan options. Don’t forget to use the best storage practices to keep them fresh. Healthy brownies can be tasty and fun. Enjoy making them your way!

Healthy Zucchini Brownies Tasty and Guilt-Free Treat

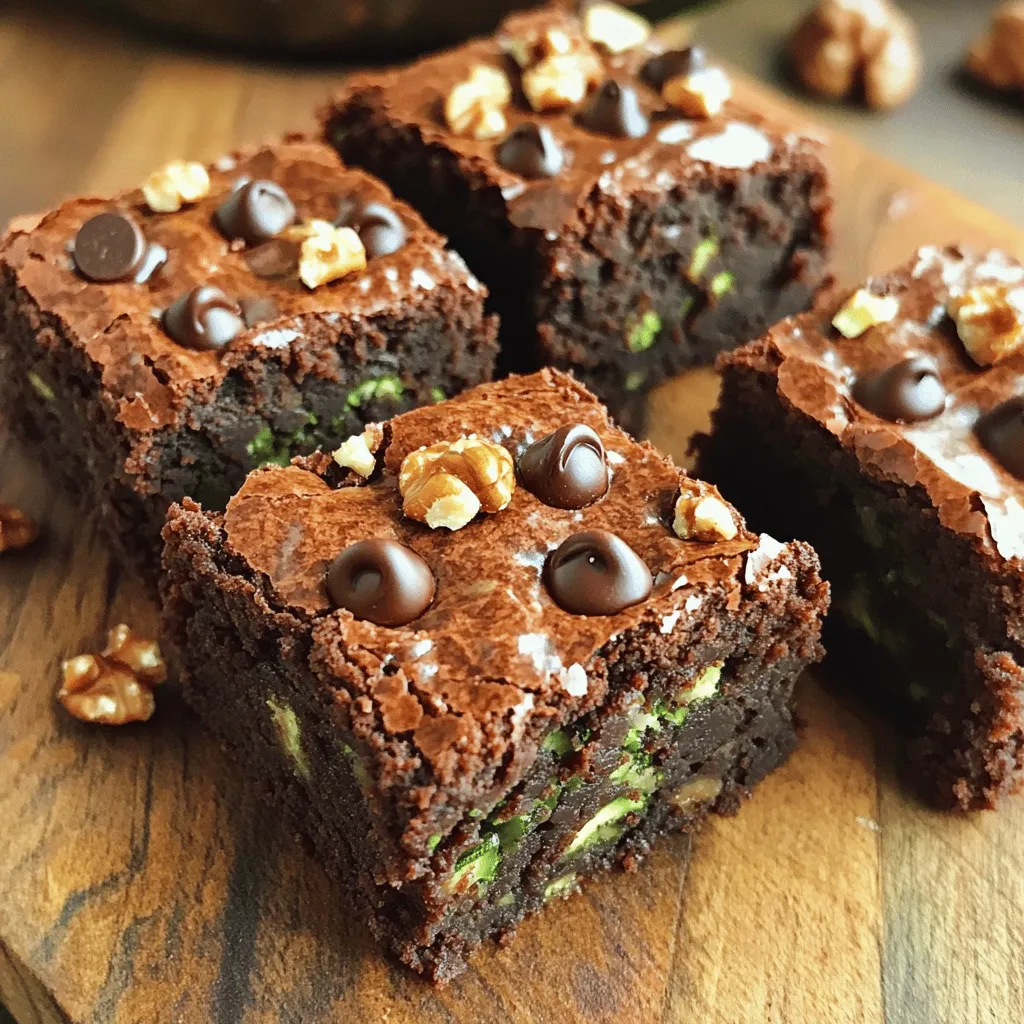
Craving a sweet treat without the guilt? I’ve got you covered with my healthy zucchini brownies! These tasty bites use

- 2 cups cooked rotini pasta - 2 cups cooked shredded chicken breast - 2 cups Alfredo sauce (store-bought or homemade) - 1 cup steamed broccoli florets - 1 cup shredded mozzarella cheese - ½ cup grated Parmesan cheese - 1 tsp garlic powder - 1 tsp Italian seasoning - Salt and pepper to taste - Fresh parsley for garnish Gathering these ingredients is the first step to making your Easy Chicken Alfredo Bake. Each item plays a key role in creating a creamy and tasty dish. The rotini pasta holds the sauce well, while the chicken adds protein. Broccoli provides color and nutrients. You can use store-bought Alfredo sauce or make your own if you prefer. The cheese blends into the creamy sauce and gives it that rich flavor. Make sure to have fresh parsley for a pop of color when serving. Each ingredient adds something special to the bake. With this list, you can easily prep and create a comforting meal that everyone will love. For the complete cooking steps, check out the Full Recipe. Set the oven temperature to 375°F (190°C). This step is key for even cooking. In a large bowl, combine these ingredients: - 2 cups cooked rotini pasta - 2 cups cooked shredded chicken breast - 1 cup steamed broccoli florets - 2 cups Alfredo sauce - 1 tsp garlic powder - 1 tsp Italian seasoning - Salt and pepper to taste Stir all the items together well. You want every piece to soak up the sauce. Transfer the mixture to a greased baking dish. Use a 9x13 inch dish for best results. Then, sprinkle on: - 1 cup shredded mozzarella cheese - ½ cup grated Parmesan cheese Cover the dish with foil. Bake for 20 minutes. After that, remove the foil. Bake for an extra 10 to 15 minutes. The cheese should be bubbly and golden. After baking, let it cool for a few minutes. This allows the flavors to settle. For a nice touch, garnish with fresh parsley. Enjoy your Easy Chicken Alfredo Bake! For more details, check the Full Recipe. The best pasta types for baking casseroles are short and sturdy. I love using rotini, penne, or fusilli. These shapes hold sauce well and mix nicely with other ingredients. Avoid long pastas like spaghetti, as they don't bake as evenly. To keep your Chicken Alfredo Bake creamy, use enough sauce. If the dish seems dry, add a splash of milk or more Alfredo sauce. Cover the dish with foil while baking to trap moisture. This helps the pasta absorb the sauce without drying out. For the best melting cheeses, I recommend mozzarella and Parmesan. Mozzarella gives that gooey, stretchy texture. Parmesan adds a nice sharp flavor. You can also try provolone or fontina for extra creaminess. Always mix different cheeses for a richer taste. For the full recipe, check the provided link. This dish is sure to impress! {{image_4}} You can easily boost nutrition by adding veggies. Try mixing in fresh spinach or colorful bell peppers. These add flavor, color, and crunch. You can also use peas or zucchini. Just chop them small, so they blend well with the pasta. This way, you make a dish that’s not only tasty but also healthy. If you want to change the protein, rotisserie chicken is a great choice. It saves time and adds rich flavor. You can also use tofu for a plant-based option. Simply cube it and toss it in the mix. Shrimp is another fun twist. Just make sure to cook it briefly before adding it to the bake. Each option makes the dish uniquely yours. For gluten-free, swap regular pasta with gluten-free rotini. There are many good brands available. If you need a dairy-free version, use coconut milk for the Alfredo sauce. Nutritional yeast can add a cheesy flavor without milk. Almond cheese or cashew cream works well for the topping too. These adjustments let everyone enjoy this comforting dish. For the full recipe, refer back to the beginning of the article. After cooking, let the Easy Chicken Alfredo Bake cool down. This helps avoid extra moisture. Once cooled, cover it tightly with plastic wrap or foil. Store it in your fridge. It stays fresh for up to three days. When you’re ready to eat, just reheat it. Want to save some for later? Freezing is a great option. First, let the bake cool completely. Then, cut it into portions. Wrap each portion tightly in plastic wrap. Place them in a freezer-safe bag or container. This way, you can enjoy it for up to three months. Remember to label the bags with the date. Reheating can be tricky. For the best taste, use the oven. Preheat it to 350°F (175°C). Place the portions in an oven-safe dish. Cover it with foil to keep it moist. Heat for about 20 minutes, or until warm. You can also use a microwave. Just heat in short bursts, stirring in between. This keeps the chicken from drying out. Enjoy your delicious meal! Yes, you can. To prep ahead, follow these steps: - Cook and mix all your ingredients. - Place the mixture into a greased baking dish. - Cover it tightly with plastic wrap. - Store it in the fridge for 1-2 days. When you're ready to bake, take it out and let it sit at room temperature for 30 minutes. Then, bake as directed in the Full Recipe. This way, you save time on busy days. If you want a different sauce, here are some ideas: - Use a creamy mushroom sauce for earthy notes. - Try a homemade cheese sauce for extra flavor. - A white sauce with herbs gives a fresh taste. - You can also use pesto for a different twist. Each option brings its own unique flavor to your bake. To keep your bake from being soggy, follow these tips: - Drain any excess liquid from cooked ingredients. - Avoid overcooking the pasta; it should be al dente. - Use a thicker sauce to help absorb moisture. - Bake uncovered for part of the time to let steam escape. These steps will help ensure your Easy Chicken Alfredo Bake stays delicious and not mushy. In this blog post, I shared a simple recipe for Easy Chicken Alfredo Bake. We covered the ingredients needed, like cooked pasta and shredded chicken, and went through step-by-step baking instructions. You learned tips to choose the right pasta and keep your dish creamy. I also offered variations for different tastes and dietary needs. Remember, making this bake is easy and fun! You can impress your family with a rich, cheesy meal that satisfies. Enjoy your cooking and happy eating!

Easy Chicken Alfredo Bake Comforting and Simple Meal

Looking for a warm and cozy meal that’s easy to make? My Easy Chicken Alfredo Bake is the answer. With

To make Garlic Butter Shrimp Pasta, you need these key ingredients: - 8 ounces linguine or spaghetti - 1 pound large shrimp, peeled and deveined - 4 tablespoons unsalted butter - 4 cloves garlic, minced - 1 teaspoon red pepper flakes - 1 lemon, zested and juiced - 1/4 cup fresh parsley, finely chopped - Salt and black pepper to taste - Grated Parmesan cheese for serving (optional) These items create a simple yet tasty dish that you can enjoy any night of the week. If you’re missing an ingredient, don’t worry. Here are some easy swaps: - Alternative pasta choices: You can use penne, fettuccine, or gluten-free pasta. - Shrimp substitutes: If shrimp isn’t your thing, try chicken or scallops. Both work well in this dish. - Vegan or vegetarian options: Use plant-based butter and swap shrimp for mushrooms or tofu. This keeps the flavors rich and satisfying. Feel free to mix and match to suit your tastes or dietary needs. For the full recipe, check out the complete steps to create this delicious meal. To cook the pasta, first, prepare salted water. Fill a large pot with water and add a good amount of salt. The salt adds flavor. Bring the water to a rolling boil. Next, add 8 ounces of linguine or spaghetti. Cook it according to the package instructions. Usually, this takes about 8 to 10 minutes. You want the pasta to be al dente, which means it should be firm but cooked. Before draining, reserve half a cup of the pasta cooking water. This water helps with the sauce later. After that, drain the pasta and set it aside. Now, let’s cook the shrimp. Heat a large skillet over medium-high heat. Add 2 tablespoons of butter and let it melt. Once the butter is melted, add 4 cloves of minced garlic and 1 teaspoon of red pepper flakes. Sauté this for about 30 seconds. The garlic should smell nice but not burn. Next, add 1 pound of large shrimp to the skillet. Make sure to lay them in a single layer. Season with salt and pepper to taste. Sauté the shrimp for 2 to 3 minutes on one side. They should turn pink. Then, flip them and cook for another 1 to 2 minutes until they are fully cooked and opaque. Remove the shrimp from the skillet and set them aside on a plate. Now, let’s combine everything. In the same skillet, lower the heat slightly. Add the remaining 2 tablespoons of butter along with the zest and juice of 1 lemon. Stir this gently to mix it all up. Let it simmer for about a minute. This lets the butter melt and creates a bubbly sauce. Next, return the cooked pasta and the shrimp to the skillet. Add a splash of the reserved pasta water. Toss everything together to coat the shrimp and pasta in the sauce. If you want a thinner sauce, add more pasta water until you like the consistency. Finally, you can mix in 1/4 cup of finely chopped fresh parsley. Check the seasoning and adjust with more salt and pepper if needed. Serve the pasta right away with a sprinkle of grated Parmesan cheese if you like. Enjoy this delicious meal! For the full recipe, click here. To get the best garlic flavor, watch the heat. Cook garlic over medium heat. This way, it releases its aroma without burning. Burnt garlic tastes bitter and can ruin your dish. Adjust the spice to fit your taste. Start with one teaspoon of red pepper flakes. You can always add more if you want extra heat. Remember, spice levels vary from person to person. For a beautiful plate, use large, shallow bowls. This lets the pasta spread out and look appealing. Garnish with fresh parsley and a lemon wedge. A drizzle of olive oil adds shine and flavor. Pair garlic butter shrimp pasta with a light salad. A simple green salad works well. You can also serve it with garlic bread for a comforting touch. Prep your ingredients before you cook. Peel and devein shrimp ahead of time. Chop garlic and parsley in advance for quick use. Try a one-pot method to save time. Cook the pasta in the same pot as the shrimp. This keeps the flavors together and minimizes cleanup. You can add pasta directly to the shrimp sauce. This method is easy and delicious. Feel free to check out the Full Recipe for more details! {{image_4}} If you want to change up the protein in garlic butter shrimp pasta, you have great choices. You can swap shrimp for chicken. Simply cut the chicken into bite-sized pieces. Cook it in the same way you cook the shrimp. You will need about one pound of chicken for this dish. Scallops are another tasty option. They cook quickly and add a sweet flavor. Use about one pound of sea scallops and follow the same cooking steps. For vegetarian or seafood options, consider using mushrooms or zucchini. Both add a nice texture. You can also use tofu for a vegan twist. Just ensure you season them well for the best flavor. You can easily change the flavor of your dish with a few tweaks. Adding fresh herbs can brighten the meal. Try basil, thyme, or oregano. Chop them finely and add them to the sauce before mixing in the pasta. If you like spice, add more red pepper flakes or try a pinch of cayenne pepper. These will give your pasta a nice kick. You can also mix up the sauce. For a creamy version, add a splash of heavy cream. This will make the dish rich and smooth. You could even add white wine for a deeper flavor. Just let it simmer before adding the pasta and shrimp. Feel free to get creative! Each variation helps you explore new tastes while enjoying this classic dish. For the full recipe, check [Full Recipe]. To store leftovers, let the garlic butter shrimp pasta cool first. Place it in an airtight container. This helps keep it fresh and tasty. Store it in the fridge for up to three days. When reheating, use a skillet over low heat. Add a splash of water or broth to keep it moist. Stir often to heat evenly. You can also use a microwave. Cover the dish with a lid or wrap to avoid drying. Heat in short intervals, stirring in between. Can you freeze garlic butter shrimp pasta? Yes, you can! Freezing works well, but the texture may change a bit. Shrimp may not be as firm once thawed. To freeze properly, let the pasta cool completely. Divide it into portions and place it in freezer-safe bags. Squeeze out as much air as possible. Label the bags with the date. You can freeze them for up to three months. When ready to eat, thaw it in the fridge overnight. Reheat on the stove or microwave until hot. For the full recipe, check out Garlic Butter Shrimp Pasta. How can I make garlic butter shrimp pasta spicier? You can add more red pepper flakes. Start with half a teaspoon more. You can also try a dash of hot sauce or chopped fresh chili. Just remember, spice builds, so add slowly! Can I use frozen shrimp? Yes, frozen shrimp work well. Thaw them in the fridge overnight or under cold water. Make sure to pat them dry before cooking. This helps them sear better and keeps them from being watery. What pasta pairs best with this dish? Linguine or spaghetti are great choices. They hold the sauce well. Fettuccine also works if you want a thicker noodle. Use whatever you like best! Estimated calories per serving Each serving has about 450 calories. This may vary based on your ingredients and portion size. Macronutrient breakdown - Protein: 25g - Carbohydrates: 55g - Fat: 15g These numbers help you understand what you eat in this dish. Suitable salads and appetizers A simple mixed green salad with lemon vinaigrette pairs nicely. You can also try garlic bread for a tasty side. Pairing with wines or drinks A chilled white wine, like Sauvignon Blanc, complements this dish well. If you prefer non-alcoholic, lemonade or sparkling water with lime works great too. Garlic Butter Shrimp Pasta is delicious and easy to make. We covered the key ingredients, cooking methods, and helpful tips. You can create variations based on your diet or preferences. Remember to store leftovers correctly for future meals. With these steps and ideas, you can impress anyone with your cooking. Enjoy making this dish and share it with loved ones. Your time in the kitchen will be rewarding and fun. Experiment with flavors and substitutions to make it your own.

Garlic Butter Shrimp Pasta Savory and Simple Recipe

Garlic Butter Shrimp Pasta is a dish that brings joy to any meal. It’s savory, quick, and easy to make.

- 2 cups rolled oats - 1 cup almond butter (or nut butter of choice) - 1/2 cup honey or maple syrup - 1/2 cup unsweetened cocoa powder - 1/2 cup chocolate chips (dark or semi-sweet) - 1/4 teaspoon sea salt - 1 teaspoon vanilla extract - Optional: 1/4 cup chopped nuts or seeds These ingredients create a tasty, chewy, and chocolatey treat. The rolled oats provide a hearty base. Almond butter gives richness while holding the bars together. Honey or maple syrup adds natural sweetness. Unsweetened cocoa powder offers deep chocolate flavor. Chocolate chips give bursts of chocolate in each bite. Sea salt enhances the flavors, and vanilla adds warmth. For crunch, you can add nuts or seeds. If you want to mix things up, try these swaps: - Use any nut butter like peanut or cashew for different flavors. - Swap honey or maple syrup for agave syrup or brown rice syrup. - If you need a cocoa powder alternative, try carob powder for a different taste. These substitutions make the recipe flexible and accessible to your pantry. Feel free to get creative. Your taste buds will thank you! For a full recipe, check out the complete instructions. 1. Start by mixing the dry ingredients. In a large bowl, combine the rolled oats, cocoa powder, and sea salt. Make sure to break up any lumps. This helps mix flavors well. 2. Next, heat the nut butter and sweetener. In a microwave-safe bowl, mix almond butter and honey. Microwave for about 20-30 seconds. This warming makes it easy to stir. Once warm, mix until it’s smooth. 1. Now, blend the warm mixture with the dry ingredients. Pour the nut butter blend into the dry mix. Add the vanilla extract, then stir until fully combined. 2. Time to add chocolate chips and optional nuts. If you want extra crunch, gently fold in the chocolate chips and nuts or seeds. This will give your bars great taste and texture. 1. Prepare and line your baking dish. Use an 8x8 inch dish and line it with parchment paper. Leave some paper hanging over the edges for easy removal later. 2. Press the mixture into the dish. Transfer the oat and chocolate mix into the lined dish. Use your hands or a spatula to press down firmly. This helps the bars hold together when set. For the full recipe, refer to the earlier section. To make your no-bake chocolate oat bars great, focus on texture and taste. Mix the dry ingredients well to avoid lumps. This helps each bite taste just right. When you press the mixture into the dish, do it firmly. Pressing down makes sure the bars hold their shape when cut. One common mistake is not lining the baking dish. Always use parchment paper for easy removal later. Another mistake is using cold ingredients straight from the fridge. Warm your nut butter and sweetener first. This makes them easier to mix. You can boost flavor by adding spices like cinnamon or nutmeg. A splash of almond or vanilla extract also works well. For added texture, think about mixing in dried fruits like raisins or cranberries. You can also toss in seeds or nuts for a nice crunch. {{image_4}} You can easily change the taste of your bars. One great option is to add peanut butter. This gives the bars a rich, nutty flavor. Just swap half of the almond butter for peanut butter. You can also add coconut flakes or dried fruit. Shredded coconut adds a sweet, chewy texture. Dried fruits like raisins or cranberries can bring a burst of natural sweetness. Mix in about 1/2 cup of these extras for a fun twist. If you want vegan-friendly bars, use maple syrup instead of honey. Always check your nut butter for any animal products. Most nut butters are vegan, but it’s good to be sure. For gluten-free options, choose certified gluten-free oats. Regular oats may contain gluten from cross-contamination. This small change makes them safe for everyone. These bars pair well with yogurt or fresh fruit. Serve them with a dollop of yogurt for a creamy contrast. Fresh berries or sliced bananas add a refreshing touch. You can create a dessert platter with these bars. Cut them into smaller squares and arrange them with other treats. This makes for a lovely presentation at parties or gatherings. For the full recipe, check out the No Bake Chocolate Oat Bars section. Enjoy! Store your no bake chocolate oat bars in an airtight container. This keeps them fresh and tasty. A glass or plastic container with a tight seal works best. Place them in a cool, dry spot in your kitchen. Avoid areas with direct sunlight or heat, as they can affect the flavor and texture. These bars stay fresh in the refrigerator for up to one week. If you want to keep them longer, you can freeze them. Wrap each bar in plastic wrap, then place them in a freezer-safe bag. They can last up to three months in the freezer. If you freeze your bars, thaw them in the fridge overnight before eating. This keeps their texture nice and chewy. If they feel too hard after freezing, let them sit at room temperature for a few minutes. This will help them regain their soft, delicious texture. Enjoy your no bake chocolate oat bars whenever you want! For the full recipe, check out the detailed instructions above. These bars stay fresh for about one week in the fridge. Store them in an airtight container. If you want to keep them longer, freeze them. They can last up to three months in the freezer. Just wrap them well in plastic wrap and then in foil. When you're ready to eat, thaw them in the fridge overnight. Yes, you can! If you want to skip nut butter, try using sunflower seed butter or tahini. You could also use coconut oil or a mashed banana. These options still give texture and sweetness along with a good taste. You can boost the bars with chia seeds, flaxseeds, or hemp seeds. These add fiber and healthy fats. You can also mix in some dried fruit like raisins or cranberries. They add sweetness and more nutrients. If you want a crunch, add chopped nuts like almonds or walnuts. These no-bake chocolate oat bars are easy to make and enjoy. We covered the key ingredients and how to use substitutes for different diets. The preparation steps are simple, and I shared tips to avoid mistakes. You can enhance flavor with variations and follow best storage practices to keep them fresh. Try these bars for a quick snack or dessert. They offer great taste with healthy options. Enjoy making and sharing them with family and friends!

No Bake Chocolate Oat Bars Simple and Tasty Treat

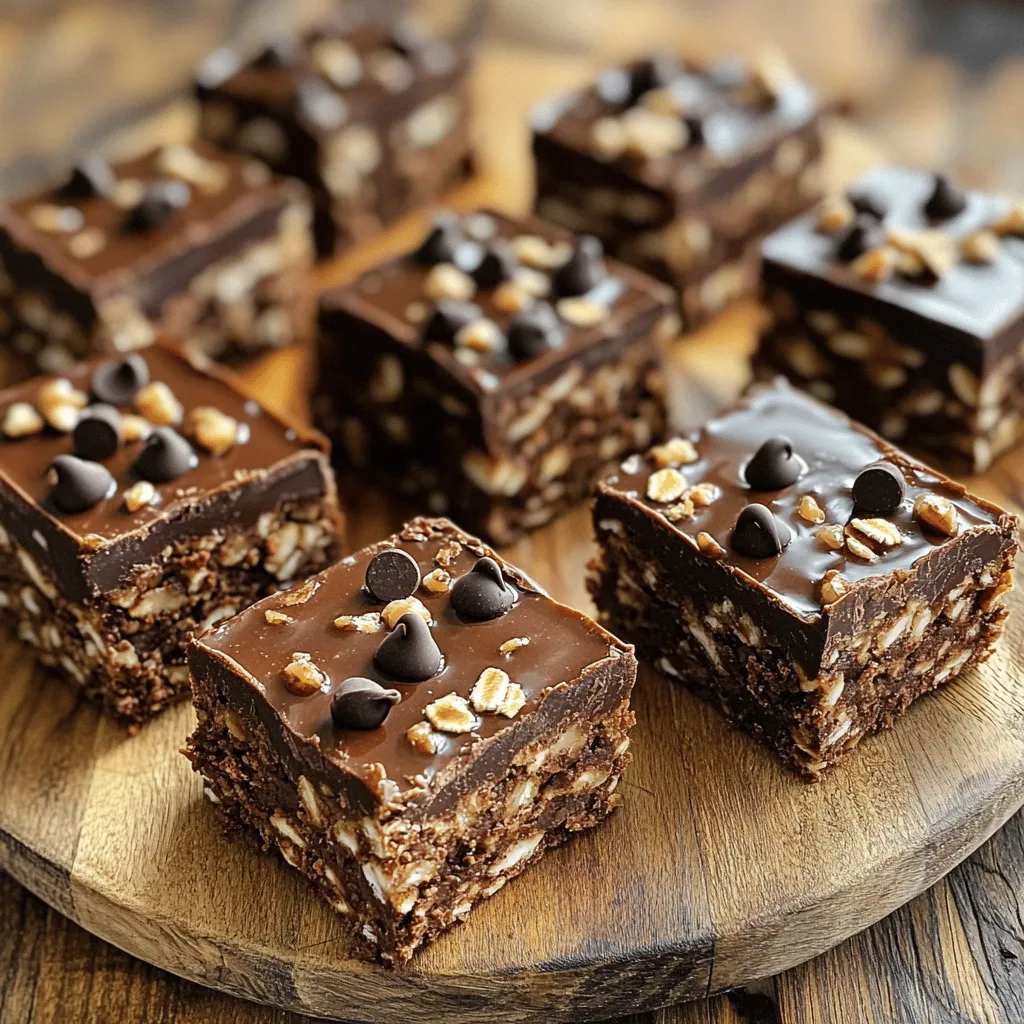
Craving a sweet treat that’s easy to make and healthy? You’re in the right place! These No Bake Chocolate Oat

- 1 ½ cups all-purpose flour - 1 teaspoon baking powder - ½ teaspoon baking soda - ¼ teaspoon fine salt - ½ cup unsalted butter, softened to room temperature - 1 cup granulated sugar - 2 large eggs, at room temperature - 1 tablespoon grated lemon zest - ¼ cup lemon juice - 1 teaspoon vanilla extract - ¼ cup plain Greek yogurt - 1 cup fresh blueberries - Optional garnish (powdered sugar, mint leaves) To create the perfect lemon blueberry bread, gather these ingredients. The dry ingredients give the bread structure. Flour, baking powder, baking soda, and salt work together to create a light loaf. Next, the wet ingredients bring flavor and moisture. Butter adds richness, while sugar balances the tartness of lemon. Eggs help bind everything, ensuring the perfect rise. Grated lemon zest and juice give this bread its fresh flavor. Vanilla and Greek yogurt add depth and creaminess. Finally, blueberries offer juicy pops of sweetness. You can use fresh or frozen. If you choose frozen, do not thaw them before adding them to the batter. Once you have all the ingredients ready, you are set to start on the full recipe for this delightful lemon blueberry bread! - Preheat oven to 350°F (175°C). - Prepare a 9x5 inch loaf pan by greasing it with butter or lining it with parchment paper. - Combine 1 ½ cups all-purpose flour, 1 teaspoon baking powder, ½ teaspoon baking soda, and ¼ teaspoon fine salt in a bowl. - Whisk these dry ingredients together until they blend evenly. - In a large bowl, use an electric mixer to cream together ½ cup softened unsalted butter and 1 cup granulated sugar. - Mix until the mixture looks light and fluffy, about 3-5 minutes. - Add 2 large eggs, one at a time, mixing well after each addition until fully combined. - Gradually mix in the dry ingredients with the wet mixture. - Alternate adding the flour mixture and ¼ cup plain Greek yogurt, starting and ending with flour. - Mix just until everything is combined. Be careful not to overmix. - Gently fold in 1 cup of fresh blueberries using a spatula. - This helps keep the blueberries intact and prevents them from bursting. - Transfer the batter into the prepared loaf pan, smoothing the top for even baking. - Bake in the preheated oven for 50-60 minutes. - Check for doneness by inserting a toothpick in the center; it should come out clean. - Once baked, let the loaf cool in the pan for about 10 minutes. - Carefully transfer it to a wire rack to cool completely. Now you have a delicious Lemon Blueberry Bread ready to enjoy! For the complete recipe, check out the Full Recipe. To make your lemon blueberry bread light and fluffy, avoid overmixing. When combining your wet and dry ingredients, mix gently. Overmixing can lead to a dense loaf. Use room temperature ingredients, like eggs and butter. This helps them blend better, giving your bread a nice rise. For extra moisture, incorporate Greek yogurt into your batter. It adds creaminess and keeps the bread soft. Also, remember that ovens vary. Check your bread a few minutes early. If a toothpick comes out clean, it’s done. Adjust the baking time as needed. Slice your bread with a serrated knife for clean, even pieces. A smooth cut keeps everything neat. To elevate your presentation, dust the cooled bread with powdered sugar. Add a few fresh blueberries on top for color. A sprig of mint adds a nice touch and enhances the fresh look of your dish. For the full recipe, refer to the details provided earlier. {{image_4}} You can add some fun twists to your lemon blueberry bread. One great option is to include almond extract. This gives the bread a nice, nutty taste. You only need a teaspoon to make a big difference. Another idea is to mix in nuts. Walnuts or pecans work well. They add a crunchy texture. This makes every bite even more exciting! If you need a gluten-free option, swap out the all-purpose flour. Use gluten-free flour instead. It works just as well, and your bread will still taste amazing. For a dairy-free choice, replace butter with coconut oil. It adds a light coconut flavor. This small change keeps your bread moist and delicious. Change things up by swapping blueberries. Try using strawberries or raspberries instead. They bring a new flavor that is just as tasty. You can also add seasonal spices. A little cinnamon or nutmeg can enhance the bread's taste. These spices add warmth and depth, making the bread perfect for any season. Looking for the full recipe? Check out the [Full Recipe]. Store your lemon blueberry bread at room temperature. Use an airtight container for best results. It will stay fresh for 2-3 days. Keeping it sealed helps prevent it from drying out. For longer storage, freeze the bread. Wrap it tightly in plastic wrap. Place it in a freezer bag to prevent freezer burn. You can freeze the bread for up to 3 months. This is perfect if you want to save some for later. To thaw, move the bread to the fridge overnight. This keeps the texture nice and moist. If you want it warm, heat a slice briefly in the microwave or toaster oven. This brings back the fresh-baked taste. Enjoy your lemon blueberry bread even after storing! Yes, you can use frozen blueberries without thawing. This saves time and keeps the bread moist. A toothpick inserted in the center should come out clean. This means your bread is baked perfectly. Increase the amount of lemon zest or juice in the recipe. This gives the bread a brighter taste. Yes, it stores well and can be made a day in advance. This makes it perfect for planning. Great with coffee, tea, or as part of a brunch spread. It also pairs well with yogurt or fresh fruit. In this blog post, we explored the ingredients and steps to make a delicious Lemon Blueberry Bread. We discussed dry and wet ingredients, along with tips for mixing and baking. You learned about flavor variations and how to store your bread. Now you can bake a moist, flavorful loaf that impresses at any gathering. Enjoy trying different variations, and make this recipe your own!

Lemon Blueberry Bread Fresh and Flavorful Delight

Are you ready to awaken your taste buds with a delightful treat? This Lemon Blueberry Bread is fresh, moist, and

To make homemade garden pickles, you need a few key items. Here’s what you will need: - 4 cups cucumbers, sliced - 1 cup distilled white vinegar - 1 cup water - 2 tablespoons kosher salt - 1 tablespoon granulated sugar - 3 cloves garlic, peeled and sliced - 1 tablespoon dill seeds or 2 sprigs of fresh dill - 1 teaspoon mustard seeds - 1 teaspoon black peppercorns - ½ teaspoon red pepper flakes (optional) For the best crunch, use Kirby or pickling cucumbers. These types have a firm texture and fewer seeds. They hold their shape well during pickling. You can also try English cucumbers, but they may be softer. The right seasonings make your pickles stand out. Garlic adds a strong flavor. Dill gives a fresh taste. Mustard seeds and black peppercorns add depth. If you like heat, add red pepper flakes. These spices work together to create a tangy and delicious brine. You can adjust the spices to match your taste. For the full recipe, check out Crunchy Garden Pickles 🥒. Start with fresh cucumbers. Wash them well under cold water. This removes dirt and residue. For the best crunch, choose Kirby or pickling cucumbers. Slice them into your favorite shape: spears, rounds, or halves. The thickness matters. Thicker slices stay crunchy longer. Now, let’s make the brine. In a medium saucepan, mix the following: - 1 cup distilled white vinegar - 1 cup water - 2 tablespoons kosher salt - 1 tablespoon granulated sugar Heat this mixture over medium heat. Stir it gently until the salt and sugar dissolve. This takes just a few minutes. Once dissolved, take it off the heat. Let it cool for about 10-15 minutes. This cooling step is key for flavor. Grab your clean jars. If you want, you can use one large jar or multiple smaller ones. Layer the bottom with spices: - Sliced garlic - Dill seeds or fresh dill - Mustard seeds - Black peppercorns - Red pepper flakes (if you like some heat) Next, pack the sliced cucumbers tightly into the jars. Fill them snugly for the best taste and crunch. Pour the cooled brine over the cucumbers. Make sure they’re fully submerged. Leave about ½ inch of space at the top. Finally, seal the jars with lids. Let them cool to room temperature. Once cooled, store them in the fridge. Wait at least 24 hours before tasting. For the best flavor, wait a week. Enjoy your homemade garden pickles! For the full recipe, check out the details above. To make crisp pickles, start with fresh cucumbers. Use Kirby or pickling cucumbers for the best crunch. Wash them well and slice them just before pickling. This keeps them firm. Pack the cucumbers tightly in jars. Less space helps maintain their crispness. Always use cold brine. Hot brine can make pickles soft. If you want extra crunch, add a few grape leaves to each jar. The tannins in grape leaves help keep pickles firm. One common mistake is using old cucumbers. They can be soft and mushy. Another mistake is not using enough salt. Salt helps with flavor and texture. Also, avoid overcrowding the jars. If they are too packed, the brine won’t cover them fully. This leads to uneven pickling. Lastly, don’t rush the refrigeration. Let your pickles sit for at least 24 hours for the best taste. Patience is key! For a great pickling experience, you need some basic tools. First, gather glass jars with tight lids. Mason jars work well. You’ll also need a medium saucepan for the brine. A ladle helps pour the brine easily into jars. A cutting board and knife are essential for slicing cucumbers. If you have a funnel, use it to avoid spills. Lastly, a measuring cup and spoons will help keep your recipe on track. With the right tools, your pickles will shine. For the full recipe, check out the Crunchy Garden Pickles section. {{image_4}} You can spice up your pickles with fun flavors. Try adding fresh herbs like basil or cilantro. For a sweet touch, add sliced jalapeños or red onions. If you love garlic, toss in more sliced cloves. You can also add spices like coriander seeds or fennel seeds for a unique twist. Experiment with these options to find your perfect blend. While cucumbers are classic, many veggies work well for pickling. Carrots add a nice crunch and sweetness. Bell peppers bring vibrant colors and flavors. You can also pickle radishes, green beans, or even cauliflower. Each vegetable gives a new taste and texture. Don't be afraid to mix and match your favorites! There are several ways to pickle your veggies. The quick method is what I use for my garden pickles. Just mix the brine and refrigerate. For a deeper flavor, try the fermentation method. This takes longer but gives a tangy taste. You can also try hot packing, where you pour hot brine over the veggies. This ensures a nice crunch and bold taste. Each technique adds its unique flair to your pickles! Store your homemade pickles in the fridge. Use clean, airtight jars to keep them fresh. Make sure the pickles are fully submerged in the brine. This helps maintain their crunch and flavor. If you have any leftover brine, save it. You can reuse it for future pickling adventures. Homemade garden pickles can last up to two months in the fridge. After a week, the flavors become even better. The longer they sit, the tastier they get. However, for the best taste and crunch, enjoy them within this time frame. Check your pickles for any strange smells or off colors. If you see mold, toss them immediately. Look for bubbles in the jar, which can mean fermentation has occurred. If they taste sour or mushy, it's time to say goodbye. Always trust your senses when it comes to food safety. It takes about 24 hours for cucumbers to pickle. After this time, they get tangy and crisp. You can eat them right away, but they taste even better after a week. This extra time lets the flavors blend well. Yes, you can use other vinegars. Apple cider vinegar adds a fruity taste, while rice vinegar gives a milder flavor. Each type of vinegar will change the taste of your pickles. Just make sure to keep the same ratio of vinegar to water. If your pickles are too salty, try rinsing them under cold water. This helps remove some salt. You can also add fresh cucumbers to the jar. This will balance out the saltiness over time. If you follow the full recipe, this problem should not happen. Making pickles is fun and easy. We covered key ingredients, step-by-step instructions, and useful tips. You learned about suggested cucumbers and essential spices. We explored variations and storage best practices. Remember, crisp pickles need the right prep and brine. Don’t forget to check for freshness before eating. With these insights, you can enjoy delicious homemade pickles anytime. Now, get started on your pickling journey!

Homemade Garden Pickles Tangy and Crisp Delight

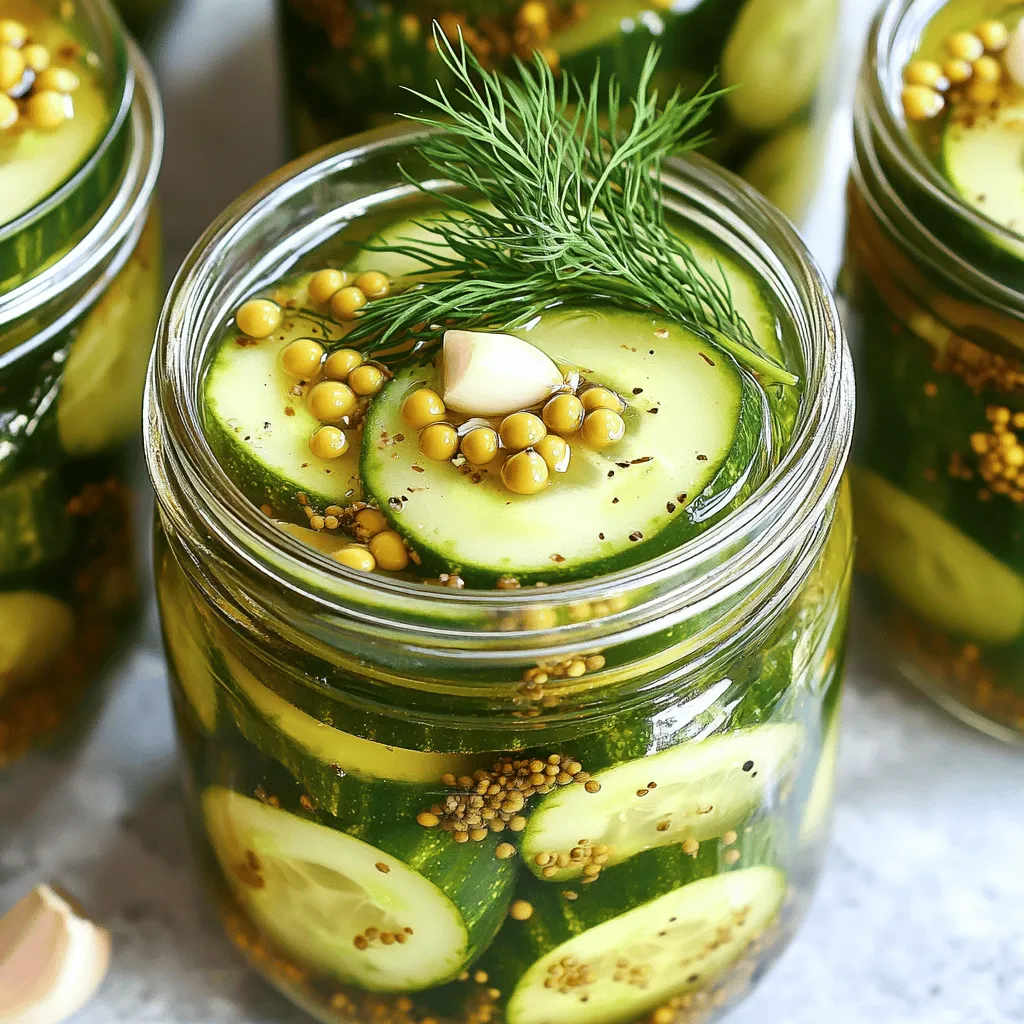
Ready to dive into the world of homemade garden pickles? I’m excited to share my tips for creating tangy, crisp

To make this delightful peach cobbler, you need just a few key ingredients: - 5 ripe peaches, peeled and sliced thinly - 1 cup granulated sugar, divided - 1 tablespoon freshly squeezed lemon juice - 1 teaspoon ground cinnamon - 1 tablespoon cornstarch - 1 cup all-purpose flour - 1 tablespoon baking powder - 1/2 teaspoon salt - 1 cup whole milk - 1/4 cup unsalted butter, melted and slightly cooled - 1 teaspoon pure vanilla extract These ingredients work together to create a sweet, juicy filling and a soft, buttery topping. Getting this peach cobbler ready is quick and easy. Here’s a breakdown of the time you’ll need: - Prep Time: 15 minutes - Total Cook Time: 50 minutes - Overall Time: 1 hour 5 minutes This makes it perfect for a weeknight treat or a weekend dessert. This recipe yields about 8 servings. It’s great for sharing with family or friends. Serve it warm with a scoop of vanilla ice cream. You can find the full recipe in the earlier sections for all the steps you need to follow. Enjoy your cooking! For the best peach cobbler, use ripe peaches. Choose peaches that feel soft but not mushy. A sweet aroma is a good sign of ripeness. Peel and slice five peaches thinly. This lets their juices mix into the batter. Fresh peaches give the cobbler a great flavor and texture. You will need one cup of granulated sugar for this recipe. Split it into two parts: half for the peach mixture and half for the batter. You can also use brown sugar for a deeper flavor. If you want a healthier option, try honey or maple syrup. Adjust the amount based on your taste. Just remember, sweetness balances the tartness of the peaches. Key baking ingredients include: - 1 cup all-purpose flour - 1 tablespoon baking powder - 1/2 teaspoon salt - 1 cup whole milk - 1/4 cup unsalted butter, melted - 1 teaspoon pure vanilla extract These components create a light and fluffy batter. The baking powder helps it rise, giving your cobbler a nice texture. The milk and butter add richness and moisture. Vanilla brings a warm flavor that complements the peaches. For a full list of ingredients, check out the Full Recipe. Start by washing your peaches well. Use five ripe peaches. Peel them and slice them thinly. In a mixing bowl, combine the sliced peaches with half a cup of granulated sugar. Add one tablespoon of freshly squeezed lemon juice, one teaspoon of ground cinnamon, and one tablespoon of cornstarch. Gently toss the peaches until they are well-coated. Let the mixture sit for about 15 minutes. This step helps the peaches soften and lets their sweet juices blend with the sugar and spices. In a separate bowl, sift together one cup of all-purpose flour, the remaining half cup of sugar, one tablespoon of baking powder, and half a teaspoon of salt. This sifting helps the dry ingredients mix well. Slowly pour in one cup of whole milk, a quarter cup of melted unsalted butter, and one teaspoon of pure vanilla extract. Use a whisk to mix until the batter is smooth. Be careful not to over-mix. A light texture is key for a great cobbler. Grease a 9x13 inch baking dish. Pour the batter into the dish, spreading it evenly across the bottom. Spoon the marinated peach mixture over the top of the batter. Do not stir! The batter will rise and cover the peaches as it bakes. Place the dish in your preheated oven at 350°F (175°C) and bake for 45-50 minutes. Keep an eye on it. The top should turn a lovely golden brown. Test for doneness by inserting a toothpick into the batter. If it comes out clean, your cobbler is ready! Once baked, let it cool for at least 15 minutes before serving. This cooling time helps the flavors settle. Enjoy your Peach Paradise Cobbler! For the complete recipe, check out the Full Recipe. {{image_4}} To get the best texture in your peach cobbler, focus on your batter. Use cold milk and melted butter. This helps keep the batter light and fluffy. Mix just until combined. Over-mixing can make it tough. The batter should be smooth but still a bit lumpy. Here are some mistakes to steer clear of: - Using overripe peaches: They can turn mushy and affect the texture. - Not letting the peach mixture sit: This step is key for flavor and softening. - Stirring the batter and peaches together: This can ruin the layers. Let them stay separate. Serve your Peach Paradise Cobbler warm. Here are some fun ideas: - Add vanilla ice cream on top: The cold ice cream melts into the warm cobbler. - Garnish with fresh mint: This adds color and a nice taste. - Drizzle with caramel sauce: This makes it extra sweet and rich. Check out the [Full Recipe] for more tips to make this dish shine! You can still enjoy peach cobbler without gluten. Use a gluten-free flour blend instead of all-purpose flour. Brands like Bob's Red Mill work well. Keep the rest of the recipe the same. The texture may change a bit, but the taste will shine through. You will still get that sweet and juicy peach goodness. If you're looking for a vegan version, swap the butter and milk for plant-based options. Use coconut oil or vegan butter in place of unsalted butter. Almond milk or oat milk can replace whole milk. This way, you can enjoy your cobbler without animal products. The flavor remains delightful, and your guests won’t even notice the difference. Add a twist to your cobbler with special flavors. Try mixing in a pinch of nutmeg with the cinnamon for warmth. You can also add a splash of almond extract for a nutty sweetness. For a tropical touch, mix in some shredded coconut or diced pineapple. These additions will take your peach cobbler to a whole new level. For the full recipe, check out the Peach Paradise Cobbler. To keep your peach cobbler fresh, allow it to cool completely first. Then, cover it tightly with plastic wrap or foil. You can also place it in an airtight container. This will help prevent it from drying out. Store it in the fridge for up to four days. Enjoy it chilled or at room temperature! If you want to save some for later, freezing is a great option! Cut the cobbler into portions. Wrap each slice in plastic wrap, then place them in a freezer-safe bag. Make sure to remove as much air as possible. You can freeze them for up to three months. Label the bags with the date for easy tracking. To reheat your cobbler, take a slice out of the fridge or freezer. If frozen, let it thaw in the fridge overnight. Preheat your oven to 350°F (175°C). Place the cobbler slice in an oven-safe dish. Cover it with foil to keep it moist. Heat for about 15-20 minutes, or until warm. You can also use the microwave for a quick reheat. Just microwave in short bursts to avoid overheating. Enjoy your warm peach cobbler! The secret is in the peaches. Use ripe, juicy peaches for the best flavor. Mix them with sugar, lemon juice, and cinnamon. This step enhances their natural sweetness. Also, the batter must be smooth but not over-mixed. Allow the batter to rise and envelop the peaches while baking. This creates a perfect texture. Yes, you can use canned peaches if fresh ones are not available. Drain the syrup from the canned peaches. Rinse them under cold water to reduce sweetness. Use the same amount as fresh peaches. Remember to adjust the sugar in the recipe to balance the sweetness. Canned peaches can save time but may have a different texture. Check the color of the top crust. It should be golden brown. Insert a toothpick into the batter. If it comes out clean, the cobbler is ready. The edges should be firm while the center may still be soft. Allow it to cool for at least 15 minutes before serving. This helps it set and improves flavor. This blog post covered a tasty peach cobbler recipe, exploring key ingredients, prep time, and servings. You learned how to prep peaches, make the batter, and bake the cobbler. I shared tips to improve texture and avoid mistakes. You can even explore gluten-free and vegan options! Enjoy your peach cobbler fresh or stored properly. Whether you're baking for fun or impressing guests, this recipe will help you shine in the kitchen. Now, gather your ingredients and get baking!

Best Peach Cobbler Delight Simple and Tasty Recipe

Are you ready to indulge in the ultimate comfort dessert? My Best Peach Cobbler Delight recipe brings together ripe, juicy

- 2 Medium Zucchinis - 2 Medium Yellow Squashes - 1 Red Bell Pepper - 1 Small Red Onion - 2 Cloves Garlic - 2 Tablespoons Olive Oil - Dried Thyme - Smoked Paprika - Salt and Black Pepper - Fresh Basil Leaves for Garnish To make sautéed squash and zucchini, you need fresh ingredients. Start with two medium zucchinis and two medium yellow squashes. The colors will pop on your plate. A red bell pepper adds sweetness and crunch. Don’t forget a small red onion. It gives a nice bite to the dish. Garlic is key; just two cloves will do. Olive oil helps cook everything and adds great flavor. For seasoning, use dried thyme and smoked paprika. These spices elevate the taste. Add salt and black pepper to make everything sing. Lastly, fresh basil leaves are perfect for garnish. They add a lovely aroma and color to your finished dish. You can find the full recipe for sautéed squash and zucchini above. Enjoy cooking this colorful, healthy dish! - Heat Olive Oil Start by heating 2 tablespoons of olive oil in a large skillet over medium heat. You want the oil to shimmer but not smoke. This step helps the veggies cook evenly. - Sauté Onions and Garlic Next, add 1 small red onion, thinly sliced. Stir it for about 2-3 minutes. Wait until the onion softens and turns translucent. Then, add 2 cloves of minced garlic. Cook this for another 30 seconds. You want it fragrant and golden, but not burnt. - Add Zucchini and Squash Now, introduce 2 medium zucchinis and 2 medium yellow squashes, sliced into half-moons. Sauté these for about 5 minutes. Stir often to keep the colors bright and the texture just right. The goal is soft but not mushy. - Incorporate Red Bell Pepper and Seasonings After that, fold in 1 diced red bell pepper. Sprinkle in 1 teaspoon of dried thyme and 1 teaspoon of smoked paprika. Don’t forget salt and freshly cracked black pepper. Cook for another 5 minutes, stirring frequently. All veggies should be tender yet still vibrant. - Adjust Seasoning and Garnish Take a moment to taste your dish. Adjust the seasoning if needed. Once you are happy, remove the skillet from heat. Let the medley sit for a minute. This resting time helps the flavors meld. Before serving, garnish with fresh basil leaves, roughly torn. This adds a nice touch and extra flavor. Enjoy your sautéed squash and zucchini fresh from the stove! For the full recipe, check out the Full Recipe section. - Tips for Choosing Zucchini: Look for zucchinis that are firm and smooth. Their skin should have a bright green color, with no blemishes or soft spots. Smaller zucchinis are often sweeter and more tender. - Selecting Optimal Yellow Squash: Pick yellow squash that is shiny and firm. Choose medium-sized ones, as they have better flavor and texture. Avoid any that feel soft or have dark spots. - Best Practices for Fresh Herbs: Fresh herbs should look vibrant and green. They should smell strong and aromatic. Store them in a glass of water in your fridge to keep them fresh longer. - How to Achieve a Perfect Sauté: Heat your skillet before adding oil. Use medium heat to avoid burning the garlic and onions. Add the veggies in batches to ensure they sauté instead of steam. - Maintaining Vegetable Color and Texture: Stir the vegetables gently and often. This helps keep their bright colors and crisp textures. Cook them just until tender, around 5 to 7 minutes. - Avoiding Overcooking: Keep an eye on cooking time. If the veggies turn mushy, they lose flavor and nutrients. Aim for tender but still crisp vegetables for the best taste and texture. Explore the [Full Recipe] for more delicious details! {{image_4}} You can add more veggies to your sautéed squash and zucchini. Carrots bring a sweet crunch. They add bright color and extra nutrients. Just slice them thinly so they cook fast. Bell peppers also work well. They have a sweet taste and a nice crunch. Mushrooms can add earthiness. They soak up flavors and add a chewy texture. You can use any kind, like button or cremini. Asparagus is another great choice. Cut it into bite-sized pieces and add it in the last few minutes of cooking. This way, it stays crisp. Try using different fresh herbs to change the taste. Basil is great, but you can also use parsley or oregano. Just chop them fine and stir them in at the end. Fresh herbs give a bright flavor. Adding spices can really wake up this dish. Cumin brings a warm, earthy taste. Just sprinkle a little in while cooking. If you like heat, try red pepper flakes. They add spice without overpowering the dish. For more ideas, check the Full Recipe for sautéed summer garden medley! To keep your sautéed squash and zucchini fresh, start with proper cooling techniques. Let the dish cool at room temperature for about 30 minutes. This step helps prevent condensation in the container. Once cooled, store the vegetables in airtight containers. This keeps out moisture and air, which can spoil the food faster. When you are ready to eat your leftovers, you can choose between a microwave or stovetop reheating. The stovetop method is best for retaining texture. Heat a skillet over medium heat and add a splash of olive oil. Add your sautéed squash and zucchini, stirring often until warmed through. If you opt for the microwave, place the food in a microwave-safe dish. Cover it with a damp paper towel to keep the moisture in. Microwave in short bursts of 30 seconds, stirring in between. This method helps prevent the veggies from becoming mushy. These simple storage and reheating tips will ensure your sautéed squash and zucchini remain fresh and flavorful. Enjoy your delicious meal again with these easy steps! Sautéed squash and zucchini can last about 3 to 5 days in the fridge. Store them in an airtight container for best results. After a few days, check for signs of spoilage. If the vegetables feel slimy or smell off, it's time to toss them. Yes, you can use frozen squash and zucchini. Just make sure to thaw them first. This helps to avoid excess water in your dish. Keep in mind that frozen veggies may be softer than fresh ones. They won't have the same crisp texture but will still taste great. Sautéed squash and zucchini pair well with many dishes. Try serving them with grilled chicken or fish for a complete meal. They also complement grains like quinoa or rice. For a hearty touch, add them to pasta or a veggie stir-fry. This helps create a balanced and tasty plate. In this article, we explored a simple sauté recipe that brightens up any meal. You learned about fresh ingredients like zucchini, squash, and red bell pepper. I shared tips for selecting the best produce and cooking techniques to avoid overcooking. We also discussed variations and storage tips to keep your dish fresh. Sautéed vegetables can be a healthy and tasty part of your meals. Make them your own with different veggies and seasonings. Enjoy making this dish and share it with others!

Sauteed Squash and Zucchini Fresh and Flavorful Recipe

Are you ready to brighten up your meals? This Sauteed Squash and Zucchini Fresh and Flavorful Recipe brings vibrant veggies

To make carrot zucchini fritters, you'll need: - 1 medium zucchini, grated - 1 large carrot, grated - 1/2 cup all-purpose flour - 1/4 cup cornmeal - 1/4 cup grated Parmesan cheese (or nutritional yeast for a vegan option) - 1 large egg (or flax egg for vegan option) - 1 teaspoon garlic powder - 1 teaspoon onion powder - 1/2 teaspoon paprika - Salt and pepper to taste - 2 tablespoons fresh parsley, finely chopped (optional) - Olive oil for frying These ingredients come together to create a tasty, crispy snack. You can adjust this recipe to fit your needs. Here are some easy swaps: - Use gluten-free flour instead of all-purpose flour. - Replace the egg with a flax egg for a vegan choice. - Nutritional yeast can replace cheese for a dairy-free option. These changes keep the fritters delicious while catering to different diets. Want to get creative? Here are some ideas to enhance your fritters: - Add chopped onions for extra flavor. - Mix in some spinach or kale for added greens. - Try spices like cumin or chili powder for a kick. Feel free to experiment! You can easily customize your fritters to suit your taste. For the full recipe, check the details above. Start by grating the zucchini and carrot. A box grater works best for this task. Once grated, put the veggies in a clean kitchen towel. Twist the towel tightly to remove excess moisture. This step is key for crispy fritters. If you skip this, your fritters may turn out soggy. In a large bowl, combine the drained zucchini and carrot with all-purpose flour, cornmeal, and grated Parmesan cheese. Stir well until everything mixes evenly. In another bowl, whisk the egg or flax egg until blended. Add this to the veggie mix and stir until coated. Now, add garlic powder, onion powder, paprika, salt, and pepper. If you like, fold in chopped parsley for more flavor. Preheat a large skillet over medium heat. Add about one tablespoon of olive oil. Wait until the oil shimmers, but do not let it smoke. Using a spoon or small scoop, drop spoonfuls of the fritter mix into the skillet. Gently flatten each fritter with the back of the spoon. Cook for about 4-5 minutes on each side. They should be golden brown and crispy. Keep an eye on the heat to avoid burning, and add more oil if needed. Once cooked, place fritters on a plate lined with paper towels to absorb extra oil. Serve warm for the best taste. Enjoy your carrot zucchini fritters with a yogurt dip or sauce for added flavor! To get crispy fritters, start by squeezing out as much water from the veggies as you can. Use a clean kitchen towel for this step. Moisture is the enemy of crispiness. Also, don’t skip the cornmeal. It adds a nice crunch. When frying, use enough olive oil to cover the bottom of the pan. This helps create a golden crust. One common mistake is not draining the vegetables. If you skip this, your fritters will turn out soggy. Another error is overcrowding the pan. Fry in small batches to ensure even cooking. Lastly, don’t forget to adjust the heat. If it’s too high, they’ll burn. If it’s too low, they won’t crisp up. To boost the flavor, try adding herbs like dill or cilantro. Fresh herbs can bring a burst of taste. You can also mix in spices such as cumin or chili powder for a kick. For a cheesy touch, use feta cheese instead of Parmesan. This adds a rich flavor that pairs well with the veggies. You can find the full recipe for more ideas! {{image_4}} You can easily make carrot zucchini fritters vegan. Instead of using an egg, use a flax egg. To make a flax egg, mix one tablespoon of ground flaxseed with three tablespoons of water. Let it sit for five minutes until it thickens. For cheese, swap out Parmesan for nutritional yeast. This gives a cheesy flavor without dairy. Feel free to mix things up! Try adding different herbs like dill or cilantro for a fresh taste. You can also switch the spices. For a kick, add cayenne pepper or chili powder. If you want a different texture, try adding cooked quinoa or rice to the mixture. These swaps keep your fritters interesting and fun. Serve your fritters with a yogurt dip or tzatziki for a tasty treat. You can also pair them with a fresh salad for a light meal. Another idea is to place them on a bun for a veggie burger. They are great hot or cold, making them perfect for lunchboxes or picnics. For extra flair, garnish with a sprinkle of fresh herbs or a squeeze of lemon juice. Enjoy the flavors! Check out the Full Recipe for more ideas and tips. To keep your carrot zucchini fritters fresh, place them in an airtight container. You can store them in the fridge for up to three days. Make sure they cool completely before sealing them in the container. This helps prevent sogginess. When you're ready to enjoy leftovers, reheat them in a skillet. Heat a little olive oil over medium heat. Place the fritters in the pan and cook for about 3 minutes on each side. This method helps them regain their crispness. You can also use an air fryer for a quick, crispy result. If you want to freeze the fritters, let them cool fully first. Arrange them in a single layer on a baking sheet and freeze until solid. Once frozen, transfer them to a freezer bag. They can stay in the freezer for up to three months. When ready to eat, reheat directly from frozen. This keeps them tasty and convenient for busy days. For the full recipe, check out the detailed steps to make these tasty treats! To make carrot zucchini fritters gluten-free, replace all-purpose flour with a gluten-free blend. You can also use almond flour or chickpea flour. This keeps the texture similar and still allows the fritters to hold together. Always check the labels to ensure your ingredients are gluten-free. Yes, you can prepare the mixture ahead of time. Mix the grated zucchini and carrot with the dry ingredients. Store this mixture in the fridge for up to two days. Just remember to add the egg or flax egg right before cooking. This helps keep the fritters fresh and tasty. Carrot zucchini fritters pair well with a variety of dips. You can serve them with yogurt sauce, tzatziki, or even a spicy salsa. For a refreshing touch, add a side salad or some lemon wedges. These complement the flavors and add a nice crunch. For the full recipe and more ideas, check the Full Recipe. This blog post covered everything you need to know about making carrot zucchini fritters. You learned about the ingredients, ways to customize them, and how to cook them perfectly. We shared tips to avoid common mistakes and enhance flavor. In the end, you can enjoy these healthy fritters in many ways. Remember to store your leftovers properly to keep them fresh. With the right ingredients and techniques, you can make delicious fritters time and again.

Carrot Zucchini Fritters Tasty and Easy Recipe

Looking for a quick and tasty snack? Carrot zucchini fritters might be just what you need! This simple recipe blends

Older posts
Newer posts
← Previous Page1 … Page39 Page40 Page41 … Page92 Next →

dsad

© 2025 recipesstation • Built with GeneratePress

Our Policies

  • Copyright Policy
  • Cookie Policy
  • GDPR Policy
  • Privacy Policy
  • Disclaimer
  • Terms Of Use

More Information

  • Home
  • About
  • Contact
  • Appetizers
  • Dessert
  • Dinner
  • Drinks
©2025, recipesstation About Back To Top