Skip to content
DisclaimerTerms Of UseGDPR PolicyCookie Policy

recipesstation

  • Home
  • Drinks
  • Appetizers
  • Dinner
  • Dessert
  • About
  • Contact
  • Privacy Policy
DisclaimerTerms Of UseGDPR PolicyCookie Policy

Emily

- 2 cups shredded cooked chicken - 1 (8 oz) package cream cheese, softened - 1/2 cup Greek yogurt - 1/2 cup buffalo sauce - 1/2 cup shredded sharp cheddar cheese - 1/2 cup shredded mozzarella cheese - 1/4 cup green onions, finely chopped - Seasoning: Salt and pepper Buffalo chicken dip brings a burst of flavor to any gathering. You need a few simple ingredients to make it. First, gather shredded cooked chicken. You can use rotisserie chicken for ease or cook your own. Next, add softened cream cheese for creaminess. Greek yogurt adds a nice tang and smooth texture. The key to that spicy kick is buffalo sauce. You can adjust its amount based on your taste. For cheesy goodness, use sharp cheddar and mozzarella. The sharp cheddar adds depth while mozzarella keeps it gooey. Finally, don’t forget the green onions. They add freshness and a pop of color. Season with salt and pepper to enhance all those flavors. This dip is not just tasty; it’s also easy to make with these ingredients. - Ideal pairings with tortilla chips or celery sticks - Additional garnishes for presentation When you serve buffalo chicken dip, it’s best with tortilla chips or celery sticks. The chips give that crunch, while celery offers a fresh bite. You can also add extra green onions on top for a nice look. A drizzle of buffalo sauce before serving makes it pop even more. This dip, warm and cheesy, will be a hit at any party. - Step 1: Preheat the oven Start by preheating your oven to 350°F (175°C). This helps cook the dip evenly. - Step 2: Combine cream cheese, Greek yogurt, and buffalo sauce In a large bowl, mix the softened cream cheese, Greek yogurt, and buffalo sauce. Use a spatula or hand mixer to make it smooth. - Step 3: Fold in chicken and cheeses Next, gently fold in the shredded chicken, cheddar cheese, and mozzarella cheese. This adds flavor and creaminess. - Step 4: Season to taste Add salt and pepper to your mix. Taste it to ensure the flavors are just right. - Step 5: Transfer to baking dish Spoon your mixture into an oven-safe baking dish. Spread it out evenly using a spatula. - Step 6: Bake and check for doneness Place the dish in the oven and bake for 20-25 minutes. The dip should be bubbly and have a golden crust on top. For the full recipe, check out the full recipe section. Enjoy your Buffalo Chicken Dip! To make your Buffalo Chicken Dip shine, adjust the buffalo sauce to match your spice level. If you need more heat, add extra sauce. For a milder dip, use less. You can mix various brands too. Each offers a unique taste. Next, let’s talk cheese. You can use different types to change the flavor. Try using pepper jack for a spicy kick or gouda for a smokier taste. Mixing cheeses adds depth and keeps things interesting. Using a hand mixer is a great way to get a smooth dip. It helps blend the ingredients well. Mix just until everything is smooth to keep the dip creamy. Avoid overmixing as this can make the dip tough. Gently fold in the chicken and cheese. This keeps the texture light and fluffy, perfect for dipping. When serving, present the dip warm in its baking dish. It looks inviting and keeps the dip hot. Pair it with a colorful platter of tortilla chips and fresh celery sticks. This adds a nice crunch. Garnish the dip with extra green onions before serving. The bright green color adds a fresh touch. You can also drizzle a bit more buffalo sauce on top. This enhances both the look and flavor. {{image_4}} To make Buffalo Chicken Dip gluten-free, simply check the labels on your buffalo sauce and any dips you use. Most sauces are safe, but some may have hidden gluten. You can also swap regular cream cheese for a gluten-free option. If you want a vegetarian version, try using chickpeas instead of chicken. Just mash them lightly before mixing. They add protein and a nice texture. This option is great for those who want to enjoy the dip without meat. You can enhance the flavor by adding ranch dressing or blue cheese to the mix. Just a few tablespoons can really change the taste. You can also try different spices like garlic powder or smoked paprika. These spices can add a new twist that makes your dip stand out. For a fun twist, you can turn this dip into a stuffed chicken breast. Just fill each breast with the dip mixture and bake until cooked through. It’s a great way to impress guests. You can also make Buffalo Chicken Dip bites or sliders. Use small bread rolls or puffs, and fill them with the dip. Bake until golden for a delicious party snack. This makes for easy serving and adds a new way to enjoy the classic dip. After making your Buffalo Chicken Dip, let it cool. Place any leftovers in an airtight container. Store it in the fridge for up to four days. This keeps the dip fresh and safe to enjoy later. When you want to reheat, scoop what you need into a microwave-safe bowl. Heat in short bursts, stirring often. This helps it heat evenly. You can also use an oven. Preheat it to 350°F (175°C) and bake for about 15 minutes. This warms it up nicely and keeps the texture creamy. You can freeze Buffalo Chicken Dip too! First, let it cool completely. Then, pour it into a freezer-safe container. Make sure to leave some space at the top, as it may expand. It can last for about three months in the freezer. To thaw, place the dip in the fridge overnight. Once thawed, reheat using the methods above. It might lose some creaminess, but it will still taste great. If you want to boost the flavor, stir in a bit more buffalo sauce after thawing. Buffalo Chicken Dip is a tasty mix of simple ingredients. Here’s what you need: - 2 cups shredded cooked chicken - 1 (8 oz) package cream cheese, softened - 1/2 cup Greek yogurt - 1/2 cup buffalo sauce - 1/2 cup shredded sharp cheddar cheese - 1/2 cup shredded mozzarella cheese - 1/4 cup green onions, finely chopped - Salt and pepper to taste Each ingredient adds flavor and creaminess. The chicken gives it a hearty base, while the cream cheese and yogurt keep it smooth. The buffalo sauce brings heat, and the cheeses add a rich taste. Green onions provide a fresh crunch. Yes, you can prepare this dip ahead of time. Here are some tips: - Mix the dip: Combine all ingredients in a bowl and store it in the fridge. - Cover it well: Use plastic wrap or a lid to keep it fresh. - Bake it later: When you're ready, bake it for 20-25 minutes at 350°F (175°C). Making it early saves time and stress. Just remember to let it cool for a few minutes before serving. If you want more heat, here are some easy ways: - Add more buffalo sauce: Increase the amount of sauce to boost spice. - Try hot sauce: Mix in your favorite hot sauce for an extra kick. - Use spicy cheese: Opt for pepper jack cheese instead of cheddar or mozzarella. These changes can help you find the perfect level of spice for your taste buds. Buffalo Chicken Dip combines simple ingredients for a tasty dish. You start with chicken and cheese, mix with creamy goodness, and bake. Add your own twist with spice or different cheeses. This dip pairs perfectly with tortilla chips or celery. You can also store it or freeze it for later. Try different ways to make it your own. Whether it’s spicy or mild, this dip is a winner. Enjoy it at parties or cozy nights in!

Buffalo Chicken Dip Flavorful and Easy Recipe Guide

Looking for a dip that packs a punch? Buffalo Chicken Dip is your answer! It’s rich, creamy, and bursting with

To make a rich and satisfying Creamy White Chicken Chili, you will need: - 2 cups cooked chicken, shredded - 1 can (15 oz) white beans, drained and rinsed - 1 can (4 oz) diced green chilies - 1 medium onion, finely diced - 3 cloves garlic, minced - 1 cup corn (fresh or frozen) - 4 cups chicken broth (preferably low-sodium) - 1 cup heavy cream - 1 teaspoon ground cumin - 1 teaspoon chili powder - 1 teaspoon dried oregano - Salt and freshly ground black pepper to taste - 2 tablespoons olive oil - Fresh cilantro, chopped, for garnish - Lime wedges, for serving If you need to swap any ingredients, here are some great options: - Chicken: Use leftover turkey or rotisserie chicken. - White beans: Any canned beans, like cannellini or navy beans, work well. - Corn: Frozen corn is just as good as fresh. - Heavy cream: Substitute with coconut milk for a lighter option. - Chicken broth: Vegetable broth makes a great alternative for a lighter taste. This Creamy White Chicken Chili serves six people. Each serving has: - Calories: Approximately 350 - Protein: 25g - Carbohydrates: 30g - Fat: 15g - Fiber: 6g This chili is not only delicious but also provides a good balance of protein and fiber. It warms you up while keeping you full. Enjoy every bite! For the full recipe, check out the details above. To start, gather all your ingredients. This helps you stay organized. You need: - 2 cups cooked chicken, shredded - 1 can (15 oz) white beans, drained and rinsed - 1 can (4 oz) diced green chilies - 1 medium onion, finely diced - 3 cloves garlic, minced - 1 cup corn (fresh or frozen) - 4 cups chicken broth (preferably low-sodium) - 1 cup heavy cream - 1 teaspoon ground cumin - 1 teaspoon chili powder - 1 teaspoon dried oregano - Salt and freshly ground black pepper to taste - 2 tablespoons olive oil - Fresh cilantro, chopped, for garnish - Lime wedges, for serving Next, heat olive oil in a spacious pot over medium heat. Once hot, add the diced onion. Sauté for about five minutes until it is soft and clear. Then, add minced garlic and cook for one more minute. Stir until the garlic smells great but does not brown. Now, add the shredded chicken, diced green chilies, corn, and white beans to the pot. Mix everything well. Gradually pour in the chicken broth. Bring the mix to a gentle simmer, stirring often. Once simmering, add ground cumin, chili powder, and dried oregano. Let the chili simmer for about 15 minutes. This helps the flavors meld together. After 15 minutes, lower the heat and stir in the heavy cream. Heat it through for another five minutes. Taste it! Adjust the salt and pepper as needed. When ready, ladle the chili into bowls. Top with chopped cilantro and serve with lime wedges. For a thicker chili, let it simmer longer. If it’s too thick, add more broth. Always stir to avoid sticking. Keep an eye on the heat. Too high can burn the bottom. Garnishing with fresh cilantro adds color and flavor. A squeeze of lime juice brightens the taste. Enjoy this rich and satisfying meal with warm crusty bread or tortilla chips. For the full recipe, check out the detailed steps above! To make your creamy white chicken chili pop, focus on fresh herbs. Add cilantro and lime at the end for a bright taste. For a kick, try adding a dash of hot sauce or some jalapeños. You can also roast the garlic before adding it to the pot. This small step gives a deeper flavor. One common mistake is not seasoning enough. Taste your chili before serving. Adjust salt and pepper as needed. Another mistake is cooking the cream too long. Stir it in at the end and heat gently. This keeps the cream from curdling and adds a nice richness. Creamy white chicken chili goes well with warm crusty bread. A side of crispy tortilla chips also works great. You can serve it with a simple green salad for freshness. For drinks, try a light beer or a refreshing iced tea. These pairings balance the chili's richness beautifully. For more details on making this delightful dish, check out the Full Recipe. {{image_4}} You can switch out chicken for turkey or shrimp. Both add great flavor and texture. If you prefer fish, try white fish like tilapia or cod. This makes it lighter yet still satisfying. Each protein adds a unique twist to your chili. To make this chili vegetarian, use plant-based chicken or just skip the meat. Add more beans, like kidney or pinto beans, for protein. For a vegan version, replace heavy cream with coconut milk or cashew cream. This keeps the creaminess while being plant-based. You can adjust the heat level easily. For spicy chili, add diced jalapeños or more green chilies. If you like mild, reduce the chili powder and use sweet peppers. Playing with spices like smoked paprika can also add depth without heat. Each variation will bring its own flair to your creamy white chicken chili. For the full recipe, check out the details provided earlier. To keep your creamy white chicken chili fresh, store it in airtight containers. Let it cool to room temperature before sealing. This helps prevent moisture build-up inside the container. For best results, eat the chili within three to four days. Keep it in the fridge and label the container with the date. When you want to enjoy the chili again, reheat it gently. Pour the chili into a pot over low heat. Stir it often to ensure even warming. If the chili seems too thick, add a splash of chicken broth or water. You can also heat it in the microwave. Use a microwave-safe bowl and cover it loosely. Heat in short bursts, stirring in between. Freezing is a great option if you want to save some chili for later. Use freezer-safe containers or bags. Make sure to leave some space at the top, as the chili will expand when frozen. It can last for up to three months in the freezer. When you’re ready to eat, thaw it overnight in the fridge. Reheat it as mentioned above. For the full recipe, check out the details and make sure to stock up! To make your creamy white chicken chili spicier, add fresh jalapeños. Dice them finely and mix them in with the onions. You can also use more chili powder or add cayenne pepper. If you like heat, try using hot green chilies instead of mild ones. Another fun option is to serve it with hot sauce on the side. This way, each person can add as much heat as they like. Yes, you can use leftover turkey instead of chicken. Shredded turkey works great in this chili. It keeps the dish tasty and saves you time. Just be sure the turkey is cooked well. You can follow the same cooking steps in the full recipe. Your chili will still be creamy and delicious. Creamy white chicken chili pairs well with various side dishes. Here are some tasty options: - Warm crusty bread - Crispy tortilla chips - Simple green salad - Cornbread muffins - Rice or quinoa These sides add texture and flavor to your meal. Enjoy mixing and matching! This blog post covered all the bases for making creamy white chicken chili. We went over the key ingredients and how to swap some for your needs. I shared cooking steps to achieve the right texture and tips for great flavor. You learned about storage and reheating, too. In the end, this recipe is flexible. You can make it your own with spice or protein ideas. I hope you feel ready to create a delicious meal that suits your taste!

Creamy White Chicken Chili Rich and Satisfying Meal

Craving a warm, cozy meal? Let me introduce you to creamy white chicken chili. It offers rich flavors and a

To create the best homemade cinnamon rolls, you need a few simple ingredients. Here’s what you will need: - 4 cups all-purpose flour - 1/4 cup honey - 1 cup warm milk (approximately 110°F) - 1/4 cup unsalted butter, melted - 2 1/4 teaspoons active dry yeast - 1/2 teaspoon salt - 2 large eggs - 1 tablespoon ground cinnamon - 1/2 cup packed brown sugar - 1/2 cup chopped walnuts (optional) - 1/4 cup powdered sugar (for icing) - 1 tablespoon milk (for icing) These ingredients work together to create a soft, sweet dough that rises beautifully. The yeast helps the dough become light and fluffy. Honey adds a nice natural sweetness. The warm milk helps the yeast wake up quickly. I suggest you measure out everything before you start. This makes the process smoother and more fun. For the best results, make sure your butter is melted and your milk is warm but not hot. If it is too hot, it can kill the yeast. Fresh ingredients are key. Using active dry yeast is essential for a good rise. You can find the full recipe for these heavenly honey cinnamon rolls in the recipe section. Enjoy making your rolls, and get ready for a tasty treat! Activating the yeast Start by mixing warm milk and yeast in a small bowl. The milk should be around 110°F. Let it sit for about five minutes. You want it to get foamy. This shows the yeast is alive and ready to work. Mixing wet and dry ingredients In a large bowl, combine flour, honey, melted butter, salt, and eggs. Mix well. Once the yeast is foamy, pour it into the bowl. Stir everything until a dough starts to form. Kneading the dough Place the dough on a floured surface. Knead it for about five to seven minutes. You want it to be smooth and elastic. If it feels too sticky, add a little more flour. First rise time Put the kneaded dough in a greased bowl. Cover it with a clean kitchen towel. Let it rise in a warm spot for about one hour. The dough should double in size. Rolling out the dough Once the dough has risen, punch it down. Roll it out on a floured surface into a rectangle. Aim for about 16x12 inches. This will give you enough space for filling. Filling and rolling the dough Brush the rolled dough with melted butter. Sprinkle brown sugar and cinnamon evenly over it. If you like, add chopped walnuts. Start rolling the dough tightly from one long side. Pinch the seam to seal it well. Cutting the rolls Use a sharp knife or dental floss to cut the log into 12 equal rolls. Place them in a greased baking dish. Make sure they are snug but not too crowded. Second rise time Cover the dish again with a towel. Allow the rolls to rise for an additional 30 minutes. This helps them get fluffy. Baking temperature and time Preheat your oven to 350°F. Bake the rolls for 20 to 25 minutes. Watch for a lovely golden brown color. While they bake, prepare the icing by mixing powdered sugar with milk until smooth. For the full recipe, check out the details above. - Ensuring proper yeast activation: Start by mixing warm milk with yeast. Let it sit until foamy. This means the yeast is alive and ready to work. If it doesn’t foam, your yeast is likely dead, and you should try again. - The importance of room temperature ingredients: Use eggs and butter at room temperature. This helps the dough mix well and rise nicely. Cold ingredients can slow the process and lead to dense rolls. - How to know when the dough has risen enough: The dough should double in size. You can gently poke it with your finger. If it springs back slowly, it’s ready. If it stays indented, give it more time. - Rolling the dough uniformly: When you roll the dough, aim for even thickness. This ensures even cooking and a nice shape. Use a rolling pin and apply gentle pressure. - Tips for cutting the rolls evenly: Use a sharp knife or dental floss to cut the dough. This prevents squishing the rolls. Aim for about 1-2 inches per slice for soft rolls. - Preventing the filling from spilling out: Roll the dough tightly but not too tight. Pinch the seam well to seal it. This keeps the filling inside while baking. - Achieving the perfect golden brown color: Bake the rolls until they turn golden brown. Watch closely after 15 minutes. If they brown too fast, cover them with foil. - Testing for doneness: Use a toothpick or knife. Insert it in the center of a roll. If it comes out clean, they are done. If it has dough on it, bake a few more minutes. - Optional glaze adjustments: For a thicker glaze, add more powdered sugar. For a thinner one, add more milk. Adjust it based on your taste to get the perfect drizzle. For detailed steps and to start baking, check out the Full Recipe. {{image_4}} If you need gluten-free options, use a blend of gluten-free flour. Look for a mix that has xanthan gum to help with texture. You can also try almond flour or coconut flour with good results. For vegan choices, swap honey for maple syrup or agave nectar. Use coconut oil or vegan butter instead of regular butter. This way, you can enjoy soft, fluffy rolls without any animal products. Want to change things up? Add chocolate chips or raisins to the filling for a sweet twist. These additions give your rolls a fun surprise in every bite. For a spicier kick, mix in a little nutmeg or cardamom. These spices add warmth and depth to the classic cinnamon flavor. You can play around with the amounts to find your sweet spot. As the seasons change, so can your rolls. In fall, try making pumpkin spice cinnamon rolls. Just add pumpkin puree and pumpkin spice to the dough for a cozy treat. During the holidays, consider cranberry orange rolls. Mix fresh or dried cranberries with orange zest in the filling. The bright flavors pair perfectly with the sweet rolls and make for a festive dish. For the full recipe, check out the earlier sections. Enjoy exploring these fun variations! To keep leftover cinnamon rolls fresh, store them at room temperature. Place them in an airtight container. This keeps them soft for about two days. If you want to keep them longer, refrigeration is an option. Wrap the rolls in plastic wrap before placing them in the fridge. This can extend their freshness to about a week. Freezing cinnamon rolls is a great way to save them for later. To properly freeze, first let the rolls cool completely. Wrap each roll tightly in plastic wrap. Then, place them in a freezer bag or container. This prevents freezer burn. When you’re ready to enjoy them, simply take out the rolls. Let them thaw in the fridge overnight. Reheat in the oven at 350°F for about 10-15 minutes. You can also microwave them for a quick warm-up. Understanding the freshness of your cinnamon rolls is key. At room temperature, they last about two days. In the fridge, they can stay fresh for a week. If you freeze them correctly, they can last up to three months. Look for signs of spoilage like mold or an off smell. If they feel dry or hard, it’s best to toss them. Homemade cinnamon rolls are a treat, so enjoy them while they are fresh! For the full recipe, check out the Heavenly Honey Cinnamon Rolls. How long do cinnamon rolls take to rise? Cinnamon rolls usually take about one hour to rise. The dough needs a warm place to double in size. If your kitchen is cool, you may need extra time. Can I prepare the dough in advance? Yes, you can prepare the dough ahead of time. After kneading, place it in the fridge. Let it rise for about 30 minutes before you bake. This helps with flavor and texture. What should I do if my dough doesn’t rise? If your dough doesn’t rise, check your yeast. Make sure it is fresh and active. Also, ensure your warm milk is not too hot. This can kill the yeast. How can I make my icing thicker? To thicken your icing, add more powdered sugar. Mix it in slowly until you reach your desired thickness. You can also reduce the milk for a thicker consistency. What are the best serving suggestions? Serve your cinnamon rolls warm. They taste best right out of the oven. Pair them with coffee or tea for a delightful treat. You can also add fresh fruit on the side. Why are my cinnamon rolls dense? Dense cinnamon rolls often come from over-kneading or too much flour. Be careful when measuring your flour. Use the spoon and level method for accuracy. How do I make them softer? To make softer rolls, try using milk instead of water. Adding an egg helps too. Also, do not overbake them. Keep an eye on them as they bake. For the full recipe, refer to the Heavenly Honey Cinnamon Rolls section. In this post, we covered how to make delicious cinnamon rolls from scratch. We discussed the ingredients, step-by-step instructions, and shared tips for perfecting your rolls. You can try different flavors and store them for later enjoyment. Homemade cinnamon rolls are satisfying and fun to make. Whether it’s for breakfast or a treat, these rolls are sure to please. Enjoy baking and savoring these warm, sweet delights!

Homemade Cinnamon Rolls Simple and Tasty Delight

Are you craving the sweet and warm comfort of homemade cinnamon rolls? You’re in the right place! In this blog,

This easy sheet pan fajitas recipe combines chicken, peppers, and onions. You get a tasty meal with fresh flavors in just 35 minutes. It's perfect for dinner or a fun gathering. To make these fajitas, gather the following fresh ingredients: - 1 pound boneless, skinless chicken breasts, sliced into thin strips - 2 bell peppers (one red and one green), sliced into strips - 1 medium onion, sliced into rings - 8 small flour tortillas - Fresh cilantro, chopped, for garnish - Lime wedges, for serving The right seasonings make these fajitas pop! Here’s what you need: - 2 tablespoons extra-virgin olive oil - 2 teaspoons chili powder - 1 teaspoon ground cumin - 1 teaspoon garlic powder - 1 teaspoon smoked paprika - Salt and freshly ground black pepper to taste These ingredients work together to create a burst of flavor that will make your taste buds dance. Enjoy the process of preparing your meal, and remember to experiment with the seasonings to find your perfect balance! First, gather all your ingredients. You need chicken, bell peppers, and onion. Slice the chicken into thin strips. Then, cut the bell peppers and onion into strips and rings. Place them in a large bowl. This helps keep things organized. Next, drizzle olive oil over the chicken and veggies. Add chili powder, cumin, garlic powder, smoked paprika, salt, and pepper. Toss everything well using your hands. Make sure every piece gets coated. This step is key for great flavor. Now, spread the mixture evenly on a lined baking sheet. Do not overcrowd the pan. This helps the chicken and veggies roast nicely. Bake in a preheated oven at 400°F for 20-25 minutes. Stir halfway through to ensure even roasting. Your fajitas are ready when the chicken is fully cooked and the veggies are tender. For the full recipe, refer to the cooking instructions earlier. Enjoy this quick and tasty meal! To make your fajitas pop, focus on the right spices. I love using chili powder, cumin, and smoked paprika. These spices add depth and warmth. You can also play with flavors by adding lime juice. It brightens the dish and enhances the taste. Try adding fresh cilantro too; it gives a fresh kick. Tender chicken is key for great fajitas. Start with fresh, high-quality chicken breasts. Slice them thinly to help them cook faster and stay juicy. Marinate the chicken in olive oil and spices for at least 15 minutes. This adds flavor and moisture. Ensure the chicken reaches 165°F to keep it safe and tender. Even roasting is crucial for perfect fajitas. Spread the chicken and veggies in a single layer on the baking sheet. Avoid overcrowding to allow heat to circulate. Stir the mix halfway through cooking. This ensures everything cooks evenly. For a nice char, use high heat and watch closely to prevent burning. {{image_4}} You can make this dish meat-free and still tasty. Start with the same base of bell peppers and onions. Add some sliced mushrooms for a nice texture. You can include zucchini or yellow squash for extra flavor. Use extra spices like smoked paprika and cumin to boost the taste. A sprinkle of cheese on top before serving adds richness. This way, everyone can enjoy fajitas, even those who don’t eat meat. If you want to switch up the protein, steak or shrimp works well. For steak, use flank or skirt steak, sliced thinly. Marinade it in lime juice and spices for added flavor. Cook it for about 15-20 minutes on the sheet pan. If you choose shrimp, they cook faster. Toss the shrimp with the veggies and seasonings. Bake for only 10-15 minutes. Both options give a different twist to the classic fajitas. Feel free to experiment with the veggies you use. Adding corn can bring a sweet crunch. Asparagus or carrots can add a unique taste and color. Try adding sweet potatoes for a heartier dish. Just make sure to cut them smaller so they cook through. Mix and match your favorite veggies based on what you have. The more colorful the pan, the more fun the meal. Enjoy trying out your own combinations! For the full recipe, check out the Easy Sheet Pan Fajitas in the earlier section. To store leftover fajitas, let them cool first. Place the fajitas in an airtight container. Make sure to separate the chicken and veggies from the tortillas. This keeps everything fresh. Store them in the fridge for up to 3 days. Always label your container with the date. You will know when to use them. Reheating is simple and quick. You can use a skillet or the microwave. If using a skillet, heat it on medium. Add a splash of olive oil. Toss the chicken and veggies until hot. This helps keep the flavors alive. If using a microwave, place the fajitas on a plate. Cover with a damp paper towel. Heat for 30 seconds to 1 minute. Check if they are warm enough. Freezing fajitas is great for meal prep. To freeze, start by letting them cool completely. Place the chicken and veggies in a freezer-safe bag. Remove as much air as possible before sealing. You can also freeze the tortillas separately. They can last up to 2 months in the freezer. When ready to eat, thaw in the fridge overnight. Reheat them as mentioned before. Enjoy your easy meal later! To add heat to your fajitas, use more chili powder. You can also add cayenne pepper or diced jalapeños. For a punch, try a spicy salsa or hot sauce on top. These options will kick up the flavor and the heat! Yes, corn tortillas work great as a substitute. They add a nice flavor and texture. Just warm them up before filling with your fajita mix. They can also be gluten-free, which is perfect for those with dietary needs. Fajitas taste great with many sides. Some popular choices are: - Mexican rice - Refried beans - Guacamole - Salsa - Chips - A fresh salad These sides complement the flavors in your fajitas and make the meal more filling. Enjoy your feast! This blog post covers all you need for tasty sheet pan fajitas. We discussed the fresh ingredients and key seasonings that create bold flavors. You now have step-by-step instructions for prep, mixing, and baking. I shared tips for perfecting flavor and ensuring tender chicken. Variations offer options for vegetarians and different proteins. Don't forget to store those leftovers smartly for later. Fajitas are versatile and fun, so get cooking and enjoy!

Easy Sheet Pan Fajitas Quick and Flavorful Recipe

Looking for a quick and tasty dinner? My Easy Sheet Pan Fajitas are your answer! This one-pan wonder combines fresh

- 4 pieces of chicken (legs and thighs) - 1 cup buttermilk - 1 cup all-purpose flour - 1 tablespoon paprika - 1 teaspoon garlic powder - 1 teaspoon onion powder - 1 teaspoon cayenne pepper - 1 teaspoon salt - ½ teaspoon black pepper - Vegetable oil for frying The first step to great Southern fried chicken is choosing your chicken pieces. I love using chicken legs and thighs. They stay juicy and get crispy skin. Next, you will need buttermilk. This helps to make the chicken tender and adds flavor. For the dredging mixture, you will need all-purpose flour and a mix of spices. Paprika adds color and a mild taste. Garlic powder and onion powder bring great flavor. Cayenne pepper gives it a little kick. Salt and black pepper round out the taste. You will also need vegetable oil for frying. It helps the chicken cook evenly and get that perfect crispy crust. This combination of ingredients is key to making delicious fried chicken. You can find the Full Recipe in the next section, which will guide you on how to put this all together. Marinating is key for great flavor. It makes the chicken juicy and tender. I recommend marinating the chicken for at least two hours. However, if you can, let it sit overnight in the buttermilk. This helps the spices soak in and makes the meat more flavorful. To prepare the dredging mixture, mix the flour and spices in a shallow dish. Use the following ingredients: - 1 cup all-purpose flour - 1 tablespoon paprika - 1 teaspoon garlic powder - 1 teaspoon onion powder - 1 teaspoon cayenne pepper - 1 teaspoon salt - ½ teaspoon black pepper Make sure to whisk these well. This ensures the spices spread evenly. A good mix gives each bite a burst of flavor. After marinating, take the chicken out. Let the excess buttermilk drip off. Dredge each piece in the flour mixture. Ensure every part is covered well. Shake off any extra flour. Next, heat vegetable oil in a skillet. Use enough oil to cover the bottom about one inch deep. Heat it to 350°F (175°C). You can check the oil by dropping a pinch of flour in. If it sizzles, it’s ready. Carefully place the chicken in the hot oil. Don’t crowd the pan; this helps it cook evenly. Fry the chicken for about 15-18 minutes on one side. When it turns golden brown, flip it over. Cook for another 10-12 minutes. The chicken should be crispy and reach 165°F (74°C) inside. Once done, transfer the chicken to a plate lined with paper towels. This absorbs excess oil, keeping your chicken crispy. Let it rest for a few minutes before serving. This helps keep the juices in and improves the flavor. To get that perfect crunch, flour coating is key. A good layer of seasoned flour gives the chicken its crispy exterior. I recommend using all-purpose flour mixed with spices. This adds flavor and texture. For frying, vegetable oil works best. It heats evenly and helps achieve that golden brown color. Rest the chicken before serving. This allows the juices to settle, keeping the meat juicy. The ideal internal temperature is 165°F (74°C). Use a meat thermometer to check. This ensures your chicken is safe and delicious. Serve the chicken on a rustic wooden platter. This makes for a lovely display. Garnish with fresh herbs like parsley or rosemary for color. Pair it with classic sides like coleslaw and cornbread to complete the meal. Enjoy your feast with family or friends! If you want to know more, check the full recipe. {{image_4}} To spice things up, add hot sauce to the marinade. A few tablespoons will add a nice kick. You can also adjust the cayenne pepper for extra heat. If you love spice, don’t hold back. Just remember, you can always add more spice, but you can't take it away. Fresh herbs can elevate your fried chicken. Try adding rosemary, thyme, or oregano to the dredging mix. This will give your chicken a fresh flavor. You can also flavor the buttermilk marinade with herbs. Just blend them well before soaking the chicken. If you need a gluten-free option, use rice flour or almond flour instead of all-purpose flour. Both work great for frying. You’ll want to adjust frying times since gluten-free flours can cook faster. Keep an eye on your chicken to get that perfect golden brown color. For the complete experience, check out the Full Recipe to try these variations! Store leftover fried chicken in the fridge. Place it in an airtight container. This helps keep it fresh. You can also wrap it in foil or plastic wrap. Make sure to eat it within three days for the best taste. To reheat fried chicken, use the oven for best results. Preheat the oven to 375°F (190°C). Place the chicken on a baking sheet. Heat for about 10-15 minutes. This method keeps the skin crispy. Avoid the microwave; it can make the chicken soggy. You can freeze leftover fried chicken. First, let it cool completely. Place it in a freezer-safe bag or container. Remove as much air as possible. It can last up to three months. To thaw, move it to the fridge overnight. Reheat in the oven to keep it crispy. You should marinate Southern fried chicken for at least 2 hours. However, I recommend marinating overnight. This extra time lets the flavors soak into the meat. It also helps keep the chicken juicy and tender during cooking. The buttermilk works wonders in breaking down proteins. You’ll love the taste! The best oil for frying chicken is vegetable oil. It has a high smoke point, which means it heats well without burning. Canola oil and peanut oil work great too. These oils help achieve that perfect crispy crust. Avoid using olive oil, as it has a lower smoke point. Yes, you can make Southern fried chicken in an air fryer. This method uses less oil and can still achieve a crispy texture. Preheat your air fryer to about 375°F (190°C). Cook the chicken in batches for about 25 to 30 minutes. Be sure to flip them halfway for even cooking. Some great side dishes include: - Coleslaw - Mashed potatoes - Cornbread - Baked beans - Collard greens These sides add to the Southern charm and flavor. They balance the richness of the chicken well. To check if the chicken is fully cooked, use a meat thermometer. Insert it into the thickest part of the chicken. It should read 165°F (74°C). Another sign is the chicken's juices running clear when pierced. If it’s still pink, cook it a bit longer. Enjoy your crispy Southern fried chicken! To make Southern fried chicken, gather your ingredients and follow the steps. Marinate the chicken to keep it juicy and flavorful. Prepare your dredging mixture for that crispy crust. Cook at the right temperature for the best results. Incorporating variations can spice things up. Knowing how to store and reheat properly helps maintain taste. Enjoy your delicious fried chicken with great sides. With these tips, you'll impress everyone at your next meal. Happy cooking!

Savory Southern Fried Chicken Crispy and Flavorful

Are you ready to indulge in the ultimate comfort food? Southern fried chicken is crispy, flavorful, and loved by many.

To make Garlic Herb Roasted Potatoes, gather the following ingredients: - 2 pounds baby potatoes, halved - 4 cloves garlic, finely minced - 3 tablespoons extra-virgin olive oil - 2 teaspoons dried rosemary - 2 teaspoons dried thyme - 1 teaspoon smoked paprika - Salt and freshly cracked black pepper, to taste - Fresh parsley, finely chopped (for garnish) These simple ingredients create a dish that is both hearty and flavorful. The baby potatoes are perfect for roasting. They are tender and have a lovely skin that crisps up nicely. Garlic adds a punch of flavor. When you roast it, garlic becomes sweet and mellow. The herbs bring freshness, while smoked paprika gives a warm depth. For garnish, fresh parsley adds a bright touch. It makes the dish look great and adds a hint of freshness. You can find the full recipe [here](#). Start by preheating your oven to 425°F (220°C). This high temperature helps roast the potatoes perfectly. It allows them to get crispy on the outside while staying soft inside. A hot oven is key to great roasted potatoes. Next, grab a big mixing bowl. Add 2 pounds of halved baby potatoes. Toss in 4 minced garlic cloves, 3 tablespoons of olive oil, 2 teaspoons of dried rosemary, 2 teaspoons of dried thyme, and 1 teaspoon of smoked paprika. Now, add salt and black pepper to taste. Use a spatula or your hands to mix everything. Make sure the potatoes get a good coat of oil and herbs. This step is vital for flavor. Spread the seasoned potatoes on a large baking sheet. Keep them in a single layer to allow for even cooking. If they are too crowded, they will steam instead of roast. Bake for 25-30 minutes. Halfway through, flip the potatoes. This helps them brown evenly. You want them golden and crispy on all sides. When they look perfect, take them out and let them cool for a few minutes. This will enhance their texture. For serving, place the potatoes in a nice dish and sprinkle with fresh parsley for color and flavor. For the complete recipe, check out the [Full Recipe]. When making garlic herb roasted potatoes, the right variety matters. I love using baby potatoes. They have a creamy texture and roast well. You can also try Yukon Gold or red potatoes. They hold their shape and soak up flavors nicely. Avoid starchy potatoes like Russets. They can turn mushy instead of crispy. You can boost the flavor of your potatoes with extra herbs and spices. Fresh herbs like rosemary and thyme work well. You can also add parsley for freshness. If you like a little kick, try red pepper flakes. For a smoky twist, add more smoked paprika. Each spice adds its own magic to the dish. To get that perfect crispiness, follow a few simple tricks. First, make sure your oven is hot enough. Preheat to 425°F (220°C). Second, space out the potatoes on the baking sheet. Crowding them makes steaming happen, not roasting. Finally, flip the potatoes halfway through cooking. This helps them brown evenly on all sides. For the best texture, let them cool for a few minutes after roasting. This step makes a big difference in crunch! {{image_4}} When it comes to herbs, you can customize your roasted potatoes. Fresh herbs offer a bright taste. Dried herbs, on the other hand, have a strong flavor. If you have fresh rosemary or thyme, use them. They add a lovely aroma. You can also mix herbs like oregano and basil for a unique twist. Experiment to find your favorite blend. Adding heat is an easy way to spice things up. Red pepper flakes bring a nice kick. Just a pinch can change the whole dish. You can also try spices like cumin or curry powder for a new vibe. These spices add warmth and depth. They can make your Garlic Herb Roasted Potatoes stand out. Combining potatoes with other veggies makes your dish more colorful and tasty. Think about adding carrots, bell peppers, or onions. Just chop them to a similar size as the potatoes. This ensures even cooking. Roasting mixed vegetables not only boosts flavor but also makes a vibrant plate. You can enjoy these tasty variations by following the [Full Recipe]. To store cooked Garlic Herb Roasted Potatoes, let them cool first. Place them in an airtight container. This prevents moisture loss and keeps them fresh. You can store them in the fridge for up to three days. When you’re ready to eat them, you will enjoy their taste and texture. To reheat the potatoes, use an oven or an air fryer. This helps maintain their crispy texture. Preheat your oven to 375°F (190°C). Spread the potatoes on a baking sheet. Heat them for about 10 to 15 minutes until warm. If using an air fryer, set it to 350°F (175°C) for about 5 to 7 minutes. Both methods keep your potatoes delicious. You can freeze Garlic Herb Roasted Potatoes if you want to save them longer. First, let them cool completely. Then, place them in a freezer-safe bag. Remove as much air as possible before sealing. They can last for up to three months in the freezer. To defrost, move them to the fridge overnight. Reheat them in the oven or air fryer for the best results. Enjoy the flavors just like when they were fresh! Garlic Herb Roasted Potatoes can last about 3 to 5 days in the fridge. To store them, place the leftovers in an airtight container. This helps keep them fresh and flavorful. When you are ready to eat, check for any signs of spoilage, like an off smell or changes in texture. Yes, you can use other types of potatoes! While baby potatoes are perfect for this recipe, you can try Yukon Gold or red potatoes. Both types have great flavor and texture. Just make sure to cut them into similar sizes for even cooking. These roasted potatoes pair well with many dishes. They go great with grilled chicken or fish. You can also serve them alongside a fresh salad or roasted vegetables. For a hearty meal, add a steak or a pork chop. The flavors complement each other nicely! Roasting garlic herb potatoes is simple and fun. You start with baby potatoes, garlic, and spices. After roasting, you achieve a crispy, tasty snack or side dish. Use fresh herbs or spices to change the flavor. Store leftovers properly to keep them fresh. Remember, these potatoes pair well with many meals. Enjoy the process, experiment with your ingredients, and savor the delicious results!

Garlic Herb Roasted Potatoes Simple and Delicious Side

If you’re looking for the perfect side dish, you’ve found it! Garlic Herb Roasted Potatoes are easy to make and

To make Easy Cheesy Baked Ziti, you need a few key ingredients: - 12 oz ziti pasta - 2 cups marinara sauce - 1 cup ricotta cheese - 2 cups shredded mozzarella cheese (divided) - 1/2 cup grated Parmesan cheese - 1 teaspoon garlic powder - 1 teaspoon Italian seasoning - Salt and pepper to taste - Fresh basil leaves for garnish (optional) When selecting ingredients, freshness matters. Look for pasta that is not broken. Choose marinara sauce that is rich and flavorful. For cheese, go for blocks or freshly shredded options. They melt better than pre-shredded varieties. Fresh basil adds a burst of flavor. If you have dietary needs, you can swap some ingredients. For a lower-fat version, use low-fat ricotta and part-skim mozzarella. You can also cut down on cheese if you prefer. For a vegan option, replace ricotta with tofu blended with lemon juice. Use cashew cheese or vegan mozzarella for the topping. Check labels to ensure your swaps fit your diet. Remember, cooking is about joy. Don’t hesitate to get creative with what you have on hand! For the full recipe, check out the details above. To start, gather your ingredients: - 12 oz ziti pasta - 2 cups marinara sauce - 1 cup ricotta cheese - 2 cups shredded mozzarella cheese (divided) - 1/2 cup grated Parmesan cheese - 1 teaspoon garlic powder - 1 teaspoon Italian seasoning - Salt and pepper to taste - Fresh basil leaves for garnish (optional) First, preheat your oven to 375°F (190°C). This warms it up for baking later. Next, fill a large pot with water and add salt. Bring the water to a rolling boil. Carefully add the ziti pasta. Cook it for about 8-10 minutes until al dente. Drain the pasta and set it aside. Now, it’s time to mix! In a big bowl, combine the marinara sauce, ricotta cheese, garlic powder, Italian seasoning, and half of the shredded mozzarella cheese. Stir it well until everything blends nicely. Taste the mixture and add salt and pepper as needed. Next, fold in the cooked ziti pasta. Make sure every piece of pasta gets coated in that creamy sauce. Take a greased 9x13 inch baking dish and spread the ziti mixture evenly in it. Then, sprinkle the rest of the mozzarella cheese and the grated Parmesan cheese on top. Place your baking dish in the oven and set the timer for about 25-30 minutes. You want the cheese to melt and get bubbly with a nice golden color. After baking, carefully take it out of the oven. Let it sit for about 5 minutes before serving. This helps the layers to settle. If you like, add fresh basil leaves on top for a colorful finish. Enjoy your Easy Cheesy Baked Ziti, a flavorful family favorite! For the complete recipe, refer to the Full Recipe. To make your ziti even tastier, add extra herbs. Fresh basil, oregano, or thyme can bring great flavor. You might also try a pinch of red pepper flakes for some heat. They will give your dish a nice kick. Adding protein is simple too. You can mix in cooked ground beef, turkey, or Italian sausage. For a vegetarian option, add cooked lentils or chickpeas. These choices will make the dish heartier and more filling. To avoid overcooked pasta, cook it just until al dente. This means it should be firm but not hard. Be sure to stir the pasta while it cooks. This helps prevent sticking. For an even cheese melt, spread the cheese out evenly. Use a mix of mozzarella and Parmesan on top. You can cover the dish with foil for the first half of baking. This helps the cheese melt nicely without burning. Remove the foil for the last few minutes to let it brown. These tips will help you create a perfect Easy Cheesy Baked Ziti. For the full recipe, refer to the earlier section. Enjoy your cooking! {{image_4}} You can change up the cheese for great taste. Mozzarella is a classic choice. It melts well and gives a stretchy texture. You might also try provolone for a sharper flavor. A blend of cheeses works wonders too. Combine mozzarella, ricotta, and Parmesan for a creamy mix. Add some gouda for a smoky touch. Experimenting with cheese can make your baked ziti unique and fun. Adding vegetables can make your dish healthier. Spinach is a great option. It adds color and nutrients without changing the taste much. You can also try mushrooms for an earthy flavor. For protein, ground beef or sausage boosts the flavor. Cook the meat before mixing it in with the ziti. Chicken or turkey also works well. These additions can turn a simple dish into a hearty meal. You can find the full recipe for Cheesy Ziti Delight [here](#). After enjoying your Easy Cheesy Baked Ziti, store any leftovers in a tight container. This helps keep the dish fresh. You can place it in the fridge for up to five days. If you want to save it longer, freeze the ziti. It will stay good for about three months in the freezer. To reheat the ziti, the oven gives the best results. Preheat your oven to 350°F (175°C). Place the ziti in an oven-safe dish. Cover it with foil to keep it moist. Bake for about 20 minutes or until heated through. You can also use a microwave for quicker reheating. Place a serving on a microwave-safe plate. Heat it in 30-second bursts until hot. However, the oven keeps the texture and cheese melty better than the microwave. For more tips on reheating or storage, check out the Full Recipe. Can I make this ahead of time? Yes, you can make Easy Cheesy Baked Ziti ahead of time. Prepare the dish up to the baking step. Cover it tightly and store it in the fridge for up to two days. When ready to bake, let it sit at room temperature for 30 minutes. Then, pop it in the oven as usual. This saves time on busy nights and still tastes great! How do I make it spicier? To add spice, consider red pepper flakes or diced jalapeños. You can mix these into the sauce before combining with the pasta. Another option is to use spicy Italian sausage instead of ground beef. These simple changes boost the flavor and heat level, making your ziti pop! Is Easy Cheesy Baked Ziti healthy? Easy Cheesy Baked Ziti can be part of a balanced diet. It has pasta, cheese, and sauce, which offer carbs and protein. To make it healthier, use whole wheat pasta and low-fat cheese. Add veggies like spinach or zucchini for extra nutrients. How to make a gluten-free version? To make a gluten-free version, swap regular pasta for gluten-free ziti. Many brands offer tasty options that cook similarly. Make sure to check the marinara sauce for hidden gluten. With these swaps, everyone can enjoy this dish without worry! For the full recipe, check out the [Full Recipe]. In this post, we explored how to make Easy Cheesy Baked Ziti. We covered the essential ingredients, tips for selecting fresh items, and tasty substitutions. I shared step-by-step instructions for preparation, mixing, baking, and offered tricks for flavor enhancement. Baked ziti is versatile. You can customize it to fit your needs. Remember to store your leftovers properly for future meals. Enjoy experimenting with flavors and ingredients. Happy cooking!

Easy Cheesy Baked Ziti Flavorful Family Favorite

Are you craving a warm, cheesy dish that the whole family will love? Look no further! This Easy Cheesy Baked

- 2 pounds chicken wings - 1/4 cup of honey - 3 tablespoons soy sauce - 2 tablespoons sriracha - 4 cloves garlic, finely minced - 1 teaspoon ginger, finely minced - 1 tablespoon olive oil - 1 teaspoon smoked paprika - 1/2 teaspoon freshly ground black pepper - 1/2 teaspoon salt - Sesame seeds and chopped green onions for garnishing - Additional spices for personal preference - Side dips like ranch or blue cheese dressing When I whip up Spicy Honey Garlic Chicken Wings, the first step is gathering my ingredients. I always use fresh chicken wings for the best flavor. Honey brings a natural sweetness that balances the heat from sriracha. Soy sauce adds a savory depth that makes every bite mouthwatering. Garlic and ginger are key players in this dish. They infuse the wings with a warm, aromatic flavor. Smoked paprika gives a lovely smokiness, while black pepper and salt enhance all the tastes. For a special touch, I suggest garnishing with sesame seeds and green onions. They add color and a nice crunch. Optional ingredients like extra spices or dips can tailor the wings to your liking. For the full experience, you can explore the [Full Recipe]. It helps you create these wings step by step. - Preheat your oven to 425°F (220°C). - Line a baking sheet with aluminum foil and place a wire rack on top. - In a large bowl, mix honey, soy sauce, sriracha, minced garlic, minced ginger, olive oil, smoked paprika, black pepper, and salt. Whisk until smooth. - Take the chicken wings and place them in the bowl with the marinade. - Use your hands or tongs to coat each wing well. - For the best flavor, let them marinate for at least 30 minutes. If you have more time, two hours will deepen the taste. - Lay the marinated wings out in a single layer on the wire rack. - Bake for 30 to 35 minutes. - Flip the wings halfway through cooking. This ensures they get crispy on both sides. After following these steps, your spicy honey garlic chicken wings will be bursting with flavor! For the full recipe, check out the complete details. To make your wings crispy, use a wire rack. This allows hot air to flow around each wing. It helps them cook evenly. If you don’t have a wire rack, try flipping the wings halfway through baking. Bake them at 425°F for about 30 to 35 minutes. If you want extra crispiness, you can cook them a bit longer. Just keep an eye on them so they don’t burn. Using leftover marinade can boost flavor. After baking, toss the wings in it for extra taste. If you want more heat, add sriracha to the marinade. You can adjust it based on your spice level. Start with two tablespoons and add more as needed. Remember, it’s all about finding the right balance for your taste buds. For presentation, serve the wings on a big platter. Sprinkle extra sesame seeds and green onions on top. This makes them look fancy and inviting. Pair them with ranch or blue cheese dressing for dipping. You can also serve them with fresh veggies like carrots or celery. They add a nice crunch and freshness to your meal. {{image_4}} You can easily change the heat level of your spicy honey garlic chicken wings. For a mild option, reduce the sriracha to just 1 tablespoon. If you want medium heat, stick with the 2 tablespoons. For hot wings, add an extra tablespoon or two of sriracha. You can also use fresh chili peppers for a unique flavor. Don't limit yourself to just one sauce! You can try BBQ sauce mixed with honey for a smoky flavor. Teriyaki sauce adds a sweet and savory twist. Mix flavors to create your own special sauce. This way, you can enjoy a new taste every time you make these wings. You can cook chicken wings in different ways. An air fryer gives you crispy wings without much oil. Set the air fryer to 400°F and cook for about 25 minutes. Flip them halfway for even crispiness. If you prefer the oven, follow the [Full Recipe] instructions for perfect wings. Grilling is another great option. Preheat the grill to medium heat and cook wings for about 20 minutes. Turn them often to avoid burning. No matter the method, your wings will be full of flavor! To keep your Spicy Honey Garlic Chicken Wings fresh, store them in an airtight container. This helps keep out air and moisture. Place the wings in the fridge if you plan to eat them within three days. For longer storage, use the freezer. Wrap the wings tightly in plastic wrap before placing them in a freezer bag. This method prevents freezer burn. To keep the wings crispy, avoid stacking them. Lay them flat in a single layer. You can also place parchment paper between layers if you must stack them. This keeps the wings from sticking together. To reheat your wings, the oven works best. Preheat your oven to 350°F (175°C). Spread the wings on a baking sheet in a single layer. Bake them for about 10 to 15 minutes. This method keeps them crispy. You can also use an air fryer. Set it to 350°F (175°C) and heat for about 5 to 7 minutes. This will crisp them up nicely. Avoid using the microwave. Microwaving wings often makes them soggy. If you must use it, cover the wings with a paper towel. This helps some, but the oven or air fryer is still better for keeping that crispy texture. For best flavor, marinate chicken wings for at least 30 minutes. If you have time, let them sit for up to 2 hours in the fridge. The longer marinating time helps the wings soak up all the tasty spices. Yes, you can use frozen chicken wings. Just make sure to thaw them first. Thaw overnight in the fridge or run them under cold water. Once thawed, follow the same marinating and cooking steps. You can serve the wings with a variety of sides. Some great options are: - Celery sticks - Carrot sticks - Ranch dressing - Blue cheese dressing - A fresh salad These sides will cool down the spice and add crunch to your meal. To make more wings, simply double or triple the ingredients. Keep the same marinating and cooking times. Just make sure your baking sheet can fit all the wings without crowding them. This way, they cook evenly and stay crispy. Each serving of Spicy Honey Garlic Chicken Wings contains: - Calories: About 400 - Protein: 30 grams - Carbohydrates: 20 grams - Fat: 25 grams These details can change based on the exact ingredients and portion sizes. For a more precise count, you can use a nutrition calculator. For the full recipe, check out the detailed instructions above. Fiery Honey Garlic Chicken Wings bring bold flavors to your table. Here’s how to make them. - 2 pounds chicken wings - 1/4 cup of honey - 3 tablespoons soy sauce - 2 tablespoons sriracha (adjust for your desired heat level) - 4 cloves garlic, finely minced - 1 teaspoon ginger, finely minced - 1 tablespoon olive oil - 1 teaspoon smoked paprika - 1/2 teaspoon freshly ground black pepper - 1/2 teaspoon salt - Sesame seeds for garnishing - Chopped green onions for garnishing 1. Preheat your oven to 425°F (220°C). Line a baking sheet with foil. Place a wire rack on top for crispiness. 2. In a large bowl, whisk together honey, soy sauce, sriracha, minced garlic, minced ginger, olive oil, smoked paprika, black pepper, and salt. Mix until smooth. 3. Add chicken wings to the marinade. Use your hands or tongs to coat each wing well. For a deeper flavor, marinate for at least 30 minutes. If you can, let them sit for 2 hours in the fridge. 4. Lay the marinated wings in a single layer on the wire rack. This helps them cook evenly and get crispy. 5. Bake the wings for 30 to 35 minutes. Flip them halfway to get both sides golden brown. 6. Toss wings in any leftover marinade after baking for extra flavor. This step is optional but tasty. 7. Serve hot, garnished with sesame seeds and chopped green onions for a fresh touch. Serve the wings on a large platter. Add extra sesame seeds and green onions for a great look. Pair with ranch or blue cheese dressing for dipping. You now have a clear guide to making spicy honey garlic chicken wings. We covered the necessary ingredients, marinating, and baking steps. Remember tips for crispiness and flavor enhancement. You can also try fun variations, different sauces, and serve these wings with cool dips or side dishes. Storing and reheating the wings properly keeps them tasty. Enjoy bringing this delicious dish to your table!

Spicy Honey Garlic Chicken Wings Irresistible Flavor

Are you ready to elevate your wing game? Spicy Honey Garlic Chicken Wings deliver an irresistible flavor that’s hard to

- 3 ripe bananas, mashed - 1/3 cup melted coconut oil - 1 teaspoon pure vanilla extract - 1 teaspoon baking soda - Pinch of salt - 3/4 cup packed brown sugar - 1 large egg - 1 teaspoon ground cinnamon - 1 1/2 cups all-purpose flour - Optional: 1/2 cup chopped walnuts - Optional: 1/2 cup dark chocolate chips To make classic banana bread, the right ingredients matter. You want ripe bananas. They should feel soft and have brown spots. This gives your bread a sweet flavor. You also need melted coconut oil. This keeps your bread moist. You can swap it with melted butter if you want. Next is pure vanilla extract. It adds a nice aroma and taste. Baking soda helps the bread rise. A pinch of salt boosts the flavor. Brown sugar gives it a rich sweetness. You will need one large egg to bind everything together. Ground cinnamon is a must. It brings warmth to the dish. All-purpose flour is the base of your batter. For extra crunch, consider adding chopped walnuts. If you love chocolate, dark chocolate chips can make it more indulgent. For the full recipe, you can check out the detailed instructions. 1. First, preheat your oven to 350°F (175°C). This step warms the oven for even baking. 2. Next, grease a 9x5-inch loaf pan with a small amount of coconut oil. This helps the bread slide out easily after baking. 1. In a large bowl, combine the mashed bananas and melted coconut oil. Use a fork to mix them well. 2. Now, add one teaspoon of pure vanilla extract, one teaspoon of baking soda, and a pinch of salt. Stir until everything is well combined. 3. Next, mix in 3/4 cup of packed brown sugar and one beaten egg. Stir until the mixture looks shiny and smooth. 4. Sprinkle in one teaspoon of ground cinnamon. Then, gently fold in 1 1/2 cups of sifted all-purpose flour. Mix just until combined. Avoid over-mixing to keep the bread fluffy. 5. If you want a little crunch, fold in optional 1/2 cup chopped walnuts or 1/2 cup dark chocolate chips. Make sure they are spread evenly throughout the batter. 1. Pour the banana bread batter into the prepared loaf pan. Use a spatula to smooth the top. 2. Place the loaf pan in your preheated oven. Bake for 60 to 65 minutes. Check for doneness by inserting a toothpick into the center. It should come out clean with a few crumbs. 3. Once baked, let the bread cool in the pan for about 10 minutes. Then, transfer it to a wire rack to cool completely. For the complete recipe, check out the Full Recipe. Ripe bananas are key for great banana bread. They should be soft and brown. This makes your bread sweet and moist. Not over-mixing the batter is just as important. Stir until the flour just blends in. Over-mixing can lead to a tough texture. You can add spices for a flavor boost. Try nutmeg or ginger for a warm twist. You could also use vanilla bean paste instead of extract. For sugars, swap some brown sugar for white sugar or honey. Each adds a unique taste to your bread. When your banana bread cools, slice it with a sharp knife. Arrange the slices on a plate. You can dust the top with powdered sugar for a nice touch. Serve the slices warm with butter for extra flavor. Fresh fruits like strawberries or kiwi make great garnishes. They add color and freshness to your dish. For the full recipe, check out the complete guide. {{image_4}} You can make a nut-free version of this banana bread. Just leave out the walnuts. This keeps the bread soft and tender. It also makes it safe for those with nut allergies. The flavor remains rich and sweet, so you won't miss the nuts. If you need a gluten-free option, you can use gluten-free flour. Almond flour or oat flour works well. You can also try a pre-mixed gluten-free flour blend. Just make sure it has a binding agent like xanthan gum. This will help give your bread a nice texture. Want to spice things up? You can add ground nutmeg or pumpkin spice. These give your banana bread a warm, cozy flavor. You can also mix in fruits like blueberries or cranberries. They add a pop of color and tartness. Both options let you get creative with your baking. You can find more ideas in the Full Recipe. To keep your banana bread fresh, wrap it in plastic wrap. You can also use aluminum foil. Store it in a cool, dry place. This method keeps it soft for up to four days. If you prefer, you can place it in the fridge. However, this may change the bread's texture. It can make it dry, so I recommend room temperature. Freezing banana bread is easy. First, let it cool completely. Then, wrap it tightly in plastic wrap. Place it in a freezer bag or airtight container. This helps keep it fresh for up to three months. When you’re ready to eat it, take it out and thaw it in the fridge overnight. You can also warm it in the microwave for a quick treat. Enjoy your banana bliss bread even when frozen! You want bananas that are very ripe. Look for bananas with lots of brown spots. The riper the bananas, the sweeter your bread will be. Overripe bananas also mash easily. This makes mixing simple and quick. Yes, you can use frozen bananas! Just thaw them first. Once thawed, drain extra liquid if needed. Frozen bananas have the same taste and sweetness as ripe ones. They work well in banana bread, making your baking easy. You can use vegetable oil or melted butter instead. Both will keep your bread moist. If you want a lighter taste, try using applesauce. It adds moisture without strong flavors. Each option will give your bread a unique twist. Banana bread lasts about 3 to 4 days at room temperature. Store it in an airtight container to keep it fresh. You can also refrigerate it for up to a week. For longer storage, freeze slices for quick treats later. Absolutely! You can mix in nuts, chocolate chips, or dried fruits. Try adding spices like nutmeg or ginger for warmth. You can also use peanut butter or swap some flour for cocoa powder. This way, you create your own delicious twist. Check out the Full Recipe for more ideas! You now have a clear guide to make classic banana bread. Keep your bananas ripe for the best flavor. Remember to mix gently and bake until golden. You can also try fun variations or store it for later. This recipe is simple and forgiving, so feel free to make it your own. Enjoy baking and sharing your delicious banana bread with friends and family!

Classic Banana Bread Simple and Tasty Recipe

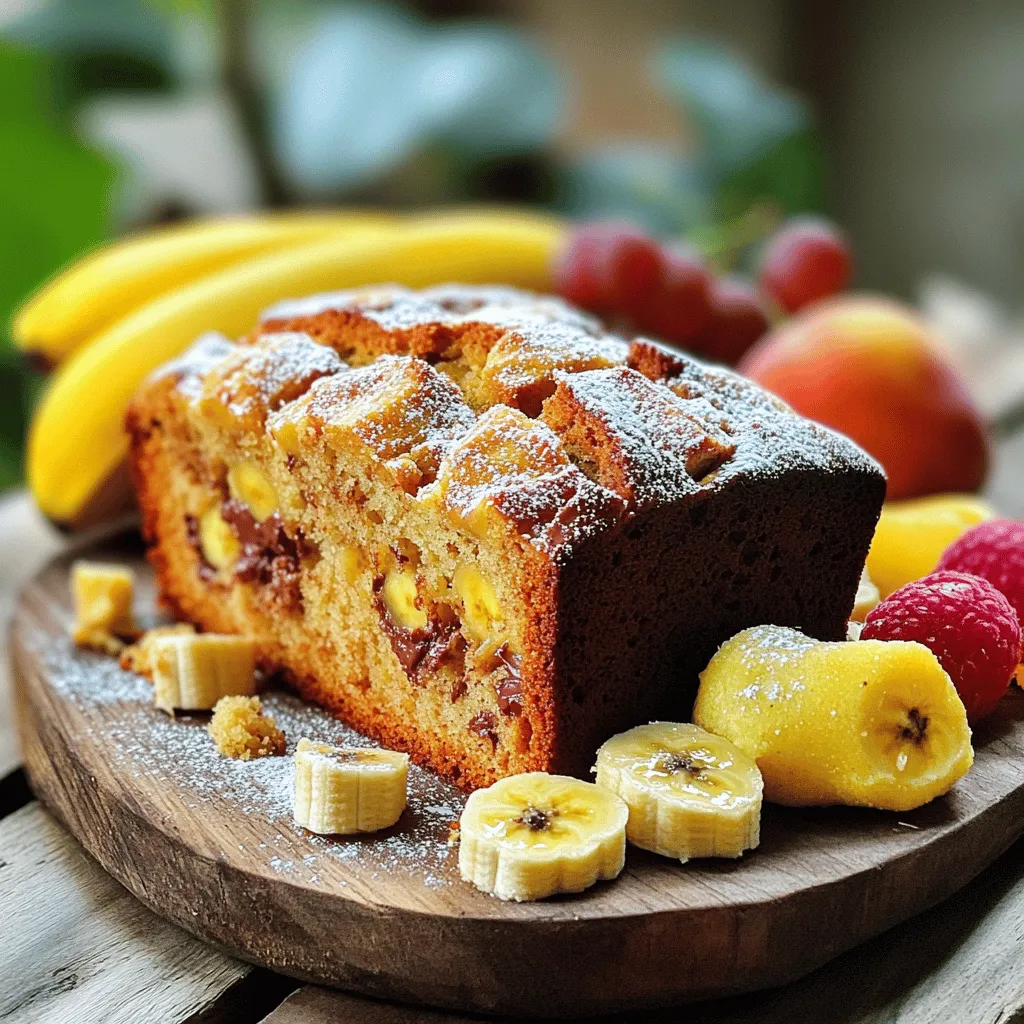
Are you ready to whip up a simple and tasty classic banana bread? This recipe is your guide to making

- 4 salmon fillets (approximately 6 ounces each) - 2 tablespoons extra-virgin olive oil - 2 tablespoons freshly squeezed lemon juice - 1 teaspoon freshly grated lemon zest - 3 cloves garlic, finely minced - 1 teaspoon dried oregano - 1 teaspoon dried thyme The main ingredients bring a clean, bright taste to your dish. Salmon fillets are rich and tender, making them perfect for this recipe. Olive oil and lemon juice create a fresh marinade that enhances the salmon’s flavor. Garlic adds depth, while oregano and thyme bring warmth. Together, these ingredients make a flavorful base. - 1 cup cherry tomatoes, halved - 1 cup asparagus spears, trimmed The vegetables add color and nutrition. Cherry tomatoes burst with sweetness and juice, balancing the dish. Asparagus spears give a nice crunch and earthy taste. They complement the salmon well and soak up the marinade flavors. - Sea salt and freshly ground black pepper to taste - Fresh parsley, finely chopped (for garnish) Seasoning is key for a tasty meal. Sea salt and black pepper bring out all the flavors in the dish. Fresh parsley adds a pop of color and a fresh note when you serve. This blend of seasonings ties everything together beautifully. For the full recipe, check out the [Full Recipe]. To start, you need to make the marinade. Gather these ingredients: - 2 tablespoons extra-virgin olive oil - 2 tablespoons freshly squeezed lemon juice - 1 teaspoon freshly grated lemon zest - 3 cloves garlic, finely minced - 1 teaspoon dried oregano - 1 teaspoon dried thyme - Sea salt and freshly ground black pepper to taste In a small bowl, mix the olive oil, lemon juice, lemon zest, garlic, oregano, thyme, salt, and pepper. Stir it well until everything blends together. This mixture adds zest and brightness to your salmon. Next, prepare your baking sheet. Line it with parchment paper for easy cleanup. Place the salmon fillets skin-side down. Make sure they fit nicely without crowding. Pour half of the marinade over the salmon. Let it soak in for flavor. Now, on the other side of the baking sheet, add the cherry tomatoes and asparagus spears. Drizzle the remaining marinade over these veggies. Toss them gently to coat each piece. Now, it’s time to bake! Preheat your oven to 400°F (200°C). Once it reaches the right temperature, put your baking sheet inside. Bake for 15 to 20 minutes. You’ll know it’s done when the salmon flakes easily with a fork and the veggies look vibrant and tender. After baking, take the pan out and let it rest for a couple of minutes. This step helps lock in flavors. You can check the full recipe if you want more details. To check if your salmon is done, look for its color. The fish should turn from bright pink to a lighter shade. You can also use a fork to flake it gently. If it separates easily, it's ready to eat. This texture shows that the fish is cooked but still moist. You can make this dish unique by changing the herbs or spices. Try adding dill, basil, or even a pinch of red pepper flakes for heat. You can also mix in vegetables like bell peppers or zucchini. These additions will bring new flavors to your plate. For a nice look, plate the salmon and veggies together. You can serve them right on the baking sheet for a rustic style. If you want something fancier, put them on individual plates. Don’t forget to sprinkle fresh parsley on top. A lemon wedge on the side adds a bright touch. These details make your meal feel special, even if it’s simple. {{image_4}} You can add couscous to the baking sheet. This gives a nice texture and flavor. To do this, simply cook the couscous as per the package instructions. Spread it on one side of the baking sheet with the salmon. The couscous soaks up the tasty juices from the salmon and veggies. It also makes the meal heartier and filling. You can mix in some lemon zest or herbs for extra flavor. Substituting asparagus with spinach is another great twist. Spinach cooks down quickly and adds a fresh taste. Just toss fresh spinach with the marinade before spreading it on the baking sheet. The spinach will wilt and soak up the lemony flavor. This variation is perfect for a quick dinner, keeping it light and healthy. You can even mix in some cherry tomatoes for color and sweetness. If you need a gluten-free meal, it's easy to adapt. Make sure all the ingredients you use are gluten-free. Most salmon and veggies are naturally gluten-free. Check the couscous package if you choose to add it. There are gluten-free options available. You can also try quinoa or rice as a substitute. These grains make the meal gluten-free while still being delicious. For the full recipe, check out the One-Pan Lemon Herb Salmon details above. Store leftover One-Pan Lemon Herb Salmon in an airtight container. Make sure to cool the salmon first. Place it in the fridge within two hours of cooking. This keeps it fresh and safe to eat. It’s best to eat leftovers within two to three days. If you have veggies left, store them separately to keep their texture. To freeze salmon, wrap each fillet tightly in plastic wrap. Then, place them in a freezer bag or container. Squeeze out as much air as possible. This prevents freezer burn. You can freeze the salmon for up to three months. To thaw, move the salmon to the fridge for about 12 hours. This slow thaw method keeps the fish moist. For reheating, the oven works best. Preheat it to 350°F (175°C). Place the salmon on a baking sheet and cover it loosely with foil. Heat for about 10-15 minutes. This helps keep the fish from drying out. You can also use the microwave. Heat in short bursts of 30 seconds. Check often to avoid overcooking. Enjoy your meal again! Bake your One-Pan Lemon Herb Salmon for 15 to 20 minutes at 400°F (200°C). The salmon should be opaque and flake easily with a fork. This time ensures the fish stays moist, while the veggies cook perfectly. Keep an eye on it, as every oven can be a bit different! Yes! You can use other types of fish like cod or tilapia. They cook well and absorb flavors nicely. Just adjust the cooking time a little. Thin fillets will need less time, while thicker ones may need a few extra minutes. To boost the flavor, try adding fresh herbs like dill or basil. You can also mix in a little chili flake for heat or a splash of soy sauce for depth. Marinating the fish longer will deepen the flavor too. Just remember, a little goes a long way! For more tips and the complete recipe, check out the Full Recipe. This blog post showed you how to make One-Pan Lemon Herb Salmon. You learned about the key ingredients like salmon, olive oil, and fresh herbs. I shared step-by-step instructions for marinating, baking, and serving the dish. You now have tips to ensure your salmon cooks perfectly, as well as ideas for variations. Remember, cooking can be fun! Experiment with flavors and make this meal your own. Enjoy your tasty dish, and share it with loved ones for a joyful dining experience.

One-Pan Lemon Herb Salmon Flavorful and Easy Meal

Looking for an easy, tasty meal? Try my One-Pan Lemon Herb Salmon! This dish combines tender salmon, fresh veggies, and

Older posts
Newer posts
← Previous Page1 … Page46 Page47 Page48 … Page91 Next →

dsad

© 2025 recipesstation • Built with GeneratePress

Our Policies

  • Copyright Policy
  • Cookie Policy
  • GDPR Policy
  • Privacy Policy
  • Disclaimer
  • Terms Of Use

More Information

  • Home
  • About
  • Contact
  • Appetizers
  • Dessert
  • Dinner
  • Drinks
©2025, recipesstation About Back To Top