Skip to content
DisclaimerTerms Of UseGDPR PolicyCookie Policy

recipesstation

  • Home
  • Drinks
  • Appetizers
  • Dinner
  • Dessert
  • About
  • Contact
  • Privacy Policy
DisclaimerTerms Of UseGDPR PolicyCookie Policy

Emily

To make Tuscan White Bean Soup, you need simple, fresh ingredients. Here’s what you’ll need: - 1 tablespoon extra virgin olive oil - 1 medium onion, finely diced - 2 cloves garlic, minced - 1 medium carrot, finely diced - 1 celery stalk, finely diced - 2 cups vegetable broth (low-sodium preferred) - 2 cans (15 oz each) white beans (cannellini or great northern), thoroughly rinsed and drained - 1 cup fresh kale or Swiss chard, roughly chopped - 1 teaspoon dried thyme - 1 teaspoon dried rosemary - Salt and freshly ground black pepper to taste - 1 tablespoon freshly squeezed lemon juice - Fresh parsley, chopped, for garnishing These ingredients create a rich and hearty soup. The beans provide protein, while the vegetables add texture and flavor. You can make your soup even better with some extra touches. Here are some optional garnishes and add-ins: - Crusty bread for dipping - Grated Parmesan cheese on top - A drizzle of olive oil for extra richness - A pinch of red pepper flakes for heat Feel free to mix and match these options. They can add new layers of taste and make the soup even more enjoyable. Choosing fresh ingredients can improve the soup's flavor. Here are some tips to help you pick the best: - Onion: Look for firm onions with dry, papery skin. Avoid any that feel soft. - Garlic: Choose bulbs that are heavy and firm. They should not have green shoots. - Carrots and Celery: Pick bright, firm vegetables. They should feel crisp and not bend easily. - Kale/Swiss Chard: Select vibrant, dark greens without any yellowing or wilting. - Beans: If using canned beans, go for brands with low sodium and no added sugar. Selecting the best ingredients makes a big difference in taste. Always look for fresh, high-quality items to ensure your soup shines. For the full recipe, check the details above. Start by heating 1 tablespoon of extra virgin olive oil in a large pot over medium heat. Once the oil shimmers, add 1 medium onion, finely diced. Cook the onion for about 5 minutes. Stir it occasionally until it turns soft and clear. Next, add 2 minced garlic cloves, 1 finely diced medium carrot, and 1 finely diced celery stalk. Cook these vegetables for 5 more minutes. You want them to soften nicely. Now, it's time to build the soup. Pour in 2 cups of low-sodium vegetable broth and bring the pot to a strong boil. Once it bubbles, lower the heat. Stir in 2 cans of thoroughly rinsed and drained white beans. I recommend using either cannellini or great northern beans. Add 1 teaspoon each of dried thyme and dried rosemary. Let the soup simmer for about 15 minutes. This step helps all the flavors blend together perfectly. After simmering, fold in 1 cup of roughly chopped fresh kale or Swiss chard. Cook for an extra 5 minutes until the greens wilt and brighten the soup. Before serving, season with salt and freshly ground black pepper. Add 1 tablespoon of freshly squeezed lemon juice to brighten the taste. Adjust the seasoning to your liking. Now, ladle the soup into bowls and garnish with freshly chopped parsley for a lovely finish. Enjoy your warm bowl of Tuscan White Bean Soup! For the complete instructions, check the Full Recipe. To boost flavor, use fresh herbs like parsley and thyme. They add depth. Dried herbs work well too. Just remember, dried herbs are stronger. Use half the amount. Lemon juice at the end brightens the soup. It adds a fresh zing that wakes up all the flavors. Texture is key for a great soup. Start with a nice onion and garlic base. Sauté them until soft. This builds a rich flavor. When adding beans, stir gently. You want them whole, not mushy. Adding greens like kale at the end keeps them vibrant. They should be tender but still bright. Avoid adding too much salt too early. Taste first before seasoning. Too much can ruin the soup. Don’t skip the lemon juice. It balances the beans and herbs. Lastly, let the soup simmer. This helps the flavors mix well. A quick boil may not create the same depth. For a full recipe, check the earlier section! {{image_4}} You can easily make this soup vegetarian or vegan. The base is already veggie-friendly. Just use vegetable broth, and you’re set. For vegans, skip any dairy products. You can add a splash of coconut milk for creaminess. This gives the soup a rich taste without losing its charm. If you want more protein, adding sausages or meats works great. Italian sausage adds a spicy kick. Just brown the sausage before adding other ingredients. For a milder taste, use chicken or turkey sausage. You can also add diced ham or cooked chicken. This makes the soup heartier and satisfying. Seasonal ingredients can change the soup's flavor. In spring, add fresh peas or asparagus. In summer, try zucchini or bell peppers. Fall is great for adding pumpkin or squash. These changes keep the soup fresh and fun. You can adjust the herbs too. Fresh basil or oregano can lift the flavors. For the full recipe, check out the complete instructions I provided earlier. After you make Tuscan White Bean Soup, let it cool. Once cool, transfer it to an airtight container. This keeps the soup fresh and tasty. Store it in the fridge for up to five days. To keep the flavors strong, avoid adding garnishes until you serve it. If you have extra soup, freezing is a good option. Use freezer-safe bags or containers. Leave some space for the soup to expand as it freezes. You can freeze Tuscan White Bean Soup for up to three months. When you are ready to eat, thaw it in the fridge overnight. To reheat the soup, use a pot on medium heat. Stir it often to warm it evenly. You can also use the microwave. Heat in short bursts, stirring in between. If the soup seems thick, add a splash of broth or water to reach your desired consistency. Enjoy your warm, comforting bowl! To make your soup creamy, try blending part of the beans. Use a blender to puree half of the soup. Then, stir it back in. This adds a rich texture without adding cream. You can also add a splash of non-dairy milk for extra creaminess. Yes, you can use dried beans! Start by soaking them overnight. Cook the soaked beans until tender before adding them to your soup. This may take longer, but the flavor is fantastic. Just remember to adjust the cooking time in the recipe for the beans to soften fully. Serve this soup with crusty bread for a perfect meal. A fresh salad also pairs well and adds crunch. For a more filling option, try a side of grilled vegetables. You can even enjoy it with a sprinkle of cheese on top for extra flavor. Tuscan White Bean Soup lasts about 3 to 5 days in the fridge. Store it in an airtight container to keep it fresh. If you want to save it longer, consider freezing it. Just thaw and reheat when you're ready to enjoy it again. For the full recipe, refer to the earlier section. This blog post shared how to make a tasty Tuscan White Bean Soup. We explored key ingredients, steps for cooking, and ways to enhance flavor. You learned about variations and how to store your soup. Remember, fresh ingredients make a big difference. Don't shy away from trying new add-ins. You can enjoy this dish in many ways, so get creative. Always taste as you go to make it perfect for you. Now, it’s time to make your own delicious soup and share it with friends and family.

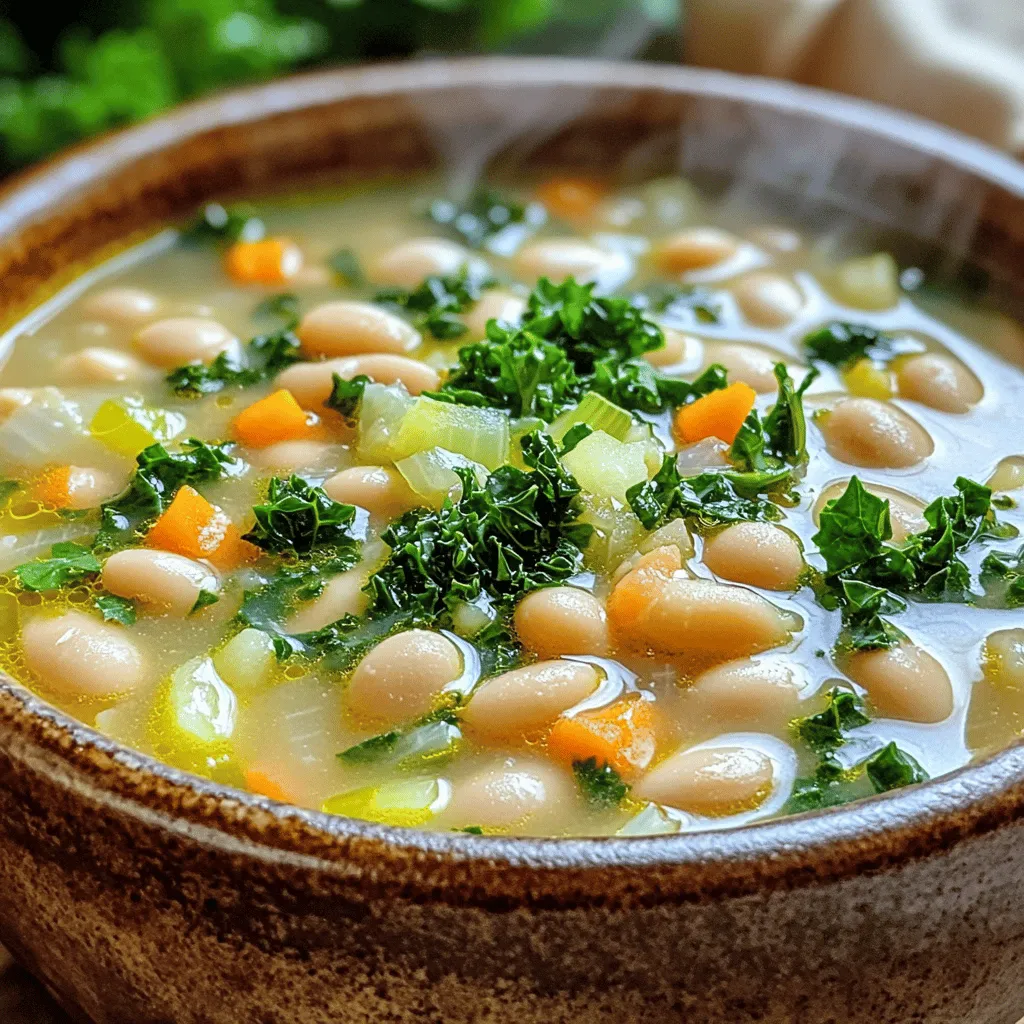
Tuscan White Bean Soup Flavorful and Simple Recipe

Are you ready to dive into a warm bowl of comfort? This Tuscan White Bean Soup is both flavorful and

- 1 cup unsalted butter, softened - 1 cup packed brown sugar - 1/2 cup granulated sugar - 2 large eggs - 2 teaspoons pure vanilla extract - 2 1/2 cups all-purpose flour - 1 teaspoon baking soda - 1/2 teaspoon fine sea salt - 1 cup chocolate chips - 1 cup mini marshmallows - 1/2 cup graham cracker crumbs - 9x13-inch baking pan - Electric mixer - Mixing bowls When making S'mores Cookie Bars, use fresh ingredients for the best taste. Start with unsalted butter. It gives you control over salt levels. Brown sugar is key for moisture and richness. Granulated sugar adds sweetness and a nice crunch. Eggs help bind everything together. Pure vanilla extract gives a warm flavor that enhances the bars. You also need all-purpose flour for structure. Baking soda helps them rise, making them soft. Fine sea salt balances sweetness. Chocolate chips add that gooey goodness. Mini marshmallows provide that classic s'mores taste, while graham cracker crumbs give a crunchy layer. Having the right tools is important too. A 9x13-inch baking pan is perfect for even baking. An electric mixer saves time and makes creaming easy. Mixing bowls help keep your workspace organized. For the full recipe, check the details above. Enjoy making this treat! - Preheat oven to 350°F (175°C). - Grease the baking pan with butter or cooking spray. - In a large bowl, cream together butter and both sugars. - Add eggs one at a time, then stir in vanilla extract. - In another bowl, combine flour, baking soda, and sea salt. - Take half of the cookie dough and spread it in the pan. - Sprinkle graham cracker crumbs over the dough layer. - Add the reserved chocolate chips and mini marshmallows on top. - Spread the remaining dough over the filling, letting some peek through. - Top with extra graham cracker crumbs for added crunch. - Bake for 25-30 minutes until edges are golden brown. - Check if the center feels set but soft to the touch. For the complete recipe, you can refer to the Full Recipe section. To make the best s'mores cookie bars, avoid overmixing the dough. When you mix too much, the bars become tough. Mix just until the ingredients come together. This keeps your bars soft and chewy. Also, ensure even baking. If your oven has hot spots, rotate the pan halfway through baking. This helps all sides bake evenly. Look for golden edges and a soft center. Serve these bars warm for a gooey experience. The chocolate and marshmallows melt in your mouth. You can add extra toppings for a decadent flair. Try drizzling warm chocolate sauce on top. You can also sprinkle more mini marshmallows for fun. Let the bars cool for at least 15 minutes before cutting. This will help them set. Use a sharp knife for clean squares. A clean cut makes for nice-looking pieces. You can serve them warm or at room temperature. Enjoy your s'mores cookie bars with family and friends! For more details, check the Full Recipe. {{image_4}} You can easily change up the flavor of your s'mores cookie bars. One simple swap is to use dark chocolate chips instead of milk chocolate. Dark chocolate adds a rich, bold taste that pairs perfectly with the sweet marshmallows. If you want a fun twist, add peanut butter to the cookie dough. Just mix in half a cup of creamy peanut butter with your butter and sugars. It adds a nutty flavor that kids and adults love! If you need a gluten-free option, you can use gluten-free flour instead of all-purpose flour. This keeps the bars just as tasty without the gluten. For a vegan version, swap out the butter for coconut oil and use flax eggs instead of regular eggs. To make a flax egg, mix one tablespoon of ground flaxseed with three tablespoons of water. Let it sit for a few minutes until it thickens. These changes let everyone enjoy this sweet treat! You can make your s'mores bars fit any season or holiday. For Halloween, add crushed candy corn on top for a spooky touch. For Christmas, mix in some peppermint extract or crushed candy canes for a festive flavor. In the summer, try adding fresh berries for a burst of fruit. Get creative and have fun with seasonal ingredients! Check out the Full Recipe for more ideas. To keep your s'mores cookie bars fresh, store them at room temperature. Place them in an airtight container. This helps them stay soft and delicious. If it's warm, cover them with plastic wrap. You can also refrigerate them to extend freshness. Just make sure to wrap them well to prevent drying out. Want to save some for later? You can freeze your s'mores cookie bars. Cut them into squares and wrap each one in plastic wrap. Then place them in a freezer bag. They keep well for up to three months. To enjoy again, thaw them in the fridge overnight. For a warm treat, you can reheat them in the oven at 350°F for about 10 minutes. When stored properly, s'mores cookie bars can last up to a week at room temperature. If you refrigerate them, they can last about two weeks. Freezing extends their life to three months. Just remember, the fresher they are, the better they taste. Enjoy them while they’re soft and gooey for the best experience! Look for golden brown edges and a set center. The top should look slightly shiny. If you press it gently, it should feel soft but not mushy. This means they are ready to come out! Yes, you can! Make the bars and let them cool completely. Cut them into squares and store in an airtight container. They stay fresh for up to three days. You can also freeze them for later use. Just thaw them before serving. You can use cookie crumbs or crushed pretzels. If you want a gluten-free option, try almond flour or gluten-free cookies. These give a nice flavor and texture to your bars. Absolutely! Use unsweetened applesauce, mashed bananas, or a flaxseed mixture. For the flaxseed, mix one tablespoon of ground flaxseed with three tablespoons of water. Let it sit for five minutes before adding it to your mix. Yes, they are safe to eat for about three days at room temperature. Keep them in an airtight container to maintain freshness. If you see any mold or strange smells, it’s best to discard them. Enjoy the Full Recipe for these delicious treats! In this article, we covered the essential ingredients for making delicious s'mores cookie bars. We walked through the step-by-step process, provided tips for perfect texture, and explored fun variations. Remember, proper storage helps keep your treats fresh. Experiment with flavors and enjoy the gooey goodness! These bars are perfect for any occasion and will surely please everyone. Enjoy baking them and have fun sharing with friends!

S’mores Cookie Bars Irresistible Sweet Treat Delight

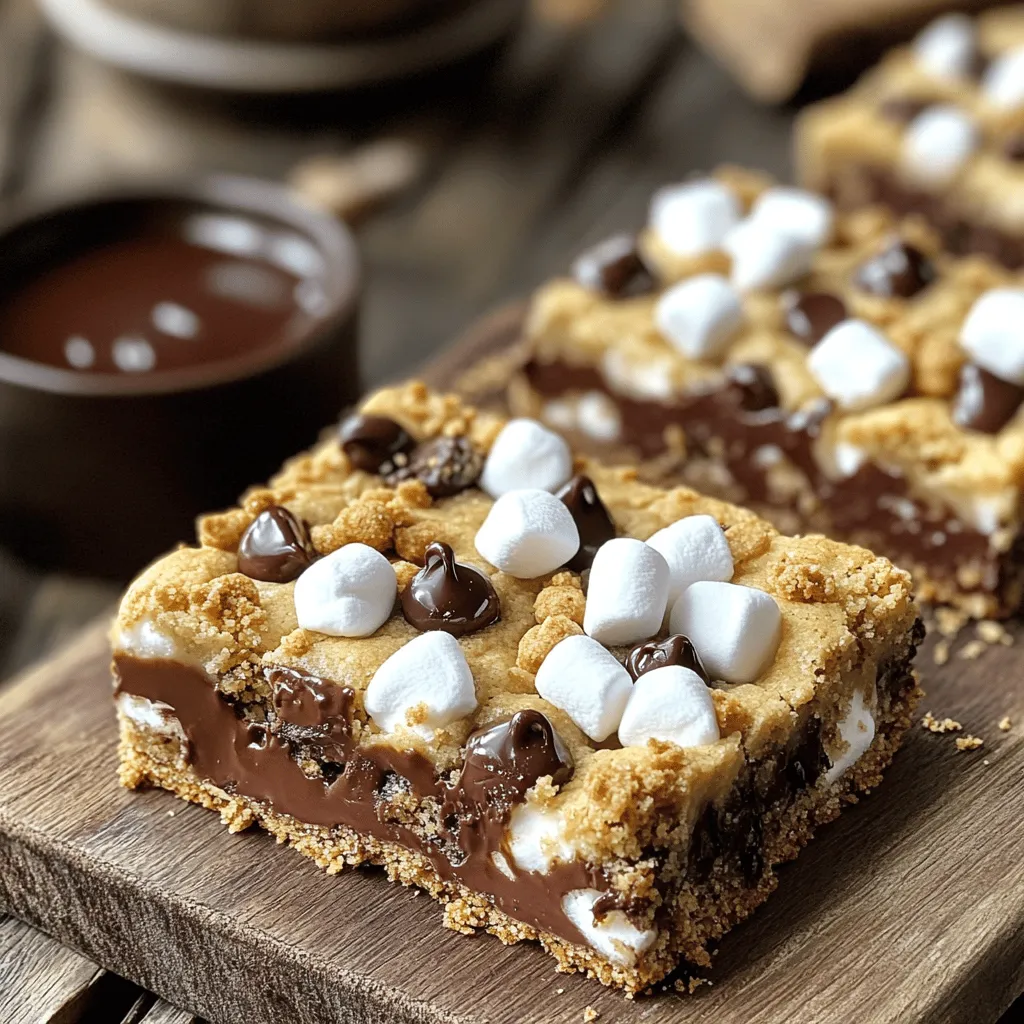
Get ready to dive into a sweet adventure with my S’mores Cookie Bars! These bars combine gooey chocolate, fluffy marshmallows,

- 1 cup frozen spinach - 1 cup canned artichoke hearts - 1 cup cream cheese - 1/2 cup sour cream - 1/2 cup mayonnaise - 1 cup shredded mozzarella cheese - 1/2 cup grated Parmesan cheese - 2 cloves garlic - 1/2 teaspoon onion powder - 1/2 teaspoon red pepper flakes (optional) - Salt and black pepper to taste The main ingredients create a rich and creamy dip. First, I use frozen spinach. It’s easy to find and quick to prepare. Thaw it and drain excess water before mixing. Next, I choose canned artichoke hearts. They add a nice texture and flavor. Cream cheese forms the base of the dip. It makes the dip thick and creamy. Adding sour cream and mayonnaise gives it extra richness. I use shredded mozzarella for its meltiness. It makes the dip gooey and indulgent. Grated Parmesan adds a sharp flavor that balances the creaminess. Minced garlic gives the dip a wonderful aroma. A bit of onion powder adds depth. I often sprinkle in red pepper flakes for a touch of heat. Finally, I season with salt and black pepper to taste. You can adjust these to your liking. - Variations for dairy-free options - Suggested spices for extra flavor - Additional ingredients for more texture For those who want to customize, you can make it dairy-free. Try using cashew cream or silken tofu for creaminess. For more spice, add cayenne pepper or smoked paprika. You can also mix in chopped jalapeños for a kick. If you want more texture, consider adding diced bell peppers or roasted red peppers. They add color and crunch. You might even try some cooked chicken or crab for protein. This dip is versatile and can fit many tastes. For the full recipe, check out the complete guide. - Begin by preheating your oven to 350°F (175°C). - Thaw and drain spinach completely. Remove all excess water to keep the dip thick. - In a bowl, combine cream cheese, sour cream, and mayonnaise. - Use a mixer or spatula to achieve a smooth texture. This step is key for a creamy dip. - Fold in the chopped artichoke hearts and spinach. Mix them well into the creamy base. - Add half of the mozzarella cheese, onion powder, and a pinch of salt and pepper. Stir until everything is creamy and well mixed. - Transfer the mixture to a medium baking dish. Spread it evenly with a spatula. - Sprinkle the remaining mozzarella cheese on top for that golden finish. - Bake for 25-30 minutes. Check for doneness when the dip is hot and the cheese is bubbly. Enjoy this dip warm with your favorite dippables! For the full recipe, check out the detailed instructions. To avoid a watery texture, ensure you drain the spinach well. Squeeze out any extra water with your hands. For creaminess, check your cheese consistency. Cream cheese and sour cream should be soft. If they are too cold, your dip may not mix well. For the best dippables, try toasted baguette slices or crunchy tortilla chips. Fresh veggies like carrot sticks or celery add a nice crunch. To make your dip look fancy, garnish it with chopped parsley or extra red pepper flakes. This adds color and a bit of flair. After serving, let the dip cool for a bit. Store it in an airtight container. This keeps it fresh longer. When reheating, use the oven at 350°F (175°C) for about 15 minutes. This ensures it warms evenly and retains its creamy texture. {{image_4}} If you want a dairy-free version, try cashew cream. Soak raw cashews in water for a few hours. Blend them with a bit of water until smooth. Use this in place of cream cheese. You can also add a splash of lemon juice for a brighter flavor. Make sure to check the taste and add more salt if needed. For a plant-based dip, use the cashew cream mentioned above. You can also swap sour cream with coconut yogurt. This will keep it creamy and add a nice touch. Nutritional yeast gives a cheesy flavor without dairy. Try to blend in a bit of garlic powder for an extra kick. Want to make it heartier? Add cooked chicken or shrimp. Shred the chicken into bite-sized pieces. For shrimp, make sure they are cooked and chopped. If you add protein, adjust your baking time to ensure it heats through. Serve with a sprinkle of fresh herbs for a nice look. To keep your Spinach Artichoke Dip fresh, store it in an airtight container. Let it cool completely before sealing. This dip lasts about 3 to 5 days in the fridge. Make sure to check for any signs of spoilage, like an off smell or mold, before enjoying leftovers. You can freeze this dip for up to 3 months. To do this, place the cooled dip in a freezer-safe container. Leave some space at the top for expansion. When you're ready to use it, thaw the dip overnight in the fridge. Reheat it in the oven at 350°F (175°C) until hot, about 20 minutes. For best results, cover the dish with foil to keep it moist. Don’t let leftover dip go to waste! Here are some fun ideas: - Pasta: Stir it into cooked pasta for a creamy dish. - Stuffed Peppers: Use it as a filling for bell peppers, then bake until tender. - Pizza: Spread it on pizza dough as a sauce before adding toppings. These ideas help you enjoy every last bit of your delicious Spinach Artichoke Dip. For the full recipe, check out the details above. You can store Spinach Artichoke Dip in the fridge for about three to four days. It stays tasty if you keep it in an airtight container. Just make sure it cools down before you put it away. Yes, you can make this dip ahead of time! Prepare the dip and place it in a baking dish. Cover it tightly with plastic wrap and store it in the fridge. When you're ready to serve, just bake it for about 30 minutes. This way, you save time when guests arrive. If you need a substitute for cream cheese, there are several options. You can use Greek yogurt for a tangy twist. Silken tofu is a great dairy-free choice. Another option is cashew cream for a rich and creamy flavor. Each choice will give a different taste, so pick one you like! While Spinach Artichoke Dip is best served warm, you can serve it cold if you prefer. The flavors will still be good, but the texture will change. Cold dip is creamy but less gooey. If you go this route, consider adding some fresh herbs for a fresh taste. We've explored the recipe for a tasty Spinach Artichoke Dip. I covered the key ingredients, step-by-step instructions, and helpful tips. Customization options let you add your favorite flavors and toppings. Proper storage keeps your leftovers fresh. I hope you find joy in making this dip and sharing it with others. Enjoy your cooking and happy dipping!

Spinach Artichoke Dip Creamy and Flavorful Delight

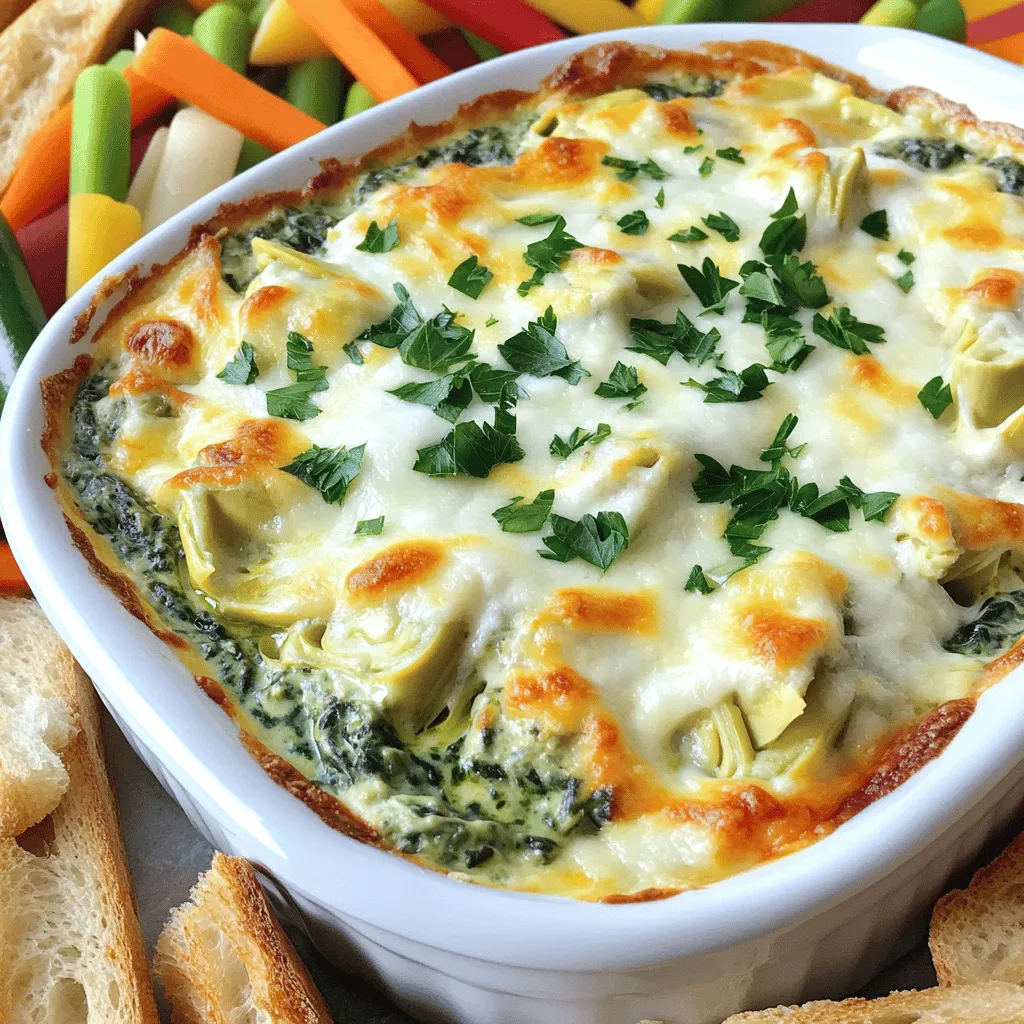
Get ready to satisfy your cravings with my creamy and flavorful Spinach Artichoke Dip! This crowd-pleasing appetizer is not just

To make Quick Garlic Parmesan Knots, you’ll need these simple ingredients: - 1 pack of refrigerated pizza dough (16 oz) - 3 tablespoons unsalted butter, melted - 4 cloves garlic, finely minced - 1/4 cup freshly grated Parmesan cheese - 1 teaspoon dried Italian herb blend (oregano, basil, thyme) - 1/2 teaspoon fine sea salt - 1/4 teaspoon freshly ground black pepper - Fresh parsley, finely chopped (for garnish) These ingredients come together to create a tasty snack everyone will love. The pizza dough serves as the base for these knots, giving them their soft and chewy texture. The garlic and butter mix adds rich flavor. Parmesan gives a nice cheesy touch, while the herbs bring freshness to each bite. Feel free to experiment with different cheese or herbs you may have on hand. Cooking should be fun and should reflect your tastes! Check out the Full Recipe for all the steps to create these yummy knots. First, preheat your oven to 400°F (200°C). This ensures your knots bake evenly. Next, prepare a baking sheet by lining it with parchment paper. This will keep the knots from sticking. Then, lightly flour a clean surface. Unroll the pizza dough and use a knife to cut it into strips. Each strip should be about 1 inch wide. To form the knots, take one dough strip and create a loop. Wrap the ends around the loop. Tuck the ends underneath to hold the shape. Place each knot on the baking sheet, leaving about 2 inches between them. This space allows them to puff up nicely while baking. In a small bowl, combine melted butter, minced garlic, dried herbs, salt, and black pepper. Stir well until mixed. This garlic butter will add great flavor to your knots. Use a pastry brush to coat each knot generously with this mixture. Make sure each knot gets plenty of the buttery goodness. Now, sprinkle grated Parmesan cheese evenly over the knots. This adds a delicious cheesy layer. Bake them in the preheated oven for 12 to 15 minutes. Keep an eye on them until they puff up and turn golden brown. When they come out, brush any leftover garlic butter over the warm knots. For a fresh touch, sprinkle with finely chopped parsley. Serve the garlic knots warm for the best taste. To ensure even baking, space the knots well on the sheet. Give them room to puff up. If they touch, they may bake unevenly. Keep an eye on them, especially near the end of baking. You want a golden brown color, not burnt spots. Avoid soggy knots by not overloading them with garlic butter. While the flavor is key, too much moisture can create a soggy texture. Brush them lightly, and save any leftover butter for later. This keeps the knots crisp and delicious. For a flavor boost, try adding red pepper flakes. They give a nice kick without overpowering the garlic. You can also mix in some grated cheese with the garlic butter for extra richness. Using fresh herbs is always a winner, but dried herbs work too. Fresh parsley adds brightness, while dried Italian herbs bring depth. When you use fresh, chop them finely to release their oils. This maximizes flavor in every bite. Make your garlic knots look amazing by arranging them on a rustic wooden board. This adds charm and warmth to your serving. For a pop of color, sprinkle some fresh parsley on top. Dipping sauces make the meal fun. Serve with marinara or a creamy ranch. You can even offer a spicy aioli for those who like heat. A small bowl with extra grated Parmesan can also make a lovely touch. For the full recipe, check out the detailed instructions provided earlier. Enjoy creating this tasty snack! {{image_4}} You can switch up the cheese in your garlic knots. While Parmesan shines, try mozzarella for a gooey pull. Feta adds a tangy kick, and cheddar gives a rich flavor. Mixing cheeses is fun! Combine mozzarella and cheddar for a tasty blend. You can even sprinkle some blue cheese for a bold twist. The type of cheese you use can change the whole taste. Want to spice things up? Add crushed red pepper for some heat. A hint of honey can bring a sweet touch. You might enjoy fresh herbs like rosemary or thyme too. Basil adds freshness, while dill gives a new taste. Don't hesitate to mix and match flavors. Each batch can be unique and exciting. If you’re short on pizza dough, don’t worry! Try using biscuit dough for a fluffy twist. Puff pastry makes them light and flaky. For a healthier option, whole wheat dough works great. If you need gluten-free, look for ready-made gluten-free dough. It’s easy to find in stores today. Each dough choice gives a special flavor and texture to the knots. Check out the Full Recipe for more details! To keep your garlic knots fresh, store them in an airtight container. This helps prevent them from drying out. If you have a lot, you can wrap them in plastic wrap and then place them in the container. They will last in the fridge for about 2 to 3 days. If you want to enjoy them later, consider freezing them. When it's time to reheat, you want to keep them crispy. The best method is to use an oven. Preheat the oven to 350°F (175°C). Place the knots on a baking sheet and heat them for about 10 minutes. This will help them regain their crispy texture. Avoid using a microwave, as it can make them soggy. To keep the flavor intact, brush them lightly with olive oil or a bit of melted butter before reheating. This will enhance the taste and keep them delicious. For even more flavor, sprinkle some extra Parmesan on top before reheating. You can find the Full Recipe for these tasty knots in the earlier sections. You can make garlic knots using homemade dough. Start with flour, yeast, water, and salt. Mix them well and knead the dough until smooth. Let it rise until it doubles in size. Once ready, roll it out and cut it into strips. Shape the strips into knots and coat them with garlic butter. Yes, you can freeze garlic Parmesan knots. To freeze, place the knots on a baking sheet and freeze them until solid. Then, transfer them to a freezer bag. When ready to eat, thaw them in the fridge overnight. You can bake them directly from the freezer for about 5 extra minutes. Garlic knots pair well with many dips. Here are some tasty options: - Marinara sauce - Ranch dressing - Alfredo sauce - Garlic butter - Pesto These dips enhance the flavor and make for a great snack experience. You learned how to make delicious garlic knots from start to finish. With simple steps and a few ingredients, you can create a tasty treat. Remember to use fresh herbs for the best flavor. Storing leftovers properly keeps them fresh. Reheating tips help maintain their crispiness. Enjoy experimenting with different flavors and variations to make these knots your own. Now, gather your ingredients, and let’s get cooking!

Quick Garlic Parmesan Knots Tasty Snack Recipe

Looking for a quick and tasty snack? You’re in the right place! My Quick Garlic Parmesan Knots are simple to

- 2 cups shredded cooked chicken - 1 can (10 oz) enchilada sauce - 1 can (15 oz) black beans, drained and rinsed - 1 cup corn kernels (can be fresh, frozen, or canned) - 2 cups shredded cheese (a blend of cheddar and Monterey Jack) - 8 corn tortillas, cut into quarters - Fresh cilantro - Sour cream - Additional spices or toppings Gathering the right ingredients is key to a great chicken enchilada casserole. I love using shredded cooked chicken. It saves time and adds great flavor. Enchilada sauce gives the dish its signature taste. I recommend using a can so you can save time. Black beans add protein and fiber. They work well in this dish. Corn kernels make everything sweeter and add texture. For cheese, I often use a blend of cheddar and Monterey Jack. This mix melts beautifully and adds richness. Corn tortillas are the base of the casserole. Cutting them into quarters helps with layering. For a fresh touch, you can use optional cilantro. It adds color and flavor. Sour cream is perfect for serving on top. You can also get creative with spices if you want more kick. For the full recipe, check out the delightful chicken enchilada casserole. Start by preheating your oven to 350°F (175°C). This step is key. Preheating helps the casserole cook evenly. If you skip this, your dish may not bake well. In a large bowl, combine the shredded chicken and half of the enchilada sauce. Then add the black beans, corn, and chopped onion. Season with garlic powder, cumin, chili powder, salt, and pepper. Mix well to ensure all flavors blend together. This makes every bite tasty. Pour a thin layer of the remaining enchilada sauce into a 9x13 inch baking dish. Spread it evenly across the bottom. This layer keeps the casserole from sticking. It also adds more flavor to the base. Start with half of the quartered tortillas. Place them evenly over the sauce in the baking dish. Next, spread half of the chicken mixture over the tortillas. Then, sprinkle one-third of the cheese on top. This order helps flavors mix well. Cover the dish with aluminum foil. This keeps moisture in while baking. Bake for 25 minutes, then remove the foil. Bake for another 15 minutes until the cheese is bubbly and golden. This timing gives you the perfect cheesiness. Enjoy making the Easy Chicken Enchilada Casserole! For the full recipe, check the sections above. Using cooked chicken is key for this recipe. It saves time and ensures even cooking. I recommend using rotisserie chicken. It adds great flavor and is easy to shred. For enchilada sauce, I suggest brands like Old El Paso or Hatch. They offer a nice balance of spice and flavor. Pair your casserole with a simple side salad or tortilla chips. A refreshing drink like iced tea or lemonade complements it well. To elevate the presentation, garnish each serving with fresh cilantro. A dollop of sour cream adds creaminess and looks inviting. If your casserole turns out dry, try adding more enchilada sauce. You can also mix in some broth to keep it moist. For spice levels, taste the filling before baking. You can add more chili powder or cumin if you want a kick. {{image_4}} You can easily make this dish vegetarian. Just swap the chicken for beans or tofu. Black beans work great, but you can also use pinto or kidney beans. Tofu adds a nice texture. For sauce, you can pick a green enchilada sauce or even a homemade version. Mixing up the cheese can change the taste. Try pepper jack for a spicy kick or queso fresco for a milder flavor. You can also add bell peppers or jalapeños for extra crunch and heat. Sauté them first to bring out their sweetness. If you need gluten-free options, look for corn tortillas labeled as gluten-free. You can also use cauliflower tortillas for a low-carb choice. Another option is to use zucchini slices instead of tortillas for a fresh twist. After your meal, let the casserole cool to room temperature. Then, cover it tightly. You can use plastic wrap or a lid for this. Store it in the fridge for up to three days. Make sure to check for any signs of spoilage before eating. If you see mold or it smells bad, throw it away. To freeze portions, first, cut the casserole into squares. Place each square in a freezer-safe container or bag. Label them with the date. This way, you'll know what you have later. You can freeze it for up to three months. When you're ready to eat, take a square out and thaw it in the fridge overnight. For reheating, you can use the oven or microwave. If using the oven, preheat it to 350°F. Heat the casserole for about 20 minutes or until warm. If you use the microwave, heat it in short bursts. Stir and check often to avoid hot spots. For even better taste, add a bit more cheese before reheating! This keeps the dish creamy and delicious. Enjoy your Easy Chicken Enchilada Casserole again with these simple storage tips. For the full recipe, check above. The Easy Chicken Enchilada Casserole lasts about three to four days in the fridge. Make sure to store it in an airtight container. This keeps it fresh and safe to eat. If it looks or smells off, toss it out. Yes, you can make the casserole ahead of time. Prepare it the night before and store it in the fridge. Just cover it well to keep it fresh. When you are ready to bake, add a few extra minutes to the cooking time. You can use flour tortillas if you prefer. They work just as well and add a different taste. Another option is to use tortilla chips for a crunchy texture. Just layer them carefully for best results. Covering the casserole with foil while baking helps keep it moist. It also prevents the cheese from burning too quickly. Remove the foil for the last few minutes to get that nice, bubbly top. This blog post covered everything you need for an Easy Chicken Enchilada Casserole. From required ingredients like chicken and cheese to step-by-step instructions, I made it simple. You learned tips for perfect layers and serving ideas that impress. Don’t forget to try some tasty variations for special diets or flavors. Enjoy the process and have fun with leftovers. This dish is versatile, making it perfect for any meal. Now, get cooking and savor your delicious creation!

Easy Chicken Enchilada Casserole Quick and Tasty Meal

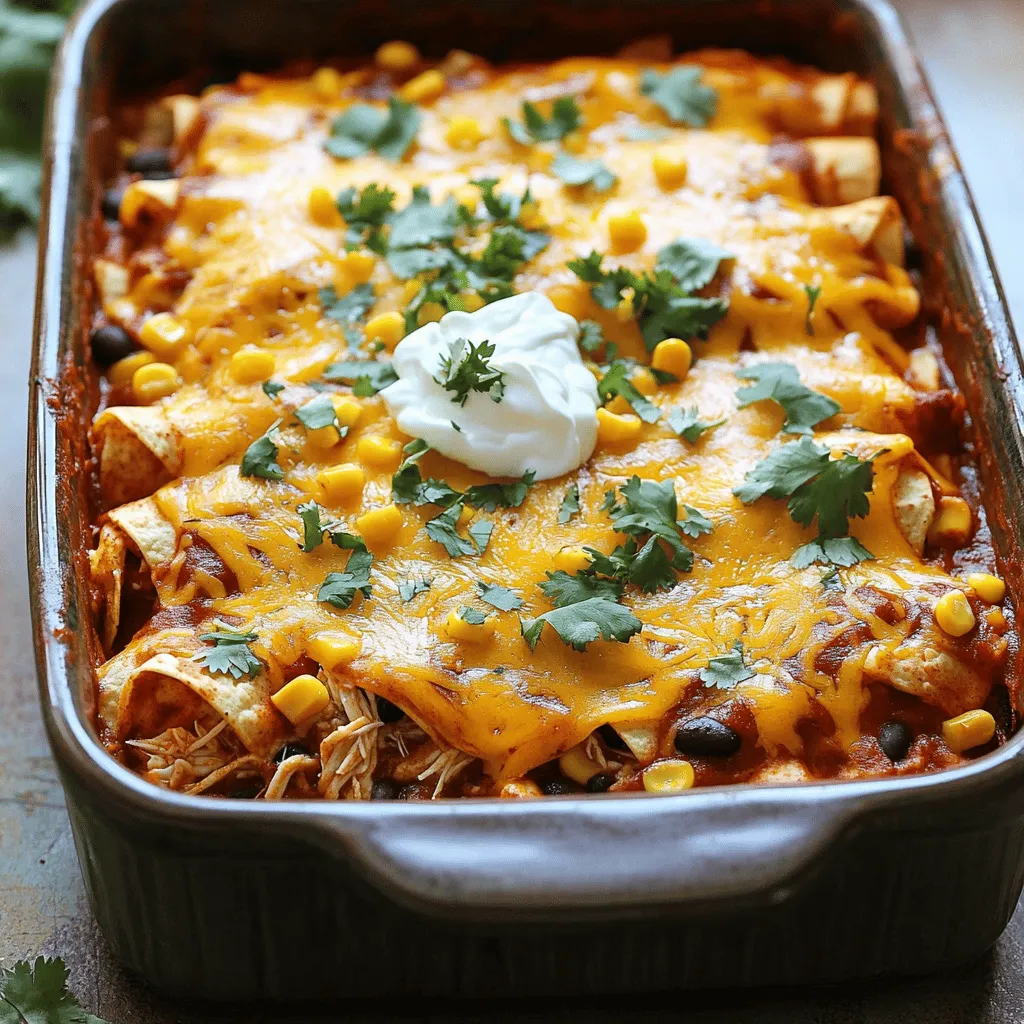
Looking for a quick and tasty dinner option? Try my Easy Chicken Enchilada Casserole! This dish combines shredded chicken, flavorful

- 1 large head of broccoli, cut into bite-sized florets - 4 cloves of garlic, finely minced - 2 tablespoons extra virgin olive oil - Zest of 1 lemon, freshly grated - 2 tablespoons freshly squeezed lemon juice - 1 teaspoon red pepper flakes (adjust to taste) - Salt and freshly cracked black pepper, to taste - 2 tablespoons finely grated Parmesan cheese (optional) - Fresh parsley, chopped, for garnish The main ingredients create a bright, zesty taste. Broccoli gives a crunchy base, while garlic adds rich flavor. Olive oil helps everything roast well and adds a nice mouthfeel. Lemon zest and juice bring a fresh, tangy kick. Red pepper flakes offer a hint of heat, making the dish exciting. Optional ingredients like Parmesan cheese can deepen the taste. Fresh parsley not only looks nice but also adds a fresh pop. If you want, you can sprinkle a bit of salt and black pepper to enhance all the flavors. This recipe uses simple yet vibrant ingredients to make a dish that stands out. For the full recipe, check out the details provided earlier. - First, set your oven to 425°F (220°C). This high heat helps the broccoli roast well. - Next, cut the large head of broccoli into bite-sized florets. Make sure they are even in size. This helps them cook evenly. - In a large bowl, combine the broccoli florets with 4 minced garlic cloves. - Add 2 tablespoons of olive oil, the zest of 1 lemon, and 2 tablespoons of lemon juice. - Sprinkle in 1 teaspoon of red pepper flakes, along with salt and pepper to taste. - Toss everything together until the broccoli is well coated in this bright mixture. - Line a baking sheet with parchment paper for easy clean-up. - Spread the seasoned broccoli in a single layer on the sheet. Avoid crowding them for the best roast. - Roast in the preheated oven for 20-25 minutes. Halfway through, stir the broccoli for even cooking. - You want the florets to be tender with crispy edges. If using Parmesan cheese, sprinkle it on during the last 5 minutes of cooking. - When finished, remove from the oven and transfer to a platter. Garnish with chopped parsley before serving. This method gives you a delicious side dish that is quick and easy to make. You can find the Full Recipe for more details. To get the best roast, spread the broccoli in a single layer on the baking sheet. This step helps the heat reach each piece evenly. If the broccoli overlaps, some pieces may steam instead of roast. Keep an eye on the cooking time. If you want a softer texture, you can roast it longer. For a crispier bite, stick to the lower end of the recommended time. To boost the taste of your broccoli, consider adding extra seasonings. Try paprika for smokiness or lemon pepper for a zesty kick. Freshly grated ingredients make a big difference. Using fresh garlic and lemon zest gives a bright flavor that dried spices can’t match. For the best taste, always choose fresh over packaged options. Feel free to explore the [Full Recipe] for more details on how to make this dish. {{image_4}} You can boost this dish by adding a protein. Chicken or shrimp works well. For chicken, cut it into bite-sized pieces. Toss it with the broccoli in the mixing bowl. Make sure to cook longer, about 30 minutes, until the chicken is done. If using shrimp, add them halfway through roasting. This keeps them juicy and tender. Don't feel limited to just broccoli. You can use other vegetables too. Cauliflower, green beans, or Brussels sprouts are great choices. You could mix these with broccoli for a colorful dish. Just keep their cooking times in mind, so they all cook evenly. For a vegan twist, skip the cheese. Instead, try using nutritional yeast. It adds a cheesy flavor without dairy. You can also enhance the dish with more veggies or spices. This keeps it vibrant and full of taste. After you make Zesty Lemon Garlic Roasted Broccoli, let it cool down first. Once it's cool, place it in an airtight container. This keeps the broccoli fresh. In the fridge, it lasts for about three to four days. If you want to keep it longer, consider freezing it. To reheat the broccoli, use your oven or a skillet. The oven method maintains the crispy edges. Preheat your oven to 350°F (175°C). Place the broccoli on a baking sheet and warm it for about 10 minutes. If you use a skillet, heat it over medium heat. Stir it gently for a few minutes until warm. Avoid using the microwave, as it can make the broccoli soggy. Enjoy its zesty flavor again! For the full recipe, you can refer to the earlier sections. Roast broccoli for 20-25 minutes at 425°F (220°C). This time gives you tender florets with crispy edges. Stir the broccoli halfway through to ensure even cooking. Keep an eye on it; you want a nice char without burning. Yes, you can use frozen broccoli. However, you need to adjust the cooking time. Roast frozen broccoli for around 25-30 minutes. Make sure to spread it out on the baking sheet. This helps it cook evenly and avoid sogginess. You can pair this dish with many options. It works well as a side to grilled chicken or baked fish. For a vegetarian meal, serve it with quinoa or pasta. Add a light salad to complete the meal. Check out the Full Recipe for more ideas! This blog post guides you to make Zesty Lemon Garlic Roasted Broccoli. You learned how to select fresh ingredients like broccoli, garlic, and olive oil. I shared tips for roasting, enhancing flavor, and making variations. Remember, the right cooking time is key for the best texture. Feel free to add proteins or mix vegetables for your taste. Enjoy making this dish as a side or main course!

Zesty Lemon Garlic Roasted Broccoli Flavorful Delight

If you’re looking for a tasty side dish that’s both healthy and simple, you’ve found it! This Zesty Lemon Garlic

To make Maple Pecan Sticky Buns, you need: - 4 cups all-purpose flour - 1/4 cup granulated sugar - 2 tablespoons active dry yeast - 1 teaspoon salt - 1 cup warm milk (110°F/45°C) - 1/4 cup unsalted butter, melted - 2 large eggs - 1 teaspoon vanilla extract - 1 cup pecans, chopped - 1/2 cup brown sugar - 1/2 cup maple syrup - 1/4 cup unsalted butter, softened (for spreading) - 1 tablespoon ground cinnamon If you want to switch things up, consider these options: - Use whole wheat flour instead of all-purpose flour. - Coconut sugar can replace granulated sugar for a healthier choice. - For a dairy-free version, use almond milk in place of regular milk. - Coconut oil can work well as a substitute for butter. Choosing fresh ingredients is key to great taste. Here’s how: - Pecans: Look for pecans with a rich, nutty smell. They should be firm and not stale. - Yeast: Check the expiration date on the package. Fresh yeast will foam when activated with warm milk. - Flour: Ensure your flour is stored in a cool, dry place. It should be free from lumps or moisture. By picking the best ingredients, you set the stage for a delicious treat. For the full recipe, click here. To start, we need to activate the yeast. In a large mixing bowl, combine warm milk, granulated sugar, and active dry yeast. Let it sit for about 5 to 10 minutes. You will see bubbles forming on top. This means the yeast is ready. Next, in another bowl, whisk all-purpose flour and salt together. Create a well in the center of the flour. Pour in the yeast mixture, melted butter, eggs, and vanilla extract. Mix with a wooden spoon until you form a sticky dough. Now, we need to knead the dough. Transfer it to a floured surface. Knead for about 5 to 7 minutes. The dough should become smooth and elastic. If it sticks to your hands, add a bit more flour. After kneading, place the dough in a large bowl coated with oil. Cover it with a clean kitchen towel. Let the dough rise in a warm place for 1 to 2 hours. You want it to double in size. A warm environment helps the dough rise properly. While the dough rises, we prepare the sticky topping. In a small saucepan, melt softened butter, brown sugar, and maple syrup over low heat. Stir until smooth. Remove from heat and mix in chopped pecans. Once the dough has risen, gently punch it down. Roll it out on a floured surface into a rectangle about 14x10 inches. Spread softened butter over the rolled dough. Then, sprinkle the brown sugar and cinnamon evenly on top. Starting from one end, tightly roll the dough into a log. Use a sharp knife to cut the log into 12 equal slices. Place the sliced rolls cut-side up in your greased baking dish over the sticky topping. Cover the dish with a towel and let the rolls rise for another 30 to 45 minutes. This proofing helps them get fluffy. Now, preheat your oven to 350°F (175°C). Once the rolls have risen, it's time to bake them. Bake for 25 to 30 minutes, until they are golden brown. To check if they are done, look for a rich golden color. You can also tap the top lightly. If it sounds hollow, they are ready. Enjoy the delicious aroma filling your kitchen! For the full recipe, see above. - Preventing over-proofing and under-baking: Over-proofing can cause your sticky buns to be too airy. Keep an eye on the dough. It should double in size, but do not let it sit too long. Under-baking leads to doughy centers. Bake until golden brown and firm to the touch. - Correctly measuring ingredients: Accurate measuring is key. Use a kitchen scale for flour and sugar when possible. For liquid ingredients, use a clear measuring cup. Too much flour can make your dough dry. Too little liquid can lead to dense buns. - Adding spices or additional toppings: For extra flavor, try adding a pinch of nutmeg or cardamom to the dough. You can also mix in chocolate chips or dried fruits. These little tweaks can create a unique twist on your sticky buns. - Recommendations for serving and presentation: Serve your sticky buns warm. Dust them with powdered sugar or drizzle with more maple syrup right before serving. This adds a beautiful touch and enhances their sweetness. - Essential kitchen tools for baking: You will need a mixing bowl, rolling pin, and sharp knife. A kitchen scale can help with measuring. A baking dish, preferably glass or ceramic, works best for even baking. - Recommended baking dishes for best results: Use a 9x13 inch baking dish for perfect sticky buns. Glass or ceramic dishes help achieve a golden crust. If you use metal, check them a few minutes early to avoid over-baking. {{image_4}} You can switch nuts in your sticky buns. Walnuts work great instead of pecans. They add a rich, earthy flavor. If you want something fun, try adding chocolate chips. They melt and create a sweet surprise inside. Mix them with the nuts for a tasty twist. Seasonal fruits or spices can change the taste of your buns. In fall, add apples or pears for a fruity flair. Cinnamon and nutmeg also add warmth. For winter holidays, include cranberries or orange zest. These flavors make your buns festive and bright. Maple pecan sticky buns pair well with coffee or tea. A warm drink balances the sweetness. You can also serve them as dessert after a meal. They taste great any time of day. Enjoy them warm for the best flavor. For the full recipe, visit the recipe section. To keep your sticky buns fresh, use an airtight container. This keeps moisture in. If you want them to last longer, store them in the fridge. They can stay good for up to a week. However, if you prefer them warm, keep them at room temperature for a day. Just make sure they are covered well so they don’t dry out. When you’re ready to enjoy leftovers, there are easy ways to reheat them. The best method is the oven. Preheat it to 350°F (175°C). Wrap each sticky bun in foil. Heat for about 10 minutes. This keeps them soft. You can also use a microwave. Just heat for 15-20 seconds. But watch out! Microwaving can make them soggy. If you want to save sticky buns for later, freezing works great. First, let them cool completely. Then, wrap each bun tightly in plastic wrap. Place them in a freezer-safe bag. They can last for up to three months frozen. To enjoy later, take them out and thaw overnight in the fridge. You can reheat them after that. This way, you get the same fresh taste as when they were baked! For the complete recipe, check the Full Recipe section above. Sticky buns and cinnamon rolls look similar but taste different. Sticky buns have a sweet, gooey topping made from maple syrup and brown sugar. The pecans add a nice crunch. Cinnamon rolls focus on the sweet cinnamon filling, often without a sticky topping. Both are delicious but offer unique flavors and textures. Yes, you can make these sticky buns ahead of time. You can prepare the dough and let it rise overnight in the fridge. Just cover it well to keep it fresh. In the morning, shape the buns and let them rise again before baking. This saves time and makes breakfast easy! Look for a golden brown color on top. The edges should be firm, and the center should feel soft but set. For a precise check, use a thermometer. The internal temperature should reach 190°F (88°C). This ensures your buns are baked perfectly. Absolutely! You can use gluten-free flour blends in place of all-purpose flour. Look for blends that contain xanthan gum for better texture. Popular choices include almond flour or a gluten-free all-purpose mix. Adjust the liquid slightly as needed, since gluten-free flours can absorb more moisture. For the full recipe, check out the link provided! You now have all the tools to make delicious maple pecan sticky buns. We covered ingredients, step-by-step instructions, and common mistakes. This recipe allows for substitutions and variations, making it adaptable. Baking can be simple and fun. Enjoy experimenting with flavors, and don’t forget to store your leftovers properly. Remember, practice makes perfect. Trust your skills as you create a delightful treat for yourself and others. Happy baking!

Maple Pecan Sticky Buns Irresistible Morning Treat

If you’re craving a sweet morning boost, you’re in the right place! Maple Pecan Sticky Buns are not just a

- 2 medium zucchinis, grated - 1 teaspoon salt - 1 cup all-purpose flour - 1/2 cup finely grated Parmesan cheese - 2 large eggs, lightly beaten - 1/4 cup fresh parsley, chopped - 1/2 teaspoon garlic powder - 1/4 teaspoon freshly ground black pepper - Olive oil for frying These ingredients make the fritters tasty and crisp. The zucchinis give moisture and flavor. Salt draws out water from the zucchinis, which is key. - Sour cream or yogurt for serving You can serve your fritters with sour cream or yogurt. This adds a cool touch and balances the warm fritters. - Grater - Mixing bowls - Clean kitchen towel or cheesecloth - Large skillet - Spoon or spatula Having the right tools makes cooking easier. A grater helps with the zucchinis, while a skillet is perfect for frying. Start by grating two medium zucchinis into a bowl. Sprinkle them with one teaspoon of salt. Let the grated zucchini sit for ten minutes. This step helps pull out moisture. After ten minutes, take a clean towel and squeeze the zucchini to remove the extra liquid. The drier the zucchini, the crispier the fritters will be. In a large mixing bowl, combine the drained zucchini, one cup of all-purpose flour, and half a cup of grated Parmesan cheese. Next, add two lightly beaten eggs, a quarter cup of chopped parsley, half a teaspoon of garlic powder, and a quarter teaspoon of black pepper. Mix gently until all ingredients blend well. Be careful not to overmix; you want the fritters to stay light and fluffy. Heat enough olive oil in a large skillet to cover the bottom by about a quarter inch. Once the oil is hot, scoop a tablespoon of the zucchini mixture into your hands and flatten it into a patty. Place the fritter in the hot oil, making sure not to crowd the pan. Cook each fritter for about three to four minutes until golden brown. Flip and cook for another three to four minutes. Once done, place them on a paper towel to absorb any excess oil. You can find the full recipe for these delicious fritters in the recipe section above. To get crispy fritters, start by removing moisture from the zucchini. Grate the zucchinis and sprinkle them with salt. Let them sit for about 10 minutes to draw out water. Then, use a clean towel to squeeze out extra moisture. This helps keep the fritters crunchy. When mixing, avoid overmixing the batter. This keeps air inside, making the fritters lighter. Also, use hot olive oil for frying. If you have extra fritters, let them cool completely. Place them in an airtight container. You can store them in the fridge for up to three days. Make sure to layer them with paper towels to absorb any moisture. This helps keep them fresh and tasty. To reheat fritters, use a skillet for best results. Heat the skillet over medium heat with a little olive oil. Place the fritters in the skillet and cook for about 2-3 minutes on each side. This restores their crispiness. You can also use the oven. Preheat it to 350°F and bake for about 10 minutes. Enjoy them warm again! For the full recipe, check the details above. {{image_4}} You can make gluten-free zucchini fritters easily. Just swap the all-purpose flour for gluten-free flour. Many brands offer blends that work well in this recipe. You might also use almond flour or chickpea flour. Both add a unique flavor and texture. Want to boost the flavor? Add fresh herbs to your fritters. Try basil, dill, or cilantro. Each herb brings a different taste. Chop them finely and mix them in with the other ingredients. You can also add dried herbs if fresh ones aren't available. If you like heat, add some spice! Mix in red pepper flakes or finely chopped jalapeños. Start with a small amount and adjust to your taste. The spice will give your fritters a nice kick. Serve them with a cooling dip like yogurt or sour cream. For the full recipe, check out Zucchini Fritters Delight. After cooking, let the fritters cool down. Place them in an airtight container. They stay fresh for about 3 days in the fridge. If you want to keep them longer, consider freezing. To freeze zucchini fritters, first, cool them completely. Lay them flat on a baking sheet. Once frozen, transfer them to a freezer bag. They can last up to 3 months in the freezer. This method helps prevent the fritters from sticking together. When you are ready to enjoy the fritters again, reheat them in a skillet. Use medium heat and add a little olive oil. This keeps them crispy. You can also use an oven at 350°F for about 10-15 minutes. Avoid microwaving, as this can make them soggy. For the full recipe, you can refer back to the earlier sections. Enjoy your zucchini fritters! You will know your zucchini fritters are cooked when they turn golden brown. The edges will be crisp, and the center will feel firm. Use a spatula to gently lift a fritter. If it releases easily from the pan, it’s ready to flip. Cook each side for about 3-4 minutes. This will give you that delightful crunch. Yes, you can make zucchini fritters ahead of time. Prepare the batter and store it in the fridge for up to 24 hours. This will save you time later. You can also cook the fritters ahead of time. Let them cool, then store them in an airtight container in the fridge. Reheat them in the oven for best results. Zucchini fritters pair well with many sides. You can serve them with a dollop of sour cream or yogurt. A fresh salad also complements them nicely. For a special touch, try a tangy sauce like tzatziki. Feel free to get creative with dips and sides. You now have all you need to make delicious zucchini fritters. We covered essential and optional ingredients to boost flavor. You learned step-by-step how to prepare, mix, and cook the fritters. Plus, you discovered ways to achieve that perfect crispiness. Don’t forget to try fun variations like gluten-free or spicy fritters. Store any leftovers properly for later enjoyment. Get creative, enjoy every bite, and share your fritter success!

Zucchini Fritters Simple and Tasty Recipe

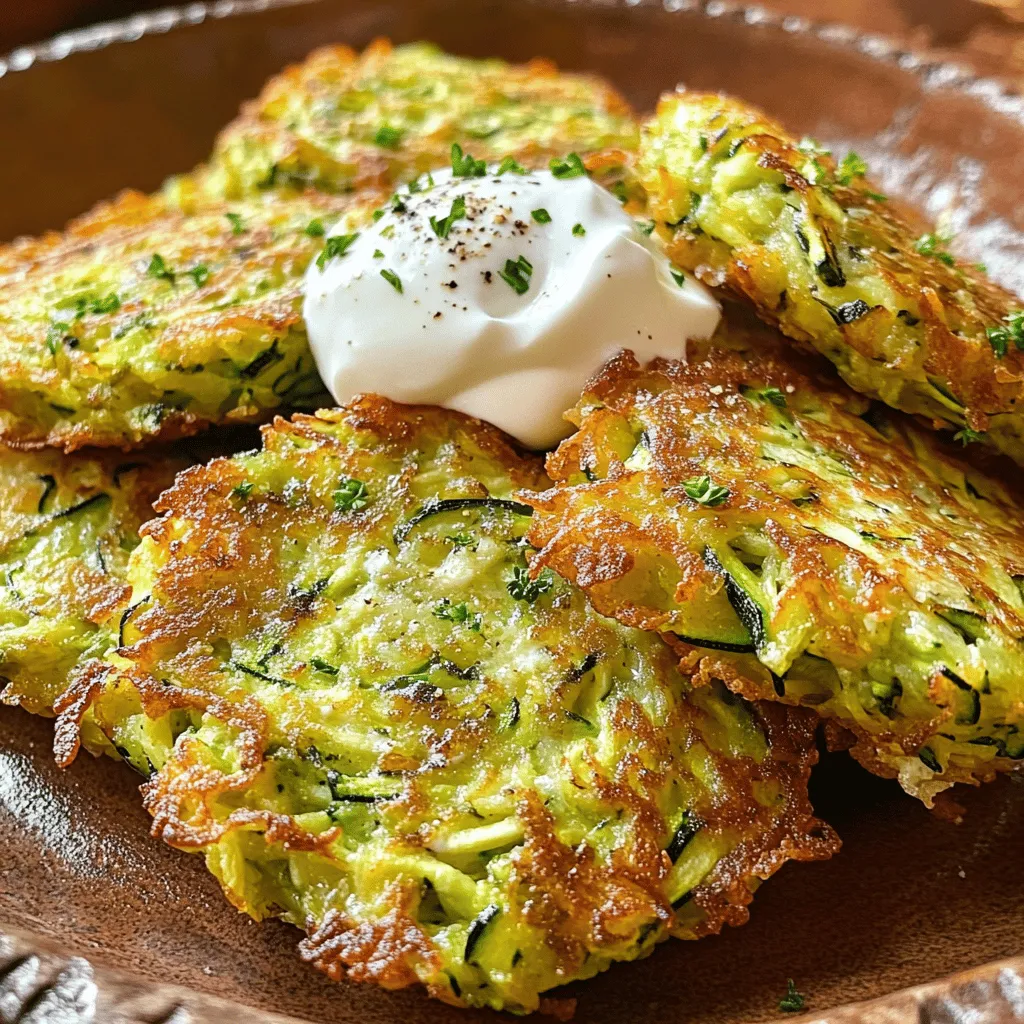
Craving a tasty snack that’s simple to whip up? Look no further than these zucchini fritters! They’re not just delicious;

- 3 ripe bananas, thoroughly mashed - 1/2 cup unsalted butter, gently melted - 3/4 cup packed brown sugar - 1 large egg, whisked until frothy - 1 teaspoon pure vanilla extract - 1 teaspoon baking soda - 1/4 teaspoon fine sea salt - 1 1/2 cups all-purpose flour, sifted - 1 cup semi-sweet chocolate chips - 1/2 cup chopped walnuts (optional, for added crunch) Gathering your ingredients is key to success. Use ripe bananas for a sweet taste. Choose unsalted butter for a balanced flavor. Brown sugar adds moisture and depth. The egg helps bind everything together. Vanilla extract brings warmth to the mix. Baking soda makes the bread rise. Sea salt enhances the sweet notes. Sift the flour to keep it light. Chocolate chips bring joy in every bite. Walnuts add a nice crunch but are optional. This mix of flavors and textures creates a delightful banana bread. Each ingredient plays an important role in achieving the perfect loaf. Check the Full Recipe for more details on how to combine these ingredients. 1. Preheat your oven to 350°F (175°C) and prepare a loaf pan. Lightly grease it with butter or non-stick spray. 2. Take a big bowl and combine the melted butter and mashed bananas. Mix them well until smooth. 3. Now, add the brown sugar to the banana mix. Next, stir in the whisked egg and vanilla extract. Blend until it looks uniform. 1. Sprinkle baking soda and salt on top of your mixture. Stir it gently. 2. Then, fold in the sifted all-purpose flour. Mix it until just combined. Don’t over-mix or your bread may turn out tough. 1. Add in the chocolate chips and walnuts if you want that crunch. Fold them in gently. 2. Pour the batter into the loaf pan and smooth the top with a spatula. 1. Place the loaf pan in your preheated oven and bake for 60-65 minutes. 2. Check if it’s ready by inserting a toothpick into the center. It should come out clean or with a few moist crumbs. 3. Once baked, cool the bread in the pan for about 10 minutes. Then, transfer it to a wire rack to cool completely. For the full recipe, check out the detailed instructions. Enjoy your baking! To get the best texture in your banana bread, avoid over-mixing the batter. When you mix too much, the bread can become tough. Just mix until you see no dry flour. Using ripe bananas also helps a lot. Ripe bananas are sweeter and softer, making your bread moist and tasty. For chocolate chips, semi-sweet is a great choice. They add just the right amount of sweetness. Dark chocolate is another option if you want a richer taste. I also suggest using mini chocolate chips. They spread out more and give you bites of chocolate in every slice. To make your banana bread look great, serve it warm with a little butter on top. A light dusting of powdered sugar adds a nice touch too. For an extra pop, garnish each slice with more chocolate chips and fresh banana slices. This simple step makes your dish both inviting and delicious. For the full recipe, check out the [Full Recipe]. {{image_4}} Adding nuts to your chocolate chip banana bread can bring a nice crunch. Chopped walnuts or pecans work well. You can also try almonds or hazelnuts for a different taste. Nuts not only add flavor but also boost the bread's texture. Feel free to mix and match the nuts you have at home. If you want a healthier option, consider using whole wheat flour. This will make your banana bread richer in nutrients. You can also use gluten-free flour if you need to avoid gluten. Almond flour or coconut flour can be great substitutes. Just keep in mind that these options may change the texture a bit, but they will still taste delicious. To elevate the flavor of your banana bread, try adding a pinch of cinnamon or nutmeg. These spices can add warmth and depth. You can also mix in some peanut butter or almond extract for a fun twist. Each of these enhancements adds a unique layer of flavor to your loaf, making it even more delightful. For the complete recipe, check out [Full Recipe]. To keep your chocolate chip banana bread fresh, store it in an airtight container. This helps retain moisture and flavor. Place it at room temperature for the best taste. Avoid putting it in the fridge, as this can dry it out. Freezing banana bread is easy! Wrap it tightly in plastic wrap or aluminum foil. You can also place it in a freezer-safe bag. This keeps air out and prevents freezer burn. To thaw, leave it at room temperature for a few hours or overnight. Reheat slices in the microwave for about 15-20 seconds. This makes the bread warm and delightful again. Enjoy your banana bread even longer with these simple steps! For the full recipe, click [Full Recipe]. Chocolate chip banana bread lasts about 3-4 days at room temperature. Store it in an airtight container. If you put it in the fridge, it can last up to a week. Just remember, cold air can dry it out. So, wrap it well if you go this route. Yes, you can substitute butter with coconut oil or applesauce. Coconut oil adds a nice flavor and keeps the bread moist. Applesauce is a great lower-fat option. Use the same amount of either to replace the butter in the recipe. You can make this recipe vegan with a few swaps. Use flaxseed meal mixed with water instead of the egg. For butter, use coconut oil or a vegan butter alternative. Lastly, make sure your chocolate chips are dairy-free. Yes, you can make mini loaves! Adjust the baking time to about 25-30 minutes. Check for doneness by inserting a toothpick. When it comes out clean, your mini loaves are ready. Absolutely! You can add dried fruits like raisins or cranberries. Chopped nuts like pecans or walnuts also work well. For a fun twist, mix in candy pieces like M&Ms or chopped chocolate bars. Just remember to adjust the baking time if you add a lot of extra ingredients. For the full recipe, check the link. This blog post covered how to make delicious chocolate chip banana bread. You learned about the key ingredients, step-by-step instructions, and helpful tips. Remember to pick ripe bananas for the best taste. You can also try different nuts or spices to suit your flavor. Storing your banana bread correctly keeps it fresh longer. With these tips, you can enjoy warm, tasty slices anytime. Your baking skills will shine, and everyone will love your banana bread!

Chocolate Chip Banana Bread Delightfully Simple Recipe

Dive into the warm, sweet world of Chocolate Chip Banana Bread! This delightfully simple recipe combines the rich taste of

To make my tasty stuffed bell peppers, you need simple and fresh items. Here’s what to gather: - 4 large bell peppers (choose your favorite colors) - 1 cup quinoa, thoroughly rinsed - 2 cups vegetable broth - 1 can (15 oz) black beans, well-drained and rinsed - 1 cup corn (fresh off the cob or frozen) - 1 cup diced tomatoes (canned or fresh work well) - 1 teaspoon ground cumin - 1 teaspoon chili powder - Salt and freshly cracked black pepper, to taste - 1 cup shredded cheese (sharp cheddar or your preferred blend) - 2 tablespoons olive oil - Fresh cilantro, chopped for garnish (optional) You can mix in extra flavors to make your stuffed peppers special. Here are some ideas: - Chopped onions or garlic for more taste. - Jalapeños for heat and spice. - Spinach or kale for a healthy boost. - Different cheeses like feta or mozzarella for variety. - Fresh herbs like parsley or basil for a bright finish. Each serving of stuffed bell peppers offers a good balance of nutrients. Here’s what you can expect: - Calories: Approximately 350 - Protein: 15g - Carbohydrates: 50g - Dietary Fiber: 12g - Fat: 10g This dish is a great way to eat healthy and enjoy flavor. You can feel good about what you serve! For the full recipe, check out the details above. Start by washing the bell peppers. Cut the tops off and remove the seeds. Use a small knife to make this easy. Brush the outside with olive oil. This adds flavor and helps them cook nicely. Set the peppers aside while you prepare the filling. In a medium pot, bring vegetable broth to a boil. Once boiling, add the rinsed quinoa. Lower the heat and cover. Let it cook for about 15 minutes. The quinoa will absorb the broth and become fluffy. In a bowl, mix the cooked quinoa with black beans, corn, and diced tomatoes. Add cumin, chili powder, salt, and pepper. Stir well to combine all the flavors. Preheat your oven to 375°F (190°C). Fill each bell pepper with the quinoa mixture. Pack it down gently so each pepper is full. Place the peppers in a baking dish upright. Cover the dish with aluminum foil and bake for 25 minutes. Remove the foil and sprinkle cheese on top. Bake for another 10 minutes until the cheese is melted and golden. Let the peppers cool a bit before serving. Garnish with cilantro for a fresh touch if you like. Enjoy your delicious stuffed bell peppers! For more details, check the Full Recipe. To cook quinoa well, first rinse it to remove bitter saponins. Use two cups of vegetable broth for every cup of quinoa. Bring the broth to a boil. Then, add the rinsed quinoa. Lower the heat to a simmer and cover it. Cook for about 15 minutes until fluffy. Fluff it with a fork when done. This adds air and makes it light. When picking bell peppers, look for shiny skin and firm flesh. Choose peppers that feel heavy for their size. Avoid any with soft spots or wrinkles. For a colorful dish, mix red, yellow, and green peppers. Each color has a unique flavor, adding depth to your meal. One common mistake is overcooking quinoa. It should be fluffy, not mushy. Another mistake is filling the peppers too loosely. Make sure to pack the filling gently. This helps the peppers hold their shape while baking. Finally, don’t skip the cheese topping! It adds a creamy layer that enhances the flavor. For a full recipe, check out the [Full Recipe]. {{image_4}} For a tasty vegetarian option, use beans and grains. I love using quinoa or rice. These grains add texture and flavor. Mix in veggies like zucchini, spinach, or mushrooms. You can also add spices to boost taste. Try using garlic or smoked paprika for depth. Top with cheese or a vegan alternative for a rich finish. This variation is satisfying and colorful. If you prefer meat, ground beef or turkey works great. Brown the meat before mixing it with your grains. You can also use sausage for a spicy kick. Add onions, garlic, or bell pepper pieces to the mix for extra flavor. This version is hearty and filling. Pair it with a fresh salad for balance. Think beyond rice and beans! You can use farro, barley, or couscous. Each grain brings a unique taste and texture. For added fun, try stuffing with lentils or chickpeas. These options pack in protein and fiber. Mix in fresh herbs like basil or parsley to brighten flavors. Experimenting with different fillings keeps the dish exciting. Check out the Full Recipe for more ideas! To keep your stuffed peppers fresh, let them cool first. Place them in an airtight container. You can store them in the fridge for up to three days. Make sure they are sealed well to prevent drying out. If you want to keep them longer, freezing is a great option. When you're ready to enjoy your leftovers, preheat the oven to 350°F (175°C). Place the peppers in a baking dish. You can add a splash of broth or water to keep them moist. Cover the dish with foil to trap steam. Heat for about 20 minutes or until hot. You can also use a microwave for faster reheating. Just heat them for two to three minutes, checking often. To freeze stuffed peppers, wrap each one tightly in plastic wrap. Then, place them in a freezer-safe bag. Make sure to remove as much air as possible. They can be frozen for up to three months. When you're ready to eat, thaw them in the fridge overnight. Then, reheat them in the oven or microwave. You’ll have a tasty meal ready in no time! For the complete recipe, refer to the Full Recipe. Yes, you can use different grains for stuffing your bell peppers. Some great options include brown rice, farro, or even couscous. Each grain brings its own taste and texture. For a nutty flavor, try farro. If you want a quick option, couscous cooks fast. Just remember to adjust the cooking time and liquid needed based on the grain you choose. This way, you can mix and match flavors to suit your taste. You can tell when the stuffed peppers are done by checking their color and texture. They should be soft but not mushy. The cheese on top should be melted and slightly golden. If you pierce a pepper with a fork, it should slide in with little resistance. Keep an eye on them in the oven, especially during the last few minutes. This will help you catch that perfect moment when they are ready to serve. Stuffed bell peppers pair well with several side dishes. Here are some tasty options: - A fresh green salad to add crunch. - Garlic bread for a nice, warm side. - Steamed vegetables for a health boost. - Rice or quinoa for added carbs. These sides will complement the flavors of your stuffed peppers nicely, making your meal more satisfying. For a twist, you can also drizzle some balsamic glaze over your salad or veggies for extra flavor. Stuffed bell peppers are a fun and tasty meal. We covered key ingredients, like quinoa and optional spices. You learned how to prep and bake your peppers for the best taste. I shared tips, like choosing fresh peppers and cooking quinoa well. You can try various fillings for your own twist. Lastly, I explained how to store and reheat leftovers. Enjoy making these tasty, healthy dishes for you and your family. They’re simple to create and fun to eat!

Stuffed Bell Peppers Easy and Flavorful Recipe

Welcome to my easy and flavorful stuffed bell peppers recipe! If you’re looking for a dish that’s both tasty and

Older posts
Newer posts
← Previous Page1 … Page48 Page49 Page50 … Page91 Next →

dsad

© 2025 recipesstation • Built with GeneratePress

Our Policies

  • Copyright Policy
  • Cookie Policy
  • GDPR Policy
  • Privacy Policy
  • Disclaimer
  • Terms Of Use

More Information

  • Home
  • About
  • Contact
  • Appetizers
  • Dessert
  • Dinner
  • Drinks
©2025, recipesstation About Back To Top