
One-Pan Lemon Herb Chicken and Rice Simple Delight
Looking for a simple yet tasty dinner? Dive into my One-Pan Lemon Herb Chicken and Rice recipe! This dish combines
Looking for a simple yet tasty dinner? Dive into my One-Pan Lemon Herb Chicken and Rice recipe! This dish combines
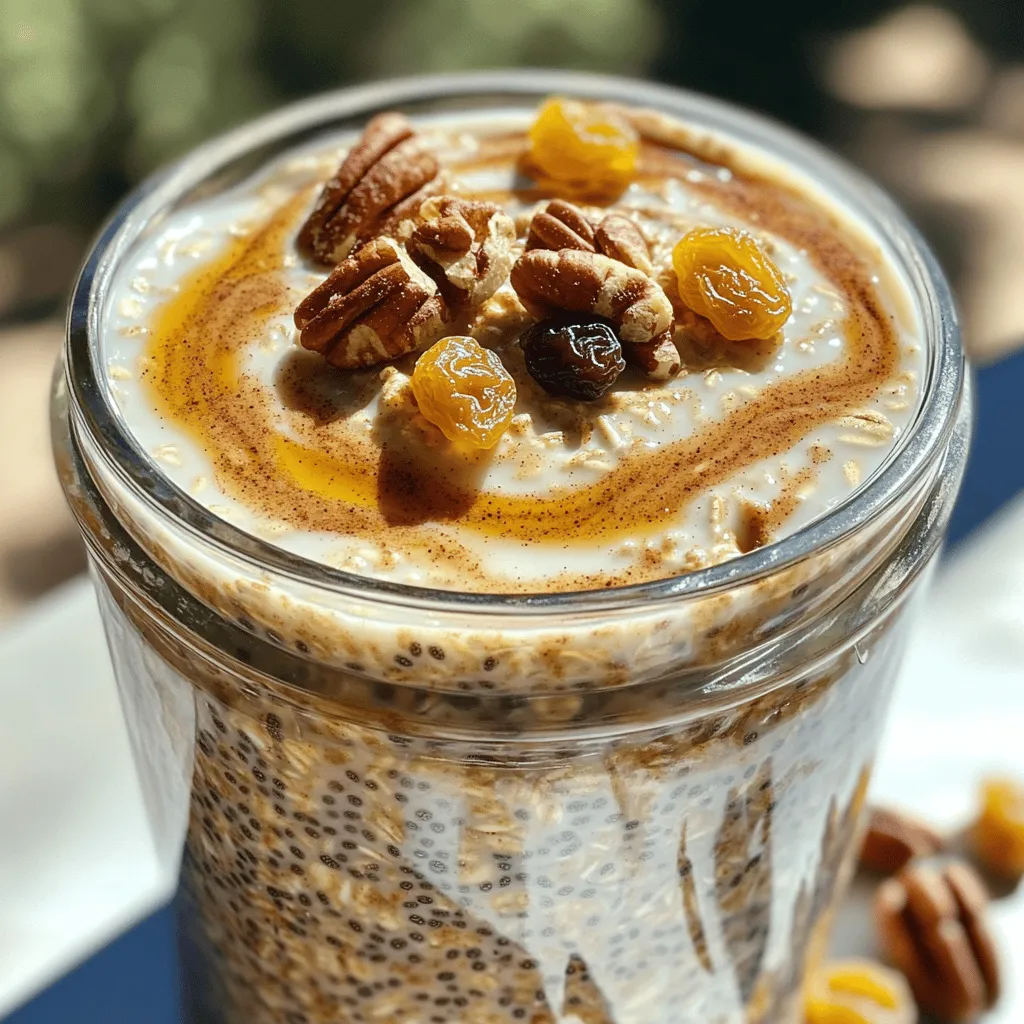
Are you looking for an easy breakfast that tastes like a treat? Cinnamon Roll Overnight Oats can turn your morning
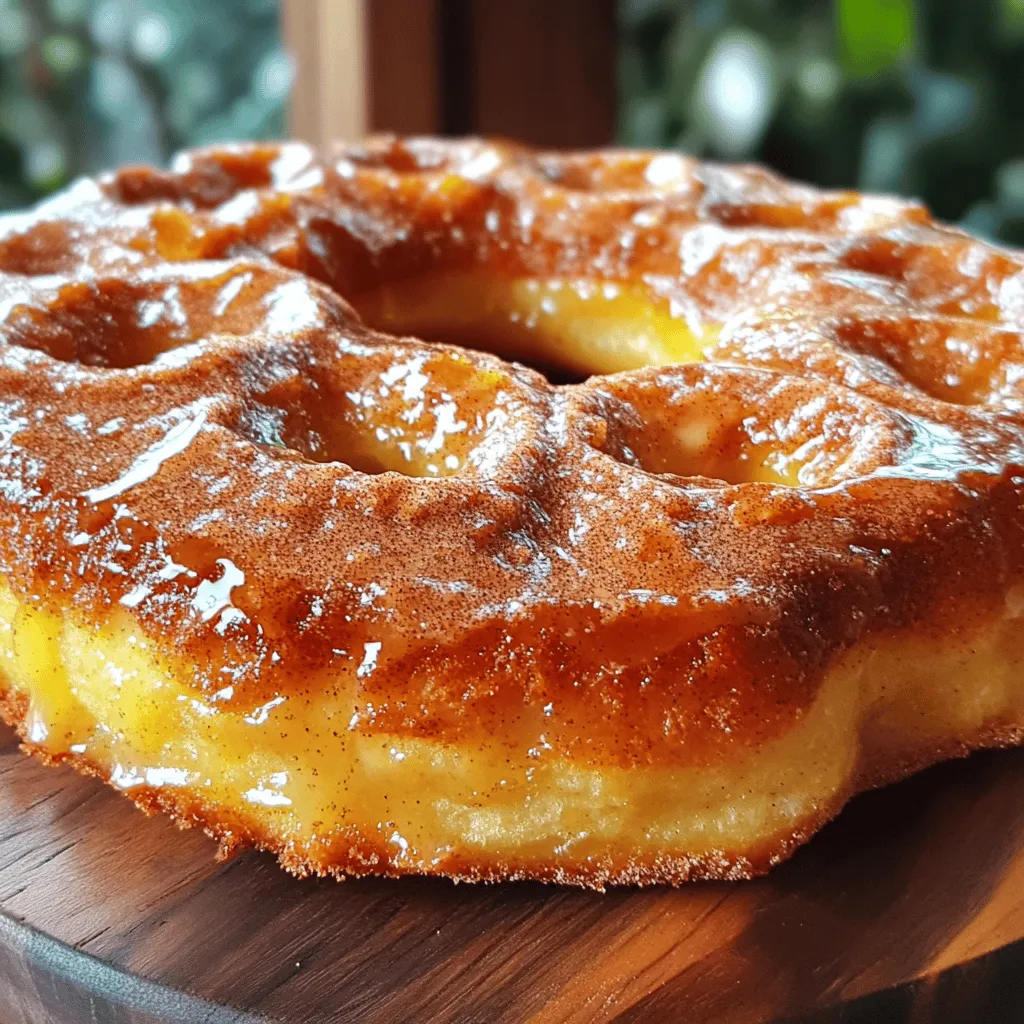
Craving something sweet and cozy? Let me introduce you to the Irresistible Apple Cider Donut Cake! This simple recipe is

Want to impress your friends and family with a simple treat? These cranberry orange scones with a zesty glaze are
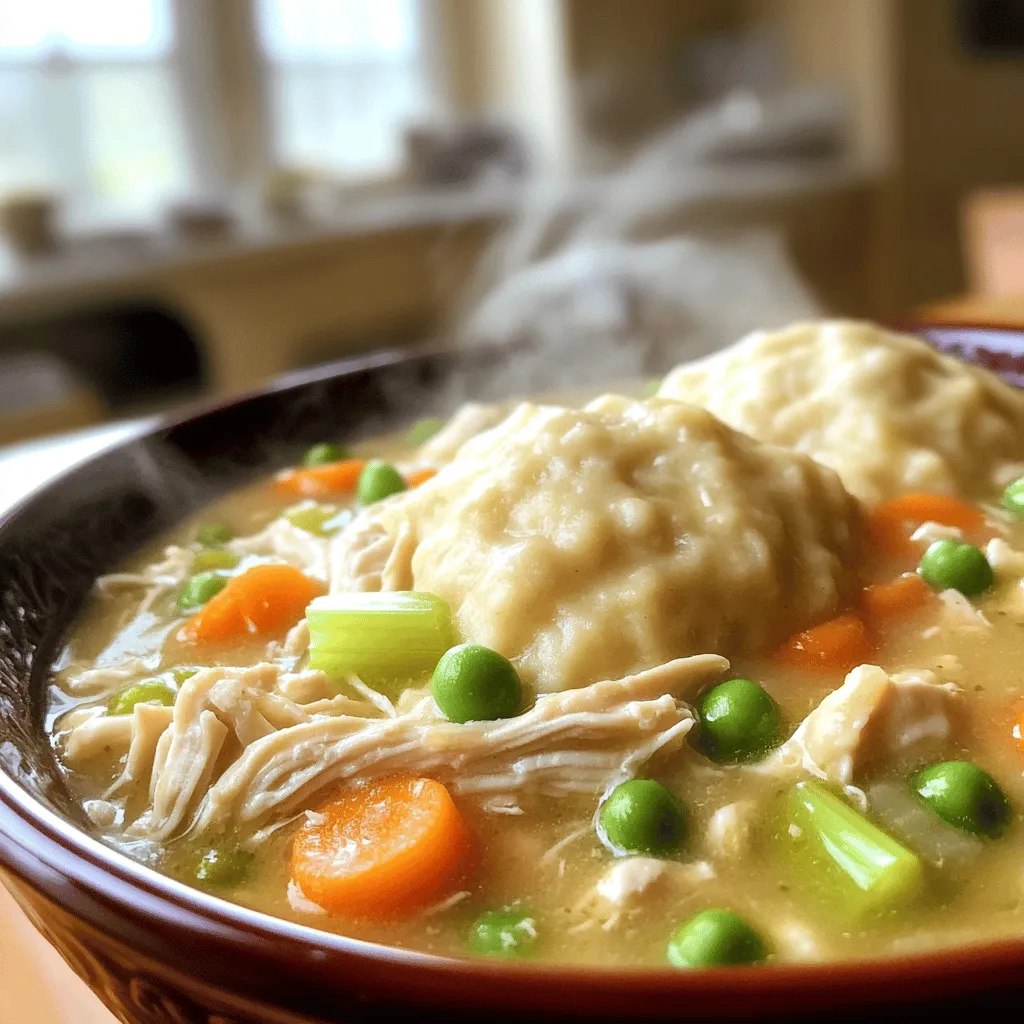
Get ready to warm up your kitchen with my Savory Slow Cooker Chicken and Dumplings recipe! This dish combines tender

Get ready to enjoy a sweet twist on two classic treats! Cinnamon Roll Apple Pie Cups combine the warmth of
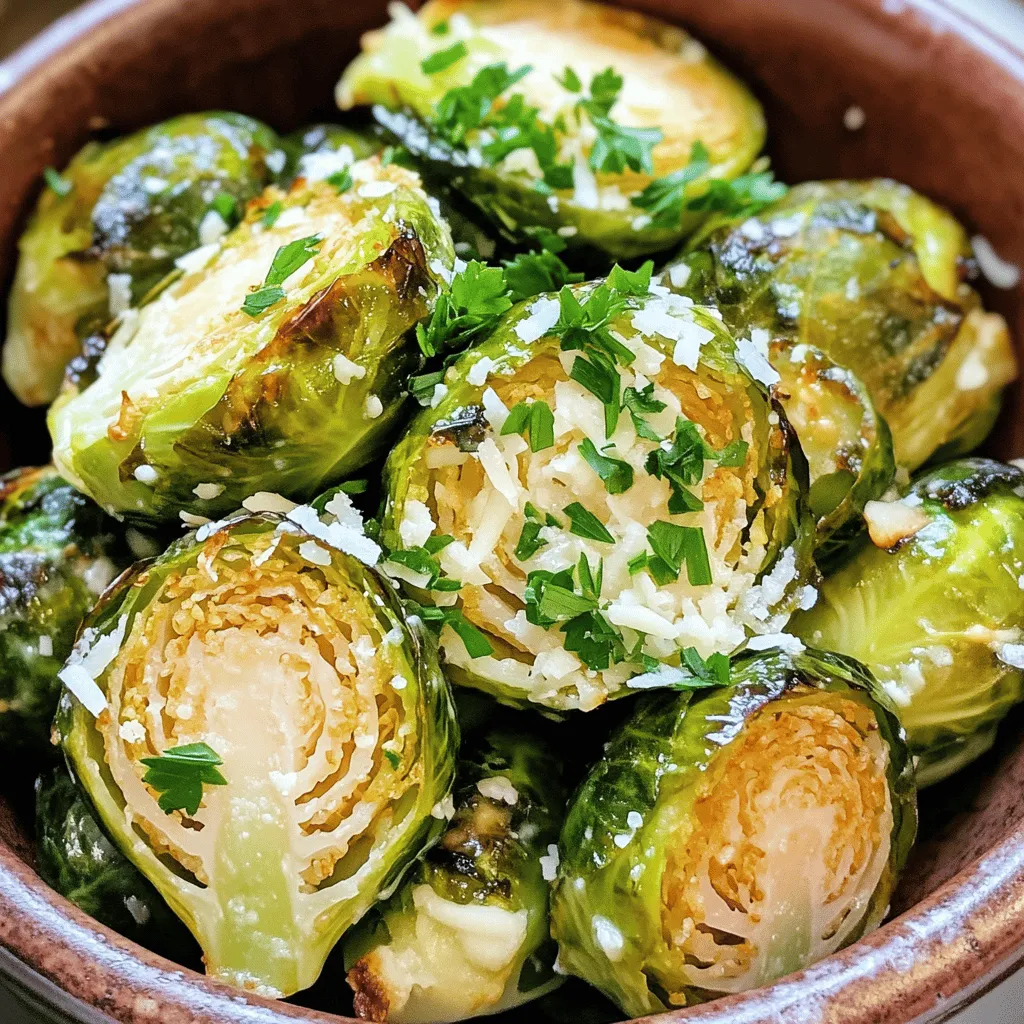
Love crispy veggies? You’ll adore Air Fryer Garlic Parmesan Brussels Sprouts! These tender bites are packed with flavor and come

Get ready for a fun, delicious treat this fall! My Pumpkin Cheesecake Truffles are creamy, sweet, and packed with pumpkin
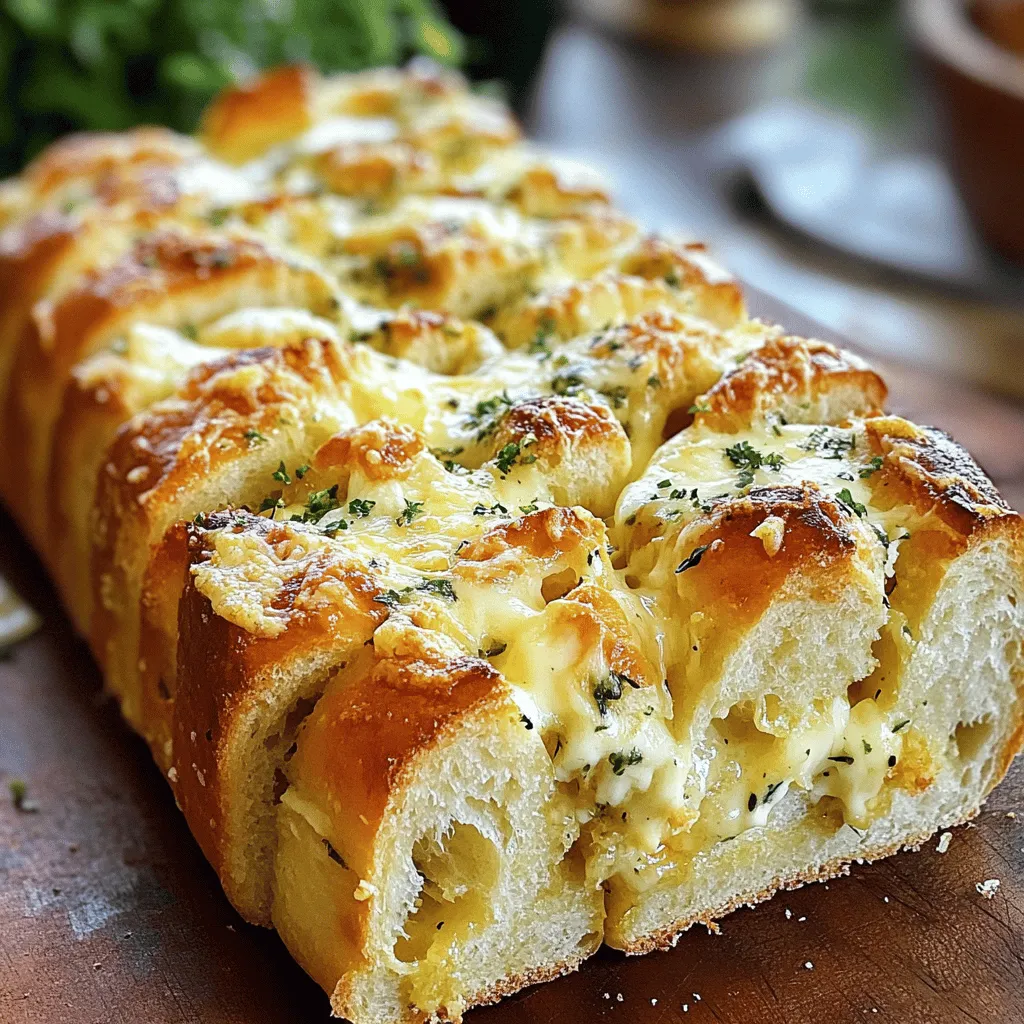
If you love bold flavors and easy-to-make snacks, Garlic Parmesan Pull-Apart Bread is for you! This savory delight is warm,

Are you ready to enjoy a new treat that blends flaky goodness with soft muffin delight? Almond Croissant Muffins are
