Skip to content
DisclaimerTerms Of UseGDPR PolicyCookie Policy

recipesstation

  • Home
  • Drinks
  • Appetizers
  • Dinner
  • Dessert
  • About
  • Contact
  • Privacy Policy
DisclaimerTerms Of UseGDPR PolicyCookie Policy

Emily

To make these fun bites, you need: - 1 cup all-purpose flour - ½ teaspoon baking soda - ¼ teaspoon salt - ½ cup unsalted butter, softened - ½ cup brown sugar, packed - ¼ cup granulated sugar - 1 teaspoon pure vanilla extract - 1 tablespoon milk (or your favorite dairy alternative) - ½ cup mini chocolate chips - 1 cup dark chocolate chips (for coating) These basic ingredients create a tasty cookie dough base. The mix of sugars gives the bites a sweet flavor. The mini chocolate chips add little pops of chocolate goodness. You can get creative with your cookie dough bites! Consider adding: - Chopped nuts (like walnuts or pecans) - Sea salt for a sweet-salty twist - Peanut butter or almond butter for a nutty flavor - Different types of chocolate chips (like white chocolate or butterscotch) These extras can change the taste and texture, making each batch unique and fun! You’ll need some basic kitchen tools to create these bites: - Mixing bowls (one medium, one large) - Whisk for mixing dry ingredients - Electric mixer for creaming butter and sugars - Spatula or wooden spoon for folding in chocolate chips - Cookie scoop or your hands for shaping the bites - Baking sheet and parchment paper for easy cleanup Having the right tools will make your baking experience smooth and enjoyable. Plus, you’ll have everything ready to whip up a batch of cookie dough bites quickly! For the full recipe, check out the details above. To start, gather all your ingredients. You will need flour, baking soda, salt, butter, sugars, vanilla, milk, mini chocolate chips, and dark chocolate chips. First, whisk together the flour, baking soda, and salt in a medium bowl. This helps mix everything well. Set this bowl aside for now. Next, in a large bowl, cream the softened butter with the brown sugar and granulated sugar. Mix on medium speed for about 2-3 minutes. The mix should look light and fluffy. Then, add the vanilla extract and milk. Stir it until everything combines nicely. Now, slowly add the dry mixture to the wet ingredients. Stir gently until just combined. Be careful not to overmix! Finally, fold in the mini chocolate chips with a spatula. This adds a sweet surprise to every bite. After the dough is ready, use a small cookie scoop or your hands. Portion out the dough into small balls. Aim for bite-sized pieces. Place them on a baking sheet lined with parchment paper. This makes it easy to remove them later. Once you have shaped all the dough, pop the baking sheet into the freezer. Let the cookie dough balls chill for about 30 minutes. This helps them firm up, making them easier to coat. While the dough balls chill, it’s time to melt the dark chocolate chips. Place them in a microwave-safe bowl. Heat them in 30-second intervals, stirring well after each time. Keep going until the chocolate is fully melted and smooth. Now, take the chilled cookie dough balls out of the freezer. Dip each ball into the melted chocolate. Make sure each one is fully coated. Place the chocolate-covered bites back on the parchment-lined baking sheet. For a fun touch, sprinkle a few mini chocolate chips on top of each bite before the chocolate hardens. This makes them look even better! Finally, return the baking sheet to the freezer for another 15-20 minutes. This lets the chocolate set completely. If you want the full recipe, you can refer to the earlier sections. To get the best dough texture, start with room temperature butter. Soft butter mixes well and gives a nice, creamy base. When you mix the butter and sugars, beat until fluffy. This adds air, making your bites light. Avoid overmixing when adding dry ingredients. Stop mixing just when everything is combined. This keeps the dough soft and chewy. For melting chocolate, use a microwave-safe bowl. Heat chocolate chips in short bursts, about 30 seconds each time. Stir well after each burst. This method helps prevent burning and clumping. If you see some chunks, keep stirring. The heat from melted chocolate will finish the job. You want a smooth, glossy chocolate for coating your bites. To impress your guests, serve the cookie dough bites on a nice plate. Place them in a circle for a fun look. Sprinkle extra mini chocolate chips on top of each bite. This adds color and makes them pop. You can also add a scoop of ice cream beside the bites. It makes for a fun dessert combo! For the full recipe, check the Full Recipe section. Enjoy your sweet treats! {{image_4}} You can make your cookie dough bites even tastier by adding mix-ins. Try folding in chopped nuts, like walnuts or pecans. They add a nice crunch. You can also use caramel bits for a sweet surprise. Just make sure to keep the proportions similar to the mini chocolate chips. This way, your dough stays balanced and delicious. Making gluten-free cookie dough bites is easy! Use a gluten-free flour blend instead of all-purpose flour. For a vegan version, swap the butter for coconut oil and use a plant-based milk. You can also find vegan chocolate chips. These changes let everyone enjoy this treat. They taste just as good, and you won’t miss the original recipe. Get creative with flavors! Add a teaspoon of mint extract for a fresh twist. Or, mix in peanut butter for a rich, nutty taste. You can even try almond extract for a sweet touch. Whatever flavor you choose, adjust the vanilla to keep the balance. This way, you can make your cookie dough bites unique and fun. Check out the Full Recipe for more inspiration! Store your chocolate chip cookie dough bites in an airtight container. This keeps them fresh and tasty. You can place parchment paper between layers to avoid sticking. I recommend using a container that fits well to prevent excess air. These cookie dough bites last about one week in the fridge. If you want them for longer, freeze them. They can stay in the freezer for up to three months. Just remember to thaw them in the fridge before serving. To freeze, place the bites on a baking sheet first. Once frozen, transfer them to your airtight container. A serving size is about two to three bites. This makes it easy to enjoy without overindulging. If you are serving guests, plan for a few bites per person. You can also double the recipe if you want more for a party. To see the full recipe, check out the earlier sections. Yes, you can eat raw cookie dough if it is made safely. Most cookie dough has raw flour and eggs, which can cause illness. To enjoy cookie dough bites safely, use heat-treated flour and omit eggs. This way, you get all the tasty flavor without the risk. You can find pre-made chocolate chip cookie dough bites at many grocery stores. Look in the frozen dessert aisle or the bakery section. Brands like Edoughble and Doughp offer ready-to-eat options. You can also order them online for a quick treat. The nutrition can vary based on ingredients, but a typical bite has about 80 calories. Each bite contains around 4 grams of fat, 10 grams of carbohydrates, and 1 gram of protein. Check the labels on store-bought bites for exact numbers. If you make them at home, you can adjust the ingredients for healthier options. You can easily change this recipe to match your taste. Here are some ideas: - Mix-ins: Add nuts, dried fruit, or even caramel bits. - Flavors: Use almond or mint extract for a different twist. - Dairy-free: Substitute butter with coconut oil and use dairy-free chocolate. - Gluten-free: Swap regular flour for almond flour or a gluten-free blend. For the full recipe, check out the Chocolate Chip Cookie Dough Bites Delight above! Enjoy making your very own bites! You learned how to make chocolate chip cookie dough bites, from ingredients to storage. With simple steps, even novices can enjoy this tasty treat. Experiment with different flavors and mix-ins to suit your taste. Remember to store them properly for the best freshness. Now, you can create delicious bites for any occasion and impress your friends or family. Enjoy making, sharing, and savoring these delightful snacks!

Chocolate Chip Cookie Dough Bites Easy and Fun Recipe

If you’ve ever craved the sweet, rich taste of cookie dough, you’re in for a treat! My easy recipe for

- 1 cup rolled oats - 1 cup almond milk (or any milk of your choice) - 1 tablespoon chia seeds - 1 tablespoon maple syrup (or honey for a natural sweetness) - 1/2 teaspoon vanilla extract - 1/2 cup mixed berries (such as strawberries, blueberries, and raspberries) - 1/4 cup Greek yogurt (optional) - Pinch of salt - Toppings: additional fresh berries, assorted nuts, or a sprinkle of cinnamon This recipe is both tasty and healthy. Each serving contains: - Calories: 300 (without yogurt) - Protein: 10g - Carbohydrates: 45g - Fiber: 8g - Fat: 10g These oats provide a balanced meal to start your day. They offer good fiber and protein, which help you feel full longer. Overnight oats are more than just a tasty breakfast. Here are some reasons to love them: - Quick and Easy: You prepare them the night before. No fuss in the morning! - Customizable: You can mix in your favorite fruits and nuts. This keeps breakfast fun and different. - Nutritious: Rolled oats are rich in fiber. They help with digestion and keep your heart healthy. - Portable: You can take them anywhere. Perfect for busy mornings or on-the-go meals. - Satisfying: The combination of oats and berries gives you energy. You’ll feel great all morning. This dish is a wonderful way to enjoy a healthy start. Follow the Full Recipe for more details on making this delicious meal! To start making your overnight oats, gather all your ingredients. You will need: - 1 cup rolled oats - 1 cup almond milk (or any milk of your choice) - 1 tablespoon chia seeds - 1 tablespoon maple syrup (or honey for a natural sweetness) - 1/2 teaspoon vanilla extract for added flavor - 1/2 cup mixed berries (such as strawberries, blueberries, and raspberries) - 1/4 cup Greek yogurt (optional for an extra creamy texture) - Pinch of salt to enhance flavors 1. In a medium bowl, combine the rolled oats, chia seeds, and a pinch of salt. Mix them well. 2. In another bowl, whisk together the almond milk, maple syrup, and vanilla extract. Make sure it is well blended. 3. Pour the milk mixture over the oats and stir gently. Avoid overmixing. 4. Carefully fold in the mixed berries. Save a few berries for later topping. 5. If you like it creamy, stir in the Greek yogurt now. 6. Distribute the mixture into jars or containers. 7. Seal them and place in the fridge overnight or for at least 4-6 hours. 8. When you're ready to eat, stir again and add milk if you want it thinner. When mixing your ingredients, remember these simple tips: - Mix dry and wet ingredients separately first. This helps them blend better. - Stir just enough to combine. Overmixing can make the oats mushy. - Folding in the berries gently keeps them intact. You want to see those beautiful colors! - If you add Greek yogurt, fold it in carefully for a creamy finish. Presentation makes your overnight oats look even more tempting. Here’s how to do it: - Use clear glass jars to show off the layers of oats and berries. - Top with reserved berries for a fresh touch. - Sprinkle some nuts or a dash of cinnamon on top for extra flavor. - Adding a sprig of mint can make it look fancy and fresh. This is where style meets health! Enjoy every bite of your berry bliss overnight oats. For the full recipe, check out the details above. One common mistake is using too much liquid. This makes the oats mushy. Stick to the recipe for the right balance. Another mistake is not letting the oats soak long enough. They need time to absorb the liquid and soften. If you rush this part, you won’t get the best texture. To get the perfect texture, use rolled oats, not quick oats. Rolled oats maintain their shape and provide a nice bite. If you want creamier oats, add Greek yogurt. It makes the dish rich and smooth. Also, mix your ingredients gently. Overmixing can break down the oats and chia seeds. To boost flavor, think beyond just berries. Add a splash of vanilla extract or a pinch of cinnamon. You can also try different sweeteners. Maple syrup or honey works well. Don’t forget to top with fresh berries or nuts. This adds crunch and brightness to each bite. For more ideas, check out the Full Recipe for inspiration. {{image_4}} You can change up the berries in your overnight oats. Each berry adds a unique taste and color. Strawberries give a sweet touch, while blueberries add a mild flavor. Raspberries bring a slight tartness. You can also use blackberries or even mixed berry blends. This variety keeps your breakfast exciting. Try different combinations to find your favorite mix! If you want dairy-free overnight oats, no worries! You can swap regular milk for almond milk, coconut milk, or oat milk. These milk options taste great and keep it creamy. If you want extra creaminess, consider using coconut yogurt instead of Greek yogurt. This way, you enjoy the same flavor and texture without dairy. Feel free to get creative with mix-ins! Add nuts like almonds or walnuts for crunch. You can also try seeds such as pumpkin or sunflower seeds for added nutrition. For sweetness, a dash of cinnamon or a spoonful of nut butter can elevate your oats. Top your oats with fresh fruits or a drizzle of honey for extra flavor. Let your taste buds guide you on this journey! To keep your overnight oats fresh, store them in the fridge. Use airtight containers to keep moisture out. You can prep them the night before and enjoy them the next morning. Mason jars work great for overnight oats. They allow you to see the layers of oats and berries. If you don’t have mason jars, small glass or plastic containers are also good. Just make sure they seal tightly. Overnight oats stay fresh for about 3 to 5 days in the fridge. If you add fresh fruit, eat them sooner, as they can spoil faster. For the best taste, enjoy them within 2 days. If you want to change things up, try adding nuts or seeds when serving. Overnight oats stay fresh for up to five days in the fridge. Store them in airtight containers to keep them from drying out. If you see any signs of spoilage, like off smells or changes in texture, it's best to toss them. Yes, you can use frozen berries in your overnight oats. Just add them straight from the freezer. They will thaw overnight and mix well with the oats. This method can add a nice chill to your breakfast. Plus, frozen berries are often just as nutritious as fresh ones. The best toppings for overnight oats include fresh fruit, nuts, and seeds. Here are some great options: - Sliced bananas or strawberries - Chopped nuts like almonds or walnuts - A sprinkle of cinnamon for warmth - A dollop of Greek yogurt for extra creaminess - Drizzle of honey or maple syrup for added sweetness Feel free to mix and match these toppings to suit your taste! For the complete recipe, check out the Full Recipe. Overnight oats are easy and healthy breakfast choices. We covered the key ingredients, including their nutrition and benefits. I shared steps to prepare and mix your oats to get the best texture. We also discussed variations and expert tips to enhance flavors. Lastly, I provided storage methods and answered common questions. By using these tips, you can enjoy tasty, nutritious oats every morning. Start making overnight oats today and enjoy the difference!

Overnight Oats with Berries Nutritious and Easy Recipe

Ready to whip up a breakfast that’s both tasty and simple? Overnight oats with berries are your answer! This nutritious

To create tasty Mini Caprese Skewers, you need fresh, vibrant ingredients. Here’s what you will need: - Cherry tomatoes - Fresh mozzarella balls (bocconcini) - Fresh basil leaves - Balsamic glaze - Extra virgin olive oil - Salt and pepper - Small skewers or toothpicks Each ingredient plays a key role in making these skewers fresh and flavorful. The cherry tomatoes bring a burst of sweetness. Fresh mozzarella offers a creamy texture that pairs well with the tomatoes. The basil adds a fragrant herb note. Balsamic glaze provides a sweet tang, while extra virgin olive oil enhances the overall flavor. Finally, salt and pepper help to bring it all together. When picking your ingredients, go for the best quality. Look for firm, ripe cherry tomatoes. Choose mozzarella balls that are soft and fresh. Fresh basil should be bright green and aromatic. If you can, try to find organic options to boost flavor and support sustainable farming. For the full recipe, check out the [Full Recipe]. This simple yet elegant appetizer is sure to impress at any gathering. Enjoy the process of gathering these ingredients and let your creativity shine in each skewer you prepare! - Rinse and dry cherry tomatoes and basil. - Take the skewers and start to assemble mini Caprese stacks. - Begin with a cherry tomato, add a basil leaf, then a mozzarella ball. - Press gently to keep everything in place. - Repeat this pattern until you have three sets on each skewer. - When done, arrange the skewers on a serving platter. - In a bowl, mix olive oil, salt, and cracked pepper. - Drizzle this mixture over your skewers for flavor. - Next, add balsamic glaze to each skewer for a sweet touch. - Optional: Chop extra basil and sprinkle it over the skewers. For the full recipe, refer to the earlier section. This simple method brings rich flavors to your table. Selecting the best cherry tomatoes When choosing cherry tomatoes, look for bright colors. Red, yellow, or orange tomatoes should feel firm. Avoid any that are soft or have dark spots. Fresh cherry tomatoes will add great flavor. They should smell sweet and earthy. Finding fresh mozzarella and basil For mozzarella, pick small balls called bocconcini. They should be soft and moist. Check the packaging date for freshness. For basil, look for vibrant green leaves. Choose bunches without wilting or browning. Fresh basil gives the skewers an aromatic lift. Arranging skewers for visual appeal To make the skewers pop, use a large white platter. Place the skewers in a crisscross pattern. This will create a fun and inviting look. You can also cluster them together for a more casual style. Consider adding some extra cherry tomatoes around the skewers for color. Serving suggestions for events At gatherings, mini Caprese skewers shine as a finger food. They are easy to grab and eat. You can serve them alongside a small bowl of extra balsamic glaze for dipping. For a festive touch, add small flags or labels to each skewer. This adds charm and helps guests know what they are enjoying. Remember, you can find the full recipe to make your skewers right here! {{image_4}} You can make your mini Caprese skewers even more exciting with different flavors. Here are some simple ideas: - Adding Herbs: Try mixing in oregano or parsley. These herbs bring a fresh taste. You can place a small leaf of oregano or parsley between the tomato and mozzarella. The extra flavor will surprise your guests! - Flavored Balsamic Glazes: Instead of regular balsamic glaze, use flavored ones. There are many options like fig or raspberry. These glazes add sweetness and a twist to the classic taste. A drizzle of these glazes can elevate your dish. If you want to cater to different diets, mini Caprese skewers can adapt well. - Vegetarian Options: The recipe is already vegetarian-friendly. You can keep it as is, or add more veggies. Bell peppers or cucumbers can add crunch and color. - Gluten-Free Considerations: This recipe is naturally gluten-free. Just ensure your balsamic glaze has no added gluten. Check the label to be safe, and you’re good to go! These variations keep the dish fresh and fun for every occasion. For the full recipe, check out [Full Recipe]. To keep your mini Caprese skewers fresh, store any leftovers in the refrigerator. Place them in an airtight container to prevent drying out. This simple step helps maintain their taste and texture. I suggest eating them within two days for the best flavor. For meal prep, assemble the skewers ahead of time. Just leave out the balsamic glaze until serving. This keeps the skewers fresh and prevents sogginess. You can make them a few hours in advance and store them in the fridge, ready for your guests. If you want to refresh the flavors before serving, take the skewers out of the fridge. Let them sit at room temperature for about 15 minutes. This enhances the taste and makes them more inviting. Instead of reheating, consider drizzling more balsamic glaze on top. This adds a nice touch and boosts the flavor. Enjoy the freshness of the ingredients with each bite of your mini Caprese skewers! How to keep skewers from getting soggy? To keep your skewers fresh, avoid soaking the tomatoes before assembly. Pat them dry instead. Use a light drizzle of olive oil just before serving. This helps keep them crisp. Can I make these ahead of time? Yes, you can prepare these skewers a few hours in advance. Just keep them in the fridge. Drizzle the balsamic glaze right before serving for the best flavor. What can I serve with mini Caprese skewers? Mini Caprese skewers pair well with a variety of snacks. Consider serving them with crusty bread or a light salad. They also work great with a cheese platter. Suggestions for pairing drinks or sides These skewers match nicely with white wine or sparkling water. A fresh lemonade adds a fun twist too. For sides, try pairing with bruschetta or a light pasta dish. Creative dips or sauces to serve alongside You can serve these skewers with a tangy pesto or a creamy avocado dip. A simple garlic aioli also adds a nice touch. Each dip brings out new flavors in the skewers. For the full recipe, check the Mini Caprese Skewers with Balsamic Drizzle. To make tasty Mini Caprese Skewers, you need just a few fresh items. Here’s what you should gather: - Cherry tomatoes - Fresh mozzarella balls (bocconcini) - Fresh basil leaves - Balsamic glaze - Extra virgin olive oil - Salt and pepper - Small skewers or toothpicks These ingredients bring bright colors and great flavors. The cherry tomatoes add a burst of sweetness. The mozzarella gives a soft, creamy texture. Fresh basil brings a strong aroma. Each skewer is a mini taste of summer! When shopping, choose ripe cherry tomatoes. They should feel firm and look shiny. For mozzarella, look for small balls in water. Fresh basil should be vibrant green with no brown spots. These choices make your dish pop. The balsamic glaze adds a sweet and tangy kick. You can find it in most grocery stores. If you prefer, you can make your own by reducing balsamic vinegar. Just simmer it until it thickens. Using high-quality olive oil is key. It enhances the taste of your dish. Don't skip the salt and pepper; they boost all the flavors. Now that you have your ingredients, you’re ready to create a delightful appetizer. For the detailed steps, check out the Full Recipe. Mini Caprese skewers are simple yet delicious. We covered the key ingredients, including cherry tomatoes, mozzarella, and fresh basil. You learned how to easily assemble them and add tasty touches like balsamic glaze. Remember, sourcing fresh ingredients makes a big difference in flavor. In the end, these skewers are a fun, versatile dish for any gathering. Enjoy experimenting with variations and serving them fresh. Try these insights, and you’ll impress your guests every time!

Mini Caprese Skewers Fresh and Flavorful Appetizer

Looking for a fresh and flavorful appetizer that impresses? Mini Caprese skewers are the answer! These bite-sized treats combine juicy

- 1 cup frozen spinach - 1 cup canned artichoke hearts - 1 cup cream cheese, softened - ½ cup sour cream - ½ cup mayonnaise - 1 cup shredded mozzarella cheese - ½ cup grated Parmesan cheese - 2 cloves garlic, finely minced - ½ teaspoon onion powder - Salt and pepper to taste - Optional: Red pepper flakes for a spicy kick Gathering these ingredients is the first step to making creamy spinach artichoke dip. I love using frozen spinach because it’s easy and quick. Just make sure to thaw it and squeeze out the water. This keeps the dip from being too watery. Canned artichoke hearts are perfect for this dip. They add a nice texture and flavor. The creamy base comes from cream cheese, sour cream, and mayonnaise. This combination creates a rich and smooth dip. I always use softened cream cheese for easy mixing. Cheeses are key. I add shredded mozzarella and grated Parmesan to bring out the flavors. The mozzarella melts beautifully, while the Parmesan adds a nutty touch. Don’t forget about flavor! Garlic and onion powder give a nice depth. Salt and pepper are essential too. If you like heat, add red pepper flakes. They give the dip a spicy kick. You can adjust the amount to your liking. With these ingredients, you are ready to create a dish that is sure to impress. For the full recipe, check out the detailed instructions. Enjoy every bite! First, take the frozen spinach and let it thaw. After it is soft, squeeze out the excess water. This step is key to avoid watery dip. Next, drain the canned artichoke hearts. Roughly chop these into small pieces. This will help them mix well in the dip. In a large bowl, add the softened cream cheese, sour cream, and mayonnaise. Use a hand mixer or a whisk to blend them until smooth. This creamy base will make your dip rich and delicious. Now, add the chopped spinach and artichokes to the bowl. Stir in the minced garlic, onion powder, and both cheeses. Mix everything well until no lumps remain. Season the dip with salt and pepper to taste. If you like it spicy, add some red pepper flakes. Mix it all together until the flavors combine. Preheat your oven to 375°F (190°C). This ensures your dip cooks evenly and gets bubbly. Once the oven is ready, transfer the dip mixture into a baking dish. Smooth it out with a spatula. Bake it for about 25-30 minutes. The dip is done when it is bubbly and golden brown on top. After baking, let it cool for a few minutes before serving. This will help avoid burns. Enjoy it warm with tortilla chips or fresh veggies. For the full recipe, check the earlier section! To make the best creamy spinach artichoke dip, start with room temperature cream cheese. If it's cold, it won't mix well. This step makes the dip creamy and smooth. Use a hand mixer or a whisk to blend the cream cheese, sour cream, and mayonnaise. Mix until the base is completely smooth. This ensures all flavors blend well together. Serve your dip warm for the best taste. It pairs well with crispy tortilla chips, slices of crusty bread, or fresh veggie sticks like carrots and celery. To impress guests, sprinkle extra Parmesan on top. A garnish of fresh parsley adds color and freshness. Consider serving it in a nice baking dish to showcase its golden, bubbly top. For a fun twist, add red pepper flakes for heat, adjusting to your taste. Enjoy this creamy dip with friends and family for a perfect snack! {{image_4}} You can swap ingredients to fit your taste or needs. If you want a lighter dip, use Greek yogurt instead of sour cream. For cream cheese, try cottage cheese or a vegan cream cheese. These swaps keep the dip creamy but change the flavor slightly. Adding different cheeses can make the dip even more exciting. You could use cheddar for a sharp taste or pepper jack for a spicy kick. Mixing in feta cheese adds a nice tang. Play around with flavors to find your favorite blend. If you follow a vegan diet, use plant-based cream cheese and yogurt. This keeps the dip creamy without dairy. You can also add cashews blended with water for a rich texture. For gluten-free options, serve the dip with rice crackers or fresh veggies. This way, everyone can enjoy it. Just make sure all your ingredients are gluten-free. This is an easy way to make the dip safe for those with dietary restrictions. To keep your creamy spinach artichoke dip fresh, follow these steps: - Cool it down: Let the dip cool to room temperature before storing. - Choose the right container: Use an airtight container. Glass or plastic work well. - Refrigerate: Store the dip in the fridge. It can last for about 3-5 days. Make sure to check for any signs of spoilage before eating. If it looks or smells off, it’s best to toss it. When it’s time to enjoy your leftovers, proper reheating is key. Here’s how to do it: - Oven method: Preheat the oven to 350°F (175°C). Place the dip in an oven-safe dish. Heat for 15-20 minutes until warm. Stir halfway through to ensure even warmth. - Microwave method: Use a microwave-safe bowl. Heat in short intervals, about 30 seconds each. Stir between intervals until warmed through. To avoid separation of ingredients, do not overheat. Slow and gentle heat keeps the dip creamy and delicious. How to make the dip spicier? To make the dip spicier, add red pepper flakes. You can mix in a teaspoon for a mild kick. For more heat, add more flakes or use hot sauce. Adjust the spice to what you enjoy. Can I prepare it ahead of time? Yes, you can prepare the dip a day before. Just mix all the ingredients and store it in the fridge. When ready to serve, bake it as directed in the Full Recipe. This makes for easy party prep! What are the best dipping options? The best dippers for this dip include: - Tortilla chips - Slices of a crusty baguette - Fresh vegetable sticks (carrots, celery, bell peppers) These options add great texture and flavor! What to do if the dip is too thick or thin? If the dip is too thick, add a bit of sour cream or mayonnaise. Stir well until you reach your desired consistency. If it’s too thin, simply bake it a few extra minutes. This will help it thicken up. How to fix a bland flavor? To fix a bland dip, add more salt, pepper, or garlic. Taste as you go. You can also mix in some lemon juice for a bright flavor. A little seasoning can make a big difference! This blog post covered a tasty spinach artichoke dip recipe, focusing on ingredients, preparation, and storage. You learned the steps to create a creamy, savory dip that impresses any guest. Remember, you can tweak the recipe with substitutions or different flavors. Store leftovers properly to enjoy later and always adapt to your dietary needs. Keep experimenting and have fun with your dip creation. You now hold the key to delicious gatherings!

Creamy Spinach Artichoke Dip Irresistible Comfort Food

Craving a warm, creamy treat that brings everyone together? Look no further than my irresistible Creamy Spinach Artichoke Dip! Made

- 1 cup broccoli florets - 1 red bell pepper, thinly sliced - 1 yellow bell pepper, thinly sliced - 1 medium carrot, julienned - 1 cup sugar snap peas, trimmed - 2 cloves garlic, finely minced - 1 tablespoon fresh ginger, finely grated - 3 tablespoons soy sauce (or tamari for gluten-free) - 1 tablespoon sesame oil - 1 tablespoon olive oil - 1 teaspoon honey or maple syrup (optional) - Toasted sesame seeds, for garnish - Cooked rice or quinoa, for serving Gathering fresh ingredients is key. I love using colorful veggies for a vibrant look. The broccoli adds crunch, while the bell peppers bring sweetness. Carrots add a nice texture, and sugar snap peas give a fresh snap. Garlic and ginger are essential for flavor. They create a strong base for your stir-fry. Using soy sauce or tamari adds depth. Sesame oil adds a nutty note that ties everything together. Optional honey or maple syrup enhances the dish. It balances the savory and adds a hint of sweetness. Lastly, toasted sesame seeds give a delightful crunch. Serve this stir-fry over rice or quinoa for a filling meal. For the full recipe, check out the cooking steps that bring all these ingredients to life! - Wash and chop vegetables. - Prepare aromatics: garlic and ginger. Start by washing all the vegetables. This step is key for freshness. Chop the broccoli into small florets. Slice the red and yellow bell peppers into thin strips. Julienne the carrot into matchsticks. Trim the sugar snap peas. This prep will help the veggies cook evenly. Next, it's time to prepare the aromatics. Finely mince two cloves of garlic. Grate one tablespoon of fresh ginger. These will bring a strong flavor to your stir-fry. - Heat oil and sauté garlic and ginger. - Add broccoli and bell peppers, stir-frying. In a large skillet or wok, heat one tablespoon of olive oil over medium-high heat. When the oil shimmers, add the minced garlic and grated ginger. Stir-fry for about 30 seconds. Be careful not to burn them; you want them fragrant, not charred. Now, toss in the broccoli florets and sliced bell peppers. Stir-fry for 3 to 4 minutes. You want them to soften slightly but stay bright and crisp. This creates a colorful dish full of vitamins. - Incorporate carrot and sugar snap peas. - Add soy sauce and sesame oil, toss to coat. - Garnish with sesame seeds and serve. Next, add the julienned carrot and sugar snap peas to the skillet. Stir-fry these for another 2 to 3 minutes. This will allow all the flavors to mingle. Pour in three tablespoons of soy sauce and one tablespoon of sesame oil. If you like sweetness, add one teaspoon of honey or maple syrup. Toss everything together to coat the vegetables well. Let it cook for another minute or two. This will help the flavors blend. Remember, you want to keep the veggies bright and crunchy. Finally, remove the pan from the heat. Sprinkle a generous amount of toasted sesame seeds over the stir-fry. This adds a nice crunch and looks great. Serve the stir-fry over a warm bed of cooked rice or quinoa. This makes for a complete meal. For the full recipe, check the recipe section above. To get a crispy stir-fry, you need high heat. Use a large pan or wok. The heat helps the veggies cook fast. This quick cooking seals in flavor and keeps them crunchy. Another tip is to avoid overcrowding the pan. If you add too many veggies at once, they will steam instead of fry. Cook in batches if needed. To make your stir-fry even tastier, consider adding sauces like teriyaki or hoisin. These sauces add depth and flavor. You can also toss in fresh herbs like basil or cilantro for a burst of aroma. They make the dish bright and fresh. Pair your veggie stir-fry with simple sides like steamed rice or quinoa. These grains soak up the sauce well. You can also add protein to your meal. Tofu, chicken, or shrimp work great. Just cook them first, then mix them in with the stir-fry. For the Full Recipe, check out the instructions above. {{image_4}} You can swap in many vegetables for your stir-fry. Try using: - Cauliflower florets - Zucchini, sliced - Green beans, trimmed - Bell peppers in different colors - Mushrooms, sliced - Baby corn or bok choy Seasonal produce is great too. In spring, add asparagus or snap peas. In fall, consider squash or Brussels sprouts. Mixing colors makes your dish more fun and healthy. This stir-fry is easy to make vegan. Just use tamari instead of soy sauce. You can also skip the honey or maple syrup. For gluten-free options, always check labels on sauces. If you want low-carb, swap rice or quinoa for cauliflower rice. This change keeps the meal light and fresh while still being filling. For a kick, add chili flakes, or a splash of hot sauce. Start small, then taste. Adjust to your family’s heat level. Kids might prefer less spice, so keep their portions mild. You can also add fresh herbs like basil or cilantro for extra flavor. These add freshness without heat and make your dish pop. Enjoy experimenting with your stir-fry! For a complete guide, check the Full Recipe. To keep your leftover stir-fry fresh, use airtight containers. Glass or plastic containers work well. Make sure they seal tightly to prevent air from getting in. This helps avoid spoilage. You can store the stir-fry in the fridge for up to three days. If you want to keep it longer, freeze it for up to three months. When reheating, you want to keep the veggies crisp. The stovetop is the best method. Heat a little oil in a pan and add the stir-fry. Stir it gently until warmed through. This method keeps the texture nice. If you use a microwave, cover it loosely. Heat it in short bursts to avoid making the veggies soggy. Stir after each burst for even heating. Making Easy Veggie Stir-Fry takes just 15 minutes. You spend about 5 minutes prepping the veggies. Cooking only takes another 10 minutes. This quick meal fits perfectly into any busy weeknight. Yes, you can use frozen vegetables. They are convenient and save time. However, you may need to adjust cooking time. Frozen veggies often need a bit longer to cook. Keep an eye on them to avoid mushiness. Fresh veggies will give the best taste and crunch. This stir-fry pairs well with many grains and proteins. You can serve it over cooked rice or quinoa. Adding tofu or chicken makes it heartier. You can also add nuts or seeds for extra crunch. This meal is flexible, making it easy to customize. You can prepare the veggies ahead of time. Just store them in the fridge in an airtight container. For best taste, cook the stir-fry fresh. If you have leftovers, keep them in the fridge for up to three days. Reheat in a pan or microwave for a quick meal. Easy Veggie Stir-Fry is quick, tasty, and healthy. You can mix any veggies you love. Remember to use high heat for a great crunch. This dish shines with soy sauce and garlic. Feel free to add your favorite proteins. Store leftovers in good containers for fresh meals. You can even reheat with care. Enjoy creating your own fun stir-fry! It’s a simple way to eat well and have fun in the kitchen.

Easy Veggie Stir-Fry Quick and Tasty Weeknight Meal

Looking for a fast and healthy dinner? You’ve come to the right place! This Easy Veggie Stir-Fry is your go-to

- 2 cups rolled oats - 1 cup almonds, roughly chopped - 1/2 cup walnuts, roughly chopped - 1/2 cup sunflower seeds - 1/2 cup honey or maple syrup - 1/4 cup almond butter (or any nut butter of your choice) - 1/2 teaspoon vanilla extract - 1/2 teaspoon ground cinnamon - 1/4 teaspoon salt - 1/2 cup dried cranberries or raisins (optional) Each ingredient plays a key role in the flavor and texture of your bars. The rolled oats serve as the base. Almonds and walnuts add crunch and protein. Sunflower seeds provide healthy fats. Honey or maple syrup acts as a sweetener and binder. Almond butter gives a creamy texture. Vanilla extract, cinnamon, and salt enhance the overall taste. If you use dried fruit, it adds sweetness and chewiness. You can swap almonds and walnuts for other nuts like pecans or cashews. For nut-free bars, try pumpkin seeds or extra sunflower seeds. If you want a vegan option, use maple syrup instead of honey. You can also add dark chocolate chips for a tasty twist. Adjust the spices to your liking; nutmeg or ginger can add unique flavors. The possibilities are endless, so feel free to get creative! Start by preheating your oven to 350°F (175°C). Grab an 8x8 inch baking pan. Line it with parchment paper. Make sure to leave some paper hanging over the edges. This helps lift the bars out later. In a large mixing bowl, add 2 cups of rolled oats. Next, toss in 1 cup of roughly chopped almonds. Then, add 1/2 cup of roughly chopped walnuts and 1/2 cup of sunflower seeds. Finally, sprinkle in 1/2 teaspoon of ground cinnamon. Mix all these dry ingredients well. Make sure they are evenly combined. In a small saucepan, pour in 1/2 cup of honey or maple syrup. Add 1/4 cup of almond butter to the pan. Heat these over low heat. Stir non-stop until both ingredients melt and blend smoothly. Once melted, take it off the heat. Mix in 1/2 teaspoon of vanilla extract and 1/4 teaspoon of salt. This will enhance the taste. Now, pour the warm wet mixture over the dry ingredients. Mix everything thoroughly. Make sure the dry ingredients are well coated. If you want, fold in 1/2 cup of dried cranberries or raisins. This adds a nice touch of sweetness. Transfer the mixture into the prepared baking pan. Use a spatula or your hands to press it down firmly. Make it an even layer. Bake in the oven for 20-25 minutes. Watch for the edges to turn golden brown. When done, let the bars cool completely in the pan. Use the parchment paper to lift them out. Place them on a cutting board and cut into individual bars or squares. For the full recipe, check out the detailed instructions above! To get the right texture for your granola bars, start by pressing the mixture firmly into the pan. This helps them hold together well. If you like chewy bars, keep the baking time short. For a crunchier texture, bake them a bit longer. Letting them cool completely in the pan is key too. It helps them firm up and makes cutting easier. You can easily boost the flavor of your granola bars. Try adding different nuts or seeds that you enjoy. Use maple syrup instead of honey for a unique taste. Adding spices like nutmeg or ginger can give an extra kick. You can also toss in some dark chocolate chips for a sweet touch. Just remember, balance is key! Avoid using too much liquid in your mixture. This can make your bars too soft. Also, don’t skip the salt! It enhances all the flavors. Another mistake is not letting the bars cool completely. If you cut them too soon, they may fall apart. Lastly, be careful not to overbake. Watch them closely for that golden edge, as this means they are done. {{image_4}} You can mix and match flavors in your granola bars. Try adding chocolate chips for a sweet twist. You can also use coconut flakes for a tropical vibe. For a spicy kick, add a pinch of cayenne pepper or some ginger. Each option brings a new taste to your bars. Making these bars vegan is easy. Just swap honey for maple syrup. For gluten-free options, ensure your oats are certified gluten-free. This way, everyone can enjoy these tasty snacks without worry. Boost the nutrition by adding seeds or nuts. Chia seeds add fiber and omega-3s. Pumpkin seeds give a crunch and are packed with nutrients. You can also use protein powder for an extra protein boost. These add-ins make your bars even healthier and more filling. For the full recipe, check out the Nutty Delight Granola Bars! To keep your homemade granola bars fresh, store them in an airtight container. Make sure they are completely cool before sealing. If you stack them, place parchment paper between layers to avoid sticking. Keep them in a cool, dry place. A pantry or kitchen cabinet works well. When stored properly, homemade granola bars can last up to one week. After that, they may lose their crunch and flavor. If you notice any changes in smell or texture, it’s best to toss them out. Always check before enjoying your snack. You can freeze granola bars for longer storage. Wrap each bar tightly in plastic wrap or foil. Place them in a freezer-safe bag or container. They can last up to three months in the freezer. When you want one, just take it out and let it thaw at room temperature. Enjoy your healthy snack anytime! To cut granola bars, first let them cool fully. After cooling, lift them from the pan using the parchment paper. Place them on a cutting board. Use a sharp knife for clean cuts. Cut into rectangles or squares. For easier cutting, run the knife under hot water before slicing. Yes, you can make these granola bars without nuts. Just skip the almonds and walnuts. Replace them with more seeds or oats. You can also add ingredients like coconut or dried fruits for texture. These changes will still give you tasty bars. Homemade granola bars last about one week at room temperature. Store them in an airtight container. For longer storage, keep them in the fridge. They can last up to two weeks there. If you freeze them, they last for three months. You can use maple syrup instead of honey. Agave nectar is another great choice. Both options provide sweetness and moisture. You can also try brown rice syrup for a different flavor. Each alternative may change the taste a bit. If you want to try making these yourself, check out the Full Recipe for Nutty Delight Granola Bars. It’s simple and full of flavor! You learned how to make tasty granola bars with simple steps. We covered ingredients, measurements, and fun mix-ins. You now know how to store them well, too. With the right tips, you can avoid common mistakes. Feel free to try new flavors and adjust for diet needs. Have fun making these bars your own. Enjoy snacking on your delicious creation!

Homemade Granola Bars Easy and Healthy Snack Idea

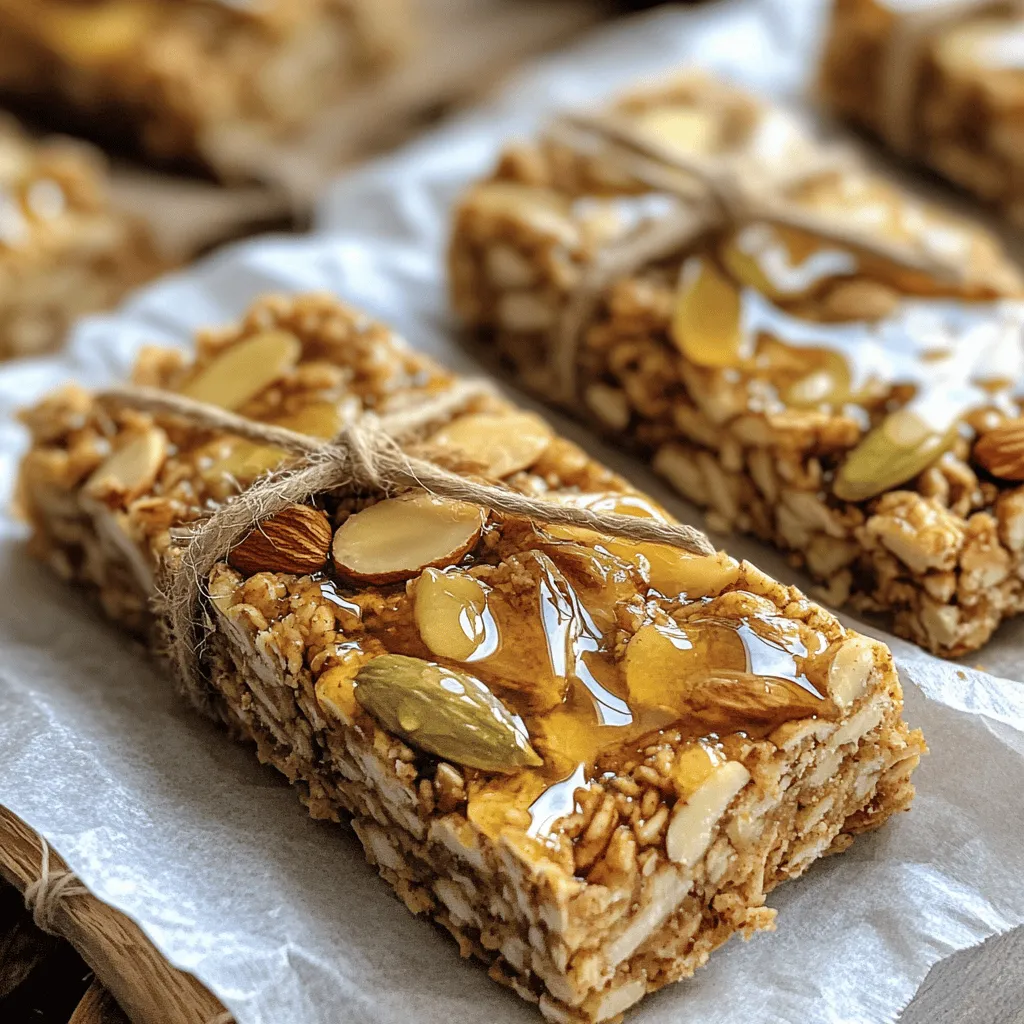
Looking for a healthy snack that’s also easy to make? Homemade granola bars are your answer! You can create delicious,

- 2 cups cooked rice (white or brown) - 2 cups fresh broccoli florets - 1 cup shredded sharp cheddar cheese (plus extra for topping) - 1 cup sour cream - 1/2 cup cream of mushroom soup (store-bought or homemade) - 1 small onion, finely chopped - 2 cloves garlic, minced - 1 teaspoon Dijon mustard - 1 teaspoon dried thyme - Salt and freshly ground black pepper to taste - 1/2 cup breadcrumbs (preferably panko for extra crunch) - 2 tablespoons olive oil I use 2 cups of cooked rice. You can use either white or brown rice. The fresh broccoli florets should also measure 2 cups. For cheese, I prefer sharp cheddar, using 1 cup for the mix and more for the top. You will need 1 cup of sour cream to add creaminess. The cream of mushroom soup can be homemade or store-bought, and I use 1/2 cup. One small onion, chopped finely, and 2 minced garlic cloves give the dish flavor. I add 1 teaspoon of Dijon mustard and 1 teaspoon of dried thyme for depth. Don’t forget salt and pepper to taste. For a crunchy topping, use 1/2 cup of breadcrumbs and 2 tablespoons of olive oil for moisture. If you want a gluten-free dish, use gluten-free breadcrumbs. You can swap the sharp cheddar for mozzarella or gouda if you prefer a milder cheese. For a lighter option, try Greek yogurt instead of sour cream. If you don’t have cream of mushroom soup, a homemade version works well too. Just blend mushrooms, broth, and cream to get a similar texture. Start by preparing your broccoli. Fill a pot with water and add a pinch of salt. Bring this to a boil. Once boiling, add 2 cups of fresh broccoli florets. Blanch them for 2-3 minutes. You want them bright green and slightly tender. After that, drain the broccoli and set it aside. Next, let’s sauté the aromatics. Grab a medium skillet and heat 2 tablespoons of olive oil over medium heat. Once it’s hot, add 1 small finely chopped onion and 2 minced garlic cloves. Cook these for 3-4 minutes. You want the onion to become translucent and smell fragrant. This step adds a great base flavor to your casserole. Now it’s time to mix everything together. In a large bowl, combine the cooked rice, blanched broccoli, and the sautéed onion and garlic. Add 1 cup of shredded sharp cheddar cheese, but save a little for later. Next, stir in 1 cup of sour cream and 1/2 cup of cream of mushroom soup. Add 1 teaspoon of Dijon mustard and 1 teaspoon of dried thyme. Don’t forget to season with salt and freshly ground black pepper to taste. Mix all these ingredients until they blend well. This will create a creamy, cheesy base for your casserole. Now, let’s get ready to bake. Lightly grease a 9x13 inch casserole dish with cooking spray or olive oil. Pour the broccoli rice mixture into the dish. Spread it evenly across the bottom. For the topping, mix 1/2 cup of breadcrumbs with a tablespoon of olive oil in a small bowl. Sprinkle this breadcrumb mix and the reserved cheddar cheese over the top of the casserole. Finally, place the casserole in your preheated oven at 350°F (175°C). Bake it for 25-30 minutes. You want the top to be bubbly and golden brown. Once it’s done, let it cool for 5-10 minutes before serving. This helps it set and makes it easier to serve. For the full recipe, refer back to the ingredients section. Enjoy your Cheesy Broccoli Rice Casserole! To boost the flavor of your casserole, try adding more spices. A pinch of paprika can add warmth. You can also mix in some cayenne pepper for a kick. Fresh herbs like thyme or parsley can brighten the dish. For the best texture, watch your cooking time. Bake the casserole until the top is golden brown. This usually takes about 25 to 30 minutes. If you want a crispier top, broil it for a minute or two at the end. Just keep an eye on it to prevent burning. When serving, consider how it looks. A sprinkle of fresh parsley over the top adds color. You can also serve it in individual bowls for a fun touch. For added crunch, serve with a side of crispy salad or garlic bread. These small details make your meal more appealing. Remember, we eat with our eyes first! For the full recipe and more details, check out the Full Recipe section above. {{image_4}} You can switch up the cheese for a new flavor. Mozzarella gives a nice stretch. Gouda adds a rich, sweet taste. You might even try a mix! Use your favorite cheese and see what happens. Want to make it heartier? Add some cooked chicken or ham. Just chop them into bite-sized pieces. Mix them in when you add the broccoli. You can also use turkey or bacon for a twist. For a vegetarian option, skip the meat and stick with the cheese. If you want it vegan, use plant-based cheese. Swap sour cream for a vegan version or plain yogurt. You can also use cashew cream for a creamy texture. This makes the dish tasty and friendly for all diets. Feeling inspired? Check out the Full Recipe to create your own Cheesy Broccoli Rice Casserole! After enjoying your cheesy broccoli rice casserole, store leftovers in an airtight container. Let the dish cool down to room temperature first. This helps keep the texture nice. You can keep it in the fridge for up to four days. If you plan to eat it later, you can freeze it too. To reheat, use your oven for the best results. Preheat your oven to 350°F (175°C). Place the casserole in a baking dish, cover it with foil, and warm it for about 20 minutes. This method keeps the cheese melty and the rice fluffy. You can also microwave it, but the oven gives a better texture. For long-term storage, freeze the casserole before baking it. Wrap it tightly in plastic wrap and then in foil. This prevents freezer burn. You can freeze it for up to three months. When ready to bake, thaw it in the fridge overnight and then bake as usual. If you want, you can add more cheese on top before baking for extra flavor. Yes, you can make this casserole ahead of time. Prepare it fully, then cover and refrigerate. You can bake it the next day. Just add a few extra minutes to the baking time if it’s cold from the fridge. This helps the cheese melt perfectly and keeps the dish moist. This casserole pairs well with many sides. Here are a few ideas: - Grilled chicken or fish - A fresh garden salad - Roasted vegetables - Garlic bread These options add more flavor and make a complete meal. To keep your casserole moist, use enough creamy ingredients. The sour cream and cream of mushroom soup help with this. Make sure to bake it covered for the first part of cooking. This traps steam and keeps the casserole from drying out. If you find it drying out, you can also add a splash of broth or water before baking. For the full recipe, check out the ingredients and steps above! This blog post covered all you need for a fantastic Cheesy Broccoli Rice Casserole. We listed ingredients, shared easy steps, and provided tips to elevate your dish. You'll find variations to suit different diets and storage tips to keep your leftovers fresh. Remember, with simple tweaks, you can make it your own. Enjoy exploring flavors and textures as you cook. This dish will surely become a favorite for you and your family. Happy cooking!

Cheesy Broccoli Rice Casserole Hearty and Easy Meal

Welcome to your new favorite dinner recipe! Cheesy Broccoli Rice Casserole is a warm and easy meal that the whole

- 1 lb sirloin steak, cut into 1-inch cubes - 4 tablespoons unsalted butter - Salt and freshly cracked black pepper - 4 cloves fresh garlic, finely minced - 1 tablespoon fresh parsley, finely chopped - 1 teaspoon fresh rosemary, finely chopped (or ½ teaspoon dried rosemary) - 1 teaspoon freshly squeezed lemon juice - Red pepper flakes (for added kick) Garlic butter steak bites shine thanks to their simple yet rich ingredients. The sirloin steak provides a tender base, while unsalted butter adds that creamy richness we love. I always use fresh garlic for its strong flavor. Season your steak cubes with salt and pepper before cooking. This helps bring out the meat's natural taste. Garlic, parsley, and rosemary will add layers of flavor. The lemon juice brightens the dish and balances the richness. If you like a little heat, adding red pepper flakes can give your dish a nice kick. The combination of these ingredients makes every bite a flavorful treat. For the complete recipe, check out the Full Recipe section. First, we need to season the sirloin steak. Use salt and black pepper to coat each cube. This step boosts the flavor and makes the dish more enjoyable. Next, cut the steak into 1-inch cubes. This size helps them cook evenly and stay juicy. Now, let’s heat the pan. Melt 2 tablespoons of unsalted butter in a large skillet over medium-high heat. Wait until the butter bubbles and sizzles. This shows it’s hot enough for cooking. Carefully add the seasoned steak bites in a single layer. Avoid overcrowding the pan. Cook them for 2-3 minutes until they turn golden brown. Then, flip them over and cook for another 2 minutes, or until they reach your desired doneness. Once the steak bites are cooked, lower the heat to medium. Add minced garlic, chopped parsley, and rosemary to the skillet. Stir these ingredients often for about 1-2 minutes. This allows the garlic to release its amazing flavor without burning. Next, mix in the remaining 2 tablespoons of butter and lemon juice. If you like, add a pinch of red pepper flakes for some heat. Toss the steak bites in the buttery sauce until they are fully coated. The sauce should bubble and look inviting. For the complete recipe, check out the Full Recipe. To get a great sear on your steak bites, do not overcrowd the pan. If you add too many pieces at once, they will steam instead of sear. This means you won’t get that nice, brown crust. Cook in batches if needed. For medium-rare steak bites, aim for about 2-3 minutes on each side. Adjust the time based on how you like your steak; less time for rare and more for well done. To boost the flavor of your garlic butter steak bites, try adding herbs like thyme or oregano. You can also sprinkle in some smoked paprika for a hint of smokiness. Using high-quality ingredients makes a huge difference. Fresh herbs and good butter will elevate the taste. Always choose fresh garlic over jarred garlic for the best flavor. Make your dish pop by garnishing with chopped parsley and fresh lemon wedges. This adds a bright touch and makes it more appealing. If you have a gathering, serve the steak bites on skewers. This makes for easy eating and adds a fun twist to your meal. For more ideas, check out the Full Recipe for garlic butter steak bites. {{image_4}} You can use many cuts for garlic butter steak bites. Sirloin is great, but ribeye or flank steak works too. Ribeye is richer, while flank is leaner. Each cut has a unique taste. Cooking time changes with different cuts. Ribeye may need a bit longer to cook. Flank steak cooks quicker, so watch it closely. Aim for 2-3 minutes per side for medium-rare. Add some herbs or spices to boost the flavor. Thyme brings a lovely earthiness. Paprika adds a sweet, smoky taste. You can also mix in some fresh basil or oregano. For a spicy kick, create a spicy garlic butter sauce. Add more red pepper flakes or a dash of hot sauce. This twist gives your steak bites a new life. Garlic butter steak bites fit well in salads or wraps. Toss them in a fresh salad with greens and a tangy dressing. For wraps, use tortillas or lettuce leaves. Pair them with sides like mashed potatoes or sautéed veggies. Creamy potatoes balance the rich steak. Roasted veggies add a nice crunch. Explore these options to make your meal special. For the full recipe, check out the Garlic Butter Steak Bites section. To store leftover garlic butter steak bites, place them in an airtight container. This keeps them fresh and tasty. Make sure the steak bites cool down first before sealing them. In the fridge, they last about 3 to 4 days. This helps you enjoy them later without losing flavor. When reheating, the goal is to keep the texture nice. Using a skillet works best. Heat it on medium-low and add a little butter. This helps the steak bites stay juicy. You can also use a microwave, but be careful. Heat them in short bursts to avoid drying them out. Yes, you can freeze garlic butter steak bites! To freeze, let them cool completely. Then, place them in a freezer-safe bag or container. Remove as much air as possible before sealing. This helps prevent freezer burn. When you're ready to eat, thaw them overnight in the fridge. Reheat them in a skillet for the best results. For a full recipe, check out the main article. To check if your steak bites are done, use a meat thermometer. It should read: - 125°F for rare - 135°F for medium-rare - 145°F for medium - 160°F for medium-well - 170°F for well-done For a simple test, press the steak. It should feel soft for rare and firm for well-done. Keep in mind that the steak will cook a bit more after you take it off the heat. Yes, you can prep garlic butter steak bites ahead of time. Cut the steak and season it the day before. Store it in the fridge until you are ready to cook. When you want to eat, just sear the steak bites as normal. If you have leftovers, store them in an airtight container. They will last about 3 days in the fridge. You can reheat them in a skillet over low heat to keep them tender. Garlic butter steak bites pair well with many sides. Here are some ideas: - Creamy mashed potatoes - Roasted vegetables like broccoli or carrots - A fresh green salad - Garlic bread for a tasty touch For drinks, try a nice red wine, like Cabernet Sauvignon. It complements the richness of the steak. You can also serve a cold beer or a refreshing lemonade. For the complete recipe, check out the [Full Recipe]. In this blog post, I covered how to make delicious garlic butter steak bites. We discussed the main ingredients, including sirloin steak, butter, and fresh herbs. You learned step-by-step instructions for cooking and tips to achieve the perfect sear. I also shared variations to try with different cuts of steak and flavor profiles. Remember, choosing high-quality ingredients and proper storage are key to enjoying your dish later. With practice, you can create a tasty meal that impresses everyone. Enjoy your cooking adventure!

Garlic Butter Steak Bites Flavorful and Savory Treat

Are you ready to elevate your weeknight dinners? Garlic Butter Steak Bites are a tasty and quick dish you’ll love

To make Feta Spinach Stuffed Chicken, gather these fresh ingredients: - 4 boneless, skinless chicken breasts - 1 cup fresh spinach, finely chopped - 1/2 cup feta cheese, crumbled - 1/4 cup cream cheese, softened to room temperature - 2 cloves garlic, minced - 1/2 teaspoon dried oregano - 1/2 teaspoon freshly ground black pepper - 1/2 teaspoon sea salt - 1 tablespoon extra virgin olive oil - 1/2 cup cherry tomatoes, halved (for garnish) - Fresh basil leaves, torn (for garnish) You can swap ingredients if needed. Here are some easy swaps: - Use ricotta cheese instead of cream cheese for a lighter filling. - If you don’t have feta, try goat cheese for a tangy taste. - Fresh spinach can be replaced with frozen spinach, just make sure to drain it well. - For a dairy-free option, use dairy-free cream cheese and omit feta. - Chicken thighs work well too if you prefer dark meat. Choosing the right ingredients matters for flavor. Here are some tips: - Chicken: Look for breasts that are firm and pink, with no bruises. - Spinach: Choose bright green leaves without any wilting or browning. - Feta Cheese: Opt for blocks of feta over pre-crumbled for better texture. - Garlic: Fresh garlic is best. Avoid any with sprouting or dry skins. - Olive Oil: Use extra virgin olive oil for the best flavor and health benefits. These tips will help you create a dish that not only tastes good but also looks great on the plate. For the full cooking process, check out the Full Recipe. To start, gather your ingredients. You need four chicken breasts, spinach, feta, cream cheese, garlic, oregano, black pepper, sea salt, and olive oil. 1. Preheat the oven to 375°F (190°C). This temperature is perfect for baking the chicken well. 2. In a bowl, mix the chopped spinach, crumbled feta, softened cream cheese, minced garlic, dried oregano, black pepper, and sea salt. Stir until everything blends into a creamy mixture. 3. Dry each chicken breast with a paper towel. This helps the chicken sear nicely. 4. Carefully slice a pocket in each chicken breast. Be careful not to cut through the bottom. This pocket will hold the tasty filling. 5. Stuff each chicken breast with the spinach and feta mixture. Make sure to fill them well. If the filling spills out, use toothpicks to close the openings. Use a large, oven-safe skillet for this dish. 1. Heat the olive oil over medium-high heat until it shimmers. This step adds flavor to the chicken. 2. Place the stuffed chicken breasts in the skillet. Sear each side for about 3-4 minutes. Look for a golden-brown crust. This adds a nice texture. 3. After searing, transfer the skillet to your preheated oven. Bake the chicken for 20-25 minutes. You'll know it's ready when it reaches an internal temperature of 165°F (75°C). Check the center to ensure it’s no longer pink. Allow the chicken to rest for a few minutes after taking it out of the oven. This helps keep it juicy. For a lovely touch, garnish with halved cherry tomatoes and torn basil leaves. For the full recipe, check out the Feta Spinach Stuffed Chicken Extravaganza. To make the perfect feta spinach stuffed chicken, start with dry chicken breasts. Pat them with paper towels. This helps the seasoning stick better. When you slice a pocket, be careful. Don’t cut all the way through. A deep pocket allows for more filling. Stuff generously, but don’t overfill. If you do, it may spill out during cooking. Use toothpicks to secure any openings. Juicy chicken needs a good sear. Heat your skillet before adding the chicken. Sear each side for 3-4 minutes until golden brown. This locks in moisture. After searing, finish cooking in the oven at 375°F. Bake until the internal temperature hits 165°F. Let the chicken rest for a few minutes after baking. This keeps the juices inside. Presentation makes food more appealing. A simple garnish can elevate your dish. Use halved cherry tomatoes for a pop of color. Fresh basil leaves add a nice touch. You can also serve the chicken on a bed of mixed greens. Drizzle with balsamic reduction for flavor and style. These small details make your meal look restaurant-worthy. For the full recipe, check the details above. {{image_4}} You can customize the filling for feta spinach stuffed chicken. Here are some tasty options: - Artichoke hearts for a tangy twist. - Sun-dried tomatoes for a burst of flavor. - Kalamata olives for a briny kick. - Fresh herbs like dill or parsley for added freshness. These add-ins enhance the taste and make the dish more exciting. If you want to switch it up, try using different proteins. Here are some great choices: - Turkey breasts work well and are leaner. - Pork tenderloin offers a nice change in flavor. - Firm tofu can be a great substitute for a plant-based option. Each protein brings its unique taste to the dish. For a vegetarian version, you can replace chicken with large portobello mushrooms. Here’s how: - Remove the stems and gills from the mushrooms. - Stuff them with the same feta and spinach mix. - Bake until the mushrooms are tender. This version is hearty and satisfying, perfect for everyone at the table. Explore these variations to keep your meals fresh and exciting. For more details, check out the full recipe for feta spinach stuffed chicken. To keep your feta spinach stuffed chicken fresh, let it cool first. Once cooled, wrap each chicken breast in plastic wrap or foil. Place them in an airtight container. Store in the fridge for up to three days. This keeps the chicken moist and tasty. When you are ready to eat your leftovers, preheat your oven to 350°F (175°C). Place the chicken in an oven-safe dish. Add a splash of chicken broth or water to help keep it moist. Cover with foil to prevent drying out. Heat for about 20-25 minutes until warm. You can also use a microwave, but it may not keep the chicken as juicy. If you want to freeze your stuffed chicken, wrap each piece tightly in plastic wrap, then place it in a freezer bag. Remove as much air as possible. This helps avoid freezer burn. You can freeze it for up to three months. To cook from frozen, thaw in the fridge overnight before reheating. This keeps the flavor intact and ready for a quick meal. For the full recipe, check out the details above. Yes, you can prepare Feta Spinach Stuffed Chicken in advance. Simply follow the recipe steps up to the baking part. After stuffing the chicken, cover it and place it in the fridge. You can make it a day ahead. When ready to eat, just bake it as directed. This saves time on busy nights. Feta Spinach Stuffed Chicken pairs well with many sides. Here are some ideas: - Roasted vegetables - Garlic mashed potatoes - Quinoa salad - Steamed asparagus - A light green salad These sides add color, flavor, and nutrition to your meal. They also balance the richness of the chicken. To check if the chicken is done, use a meat thermometer. Insert it into the thickest part of the chicken. The safe internal temperature is 165°F (75°C). If you don’t have a thermometer, cut into the chicken. The meat should be white and no pink should show. Always let the chicken rest a few minutes before serving. This helps keep it juicy. For the full recipe, check the details above. In this blog post, we covered the ingredients, cooking steps, and tips for making Feta Spinach Stuffed Chicken. We discussed ingredient choices and how to keep the chicken juicy. You learned about fun variations and storage tips for leftovers. Cooking should be enjoyable, so don’t stress! With these ideas, you can create a tasty dish tailored to your tastes. Enjoy your cooking adventure!

Feta Spinach Stuffed Chicken Flavorful Dinner Delight

Are you ready to spice up your dinner routine? Feta Spinach Stuffed Chicken is a tasty treat that will impress

- 2 large sweet potatoes - 2 tablespoons olive oil - 1 teaspoon garlic powder - 1 teaspoon smoked paprika - ½ teaspoon sea salt - ½ teaspoon black pepper - ¼ teaspoon cayenne pepper (optional) To make air fryer sweet potato fries, you need just a few key ingredients. Start with two large sweet potatoes. They give the fries a natural sweetness. Next, grab two tablespoons of olive oil. This oil helps the fries crisp up nicely. For flavor, use one teaspoon each of garlic powder and smoked paprika. Garlic powder adds warmth, while smoked paprika brings a subtle smokiness. You will also need half a teaspoon each of sea salt and black pepper. These spices enhance the natural sweet taste of the potatoes. If you like extra heat, add a quarter teaspoon of cayenne pepper. This step is optional, but it can really boost the flavor! Gather these items, and you’re ready to create crispy, delicious fries. You can find the full recipe in the steps that follow! - Wash and peel sweet potatoes - Cut into uniform sticks, aiming for 1/4 inch thickness Start by washing the sweet potatoes under cold water. This removes any dirt and grit. Next, peel them using a vegetable peeler. Uniform sticks are key for even cooking. Aim for about 1/4 inch thick. This thickness helps the fries cook quickly and get crispy. - Soak cut fries in cold water for a minimum of 30 minutes - Drain and pat dry with a kitchen towel Soaking the fries is important. Place them in a bowl and cover with cold water. Let them soak for at least 30 minutes. This step helps remove excess starch. Less starch means crispier fries! After soaking, drain the fries and pat them dry with a kitchen towel. Removing moisture is essential for crispiness. - Combine with olive oil and spices - Ensure even coating on all fries In a large bowl, mix the dried fries with olive oil and spices. Use 2 tablespoons of olive oil, 1 teaspoon of garlic powder, 1 teaspoon of smoked paprika, ½ teaspoon of sea salt, and ½ teaspoon of black pepper. Add ¼ teaspoon of cayenne pepper if you want extra heat. Toss everything well. Make sure each fry gets a nice coat of the seasoning mix. - Preheat air fryer to 400°F (200°C) - Air fry fries in a single layer for 15-20 minutes, shaking halfway Preheat your air fryer to 400°F (200°C). This step is crucial for achieving that perfect crunch. Once heated, place the seasoned fries in the air fryer basket. Make sure to arrange them in a single layer, so they cook evenly. Air fry for 15-20 minutes. Shake the basket halfway through to ensure all sides get crispy. - Look for golden color and crispiness - Allow to cool slightly before serving The fries are ready when they turn a golden color and are crispy. If they need more time, add 2-3 minutes. Keep an eye on them to prevent burning. Once cooked, take them out and let them cool slightly. This short wait makes for a crispier bite when you serve them. To make the crispiest sweet potato fries, soak and dry them well. This step is key. Soaking removes excess starch, which helps the fries crisp up nicely. After soaking for at least 30 minutes, drain them. Pat them dry with a clean towel or paper towels to remove moisture. When placing fries in the air fryer basket, arrange them in a single layer. Avoid overcrowding the basket. If you add too many fries, they will steam instead of crisp. Fry in small batches if needed. Get creative with your spices! You can try various blends to change the flavor of your fries. For a classic taste, stick with garlic powder and smoked paprika. If you want more heat, add cayenne pepper. To adjust seasonings, taste and tweak as you go. If you love herbs, sprinkle some dried oregano or rosemary. You can also try a dash of cinnamon for a sweet twist. Dipping sauces can take your fries to the next level. Try tangy yogurt sauce or spicy sriracha mayo. Ketchup is a classic, but you can also mix it with hot sauce for extra kick. For a fun presentation, serve fries in a rustic basket lined with parchment paper. Add fresh herbs like parsley for a pop of color. This makes it more appealing when you host friends or family. Check out the Full Recipe for more details on making these delicious fries! {{image_4}} You can make sweet potato fries even more fun by adding flavors. Here are two tasty ideas: - Buffalo-style sweet potato fries: For a spicy twist, toss your fries in buffalo sauce after air frying. The heat from the sauce will give them a zesty kick. Serve with blue cheese dressing on the side. It’s a fun way to enjoy your fries! - Sweet and spicy version: Mix brown sugar and chili powder into your seasoning. This creates a sweet and spicy taste that pairs well with the natural sweetness of sweet potatoes. Go for about 1 tablespoon of brown sugar and 1 teaspoon of chili powder to start. Toss the fries with this mix before air frying. If you don’t have an air fryer, you can still enjoy sweet potato fries. Here are two simple methods: - How to bake sweet potato fries in the oven: Preheat your oven to 425°F (220°C). Spread the seasoned fries on a baking sheet lined with parchment paper. Bake for 20-25 minutes, flipping halfway through. Keep an eye on them to ensure they don’t burn. - Tips for frying in oil: If you prefer frying, heat about 2 inches of oil in a deep pot. Fry the sweet potato fries in small batches for about 3-5 minutes or until golden. Be cautious with the hot oil. Drain the fries on paper towels to remove excess oil. For the full recipe, check out the earlier section! To store leftover sweet potato fries, let them cool first. Place them in an airtight container. You can keep them in the fridge for up to three days. This keeps them fresh and tasty. When reheating, the goal is to keep them crispy. Preheat your air fryer to 350°F (175°C). Place the fries in the basket in a single layer. Heat them for about 5-7 minutes. This way, they will regain their crunch. If you want to save sweet potato fries for a longer time, freezing is a great option. First, fully cook them in the air fryer. Let them cool completely. Then, spread them on a baking sheet in a single layer. Freeze them for about 1-2 hours until firm. After that, transfer the fries to a freezer bag. Squeeze out as much air as you can before sealing. When you are ready to cook from frozen, no need to thaw. Preheat your air fryer to 400°F (200°C). Cook the frozen fries for 15-20 minutes, shaking the basket halfway. This ensures they cook evenly and stay crispy. To make air fryer sweet potato fries, follow these steps: 1. Wash and Peel: Clean 2 large sweet potatoes and peel them. 2. Cut into Sticks: Slice them into uniform sticks, about 1/4 inch thick. 3. Soak in Water: Soak the fries in cold water for at least 30 minutes. This helps remove excess starch. 4. Dry the Fries: After soaking, drain and pat the fries dry with a towel. 5. Season: Toss them with 2 tablespoons of olive oil and spices, like garlic powder and smoked paprika. 6. Preheat Air Fryer: Set the air fryer to 400°F (200°C) for about 5 minutes. 7. Air Fry: Place the fries in a single layer and cook for 15-20 minutes, shaking halfway. 8. Check for Doneness: They should be golden and crispy. If not, add a few more minutes. Common pitfalls include not soaking long enough and overcrowding the basket. Both can lead to soggy fries. Yes, you can use frozen sweet potato fries in an air fryer. Here are the guidelines: - Do Not Thaw: Cook them straight from the freezer. Thawing can make them soggy. - Adjust Cooking Time: Cook for about 10-15 minutes at 400°F (200°C). - Shake the Basket: Shake halfway through to ensure even cooking. Always check the package for specific instructions, as cooking times can vary. Soggy fries often come from a few common causes: - Too Much Moisture: Not drying the fries well after soaking leads to sogginess. - Overcrowding: If you fill the air fryer too full, the fries won’t crisp. - Low Temperature: Cooking at a lower temperature can also cause sogginess. To avoid this, soak, dry, and spread fries in a single layer in the air fryer. Sweet potato fries pair well with many dipping sauces. Here are some popular and unique options: - Ketchup: Classic and simple, always a favorite. - Yogurt Sauce: A tangy yogurt sauce with herbs adds freshness. - Sriracha Mayo: Mix mayonnaise with sriracha for a spicy kick. - Maple Syrup: Drizzle with maple syrup for a sweet contrast. - Chipotle Aioli: Blend chipotle peppers with mayo for a smoky flavor. Feel free to experiment with your favorite sauces to enhance the flavor experience. For the full recipe, check out the link. This blog post covered how to make delicious air fryer sweet potato fries. We talked about the right ingredients, how to prepare and soak the fries, and the best cooking techniques. You can also try different spices and serving ideas to keep things fun. Remember to store leftovers properly for the best taste. Sweet potato fries can be a tasty and healthy snack, so give them a try. Enjoy your cooking and the smiles it brings!

Air Fryer Sweet Potato Fries Crispy and Simple Recipe

Do you crave crispy, golden sweet potato fries but dread the hassle of frying? I’ve got you covered! In this

Older posts
Newer posts
← Previous Page1 … Page50 Page51 Page52 … Page91 Next →

dsad

© 2025 recipesstation • Built with GeneratePress

Our Policies

  • Copyright Policy
  • Cookie Policy
  • GDPR Policy
  • Privacy Policy
  • Disclaimer
  • Terms Of Use

More Information

  • Home
  • About
  • Contact
  • Appetizers
  • Dessert
  • Dinner
  • Drinks
©2025, recipesstation About Back To Top