Skip to content
DisclaimerTerms Of UseGDPR PolicyCookie Policy

recipesstation

  • Home
  • Drinks
  • Appetizers
  • Dinner
  • Dessert
  • About
  • Contact
  • Privacy Policy
DisclaimerTerms Of UseGDPR PolicyCookie Policy

Emily

- 300g penne pasta - 2 boneless, skinless chicken breasts, diced - 4 cloves garlic, finely minced - 1 cup heavy cream - 1 cup chicken broth - 1 cup freshly grated Parmesan cheese - 1 tablespoon olive oil - 1 teaspoon dried Italian herbs - Salt and freshly ground black pepper - Fresh parsley, for garnish When I think of Creamy Garlic Chicken Penne, I picture a dish that brings warmth and comfort. The main ingredients are simple yet important. The penne pasta forms a perfect base, while the chicken gives it substance. Garlic adds a strong, fragrant touch, making it irresistible. Next, we have the cooking essentials. Heavy cream creates that rich, creamy texture we love. Chicken broth brings depth of flavor, while Parmesan cheese adds a savory touch. Olive oil is key for cooking the chicken and starting the dish off right. Don’t forget the seasoning and garnish. Italian herbs add a burst of flavor, and salt and pepper balance everything out. Fresh parsley not only looks great but also adds freshness to the plate. For the full experience, check out the Full Recipe. Remember, each ingredient plays a role in making this dish truly special! Start by filling a large pot with water and add a good amount of salt. This step adds flavor to the pasta. Bring the water to a rolling boil. Once boiling, add the penne pasta. Cook it according to the package instructions until it is al dente, usually about 10-12 minutes. When done, drain the pasta in a colander. Remember to save a cup of the starchy pasta water for later. While the pasta cooks, take your diced chicken breasts. Season them well with salt, black pepper, and dried Italian herbs. In a large skillet, heat the olive oil over medium heat. Once the oil shimmers, add the chicken. Cook the chicken for about 5-7 minutes, stirring occasionally. It should turn golden brown and be fully cooked. After cooking, remove the chicken from the skillet and let it rest on a plate. In the same skillet, add your minced garlic. Sauté it for 1-2 minutes, stirring often to avoid burning. You want the garlic to smell amazing! Next, pour in the chicken broth and let it simmer for about 2 minutes. Slowly add the heavy cream, stirring continuously. Let the sauce simmer on low heat for another 3-4 minutes until it thickens into a rich and creamy texture. Now it's time to bring everything together. Return the cooked chicken to the skillet, along with the drained penne. Gently fold in the grated Parmesan cheese. Stir until all the ingredients are well mixed and the pasta is coated in the creamy sauce. If the sauce is too thick, add a splash of the reserved pasta water to reach your desired consistency. Before serving, taste your dish. Adjust the seasoning with more salt and freshly ground pepper if needed. Once it tastes just right, remove the skillet from heat. Serve your Creamy Garlic Chicken Penne hot, garnished with freshly chopped parsley for a touch of color. For the full recipe, check below! To avoid burning garlic, cook it slowly. Add it to your pan after the chicken. Stir it often for one to two minutes. You want it golden, not brown. This gives a nice flavor without bitterness. For a creamy consistency, use heavy cream. Slowly add it to the pan after the broth. Stir often to blend. Let it simmer on low heat. This helps it thicken and get rich. Timing is key for pasta. If you overcook it, it turns mushy. Check the package for cooking times. Start tasting the pasta a minute or two before the time is up. Look for a firm bite when you taste it. It should not be hard but have some resistance. This is the perfect al dente texture for your penne. For side dishes, think about a fresh salad or garlic bread. A simple green salad with lemon dressing works well. Garlic bread adds a nice crunch and flavor. To present your dish, use shallow bowls. This makes the meal look elegant. Top it with extra Parmesan and a sprig of parsley. It adds color and style to your creamy garlic chicken penne. {{image_4}} You can make this dish fit many diets. If you need gluten-free options, use gluten-free pasta. Many brands offer good substitutes that taste great. You can easily find them in stores. For a vegan option, swap the chicken and cream. Use chickpeas or tofu for protein. Instead of heavy cream, try coconut cream or cashew cream. These options keep the dish creamy and rich. Want to boost the flavor? Add vegetables to your dish. Spinach is a great choice. It wilts nicely and adds nutrients. Sun-dried tomatoes bring a burst of flavor, too. They add a nice sweetness that pairs well with garlic. If you like a little heat, sprinkle in red pepper flakes. Start with a small amount. You can always add more if you like it spicy. You can switch out chicken for other proteins. Shrimp works wonderfully in this dish. It cooks quickly and adds a nice seafood twist. Tofu is another great substitute. Make sure to press it first to remove excess water. Cook it until golden brown for the best texture. Adjust cooking times as needed. Shrimp cooks fast, while tofu takes a bit longer to get crispy. Explore these variations to make the dish your own. Each twist offers a fresh take on a classic. For the full recipe, check out the detailed instructions above. To keep your Creamy Garlic Chicken Penne fresh, store it in an airtight container. Make sure it cools to room temperature before sealing. This dish will last in the fridge for about 3 to 4 days. If you notice any change in smell or color, it’s best to throw it away. You can freeze Creamy Garlic Chicken Penne if you want to save some for later. Portion it into freezer-safe containers. It’s best to freeze it within two days of making it. This dish can last in the freezer for up to 2 months. When you’re ready to eat, thaw it overnight in the fridge. To reheat, check the next section for the best methods that keep it creamy and delicious. To reheat your creamy dish, use a skillet over low heat. Add a splash of chicken broth or milk to keep it smooth. Stir it gently to avoid burning. If you prefer the microwave, heat it in short bursts. Stir between each burst to ensure even heating. Be careful not to overcook it, as this can make the sauce separate. Enjoy your meal just like it was fresh! Making Creamy Garlic Chicken Penne takes about 35 minutes. You need 10 minutes to prep and 25 minutes to cook. This timing works well for a quick weeknight meal. Yes, you can add more garlic if you love its flavor. Start with an extra clove. Taste as you go to avoid making the dish too strong. Garlic adds depth, but balance is key. This dish pairs well with a fresh green salad or garlic bread. A simple side of steamed broccoli can also add color and nutrition. These sides complement the creamy sauce and give you a complete meal. To add spice, try red pepper flakes or black pepper. Start with a pinch and stir. You can also use spicy Italian sausage instead of chicken. This change gives a nice heat to the meal. Yes, you can prep the chicken and sauce ahead of time. Store them in the fridge for up to two days. Cook the penne just before serving. This method keeps the pasta fresh and prevents it from getting soggy. For the full recipe, check the earlier section. This blog post covered how to make Creamy Garlic Chicken Penne. You learned about key ingredients, step-by-step cooking, and serving ideas. We explored fun variations and how to store leftovers. Remember, cooking should be fun and flexible. Feel free to tweak the recipe to fit your taste. Enjoy creating your dish and sharing it with others!

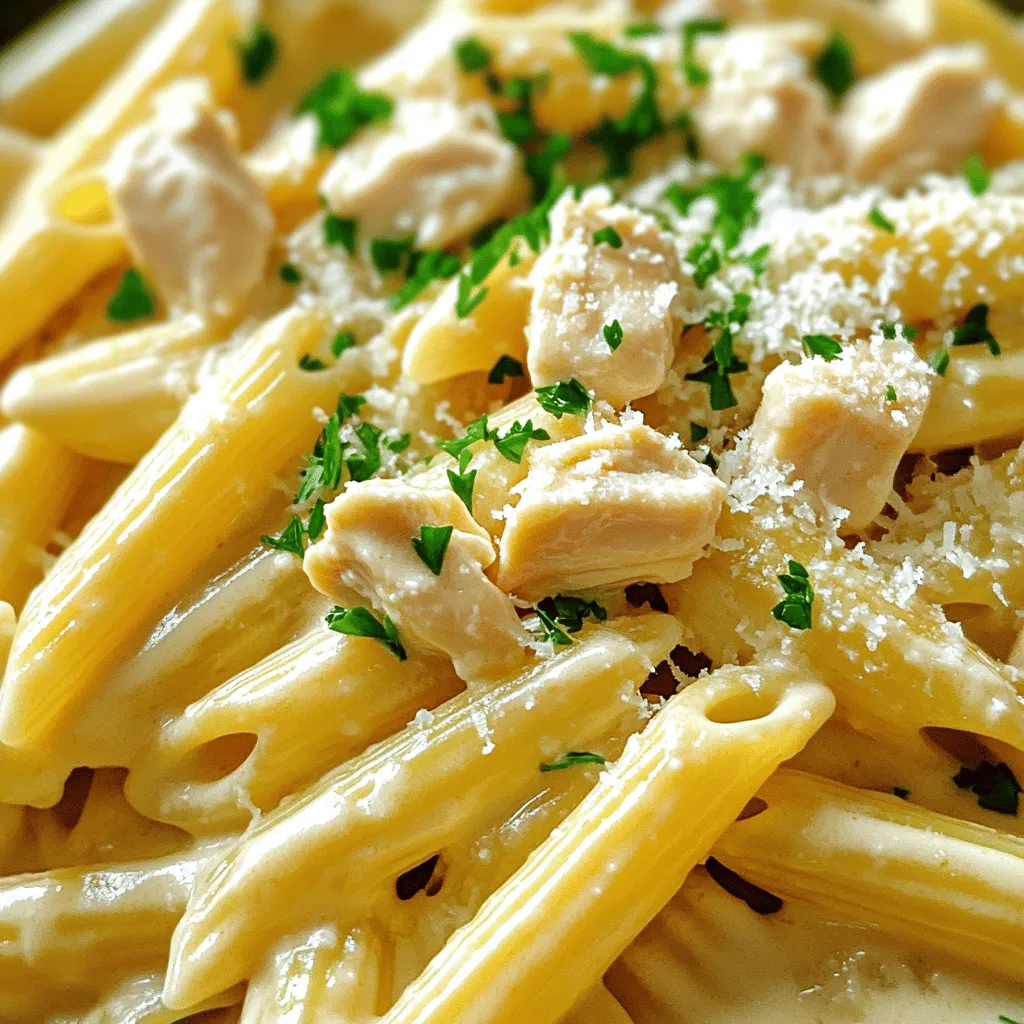
Creamy Garlic Chicken Penne Rich and Flavorful Dish

Looking for a rich and flavorful dish that impresses every time? Join me as we dive into the joys of

To start, gather the following fresh ingredients: - 1 pound large shrimp, peeled and deveined - 1/3 cup honey - 1/4 cup low-sodium soy sauce - 4 cloves garlic, finely minced - 1 tablespoon fresh ginger, grated - 2 tablespoons extra virgin olive oil - Skewers (wooden or metal) These ingredients work together to create a sweet and savory blend. The honey gives a nice glaze, while the soy sauce adds depth. To elevate your dish, consider these garnishes: - 1 tablespoon sesame seeds - 1 tablespoon chopped green onions These optional garnishes add a nice crunch and color. They enhance the dish's presentation and flavor. If you need to swap some items, here are a few ideas: - Use maple syrup instead of honey for a vegan option. - Replace low-sodium soy sauce with tamari for a gluten-free version. - Use garlic powder if you don’t have fresh garlic. These substitutions help keep the dish tasty and cater to different diets. Feel free to mix and match based on what you have on hand. For the full recipe, follow the steps outlined above. Start with the skewers. If you have wooden skewers, soak them in water for 30 minutes. This step stops them from burning on the grill. If you use metal skewers, you can skip this step. Next, let’s make the marinade. In a medium bowl, mix together the honey, low-sodium soy sauce, minced garlic, grated ginger, and olive oil. Whisk until it’s smooth and all the ingredients blend well. This marinade brings sweet and savory flavors to the shrimp. Now, add the shrimp to the marinade. Make sure each shrimp gets a nice coating. Let them sit for at least 20 minutes. For a stronger flavor, refrigerate them for up to 1 hour. This time allows the shrimp to soak in all that delicious taste. While the shrimp marinates, preheat your grill to medium-high heat. Once ready, thread the marinated shrimp onto the skewers. Leave small gaps between each shrimp for even cooking. Place the skewers on the grill and cook for about 2-3 minutes per side. Watch closely! The shrimp should turn pink and opaque. Overcooking can make them chewy. Remove the skewers from the grill, garnish them with sesame seeds and green onions, and enjoy your tasty treat! To cook shrimp just right, aim for a bright pink color. Cook them for 2-3 minutes on each side. Shrimp cook fast, so watch them closely. Overcooking makes them tough and rubbery. Always use fresh shrimp for the best taste. If using frozen shrimp, thaw them completely first. This helps them cook evenly. When skewering, leave small gaps between the shrimp. This allows heat to circulate and cook them evenly. Use soaked wooden skewers to avoid burning. If you prefer metal skewers, they work well too. Make sure to thread the shrimp through the thickest part. This keeps them secure during grilling. Serve these skewers hot off the grill. Arrange them on a bright platter for a pop of color. Add a sprinkle of sesame seeds and green onions for flair. Offer extra honey sauce on the side for drizzling. Fresh lime wedges also add a nice zing. Pair the skewers with rice or a fresh salad for a complete meal. Check out the Full Recipe for more details. {{image_4}} You can boost flavor and nutrition by adding veggies. Bell peppers, zucchini, and cherry tomatoes work great. Cut them into chunks and thread them on the skewers with shrimp. This adds color and a nice crunch. You can also try mushrooms or onions for extra taste. Just remember to cut your veggies similar in size to the shrimp for even cooking. If you want to mix things up, try new marinades. A spicy chili sauce can add heat. You can also use lime juice for a fresh twist. For a more tropical flavor, mix in some pineapple juice. If you love herbs, add fresh cilantro or basil. Each marinade will create a unique taste and make your dish exciting. Grilling gives shrimp a smoky flavor. It’s quick and easy! Just watch the time to avoid overcooking. If you prefer baking, preheat your oven to 400°F. Place the skewers on a baking sheet and bake for about 8-10 minutes. Baking keeps everything juicy. Both methods have their perks, so choose what works best for you! For more details, check out the Full Recipe. After enjoying your honey garlic shrimp skewers, you may have some left. Store them in an airtight container. They stay fresh in the fridge for up to three days. Be sure to let them cool before sealing. This helps keep the shrimp tender and tasty. To reheat your shrimp skewers, use the oven or a skillet. If using an oven, preheat it to 350°F (175°C). Place the skewers on a baking sheet and heat for about 10 minutes. If using a skillet, add a splash of water to create steam. Heat on low for about 5 minutes. This keeps the shrimp juicy and flavorful. You can freeze leftover skewers for longer storage. Wrap each skewer in plastic wrap and then in foil. This helps prevent freezer burn. They can stay in the freezer for up to three months. When ready to eat, thaw them in the fridge overnight. Reheat as mentioned for a delicious meal again. For the full recipe, check the earlier sections. Yes, you can use frozen shrimp. Just thaw them before marinating. Place them in a bowl of cold water for about 15-20 minutes. This keeps the shrimp tender and juicy. You can marinate the shrimp for 20 minutes to 1 hour. For a stronger flavor, I recommend 30 minutes. Just don’t leave them too long, or they may get mushy. These skewers pair well with many sides. Some great options include: - Steamed rice - Grilled vegetables - Fresh salad - Garlic bread You can mix and match these sides for a complete meal. For the full recipe, check out the Honey Garlic Shrimp Skewers. This dish is simple yet packed with flavor. Each bite gives you a burst of sweet and savory goodness. Enjoy it as a fun appetizer or a main dish. Honey garlic shrimp skewers are simple to make and tasty to eat. We discussed the key ingredients, like shrimp and garlic, and fun extras to make your dish shine. I shared tips for grilling and cooking shrimp to get them just right. You can even mix it up with veggies or different marinades. Remember to store leftovers properly and reheat them well. Don’t forget to try new sides to pair with your skewers. Enjoy crafting your own honey garlic shrimp dish!

Honey Garlic Shrimp Skewers Easy and Tasty Delight

Are you ready to elevate your grilling game? Honey Garlic Shrimp Skewers are an easy and tasty delight that can

To make a delightful Mediterranean quinoa salad, you need these key ingredients: - 1 cup quinoa, thoroughly rinsed - 2 cups vegetable broth or water - 1 cup cherry tomatoes, halved - 1 medium cucumber, diced - 1 bell pepper (any vibrant color), diced - 1/2 red onion, finely chopped - 1/2 cup Kalamata olives, pitted and halved - 1/2 cup feta cheese, crumbled (omit for a dairy-free version) - 1/4 cup fresh parsley, finely chopped - 1/4 cup fresh mint, finely chopped - 3 tablespoons extra virgin olive oil - 2 tablespoons fresh lemon juice - 1 teaspoon dried oregano - Salt and freshly ground black pepper, to taste These ingredients blend well and create a fresh taste. Each item adds a special touch to the dish. Quinoa is a great source of protein. It is also gluten-free, making it a healthy choice. The cherry tomatoes bring vitamins A and C, which help your immune system. Cucumbers add hydration since they have lots of water. Bell peppers add crunch and vitamins, too. Red onions contain antioxidants that may support heart health. Kalamata olives offer healthy fats and a unique flavor. Feta cheese adds creaminess and calcium, which is key for strong bones. Fresh herbs like parsley and mint boost the salad’s flavor while adding nutrients. Olive oil is heart-healthy and gives the salad richness. Lemon juice brightens the dish, making it refreshing. If you don't have quinoa, you can swap it for bulgur or couscous. Both will provide a similar texture. Use vegetable broth for added flavor, but water works too. If you can't find Kalamata olives, black olives are a good substitute. For a dairy-free version, skip the feta or try a plant-based cheese. Feel free to play with the veggies. Zucchini, carrots, or even arugula can be great add-ins. If you want more protein, consider adding chickpeas or grilled chicken. This salad is versatile, so adjust it to fit your taste. For the full recipe, check out Mediterranean Quinoa Delight. To start, you want to cook the quinoa right. Use a medium saucepan for this. Pour in 2 cups of vegetable broth or water. Bring it to a rolling boil over medium heat. Once it bubbles, add 1 cup of rinsed quinoa. Turn the heat down low, then cover the pot. Let it simmer for about 15 minutes. The liquid will soak up, and quinoa will become fluffy. After that, remove it from the heat. Let it sit, covered, for 5 more minutes. Fluff it with a fork and let it cool. Next, grab a large mixing bowl. Add the fun colors and flavors. Use 1 cup of halved cherry tomatoes, 1 diced cucumber, and 1 diced bell pepper. You can choose any vibrant color for the bell pepper. Then chop 1/2 red onion finely. Toss in 1/2 cup of halved Kalamata olives. If you like cheese, add 1/2 cup of crumbled feta. Finally, sprinkle in 1/4 cup of finely chopped parsley and mint. Mix these ingredients gently. Make sure they are evenly spread. In a small bowl, it's time to make the dressing. Whisk together 3 tablespoons of extra virgin olive oil and 2 tablespoons of fresh lemon juice. Add 1 teaspoon of dried oregano for flavor. Don’t forget a pinch of salt and pepper. Whisk it well until it blends nicely. This will bring great taste to your salad. Now, let’s bring it all together. Once the quinoa cools, add it to the bowl of vegetables. Drizzle the dressing over the top. Gently toss everything together. You want each piece coated well. It should look colorful and inviting. Taste your salad to see if it needs more salt or pepper. For the best flavor, let it rest for 10-15 minutes before serving. This allows the flavors to mix well. You can serve it chilled or at room temperature. For a beautiful touch, use a large serving bowl. Garnish with extra fresh herbs and whole Kalamata olives. This makes it look even more appetizing. You can find the full recipe for Mediterranean Quinoa Salad Fresh and Healthy Delight above. To cook quinoa just right, start with clean grains. Rinse your quinoa in cold water to remove its natural coating, called saponin. This step helps reduce bitterness. Use two cups of vegetable broth or water for every cup of quinoa. Bring the liquid to a boil, then stir in the quinoa. Lower the heat, cover the pot, and let it simmer for about 15 minutes. Once the liquid is gone, remove it from heat and let it sit. Fluff it with a fork after five minutes. This method gives you light, fluffy quinoa. To enhance the flavor of your Mediterranean quinoa salad, think fresh herbs and spices. Use fresh parsley and mint for a bright touch. Drizzle extra virgin olive oil and fresh lemon juice for a zesty kick. Add dried oregano for an earthy note. You can also try a splash of balsamic vinegar for depth. Want a little heat? Add a pinch of red pepper flakes to the dressing. Taste as you go to find your perfect balance. When serving your salad, use a colorful bowl to catch the eye. Layer the salad with care to show off the vibrant ingredients. Garnish with extra herbs and whole Kalamata olives for a beautiful finish. You can also serve it in individual bowls for a more personal touch. For a fun twist, add lemon wedges on the side for an extra burst of flavor. This makes your Mediterranean quinoa salad look as good as it tastes. Check out the Full Recipe for more details on this delicious dish! {{image_4}} To make a vegan version of this salad, simply skip the feta cheese. This keeps the dish light and fresh. You can add more veggies like zucchini or carrot for extra color and crunch. Toss in some avocado for creaminess. This adds healthy fats and makes the salad even more filling. For a protein boost, chickpeas are a great choice. They blend well and add texture. Just rinse and drain a can, then mix them in. If you prefer chicken, grill some pieces and slice them thin. Add them to the salad for a hearty meal. Both options keep the dish delicious and satisfying. Feel free to get creative with your add-ins. Nuts like almonds or walnuts bring a nice crunch. Seeds, such as sunflower or pumpkin seeds, add a nutty flavor. You can also try different vegetables. Roasted bell peppers or artichokes can add depth. The more you mix, the more unique your salad becomes. You can find the full recipe for Mediterranean Quinoa Salad above. To keep your Mediterranean quinoa salad fresh, store it in an airtight container. This will help keep out air and moisture. You can use glass or plastic containers. Make sure the salad is completely cool before sealing it. This prevents condensation from forming. You can enjoy this salad cold or at room temperature. If you prefer it warm, gently heat it in a pan on low. Stir it often to avoid burning. If you want to serve it chilled, let it sit in the fridge for about 30 minutes before serving. This allows the flavors to meld nicely. When stored properly, your salad will last about 3 to 5 days in the fridge. Always check for any signs of spoilage before eating. If the salad smells off or looks strange, it's best to toss it. Enjoy your Mediterranean quinoa salad fresh for the best taste! For the full recipe, check out the detailed instructions above. Mediterranean Quinoa Salad lasts about 3 to 5 days in the fridge. Store it in an airtight container to keep it fresh. After a few days, the veggies may lose some crunch, but the flavors will still be great. Yes, you can make Mediterranean Quinoa Salad in advance. It tastes even better after sitting for a while. Just mix all the ingredients and chill it in the fridge. This salad is perfect for meal prep or potlucks. Absolutely! You can use grains like couscous, farro, or bulgur instead of quinoa. Each grain brings a different texture and flavor. Just adjust the cooking time based on the grain you choose. You can use many dressings for your salad. A balsamic vinaigrette or tahini dressing works well. Try a yogurt-based dressing for a creamy twist. Feel free to mix and match to suit your taste! This blog post shared how to make a tasty Mediterranean quinoa salad. We covered key ingredients and their health benefits. I provided steps to cook and dress your salad. You also learned tips for cooking quinoa and making it look great. Experiment with variations by adding protein or creative mix-ins. With proper storage, your salad will last days. Enjoy making this healthy dish easy and fun! Remember, the best meals come from your kitchen!

Mediterranean Quinoa Salad Fresh and Healthy Delight

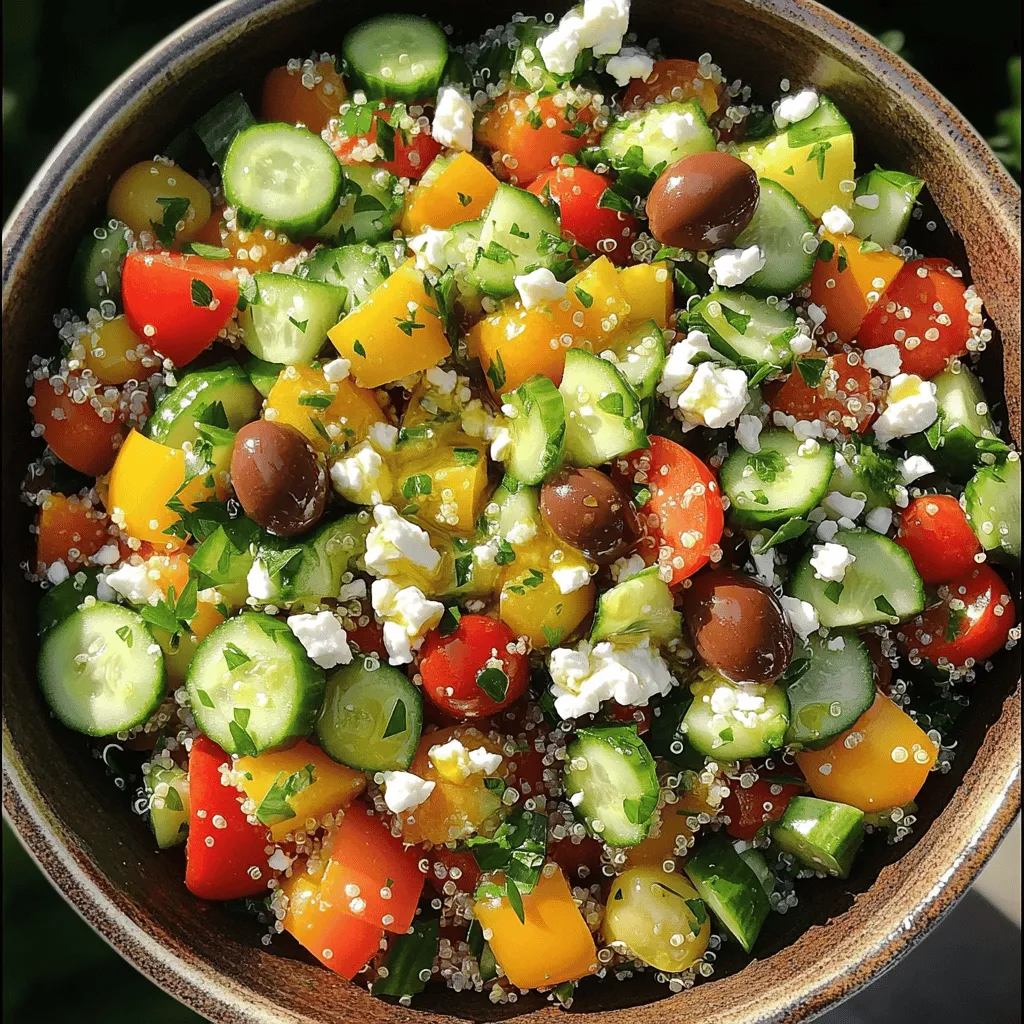
Looking for a fresh and healthy dish that’s easy to make? The Mediterranean Quinoa Salad is your answer! Packed with

To make the Easy Chicken Alfredo Bake, gather these simple items: - 3 cups cooked rotini pasta - 2 cups cooked chicken breast, shredded - 2 cups Alfredo sauce (store-bought or homemade) - 1 cup broccoli florets, steamed until tender - 1 cup mozzarella cheese, shredded - 1/2 cup Parmesan cheese, freshly grated - 1/2 teaspoon garlic powder - 1/2 teaspoon Italian seasoning - Salt and pepper, to taste - Fresh parsley, finely chopped (for garnish) You can change this recipe to fit your taste. Here are some fun options: - Substitute whole wheat or gluten-free pasta for a healthier choice. - Add cooked spinach or sun-dried tomatoes for extra flavor. - Use grilled shrimp or sausage for a protein twist. - Try different cheeses like gouda or cheddar for a new taste. If you want to use store-bought Alfredo sauce, I recommend these brands: - Classico for its creamy texture and rich flavor. - Rao's Homemade for a fresh taste with no fillers. - Bertolli for a classic flavor that pairs well with pasta. Feel free to choose your favorite! The right sauce makes your dish shine. For the full recipe, check out my cooking guide. 1. Preheat your oven to 375°F (190°C). This is key for baking. 2. In a large bowl, mix together the cooked rotini pasta, shredded chicken, and Alfredo sauce. 3. Add steamed broccoli, garlic powder, Italian seasoning, salt, and pepper. Stir gently until everything is well combined. 4. Transfer this mixture into a greased 9x13 inch baking dish. Make sure it spreads evenly. 5. Sprinkle the shredded mozzarella cheese and grated Parmesan cheese on top. This will create a cheesy crust. 1. Cover the baking dish with aluminum foil. This helps keep the cheese from burning. 2. Place the dish in the oven and bake for 20 minutes. This part warms everything up. 3. After 20 minutes, take off the foil. Bake for another 10 minutes until the cheese is golden and bubbly. 4. Once it's done, remove it from the oven. Let it cool for a few minutes before serving. - Use fresh mozzarella for a gooey texture. - Shred your cheese for even melting. Pre-shredded cheese can have anti-caking agents. - Bake uncovered during the last 10 minutes for a crispy top. - If you want extra cheese, add a bit more during the last few minutes of baking. These steps will help you create a dish that is creamy, cheesy, and full of flavor. For a full recipe, check out the details above. Making your own Alfredo sauce is easy and fun. Start with simple ingredients. You need butter, heavy cream, garlic, and cheese. Melt 1/2 cup of butter in a pan over medium heat. Add 1 cup of heavy cream and stir it well. Next, add minced garlic, about 2 cloves. Cook for a few minutes. Finally, mix in 1 cup of grated Parmesan cheese. Stir until the cheese melts. This sauce is rich and creamy, perfect for your Chicken Alfredo Bake. Leftovers are great for a quick meal. To reheat, use the oven for best results. Preheat the oven to 350°F (175°C). Place your Chicken Alfredo Bake in an oven-safe dish. Cover it with foil to keep it moist. Heat for about 20 minutes. You can also use the microwave. Just add a splash of water to the dish. Cover loosely and heat in short bursts until warm. Check often to avoid overcooking. You can make this Chicken Alfredo Bake your own. Add vegetables like mushrooms or spinach for extra flavor and nutrition. Use different cheeses, like gouda or cheddar, for a twist. If you like spice, sprinkle in some red pepper flakes. For a lighter dish, swap the rotini for zucchini noodles. You can also make it gluten-free by using gluten-free pasta. The options are endless, so get creative! {{image_4}} You can easily make a vegetarian version of this dish. Just swap the chicken for sautéed mushrooms or grilled zucchini. Use a plant-based Alfredo sauce or make your own with cashews. This keeps it creamy and rich, just like the original. Add in extra veggies like bell peppers or spinach for more color and nutrients. If you need a gluten-free option, use gluten-free pasta. There are many good kinds available. For a dairy-free version, choose a nut-based cheese or a vegan Alfredo sauce. You can also skip the cheese completely if you want. Adjust the seasonings to taste, and you'll still enjoy a great meal. Want to boost the flavor? Try adding cooked bacon or sun-dried tomatoes. They add a nice kick to the dish. For more nutrition, toss in some peas or kale. These ingredients not only enhance the taste but also make the meal more filling. Experiment with different herbs like thyme or basil for a fresh twist. Each variation keeps the essence of the Easy Chicken Alfredo Bake while catering to different tastes and needs. For the complete recipe, check out the Full Recipe section. After you enjoy your chicken Alfredo bake, let it cool down. Then, place it in an airtight container. Make sure to cover it tightly to keep it fresh. Store it in the fridge for up to three days. Keep in mind that the pasta will soak up some sauce, so it may get a bit dry. You can add a splash of Alfredo sauce before reheating to make it creamy again. If you want to keep your chicken Alfredo bake for longer, freezing is a great option. First, let the dish cool completely. Then, cut it into portions for easy serving later. Wrap each piece in plastic wrap. Next, place the wrapped portions in a freezer-safe bag. Squeeze out the air to prevent freezer burn. You can freeze it for up to three months. When you’re ready to eat, thaw it overnight in the fridge before reheating. For meal prep, use glass or BPA-free plastic containers. Glass containers are great because they can go from the oven to the fridge. They are also easy to clean. If you prefer plastic, choose containers that are microwave-safe. Look for ones with tight lids to keep your meals fresh. This way, your chicken Alfredo bake stays tasty and ready to enjoy anytime! Yes, you can use different pasta types. Penne, fusilli, or even shells work well. Just make sure to cook them according to the package instructions. The shape of the pasta will hold the sauce nicely. This will add fun and variety to your dish. If you don't have cooked chicken, use raw chicken instead. Simply dice it and cook it before mixing with the pasta. You can also use rotisserie chicken for a quick option. Just shred it and add it to the mix. This makes your meal fast and easy. You can store leftovers for about three to four days. Place them in an airtight container in the fridge. When you want to eat them, just reheat them in the oven or microwave. This makes a great lunch or quick dinner later on. Yes, this recipe is perfect for meal prep. You can make it in advance and portion it out. Simply divide the bake into meal-sized containers. This way, you have tasty meals ready for busy days. Reheat and enjoy your easy chicken Alfredo bake anytime! For the full recipe, check out the earlier section. This post covered all you need for a Chicken Alfredo Bake. We shared a full list of ingredients, tips for cooking, and ways to customize your dish. You learned how to make your own sauce and store any leftovers. With this knowledge, you can make your meal unique and tasty. Try different pasta or add veggies for a twist. Enjoy your cooking and share with friends!

Easy Chicken Alfredo Bake Simple and Flavorful Meal

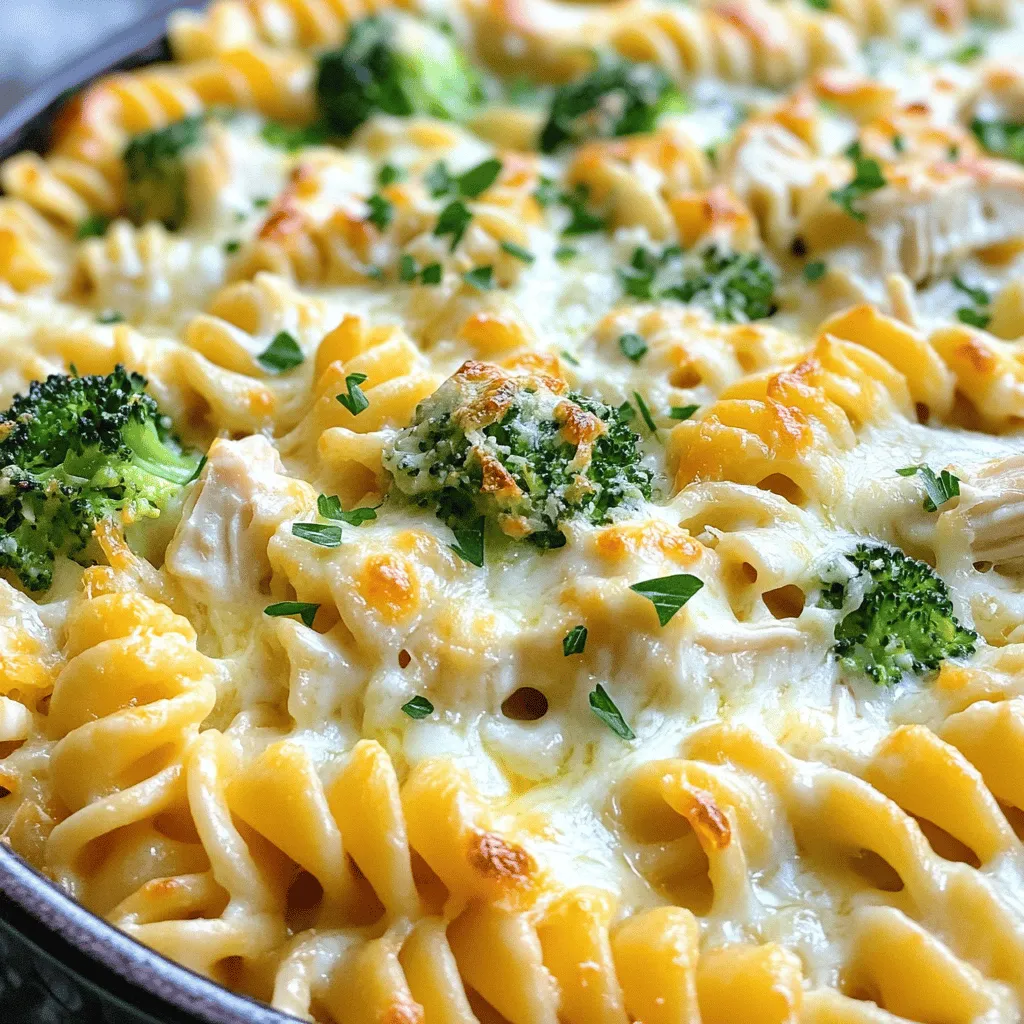
Are you ready to whip up a delicious, easy Chicken Alfredo Bake? This simple and flavorful meal is perfect for

To make these no-bake chocolate peanut butter bars, you'll need: - 1 cup rolled oats - 1 cup natural peanut butter (smooth or crunchy) - 1/2 cup honey or maple syrup (use maple syrup for vegan bars) - 1/2 cup unsweetened cocoa powder - 1/4 cup coconut oil, melted - 1/2 teaspoon vanilla extract - A pinch of salt - 1/2 cup dark chocolate chips (dairy-free if desired) - 1/4 cup chopped nuts (optional for topping) You can easily swap some ingredients if needed. For example, if you don't have rolled oats, quick oats work too. You can use almond butter instead of peanut butter for a nut-free option. For a sweeter taste, substitute honey with agave syrup. If you want a nut-free version, ensure your chocolate chips are also nut-free. Always choose high-quality ingredients for the best flavor. Use natural peanut butter without added sugars or oils. Look for dark chocolate chips with a high cacao percentage. Fresh oats and raw honey add more taste and nutrition. If possible, opt for organic ingredients to enhance the health benefits of your bars. Quality matters, and it shows in the taste! To start, gather your ingredients. Grab a large mixing bowl. Add 1 cup of rolled oats. Next, add 1 cup of peanut butter. You can choose smooth or crunchy based on what you like. Then, pour in 1/2 cup of honey or maple syrup. This will sweeten your bars. Now, add 1/2 cup of unsweetened cocoa powder. This gives a rich chocolate taste. Don't forget the 1/4 cup of melted coconut oil. It helps bind the mixture. Add 1/2 teaspoon of vanilla extract and a pinch of salt. Stir all these together until you have a thick, sticky dough. This is the base of your bars. Now, prepare an 8x8 inch baking pan. Line it with parchment paper. Make sure some paper hangs over the sides for easy removal. Carefully transfer your oat mixture into the pan. Use the back of a spatula or your hands to press it down. You want it packed tightly and evenly. This step is key for a good texture. Take your time to make it smooth and firm. Next, it's time to melt the chocolate. Place 1/2 cup of dark chocolate chips in a microwave-safe bowl. Heat it in 30-second bursts. Stir after each time until the chocolate is smooth. Once melted, pour the chocolate over the pressed oat mixture. Use a spatula to spread it evenly. For a fun crunch, sprinkle 1/4 cup of chopped nuts on top. Press them down slightly so they stick. This adds flavor and texture. Now, refrigerate the bars for about 2 hours. They need to firm up before you can enjoy them. Once set, lift the bars out using the parchment paper. Slice them into squares or bars as you wish. For the full recipe, refer back to the beginning. To get the right texture, use fresh ingredients. Old oats or peanut butter can change the taste and feel. Mix the wet and dry ingredients well. You want a thick, sticky dough. If the mixture feels too dry, add a bit more honey or coconut oil. If it’s too wet, add more oats. This balance is key for great bars. When serving, cut the bars into equal pieces. You can use a sharp knife for clean edges. For a fun twist, serve them with fresh fruit or a scoop of yogurt. The creamy yogurt pairs perfectly with the rich bars. You can also drizzle melted chocolate on top for extra flair. This adds a nice touch and makes them look gourmet. To slice the bars easily, chill them well first. Once they are firm, lift them out using the parchment paper. Place them on a cutting board. Use a sharp knife and cut straight down to avoid crumbling. Wipe the knife between cuts for cleaner slices. This helps keep the bars looking neat and tidy. Enjoy your tasty creation! {{image_4}} You can make these bars healthier with simple swaps. Instead of honey, use agave syrup. This change lowers the glycemic index. You can also substitute half the oats with ground flaxseed. Flaxseed adds fiber and omega-3 fatty acids. Choose dark chocolate with a higher cocoa content for less sugar. This small change boosts the health benefits. Want to mix up the flavor? Add a teaspoon of cinnamon for warmth. This spice works well with chocolate and peanut butter. You can also include a tablespoon of espresso powder. It elevates the chocolate flavor without adding caffeine. For a fruity twist, fold in dried fruit like cranberries or cherries. These additions give your bars a fun burst of taste. Peanut butter isn’t the only nut butter that works. Try almond or cashew butter for a different flavor. Each nut brings its unique taste and texture. If you want to go nut-free, sunflower seed butter is a fantastic choice. Just make sure it’s safe for those with allergies. Each nut butter alters the flavor and makes these bars your own. For the full recipe, check out the detailed instructions and ingredients above. Store your no-bake chocolate peanut butter bars in an airtight container. This keeps them fresh and prevents drying out. Place parchment paper between layers if stacking, to avoid sticking. Keep them in the fridge to maintain firmness and flavor. You can freeze these bars for longer storage. Cut them into squares before freezing. Wrap each square in plastic wrap and place them in a freezer bag. This helps keep them fresh for up to three months. Thaw them in the fridge for a few hours before serving. These bars last about one week in the fridge. They taste best when fresh. After a week, they may still be safe to eat but will lose some texture. If frozen, they stay fresh for three months, making them a great make-ahead treat. Enjoy them whenever you crave a chocolatey snack! Yes, you can easily make these bars vegan. Just swap honey for maple syrup. Use dark chocolate chips that are dairy-free. With these changes, the bars will be 100% vegan and still delicious. These bars take about 2 hours to set in the fridge. You want them firm to the touch. After that, they are ready to slice and enjoy! You can use different sweeteners in this recipe. Choices like agave syrup or coconut nectar work well. Just remember that they may slightly change the flavor and texture. Always adjust to your taste! For the full recipe, check out the details above. This blog post shared key tips for making delicious bars. We covered ingredients, including substitutions and quality advice. I provided step-by-step instructions for the mixture, packing, and topping. You learned tricks for texture, serving, and slicing. We explored healthy variations and storage tips to keep your bars fresh. Lastly, I answered common questions about vegan options and sweeteners. With these insights, you can make tasty bars that everyone will enjoy. Start creating your own versions and have fun!

No-Bake Chocolate Peanut Butter Bars Delightful Treat

Are you ready for a sweet treat that comes together in no time? No-Bake Chocolate Peanut Butter Bars are a

- 2 perfectly ripe avocados, pitted and peeled - 2 cloves of garlic, finely minced - 1/4 cup fresh basil leaves, packed - 2 tablespoons freshly squeezed lemon juice - 1/4 cup extra virgin olive oil - Sea salt and freshly cracked black pepper to taste - 8 oz spaghetti or your favorite pasta (e.g., fettuccine, penne) The key to making this dish shine is using ripe avocados. Ripe avocados are soft but not mushy. They blend into a creamy sauce, making your pasta rich and smooth. If the avocados are not ripe, your sauce will be chunky and dry. - 1/4 cup cherry tomatoes, halved (for garnish) - Freshly grated Parmesan cheese (optional, for garnish) For a nice touch, add garnishes like cherry tomatoes. They bring a burst of color and freshness. You can also sprinkle nuts or seeds on top for a crunchy texture. This adds flavor and makes your dish look appealing. Consider using toasted pine nuts or chopped walnuts. To start, fill a large pot with water and add salt. Bring the water to a rolling boil. This step helps flavor the pasta. Add 8 oz of spaghetti or your favorite pasta. Cook it according to the package directions. You want it to be al dente, which means it should still have a slight bite. Once the pasta is ready, save about 1/2 cup of the pasta water. This water helps adjust the sauce later. Drain the pasta in a colander, but don’t rinse it. Rinsing washes away the starch, which helps the sauce stick. Now, let’s make the creamy avocado sauce. In a food processor, add the following ingredients: - 2 ripe avocados, pitted and peeled - 2 cloves of garlic, finely minced - 1/4 cup fresh basil leaves - 2 tablespoons freshly squeezed lemon juice - 1/4 cup extra virgin olive oil Blend these ingredients on high speed. You want a smooth and creamy texture. Taste the sauce and add sea salt and freshly cracked black pepper to your liking. If the sauce is too thick, slowly blend in small amounts of the reserved pasta water. This will help achieve the perfect creamy consistency. In a large mixing bowl, add the drained pasta. Pour the creamy avocado sauce over the pasta. Gently toss them together. Make sure all the pasta gets coated in that luscious sauce. Now it’s time to taste. Adjust the flavors if needed. You can add more salt, pepper, or even a splash of lemon juice. This step makes sure your dish shines before serving. Serve the creamy avocado pasta right away. Enjoy the vibrant colors and fresh flavors! For a final touch, garnish with halved cherry tomatoes and, if you like, a sprinkle of Parmesan cheese. When picking avocados, look for dark green skin. Gently press the fruit. It should yield slightly. This sign shows ripeness. If you find hard avocados, leave them out at room temperature. They will ripen in a few days. To avoid browning, use lemon juice in your sauce. The acid slows down browning. If you have leftover avocado, wrap it tightly in plastic wrap. Store it in the fridge. Use it within a day or two for best taste. For perfect pasta, timing is key. Start boiling water with salt before adding pasta. Check the package for cooking times. Typically, cook until it's al dente, which means firm to the bite. Common mistakes include not stirring the pasta or not using enough water. Stir the pasta right after adding it to the pot. This prevents sticking. Also, remember to reserve some pasta water before draining. This helps adjust your sauce later. Pair your creamy avocado pasta with fresh salad or garlic bread. These sides add texture and flavor. For a restaurant-style dish, add color with garnishes. Use cherry tomatoes, fresh basil, and a drizzle of olive oil. To present well, serve in warm bowls. This keeps your dish hot longer. Add a sprinkle of cheese or nuts for a crunchy touch. Enjoy your meal like a pro! {{image_4}} For those needing gluten-free options, choose gluten-free pasta. Many brands now offer great taste and texture. You can find pasta made from rice, quinoa, or lentils. These options work well with the creamy avocado sauce. If you're looking for vegan variations, skip the cheese. You can use nutritional yeast for a cheesy flavor. It adds a nice depth without dairy. Some people also enjoy adding a splash of plant-based cream for extra richness. To create a balanced meal, consider adding proteins. Grilled chicken or shrimp pairs well with this dish. You can also toss in chickpeas for a plant-based option. They add protein and texture to the pasta. Incorporating vegetables boosts nutrition. Try adding spinach, peas, or zucchini. These veggies blend nicely with the sauce and add color. You can roast them for extra flavor or simply sauté them before mixing. Serving this pasta cold as a salad is a fun twist. Just let it chill after mixing the sauce and pasta. This version is great for hot days or picnics. You can also explore alternative sauces. Use the same ingredients to create a dip. Blend the avocado and spices, then serve with fresh veggies or chips. This gives you a versatile dish from the same base recipe. For the full recipe, check the previous sections. To keep your creamy avocado pasta fresh, store any leftovers in an airtight container. This way, you help prevent browning and keep the flavors intact. Make sure the pasta cools down first before sealing it up. If you can, use glass containers as they don’t absorb odors. Plastic ones work too, but glass is better for flavor. When reheating your creamy pasta, use low heat. A skillet is a great choice. Add a splash of water or olive oil to help keep it creamy. Stir often to heat evenly. If the sauce thickens too much, mix in a little pasta water until it gets smooth again. This keeps the texture just right. To freeze portions, scoop the pasta into freezer-safe bags. Remove as much air as you can before sealing. This helps prevent freezer burn. When you're ready to eat, thaw it in the fridge overnight. To reheat, warm it gently on the stove, adding a bit of water if needed. This way, your creamy avocado pasta stays tasty! For the complete recipe, check out the Full Recipe section. Creamy avocado pasta lasts about 2 to 3 days in the fridge. To keep it fresh, store it in an airtight container. Check for signs of spoilage, like a sour smell or brown color. If the pasta looks or smells off, it's best to toss it. Yes, you can make this pasta dish ahead of time. To prep, cook the pasta and sauce separately. Store them in the fridge until you're ready to serve. This way, the sauce stays fresh and creamy. When you are ready to eat, combine the pasta and sauce. If it seems thick, add a bit of the reserved pasta water to loosen it up. If you are allergic to avocado, try using cooked cauliflower. Blend it until creamy to mimic the texture. You can also use silken tofu for a smooth sauce. Both alternatives provide a nice base without the avocado flavor. Enjoy experimenting and find what works best for you! Creamy avocado pasta is simple and fun to make. We discussed key ingredients, like ripe avocados, and how they ensure great flavor. I shared steps to cook pasta perfectly and create a smooth sauce. You learned tips for storing leftovers and even fun serving ideas. Enjoying this dish is easy with all the variations too. So, gather your ingredients, have fun cooking, and enjoy a healthy meal that’s creamy and satisfying. You can impress anyone with this recipe!

Creamy Avocado Pasta Tasty and Simple Recipe Guide

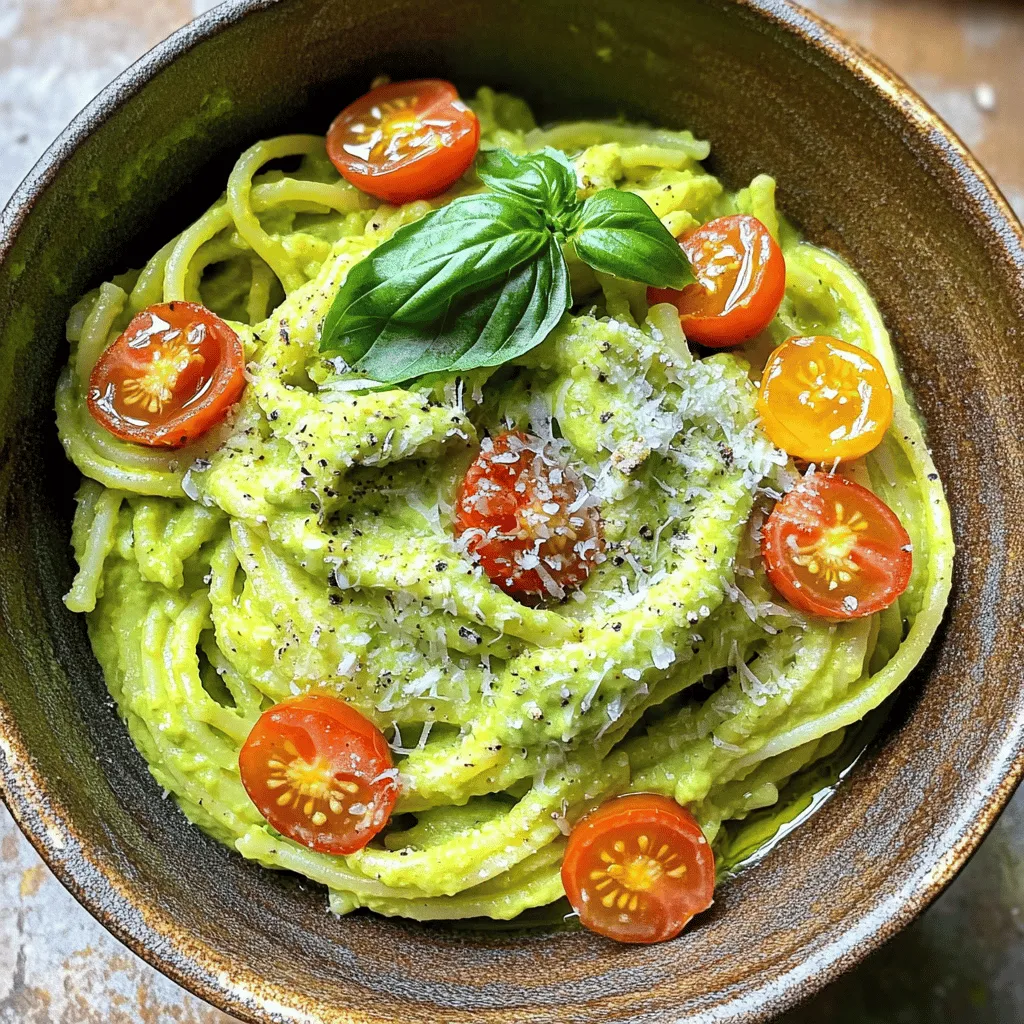
Looking for a quick and tasty meal? This Creamy Avocado Pasta is perfect for you! With ripe avocados and simple

- 8 oz spaghetti or preferred noodles - 4 tablespoons extra virgin olive oil - 6 cloves garlic, finely minced - 1-2 tablespoons red chili flakes - 1 tablespoon low-sodium soy sauce - 1 tablespoon toasty sesame oil - 1/4 cup scallions, chopped - 1/4 cup fresh cilantro, finely chopped - Optional: 1 tablespoon lime juice - Salt to taste - Adjust red chili flakes for desired heat level The main ingredients in this dish create a bold and tasty meal. The noodles are the base. You can use spaghetti or any noodles you like. Olive oil gives richness and flavor. Garlic brings a strong aroma and taste. Red chili flakes add spice, so adjust them for your heat preference. Soy sauce gives a savory depth to the dish. You can add optional ingredients for extra flavors. Toasty sesame oil adds a nutty touch. Chopped scallions make it fresh and bright. Cilantro gives a nice herbal note. Lime juice is great for a zesty kick when you want it. Season the dish well with salt. Remember, soy sauce is salty, so taste as you go. This way, you create a balanced flavor in your spicy garlic noodles. You’ll find that these simple ingredients lead to a meal that is both delicious and easy to make. For the full recipe, check out the details above. 1. Start by boiling a large pot of salted water. This helps flavor the noodles. 2. Once the water boils, add 8 oz of spaghetti or your favorite noodles. 3. Cook the noodles according to the package instructions until they are al dente. This usually takes about 8 to 10 minutes. 4. After cooking, drain the noodles in a colander. Remember to save about 1/2 cup of the starchy pasta water. This water will help later. 1. In a large skillet, heat 4 tablespoons of extra virgin olive oil over medium heat. 2. Wait until the oil shimmers, which means it’s hot enough. 3. Add 6 cloves of finely minced garlic to the skillet. 4. Sauté the garlic for about 2 minutes. Stir it constantly to prevent burning. You want it to be fragrant and golden. 1. Stir in 1-2 tablespoons of red chili flakes. Adjust this based on how spicy you want your dish. 2. Sauté for one more minute. The heat from the oil will wake up the spices. 3. Now, add the cooked noodles directly into the skillet. Use tongs or a fork to toss them well. 4. Pour in 1 tablespoon of low-sodium soy sauce and 1 tablespoon of toasty sesame oil. Mix to combine all flavors. 5. Gradually add the reserved pasta water. Do this a little at a time until you reach your desired sauce thickness. 6. Taste the noodles and add salt if needed. Remember, the soy sauce adds some saltiness too. 7. Turn off the heat and fold in 1/4 cup of chopped scallions and 1/4 cup of fresh cilantro for freshness. 8. If you want a zesty flavor, squeeze in 1 tablespoon of lime juice. Now, you’re ready to enjoy your spicy garlic noodles! For the full recipe, refer to the recipe section. To balance heat and saltiness, taste as you go. Start with less chili. You can always add more later. A splash of lime juice adds brightness and cuts through the heat. If your noodles taste a bit salty, use less soy sauce or dilute with pasta water. Prevent burnt garlic by cooking it on medium heat. Stir it constantly for even cooking. If it browns too fast, lower the heat. To achieve a silky sauce, reserve some pasta water. This starchy water helps the sauce cling to the noodles. Add it slowly while mixing. Garnish your spicy garlic noodles with extra scallions and cilantro. This adds color and freshness. You can also sprinkle sesame seeds for crunch. Serve in a deep bowl for a cozy feel. A lime wedge on the side offers a zesty touch for those who want it. For the full recipe, check out the link above. {{image_4}} You can easily add protein to your spicy garlic noodles. Here are a few ideas: - Chicken: Use cooked chicken breast. Slice it thin and toss it in with the noodles. - Shrimp: Cook shrimp in the skillet before adding garlic. This gives it a nice flavor. - Tofu: Use firm tofu. Cut it into cubes and pan-fry until golden. Mix it in for a lovely crunch. Each option adds a new layer to the dish and makes it more filling. Adding veggies to your spicy garlic noodles is simple. Here are some tasty options: - Bell Peppers: Slice them thin. Add them to the skillet when cooking garlic for extra crunch and color. - Broccoli: Steam or stir-fry the broccoli first. Toss it in with the noodles for a healthy touch. - Snow Peas: These add a nice snap. Just toss them in for the last minute while the noodles cook. Veggies not only add flavor but also boost nutrition. Changing the sauce can give your noodles a new twist. Here are some tasty ideas: - Teriyaki Sauce: Swap soy sauce for teriyaki sauce. This adds sweetness to the dish. - Chili Garlic Sauce: Use this if you want more heat. It deepens the spicy flavor. - Peanut Sauce: Mix in some peanut sauce for a rich, creamy texture that’s oh-so-delicious. Play around with these sauces to find your perfect flavor. For the full recipe, check out the recipe section above. To keep your spicy garlic noodles fresh, store them in an airtight container. Make sure they cool down completely before sealing. This helps prevent moisture build-up that can make the noodles soggy. In the fridge, they last for about three to four days. When you’re ready to enjoy them again, just follow the reheating method below. Freezing is a great option if you want to save leftovers for later. First, let the noodles cool completely. Then, place them in a freezer-safe bag or container. Remove as much air as possible to avoid freezer burn. You can freeze them for up to three months. Just remember to label the bag with the date for easy tracking. To reheat your noodles, the best method is the stovetop. Add a splash of water or broth in a pan over low heat. Stir the noodles gently to heat them evenly. This keeps the texture nice and prevents them from becoming dry. You can also use a microwave, but cover the bowl with a damp paper towel. This helps retain moisture while heating. Enjoy your spicy garlic noodles like they were just made! To make Spicy Garlic Noodles vegan, you can swap a few ingredients. Use vegetable broth instead of the reserved pasta water for added flavor. Replace the soy sauce with a vegan option, like tamari. You can also skip the sesame oil or use a plant-based version. For a protein boost, add tofu or tempeh. This way, you still enjoy the great taste without animal products. Yes, you can use various noodles for this dish. Rice noodles, udon, or soba noodles work well. Each type brings a unique texture and taste. Just adjust cooking times as needed. If you want a gluten-free option, try rice noodles or gluten-free pasta. Your Spicy Garlic Noodles will still be flavorful and satisfying. Spicy Garlic Noodles go well with many dishes. Consider serving them with stir-fried veggies like bell peppers or broccoli. You might enjoy a light salad on the side. If you like protein, grilled chicken or shrimp complements the noodles nicely. For a full meal, add spring rolls or dumplings. These pairings enhance the flavors and give you a delightful dining experience. In this blog post, we covered how to make delicious Spicy Garlic Noodles. We explored key ingredients, from spaghetti to garlic and chili flakes. You learned easy steps to cook the noodles and sauté garlic. I shared tips for flavor and cooking techniques. We also looked at fun ways to vary the dish with proteins and vegetables. Lastly, we discussed how to store and reheat leftovers. With these insights, you can create a tasty meal that fits your taste. Enjoy cooking and experimenting!

Spicy Garlic Noodles Flavorful and Easy Recipe

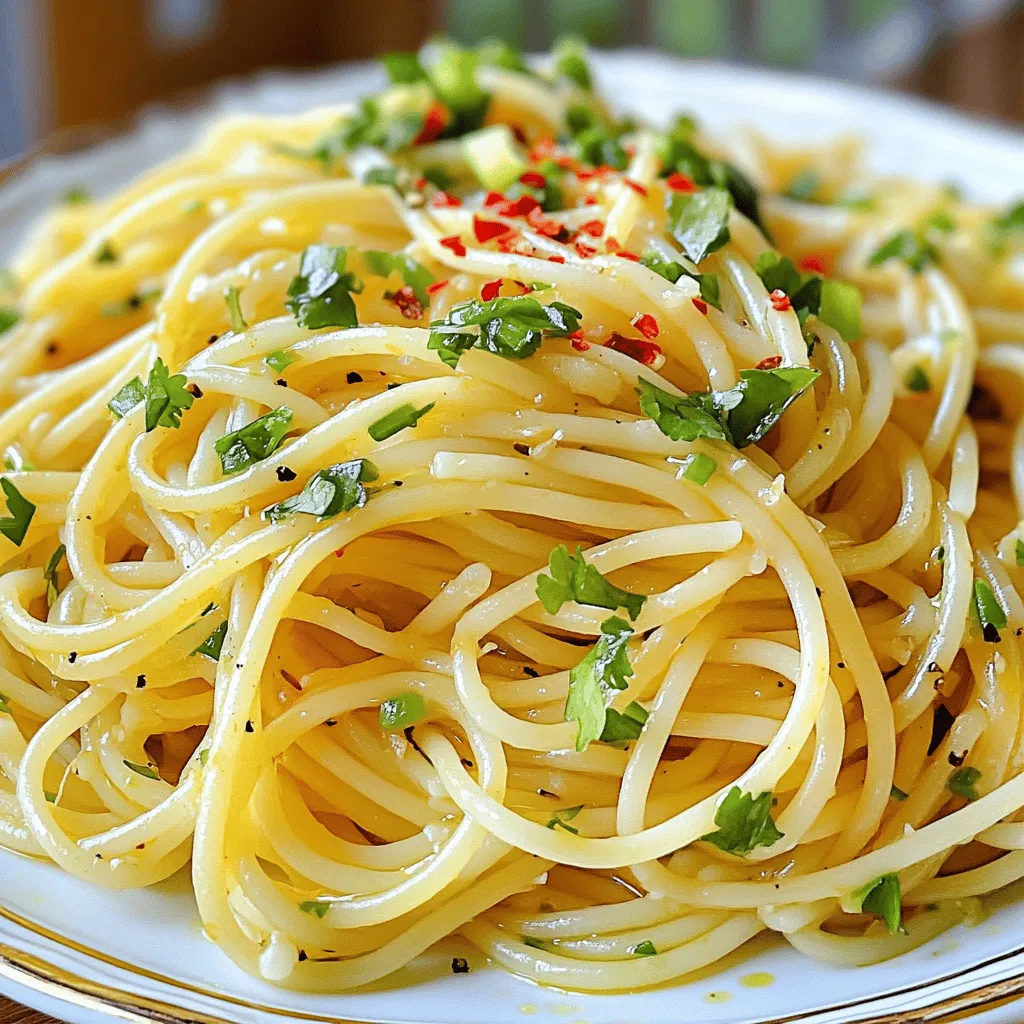
Are you ready to spice up your dinner routine? This blog post reveals my easy, flavorful recipe for Spicy Garlic

To create a rich and hearty Sunday gravy, you need quality ingredients. Here’s what you need: - 1 large onion, finely chopped - 4 cloves garlic, minced - 1 large carrot, diced - 1 celery stalk, diced - 2 cans (28 oz each) crushed tomatoes - 2 tablespoons tomato paste - 5 Italian sausage links (mild or spicy) - 1 pound beef chuck, cut into large chunks Fresh produce like onion, garlic, carrot, and celery adds depth to the sauce. You can use crushed tomatoes for a smoother texture or whole tomatoes for a chunkier sauce. Both work well, but I prefer crushed for its ease. Dried herbs make your gravy shine. I recommend: - 1 teaspoon dried oregano - 1 teaspoon dried basil These herbs bring a warm flavor to the dish. Adding a teaspoon of sugar balances the acidity of the tomatoes. A bay leaf adds an earthy note that enhances the overall taste. For a finishing touch, consider fresh basil and grated Parmesan cheese. These add brightness and richness. You can serve the gravy over pasta or with crusty bread on the side. Both options let you soak up every drop of that delicious sauce. If you're feeling creative, a simple salad pairs nicely, too, adding freshness to your meal. For a complete guide on how to prepare this dish, check the Full Recipe. To start your Sunday gravy, heat 2 tablespoons of olive oil in a large pot over medium heat. As the oil warms, chop one large onion, one large carrot, and one celery stalk. Add these veggies to the pot. Sauté them for about 5-7 minutes. You want the onion to turn soft and clear. This step builds the flavor base for your sauce. Next, mince 4 cloves of garlic. After the onion is ready, add the garlic to the pot. Stir it for one minute. You want the garlic to become fragrant but not brown. This will enhance the taste of your sauce. Once your base is ready, pour in two cans of crushed tomatoes and 2 tablespoons of tomato paste. Mix everything well. Add in one teaspoon each of dried oregano and dried basil. Also, add one teaspoon of sugar, salt, and pepper to taste. Finally, toss in one bay leaf. Now, bring your sauce to a gentle simmer. This is key! Let it simmer for at least 1.5 to 2 hours. The longer you simmer, the better the flavors blend. If your sauce gets too thick, add a little water until you reach your desired texture. In a separate skillet, heat it over medium heat. First, add five links of Italian sausage. Brown the sausage for about 5-7 minutes, turning it often. You want a nice golden color on all sides. After browning, transfer the sausage to your sauce pot. Next, add one pound of beef chuck cut into large chunks to the same skillet. Sear the beef for 8-10 minutes. You want a brown crust on all sides. This step adds depth to your sauce. Once done, add the beef to the sauce pot. Cover the pot with a lid and let it simmer. Remember to stir occasionally to prevent the sauce from sticking. Keep an eye on the flavors, and adjust salt and pepper if needed. For the full experience, check out the Full Recipe! To get the best taste in your Sunday gravy, choose high-quality ingredients. I recommend using extra virgin olive oil. It adds rich flavor and depth. For tomatoes, go for San Marzano canned tomatoes. They have the right balance of sweetness and acidity. When it comes to herbs, always use fresh where possible. Fresh basil and oregano give a brighter flavor. Dried herbs work, but their taste is less vibrant. One common mistake is overcooking garlic. Garlic should be fragrant but not brown. Browning can lead to a bitter taste. Another mistake is not letting the sauce simmer long enough. A good gravy needs at least two hours to develop full flavor. Don’t rush this step. The longer it simmers, the better it gets. You can enhance your gravy in many ways. Adding a splash of red wine brings depth. A Parmesan rind adds richness too. It melts into the sauce, infusing it with flavor. You can also mix in different meats. Try adding meatballs, pork, or even vegetables like mushrooms. This gives you a unique twist on the classic dish. {{image_4}} You can easily make a meatless version of Sunday gravy. To do this, replace the meat with hearty vegetables or plant-based proteins. Some great substitutes include: - Lentils - Chickpeas - Tempeh - Cauliflower These options add protein and texture. For flavor, use a mix of mushrooms and eggplant. They give a rich taste that mimics meat. You can follow the same Full Recipe, but skip the meat steps. Just add the vegetables when you sauté the onion and garlic. This creates a delicious vegetarian gravy. Sunday gravy can change based on where you are in Italy. In Southern Italy, it often includes more tomatoes and a bit of spice. In Northern Italy, you might find cream or butter added for richness. Here are some key differences: - Southern Italy: Rich tomato base, often with sausage. - Northern Italy: Creamy or buttery textures with less tomato. - Central Italy: A mix of both, using seasonal vegetables. Each region has its own way to serve gravy too. Some serve it over polenta or rice. Others stick to pasta, but the type may vary. You might find spaghetti in one area and rigatoni in another. To enjoy the full flavor of Sunday gravy, consider these pasta pairings: - Spaghetti - Fettuccine - Rigatoni These shapes hold the sauce well. You can also try serving it with: - Garlic bread - A simple green salad - Roasted vegetables These sides complement the meal perfectly. They add freshness and balance. Enjoying Sunday gravy is all about bringing the family together for a hearty feast. To keep your Sunday gravy fresh, store it in an airtight container. This helps lock in flavors. Place the gravy in the fridge if you plan to eat it within a few days. For longer storage, freeze it in freezer-safe bags or containers. Leave some space for expansion. When you’re ready to reheat, thaw in the refrigerator overnight. Heat it on the stove over low heat, stirring often. This way, you won’t lose any of that rich flavor. When stored properly, your Sunday gravy can last in the fridge for about 3 to 4 days. In the freezer, it can stay good for up to 3 months. To check for spoilage, look for any off smells or changes in color. If you see mold, discard the gravy. Always trust your senses; if it seems off, it's best to toss it. Leftover gravy is a great base for many meals. You can use it in baked ziti or over meatballs. It also works well with rice or polenta. For a quick lunch, mix it with veggies for a hearty soup. You can even use it as a dip for breadsticks. Get creative and enjoy your Sunday gravy throughout the week! For the full recipe of this dish, check out the link provided. Sunday gravy is richer than marinara sauce. It has meat, often beef and sausage. Marinara is a simple sauce made mostly from tomatoes, garlic, and herbs. You use it for pasta or pizza. Sunday gravy simmers for hours, allowing the flavors to deepen. Marinara cooks quickly and serves as a base for many dishes. Yes, you can use fresh tomatoes. Use about 2-3 pounds of ripe tomatoes. First, blanch them in boiling water for 30 seconds. Then, cool them in ice water to peel easily. Chop the tomatoes and add them to the pot. Fresh tomatoes need more cooking time, so simmer for an extra 30 minutes. This helps the flavors develop. To thicken your gravy, reduce the heat and let it simmer longer. This cooks off excess liquid. You can also mash some of the vegetables in the pot. Another option is to add a bit of tomato paste. It boosts flavor and thickens the sauce. For a smooth texture, blend a small portion of the gravy and stir it back in. You now have the tools to make authentic Italian Sunday gravy. Remember the key ingredients: fresh produce, quality meat, and seasoning. Follow the step-by-step guide for great results. Avoid common mistakes, and don't hesitate to try variations, like meatless options or regional styles. Store leftovers well to enjoy later. The right preparation and care ensure that your gravy tastes fantastic. Enjoy cooking and savor each bite of your homemade comfort food.

Authentic Italian Sunday Gravy Hearty and Flavorful Dish

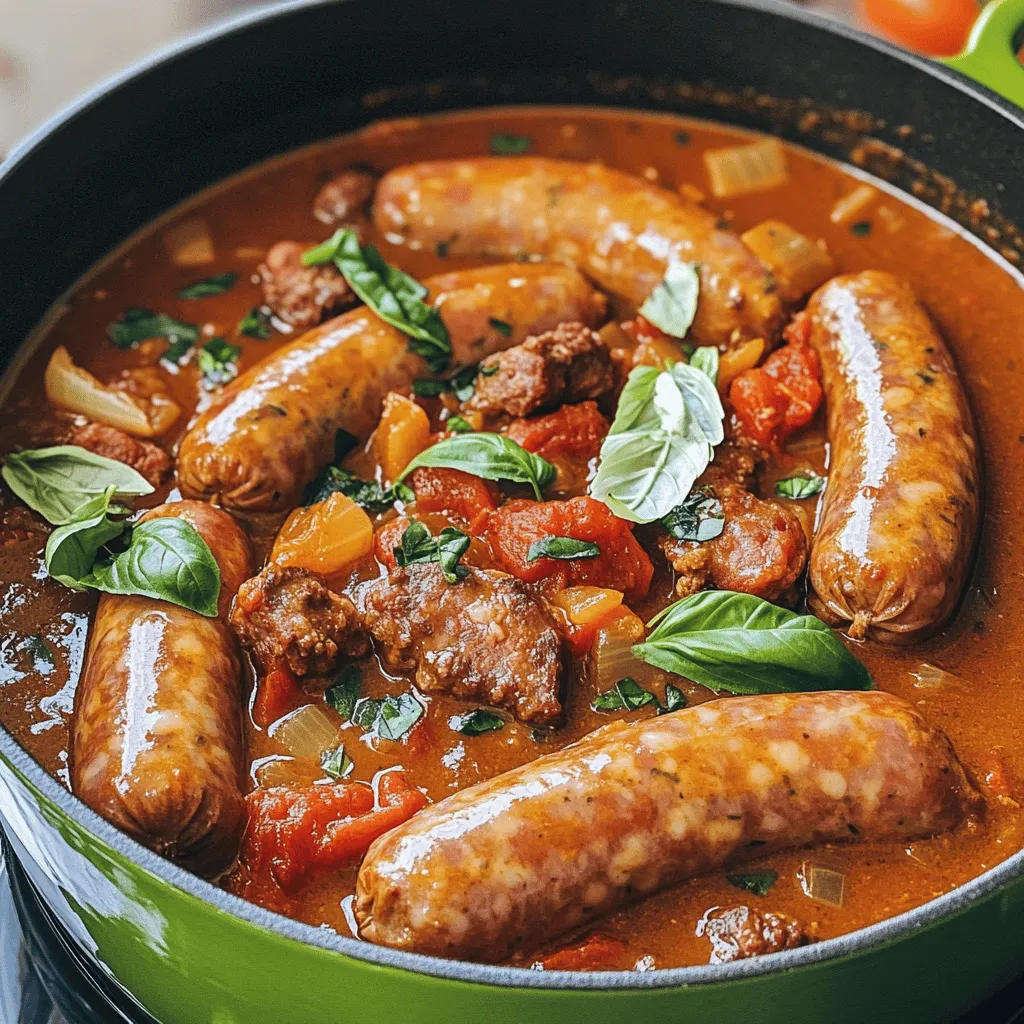
Get ready to bring a taste of Italy into your kitchen with my authentic Italian Sunday gravy recipe! This hearty

To make the best almond pound cake, you'll need some key ingredients. Here’s what you’ll need: - 1 cup unsalted butter, softened to room temperature - 2 cups granulated sugar - 4 large eggs - 1 teaspoon almond extract - 1 teaspoon vanilla extract - 3 cups all-purpose flour - 1 teaspoon baking powder - 1/2 teaspoon salt - 1 cup whole milk, room temperature - 1/2 cup sliced almonds (for topping) - Powdered sugar (for optional dusting) Each ingredient plays an important role. The butter adds richness, while sugar gives sweetness. Eggs keep the cake moist and fluffy. Almond extract brings a lovely nutty flavor, and vanilla enhances the taste. Flour provides structure, and baking powder helps it rise. When choosing almond extract, I recommend using brands like Nielsen-Massey or McCormick. These brands have a pure almond flavor that makes your cake shine. For flour, King Arthur Flour and Bob’s Red Mill are my go-to choices. Their quality ensures a soft and tender cake. You can make this cake even more delightful with some toppings and add-ins. Here are a few suggestions: - Fresh berries for a fruity touch - Whipped cream for added richness - A drizzle of chocolate for sweetness - Chopped nuts for crunch Feel free to mix and match these options to suit your taste! You can also find the Full Recipe to guide you through the baking process. To start, gather all your ingredients. You will need unsalted butter, sugar, eggs, almond extract, and more. Cream the butter and sugar together until light and fluffy. This step adds air to the batter, which helps the cake rise. Next, mix in the eggs one at a time. Always blend well after each egg. Then, add the almond and vanilla extracts. These flavors make the cake taste amazing. In another bowl, whisk together the flour, baking powder, and salt. This helps to mix the dry ingredients evenly. Gradually add this mix to the wet ingredients, alternating with milk. Start and end with the flour mix. This method keeps the batter smooth. Remember, do not overmix! Now, it’s time to bake! Preheat your oven to 350°F (175°C). Prepare your bundt pan by greasing it and dusting it with flour. This step is key to prevent sticking. Pour the batter into the pan and smooth the top with a spatula. Sprinkle sliced almonds on top for a crunchy texture. Bake the cake in the oven for about 50 to 60 minutes. You will know it’s done when a toothpick inserted in the center comes out clean. If it has wet batter on it, let it bake a little longer. Once the cake is baked, take it out of the oven. Let it cool in the pan for about 15 minutes. Then, carefully flip it onto a wire rack. This helps it cool evenly. If you want, dust the cooled cake with powdered sugar for a sweet finish. Enjoy your almond pound cake! It’s perfect for any occasion. You can find the Full Recipe for more detailed steps. Baking can be tricky. Here are some common mistakes to watch out for: - Skipping the room temperature step: Make sure your butter and milk are at room temp. Cold ingredients can make the cake dense. - Overmixing the batter: Mix just until combined. Overmixing can lead to a tough cake. - Not greasing the pan: Always grease your bundt pan well to avoid sticky situations. A light and fluffy texture is key for a great almond pound cake. Here’s how: - Cream the butter and sugar well: Beat them for about 4-5 minutes until fluffy. This adds air and helps the cake rise. - Use the right flour: All-purpose flour works best. It gives the cake a nice structure. - Don’t skip the baking powder: This helps the cake rise and stay light. Almonds add a lovely flavor and crunch. Here’s how to enhance their taste: - Use both almond extract and sliced almonds: This gives a rich almond flavor. - Toast the sliced almonds: Lightly toasting them brings out their nutty flavor. Add them on top before baking. - Try almond flour: You can replace some all-purpose flour with almond flour for a deeper flavor. For more details on making this delicious cake, check the Full Recipe. {{image_4}} To make a gluten-free almond pound cake, swap out the all-purpose flour. Use a gluten-free flour blend instead. I recommend a mix that includes almond flour and tapioca flour. This blend gives your cake a nice texture. Follow the same steps as the full recipe. Just be sure to check the label for any added ingredients. For a vegan version, replace the eggs with flax eggs. Mix one tablespoon of ground flaxseed with three tablespoons of water. Let it sit for a few minutes until it thickens. Use almond milk in place of whole milk. You can also use vegan butter instead of unsalted butter. This will keep the cake moist while making it plant-based. Want to spice things up? Here are some fun flavor ideas to try: - Citrus Zest: Add zest from one lemon or orange. This brightens the cake. - Chocolate: Fold in half a cup of mini chocolate chips for a sweet twist. - Coconut: Mix in shredded coconut for a tropical touch. - Spices: A pinch of cinnamon or nutmeg adds warmth and depth. These variations keep your almond pound cake exciting and fresh. Don’t be afraid to experiment! To keep your almond pound cake fresh, let it cool completely first. Wrap it tightly in plastic wrap or place it in an airtight container. This helps prevent it from drying out. Store it at room temperature for up to three days. If you want it to last longer, refrigeration is an option, but it may change the texture. If you have more cake than you can eat, freezing is a great choice. Slice the cake into pieces for easy thawing later. Wrap each slice in plastic wrap, then place the slices in a freezer-safe bag. Be sure to remove as much air as you can to avoid freezer burn. Almond pound cake can be frozen for up to three months. When you're ready to enjoy it, thaw the slices in the fridge overnight. The best containers for your almond pound cake are airtight and moisture-proof. A glass or plastic container with a tight-fitting lid works well. If you prefer to use a cake dome, that can keep it fresh too. Just make sure it’s not too tight to allow airflow. This way, your cake stays soft and tasty for longer. For the full recipe, check the section above! Almond pound cake lasts about four to five days. Keep it in an airtight container. This helps keep it moist. If you want it to last longer, you can freeze it. Wrap it well in plastic wrap and foil. It can last up to three months in the freezer. Just remember to thaw it in the fridge before serving. Yes, you can substitute some ingredients in the almond pound cake. If you want a dairy-free option, use almond milk instead of whole milk. For a lighter version, you can replace half the butter with applesauce. If you don't have almond extract, use vanilla extract instead. This will change the flavor a bit but still taste good. To reheat almond pound cake, use the oven. Preheat it to 350°F (175°C). Slice the cake and place it on a baking sheet. Heat for about 10 minutes. This warms the cake without drying it out. You can also use the microwave. Heat a slice for about 15-20 seconds. Keep an eye on it to avoid overheating. Enjoy your warm cake! For the full recipe, check out the Almond Bliss Pound Cake. In this post, we explored what makes a perfect almond pound cake. We discussed key ingredients like almond extract and flour, along with useful brands. You learned step-by-step instructions for preparation and baking. We covered tips to avoid common baking mistakes and ideas for delicious variations, including gluten-free options. Remember, storing your cake properly keeps it fresh longer. With this knowledge, you can create a tasty and moist almond pound cake that everyone will enjoy. Enjoy your baking journey and share your delicious results!

Almond Pound Cake Delightful and Easy to Make

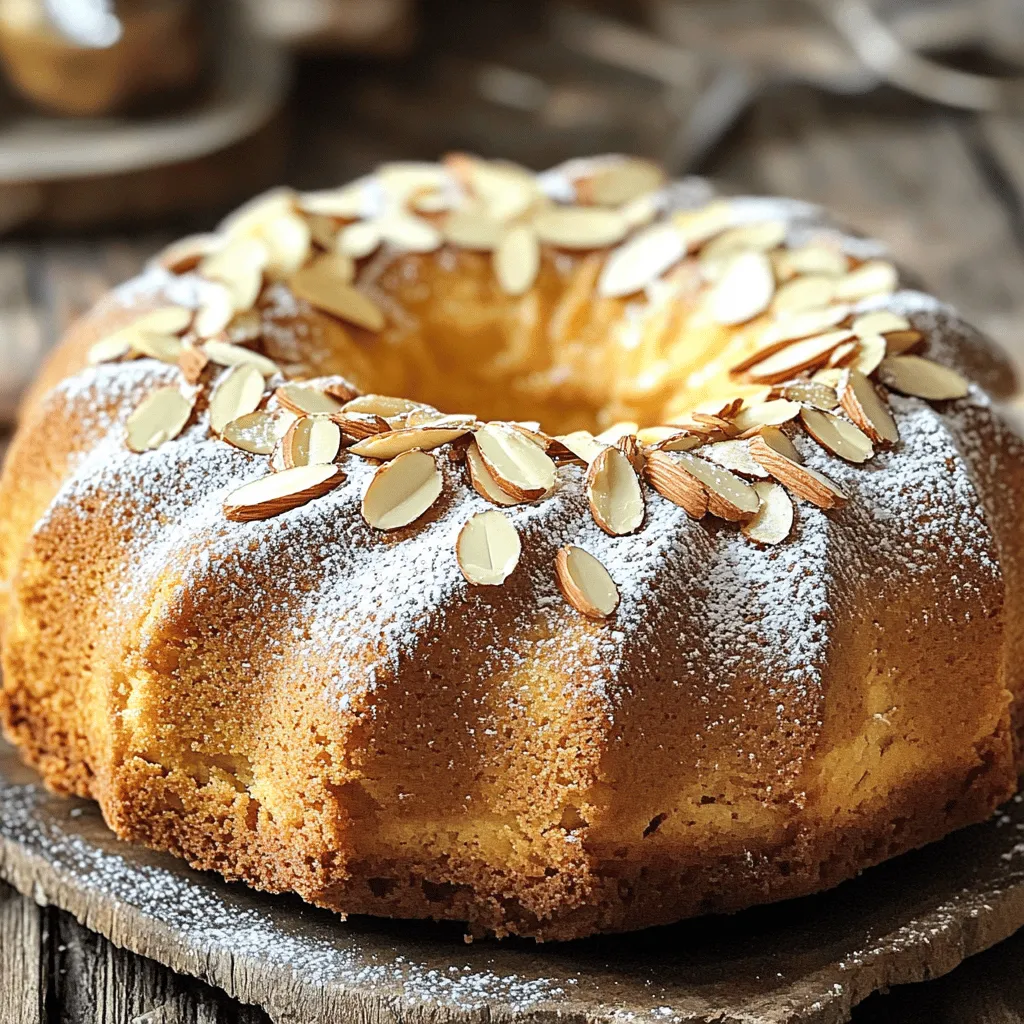
Are you ready to bake a treat that warms your heart and delights your taste buds? This Almond Pound Cake

- 4 salmon fillets (approximately 6 oz each) - 3 tablespoons extra virgin olive oil - 2 cloves garlic, finely minced - 1 cup cherry tomatoes, halved - 1 cup fresh spinach, roughly chopped - 1 teaspoon dried Italian herb blend (including oregano, basil, and thyme) - 1/2 teaspoon red pepper flakes (adjust to taste for heat level) - Sea salt and freshly ground black pepper, to taste - Zest and juice of 1 fresh lemon - Fresh basil leaves for garnish This dish shines thanks to its fresh and vibrant flavors. Fresh salmon fillets give a rich base. I love using extra virgin olive oil for its fruity notes. Garlic adds depth, while cherry tomatoes bring sweetness and color. Fresh spinach helps balance the dish with its green goodness. The Italian herb blend is a must for that savory touch. Red pepper flakes add a little kick. Adjust it based on your heat preference. Sea salt and black pepper enhance all the flavors, making each bite pop. Don’t forget the lemon! It brightens the dish with zest and juice. Fresh basil leaves finish it off with a lovely aroma. To see how these ingredients come together, check out the Full Recipe. 1. Preheating the oven: Set your oven to 400°F (200°C). This step gets it ready for baking the salmon. 2. Sautéing garlic and cherry tomatoes: Pour 2 tablespoons of olive oil into a large skillet. Heat it over medium heat. Add 2 minced garlic cloves and sauté for about 1 minute. You want it fragrant but not burnt. Next, toss in 1 cup of halved cherry tomatoes. Cook for 3-4 minutes. They should soften and release their juices. 3. Adding spinach and seasoning: Stir in 1 cup of roughly chopped spinach. Add 1 teaspoon of dried Italian herbs, 1/2 teaspoon of red pepper flakes, sea salt, and black pepper. Cook for 2 minutes. The spinach will wilt and shrink down. 1. Positioning the salmon in the skillet: Push the cooked veggies to one side. Pour 1 tablespoon of olive oil into the cleared space. Place 4 salmon fillets, skin-side down, in the skillet. Season them with salt, pepper, and lemon zest. 2. Easy baking instructions: Squeeze the juice of 1 lemon evenly over the salmon and vegetables. Carefully transfer the skillet to your preheated oven. Bake for 12-15 minutes until the salmon is cooked through and flakes easily. 3. Checking for doneness: After baking, take the skillet out with care. Let it cool for a minute. The salmon should be opaque and flaky. If it is, you’ve done well! Enjoy your delightful dish. For the full recipe, you can refer back to the ingredients and steps mentioned above. To boost the flavor of Savory Tuscan Salmon, I suggest using fresh herbs. Basil and oregano work best here. They bring a bright taste that pairs well with salmon. You can also add thyme for a deeper flavor. Want a bit of heat? Use red pepper flakes! Start with half a teaspoon. You can always add more if you like it spicy. This adds a nice kick without overpowering the dish. Using an oven-safe skillet is key for this recipe. It lets you sauté and bake in one pan. This saves time and makes cleanup easier. Make sure the skillet is hot before adding your garlic. This helps it brown nicely and adds depth to the dish. For perfectly cooked salmon, keep an eye on the time. Bake it for 12 to 15 minutes. Check the salmon at the 12-minute mark. It should flake easily with a fork when it’s done. I love serving this dish directly from the skillet. It looks rustic and inviting. Just be careful! The skillet will be hot. If you want to plate it, try this: Place a salmon fillet on a plate, then spoon some veggies beside it. Drizzle a bit of olive oil around the salmon for a touch of elegance. A lemon wedge adds color and freshness to the plate. For more details, check out the Full Recipe. {{image_4}} You can make this dish even more fun by using seasonal vegetables. Try adding zucchini or asparagus in spring. In the fall, roasted butternut squash adds a great touch. These veggies bring different flavors and colors to your plate. For herbs, switch things up! Instead of Italian herbs, try fresh dill for a lighter taste. Cilantro can add a fresh twist, too. Each herb brings a new vibe to your dish. If you want to keep it low-carb, skip the tomatoes. Use cauliflower rice instead for a hearty side. You can also add more spinach to keep it filling. For gluten-free friends, this dish is already a winner! Just check that your olive oil and seasonings are gluten-free. You can enjoy this meal with confidence. Pair Savory Tuscan Salmon with a lemon butter sauce for extra richness. A simple garlic aioli can also add a nice touch. Both sauces enhance the dish without overpowering it. For side dishes, serve it with a fresh green salad. Quinoa or wild rice also work well. They soak up the flavors and make your meal complete. Don’t forget to check the Full Recipe for all the details you need! After enjoying your Savory Tuscan Salmon, store any leftovers in an airtight container. This helps keep the salmon fresh. Always refrigerate it within two hours after cooking. The salmon stays good for up to three days in the fridge. When it’s time to enjoy your leftovers, reheat the salmon gently. You can use an oven, skillet, or microwave. Each method has its perks: - Oven: Preheat to 300°F (150°C). Place the salmon on a baking sheet and heat for about 10 minutes. This keeps the salmon moist. - Skillet: Warm a small amount of olive oil over low heat. Add the salmon and cover for a few minutes. This helps maintain its flavor and texture. - Microwave: Place the salmon on a microwave-safe plate. Cover it with a damp paper towel to prevent drying. Heat in short bursts of 30 seconds until warm. These methods help keep your Savory Tuscan Salmon tasty and enjoyable. What can I serve with Savory Tuscan Salmon? You can serve this salmon with many sides. Some great options include: - Rice or quinoa for a filling base. - A fresh green salad for a light touch. - Roasted vegetables to add color and taste. - Garlic bread to soak up the juices. These sides balance the rich flavors of the salmon well. Can I use frozen salmon for this recipe? Yes, you can use frozen salmon. Just remember to thaw it first. Place it in the fridge overnight or run it under cold water. This way, it cooks evenly and tastes great. What are some tips for cooking salmon perfectly? To cook salmon perfectly, follow these tips: - Start with fresh or properly thawed salmon. - Pat the salmon dry to get a nice crust. - Use a hot skillet to sear the skin. - Cook until it flakes easily with a fork. - Let it rest for a few minutes before serving. These steps help keep the salmon juicy and flavorful. Caloric content per serving Each serving of Savory Tuscan Salmon has about 350 calories. This makes it a healthy choice for dinner. Key nutrients provided by the ingredients This dish is rich in: - Omega-3 fatty acids from salmon for heart health. - Vitamins A and C from spinach and tomatoes for immunity. - Garlic, which adds flavor and has health benefits. These nutrients make it a tasty and nutritious meal. Necessary kitchen tools and equipment needed To make this dish, you will need: - A large oven-safe skillet for cooking. - A good knife for chopping. - Measuring spoons for accuracy. These tools ensure you cook the salmon well. Optional tools for enhanced cooking experience You might also want to use: - A fish spatula for easy flipping. - A kitchen thermometer to check doneness. These tools help you achieve great results. For the full recipe, check out the details above. This blog post shared a simple recipe for Savory Tuscan Salmon. We covered ingredients, cooking steps, and tips to boost flavor. You can tweak the recipe with seasonal veggies or sauces. Proper storage and reheating keep it fresh and tasty. Enjoy experimenting to make it your own. Cooking can be fun and rewarding. With these tips, you can impress your family and friends with delicious meals.

Savory Tuscan Salmon Delightfully Simple Dish

Are you ready to impress your taste buds and guests alike? In this blog, I’ll show you how to prepare

Older posts
Newer posts
← Previous Page1 … Page55 Page56 Page57 … Page91 Next →

dsad

© 2025 recipesstation • Built with GeneratePress

Our Policies

  • Copyright Policy
  • Cookie Policy
  • GDPR Policy
  • Privacy Policy
  • Disclaimer
  • Terms Of Use

More Information

  • Home
  • About
  • Contact
  • Appetizers
  • Dessert
  • Dinner
  • Drinks
©2025, recipesstation About Back To Top