. First, gather a large bowl. In this bowl, combine 1 cup of rolled oats, 1/2 cup of creamy almond butter, and 1/4 cup of honey or pure maple syrup. Use a strong spoon or spatula to mix these ingredients together. Keep mixing until the mixture looks smooth and homogenous. This step is key to getting a great texture for your energy bites. Next, it’s time to add more flavor. Fold in 1/3 cup of unsweetened shredded coconut, 1/4 cup of dairy-free dark chocolate chips, and 1/4 cup of chopped almonds. Don’t forget to add 1 teaspoon of pure vanilla extract and a pinch of fine sea salt. Stir well to make sure all these tasty bits get mixed evenly throughout the mixture. Now comes the fun part! Scoop out small portions of the mixture with your hands. Roll these into bite-sized balls, about 1 inch in diameter. If the mixture feels too sticky, just dampen your hands with a bit of water. This trick makes shaping the bites much easier. Once you’ve rolled all the balls, place them on a lined baking sheet. Chill these bites in the refrigerator for at least 30 minutes. This helps them firm up and hold their shape nicely. When you’re ready, enjoy your delicious Almond Joy Energy Bites! For the full recipe, check out the earlier section. Chilling the mixture is key to making great Almond Joy Energy Bites. It helps the bites hold their shape. After mixing, refrigerate the mixture for at least 30 minutes. This makes them easier to roll into balls. You can also use whole almonds for a crunchy texture. They give a nice bite and enhance the flavor. To make your bites look fancy, serve them in decorative bowls. This adds a touch of style. You can drizzle melted dark chocolate over them for flair. A sprinkle of shredded coconut on top makes them look even better. These small steps make your treats stand out. Enjoy Almond Joy Energy Bites with your favorite drinks. A cold glass of almond milk works well. You can also pair them with coffee or tea for a tasty snack. For a complete treat, serve with fresh fruit or yogurt. These pairings make for a delightful snack time. {{image_4}} You can make these bites even more fun! Adding protein powder gives them a healthy boost. Try using chocolate or vanilla protein powder for added flavor. You can also switch out the almond butter. Peanut butter or cashew butter works great, too. Each nut butter adds its unique taste and texture. If you need gluten-free options, use certified gluten-free oats. They work just as well and keep the bites tasty. For a vegan version, swap honey for maple syrup. You can also check for dairy-free chocolate chips to keep it all plant-based. These changes help everyone enjoy the treat. Get creative with seasonal themes! For Halloween, add a sprinkle of orange zest or use pumpkin spice. During the winter holidays, mix in dried cranberries or festive nuts. You can even use seasonal fruits like apples or pears for a fresh twist. These ideas keep the energy bites exciting all year long. To keep your Almond Joy Energy Bites fresh, use an airtight container. This keeps moisture out and preserves flavor. Storing them in the fridge is best for short-term use. If you want to save them longer, consider freezing. Just make sure they are well-wrapped to avoid freezer burn. In the fridge, these bites last about one week. After that, they may start to lose their taste and texture. Look for signs like a change in smell or a dry, crumbly texture. If they don't taste right, it’s best to toss them out. If you freeze your bites, let them thaw overnight in the fridge. This keeps them soft and tasty. If they feel a bit dry, you can add a tiny bit of almond butter to moisten them. Enjoy them fresh for the best flavor and texture! For the Full Recipe, check out the detailed instructions on making these tasty bites. Each bite has about 100 calories. Here’s the breakdown per bite: - Rolled oats: 15 calories - Creamy almond butter: 40 calories - Honey or maple syrup: 20 calories - Shredded coconut: 10 calories - Dark chocolate chips: 10 calories (optional) - Chopped almonds: 5 calories This adds up to a tasty snack without guilt! Yes, you can! Use sunflower seed butter or tahini instead of almond butter. Both work great and keep the bites creamy. For the chopped almonds, substitute with pumpkin seeds or sunflower seeds for crunch. It takes about 10 minutes to prepare. Then, chill them for 30 minutes. So, you can have them ready in just 40 minutes. Absolutely! Portion them into small containers. Store them in the fridge for a week. You can grab one as a quick snack anytime. Enjoy them cold straight from the fridge. You can also drizzle some melted dark chocolate on top for extra fun! Serve them in a bowl for a pretty snack display. These Almond Joy Energy Bites are easy to make and tasty. You can customize them with different ingredients or flavors. The steps are simple: mix, roll, and chill. Storing them properly keeps them fresh longer. They make a great snack or treat anytime. Experiment with your favorites and enjoy the fun of creating your own energy bites. Your kitchen can be a place of tasty creations!](https://recipesstation.com/wp-content/uploads/2025/05/92a8a4de-ba73-41d3-8b22-152c3bc83ff0.webp)
Almond Joy Energy Bites Deliciously Energizing Treat
Craving a tasty snack that will fuel your day? Almond Joy Energy Bites offer a delicious blend of chocolate, coconut,
Craving a tasty snack that will fuel your day? Almond Joy Energy Bites offer a delicious blend of chocolate, coconut,
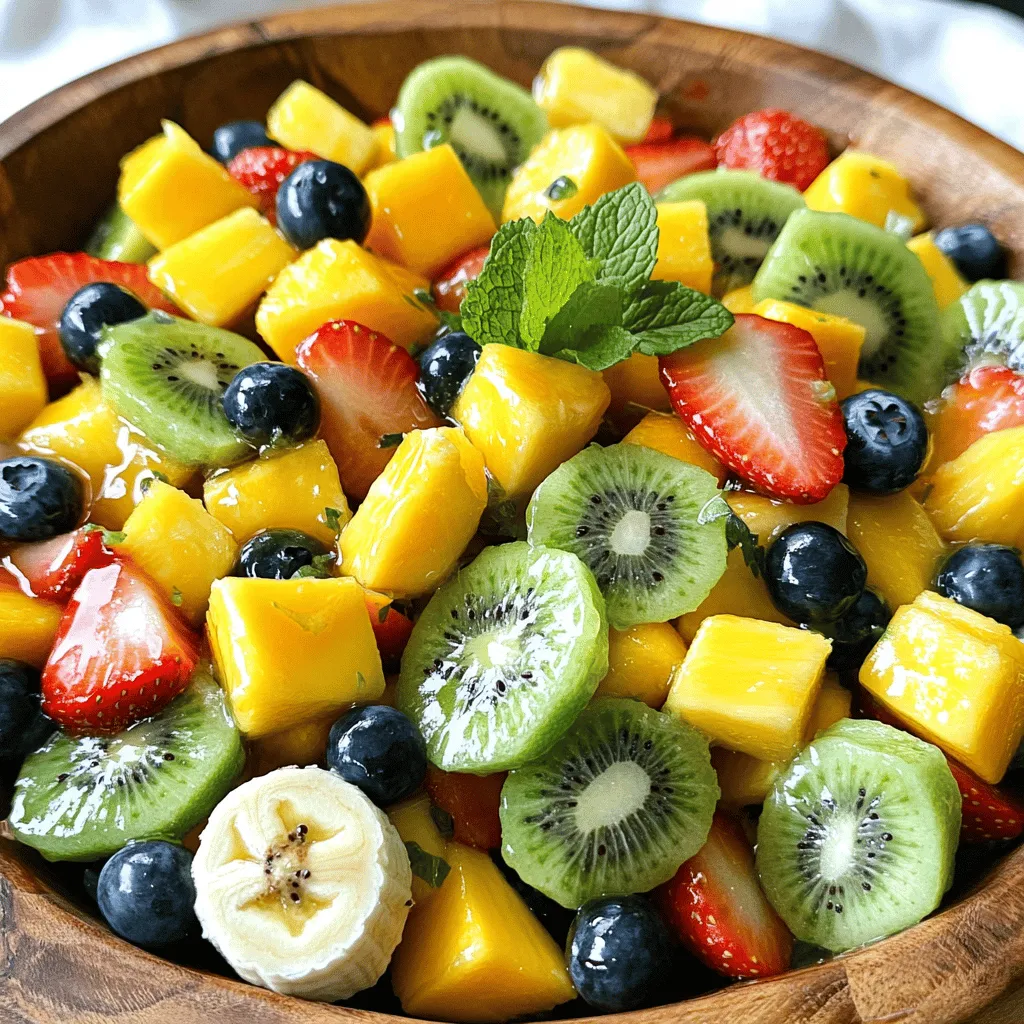
Get ready to dive into a burst of flavor with my Tropical Fruit Salad with Honey Lime Dressing! This vibrant

Are you looking for an easy and delicious breakfast that the whole family will love? Try making a Cinnamon Roll

Are you ready for a deliciously healthy meal? Stuffed bell peppers with quinoa are both tasty and easy to make.

Craving a meal that’s crunchy, cheesy, and full of flavor? Look no further! My Oven-Baked Chicken Parmesan is the perfect
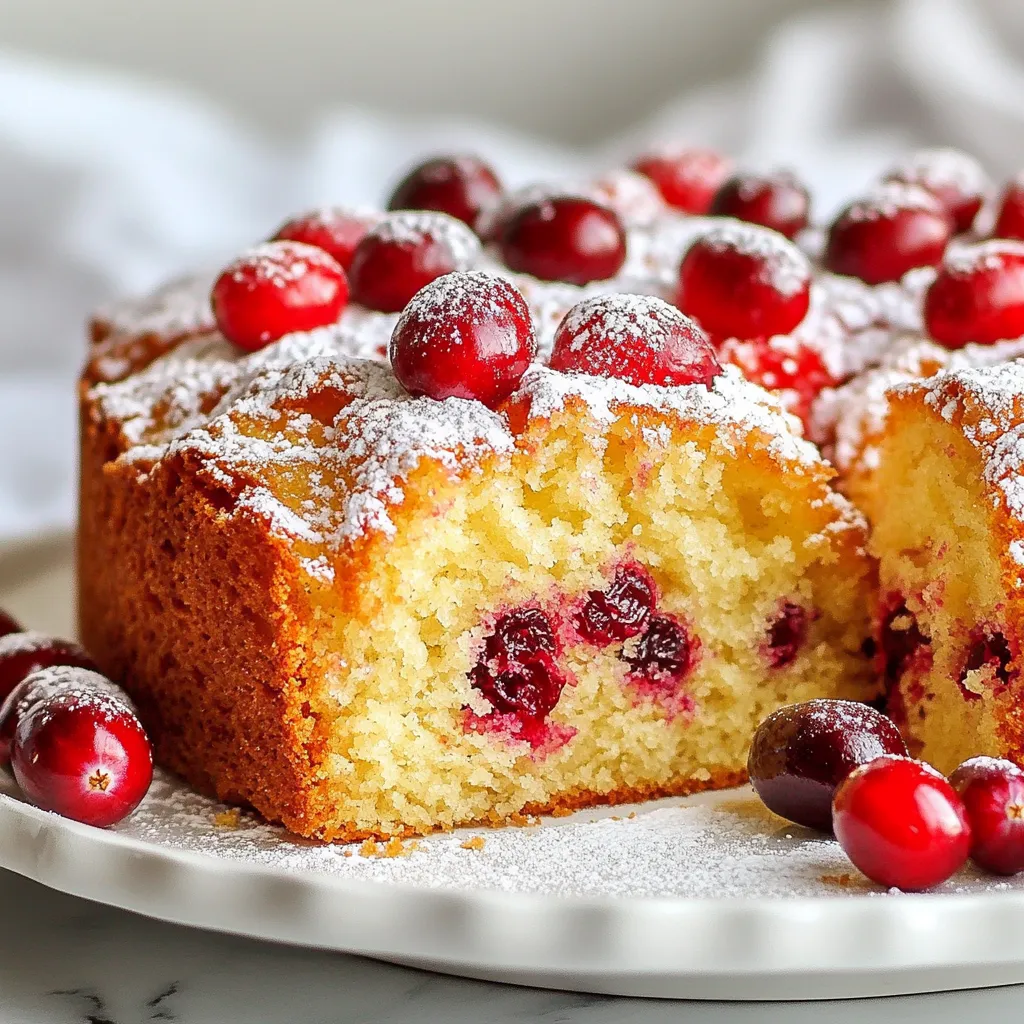
Looking for a festive treat that brightens up your table? Our Cranberry Orange Coffee Cake is bursting with flavor! This

Are you ready to elevate taco night? My Crispy Poblano Chicken Tacos offer bold flavors with all the crunch you
![To create Peanut Butter Chocolate Chip Energy Balls, you need a few simple ingredients. Here’s what you will need: - 1 cup natural peanut butter (creamy or chunky) - 1 cup rolled oats (old-fashioned) - 1/2 cup honey or pure maple syrup - 1/2 cup mini chocolate chips (dark or milk) - 1/4 cup ground flaxseed - 1/2 teaspoon pure vanilla extract - A pinch of salt Each ingredient plays a key role in making these energy balls delicious and nutritious. Natural peanut butter gives a rich, nutty flavor and healthy fats. Rolled oats add texture and fiber, while honey or maple syrup adds natural sweetness. Mini chocolate chips bring a fun, sweet touch. Ground flaxseed boosts nutrition with omega-3s. Pure vanilla extract enhances the overall flavor, and a pinch of salt balances the sweetness. I love how these ingredients work together to create a tasty snack. You can mix and match based on what you have at home. This recipe is flexible, making it easy to adapt. For the full recipe, check out the details provided earlier. In a large bowl, add the natural peanut butter, honey, and vanilla extract. Stir these ingredients together until the mixture is smooth. You want it creamy and well mixed. This step is key to getting the right taste in each energy ball. Now, it’s time to add the dry ingredients. Toss in the rolled oats, ground flaxseed, and a pinch of salt. Mix everything together until you have a thick, even mixture. This helps create a strong base for our energy balls. Next, fold in the mini chocolate chips. Make sure they are spread out throughout the mixture. Each bite should have a taste of chocolate. This adds a fun twist and makes the energy balls even more enjoyable. Using your hands, scoop out tablespoon-sized portions of the mixture. Roll each portion into a smooth ball. Place them on a lined baking sheet or plate. This step is easy and lets you see your progress. Cover the baking sheet with plastic wrap or a clean towel. Place it in the fridge for at least 30 minutes. Chilling helps the energy balls firm up, making them easier to eat later. Once chilled, these energy balls are ready for snacking! Enjoy them right away or store any leftovers in an airtight container in the fridge. They stay fresh for up to one week. These bites make great snacks for busy days or a quick pick-me-up. For the full recipe, check the earlier section. When mixing your ingredients, start with the wet ones first. This helps them blend well. Use a big bowl and a sturdy spatula. Stir until the peanut butter and sweetener are smooth. This makes it easier to combine with the dry ingredients later. If the mixture feels too thick, add a teaspoon of water to loosen it. For a great texture, use rolled oats instead of quick oats. Rolled oats give a nice chewiness. Ground flaxseed adds fiber and makes the balls more filling. If you want a softer ball, add a bit more honey. For a firmer ball, mix in a touch more oats. These energy balls work best as snacks before or after workouts. They give you energy without making you feel heavy. You can also enjoy them as a quick breakfast on busy mornings. Store them in the fridge for easy access. For the full recipe, check the earlier section. {{image_4}} You can change the nut butter in this recipe. Try almond butter or cashew butter. Each nut brings its own taste. If you love a stronger flavor, go for almond butter. It adds a nice twist. Just use the same amount as peanut butter. Want to make these energy balls even better? Consider adding extras like dried fruit or seeds. Chopped dates or raisins can add sweetness. You can also try sunflower seeds or pumpkin seeds. These add crunch and nutrition. Just keep the total amount around one cup for the best texture. You can spice up your energy balls too! Try adding a dash of cinnamon or cocoa powder. Cinnamon gives warmth, while cocoa boosts the chocolate flavor. You could also add a touch of nutmeg for a unique taste. Experiment with these flavors to find your favorite mix! For the complete recipe, check out the [Full Recipe]. To store your peanut butter chocolate chip energy balls, place them in an airtight container. This keeps them fresh and tasty. You can layer them with parchment paper to prevent sticking. Store the container in the refrigerator. This way, they'll stay good for about one week. If you want to keep them longer, freezing is a great option. Place the energy balls in a single layer on a baking sheet. Freeze them for about an hour until firm. After that, transfer the balls to a freezer-safe bag or container. Remember to label the bag with the date. They can last up to three months in the freezer. Just thaw them in the fridge before enjoying. These energy balls are best eaten fresh, but they stay good for a while. In the fridge, they last up to a week. To check freshness, look for any changes in smell or texture. If they feel too dry or hard, it's time to toss them. For the best taste, enjoy them within the first few days. For the full recipe, refer to the earlier section. Yes, you can use crunchy peanut butter. It adds a nice texture. Your energy balls will have a delightful crunch. Just keep the other ingredients the same. To make these energy balls vegan, switch honey for pure maple syrup. Both work well for sweetness. Ensure your chocolate chips are dairy-free too. This way, you keep the taste and make them plant-based. These energy balls pack a nutritious punch. Peanut butter provides protein and healthy fats. Rolled oats offer fiber, which helps digestion. Flaxseed is rich in omega-3 fatty acids. Chocolate chips can bring joy and antioxidants. Together, these ingredients support energy and overall health. Absolutely! Doubling the recipe is easy. Just use twice as much of each ingredient. This way, you can enjoy more energy balls or share with friends. They will still taste great. You know they’re done chilling when they feel firm. After about 30 minutes in the fridge, check their texture. If they hold their shape well, they are ready. Enjoy your tasty snacks! These energy balls blend tasty ingredients into a quick snack. We learned how to mix wet and dry items perfectly. You can customize them with different nuts or spices for extra flavor. Remember to store them right to keep them fresh. Try this fun recipe to fuel your day. Enjoy making these healthy treats at home! They are easy, fun to eat, and full of energy.](https://recipesstation.com/wp-content/uploads/2025/05/27537f1f-f1df-486a-8584-d2dbfe849595.webp)
Looking for a quick and tasty snack? Peanut Butter Chocolate Chip Energy Balls are the answer! These little bites pack

Are you ready to dive into a bowl of bliss? This Creamy Spinach and Artichoke Dip is everything you need

If you’re ready to fall in love with Brussels sprouts, I’ve got the perfect recipe for you! These Crispy Garlic
