Skip to content
DisclaimerTerms Of UseGDPR PolicyCookie Policy

recipesstation

  • Home
  • Drinks
  • Appetizers
  • Dinner
  • Dessert
  • About
  • Contact
  • Privacy Policy
DisclaimerTerms Of UseGDPR PolicyCookie Policy

Emily

To make honey mustard chicken thighs, gather these key items: - 4 bone-in, skin-on chicken thighs - 1/4 cup Dijon mustard - 1/4 cup honey - 2 tablespoons olive oil - 3 cloves garlic, minced - 1 teaspoon paprika - 1 teaspoon dried thyme - Salt and pepper to taste - Fresh parsley, chopped (for garnish) You can boost the taste with these optional ingredients: - 1 tablespoon apple cider vinegar for tang - 1 teaspoon chili powder for heat - Lemon zest for a fresh kick - A sprinkle of brown sugar for extra sweetness This dish is not only tasty but also has solid nutrition. Each serving of honey mustard chicken thighs has: - About 350 calories - 20 grams of fat - 30 grams of protein - 5 grams of carbohydrates - Rich vitamins from the garlic and herbs These ingredients come together to create a meal that is both simple and full of flavor. Every bite offers sweet, tangy goodness that makes your taste buds dance. First, you need to preheat your oven. This step is key for great cooking. Set your oven to 400°F (200°C). This temperature ensures your chicken cooks evenly and gets crispy. While the oven warms up, you can prepare the marinade and chicken. Now, let’s whip up the honey mustard marinade. In a medium bowl, add 1/4 cup of Dijon mustard and 1/4 cup of honey. These two ingredients balance well, giving a sweet and tangy flavor. Next, pour in 2 tablespoons of olive oil for richness. Then, add 3 minced garlic cloves for a flavor boost. Sprinkle in 1 teaspoon of paprika and 1 teaspoon of dried thyme for extra taste. Add salt and pepper to your liking. Whisk everything together until it’s smooth and well mixed. This marinade is what makes the chicken shine. Now, it’s time to work with the chicken. Take 4 bone-in, skin-on chicken thighs and pat them dry with paper towels. This step is important. Dry skin gets crispy when cooked. Place the chicken in a large bowl or a baking dish. Pour the marinade over the chicken, making sure each piece gets covered. For the best flavor, let the chicken marinate for at least 20 minutes. If you have more time, marinate it longer. This allows the flavors to soak in deeply. After marinating, you’re ready to bake your chicken! Check the full recipe for more details. To get that perfect crispy skin, start with dry chicken. Pat the chicken thighs with paper towels before marinating. This step helps remove excess moisture. For the best results, use bone-in, skin-on thighs. The skin will crisp up beautifully in the oven. A high oven temperature of 400°F (200°C) also aids in achieving crispy skin. If you want an extra crunch, broil the chicken for the last few minutes. Just watch closely to avoid burning. Marinating chicken is key for flavor. I suggest a minimum of 20 minutes. This allows the marinade to soak in. For even deeper flavor, marinate for up to 2 hours. You can also prepare the chicken in the morning and let it sit in the fridge until dinner. Just remember, longer marination means more flavor, but don’t exceed 24 hours. The acidity in the mustard can affect the texture if left too long. To ensure your chicken is done, use a meat thermometer. The safe internal temperature is 165°F (75°C). Insert the thermometer into the thickest part of the thigh, avoiding bone. If you don't have a thermometer, check the juices. They should run clear, not pink. The skin should look golden brown. If it’s still pale, give it a few more minutes in the oven. Always let the chicken rest for 5 minutes after baking. This helps keep it juicy and tender. For the full recipe, check out the section above. {{image_4}} You can change the flavor of your honey mustard chicken thighs by using different herbs. Try rosemary for a woodsy taste. You can also use oregano for a hint of the Mediterranean. Basil adds a fresh twist, while cilantro gives it a bright flavor. Mix and match these herbs to find your favorite blend. Experimenting with herbs makes cooking fun and exciting! Grilling honey mustard chicken thighs brings a smoky flavor that’s hard to beat. Start by following the marinade steps from the Full Recipe. After marinating, preheat your grill to medium-high heat. Place the chicken thighs skin-side down on the grill. Cook for about 7-10 minutes per side. This gives you crispy skin and juicy meat. You can brush extra marinade on during cooking for added flavor. Using a slow cooker for honey mustard chicken thighs is super easy. First, prepare the marinade like in the Full Recipe. Place the chicken thighs in the slow cooker and pour the marinade over them. Set it to low for 6-7 hours or high for 3-4 hours. This method makes the chicken very tender and full of flavor. Serve it with rice to soak up the delicious sauce! To keep your honey mustard chicken thighs fresh, let them cool completely. Once cool, place them in an airtight container. You can store them in the fridge for up to three days. If you want to keep them longer, freezing is a great option. Always label the container with the date to track storage time. When you’re ready to enjoy the leftovers, reheat them in the oven. Set your oven to 350°F (175°C). Place the chicken on a baking sheet and cover it with foil. Heat for about 20 minutes. This method keeps the chicken juicy and the skin crispy. You can also use a microwave, but the skin may lose its crispiness. If you use the microwave, heat on medium power for short bursts, checking often. If you want to freeze the chicken, first ensure it is completely cooled. Wrap each thigh in plastic wrap, then place them in a freezer bag. Squeeze out excess air before sealing. You can freeze honey mustard chicken thighs for up to three months. To thaw, place them in the fridge overnight before reheating. Enjoy this simple and tasty meal anytime! You can find the full recipe in the article to make it again. You can serve honey mustard chicken thighs with many sides. Some great options include: - Roasted vegetables like carrots and broccoli - Mashed potatoes or sweet potatoes - A fresh garden salad with a light dressing - Rice or quinoa for a hearty side - Garlic bread or dinner rolls for a cozy touch These sides balance the sweet and tangy flavors of the chicken. They also add color and texture to your meal. Yes, you can use boneless chicken thighs. They will cook faster than bone-in thighs. To adjust the cooking time, bake them for about 25-30 minutes. Always check that the internal temperature reaches 165°F (75°C). Boneless thighs will still absorb the honey mustard flavor well. To add spice, try these options: - Mix in a teaspoon of cayenne pepper or red pepper flakes into the marinade. - Substitute some Dijon mustard with spicy brown mustard. - Add minced jalapeños or a splash of hot sauce for heat. These tweaks will give your chicken a nice kick without losing its sweet taste. Enjoy experimenting with flavors! This blog post explored the tasty world of honey mustard chicken thighs. We reviewed main ingredients, optional add-ons, and their nutrition facts. I detailed simple steps for cooking, from preheating the oven to making a flavorful marinade. With tips for crispy skin and perfect doneness, you can easily wow your family or friends. We also looked at fun recipe variations, storage tips, and addressed common questions. Enjoying this dish is simple, and you can create your own favorite twist. Happy cooking!

Honey Mustard Chicken Thighs Flavorful and Simple Meal

Looking for a simple yet flavorful meal? Honey Mustard Chicken Thighs might be your new favorite. This dish balances sweet

- 1 cup rolled oats - 2 cups vegetable broth - 1 cup fresh spinach, finely chopped - 2 large eggs - 1 tablespoon extra virgin olive oil - 1 garlic clove, finely minced - 1/2 teaspoon red pepper flakes (optional, for spice) - Salt and freshly ground black pepper, to taste - Fresh herbs for garnish (such as chives or parsley) When I make savory oatmeal with spinach and eggs, I choose high-quality ingredients. The rolled oats form the base, offering a hearty texture. I prefer using vegetable broth instead of water. It adds rich flavor and depth. Fresh spinach is a must. It wilts down nicely and brings vibrant color. The eggs are the star here, providing protein and creaminess. I usually opt for large eggs, fried sunny-side up. This way, the yolk runs into the oats. Extra virgin olive oil adds healthy fats and enhances the dish's taste. Garlic gives a savory punch, while red pepper flakes bring a hint of heat. I season with salt and pepper to balance the flavors. Finally, fresh herbs, like chives or parsley, give a pop of freshness and color. For the Full Recipe, check the complete cooking instructions. - Gather all ingredients: - 1 cup rolled oats - 2 cups vegetable broth - 1 cup fresh spinach, finely chopped - 2 large eggs - 1 tablespoon extra virgin olive oil - 1 garlic clove, finely minced - 1/2 teaspoon red pepper flakes (optional) - Salt and freshly ground black pepper, to taste - Fresh herbs for garnish - Prepare cooking utensils: - A medium-sized saucepan - A non-stick skillet - Measuring cups and spoons - A spoon for stirring - Start by pouring the vegetable broth into a medium saucepan. Bring it to a vigorous boil over medium heat. - Once boiling, slowly stir in the rolled oats. Then, reduce the heat to low. Let the oats simmer gently. - Cook the oats for about 5-7 minutes. Stir occasionally. You want the oats to become tender and creamy. - In a non-stick skillet, heat the olive oil over medium heat. Add the minced garlic. If you like spice, toss in the red pepper flakes. - Sauté for about 1 minute. You want the garlic fragrant, not browned. - Add the chopped spinach to the skillet. Cook for 2-3 minutes until it wilts and turns bright green. Season with salt and pepper. - Remove the skillet from heat and set the spinach aside. - In the same skillet, crack the eggs. Cook them sunny-side up, or to your liking. This takes about 3-4 minutes. - Once the oatmeal is done, spoon it into two bowls. Top each bowl with the sautéed spinach. Place a fried egg on top of each. - You can garnish with fresh herbs. Add more salt and pepper if you wish. Enjoy your meal! To make your oatmeal creamy, adjust the liquid ratios. I use two cups of vegetable broth for one cup of rolled oats. This mix gives a rich, smooth texture. If you want thicker oatmeal, add less broth. For creaminess, cook your oats for about five to seven minutes. Stir occasionally to keep them from sticking. Boost the flavor of your oatmeal with extra spices. Consider adding garlic powder, cumin, or smoked paprika. These spices can make your dish pop. You can also use different oils for sautéing. Try sesame oil or coconut oil for a unique twist. These choices add depth and richness to your meal. Choose the right dish to serve your oatmeal. A shallow bowl works best for a beautiful presentation. Pair your oatmeal with slices of avocado or fresh fruit for balance. For drinks, a cup of green tea or fresh orange juice can complement the flavors nicely. {{image_4}} You can switch out spinach for other greens like kale or Swiss chard. These greens add unique flavors and nutrients. Try adding cheese like feta or goat cheese for creaminess. Avocado is another great choice. It brings healthy fats and a smooth texture to your bowl. To make this dish vegan-friendly, replace the eggs with tofu. Scrambled tofu works great as a protein substitute. You can also cook oatmeal in the microwave. Use the same proportions of oats and broth. Microwave on high for about 2-3 minutes, stirring halfway through. This method is quick and perfect for busy mornings. Experiment with umami elements like miso or nutritional yeast. These will deepen the flavor and add a savory touch. Adjust spice levels by adding more red pepper flakes or a splash of hot sauce. You can also try spices like cumin or smoked paprika for a different kick. Each change can transform your savory oatmeal into a new dish. For the complete recipe, check out the Full Recipe section. To keep your savory oatmeal fresh, store it in an airtight container. Place it in the fridge within two hours after cooking. It should stay good for about three to five days. If you want to save it longer, you can freeze it. Just make sure to leave some space in the container for the oatmeal to expand. You can freeze it for up to three months. When reheating, the best method is to use the stove. Place the oatmeal in a pan and add a splash of vegetable broth or water. Heat it over low to medium heat, stirring often. This helps keep the texture creamy. You can also use the microwave. Just heat it in 30-second bursts, stirring in between. This way, your oatmeal won’t dry out. In the fridge, your savory oatmeal will be fresh for up to five days. If you freeze it, it can last for three months. After this time, the flavor and texture might change. Always check for any signs of spoilage, like off smells or mold, before eating. You can easily boost the health factor of this dish. Here are some tips: - Use whole grain oats instead of regular oats for more fiber. - Add more veggies, like diced tomatoes or bell peppers. They are low-cal and tasty. - Swap the eggs for egg whites if you want less fat and cholesterol. - Try different greens, like kale or Swiss chard, for variety. - Mix in seeds or nuts, such as chia seeds or walnuts, for healthy fats and crunch. These changes can make your meal even more nutritious while keeping it delicious! Yes, you can prep this recipe ahead of time. Here’s how: - Cook the oatmeal and spinach mixture first. Store them in the fridge. - Reheat the oatmeal on the stove or in the microwave. Add a splash of broth if it’s thick. - Fry the eggs fresh when you’re ready to eat. This keeps them tasty and warm. - You can prepare everything up to two days in advance. This makes it easy to enjoy a healthy breakfast on busy mornings! Here are some common mistakes and how to fix them: - Cooking the oats too long can make them mushy. Keep an eye on the timer. - Not using enough broth can lead to dry oats. Adjust the liquid for creaminess. - Overcooking the spinach can make it lose color and nutrients. Sauté it just until wilted. - Not seasoning enough can result in bland flavors. Add salt and pepper to taste. Avoiding these errors will help you make perfect savory oatmeal every time! Yes, this dish works great for meal prepping. Here are some best practices: - Store each component separately. Keep the oatmeal, spinach, and eggs in different containers. - Use airtight containers to keep everything fresh in the fridge. - Reheat the oatmeal and spinach together, but cook the eggs fresh for best taste. - Label the containers with dates to keep track of freshness. This way, you can enjoy a healthy meal anytime, without extra cooking! For the complete recipe, check out the Full Recipe section. This recipe combines rolled oats, spinach, and eggs for a tasty meal. I shared step-by-step directions to cook it perfectly. Use tips to enhance flavors and textures. Explore variations to keep things fresh and fun. Remember, it’s easy to store leftovers and reheat them well. Try different spices or greens to match your taste. If you stick to these guides, you’ll enjoy savory oatmeal again and again. Enjoy your cooking journey!

Savory Oatmeal with Spinach and Eggs Healthy Breakfast

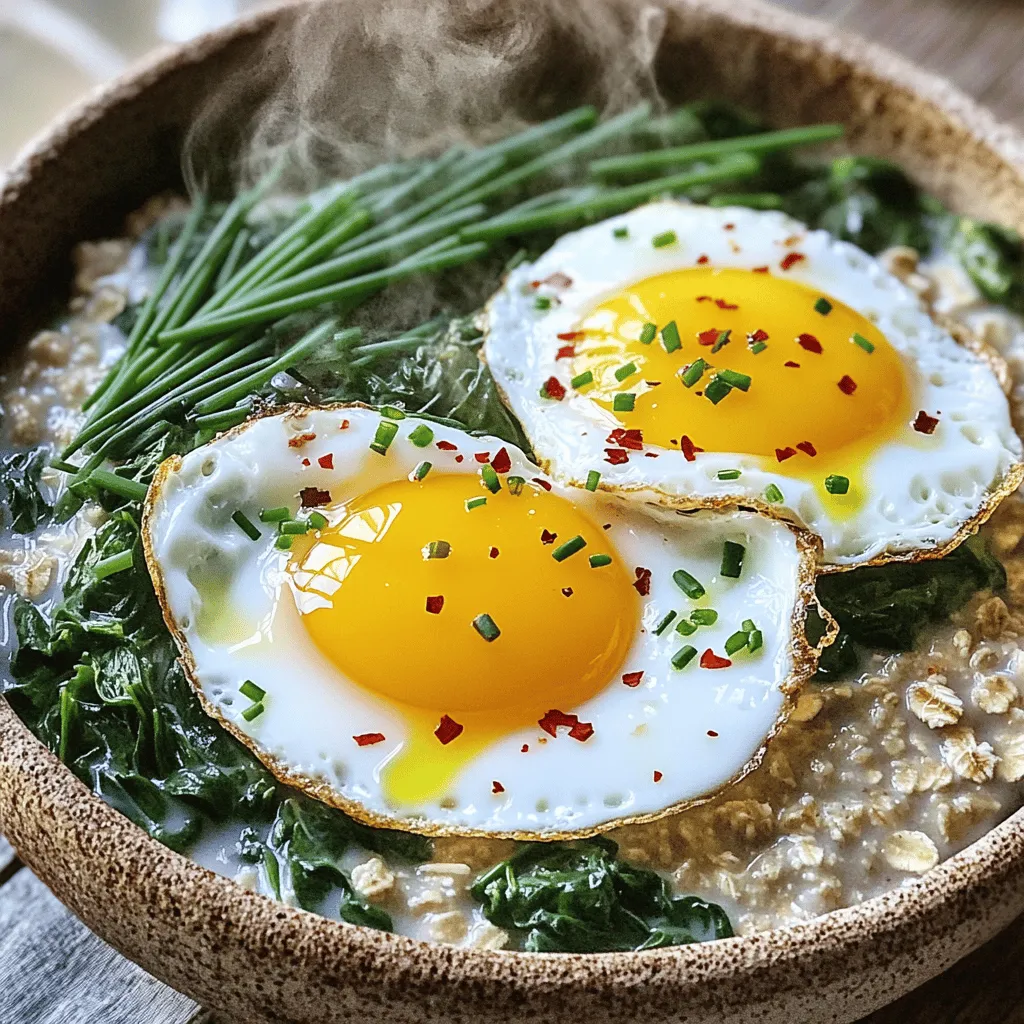
Start your day right with my savory oatmeal with spinach and eggs! This healthy breakfast blends comfort and nutrition. I’ll

- 1 cup quinoa - 2 cups vegetable broth (or water) - 1 red bell pepper, chopped into bite-sized pieces - 1 yellow bell pepper, chopped into bite-sized pieces - 1 medium zucchini, sliced into half-moons - 1 cup cherry tomatoes, halved - 1 red onion, diced thoughtfully - 3 tablespoons extra-virgin olive oil - 1 teaspoon garlic powder - 1 teaspoon smoked paprika - Sea salt and freshly ground black pepper, to taste The base of this roasted vegetable grain bowl is quinoa. Quinoa is a great grain. It cooks quickly and is full of protein. I love using vegetable broth for cooking it. The broth adds a nice depth of flavor. Next, I use assorted vegetables. I like bell peppers, zucchini, cherry tomatoes, and red onion. These veggies roast well. They become sweet and tender. The colors make the bowl attractive too! Seasonings are key to packing flavor. I use garlic powder and smoked paprika. These spices bring warmth and earthiness. Sea salt and black pepper help balance everything. - 1 ripe avocado, sliced delicately - ½ cup creamy hummus (store-bought or homemade) - Fresh parsley or cilantro, chopped, for garnish Garnishes take this bowl to the next level. Avocado adds creaminess and healthy fats. Hummus gives a smooth texture and flavor boost. Fresh herbs like parsley or cilantro bring freshness. These add color and taste, making the dish pop! For the full recipe, check out the detailed instructions to assemble your delicious meal. - Preheat the oven to 400°F (200°C). - In a medium pot, combine 1 cup of rinsed quinoa with 2 cups of vegetable broth. Bring this mixture to a boil over medium-high heat. Once it boils, lower the heat and cover the pot. Let it simmer for about 15 minutes, until fluffy. After cooking, let it sit covered for 5 more minutes before fluffing with a fork. - Grab a large baking sheet. Chop 1 red bell pepper, 1 yellow bell pepper, 1 medium zucchini, 1 cup of cherry tomatoes, and 1 red onion. Spread these veggies evenly on the baking sheet. - Drizzle 3 tablespoons of extra-virgin olive oil over the veggies. Then, sprinkle with 1 teaspoon of garlic powder, 1 teaspoon of smoked paprika, sea salt, and freshly ground black pepper. Use your hands to toss the veggies until they are well-coated. - Place the baking sheet in the preheated oven. Roast the vegetables for 20-25 minutes. Stir them halfway through for even cooking. The veggies should become tender and caramelized. - To assemble the bowls, start with a scoop of quinoa in each bowl. Top it with the roasted vegetables. Then, add slices of avocado and a dollop of creamy hummus. - Finish with a sprinkle of chopped fresh parsley or cilantro to add a pop of color. Enjoy this vibrant and tasty dish! For the full recipe, check out the details above. To make perfect quinoa, avoid common mistakes. One mistake is not rinsing it. Rinsing removes a bitter coating called saponin. Always rinse it under cool water for a minute before cooking. Another mistake is using too much water. The ratio is always one part quinoa to two parts liquid. If you add too much, it can turn mushy. To tell when quinoa is done, look for tiny white spirals. These are the germ of the grain. When all the water is absorbed, it's time to remove it from heat. Let it rest for five minutes, then fluff it with a fork. When roasting vegetables, caramelization brings out their natural sweetness. To achieve this, keep the pieces uniform in size. This helps them cook evenly. Spread them out on the baking sheet. If they are too crowded, they will steam instead of roast. Timing is key for different vegetables. For example, bell peppers and zucchini take about 20-25 minutes. Cherry tomatoes may need just 15 minutes. Always check for tenderness halfway through cooking. Stir the vegetables to ensure even browning. For ideal pairings, top your grain bowl with creamy avocado and hummus. These add rich flavors and smooth textures. You can also sprinkle some fresh herbs like cilantro or parsley for brightness. When plating, focus on color and height. Start with a base of quinoa. Then, layer the roasted vegetables on top. Place avocado slices and a dollop of hummus artfully on the bowl. Serve with a lemon or lime wedge. This adds a fresh zing that enhances the flavors. For the complete recipe, check the Full Recipe section. {{image_4}} You can switch quinoa for brown rice or farro. Both options add unique textures. Brown rice gives a chewy bite. Farro offers a nutty flavor that enhances the bowl. For gluten-free choices, try using millet or buckwheat. Both grains are rich and filling. They keep your dish hearty and satisfying. Using seasonal produce boosts freshness and taste. For spring, add asparagus or peas. In summer, consider zucchini and corn. Autumn calls for sweet potatoes or Brussels sprouts. Winter veggies like kale or root veggies work well too. You can mix colors and textures for a fun look. Try tossing in roasted beets for a sweet twist. You can elevate your grain bowl with sauces or dressings. A simple lemon-tahini dressing adds brightness. For a spicy kick, try sriracha or harissa. Incorporating proteins like tofu or grilled chicken makes it more filling. Tofu can be marinated and roasted for added flavor. Chicken pairs well with roasted garlic and herbs, adding depth. For the complete recipe, refer to the Full Recipe section above. To keep your roasted vegetable grain bowl fresh, store leftovers in the fridge. Place the grain bowl in an airtight container. This helps to lock in moisture and flavor. You can safely keep it in the fridge for up to three days. When ready to eat, the best way to reheat your grain bowl is in the microwave. Place it in a microwave-safe dish and cover it with a damp paper towel. Heat for one to two minutes, stirring halfway through. This method helps to keep the grains fluffy and the veggies tender. If you prefer, you can also reheat it on the stove. Use a non-stick pan over low heat. Add a splash of water to keep it moist while warming. Yes, you can freeze the grain bowl! To do this, separate the quinoa and vegetables. Use airtight containers or freezer bags for storage. Make sure to remove as much air as possible. This helps prevent freezer burn. You can freeze it for up to three months. When ready to enjoy, thaw it in the fridge overnight before reheating. This method keeps the flavors intact and the texture pleasant. If you want to swap quinoa, try brown rice or farro. Both provide a hearty base. You can also use millet or couscous. These grains add great texture and taste. Just remember to adjust cooking times. For brown rice, it usually takes about 45 minutes to cook. Farro cooks in about 30 minutes. To make this dish vegan, ensure all ingredients are plant-based. Use vegetable broth instead of chicken broth. Make sure your hummus is dairy-free. Check the label before buying. Avoid any toppings that contain animal products. This way, you keep the meal fresh and tasty without animal ingredients. Yes, this dish can be gluten-free. Quinoa is naturally gluten-free. If you choose other grains, ensure they are certified gluten-free. Some brands may process grains in facilities with gluten. Always read the labels carefully. The seasonings used in this recipe are also gluten-free. This makes the grain bowl safe for those with gluten sensitivities. You learned how to make a tasty grain bowl with quinoa and veggies. We covered key ingredients, step-by-step instructions, and helpful tips. You can even change it up with different grains and seasonal veggies. Don't forget to store leftovers properly and try new garnishes like avocado and hummus. Making this dish is fun and offers many options. Enjoy experimenting with flavors and sharing your tasty creations!

Roasted Vegetable Grain Bowl Packed with Flavor

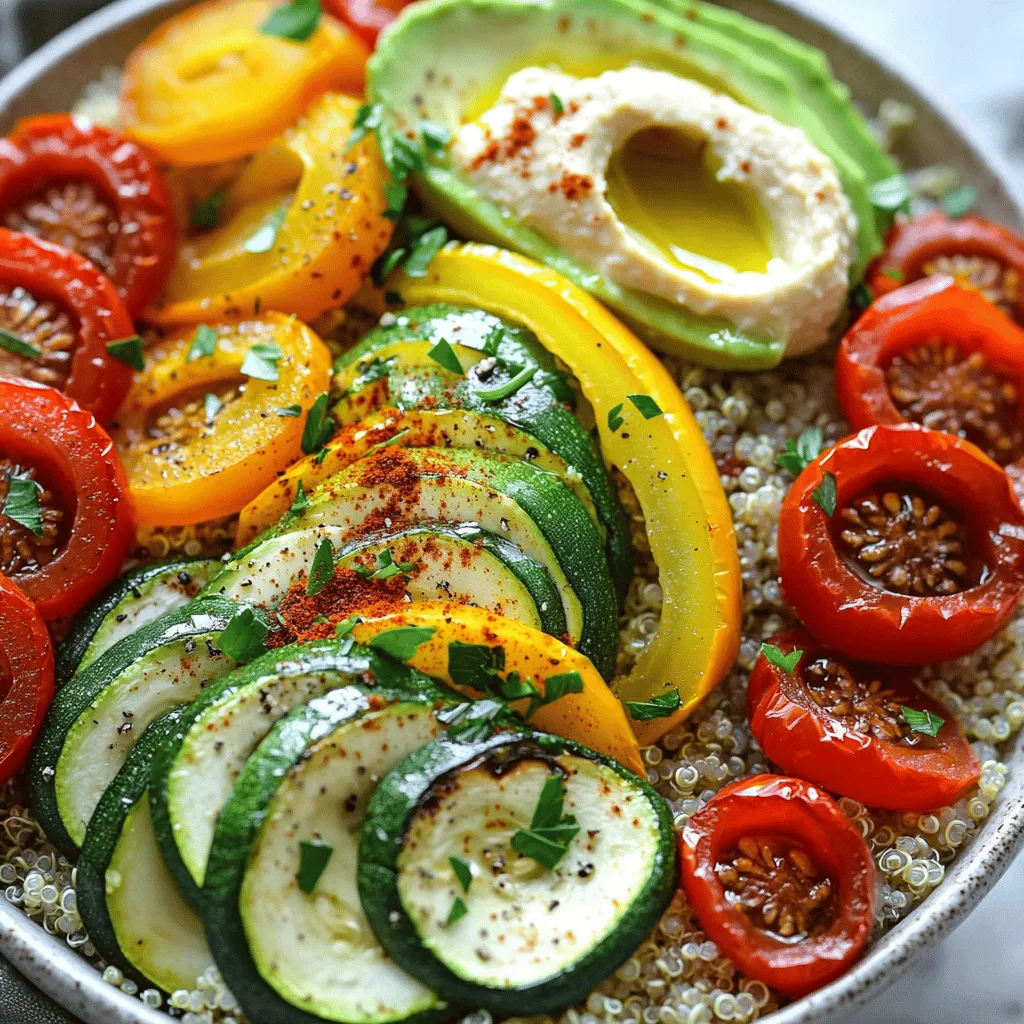
Are you looking for a bright, tasty meal that’s easy to make? A Roasted Vegetable Grain Bowl offers fresh flavors,

To make a rich and creamy chocolate avocado mousse, you will need: - 2 ripe avocados, peeled and pitted - 1/2 cup unsweetened cocoa powder - 1/2 cup maple syrup (or substitute with agave syrup) - 1/4 cup almond milk (or any milk of choice) - 1 teaspoon vanilla extract - A pinch of sea salt These ingredients create a smooth and velvety texture. The avocados provide creaminess without the need for heavy cream. The cocoa powder adds deep chocolate flavor, while the maple syrup gives natural sweetness. You can customize your mousse with these optional ingredients: - Fresh berries (such as raspberries or strawberries, for garnish) - Shaved dark chocolate (for garnish) - A dash of espresso powder for a coffee kick - A few mint leaves for a refreshing touch These additions can change the flavor and make the dish more fun. Try different toppings to see what you like best. Avocados are not just creamy and delicious; they also offer great nutrition. Here are some benefits: - High in healthy fats that support heart health - Full of fiber, which aids digestion - Packed with vitamins like E, K, and B6 Using avocado in dessert makes it healthier without losing taste. It’s a smart way to enjoy something sweet while getting nutrients. You can find the full recipe [here](#). To start, you need ripe avocados. Cut them in half, remove the pit, and scoop the flesh into your blender. Next, add the unsweetened cocoa powder. This gives the mousse its rich chocolate flavor. Then, pour in the maple syrup. You can swap it for agave syrup if you wish. Add the almond milk for creaminess and the vanilla extract for extra depth. Don’t forget a pinch of sea salt to balance the sweetness. Blend the mixture on high speed. Watch as it transforms into a creamy delight. You may need to stop and scrape down the sides of the blender. This helps mix everything evenly. Blend until you achieve a silky smooth consistency. Taste your mousse. If you want it sweeter, add more maple syrup. Blend again until smooth. Once blended, scoop the mousse into individual bowls or cups. Cover them with plastic wrap or lids. Place them in the fridge for at least 30 minutes. This chilling time helps the mousse firm up and lets the flavors mingle. When you are ready to serve, top each bowl with fresh berries. Add some shaved dark chocolate for a beautiful finish. For the full recipe, check here. To make a great chocolate avocado mousse, pick ripe avocados. Look for ones that feel soft but not mushy. Press gently; if it yields slightly, it's perfect. Avoid any avocados with dark spots or blemishes. These can spoil your mousse's flavor. Ripe avocados have a rich, creamy texture that blends well. They add a smooth and creamy base that makes your dessert delightful. The sweetness of your mousse can change based on your taste. I use maple syrup for a nice, natural sweetness. However, agave syrup works well too. If you want it sweeter, add more syrup, a little at a time. Taste as you go; this helps you find the right balance. You can also use honey if you like. For a sugar-free option, try stevia or monk fruit sweetener. These can give you a lighter version without the added sugar. Presentation matters when serving mousse. Use clear glass cups to showcase that rich, dark color. Garnish each serving with fresh berries for a pop of color. Raspberries or strawberries are my favorites. A sprinkle of shaved dark chocolate adds a fancy touch. It also brings a nice texture. Arrange the garnishes artfully for a beautiful display. This way, your guests will be excited to dig in. For more tips, check out the Full Recipe for added insights! {{image_4}} You can easily make this mousse dairy-free and vegan. Just use almond milk or any plant milk. Maple syrup keeps it sweet without animal products. This mousse is rich and creamy, just like the original. You get all the taste without the dairy. This chocolate avocado mousse is naturally gluten-free. The main ingredients, like avocados and cocoa powder, are safe for gluten-free diets. You don’t need to change much for this option. Just ensure that any added sweetener or flavoring is also gluten-free. You can add fun flavors to this mousse. A little mint extract gives a fresh taste. Adding espresso powder makes it like a mocha treat. Just mix in these flavors when blending. Start with a small amount, then taste and adjust. This way, you create a mousse that suits your taste perfectly. For the full recipe, check out the section above. After you enjoy your mousse, store any leftovers in the fridge. Use airtight containers to keep it fresh. This helps prevent the mousse from absorbing other smells. If you leave it uncovered, it may lose its creamy texture. Chocolate avocado mousse lasts about 3 to 5 days in the fridge. Check for any changes in color or smell before eating. If it looks or smells odd, it’s best to throw it away. Always remember, fresh is best! You can freeze the mousse for up to 2 months. Use freezer-safe containers or ice cube trays for easy portions. Before serving, thaw it in the fridge overnight. Stir it well to restore the creamy texture. This mousse is rich and delicious, even after freezing! For the full recipe, check out the detailed instructions above. Yes, you can use other sweeteners. If you want a different taste, try honey or agave syrup. You can also use stevia if you want it low-calorie. Just remember, each sweetener has a different flavor. Start with a little and taste as you go. Adjust until you find the perfect sweetness for your mousse. Absolutely! This mousse is a hit with kids. It tastes rich and sweet, just like a dessert should. Plus, it packs in healthy fats from avocados. This dessert is a sneaky way to add nutrition to their diet. It’s fun to make together too. Kids love to help blend and decorate with berries and chocolate. To make your mousse fluffier, add a bit of whipped cream or whipped coconut cream. This will lighten the texture and give it a nice, airy feel. You can also fold in the whipped cream gently after blending the avocado mixture. Don’t mix too hard; you want to keep that fluffiness. Enjoy your rich and creamy Chocolate Avocado Mousse! For the full recipe, check out [Full Recipe]. This blog post showed you how to make chocolate avocado mousse step by step. You learned about the main and optional ingredients, tips for the perfect texture, and how to store leftovers. Variations for special diets and flavor changes help everyone enjoy this treat. Remember, avocado adds health benefits, making this dessert rich and good for you. With these tips and tricks, you can impress anyone with your mousse. Enjoy making and sharing this delightful dessert!

Chocolate Avocado Mousse Rich and Creamy Delight

Are you ready to indulge in a rich and creamy dessert that’s good for you? Chocolate Avocado Mousse combines the

Lemon Garlic Butter Shrimp is a quick and tasty dish. It combines fresh shrimp with rich butter and bright lemon. This meal takes just 15 minutes to make. It serves four, so it's perfect for a family dinner or a quick weeknight meal. To make this dish, gather these ingredients: - 1 pound large shrimp, peeled and deveined - 4 tablespoons unsalted butter - 4 cloves garlic, finely minced - 1 lemon, zested and juiced - 1 teaspoon red pepper flakes (adjust based on your spice preference) - Salt and freshly ground black pepper to taste - 2 tablespoons fresh parsley, finely chopped - Lemon wedges for garnish You can swap out some ingredients if needed. For a dairy-free option, use olive oil instead of butter. If you want a different flavor, try lime juice instead of lemon juice. You can also use fresh herbs like basil or cilantro instead of parsley for a unique twist. Start by gathering your ingredients. This makes cooking smooth and fun. You need: - 1 pound large shrimp, peeled and deveined - 4 tablespoons unsalted butter - 4 cloves garlic, finely minced - 1 lemon, zested and juiced - 1 teaspoon red pepper flakes - Salt and freshly ground black pepper to taste - 2 tablespoons fresh parsley, finely chopped - Lemon wedges for garnish Next, wash the shrimp under cold water. Pat them dry with a paper towel. This helps the shrimp brown nicely. Zest and juice the lemon. Set these aside for later. Mince the garlic and chop the parsley. Now, heat a large skillet over medium heat. This usually takes about 2 minutes. Add the butter and let it melt. Keep an eye on it. Once it bubbles, add the minced garlic. Cook for 1-2 minutes, stirring often. You want the garlic to smell great, but not brown. After the garlic, add the red pepper flakes and lemon zest. Stir this mix for another minute. It should smell amazing! Now, gently add the shrimp to the skillet. Season them with salt and pepper. Cook the shrimp for 2-3 minutes on each side. They should turn pink and opaque. Once cooked, pour in the lemon juice. Stir everything together. Let it simmer for 1 more minute. This thickens the sauce a little. To get the best shrimp, always use fresh or thawed shrimp. Frozen shrimp can work, but they may release water. Make sure not to overcrowd the skillet. This helps the shrimp sear nicely. If you love spice, feel free to add more red pepper flakes. For a twist, try adding fresh herbs like basil or dill. These can brighten the dish even more! Don’t forget to serve your shrimp right away. Garnish with parsley and lemon wedges. This adds color and freshness. For a complete meal, pair your shrimp with crusty bread or fluffy rice. Enjoy this simple yet flavorful dish! To make your Lemon Garlic Butter Shrimp even better, you can add a few simple touches. Consider using fresh herbs like basil or dill for a fresh taste. You can also try adding a splash of white wine while cooking. This will give the dish a nice depth and richness. If you like heat, you can increase the red pepper flakes or add a dash of hot sauce. A sprinkle of lemon zest at the end adds brightness and aroma. Many home cooks make mistakes that can affect the flavor and texture. Here are a few to watch out for: - Overcooking the shrimp: Shrimp cook fast. Remove them from heat as soon as they turn pink and opaque. - Burning the garlic: Garlic can turn bitter if it burns. Cook it gently and stir often. - Not seasoning enough: Always taste your dish before serving. Adjust the salt, pepper, and lemon juice for the best flavor. Having the right tools makes cooking easier and more fun. Here are some must-haves for this recipe: - A large skillet or pan: This ensures even cooking and enough space for the shrimp. - A good quality chef’s knife: Use it for chopping garlic and herbs. - A zester: This tool helps you get the lemon zest without the bitter white pith. - A spatula: Use it to turn the shrimp without breaking them. For the full recipe, check the details above and enjoy your cooking adventure! {{image_4}} To spice things up, add more heat. Use more red pepper flakes. You could also add fresh diced jalapeños. This gives your dish a nice kick. Adjust the spice level to your taste. If you love heat, go for it! Herbs can brighten the flavor. Try adding fresh basil or dill. You can also use thyme or oregano. These herbs mix well with lemon and shrimp. They add freshness and depth. Chop the herbs finely and add them at the end for the best flavor. If you want something new, use other proteins. Chicken or scallops work well with this recipe. You can even try tofu for a vegetarian option. Just adjust the cooking time. Make sure to cook until fully done for safety. Each protein brings a different taste, making your meal unique! For the complete recipe, please refer to the Full Recipe. You can keep leftover lemon garlic butter shrimp in the fridge. Place it in an airtight container. It stays fresh for up to three days. Make sure it cools down first before sealing it. This helps keep the shrimp juicy and tasty. If you want to save shrimp for later, freezing works well. Put the shrimp in a freezer-safe bag. Try to remove as much air as possible. They can last up to three months in the freezer. When you’re ready to eat, thaw them in the fridge overnight for best results. To reheat your shrimp, use a skillet over low heat. Add a bit of butter or oil to keep it moist. Heat gently, stirring often, for about five minutes. You can also use the microwave. Just cover the dish and heat in short bursts. This method helps you avoid overcooking the shrimp. Enjoy the bright flavors all over again! For a full recipe, check the full recipe section. You can make Lemon Garlic Butter Shrimp ahead of time. Cook the shrimp and sauce as usual. Let it cool completely. Store it in an airtight container in the fridge. When ready to eat, reheat it on the stove over low heat. Add a little extra butter and lemon juice to freshen it up. Yes, you can use frozen shrimp. Just make sure to thaw it first. Place the shrimp in cold water for about 15 minutes. Drain and pat them dry before cooking. This helps the shrimp cook evenly and absorb the flavors well. Lemon Garlic Butter Shrimp pairs well with many sides. Here are some great options: - Rice: Fluffy white or brown rice soaks up the sauce. - Pasta: Toss cooked pasta with the shrimp for a hearty meal. - Bread: Crusty bread is perfect for dipping into the garlic butter. - Salad: A fresh green salad adds a crisp texture. - Vegetables: Sautéed or steamed veggies make a nice contrast. For the full recipe, check out the [Full Recipe]. This blog post covered all you need to make lemon garlic butter shrimp. We discussed the key ingredients, optional substitutions, and the full recipe. You learned step-by-step instructions, cooking tips, and common mistakes to avoid. We also explored tasty variations and proper storage methods. In conclusion, cooking shrimp can be fun and easy. With these tips, you can enjoy great meals. Try different flavors and enjoy your culinary success!

Lemon Garlic Butter Shrimp Flavorful and Simple Meal

Looking for a quick and tasty meal? You’ve come to the right place! In this post, I’ll show you how

- 1 cup rolled oats - ½ cup creamy almond butter - ¼ cup honey or maple syrup These main ingredients are the heart of your bites. Rolled oats give a nice texture. Creamy almond butter adds richness. Honey or maple syrup provides sweetness. - 1 cup unsweetened shredded coconut - ½ cup dark chocolate chips - ¼ cup finely chopped almonds The additional ingredients really make these bites shine. Unsweetened shredded coconut gives a tropical flavor. Dark chocolate chips add a sweet touch. Finely chopped almonds give a nice crunch. - 1 teaspoon pure vanilla extract - ½ teaspoon sea salt Flavor enhancers are key in this recipe. Pure vanilla extract adds depth. A pinch of sea salt balances the sweetness. For the full recipe, check the details above. Enjoy making these Almond Joy Energy Bites! - Combine 1 cup rolled oats and ½ cup creamy almond butter in a large bowl. - Add ¼ cup honey or maple syrup to the mix. Stir well until it blends. - Incorporate 1 cup unsweetened shredded coconut, ½ cup dark chocolate chips, and ¼ cup finely chopped almonds. - Add 1 teaspoon pure vanilla extract and ½ teaspoon sea salt. Mix thoroughly. - Roll the mixture into bite-sized balls, about 1 inch wide. - Chill the bites in the refrigerator for at least 30 minutes. Store them in an airtight container for up to a week. For the full recipe, check out the detailed instructions and ingredient list. To prevent sticking while rolling the bites, wet your hands slightly. This helps the mixture slide off easily. If the mixture feels too dry, add a splash of almond butter or a little honey. This will help you reach the right consistency. For serving, arrange the energy bites on a colorful plate. You can also use a mason jar for a fun look. To make them pop, sprinkle a bit of shredded coconut on top. This adds a nice touch for your guests. To prepare in advance, roll the bites and chill them first. Once firm, store them in an airtight container. This keeps them fresh for up to one week. You can also freeze them for longer storage. Just place them in a freezer bag and label it. When ready to eat, thaw them in the fridge overnight before serving. {{image_4}} When you make Almond Joy Energy Bites, you can easily change the recipe to fit your taste. Here are some fun ideas. - Use peanut butter instead of almond butter for a different flavor. - Try agave syrup in place of honey or maple syrup for a vegan option. - Add protein powder to boost the nutrition. This makes them great for post-workout snacks. - Incorporate dried fruits or seeds like raisins, chia, or pumpkin seeds for extra texture. - Make nut-free options by using sunflower seed butter instead of almond butter. - For vegan modifications, ensure you use maple syrup and dairy-free chocolate chips. These variations keep your energy bites exciting and can fit different diets. Feel free to mix and match based on what you have at home! Remember, these ideas help you create a snack you love. Check out the Full Recipe for all the details. Store your Almond Joy Energy Bites in an airtight container. This helps keep them fresh. A glass jar or a plastic container will work well. Place a piece of parchment paper between layers if you stack them. This prevents them from sticking together. Refrigerate the container for best results. The cool temperature helps the bites last longer. Avoid storing them at room temperature, as they can get too soft and lose their shape. Almond Joy Energy Bites can last up to one week in the fridge. They taste best within the first few days. Look for signs of spoilage. If you see mold or an off smell, it’s time to throw them out. If they feel very hard or dry, they may not be enjoyable. Always check before eating to ensure they are still fresh. You don’t need to reheat these bites. They taste great straight from the fridge. If they feel a bit firm, let them sit at room temperature for a few minutes. This softens them slightly and makes them enjoyable. For an extra treat, pair them with fresh fruit or a dollop of yogurt. This adds flavor and makes a satisfying snack. Enjoy these bites anytime you need a quick energy boost! To make Almond Joy Energy Bites, follow these simple steps: 1. Mix the base: In a large bowl, combine 1 cup of rolled oats and ½ cup of creamy almond butter. 2. Add sweetness: Pour in ¼ cup of honey or maple syrup. Stir until well mixed. 3. Incorporate flavors: Add 1 cup of unsweetened shredded coconut, ½ cup of dark chocolate chips, ¼ cup of finely chopped almonds, 1 teaspoon of pure vanilla extract, and ½ teaspoon of sea salt. Mix well. 4. Shape the bites: Take small portions and roll them into balls about 1 inch in size. 5. Chill: Place them on a baking sheet and chill in the fridge for at least 30 minutes. 6. Store: Keep them in an airtight container in the refrigerator for up to one week. For the full recipe, check the recipe section. Yes, you can freeze Almond Joy Energy Bites. To do this, first, roll the bites as directed. Next, place them on a baking sheet lined with parchment paper. Freeze them for about an hour until firm. Once frozen, transfer the bites to an airtight container or a zip-top bag. They can last for up to three months in the freezer. To enjoy, simply thaw them in the fridge for a few hours or leave them at room temperature for about 30 minutes. You can try many fun variations of Almond Joy Energy Bites. Here are a few ideas: - Nut Butter Swap: Use peanut butter instead of almond butter for a different taste. - Sweetener Change: Try agave syrup or brown rice syrup instead of honey or maple syrup. - Add-ins: Mix in dried fruit like cranberries or raisins for added sweetness. - Protein Boost: Add some protein powder for an extra energy kick. These changes can give your bites a fresh twist. This recipe yields about 16 Almond Joy Energy Bites. Each bite is perfect for a quick snack or a sweet treat. If you need more bites, you can easily double the recipe! Almond Joy Energy Bites are easy and fun to make. We covered the main and additional ingredients, plus tips for great results. Personalize these bites with different flavors or dietary needs. Store them properly for lasting freshness. With these ideas, you can enjoy delicious, healthy snacks every day. Try these bites for a sweet treat that boosts your energy and satisfies your cravings. You’ll love how simple and tasty they are!

Almond Joy Energy Bites Tasty and Simple Recipe

Looking for a quick snack that satisfies your sweet tooth? These Almond Joy Energy Bites are the perfect blend of

- 1 ½ cups arborio rice - 3 cups vegetable broth - 1 red bell pepper, diced - 1 yellow bell pepper, diced - 1 zucchini, diced - 1 cup green peas (fresh or frozen) - 1 medium onion, finely chopped - 4 cloves garlic, minced - 1 teaspoon smoked paprika - ½ teaspoon saffron threads (or turmeric for a budget-friendly option) - 2 tablespoons olive oil - Salt and pepper to taste - Fresh parsley for garnish - Lemon wedges for serving I love using arborio rice for this dish. It gives the paella a creamy texture. The vegetable broth adds depth. You can make it from scratch or buy it ready-made. Fresh vegetables are key for flavor. I enjoy using red and yellow bell peppers. They add color and sweetness to the dish. Zucchini brings a nice crunch, while peas add a pop of freshness. Don't skip the garlic and onion. They lay the flavor base. Smoked paprika brings a warm, smoky taste. Saffron gives the paella its golden hue and unique flavor. If saffron is too costly, turmeric works well too. For a final touch, I suggest fresh parsley for garnish. It brightens the dish. Lemon wedges bring a zesty kick. You can serve the paella right from the pan. It looks rustic and inviting. For the full recipe, check out the details above. Warm the vegetable broth over low heat. Add saffron threads and stir gently. This helps the saffron dissolve and adds flavor. Keep the broth warm but do not boil it. Heat olive oil in a large pan over medium heat. Add chopped onion and minced garlic. Sauté for about 2-3 minutes until the onion is soft and fragrant. Next, add the diced red and yellow bell peppers and zucchini. Cook for another 4-5 minutes. Stir occasionally until the veggies start to soften. Season with salt, pepper, and smoked paprika for extra flavor. Now, add arborio rice to the pan. Stir well to coat the rice with oil and veggies. Toast the rice for about 2 minutes without letting it brown. This brings out the nutty flavor. Carefully pour the warm vegetable broth into the pan. Make sure the rice is fully submerged. Increase the heat slightly to bring it to a gentle boil. Once it boils, reduce the heat to low and let it simmer for about 20 minutes. After 15 minutes, sprinkle green peas over the top of the paella. Keep simmering for another 5 minutes, until the rice absorbs all the liquid and is tender. Once done, remove the pan from heat. Cover it with a clean kitchen towel or lid and let it rest for 5 minutes. This allows the flavors to mix and improves the texture. Enjoy making your vegetable paella. For the full recipe, check the complete details above. For the best texture, let your paella simmer undisturbed. This helps the rice cook evenly and absorb flavors. Avoid stirring while it simmers. After cooking, let it rest for about five minutes. This resting time allows the flavors to meld together, making each bite even better. You can swap spices and herbs to match your taste. If you want more depth, add smoked paprika or fresh herbs like thyme. Consider adding artichokes or asparagus for extra veggies. They boost nutrition and give a lovely crunch. Serve paella straight from the pan. It adds charm and warmth to your meal. Choose vibrant dishware to emphasize the colorful veggies. Bright plates can make the dish pop and look even more inviting. For a special touch, add lemon wedges on the side. They bring brightness and freshness to each serving. For the full recipe, check out the [Full Recipe]. {{image_4}} You can boost the protein in vegetable paella. Consider adding chickpeas or tofu. Chickpeas offer a nutty taste and creamy texture. They also add fiber and protein. Tofu, when pressed and cubed, absorbs flavors well. You can sauté tofu with the vegetables. Both options make the dish hearty and satisfying. For vegan vegetable paella, check your broth. Make sure it has no animal products. Many store-bought vegetable broths are vegan. You can also make your own broth using veggies and herbs. This way, you control the flavors and ingredients. Just use water as a base and add your favorite vegetables. Spanish vegetable paella has many regional variations. Each region adds its unique twist. In Valencia, you might find artichokes and green beans. In Catalonia, they use a mix of seasonal vegetables. You can also try adding spices like saffron or smoked paprika for depth. Each variation tells a story about the local culture and flavors. Explore these options to make your paella special. For the full recipe, check below. To store leftovers, let the paella cool first. Then, put it in an airtight container. Place it in the fridge. It will stay fresh for up to three days. When you want to eat it, check for any off smells before reheating. To freeze paella, follow these steps: 1. Cool the paella completely. 2. Divide it into smaller portions. 3. Use freezer-safe containers or bags. 4. Remove as much air as possible. 5. Label with the date and freeze. Paella can last up to three months in the freezer. To reheat, thaw it overnight in the fridge. You can also use the microwave to defrost quickly. When reheating, keep these tips in mind: - Use a skillet for even heating. - Add a splash of vegetable broth. - Cover the pan to trap moisture. - Stir occasionally to prevent sticking. These methods help keep the flavor and texture tasty. Enjoy your paella like it’s fresh! Paella and risotto are both rice dishes, but they have key differences. Paella comes from Spain, while risotto is Italian. - Rice Type: Paella uses short-grain rice like arborio. Risotto typically uses arborio or carnaroli rice, which absorbs more liquid. - Cooking Method: In paella, you cook the rice in a wide pan, allowing it to absorb flavors. Risotto requires constant stirring while adding broth slowly. - Flavor Profile: Paella features spices like saffron and smoked paprika. Risotto often relies on creamy cheese and butter for its rich taste. - Serving Style: Paella is served in the pan it’s cooked in, while risotto is served in bowls. You can use brown rice, but it changes the cooking time. Brown rice takes longer to cook and needs more liquid. - Cooking Adjustments: Use about 4 cups of vegetable broth for 1 ½ cups brown rice. Increase the cooking time to about 40-50 minutes. - Texture: Brown rice has a chewier texture compared to arborio rice. This can give your paella a different bite. - Flavor: Brown rice adds a nuttier flavor, which can complement the dish. The spice level in Vegetable Paella is mild, but you can adjust it based on your taste. - Mild Base: The main spices are smoked paprika and saffron, which are not spicy. - Adding Heat: If you like it spicier, add a pinch of cayenne pepper or some chopped jalapeños. - Serving Suggestions: Serve hot sauce on the side. Let everyone spice their own dish to their liking. For more details on making this delightful dish, check out the Full Recipe. This blog post covered how to make a delicious vegetable paella. You learned about the key ingredients, like arborio rice and fresh veggies. I shared steps for prepping broth, sautéing, and cooking rice. You also found tips for perfect texture and flavor. Don't forget to try fun variations or proper storage methods. With these details, you can enjoy a tasty and colorful paella at home. Cooking is fun, so get started and impress your friends!

Vegetable Paella Flavorful and Simple One-Pan Dish

Vegetable paella is a bright and tasty treat that takes only one pan to make! With fresh vegetables and fragrant

- 4 cups green cabbage, finely shredded - 1 cup purple cabbage, finely shredded - 2 large carrots, grated - 1/2 cup mayonnaise - 1 tablespoon apple cider vinegar - 1 tablespoon honey - 1 teaspoon Dijon mustard - Salt and pepper to taste - 1/4 cup green onions, chopped To create the best classic coleslaw, start with fresh vegetables. I love using both green and purple cabbage. The green cabbage gives a nice crunch, while the purple adds color. Grating two large carrots brings sweetness and a bit of texture. Next, let’s make the dressing. I often use mayonnaise as the base. It makes the coleslaw creamy. Adding apple cider vinegar gives a nice tang. Honey adds sweetness and balances the vinegar. A spoonful of Dijon mustard adds depth. Don’t forget to add salt and pepper for flavor. If you want to mix it up, add chopped green onions for a fresh taste. They also add a bit of crunch. This simple mix of ingredients will create a crunchy and fresh side dish that pairs well with many meals. Follow the Full Recipe for more details on how to bring it all together! - Combine green and purple cabbage in a bowl. - Add grated carrots to mix. First, grab a large mixing bowl. You will want to add 4 cups of finely shredded green cabbage. Next, toss in 1 cup of finely shredded purple cabbage. This colorful mix gives coleslaw its vibrant look. Then, add 2 large grated carrots for sweetness and crunch. Make sure to mix everything well, so you get an even blend of colors. - Whisk together the dressing ingredients until smooth. In a smaller bowl, it’s time to make the dressing. You need 1/2 cup of mayonnaise, 1 tablespoon of apple cider vinegar, 1 tablespoon of honey, and 1 teaspoon of Dijon mustard. Add a pinch of salt and pepper to taste. Whisk these ingredients together until you have a smooth and creamy mixture. This dressing is the heart of your coleslaw. - Drizzle dressing over vegetables and mix. - Chill before serving. Now, drizzle the dressing over your vegetable mix. Use tongs or two large forks to toss everything together. You want each piece of cabbage and carrot coated in dressing. If you like, add 1/4 cup of chopped green onions for extra flavor. Make sure to mix gently to keep the veggies fresh. Cover the bowl and chill it in the refrigerator for at least 30 minutes. This chilling time helps the flavors blend. You can find the full recipe [here](#). To make coleslaw crispy, cut your veggies well. Use a knife or a mandoline. I like to finely shred the cabbage. The thinner the strips, the better they mix and crunch. A good ratio is two parts green cabbage to one part purple cabbage. This keeps the color bright and the texture exciting. Add grated carrots for sweetness and crunch. Aim for about one cup of carrots for every five cups of cabbage. To give your coleslaw a flavor boost, think outside the box. You can add spices like celery seeds or black pepper. These small additions make a big difference. Don’t forget fresh herbs! Chopped parsley or dill can brighten the taste. For a tangy kick, mix in some extra apple cider vinegar. You can also try different dressings. A yogurt-based dressing can add creaminess while cutting calories. Coleslaw pairs well with many dishes. It works great as a side for BBQ ribs or fried chicken. You can also use it as a topping for tacos or sandwiches. The crunchiness complements soft textures perfectly. For a fun twist, serve it in a taco shell. This adds a crunchy layer. Explore different ways to enjoy your coleslaw! For the full recipe, check out the details above. {{image_4}} You can switch up the classic coleslaw by using Greek yogurt instead of mayonnaise. This change cuts calories and adds protein. The yogurt gives a nice tang. You can also add fruits like apples or pineapple for a sweet twist. The crisp apples add crunch, while pineapple gives a tropical flair. Both options boost flavor and nutrition. Want a vegan coleslaw? Just swap out the mayonnaise for a plant-based option. Many brands now offer tasty vegan mayonnaise. For gluten-free coleslaw, check your dressing. Most basic ingredients are gluten-free, but always read labels. This way, everyone can enjoy this crunchy dish. Coleslaw varies by region. Southern coleslaw often uses sweet dressing, while Asian coleslaw may add sesame oil and soy sauce. Caribbean versions include mango or lime for a zesty kick. Each version tells a story through its unique flavors. Explore these styles to find your favorite! To keep your coleslaw fresh, store it in an airtight container. This helps retain its crunch and flavor. Place it in the fridge right after serving. It will stay fresh for about three to five days. Always check for any signs of spoilage before eating leftovers. If it looks or smells off, it’s best to toss it. You can freeze coleslaw, but it may lose some crunch. If you want to freeze it, do not add the dressing first. Instead, prepare the veggies and store them in a freezer-safe bag. Squeeze out air to prevent freezer burn. When you are ready to eat, thaw it in the fridge overnight. Add fresh dressing just before serving for the best taste. Coleslaw can last in the fridge for about three to five days. If it has dairy, like mayonnaise, it might spoil faster. Always keep an eye on the smell and look of the coleslaw. If you have fresh veggies in it, they can wilt and lose their crunch quickly. To enjoy the best flavor and texture, eat it within a few days. To make classic coleslaw, start with fresh veggies. Here is a step summary of the recipe: - Shred 4 cups of green cabbage and 1 cup of purple cabbage. - Grate 2 large carrots and add them to the cabbages. - In a bowl, mix 1/2 cup of mayonnaise, 1 tablespoon of apple cider vinegar, 1 tablespoon of honey, and 1 teaspoon of Dijon mustard. - Season with salt and pepper to taste. - Pour the dressing over the veggies and toss until coated. - Chill for at least 30 minutes before serving. This lets the flavors blend. For the full recipe, check out the earlier sections. Yes, you can make coleslaw ahead of time. Prepare it and store it in the fridge. This helps the flavors meld together. Aim to make it no more than 24 hours before serving. If you wait longer, the cabbage may get too soft. To keep it crunchy, add the dressing just before serving. This keeps your coleslaw fresh and crisp. I suggest serving coleslaw in a colorful bowl. You can also use it as a topping for sandwiches and burgers. To make it look even better, sprinkle some chopped green onions or sesame seeds on top. This adds a pop of color and extra crunch. Enjoy it as a side dish with barbecue, fried chicken, or grilled meats. This post shared a simple coleslaw recipe, highlighting key ingredients and preparation steps. I covered how to mix veggies and create a tasty dressing. You can experiment with flavors and even modify for diets. To enjoy coleslaw at its best, store it properly and serve it fresh. This dish is versatile and can complement many meals. Try your version and see what flavors you love most. Enjoy making your coleslaw memorable!

Classic Coleslaw Crunchy and Fresh Side Dish Recipe

Looking for a crunchy and fresh side dish that everyone loves? This classic coleslaw recipe is just what you need!

- Coconut milk - Almond milk - Chia seeds - Maple syrup - Ripe mango - Vanilla extract - Salt - Toasted coconut flakes (optional) Gathering the right ingredients is key to making Mango Coconut Chia Pudding a delight. I love using creamy coconut milk to give the pudding a rich taste. Almond milk adds a nice flavor and balances the dish. Chia seeds are important because they help the pudding thicken. You can sweeten it with maple syrup, which gives a natural sweetness. Ripe mango is my favorite part. It adds freshness and a fruity layer. A touch of vanilla extract brings warmth to the flavor. Don’t forget a pinch of salt! It enhances the sweetness and makes each layer pop. If you want some crunch, toasted coconut flakes are a great option. They add texture and a fun twist. For the full recipe, check the section above. Chia seeds are tiny powerhouses. They are full of fiber, protein, and healthy fats. This makes them good for your digestion and keeps you full longer. Mango is not just tasty; it is also healthy. It is high in vitamins A and C. These vitamins support your skin and immune system. Plus, mango adds natural sweetness without extra sugar. Coconut milk is rich in nutrients, too. It has healthy fats that can help with energy and weight loss. Using coconut milk makes this dessert creamy without dairy. It’s a perfect choice for those who are lactose intolerant. In a mixing bowl, combine the coconut milk and almond milk. Use a whisk to blend them well. This mix gives the pudding a creamy feel. Next, add the maple syrup and vanilla extract. These bring a nice sweetness. Don’t forget to add a pinch of salt. This small amount enhances the flavor. Now, it's time to add the chia seeds. Sprinkle them in slowly while stirring. Stirring continuously is key to avoid clumps. Chia seeds need liquid to swell. If you don’t stir, they might stick together. Keep mixing until they are evenly spread in the liquid. Once you mix well, let the pudding rest for about 5 minutes. This allows the chia seeds to start swelling. After that, stir again to break any clumps that form. Cover the bowl with plastic wrap or a lid. Place it in the fridge for at least 4 hours. You can also chill it overnight for best results. Chilling is important because it helps the pudding thicken. After chilling, stir one more time to combine anything that may have separated. Resting time is key for the best chia pudding. After mixing your ingredients, let it sit. The chia seeds need time to absorb liquid and swell. This creates a creamy texture. To avoid clumping, add chia seeds slowly. Stir constantly as you sprinkle them in. This helps each seed spread out in the mix. After five minutes, stir again to break up any clumps. This ensures a smooth pudding. Finding the right sweetness can make or break your pudding. Taste the mix before chilling. If it’s not sweet enough, add more maple syrup. You can always adjust to your liking. If you want alternatives to maple syrup, try honey or agave nectar. These can give a different flavor while still sweetening your dish. You can even use mashed ripe bananas for a fun twist. Layering makes your pudding look stunning. Start with a spoonful of pudding, then add diced mango. Repeat this until your glass is full. The layers create a beautiful visual effect. For garnishing, sprinkle toasted coconut flakes on top. This adds both crunch and flavor. You can also add a few mango cubes for color. These small touches make your pudding more inviting and fun to eat. {{image_4}} You can mix up the flavors of your Mango Coconut Chia Pudding. Try adding other fruits, like berries or bananas. These fruits add a burst of color and taste. You can also experiment with flavoring options. Cocoa can add a rich taste, while matcha gives a fresh, earthy note. Each variation offers a unique twist on this healthy delight. You have many choices for milk in this recipe. I suggest exploring nut milks, like cashew or hazelnut. They add a lovely flavor and creaminess. You can also use dairy alternatives, like oat milk or soy milk. Each type brings its own taste and texture to the pudding. Sweeteners can change the pudding’s flavor. You can choose natural options like honey or agave. For those looking for sugar-free options, consider stevia or erythritol. These alternatives help you enjoy a sweet treat without the extra calories. Don't be afraid to test different sweeteners until you find your favorite balance. For the full recipe, check the section above. Store your mango coconut chia pudding in airtight containers. Glass jars work well. They keep the pudding fresh and let you see the layers. Make sure to fill the jars to the top. This limits air exposure. Always place the containers in the fridge right after making them. If you want to keep it fresh longer, use a lid. Your pudding will stay good in the fridge for about 4 to 5 days. After that, the texture may change. Look for signs of spoilage. If you see mold or a sour smell, it’s time to throw it away. If it starts to separate, just stir it well before eating. Yes, you can freeze chia pudding! Pour it into freezer-safe containers. Leave some space at the top for expansion. When you want to eat it, take it out and place it in the fridge overnight. If you need it faster, use the microwave. Heat it in short bursts and stir often. This will help keep the texture nice. Chia pudding is a simple, healthy snack. It uses chia seeds, which swell when mixed with liquid. This creates a thick, creamy texture. To make it, you mix chia seeds with milk and a sweetener. You can add flavors like vanilla or fruit. Let it sit so the seeds absorb the liquid. After a few hours, the pudding is ready to eat. I love adding mango and coconut for a tropical twist in my Mango Coconut Chia Pudding recipe. Yes, you can make this pudding ahead of time. In fact, it tastes even better after chilling overnight. Prepare the pudding in the evening, then let it set in the fridge. This allows the chia seeds to absorb the liquid fully. Just stir it again before serving. You can layer it with fresh mango right before you eat. This makes for a quick, tasty breakfast or snack. If you want to serve more people, it’s easy to adjust the recipe. Simply double or triple the ingredients. For example, use 2 cups of coconut milk instead of 1. Keep the same ratios for other ingredients. This helps to maintain the flavor and texture. Just remember to use a larger bowl for mixing. After chilling, you can layer the pudding in bigger containers or more individual cups. Enjoy sharing this yummy treat! This blog post covered the essentials of making Mango Coconut Chia Pudding. We explored key ingredients like chia seeds, coconut milk, and mango. You learned how to mix these ingredients and chill them for the best texture. In conclusion, this pudding is not only delicious but also packed with nutrients. Experiment with flavors, adjust sweetness, and enjoy the endless variations. Now, make this treat and enjoy every tasty bite!

Mango Coconut Chia Pudding Easy and Healthy Delight

Welcome to a tropical treat you can whip up at home! Mango Coconut Chia Pudding is an easy and healthy

To make the best creamy tomato basil soup, you need fresh and simple ingredients. Here is what you'll need: - 2 tablespoons olive oil - 1 medium onion, finely chopped - 3 cloves garlic, minced - 2 cans (14.5 oz each) diced tomatoes, with juices - 2 cups vegetable broth - 1 cup heavy cream (or coconut cream for a dairy-free alternative) - 1 teaspoon dried oregano - 1 teaspoon sugar (to balance acidity) - Salt and black pepper to taste - 1/2 cup fresh basil leaves, chopped - Fresh basil leaves for garnish - Crusty bread or grilled cheese for serving (optional) These ingredients create a rich and creamy soup. Each one plays a key role in building flavor and texture. If you have dietary needs, you can swap some ingredients. Here are a few options: - Use coconut cream instead of heavy cream for a dairy-free version. - Substitute vegetable broth with chicken broth if you prefer. - For a low-sodium option, choose low-sodium canned tomatoes and broth. - You can replace sugar with maple syrup for a natural sweetener. These substitutions keep the soup tasty while catering to different diets. Garnishes can elevate your soup. Here are some ideas: - Add extra fresh basil leaves on top for a pop of color. - Drizzle olive oil for added richness. - Sprinkle parmesan cheese for a salty finish. - Serve with crusty bread or a grilled cheese for a comforting meal. These options let you customize your soup and make it even more enjoyable! Start by gathering all your ingredients. You will need olive oil, onion, garlic, diced tomatoes, vegetable broth, heavy cream, oregano, sugar, salt, black pepper, and fresh basil. Chop the onion and garlic finely. This helps them cook faster and blend well into the soup. Measure out the other ingredients, so you are ready to go. 1. Heat 2 tablespoons of olive oil in a large pot over medium heat. 2. Add the chopped onion and sauté for about 5 minutes. Cook until the onion is soft and clear. 3. Stir in 3 minced garlic cloves and cook for 1 more minute. You want it fragrant but not brown. 4. Pour in 2 cans of diced tomatoes with their juices and 2 cups of vegetable broth. Stir everything together. 5. Add 1 teaspoon of dried oregano and 1 teaspoon of sugar. Mix well. 6. Let the soup simmer uncovered for about 15 minutes. This helps the flavors blend nicely. 7. Use an immersion blender to purée the soup until smooth. If you don’t have one, blend in batches after cooling slightly. 8. Return the smooth soup to low heat. Gradually stir in 1 cup of heavy cream. Don’t let it boil. 9. Season with salt and black pepper to taste. 10. Finally, fold in 1/2 cup of chopped fresh basil leaves. This adds a fresh flavor. 11. Serve hot. Garnish with more fresh basil leaves. Enjoy with crusty bread or grilled cheese if you like. Using an immersion blender is easy and fun. Hold it steady while blending to avoid splashes. Start blending at the bottom, then move it up and down. This ensures a smooth texture. If your soup is too hot, let it cool a bit before blending. Always blend in small batches if you use a traditional blender. This keeps the mess down and prevents burns. For more tips, check the Full Recipe for the perfect creamy tomato basil soup. To make your creamy tomato basil soup truly shine, focus on fresh ingredients. Fresh basil adds a bright taste that dried herbs can't match. Always taste your soup before serving. Adjust with salt, pepper, or sugar to balance flavors. A splash of balsamic vinegar can also enhance the soup's depth. Many people rush the cooking process. Don't skip simmering; this helps flavors blend well. Avoid using low-quality tomatoes. They can make your soup taste flat. Be careful with the cream; adding it too fast can curdle it. Lastly, avoid overblending the soup. You want a smooth texture, not a watery one. Having the right tools can make a big difference. Here are my top picks: - Large pot: A sturdy pot helps with even cooking. - Immersion blender: This makes blending easy and safe. - Cutting board and knife: Sharp tools save time and effort. - Measuring cups and spoons: Precision is key for great flavor. These tools will help you create the best creamy tomato basil soup. For the full recipe, check the section above. {{image_4}} You can easily make this soup vegan. Swap heavy cream for coconut cream. This change gives you a rich texture without dairy. Use vegetable broth to keep it plant-based. You can also add a splash of lemon juice. This brightens the flavors and adds a fresh taste. This creamy tomato basil soup is naturally gluten-free. Use corn starch or rice flour to thicken it if needed. These options work well and keep the soup smooth. Always check labels on store-bought ingredients to ensure they are gluten-free. This way, you avoid any hidden gluten. Change up ingredients based on the season. In summer, use fresh tomatoes instead of canned ones. They provide a fresh and bright flavor. In the fall, add roasted red peppers for depth. You can also mix in seasonal herbs, like thyme, for a twist. This flexibility makes the soup fun to prepare. You can enjoy new flavors while sticking to the original recipe. For the full recipe, check out the Creamy Tomato Basil Bliss. After enjoying your creamy tomato basil soup, let it cool down. Pour the soup into an airtight container. This keeps it fresh for later. Store it in the fridge for up to three days. If you want to enjoy it longer, freezing is a great option. To freeze your soup, first let it cool completely. Use freezer-safe containers or bags for storage. Leave a little space at the top since soup expands when frozen. You can freeze the soup for up to three months. Just label the containers with the date for easy tracking. When you're ready to eat your soup, take it out of the fridge or freezer. If frozen, let it thaw overnight in the fridge. For quick reheating, use the stove. Pour the soup into a pot and heat over medium heat. Stir often until it's hot. You can also use a microwave for quick reheating, but make sure to stir midway for even heating. Enjoy your creamy tomato basil soup again! Check out the Full Recipe to recreate this delightful dish. You can swap heavy cream for coconut cream. This gives the soup a rich texture. Use the same amount. You can also add extra herbs for flavor. Nutritional yeast adds a cheesy taste too. This creamy tomato basil soup shines with crusty bread. A grilled cheese sandwich pairs perfectly. You can also sprinkle extra basil on top. For a twist, add a dollop of pesto. Serve it with a fresh salad for a complete meal. Yes, you can use fresh tomatoes! About 2 pounds of ripe tomatoes work well. Blanch and peel them first. Chop them into smaller pieces before adding. Fresh tomatoes add a bright flavor to the soup. You may need to adjust cooking time for freshness. To try the full recipe, check out the Creamy Tomato Basil Bliss section. This blog post covered essential ingredients and step-by-step instructions for making creamy tomato basil soup. We explored tips to enhance flavor, avoid common mistakes, and recommended tools for success. I've shared variations, including vegan and gluten-free options. Finally, we discussed storage and reheating methods to keep your soup fresh. With these insights, you can create delicious soup that suits many tastes and needs. Enjoy your cooking journey and make this recipe your own!

Creamy Tomato Basil Soup Savory Comfort Food Delight

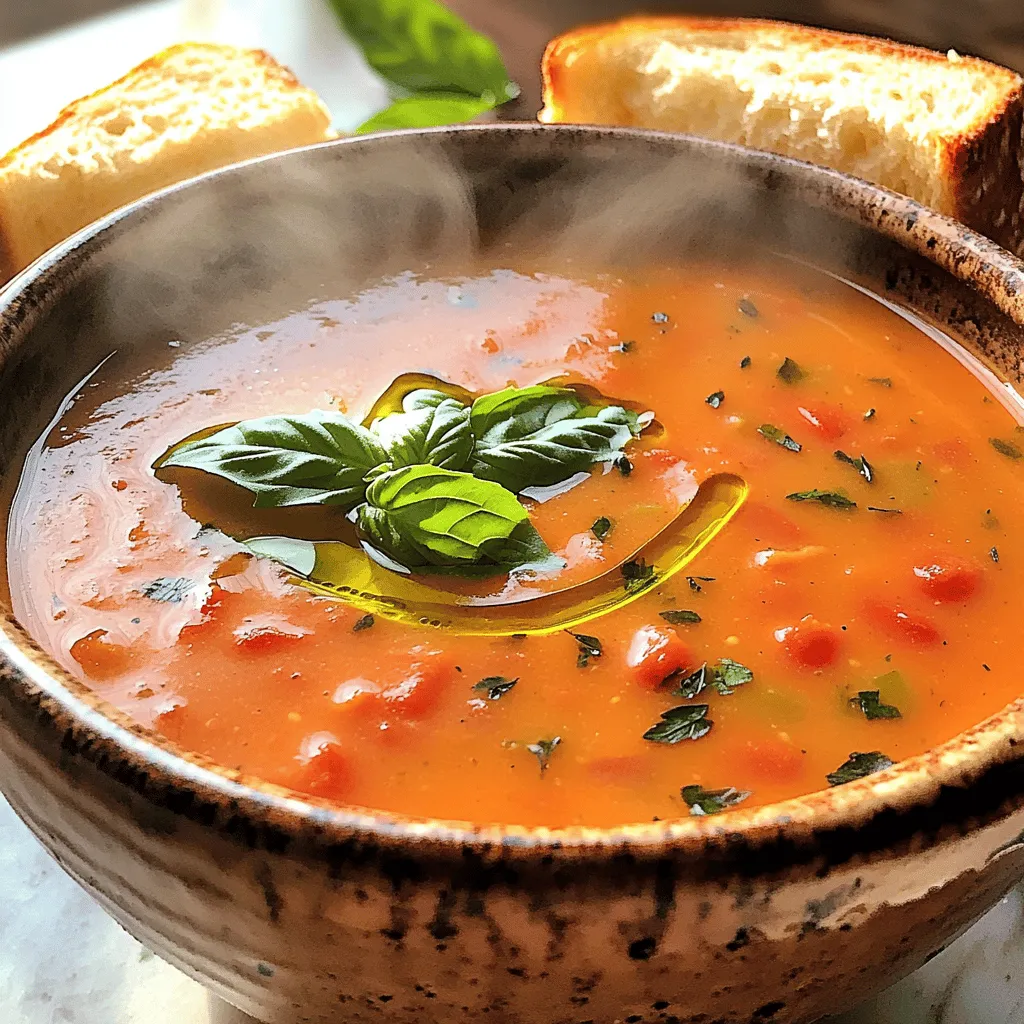
Welcome to a bowl of comfort! My creamy tomato basil soup is the perfect dish for any day. Bursting with

Older posts
Newer posts
← Previous Page1 … Page59 Page60 Page61 … Page91 Next →

dsad

© 2025 recipesstation • Built with GeneratePress

Our Policies

  • Copyright Policy
  • Cookie Policy
  • GDPR Policy
  • Privacy Policy
  • Disclaimer
  • Terms Of Use

More Information

  • Home
  • About
  • Contact
  • Appetizers
  • Dessert
  • Dinner
  • Drinks
©2025, recipesstation About Back To Top