Skip to content
DisclaimerTerms Of UseGDPR PolicyCookie Policy

recipesstation

  • Home
  • Drinks
  • Appetizers
  • Dinner
  • Dessert
  • About
  • Contact
  • Privacy Policy
DisclaimerTerms Of UseGDPR PolicyCookie Policy

Emily

- 4 boneless, skinless chicken breasts - 2 cups fresh spinach, roughly chopped - 1 cup feta cheese, crumbled - 1/2 cup cream cheese, softened - 2 cloves garlic, finely minced - 1 teaspoon dried oregano - 1 teaspoon fresh lemon zest - Salt and freshly ground black pepper to taste - 1 tablespoon olive oil - Toothpicks or kitchen twine for securing - Sharp knife for pocketing chicken - Oven-safe skillet When I make Spinach Feta Stuffed Chicken, I always start with fresh, quality ingredients. The chicken breasts are the star here. They need to be boneless and skinless for easy stuffing and cooking. I love using fresh spinach because it adds great color and nutrition. The feta cheese brings a salty, tangy flavor that pairs perfectly with the creamy texture of cream cheese. For seasonings, don't skip on the garlic. It adds a nice depth to the filling. Dried oregano gives a hint of warmth, while fresh lemon zest brightens the dish. A little salt and pepper will enhance all the flavors. As for tools, having a sharp knife is key. It helps create pockets in the chicken without tearing. Toothpicks or kitchen twine keep the filling inside while cooking. Finally, an oven-safe skillet makes it easy to sear the chicken before baking. If you're curious about how to bring all these ingredients together, check out the Full Recipe for detailed steps. - Preheat the oven to 375°F (190°C). - In a bowl, mix the spinach, feta cheese, cream cheese, garlic, oregano, lemon zest, salt, and pepper. - Take a sharp knife and create pockets in each chicken breast. - Spoon the spinach and feta filling into the pockets. Gently press the edges to secure. - Heat olive oil in a large skillet over medium-high heat. - Sear the stuffed chicken for 3-4 minutes on each side until golden brown. - Transfer the skillet to the oven. Bake for 25-30 minutes until the internal temperature reaches 165°F (74°C). Rest the chicken for 5 minutes after baking. Remove any toothpicks before serving. For a nice touch, slice each breast to show off the vibrant filling. Enjoy your meal! For the full recipe, check out the recipe card. To get juicy chicken, aim for the right internal temperature. Use a meat thermometer to check. The chicken should reach 165°F (74°C) to be safe and tasty. When seasoning your filling, mix well. Use fresh spinach and crumbled feta. Add minced garlic and lemon zest for a bright taste. A pinch of salt and pepper ties it all together. Taste the filling before stuffing to ensure it’s just right. For an elegant dish, slice the chicken in half. Show off the colorful filling inside. Arrange the slices on a large platter. Drizzle olive oil on top and sprinkle fresh herbs for color. Lemon wedges add a refreshing touch, perfect for squeezing over the chicken. Pair this dish with simple sides. Roasted vegetables or a fresh salad work well. Rice or quinoa can soak up the juices nicely. Make sure to secure the chicken pockets well. Use toothpicks or kitchen twine to hold them shut. This keeps the filling from spilling out while cooking. Watch the cooking time closely. Overbaking the chicken dries it out. Aim for that perfect 25-30 minutes in the oven. {{image_4}} You can easily switch chicken breasts for chicken thighs. Thighs are juicier and add more flavor. They also stay tender through cooking. If you want to change the cheese, try goat cheese instead of feta. Goat cheese adds a creamy texture and a tangy taste. It pairs well with spinach and herbs. Want to add more flavor? Fresh herbs like basil or dill work great. They bring a bright taste to the dish. You can also spice things up with red pepper flakes. A small pinch can add a nice kick without being too hot. If you need a gluten-free option, use gluten-free breadcrumbs in the stuffing. This keeps the dish safe for those with gluten allergies. For a vegetarian twist, try stuffing mushrooms instead of chicken. Large portobello mushrooms hold the filling well and taste amazing. You can find the full recipe to make these variations shine! To keep your Spinach Feta Stuffed Chicken fresh, store leftovers in an airtight container. This helps keep out air and moisture. You can enjoy the dish for up to three days in the fridge. It tastes best when heated thoroughly before serving. If you want to save some for later, freezing works well. First, let the chicken cool completely. Wrap each piece tightly in plastic wrap or aluminum foil. You can also place them in freezer-safe bags. This way, they stay fresh for up to three months. When you're ready to eat, thaw it overnight in the fridge. To reheat, avoid the microwave if you can. The oven is better for keeping the chicken moist. Preheat the oven to 350°F (175°C). Place the chicken in a dish, cover it with foil, and heat for about 15 to 20 minutes. This way, it stays juicy and delicious. Remember, avoid overcooking, or it may become dry. To check if your chicken is cooked, use a meat thermometer. Insert it into the thickest part of the chicken. The safe internal temperature is 165°F (74°C). If you don’t have a thermometer, cut into the chicken. The juices should run clear, not pink. Always make sure the filling is also hot. Yes, you can prep this dish ahead of time. Stuff the chicken breasts and store them in the fridge. Cover them tightly with plastic wrap. When ready, preheat your oven and bake as directed. If you are reheating, add a few minutes to ensure it’s hot throughout. Spinach Feta Stuffed Chicken pairs well with many sides. Here are some great options: - Roasted vegetables like carrots and zucchini - Creamy mashed potatoes - A fresh garden salad - Quinoa or couscous for a healthy touch These sides will complement the flavors of the chicken nicely. You can find the full recipe for Spinach Feta Stuffed Chicken in the earlier section. You now have a simple guide to make Spinach Feta Stuffed Chicken. We covered vital ingredients, clear steps, and great tips. Keeping chicken juicy is key, so monitor the cooking time. Feel free to experiment with flavors and ingredients to suit your taste. Remember to store leftovers properly to enjoy later. Use the FAQs to solve any questions you may have. Get ready to impress with this delicious dish, and happy cooking!

Spinach Feta Stuffed Chicken Flavorful and Easy Meal

Looking for a quick, tasty meal? Spinach feta stuffed chicken is your answer! With juicy chicken breasts loaded with fresh

To make a fresh and tasty Mango Avocado Salsa, you'll need: - 1 ripe mango, diced into small cubes - 2 ripe avocados, diced into bite-sized pieces - 1/2 red onion, finely chopped for a sweet crunch - 1 small red chili, deseeded and finely minced for a hint of heat - 1 small yellow bell pepper, diced for a pop of color - 2 tablespoons fresh cilantro, chopped for a fresh herbal note - Juice of 1 lime, freshly squeezed for acidity - 2 tablespoons extra virgin olive oil for richness - Salt and freshly ground black pepper to taste These ingredients create a perfect balance of sweet, savory, and spicy flavors. The ripe mango and avocado provide creaminess, while the onion and chili add texture. You can tweak the salsa by adding optional ingredients: - A splash of apple cider vinegar for extra tang - Diced tomatoes for added juiciness - A pinch of cumin for a warm, earthy note - Finely chopped garlic for depth of flavor These additions can make your salsa unique and exciting. Feel free to experiment! Not all ingredients may be on hand. Here are some easy swaps: - Swap mango for peach or pineapple if you want a different fruit. - Use lime juice in place of lemon juice for a similar acidity. - If you lack fresh cilantro, parsley can work as a substitute. These substitutions can help you make a delicious salsa even if you’re missing a few items. Check out the Full Recipe for detailed instructions on how to bring all these ingredients together! First, gather all your ingredients. You need: - 1 ripe mango, diced into small cubes - 2 ripe avocados, diced into bite-sized pieces - 1/2 red onion, finely chopped - 1 small red chili, deseeded and minced - 1 small yellow bell pepper, diced - 2 tablespoons fresh cilantro, chopped - Juice of 1 lime, freshly squeezed - 2 tablespoons extra virgin olive oil - Salt and freshly ground black pepper Start by peeling the mango and avocados. Use a sharp knife to cut them into small cubes. It’s key to keep the pieces even in size. This helps the salsa mix well and look nice. In a large mixing bowl, add the diced mango, avocados, red onion, yellow bell pepper, and chili. Stir gently with a spoon. Be careful not to mash the avocado. The goal is to keep everything intact for a fresh bite. Next, sprinkle the chopped cilantro on top. This adds a great herbal taste to your salsa. Mix it in lightly to keep the colors vibrant. Now, take a small bowl. Whisk together the lime juice, olive oil, salt, and pepper. This dressing brings all the flavors together. Once it’s mixed, drizzle it over the salsa. Use a spatula to fold everything together gently. Taste your salsa now. If it needs more flavor, add salt, pepper, or lime juice. Let it rest for about 10 minutes. This time allows the flavors to blend perfectly. Serve the salsa in a colorful bowl. This makes it eye-catching. You can also garnish the top with additional cilantro leaves for a fresh look. Mango avocado salsa goes great with crispy tortilla chips. You can also use it as a topping for grilled fish. Enjoy making this fresh and tasty dish! To make great salsa, you need to balance the sweet, spicy, and tangy flavors. Start with sweet mango and creamy avocado. Add lime juice for tang and salt to enhance taste. If you want heat, include a red chili. Taste as you mix. Adjust the lime or salt until you find your perfect balance. Select ripe avocados and mangoes for the best flavor. A ripe avocado feels soft but not mushy when you press it. For mangoes, look for a slight give when squeezed. Their skin should have some color, but not too many dark spots. If you can’t find ripe fruit, let them sit at room temperature for a few days. This salsa shines as a dip with tortilla chips. It also works well as a topping for grilled chicken or fish. Try adding it to tacos for a fresh twist. You can even top a salad with it for extra flavor. Get creative with serving ideas. The vibrant colors and fresh taste make any dish pop! For the full recipe, check out Mango Avocado Salsa Delight. {{image_4}} To turn up the heat, add jalapenos. Chop one or two small jalapenos and mix them in. Adjust the amount based on your spice level. The heat from jalapenos pairs well with the sweet mango and creamy avocado. This salsa is great for those who love bold flavors! For a fruity twist, add fresh pineapple. Dice about a cup of pineapple and mix it in. This adds a juicy sweetness that brightens the salsa. Pineapple and mango complement each other well. This version is perfect for summer barbecues and tropical-themed parties. This salsa is naturally vegan and gluten-free. All the ingredients are plant-based and safe for gluten-free diets. If you want to add protein, consider black beans or chickpeas. These additions can make the salsa a more filling option. This makes it great for a light meal or snack. For the Full Recipe, use the basic ingredients and follow the steps. Enjoy these variations to keep your salsa fresh and exciting! To keep your mango avocado salsa fresh, store it in an airtight container. Make sure the container is clean and dry. Place the salsa in the fridge right after you make it. This helps maintain the bright colors and flavors. The salsa tastes best within a few hours of making it. However, it can last up to 2 days in the fridge. Just remember, the longer it sits, the more the avocado may brown. You can freeze mango avocado salsa, but it may change texture. If you want to freeze it, do so right after making it. Use a freezer-safe container and leave some space for expansion. The salsa can last in the freezer for about 3 months. When you thaw it, the avocado may become mushy. This won't hurt the taste, but it will change how it looks. Use thawed salsa for cooking or as a topping on dishes. If you have leftovers, store them properly to enjoy later. Cover the salsa well to avoid air exposure. Adding a little lime juice on top can slow browning. Use leftovers within 2 days for the best taste. If the salsa looks brown, you can still eat it. Just mix it up to blend the flavors. Enjoy your mango avocado salsa with chips or on tacos for a treat! For the full recipe, check out the detailed instructions above. Yes, you can make Mango Avocado Salsa ahead of time. I suggest making it a few hours before you serve it. The flavors will blend better as it sits. Just remember to add the avocado last. This keeps it fresh and green. Mango Avocado Salsa pairs well with many dishes. You can serve it with tortilla chips for a crunchy snack. It also tastes great on grilled chicken or fish. You can even use it as a topping for tacos or burritos. Mango Avocado Salsa lasts about two days in the fridge. After that, the avocado may brown and lose its appeal. Store it in a sealed container to keep it fresh longer. Absolutely! You can add other ingredients to boost flavor. Try adding black beans for protein or corn for sweetness. Chopped tomatoes or cucumber can add more crunch. Just keep the balance of flavors in mind. For the full recipe, check the section above. Mango avocado salsa is fresh and full of flavor. You learned about the key ingredients and how to prepare them. We discussed tips for balancing flavors and serving ideas. Variations like spicy or tropical add fun twists. Store your salsa properly to enjoy it longer. Making salsa in advance is easy and saves time. With these tips, you can create tasty dishes. Enjoy making your Mango Avocado Salsa!

Mango Avocado Salsa Flavorful and Fresh Recipe

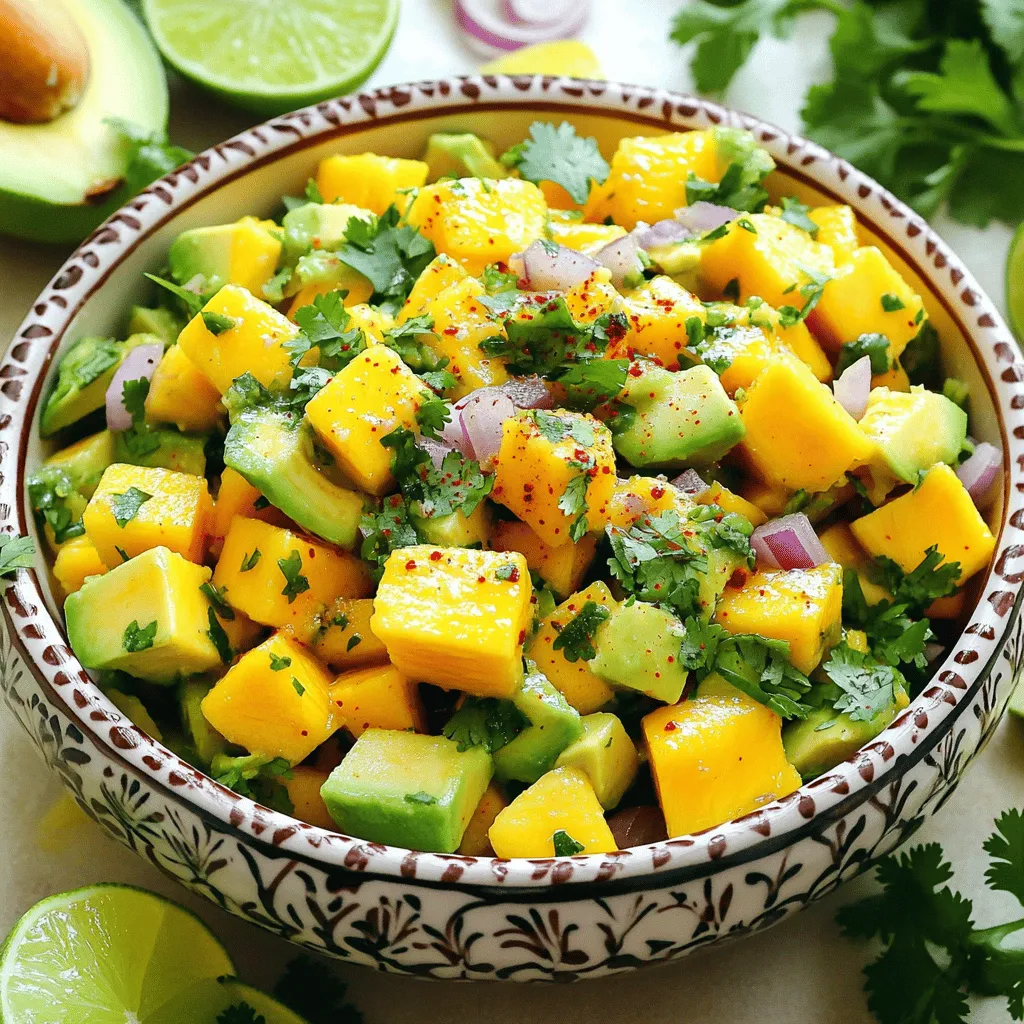
Looking for a fresh and tangy dip? Mango Avocado Salsa is bursting with flavor! This easy recipe combines sweet mangoes

To make pineapple fried rice, you need a few key ingredients: - 2 cups cooked jasmine rice (preferably day-old) - 1 cup fresh pineapple, diced - 1/2 cup peas (fresh or frozen) - 1/2 cup carrots, finely diced - 1/2 bell pepper (any color), diced - 2 green onions, sliced - 3 cloves garlic, finely minced - 2 tablespoons soy sauce - 1 tablespoon sesame oil - 1 tablespoon olive oil - 1 teaspoon fresh ginger, grated - Salt and pepper, to taste - Fresh cilantro leaves, for garnish These ingredients create a vibrant mix of flavors and textures. The rice acts as a base, while the pineapple adds sweetness. The vegetables give crunch and color. You can make this dish your own by adding optional ingredients: - Fried egg (for topping) - Cashews or peanuts (for crunch) - Bell peppers (for more color) - Shrimp or chicken (for protein) - Red pepper flakes (for spice) Feel free to mix and match based on your taste. This flexibility makes the recipe fun and personal. I always prefer fresh pineapple for this dish. Fresh pineapple has a bright, juicy taste. It caramelizes well and adds a lovely sweetness. Canned pineapple works too if you are in a rush. Just make sure to drain it well. Canned pineapple can be sweeter, so adjust your soy sauce to balance the flavors. For the full recipe, check out the Tropical Pineapple Fried Rice section. Enjoy the process as you create this tropical delight! Start by gathering your ingredients. You need: - 2 cups cooked jasmine rice (preferably day-old) - 1 cup fresh pineapple, diced - 1/2 cup peas (fresh or frozen) - 1/2 cup carrots, finely diced - 1/2 bell pepper (any color), diced - 2 green onions, sliced - 3 cloves garlic, finely minced - 2 tablespoons soy sauce - 1 tablespoon sesame oil - 1 tablespoon olive oil - 1 teaspoon fresh ginger, grated - Salt and pepper, to taste - Fresh cilantro leaves, for garnish - Optional: fried egg, for topping Prep all your ingredients before cooking. Dice the pineapple and vegetables. Mince the garlic and ginger. This makes cooking smooth and easy. In a large skillet or wok, heat the olive oil over medium-high heat. Wait until the oil shimmers but doesn’t smoke. Add the minced garlic and grated ginger. Stir for about 30 seconds until they smell amazing and turn golden. Next, toss in the diced carrots, bell pepper, and peas. Stir-fry for 3 to 4 minutes. The veggies should soften but still have some crunch. Now, add the diced pineapple. Cook for another 2 minutes to caramelize it a bit. This brings out the pineapple's natural sweetness. Now, it’s time for the rice! Add the day-old jasmine rice to the pan. Break up any clumps with a spatula. Mix the rice with the veggies and pineapple well. Next, drizzle in the soy sauce and sesame oil. Toss everything together to coat. Season with salt and pepper to taste. Cook for another 2 to 3 minutes until everything is hot. Just before you finish, stir in the chopped green onions. They add a fresh crunch. Transfer your tropical pineapple fried rice to plates and garnish with cilantro. If you want to indulge, top each serving with a fried egg. When you cut into the egg, it adds a creamy richness. Enjoy this vibrant and tasty dish! I recommend using jasmine rice for your pineapple fried rice. It's light and fragrant. Day-old rice works best. Freshly cooked rice can be too moist. The grains of day-old rice are firmer and less sticky. This helps create a great texture. To boost flavor, use fresh ingredients. Fresh pineapple adds sweetness and juiciness. Use garlic and ginger for a fragrant base. Don’t skip the soy sauce; it adds depth to the dish. Mix all ingredients well to coat the rice evenly. This ensures each bite is packed with flavor. To keep your fried rice from getting soggy, use less oil. Too much oil can make the rice greasy. Make sure to stir-fry on high heat. This helps evaporate excess moisture. If your rice clumps, break it apart gently. You want each grain to shine in your dish. For the full recipe, follow the steps above and enjoy a delightful meal! {{image_4}} I love making vegetarian pineapple fried rice. It’s colorful and packed with flavor. You can use the same base recipe, swapping out the protein for more veggies. Add mushrooms, zucchini, or even corn. Fresh herbs like basil or mint can bring a bright touch. You still get that sweet and savory mix with the pineapple. It’s a great way to enjoy a filling meal without meat. Plus, it’s perfect for any occasion. If you want a heartier dish, add protein! Chicken, shrimp, or tofu work great in this recipe. For chicken, cut it into small pieces. Sauté it until golden before adding the garlic and ginger. For shrimp, toss them in right after the garlic. They cook quickly and add a nice touch. Tofu is a fantastic option too. Use firm tofu and fry it for a crispy bite. Each protein brings a unique taste that complements the pineapple. If you like heat, make a spicy version of pineapple fried rice. A sprinkle of red pepper flakes can do wonders. Start with a small amount and taste as you go. You can mix the flakes in with the garlic. This allows the spice to infuse into the oil. You can also add fresh chili peppers if you want a fresh kick. The heat will balance the sweetness of the pineapple, creating a delicious contrast. Try these variations to make pineapple fried rice your own. Each twist adds a new layer of flavor, making every bite exciting. For the complete recipe, check out the Full Recipe section. To keep your pineapple fried rice fresh, let it cool down first. Then, place it in an airtight container. Make sure to store it in the fridge. Proper storage helps maintain its flavor and texture. You can enjoy it within 3 to 4 days. When reheating, add a splash of water or broth. This addition helps steam the rice. Use a microwave or a skillet. If using a skillet, heat it on medium. Stir the rice often for even heating. This method keeps the rice moist and tasty. You can freeze pineapple fried rice for up to 3 months. Use a freezer-safe container or bag. Make sure to squeeze out excess air before sealing. To thaw, place it in the fridge overnight. Reheat it in a skillet for the best flavor. This method ensures your tropical delight stays delicious. For the Full Recipe, check out the detailed cooking steps. Pineapple fried rice stays good in the fridge for about 3 to 4 days. Store it in an airtight container. This helps keep it fresh and tasty. Always reheat it well before eating to enjoy its flavors again. Yes, you can use different types of rice. Jasmine rice works best for its aroma and texture. However, you can also try basmati or brown rice. Just make sure the rice is cooked and cooled before using it in the dish. Pineapple fried rice pairs well with many side dishes. Here are a few ideas: - Spring rolls - Thai salad - Grilled chicken or shrimp - Fresh fruit salad These sides complement the sweet and savory flavors of the fried rice. Pineapple fried rice can be gluten-free. Just ensure you use gluten-free soy sauce. Most other ingredients are naturally gluten-free. Always check labels if you have strict dietary needs. Yes, you can make pineapple fried rice ahead of time. Prepare it and store it in the fridge. Just reheat it when you're ready to serve. This makes it a great option for meal prep or gatherings. For the full recipe, check the previous section. Making pineapple fried rice is easy and fun. This dish bursts with tropical flavors. It combines sweet pineapple with savory rice, making a perfect meal. You can use fresh or day-old rice. Day-old rice is best because it stays firm. This method keeps the dish from getting soggy. To start, here are the ingredients you need: - 2 cups cooked jasmine rice (preferably day-old) - 1 cup fresh pineapple, diced - 1/2 cup peas (fresh or frozen) - 1/2 cup carrots, finely diced - 1/2 bell pepper (any color), diced - 2 green onions, sliced - 3 cloves garlic, finely minced - 2 tablespoons soy sauce - 1 tablespoon sesame oil - 1 tablespoon olive oil - 1 teaspoon fresh ginger, grated - Salt and pepper, to taste - Fresh cilantro leaves, for garnish - Optional: fried egg, for topping Follow these steps to create this dish: 1. Prepare Ingredients: Start by prepping all ingredients. Dice the pineapple, carrots, and bell pepper. Mince the garlic and ginger. This helps your cooking process go smoothly. 2. Heat the Pan: Use a large skillet or wok. Add olive oil and heat over medium-high. Wait until the oil is shiny but not smoking. 3. Sauté Aromatics: Add minced garlic and grated ginger to the hot oil. Stir quickly for about 30 seconds. You want them to smell great and turn golden. 4. Add Vegetables: Stir in diced carrots, bell pepper, and peas. Cook for 3-4 minutes. The veggies should soften but still be crunchy. 5. Incorporate Pineapple: Toss in the diced pineapple. Cook for another 2 minutes. This caramelizes the pineapple and boosts its sweetness. 6. Stir in Rice: Add day-old jasmine rice to the pan. Break apart any clumps. Mix the rice with the veggies and pineapple evenly. 7. Season: Drizzle soy sauce and sesame oil over the rice. Toss everything to coat well. Season with salt and pepper as desired. Cook for another 2-3 minutes. 8. Finish with Green Onions: Just before turning off the heat, mix in the chopped green onions. They add a fresh crunch to your dish. 9. Serve: Place the tropical pineapple fried rice on plates. Garnish with fresh cilantro leaves. For a special touch, add a fried egg on top. The yolk will add richness when you cut into it. This dish is not only tasty but also healthy. It is rich in vitamins from the vegetables and the pineapple. Each serving offers a good balance of carbs and protein. The fried egg adds extra protein, making it filling. For an eye-catching presentation, serve the fried rice in a hollowed-out pineapple half. This makes your meal look festive and fun. You can also sprinkle toasted sesame seeds on top. This adds a nice crunch and enhances the flavor. Enjoy your tropical delight! Pineapple fried rice is a fun dish to make. We covered its key ingredients, tips for cooking, and possible variations. With fresh or canned pineapple, you can customize every plate. Remember, choosing the right rice keeps it fluffy. Don’t forget to store leftovers well for later. Try different proteins or spices to suit your taste. Enjoy the balance of sweet and savory flavors. Cooking should be enjoyable, so experiment and make it your own! Pineapple fried rice will impress your family and friends.

Pineapple Fried Rice Flavorful Tropical Delight

Are you ready to take a taste trip to the tropics? Pineapple Fried Rice is a colorful, tasty dish that

- 2 cans (12.4 oz each) refrigerated cinnamon rolls - 4 large eggs - 1 cup milk - 1/2 cup cream cheese, softened - 1/4 cup pure maple syrup - 1 tablespoon pure vanilla extract - 1 teaspoon ground cinnamon - 1/2 cup chopped pecans or walnuts (optional) - Icing from the cinnamon rolls package - Fresh berries for garnish - Powdered sugar for dusting Cinnamon Roll Casserole is a simple yet delightful dish. You can whip it up with just a few ingredients. The base is made from refrigerated cinnamon rolls. Using these saves time and adds great flavor. I love the rich mix of eggs and cream cheese. They make the casserole creamy and smooth. Maple syrup adds a lovely sweetness. Ground cinnamon gives it that classic cinnamon roll taste. If you want a nutty crunch, add chopped pecans or walnuts. They add texture and flavor that you will enjoy. You can also sprinkle fresh berries or powdered sugar on top. They give a nice finish and make it look pretty. Make sure to check the ingredients list for the full recipe. This dish is great for brunch or a special breakfast. It is sure to impress your family and friends! - Preheat your oven to 350°F (175°C). - Lightly grease a 9x13-inch baking dish. - Open and cut each cinnamon roll into quarters. - Arrange the pieces in the baking dish. - Whisk eggs, milk, cream cheese, maple syrup, vanilla extract, and cinnamon together. - Pour over cinnamon roll pieces and ensure even coating. - Optionally, add chopped nuts. - Bake for 25-30 minutes until puffed and set. - Prepare icing as per package instructions. - Drizzle over the casserole after cooling for 5 minutes. This is how you create a delightful breakfast treat with cinnamon roll casserole. For the full recipe, check out the earlier sections. To make the best cinnamon roll casserole, focus on even cooking. Cut each cinnamon roll into quarters to help them cook through. Spread them evenly in your baking dish. This helps every piece soak up the egg mixture. For avoiding sogginess, ensure you pour the egg mixture evenly. If it looks too wet, you may need to bake a bit longer. To check doneness, stick a toothpick in the center. If it comes out clean, your casserole is ready. Keep an eye on the edges. They should be golden brown. This means the casserole is cooked well. Pair your casserole with a hot cup of coffee or tea. This adds warmth to your meal. For a beautiful presentation, dust powdered sugar on top. Fresh berries like strawberries or blueberries add color and taste. Serve the casserole warm in individual portions for that special touch. For a dairy-free version, you can replace eggs with flaxseed meal. Mix one tablespoon of flaxseed with three tablespoons of water. Let it sit for a few minutes until it thickens. For cream cheese, try using coconut cream or dairy-free cream cheese. If you need a gluten-free option, look for gluten-free cinnamon rolls. Check labels to ensure all your ingredients meet gluten-free standards. This way, everyone can enjoy this treat! For the full recipe, check out the details above. {{image_4}} You can change your cinnamon roll casserole with seasonal flavors. In fall, add pumpkin spice. This spice gives a warm, cozy taste. For winter, try apple pie spice or caramel. These flavors bring a sweet twist to your dish. If you want a nut-free casserole, just leave out the nuts. You can still add great flavors. Try adding fruits like bananas or blueberries. These fruits will add sweetness and color to your dish. Both options make the casserole just as tasty. You can also make this casserole savory. Swap out the maple syrup for cheese and herbs. Use eggs, milk, and cheese to create a rich texture. This version works well for brunch or breakfast. It’s a fun twist on the classic dish. To keep your cinnamon roll casserole fresh, let it cool first. Then, place it in an airtight container. Store it in the fridge for up to five days. If you want to freeze leftovers, cut the casserole into portions. Wrap each portion tightly in plastic wrap and then in aluminum foil. This helps prevent freezer burn. You can freeze it for up to three months. To reheat, the oven is best for keeping the texture nice. Preheat your oven to 350°F (175°C). Place the casserole in an oven-safe dish, cover it with foil, and heat for about 15-20 minutes. This method warms it evenly. The microwave is quicker but can make it soggy. If you use the microwave, heat in short bursts. Check every 30 seconds until it's warm enough. Choose the method that fits your time and taste! You can prepare your casserole in advance. Start by following the recipe up to the baking step. After mixing the egg mixture with the cinnamon roll pieces, cover the dish with plastic wrap. Store it in the fridge for up to 24 hours. When ready to bake, simply remove the wrap and bake as directed. This way, you save time in the morning! Yes! You can use many flavors of cinnamon rolls. Try caramel or vanilla rolls for a twist. You can even use chocolate rolls for a sweet treat. Mixing flavors keeps breakfast fun and exciting. Serve the casserole warm for the best taste. Slice it into squares and place on plates. Drizzle icing over each piece. For added fun, sprinkle powdered sugar or fresh berries on top. Pair it with coffee or tea for a perfect morning. To serve more people, simply double the recipe. Use a larger baking dish to fit all the rolls and egg mixture. Adjust baking time as needed. Check the casserole's doneness with a toothpick to ensure it cooks through. Yes, you can reduce sugar in this recipe. Use unsweetened almond milk instead of regular milk. Replace the syrup with a sugar-free version. You can also cut back on the icing or use less. Enjoy your treat with less sugar while still tasting great! This blog shared a simple and tasty cinnamon roll casserole recipe. You learned how to gather ingredients, prepare the dish, and bake it to perfection. We covered tips for serving and storing, plus variations for any occasion. In conclusion, you can customize this dish easily based on your tastes. Enjoy trying different flavors or serving ideas. It's a fun dish that's sure to please everyone!

Cinnamon Roll Casserole Delightful Breakfast Treat

If you’re searching for an easy yet delightful weekend breakfast, look no further! My Cinnamon Roll Casserole is a warm,

- 1 block (14 oz) firm tofu - 2 tablespoons toasted sesame oil - 3 tablespoons low-sodium soy sauce - 1 tablespoon hoisin sauce - 1 red bell pepper - 1 cup broccoli florets - 1 cup snap peas - 2 cloves fresh garlic - 1-inch piece fresh ginger - 1 tablespoon rice vinegar The main components of this stir-fry start with firm tofu. Tofu adds protein and texture. I recommend using a 14 oz block, as it holds up well during cooking. Next, toasted sesame oil brings a rich, nutty flavor. You’ll need two tablespoons. For the sauce, low-sodium soy sauce and hoisin sauce create a balance of salty and sweet. Use three tablespoons of soy sauce and one tablespoon of hoisin sauce. Now, let's talk about the vegetables. A red bell pepper adds a sweet crunch. Broccoli florets give a lovely green color and health benefits. Snap peas add a fresh, crisp bite. Together, these veggies create a beautiful and tasty dish. Finally, we have the flavor enhancers. Fresh garlic provides a strong aroma. You’ll need two cloves, minced. Fresh ginger adds warmth and spice, and one inch is perfect. Rice vinegar gives a tangy finish, so add one tablespoon for that extra zing. You can find the full recipe for more details on preparing this vibrant dish. Start by cutting the pressed tofu into bite-sized cubes. This helps the tofu cook evenly and absorb flavor. Next, toss the cubes with cornstarch. This coating gives the tofu a crispy texture when cooked. Make sure each piece is well covered. Heat two tablespoons of toasted sesame oil in a skillet over medium-high heat. Once the oil is hot, carefully add the tofu cubes. Fry them for about 8-10 minutes until they turn golden and crispy on all sides. This step is crucial for flavor. Remove the tofu from the skillet and set it aside on a plate. In the same skillet, add the minced garlic and finely grated ginger. Sauté for about 30 seconds. This brings out the fragrant oils in the garlic and ginger without burning them. Now it’s time to add your colorful veggies. Toss in the julienned bell pepper, bite-sized broccoli florets, trimmed snap peas, and sliced carrot. Stir-fry these for about 4-5 minutes. You want them to stay crisp and bright. Near the end, add chopped bok choy and stir-fry for another 2 minutes. The bok choy will wilt slightly while keeping its vibrant color. For the full recipe, check the details above. Enjoy making this dish! Pressing tofu is key for a great stir-fry. It removes extra water. This step helps the tofu get crispy when you fry it. To press tofu, wrap it in a clean towel. Place a heavy object on top for about 15-30 minutes. This way, your tofu will absorb flavors better. Fry the tofu for about 8-10 minutes. You want it golden and crispy on all sides. This gives it a nice texture. Make sure you do not rush this step. Crispiness enhances the dish. Use simple seasonings to boost flavor. Start with soy sauce and hoisin sauce. You can adjust these based on your taste. If you like heat, add chili flakes. Start with a pinch to avoid overpowering the dish. You can always add more later. Another way to enhance flavors is with fresh herbs. Adding basil or cilantro at the end gives a fresh kick. You can also try a splash of lime juice for brightness. Serve the stir-fry in colorful bowls. Place it over fluffy jasmine rice or protein-rich quinoa. This makes the meal look inviting. Garnish with sesame seeds for crunch. You can also sprinkle chopped green onions on top. This adds a pop of color and flavor. For a nice touch, use vibrant plates. A good presentation makes the meal feel special. Your family and friends will appreciate the extra effort. Check the [Full Recipe] for more details on making this dish. {{image_4}} You can mix up the protein in your stir-fry. Tempeh and seitan work well. Both can soak up flavors nicely. Tempeh has a nutty taste, while seitan offers a meaty texture. You can also add legumes like chickpeas or black beans. They boost protein and add a hearty feel. Feel free to swap in other vegetables. Bell peppers, zucchini, or even asparagus shine in stir-fries. Each gives a different taste and look. You can also play with seasonings. Try adding curry powder for an Indian twist or chili sauce for a kick. Each change can make your dish unique. Sauce choices can change the whole dish. Instead of soy sauce, consider using teriyaki or peanut sauce. They bring new flavors. You can also mix in nut or seed butters for creaminess. Almond butter or tahini adds richness that pairs well with veggies. Try these ideas to make your stir-fry even better. For the full recipe, check here. To keep your vegetable stir-fry with tofu fresh, refrigerate it right away. Place any leftovers in an airtight container. This helps keep flavors strong and veggies crisp. Cool the stir-fry for about 30 minutes before sealing it up. Store it in the fridge for up to three days. For cooked tofu and veggies, you can store them together. Just make sure they cool first. If you have extra sauce, store it separately. This prevents the stir-fry from becoming too soggy. When you want to enjoy leftovers, avoid the microwave if possible. It can make the tofu soft and the veggies mushy. Instead, use a skillet. Heat a little oil over medium heat. Add your stir-fry and stir it gently for about five minutes. This keeps the texture nice. If you must use the microwave, cover your dish with a damp paper towel. This helps retain moisture and keeps the stir-fry from drying out. Heat it in short intervals, stirring in between. You can freeze your stir-fry for meal prep. Just let it cool completely. Transfer it to freezer-safe bags or containers. Try to remove as much air as possible. This helps prevent freezer burn. Your stir-fry can last for up to three months in the freezer. When you’re ready to eat it, thaw it in the fridge overnight. For quick thawing, you can use a microwave on the defrost setting. After thawing, reheat it in a skillet to regain that fresh stir-fry texture. For the full recipe, check out the complete guide to making this colorful dish! Yes, you can. Prepping ingredients in advance saves time. Chop the vegetables and press the tofu a day before. Store them in airtight containers in the fridge. This way, you only need to cook when you are ready to eat. Keep the sauce separate until you stir-fry. This helps keep your veggies crisp. If you don’t like tofu, don’t worry! You can use tempeh or seitan instead. Both provide great texture and protein. You can also add beans like chickpeas or black beans for a hearty twist. These options keep the meal tasty and filling. You can store leftovers in the fridge for about 3 to 4 days. Keep them in a sealed container to maintain freshness. If you want to keep it longer, consider freezing it. Frozen stir-fry can last up to 3 months. Just thaw it in the fridge before reheating. Absolutely! This stir-fry is perfect for meal prep. Make a big batch and divide it into portions. You can enjoy it throughout the week. Pair it with rice or quinoa for a well-rounded meal. This is a great way to plan healthy lunches or dinners ahead of time. Check out the Full Recipe for detailed steps! This blog post covered a delicious stir-fry recipe packed with protein and veggies. You learned about the main ingredients, the step-by-step cooking process, and useful tips for the best results. Remember, you can swap out ingredients for variety and store leftovers properly. Cooking should be fun and flexible. Enjoy making this dish your own, and feel proud of each bite you create. Celebrate the joy of good food with every stir-fry you whip up!

Vegetable Stir-Fry with Tofu Easy and Delicious Meal

Looking for a quick, healthy meal? Try my Vegetable Stir-Fry with Tofu! It’s packed with flavor and comes together in

To make a delicious savory sweet potato hash, gather these key ingredients: - 2 large sweet potatoes, peeled and diced into ½-inch cubes - 1 small red onion, diced - 1 bell pepper (any color), diced - 1 cup kale, tough stems removed and leaves chopped - 2 cloves garlic, minced - 1 teaspoon smoked paprika - 1 teaspoon ground cumin - Salt and pepper to taste - 3 tablespoons olive oil - 4 large eggs - Fresh parsley, chopped (for garnish) Each ingredient plays a big role in building flavor. Sweet potatoes give a natural sweetness. The red onion and bell pepper add crunch and color. Garlic brings a rich aroma. Spices like smoked paprika and cumin give depth. Kale adds a healthy green touch. Olive oil helps to cook and blend the flavors together. The eggs on top create a creamy finish. Finally, parsley adds a fresh touch. For the full recipe, check out Savory Sweet Potato Hash 🥔. Start by peeling the sweet potatoes. Then, dice them into ½-inch cubes. This size cooks evenly and gives a nice texture. You want them to be tender but not mushy. Next, season the diced sweet potatoes. Use salt, pepper, smoked paprika, and ground cumin. These spices add depth and warmth to the dish. Heat three tablespoons of olive oil in a large skillet over medium heat. Let the oil warm for 1-2 minutes until it shimmers. Add the seasoned sweet potatoes and sauté them for about 10-15 minutes. Stir occasionally to ensure even cooking. You’ll know they are ready when they are golden and tender. After that, add the diced red onion and bell pepper. Cook for another 5 minutes. This will soften the veggies and enhance the flavors. Next, mix in the chopped kale and minced garlic. Cook for an additional 3-4 minutes. The kale should wilt and blend well with the sweet potato mixture. This step adds a lovely green color and boosts nutrition. While the hash is finishing, fry the eggs in a separate pan. Choose your favorite style—sunny-side up or over-easy works great. Once the sweet potato hash is ready, taste it and adjust the seasoning if needed. Plate the hash generously on each plate, then top it with a fried egg. To finish, sprinkle fresh chopped parsley on top. This adds a burst of color and fresh flavor. Enjoy your tasty meal! For the complete recipe, check out Savory Sweet Potato Hash 🥔. To make your sweet potato hash just right, focus on cooking time. Sweet potatoes need about 10 to 15 minutes to get tender. They should be golden and slightly crispy on the edges. To avoid mushiness, cut your sweet potatoes into ½-inch cubes. This size cooks evenly and holds its shape well. You can boost flavor with spices. If you want a twist, try cayenne pepper or chili powder instead of smoked paprika. Fresh herbs make a big difference too. Adding chopped parsley or cilantro at the end brightens the dish. They also add a fresh taste that balances the sweetness of the potatoes. Choosing how to cook your sweet potatoes matters. Baking gives a softer texture, while frying adds a nice crisp. If you're short on time, use one pan for everything. This saves on cleanup and helps flavors mix well. Just remember to cook the ingredients in stages to keep everything fresh and tasty. For more details, check out the Full Recipe. {{image_4}} You can make savory sweet potato hash even better by adding protein. Consider using sausage for a hearty bite. Tofu is a great option for a lighter meal. Both add flavor and keep you full. For cheese lovers, try adding sharp cheddar or crumbled feta. These cheeses melt well and enhance the dish’s creaminess. Just sprinkle some on top before serving for a delicious finish. Switching up your vegetables can change the hash's flavor profile. In summer, add zucchini or corn. In the fall, consider using butternut squash or Brussels sprouts. Each season brings new veggies to explore. You can also adjust the spices to match the season. In winter, use warming spices like nutmeg or cinnamon. In spring, fresh herbs like basil or dill brighten the dish. If you need vegan options, swap the eggs for avocado or chickpeas. This keeps the meal filling and tasty. For gluten-free eaters, the recipe already fits the bill. Just ensure your add-ins are gluten-free. This way, everyone can enjoy this savory sweet potato hash. For the full recipe, check out Savory Sweet Potato Hash 🥔. To store cooked hash, let it cool completely. Transfer the hash to an airtight container. It will keep well in the fridge for up to four days. For best results, store the eggs separately. This keeps them from getting rubbery. If you plan to meal prep, make the hash without the eggs. You can add them fresh when ready to serve. For freezing leftovers, first let the hash cool. Then, place it in a freezer-safe container. It can last up to three months in the freezer. For the best texture, freeze in portions. This way, you can thaw just what you need. To thaw, move the container to the fridge overnight. Reheat the hash in a skillet over medium heat. Stir well to ensure even warming. You can also microwave it, but add a splash of water to keep it moist. Enjoy your delicious Savory Sweet Potato Hash anytime! Cooking sweet potatoes takes about 15 to 20 minutes on the stove. First, peel and dice them into ½-inch cubes. This size helps them cook evenly. When sautéing, keep an eye on them. You want them tender and golden but not mushy. Yes, you can make sweet potato hash ahead of time. Cook the hash and let it cool down. Store it in an airtight container in the fridge for up to three days. When ready to serve, just reheat it in a pan. This makes busy mornings easier! Savory sweet potato hash pairs well with many sides. Try it with fresh fruit or a green salad for balance. You can also serve it alongside toast or avocado for added creaminess. A slice of your favorite bread works too! You can mix in different ingredients for fun flavors. Add cooked sausage or black beans for protein. Use different veggies like zucchini or spinach to change things up. Try fresh herbs like cilantro or basil for extra zest! You can find the complete details in the "Savory Sweet Potato Hash 🥔" recipe. This includes all the steps and tips to make the perfect dish. Enjoy creating a delightful breakfast! This article explored making savory sweet potato hash. We covered the key ingredients, preparation steps, and cooking tips. You learned about variations, substitutions, and storage options. Sweet potato hash provides endless ways to customize your meal. Remember to enjoy the cooking process and try new flavors. With simple tips, you can make a hearty dish that fits your needs. Explore and create your own delicious twists on this recipe!

Savory Sweet Potato Hash Flavorful Breakfast Delight

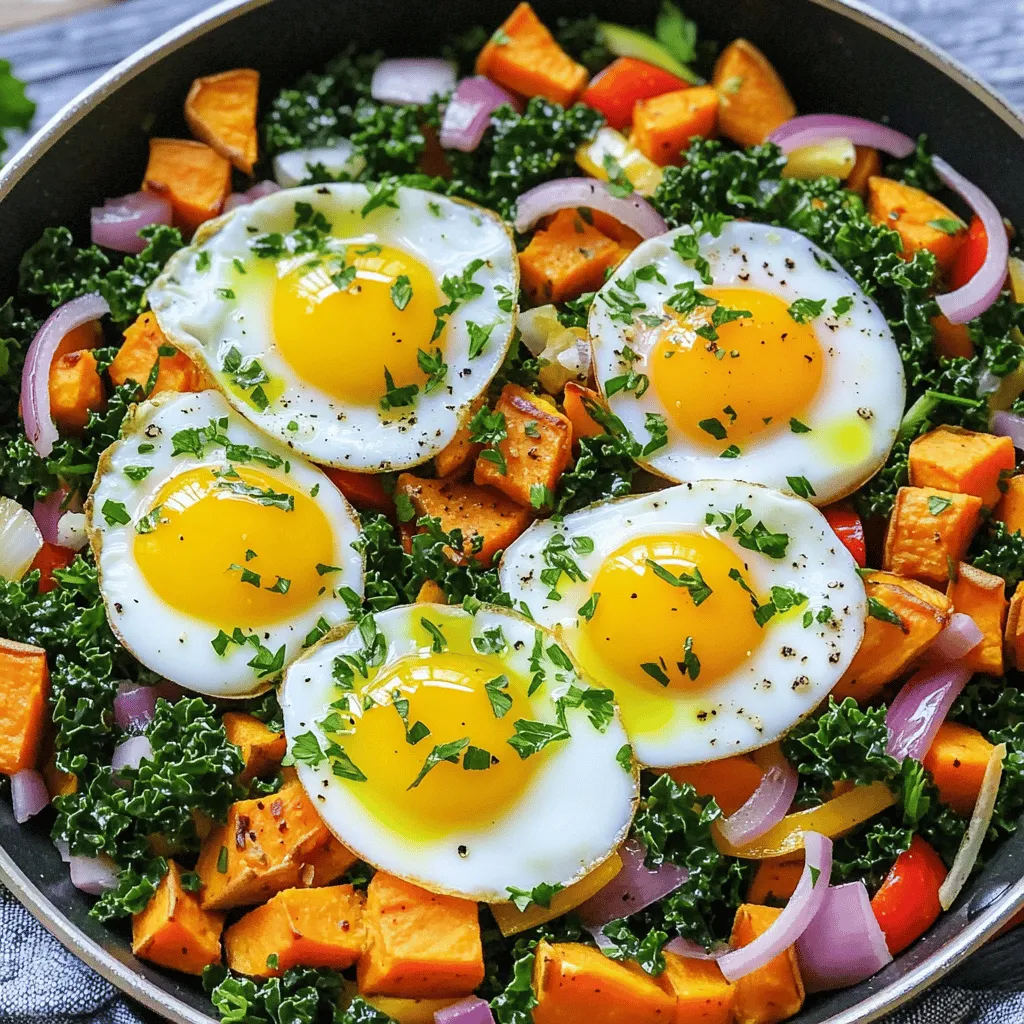
Looking for a tasty breakfast that’s easy to make? Try my Savory Sweet Potato Hash! This dish is packed with

- Medium shrimp - Extra virgin olive oil - Corn tortillas - Ripe mango - Red onion - Fresh cilantro - Smoked chili powder - Garlic powder - Fresh lime juice When making spicy shrimp tacos, choose fresh medium shrimp. The shrimp should be peeled and deveined for a clean taste. I love using extra virgin olive oil to keep the shrimp moist and flavorful. For the base, corn tortillas add a wonderful texture. They warm up beautifully and hold all the delicious layers. For the mango salsa, get a ripe mango. The sweetness of the mango pairs so well with the spice. A finely chopped red onion adds crunch and a slight bite. Fresh cilantro brings a bright note that makes everything pop. For seasoning, smoked chili powder offers a deep flavor. Garlic powder is a must for that savory touch. Finally, a splash of fresh lime juice brightens everything. It enhances the shrimp and salsa, making each bite a fresh delight. You can find the full recipe in the article. Enjoy crafting these tasty tacos! To make a fresh mango salsa, start by gathering your ingredients. In a medium bowl, combine the following: - 1 perfectly ripe mango, finely diced - 1/2 medium red onion, finely chopped - 1 medium red bell pepper, diced - 1 fresh jalapeño, deseeded and minced - 2 tablespoons fresh cilantro, chopped Next, squeeze in the juice of one lime. Season with salt and freshly ground black pepper to taste. Mix well to combine all the flavors. Let the salsa chill in the fridge while you prepare the shrimp. Chilling helps the flavors blend together nicely. In a mixing bowl, toss together the shrimp and spices. Combine: - 2 tablespoons extra virgin olive oil - 2 teaspoons smoked chili powder - 1 teaspoon ground cumin - 1 teaspoon garlic powder - 1/2 teaspoon cayenne pepper (adjust for desired heat) - Salt and freshly ground black pepper to taste Make sure the shrimp are evenly coated with the spice mixture. This step brings out the best flavor in the shrimp, making your tacos exciting and tasty. Heat a large skillet over medium-high heat. Once hot, add the seasoned shrimp to the skillet. Cook each side for about 2-3 minutes. You’ll know the shrimp are done when they turn pink and opaque. This shows they are fully cooked. When done, remove the skillet from the heat. Warm your corn tortillas in the same skillet or on a separate griddle. Heat them for about 30 seconds on each side. This will make them soft and easy to fold. Now, take each warmed tortilla and layer it with: - Cooked shrimp - A handful of shredded red cabbage - A few slices of avocado Finally, spoon a generous amount of the chilled mango salsa over each taco. This adds a vibrant touch and a sweet contrast to the spicy shrimp. Enjoy your fresh delight! For detailed information, check the Full Recipe. How to choose the perfect shrimp When picking shrimp, look for firm and shiny shells. They should smell like the ocean, not like fish. Choose medium-sized shrimp for a nice bite. If buying frozen, check that they are not stuck together. Identifying ripe mangoes A ripe mango feels slightly soft when you press it. It should have a sweet smell near the stem. Look for skin that is yellow or red, but avoid any dark spots. A good mango adds sweetness to your tacos. Best skillet methods for shrimp Use a large skillet for even cooking. Preheat the skillet on medium-high heat before adding the shrimp. This helps them cook fast and stay juicy. Make sure not to overcrowd the pan; cook in batches if needed. Avoiding overcooking shrimp Cook the shrimp for just 2-3 minutes per side. They are done when they turn pink and opaque. Overcooking makes them tough and rubbery. Keep an eye on the color for perfect shrimp every time. Ideas for taco toppings Try adding toppings like shredded cheese, fresh cilantro, or zesty lime wedges. Sliced jalapeños add extra heat. You can also use sour cream or Greek yogurt for creaminess. Be creative with your toppings! Pairing side dishes with tacos Serve your tacos with a side of rice or beans for a complete meal. A fresh salad pairs well too. You can also offer tortilla chips and salsa for a nice crunch. Enjoy these tasty combinations! {{image_4}} You can swap shrimp for chicken or fish. Chicken works great if you marinate it like the shrimp. Use the same spices to keep it tasty. For fish, go with firm varieties like cod or halibut. Cook them the same way as the shrimp. If you want a vegetarian option, use black beans or grilled veggies. These add flavor and texture to your tacos. Feel free to mix up the salsa too. Pineapple salsa is a sweet twist. Just replace mango with diced pineapple. It pairs well with the shrimp. Another option is avocado salsa. Mash ripe avocados and mix them with lime juice, salt, and diced onion. This creamy salsa gives a smooth contrast to the crunchy taco. Not everyone likes spice. You can make mild salsa by skipping the jalapeño. Just use more mango and onion for a fresh taste. For the shrimp, cut back on cayenne pepper. This keeps the shrimp flavorful without too much heat. Adjusting these elements helps you cater to everyone’s tastes. Try these variations to keep your spicy shrimp tacos exciting and new! For the full recipe, check out the detailed steps above. To keep your tacos fresh, wrap them tightly in plastic wrap or foil. This helps keep the moisture in. Place them in an airtight container for added protection. When reheating, use a skillet over low heat. This way, the tortillas stay crisp while warming the shrimp. Avoid using a microwave, as it can make the tacos soggy. For salsa, store it in a glass jar or airtight container. Make sure to press a piece of plastic wrap against the surface. This prevents air from causing browning. In the fridge, salsa lasts about 3-5 days. Use it as a topping for grilled chicken or as a dip for chips. Prep shrimp and mango salsa a day ahead. This saves time when you are ready to eat. Chop your veggies and store them in separate containers. When it’s time to serve, warm the tortillas and assemble the tacos. This way, they stay fresh and tasty! To make spicy shrimp tacos, follow these easy steps: 1. Start with fresh shrimp. Peel and devein them. 2. Toss shrimp in olive oil and spices. Use smoked chili powder and cayenne. 3. Cook shrimp in a hot skillet for 2-3 minutes per side. 4. Warm corn tortillas for a few seconds in a skillet. 5. Layer cooked shrimp on tortillas with red cabbage and avocado. 6. Top with mango salsa for a fresh kick. For the full recipe, check out the details above. Yes, you can prep this recipe ahead of time. Here’s how: - Make the mango salsa a day in advance. Keep it in the fridge. - Cook the shrimp a few hours before serving. Store them in an airtight container. - Warm tortillas just before serving for the best taste. If you want to switch up the tortillas, here are some great options: - Flour tortillas for a softer bite. - Lettuce wraps for a low-carb choice. - Whole wheat tortillas for extra fiber. To control spice in your shrimp, try these tips: - Use less cayenne pepper for milder shrimp. - Add more chili powder for a smoky flavor without too much heat. - For extra heat, include diced jalapeños in the shrimp mix. Adjust spices to fit your taste! In this blog, we explored the joyful process of making tasty shrimp tacos. We discussed key ingredients like fresh shrimp and ripe mangoes. The step-by-step guide made cooking easy, while tips helped you choose and prepare ingredients well. You can impress friends with various taco options and salsas. Remember, cooking can be fun and creative! Enjoy your tacos, and don’t be afraid to experiment with flavors. Your culinary adventures can lead to delicious results!

Spicy Shrimp Tacos with Mango Salsa Fresh Delight

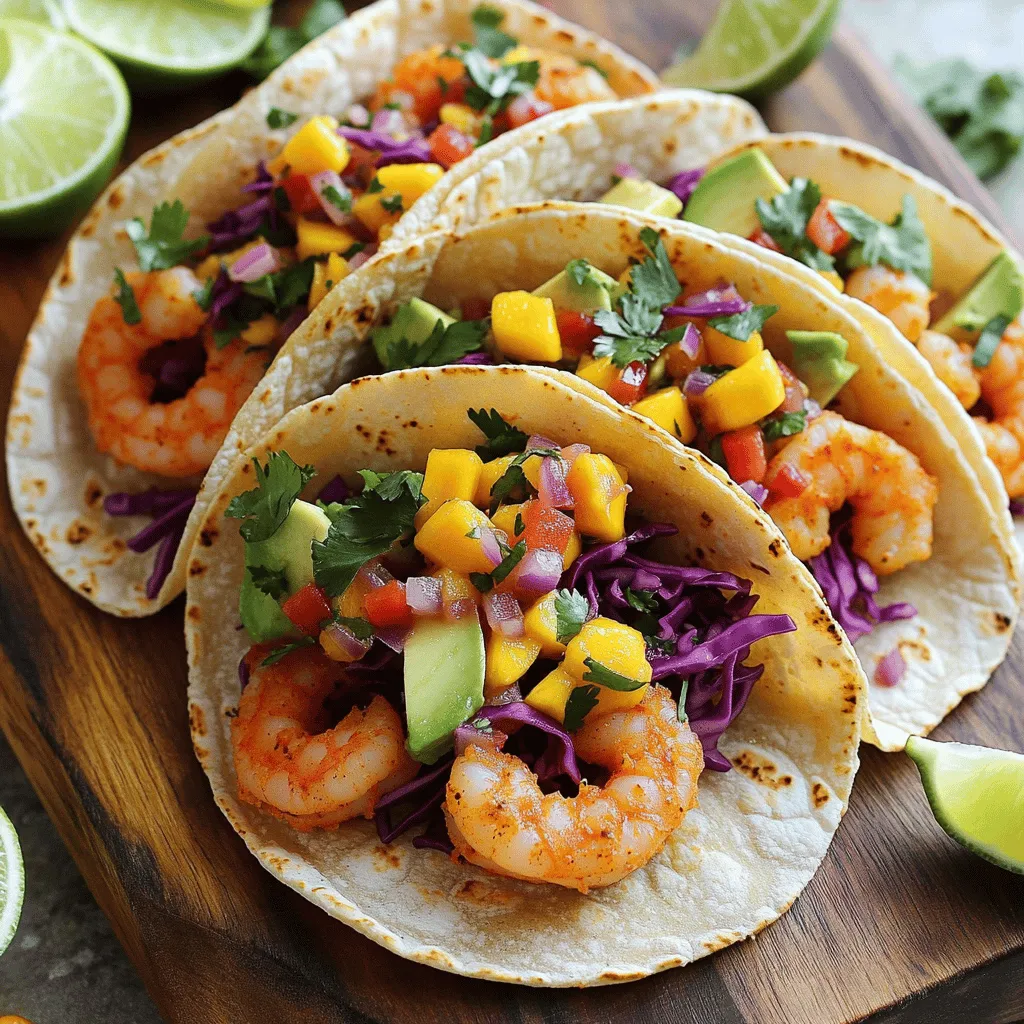
Get ready to spice up your dinner with my easy and delicious Spicy Shrimp Tacos with Mango Salsa! This recipe

- 1 lb boneless, skinless chicken breasts - Bell pepper varieties (red, yellow, or green) - 1 large red onion The main ingredients in this recipe are simple and fresh. You need chicken breasts, which provide protein and flavor. Choose your favorite bell pepper for color and taste. A large red onion adds sweetness and crunch. - 2 teaspoons chili powder - 1 teaspoon ground cumin - 1 teaspoon smoked paprika These spices bring the dish to life. Chili powder adds heat, while cumin gives it depth. Smoked paprika adds a lovely smoky flavor that elevates the dish. - 2 tablespoons olive oil - 8 small flour tortillas - Fresh cilantro and lime wedges for garnish Olive oil helps cook and flavor the chicken and vegetables. Flour tortillas are perfect for wrapping your fajitas. Fresh cilantro adds brightness, and lime wedges give a zesty finish. For the full recipe, make sure to check out the instructions. Enjoy cooking! - Preheat the oven to 400°F (200°C). - Prepare the baking sheet with parchment paper. Start by heating your oven. This helps the fajitas cook evenly. Next, take a large baking sheet and cover it with parchment paper. This will make cleaning up easy after you're done cooking. - Combine chicken, bell peppers, and onion in a bowl. - Drizzle with olive oil and seasonings, and toss to coat. In a big bowl, mix together the sliced chicken, bell peppers, and onion. Make sure they are all cut into similar sizes. Then, drizzle olive oil over the mix. Add in chili powder, cumin, smoked paprika, garlic powder, salt, and pepper. Use your hands or a spatula to toss everything until the chicken and veggies are well coated. - Spread the mixture on the baking sheet. - Bake for 20-25 minutes, stirring halfway through. Now, spread the chicken and veggie mix evenly on the baking sheet. This helps them cook well. Put the pan in your oven and bake for 20 to 25 minutes. Remember to stir the mixture halfway through. This ensures everything cooks evenly. Once done, the chicken should be cooked through, and the veggies should be tender. If you want the full recipe, check out the details provided earlier. To get great chicken, slice it thinly. Thin pieces cook faster and stay juicy. Use a sharp knife for clean cuts. This helps the chicken absorb spices better. Coating the chicken with spices is key. Mix spices well with the olive oil before adding it to the chicken. This ensures every bite has flavor. Use chili powder, cumin, and smoked paprika for the best taste. For the veggies, bell peppers and onions work well. They add color and flavor. Try using a mix of red, yellow, and green peppers. This gives your dish a vibrant look. To keep veggies crisp, cut them into larger pieces. If they are too small, they may become mushy. Toss them with the chicken but avoid overcooking. Aim for tender but firm veggies. When serving, warm the tortillas first. This makes them soft and easy to handle. You can stack them on a platter for a nice look. For garnishing, use fresh cilantro and lime wedges. These add brightness to the dish. Good sides include rice, beans, or a fresh salad. These pair well with the fajitas and enhance the meal. For the full recipe, refer to the earlier section on ingredients and steps. {{image_4}} You can switch up the protein in your fajitas. If you want a seafood twist, use shrimp instead of chicken. Shrimp cooks fast and adds a light flavor. Just adjust the cooking time to about 10-15 minutes. Beef is another great option. Slice flank steak thinly and follow the same steps as for chicken. The beef adds a rich taste that many enjoy. For a vegetarian choice, try tofu or mushrooms. Tofu absorbs flavors well. Press it first to remove excess moisture. Mushrooms add a savory touch too. Want more flavor? Add jalapeños for a spicy kick. Slice them thin and mix them in with the chicken and veggies. This adds heat without overpowering the dish. If you prefer mild, leave them out. Corn or black beans are great for extra texture. They also bring a sweet flavor that balances the spices. Just toss them in with the other ingredients before baking. If you need a gluten-free option, look for gluten-free tortillas. They are widely available and taste great. You can also use lettuce wraps for a low-carb choice. Just take large lettuce leaves and fill them with the fajita mix. These swaps keep the meal light and fresh. Enjoy the flavors while meeting your dietary needs. For the full recipe, check the earlier section and get cooking! After your meal, let the chicken fajitas cool down. This helps keep them fresh. Use airtight containers to store your leftovers. Glass or plastic containers work well. Make sure to seal them tightly to avoid any air. Keep them in the fridge. The fajitas will stay good for about three days. To reheat your fajitas, use the oven or a skillet. The oven keeps them from drying out. Preheat it to 350°F (175°C) and place the fajitas on a baking sheet. Heat for about 10-15 minutes. If using a skillet, add a splash of water to keep them moist. Cover with a lid and heat on low. This method keeps the chicken juicy and the veggies crisp. If you want to freeze your chicken fajitas, do it right after cooking. Let them cool completely first. Then, pack them in freezer-safe bags. Remove as much air as possible to prevent freezer burn. They can last for up to three months. To thaw, place them in the fridge overnight. Reheat them gently to keep the flavors intact. To prepare chicken fajitas ahead of time, follow these steps: - Slice the chicken: Cut your chicken into thin strips. - Chop the veggies: Slice the bell peppers and onion. - Mix and season: Combine chicken and veggies in a bowl. Add olive oil and spices. - Store: Place the mixture in an airtight container. Keep it in the fridge for up to two days. When you’re ready to cook, just spread it on a sheet pan and bake. This makes dinner fast and easy! Yes, you can use frozen chicken, but there are some things to keep in mind: - Thaw first: Always thaw the chicken safely in the fridge overnight. - Cook time: Frozen chicken may need more time to cook. Use a meat thermometer to check. - Texture: Fresh chicken gives the best texture, but frozen works in a pinch. Just make sure to cut it into smaller pieces for even cooking. Here are some ideas for sides and drinks: - Rice: Serve with cilantro lime rice for a tasty combo. - Beans: Black beans or refried beans add protein and flavor. - Guacamole: A fresh guacamole dip will enhance your meal. - Salsa: Fresh salsa adds a zesty kick. - Beverages: Pair with a cold drink like iced tea or a light beer. These options will round out your fajita feast! For the full recipe, check out the details above. You can cook delicious sheet pan chicken fajitas with ease. This post covered ingredients, step-by-step instructions, and tips for perfect cooking. You can customize the recipe with different proteins or veggies. Plus, learn how to store and reheat leftovers for later. Fajitas are perfect for any meal. With this recipe, you can impress family and friends. Enjoy your cooking adventure and savor every bite!

Sheet Pan Chicken Fajitas Tasty and Simple Recipe

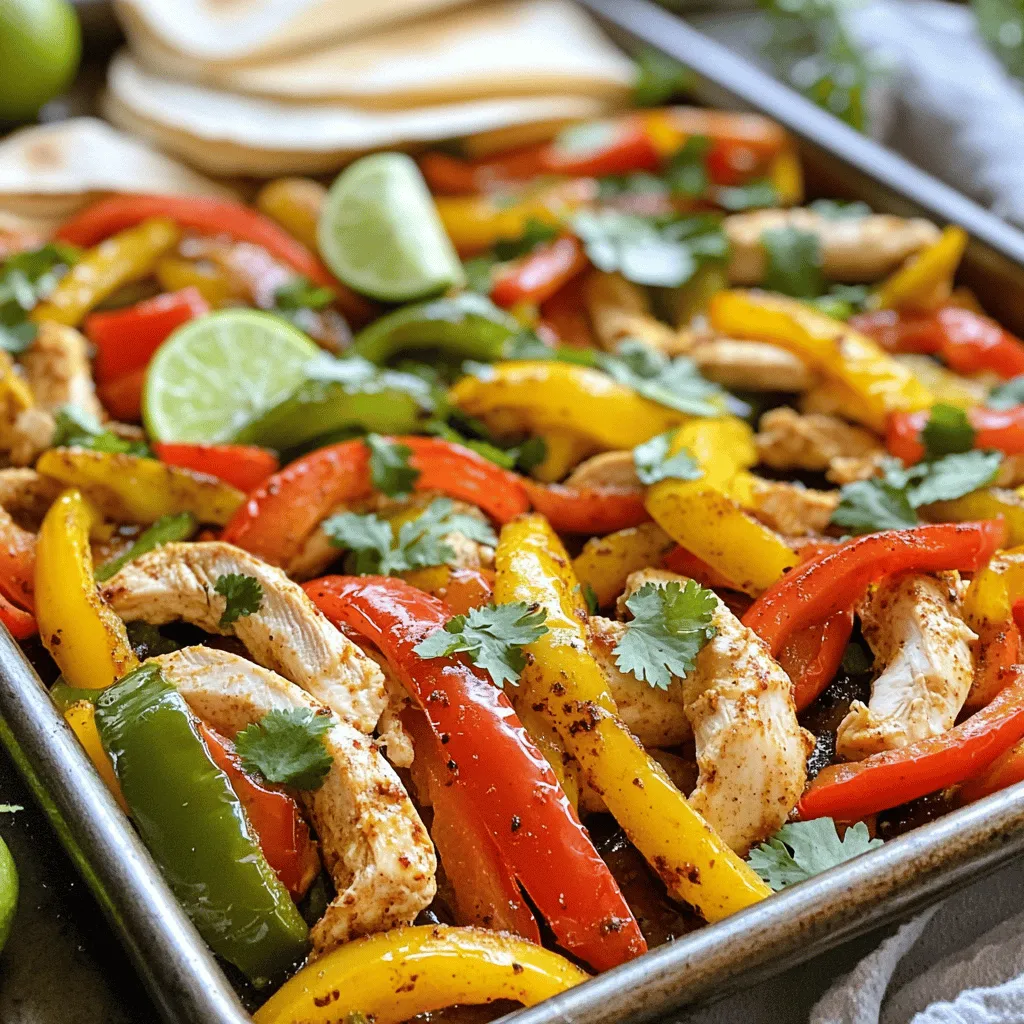
Looking for a simple yet delicious meal? My Sheet Pan Chicken Fajitas are just what you need! With vibrant bell

- 1 pound of fresh carrots, peeled and cut into sticks - 3 tablespoons honey - 2 tablespoons extra virgin olive oil - 4 cloves of garlic, finely minced - 1 teaspoon fresh rosemary, finely chopped - 1 teaspoon salt - 1/2 teaspoon freshly ground black pepper - Sesame seeds for garnish (optional) The key to this dish is using fresh carrots. Their natural sweetness shines when roasted. You will start with one pound of carrots. Make sure they are peeled and cut into sticks. This helps them cook evenly. Next, you will need honey. Three tablespoons will add a delightful glaze. Honey brings a warm sweetness to balance the garlic's bold flavor. Extra virgin olive oil is next. Two tablespoons enhance the roasting process. It helps the carrots caramelize and adds healthy fat. Don’t forget the garlic! Four cloves, finely minced, will give a savory punch. Fresh rosemary, one teaspoon, adds a nice herbal note. You also need salt and black pepper. One teaspoon of salt and half a teaspoon of pepper will season the carrots well. Lastly, sesame seeds are optional. They add a nice crunch and a touch of elegance to the dish. Each serving of honey garlic roasted carrots is packed with nutrients. Carrots provide vitamins A, C, and K. They are low in calories, making them a healthy side. - Calories: About 120 - Fats: 5 grams - Carbohydrates: 20 grams - Protein: 2 grams Carrots are rich in antioxidants. They help protect your body from free radicals. Garlic also offers health perks. It can boost your immune system and lower blood pressure. Healthy fats from extra virgin olive oil are crucial. They support heart health and help absorb vitamins. Enjoying this dish contributes to a balanced diet. For the complete recipe, check out the Full Recipe. - Preheat your oven to 425°F (220°C). This helps cook the carrots evenly. - In a bowl, mix together honey, olive oil, minced garlic, rosemary, salt, and pepper. Whisk until smooth. - Add the carrot sticks to the bowl. Toss them well to coat each stick in the honey-garlic mixture. - Line a baking sheet with parchment paper. Spread the carrots in a single layer. This ensures they roast well without steaming. - Place the baking sheet in the oven. Roast the carrots for 25-30 minutes. Shake the pan halfway to cook them evenly. The carrots should be tender and caramelized. - Once done, take the pan out and let the carrots cool slightly. This helps enhance their flavors. - Transfer the carrots to a serving dish. If you like, sprinkle sesame seeds on top for added crunch and flavor. For the full recipe, check out the details above. Enjoy your cooking! To make the best honey garlic roasted carrots, start with fresh carrots. Look for firm, bright carrots. Thin carrots are sweeter, while thicker ones have a hearty bite. Choosing the right size helps cook evenly. For caramelization, cut the carrots into uniform sticks. This allows them to roast at the same rate. Give them space on the baking sheet. If they touch, they will steam instead of roast. The honey and olive oil help create a nice glaze. One common mistake is overcrowding the baking sheet. When carrots are too close, they don’t brown well. Make sure they are in a single layer. This gives them room to breathe and caramelize. Another mistake is under-seasoning. Don’t skip the salt and pepper. They enhance the natural sweetness of the carrots. Taste the honey-garlic mix before tossing the carrots in. Adjust seasoning if needed. Honey garlic roasted carrots pair well with many main dishes. They complement roasted chicken, grilled steak, or baked fish. Their sweetness balances savory flavors. For presentation, serve them on a colorful platter. You can add a sprig of fresh rosemary for a pop of color. Sprinkle sesame seeds on top for added crunch and flair. This makes the dish look as good as it tastes. You can find the Full Recipe to explore more ideas! {{image_4}} You can switch things up with flavors. Try maple syrup instead of honey. It adds a rich, sweet taste. You can also add spices like cayenne or paprika. A pinch of cayenne gives a nice kick. Paprika adds warmth and depth to the dish. For a change, use an Instant Pot or air fryer. They cook carrots fast while keeping them tender. You can also grill the carrots during summer. Grilling gives them a smoky flavor. Just brush them with the honey-garlic mix and grill until tender. If you want a vegan dish, swap honey with maple syrup. This keeps the sweetness while making it plant-based. For gluten-free options, this recipe is already safe. All ingredients are gluten-free, so you can enjoy them without worry. To store leftover honey garlic roasted carrots, let them cool first. Place them in an airtight container. This keeps them fresh and tasty. You can keep them in the fridge for up to four days. After that, they may lose their flavor and texture. If you want to keep roasted carrots longer, freezing is a great option. Start by letting them cool completely. Then, place them in a freezer-safe bag or container. Remove as much air as possible before sealing. Frozen carrots can last for up to three months. When you want to eat them, thaw them overnight in the fridge. Reheat in a pan over low heat, adding a little olive oil to bring back their shine. Roasted carrots can fit well into your meal plan. They make a great side dish for lunch or dinner. You can also add them to salads or grain bowls for extra flavor. If you have leftovers, try mixing them in a stir-fry or using them in a soup. Their sweet and savory taste adds a nice touch to many meals. For more ideas, check the Full Recipe for inspiration. To make honey garlic roasted carrots, follow these steps: 1. Preheat your oven to 425°F (220°C). 2. In a bowl, mix 3 tablespoons of honey, 2 tablespoons of olive oil, 4 minced garlic cloves, 1 teaspoon of chopped rosemary, 1 teaspoon of salt, and 1/2 teaspoon of black pepper. 3. Add 1 pound of peeled and cut carrots to the bowl. Toss them well to coat. 4. Line a baking sheet with parchment paper and spread the carrots in a single layer. 5. Roast for 25-30 minutes, shaking the pan halfway through for even cooking. 6. Once done, let them cool a bit, then serve. You can sprinkle sesame seeds on top if you like. For full details, check the Full Recipe. Yes, you can use other vegetables! Try parsnips, sweet potatoes, or even Brussels sprouts. Each will bring a unique flavor and texture. Just cut them into similar sizes for even roasting. Be sure to adjust cooking times if needed. Honey garlic roasted carrots pair nicely with many dishes. Consider serving them with grilled chicken or fish. They also go well with roasted meats or as a side to a hearty grain bowl. For a complete meal, add a fresh salad or some crusty bread. Yes, this recipe is great for meal prep. You can store roasted carrots in the fridge for up to five days. Keep them in an airtight container. To reheat, simply warm them in the oven or microwave. They taste just as good! This blog post explored how to make delicious honey garlic roasted carrots. We covered ingredients, step-by-step instructions, and tips to perfect the recipe. You learned about the health benefits of carrots and garlic and how to store leftovers. Lastly, we shared variations to suit your taste. Try this dish as a side or snack. It’s easy, tasty, and good for you! Enjoy the cooking process and share your delicious results. Happy roasting!

Honey Garlic Roasted Carrots Simple and Savory Dish

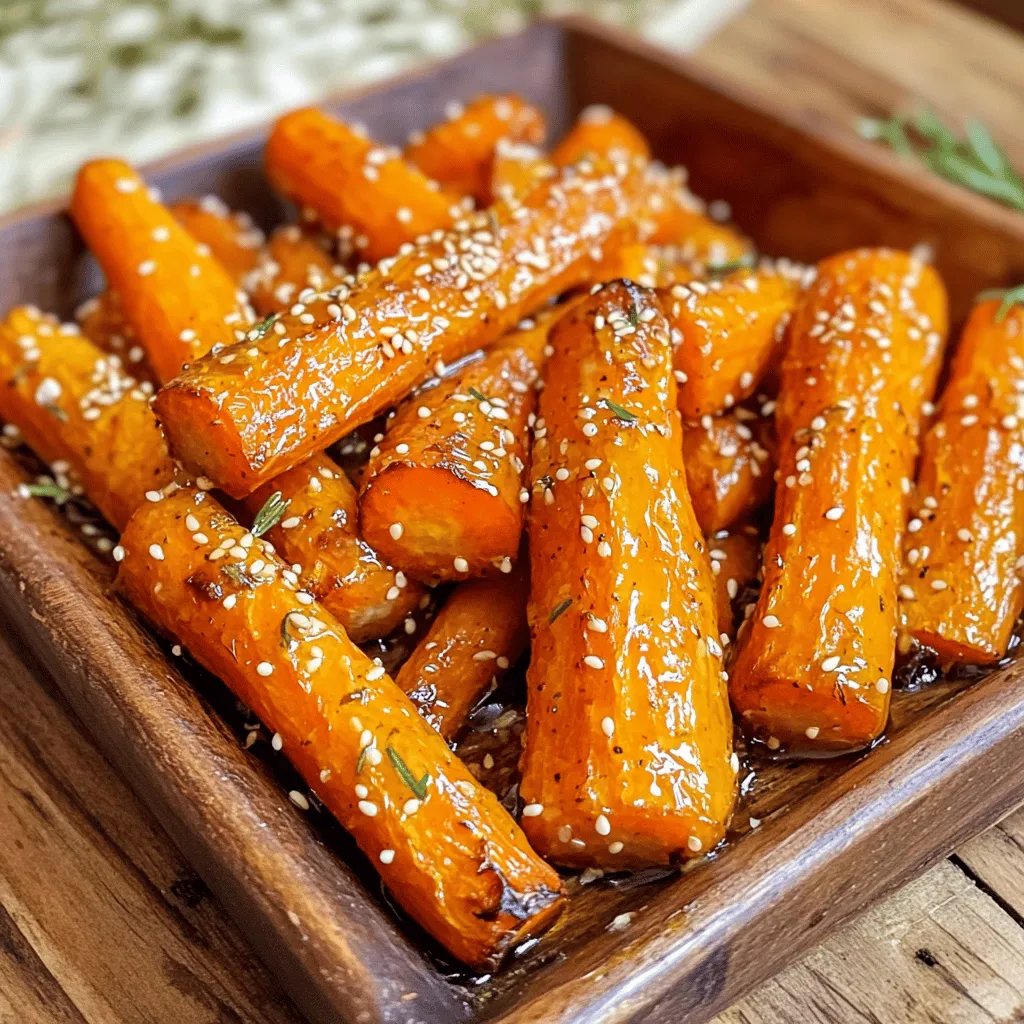
Are you ready to transform your side dish game? Honey Garlic Roasted Carrots are simple yet bursting with flavor. This

To make avocado toast with a poached egg, gather these simple ingredients: - Whole grain bread - Ripe avocado - Eggs - Fresh lemon juice - Garlic powder - Red chili flakes - Salt and pepper - Fresh herbs - Extra virgin olive oil These ingredients come together to create a meal that is both tasty and healthy. I love using whole grain bread for its nutty flavor and hearty texture. The ripe avocado is creamy and rich, making it the star of this dish. For the eggs, I prefer large ones because they poach beautifully. Fresh lemon juice adds a nice zing to the avocado, while garlic powder gives it depth. Red chili flakes bring heat, which I enjoy, but you can adjust this to your taste. Don't forget the salt and pepper! They enhance all the flavors. Fresh herbs like parsley or cilantro add a pop of color and freshness. Lastly, a drizzle of extra virgin olive oil ties everything together, adding richness to each bite. For the full recipe, check out [Full Recipe]. To start, choose whole grain bread for great flavor and health benefits. You can toast it in a toaster or on a skillet. If using a skillet, heat it over medium heat. Add a tiny amount of olive oil for extra crispiness. Toast until golden-brown. This step builds a strong base for your toppings. Next, grab a ripe avocado. Cut it in half, remove the pit, and scoop the flesh into a bowl. Use a fork to mash it. Aim for a creamy texture, but a few chunks add nice character. Mix in one tablespoon of lemon juice. This adds flavor and keeps the green color. Sprinkle in garlic powder, salt, and black pepper for a tasty boost. For the poached eggs, fill a saucepan with water. Heat it gently until it simmers. Optionally, add a splash of vinegar. This helps the eggs hold their shape. Crack each egg into a small dish. Then, slide them into the water carefully. Cook for 3-4 minutes. You want the whites set and the yolks runny. Now, it’s time to assemble your toast. Spread the mashed avocado generously over each slice of toast. Make sure to cover every edge. Then, place a poached egg on top of the avocado. As you cut into the egg, the yolk should flow out. For a finishing touch, sprinkle red chili flakes for heat. Drizzle some olive oil on top for richness. Garnish with chopped parsley or cilantro for color. This simple process results in a lovely plate of avocado toast with poached egg, made with care and flavor. For more details, check out the Full Recipe. To get a perfect poached egg, many run into common pitfalls. One mistake is cooking the eggs at too high a temperature. The water should simmer gently, not boil. If the water is too hot, the whites can break apart. Another issue is cracking the eggs directly into the pot. Instead, crack them into a small dish first. This gives you more control. Using vinegar can help too. A splash of vinegar in the water helps the egg whites stay together. It’s not necessary, but it can improve your results. Just don’t add too much; a tablespoon is enough. To make your avocado toast pop, think about creative seasoning ideas. Besides salt and pepper, try adding a pinch of smoked paprika or even a dash of cayenne pepper for heat. You can also mix in fresh herbs into the avocado, like cilantro or chives. If you want to switch things up, consider alternative toppings. Sliced radishes or cherry tomatoes add color and crunch. A sprinkle of feta cheese brings a salty bite that pairs well with the creamy avocado. Pair your avocado toast with a refreshing drink. A cold glass of freshly squeezed orange juice is a classic choice. If you prefer something warm, try a cup of herbal tea. Complementary sides can elevate your meal. Adding a small side salad with mixed greens brightens the plate. You could also serve it with fresh fruit, like slices of watermelon or berries. For a heartier option, consider a side of crispy bacon or smoked salmon. Feel free to explore the [Full Recipe] for a complete guide to this tasty meal! {{image_4}} You can add many toppings to your avocado toast. Here are a few fun ideas: - Other vegetables: Try sliced tomatoes, radishes, or cucumbers. They add crunch and flavor. - Different cheese options: Feta, goat cheese, or fresh mozzarella can elevate your toast. Each cheese brings its own unique taste. If you want to make this dish suit your diet, consider these options: - Vegan alternatives: Replace the poached eggs with sliced cherry tomatoes or marinated tofu. You still get great taste. - Gluten-free options: Use gluten-free bread instead of whole grain. This keeps the meal safe for gluten-free diets. You can also give your toast a regional flair: - Mediterranean style: Add olives, sun-dried tomatoes, and a drizzle of balsamic glaze. This twist adds rich Mediterranean flavors. - Asian-inspired toppings: Top with pickled ginger, sesame seeds, and sliced scallions. These ingredients add a fresh, zesty taste. These variations make avocado toast fun and exciting. Each twist lets you explore new flavors while enjoying the classic base. For a complete guide, check the Full Recipe. To store mashed avocado, place it in an airtight container. Add a thin layer of lemon juice on top. This helps keep it fresh and green. Seal the container tightly and store it in the fridge. Use it within one day for the best taste. For leftover toast, it’s best to eat it fresh. If you have extra slices, wrap them in foil. Store them at room temperature for a few hours. For longer storage, put the toast in the fridge. Reheat it in a toaster or an oven before serving. You can make parts of this dish ahead of time. Mash the avocado and store it as mentioned. You can also toast the bread in advance. Just keep it in a sealed bag at room temperature. When you are ready to eat, reheat the toast. Poach the eggs fresh for the best taste. This way, you can enjoy a quick meal on busy mornings. To make perfect poached eggs, you need to control heat and timing. - Use fresh eggs, as they hold their shape better. - Bring water to a gentle simmer, not a rolling boil. - Adding a splash of vinegar helps the egg whites stay together. Slide the eggs in gently and cook them for 3-4 minutes. Check the whites; they should be firm while the yolks stay soft. Yes, you can microwave eggs for a quick option. - Crack an egg into a microwave-safe bowl. - Add a splash of water and cover it with a microwave-safe plate. - Microwave for about 30 seconds or until cooked to your liking. This method is fast but can be less precise than poaching. Avocado toast offers a good mix of nutrients. - Whole grain bread provides fiber and B vitamins. - Avocado is rich in healthy fats, vitamins E and K. - Eggs add protein, vitamin D, and essential minerals. This meal is balanced and can keep you full longer. For more details, refer to the Full Recipe. In this post, we shared the essentials for making great avocado toast. We covered the ingredients, from whole grain bread to fresh herbs. You learned how to prepare and assemble each component for the best flavor and texture. We also explored tips for perfect poached eggs and unique topping ideas. Remember, avocado toast is versatile. It can be made in many ways to fit your taste. Have fun experimenting with flavors and toppings! Enjoy your delicious breakfast creation.

Avocado Toast with Poached Egg Simple and Tasty Meal

If you crave a simple yet delicious meal, look no further than avocado toast with poached egg. This trendy dish

Older posts
Newer posts
← Previous Page1 … Page60 Page61 Page62 … Page91 Next →

dsad

© 2025 recipesstation • Built with GeneratePress

Our Policies

  • Copyright Policy
  • Cookie Policy
  • GDPR Policy
  • Privacy Policy
  • Disclaimer
  • Terms Of Use

More Information

  • Home
  • About
  • Contact
  • Appetizers
  • Dessert
  • Dinner
  • Drinks
©2025, recipesstation About Back To Top