Skip to content
DisclaimerTerms Of UseGDPR PolicyCookie Policy

recipesstation

  • Home
  • Drinks
  • Appetizers
  • Dinner
  • Dessert
  • About
  • Contact
  • Privacy Policy
DisclaimerTerms Of UseGDPR PolicyCookie Policy

Emily

- 1 cup finely shredded cabbage - 1 cup finely shredded carrots - 1 bell pepper, thinly sliced - 1 cup fresh bean sprouts - 2 green onions, finely chopped - 2 cloves garlic, minced - 1 tablespoon fresh ginger, grated - 1 teaspoon soy sauce (or tamari) - 1 tablespoon toasted sesame oil - 12 rice paper wrappers - Cooking spray or olive oil for brushing - Salt and black pepper to taste To create these baked veggie spring rolls, gather all these fresh ingredients. I love using vibrant colors in my veggies. They not only look good but also taste amazing! The combination of cabbage, carrots, and bell pepper gives a great crunch. Fresh bean sprouts add a nice texture too. For flavor, garlic and ginger bring a punch. Soy sauce adds depth, while sesame oil gives a nutty kick. Don't forget the rice paper wrappers! They are key to making our spring rolls. I recommend brushing the rolls with olive oil or cooking spray for that lovely crispy finish. You can find the full recipe in the article above. Enjoy your cooking! - Preheat oven to 400°F (200°C). - Line a baking sheet with parchment paper. - Sauté garlic and ginger until fragrant. - Stir-fry cabbage, carrots, bell pepper, and bean sprouts. To cook the filling, I start by heating sesame oil in a large skillet. I add minced garlic and grated ginger. I sauté them for about one minute. This step adds a nice aroma to the dish. Next, I introduce the shredded cabbage, carrots, bell pepper, and bean sprouts. I stir-fry everything for 3-4 minutes. This keeps the veggies crunchy yet tender. After cooking, I remove the skillet from heat. I stir in the chopped green onions and a splash of soy sauce. I season with salt and black pepper to taste. Make sure to mix it well. - Dip rice paper in warm water and soften. - Spoon filling onto the wrapper and roll. For the spring rolls, I take a shallow dish and fill it with warm water. I dip a rice paper wrapper in the water for about 10 seconds. Once it’s soft, I lay it on a clean surface. I take about 2 tablespoons of the veggie filling and place it on the lower third of the wrapper. I then fold in the sides and roll from the bottom up tightly. I repeat this for all the wrappers and filling. - Arrange rolls on the baking sheet and brush with oil. - Bake for 15-20 minutes, flipping halfway. I place the rolled spring rolls seam-side down on the baking sheet. I lightly spray or brush them with cooking spray or olive oil. This step helps them turn golden brown. I bake them in the preheated oven for 15-20 minutes. I flip them halfway through for even cooking. When they are golden and crispy, they are ready to enjoy. For the full recipe, check below. To ensure even cooking, bake spring rolls on a lined sheet. Flip them halfway through baking. This method lets hot air circulate around each roll. Make sure they are spaced out. Crowding the pan can lead to soggy spots. For a crispy texture, lightly brush the rolls with oil. You can use cooking spray or olive oil. This step helps them brown nicely. Do not skip this, or they might not be as crunchy. Also, keep an eye on the oven temperature. Too high can burn them, while too low can make them soft. Dipping sauces make the rolls shine. Try spicy sriracha for a kick. Sweet chili sauce is a great choice for those who prefer mild spice. You can also mix soy sauce with lime juice for a fresh taste. To present your spring rolls, use a colorful platter. Add fresh cilantro and lime wedges for flair. Arrange the rolls neatly to catch the eye. This presentation makes them fun to eat. You can swap veggies based on your taste. Try zucchini or mushrooms for fun flavors. Bell peppers can be any color for a vibrant look. Even add cooked quinoa for extra texture. If you need gluten-free options, use rice paper wrappers. They are easy to find at stores. You can also use lettuce leaves for a fresh twist. This way, everyone can enjoy your spring rolls without worry. {{image_4}} You can change the filling for your baked veggie spring rolls to suit your taste. Adding proteins like tofu or shrimp gives a nice boost. Tofu is a great choice for a vegan option. It soaks up flavors well and adds a nice texture. You can also use cooked chicken or beef if you prefer meat. For a vegan twist, try adding chickpeas or lentils. They pack protein and fiber, making your rolls even healthier. You can mix in mushrooms or zucchini for extra flavor. Mix and match your favorite veggies to create your perfect filling. Adding herbs and spices can take your spring rolls to the next level. Fresh herbs like cilantro or mint give a bright taste. You can also add basil or parsley for a unique flavor. Spices like paprika or chili flakes add warmth and depth. Experimenting with different sauces can also enhance the taste. A sweet chili sauce pairs well with the crispy rolls. You can try peanut sauce for a creamy touch or soy sauce for a salty kick. Don’t be afraid to mix sauces for a fun twist! Wrapping your spring rolls can be fun and creative. Making mini rolls is a great way to serve appetizers. Just use smaller pieces of rice paper and less filling. They are perfect for parties or snacks. You can also try different kinds of wrappers. Use whole wheat or gluten-free wrappers for a healthier option. You can even use lettuce leaves for a low-carb version. It’s all about what you like and what you want to try! To keep your baked veggie spring rolls fresh, store them in the fridge. Place them in an airtight container. They will stay good for about three days. If you want to save them for longer, you can freeze them. To freeze, first, let the rolls cool completely. Then, wrap each roll in plastic wrap. Place them in a freezer-safe bag. You can freeze them for up to three months. This way, you can enjoy your spring rolls later. To reheat baked spring rolls, the oven is your best friend. Preheat the oven to 350°F (175°C). Place the rolls on a baking sheet. Bake them for about 10 minutes. This method helps restore their crispiness. If you need a quick option, you can use the microwave. Place the rolls on a microwave-safe plate. Heat them for about 30 seconds to one minute. Keep an eye on them to prevent sogginess. For best results, use the oven method when possible. For the full recipe, check out the details above. Yes, you can prepare baked veggie spring rolls ahead of time. First, make the filling and let it cool. Then, roll the spring rolls and place them on a baking sheet. Cover them well with plastic wrap, and store them in the fridge. Bake them when you are ready to eat. This way, you save time and enjoy a fresh snack! Many sauces pair well with baked veggie spring rolls. Here are some easy ideas: - Sweet chili sauce: A classic choice that adds sweetness. - Peanut sauce: Creamy and nutty, this sauce is a favorite. - Soy sauce: Simple and savory, it enhances the flavor of the rolls. - Sriracha: For those who like heat, this adds a spicy kick. Absolutely! You can mix and match your veggies. Here are some suggestions: - Mushrooms: They add great flavor and texture. - Zucchini: Thinly sliced, it brings a fresh taste. - Spinach: Packed with nutrients, it’s a great green addition. - Broccoli: Finely chopped, it adds crunch and color. Baked spring rolls are healthier than fried ones. They have less fat and fewer calories. Here are some benefits: - Low in calories: Baking reduces added oils. - High in fiber: The veggies provide fiber, aiding digestion. - Rich in vitamins: Fresh vegetables offer many essential nutrients. - Lower in sodium: You control the salt added to the filling. Baked veggie spring rolls can last up to three days in the fridge. To keep them fresh: - Store them in an airtight container. - Place a paper towel inside to absorb moisture. Reheat them in the oven or air fryer for the best results. Enjoy them crispy and warm! Baked veggie spring rolls are a fun and healthy snack. You now know the main ingredients, steps to prepare, and tips for perfecting your rolls. From serving ideas to storing leftovers, this recipe is versatile and easy. Try different fillings and sauces to suit your taste. Enjoy creating a delicious dish that your friends and family will love! These spring rolls can be a hit at your next meal. Get cooking and have fun with your food!

Baked Veggie Spring Rolls Crispy and Healthy Treat

Do you crave a snack that’s both crispy and healthy? Baked veggie spring rolls are your answer! Packed with colorful

To make Ginger Sesame Noodles, gather these fresh ingredients: - 8 oz. whole wheat noodles - 2 tablespoons sesame oil - 1 tablespoon fresh ginger, finely grated - 2 cloves garlic, minced - 1/4 cup low-sodium soy sauce - 2 tablespoons rice vinegar - 1 tablespoon honey or maple syrup (to taste) - 1 cup assorted bell peppers, thinly sliced (red, yellow, and green for a colorful mix) - 1 cup shredded carrots - 1/2 cup green onions, finely chopped - 1 tablespoon sesame seeds - Salt and pepper to taste Using fresh ingredients makes a big difference in flavor. Fresh ginger gives a warm, spicy kick. Fresh veggies like bell peppers and carrots add color and crunch. The taste of fresh ingredients pops in every bite. They also hold more nutrients, which boost the dish's health. When you pick the best ingredients, your Ginger Sesame Noodles will shine. If you can’t find an ingredient, don’t worry! Here are some swaps: - Noodles: Use rice noodles or gluten-free pasta. - Sesame Oil: Swap with olive oil for a milder taste. - Honey: Maple syrup or agave nectar works well too. - Veggies: Try broccoli or snap peas instead of bell peppers. - Soy Sauce: Use tamari for a gluten-free option. Feel free to get creative! Each swap can give the dish a new twist while keeping it delicious. First, fill a large pot with water and boil it. Once the water is bubbling, add 8 oz. of whole wheat noodles. Cook them as the package says until they are al dente. This usually takes about 8 to 10 minutes. After cooking, drain the noodles and rinse them with cold water. This step stops the cooking and keeps them from getting mushy. Set the noodles aside in a large mixing bowl. Now, let's make the ginger sauce. Grab a medium mixing bowl. Here, combine 2 tablespoons of sesame oil, 1 tablespoon of finely grated fresh ginger, and 2 minced cloves of garlic. Next, add 1/4 cup of low-sodium soy sauce, 2 tablespoons of rice vinegar, and 1 tablespoon of honey or maple syrup. Whisk everything together until it is smooth. Set this tasty sauce aside for later. In a large skillet or wok, heat a splash of sesame oil over medium heat. Add 1 cup of assorted thinly sliced bell peppers and 1 cup of shredded carrots. Sauté these veggies for about 3 to 4 minutes. Stir them often so they cook evenly. You want them to be tender but still a bit crisp. This keeps the dish fresh and vibrant. Now that the veggies are ready, it’s time to mix everything. Add the drained noodles to the skillet with the sautéed vegetables. Pour the ginger sauce over the top. Toss the mixture carefully to coat everything well. Stir for about 2 to 3 minutes until the noodles warm up and soak in the flavor. Once combined, take the skillet off the heat. Toss in 1/2 cup of finely chopped green onions. Season with salt and pepper to your taste. For a delightful crunch, sprinkle 1 tablespoon of sesame seeds on top. Serve the Ginger Sesame Noodles in individual bowls. For a fun touch, add a lime wedge for guests to squeeze over their dish. This adds a zesty kick! Enjoy your meal! To cook noodles just right, start with plenty of water. Use a large pot and bring it to a boil. Add salt to the water for flavor. Follow the package instructions for cooking time. Test the noodles a minute before the time ends. They should be firm but not hard. After cooking, drain them and rinse with cold water. This stops the cooking and keeps them from sticking. When sautéing, always heat your pan before adding oil. Use medium heat for best results. Add a splash of sesame oil first; it adds great flavor. Then, add your vegetables. Stir them often to cook evenly. Keep an eye on the time; you want them tender yet crisp. If they start to brown too fast, lower the heat. This keeps their bright color and crunch. You can make Ginger Sesame Noodles ahead of time. Store them in an airtight container in the fridge. They last up to three days. When reheating, add a splash of water or extra sauce. This keeps the noodles moist. Heat them in a skillet over medium heat, stirring gently. This method warms them without making them mushy. You can also use a microwave, but be careful not to overcook. For the full recipe, check the section above. {{image_4}} If you need gluten-free noodles, try rice noodles or quinoa noodles. These options work well and maintain great flavor. Look for gluten-free soy sauce too. It’s easy to find, and it keeps the dish tasty. To make Ginger Sesame Noodles heartier, add protein. Cooked chicken breast works nicely. Just slice it thin and toss it in. For a plant-based option, use firm tofu. Press it, cube it, and sauté until golden. Shrimp is another great choice. Cook them quickly until they turn pink. Each protein adds its unique twist to the dish. Feel free to mix in seasonal veggies. Broccoli and snap peas are great in spring. Try zucchini or asparagus in summer. In fall, add roasted squash or Brussels sprouts. This keeps the dish fresh and fun. Use whatever you enjoy or have on hand for a personal touch. For the full recipe, check out the complete instructions above. To store leftover Ginger Sesame Noodles, let them cool first. Once cooled, place them in an airtight container. This keeps the noodles fresh. You can store them in the fridge for up to three days. Make sure to label the container with the date. This will help you keep track of their freshness. You can freeze Ginger Sesame Noodles for later use. First, cool them completely. Then, portion the noodles into freezer bags. Press out as much air as you can before sealing the bags. Label the bags with the date. They can last in the freezer for about three months. When you’re ready to eat, thaw them in the fridge overnight. Ginger Sesame Noodles stay good in the fridge for up to three days. To reheat, simply place them in a pan over medium heat. Add a splash of water or extra sesame oil to prevent sticking. Stir often until heated through. You can also microwave them in a bowl. Cover the bowl with a damp paper towel to keep them moist while reheating. Enjoy your tasty meal again! Yes, you can use different noodles. Try rice noodles, egg noodles, or udon. Each type gives a unique taste and texture. I prefer whole wheat noodles for their health benefits and nutty flavor. Ginger sesame noodles have roots in Asian cuisine. They blend flavors from China and Japan. These noodles highlight ginger and sesame, two common ingredients in many Asian dishes. Yes, they can be healthy! Whole wheat noodles add fiber. Fresh veggies like bell peppers and carrots boost vitamins. Use low-sodium soy sauce to keep sodium in check. Absolutely! To make it vegan, just swap honey for maple syrup. The rest of the ingredients are already plant-based. This way, everyone can enjoy the dish. You can serve Ginger Sesame Noodles with various sides. Try steamed broccoli, sautéed greens, or a fresh salad. They also pair well with grilled chicken or tofu for extra protein. For the full recipe, check out the previous section. In this blog post, we explored the key ingredients for making Ginger Sesame Noodles. Fresh ingredients enhance flavor and quality. We also discussed cooking techniques and offered creative variations to suit your taste. Remember, you can prepare these noodles ahead of time for easy meals. With the right storage, leftovers can still taste great. Try using different proteins or veggies to make each dish unique. Enjoy your cooking, and let the flavors shine!

Ginger Sesame Noodles Flavorful and Simple Recipe

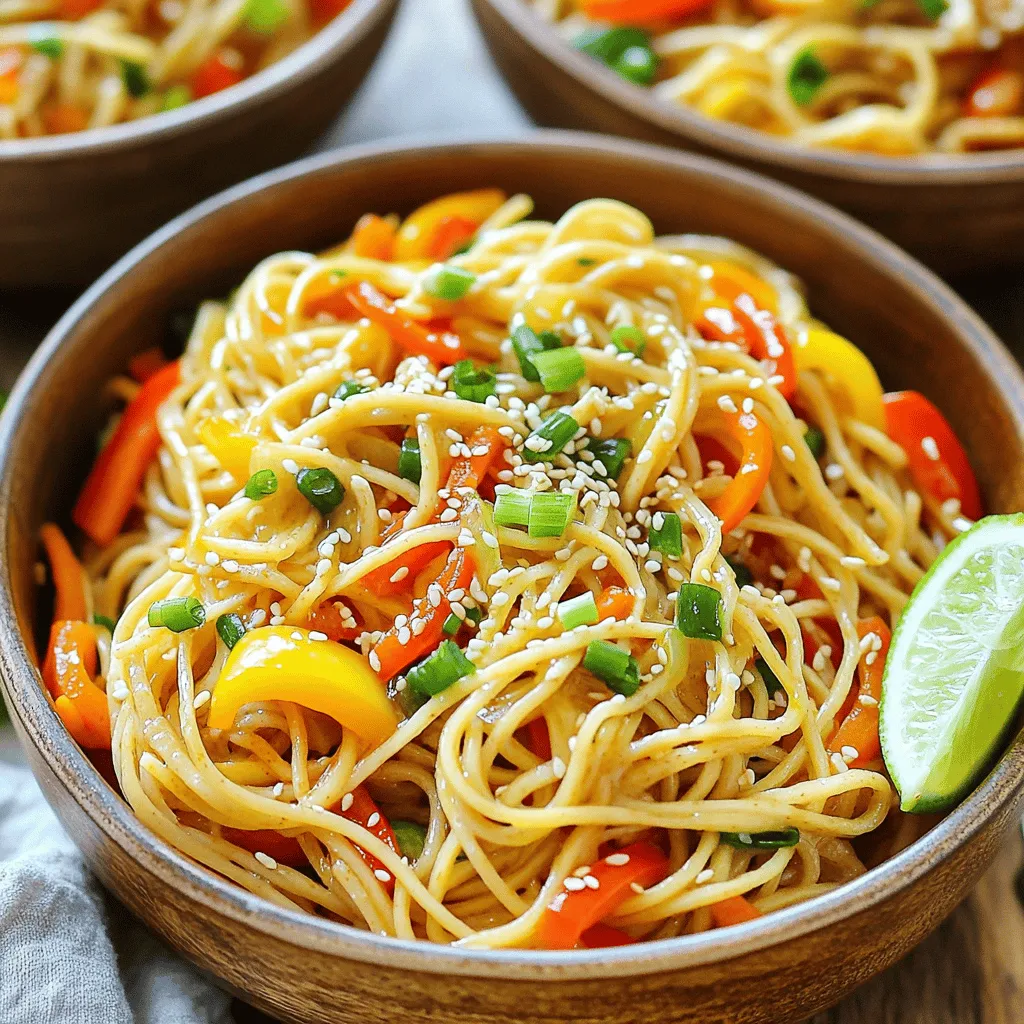
Looking for a quick, tasty meal? Try my Ginger Sesame Noodles! This simple recipe bursts with flavor and is perfect

- Fresh lime juice - Extra virgin olive oil - Garlic - Honey - Spices: cumin, smoked paprika, chili powder, black pepper, sea salt - Chicken breasts Choosing the right limes Select limes that feel heavy for their size. They should have smooth skin and a bright green color. Fresh limes give the best juice. When you squeeze them, they should feel soft but not mushy. Benefits of high-quality olive oil Use extra virgin olive oil for its rich flavor. Good olive oil adds depth to your marinade. It also contains healthy fats that enhance the dish. Look for oil that smells fresh and fruity. Importance of fresh garlic Always choose fresh garlic for the best taste. Fresh garlic has a strong flavor that dried garlic cannot match. Avoid garlic that is sprouting or has soft spots. Mince it finely to release its full aroma in the marinade. When you gather your ingredients, remember that quality matters. These choices ensure your Zesty Lime Chicken has vibrant flavors. For the full recipe, refer to the section above. Enjoy the cooking process and the delightful scents in your kitchen! To start, gather your ingredients. You will need fresh lime juice, olive oil, minced garlic, and honey. In a medium mixing bowl, combine these liquids. Whisk them together well until they blend smoothly. Next, add your spices. Include ground cumin, smoked paprika, chili powder, black pepper, and sea salt. Stir the mixture until all the spices spread evenly. You want a vibrant and aromatic marinade that will add zest to your chicken. Now, let’s marinate the chicken. Place the four boneless, skinless chicken breasts in a resealable plastic bag or a shallow dish. Make sure the container is big enough for the chicken to move around. Pour the marinade over the chicken, ensuring each piece gets coated well. Seal the bag tightly or cover the dish with plastic wrap. Let the chicken marinate in the fridge for at least 30 minutes. For the best flavor, allow it to sit for 2-4 hours. This time helps the chicken absorb the zesty flavors from the marinade. Once marinated, it’s time to grill. Preheat your grill or grill pan over medium-high heat. Make sure it’s hot enough to create nice grill marks on the chicken. Carefully take the chicken out of the marinade. Let any excess marinade drip off before grilling. Discard the leftover marinade to keep things safe. Grill the chicken for about 6-7 minutes on each side. You want it to reach an internal temperature of 165°F (75°C). Look for a beautiful golden brown crust; that’s your cue it’s done. After grilling, let the chicken rest for about 5 minutes. This resting time helps the juices stay inside, making each bite moist and flavorful. For the full recipe, check out the detailed instructions mentioned above. To get the best flavor, you want to let the chicken soak in the marinade. Here are a few tips: - Marinate time: Aim for at least 30 minutes. For a deeper flavor, 2-4 hours is best. - Container choice: Use a resealable bag or a shallow dish. This helps the marinade coat all sides of the chicken. - Poke holes: Use a fork to poke holes in the chicken. This helps the marinade soak in better. Now, let’s talk about consistency. You want your marinade to be smooth. This helps it cover the chicken well. A good mix is key to even flavor. Whisk the ingredients together until no lumps remain. To check if your chicken is done, use a meat thermometer. The internal temperature should reach 165°F (75°C). Look for a nice golden brown crust. This shows that the chicken is cooked well. After grilling, let the chicken rest for five minutes. This step is important. It helps the juices stay inside the meat. When you slice it, you’ll find it moist and flavorful. For a beautiful look, slice the grilled chicken into medallions. Arrange them on a bright plate. Freshly chopped cilantro adds a nice touch. Serve with lime wedges on the side for extra zest. For sides, consider a fresh salad or grilled veggies. They pair well with the zesty flavors. You can also serve it with rice or tortillas to complete the meal. If you want the full recipe, check the earlier section for all the details! {{image_4}} You can switch things up with different citrus fruits. Try using orange or lemon juice instead of lime. Each option gives the chicken a unique taste. Experimenting with citrus can surprise you with fresh flavors. Adding fresh herbs can also enhance your marinade. Consider cilantro, thyme, or parsley. Herbs bring a burst of freshness. Chop them finely and mix them into the marinade. They will add depth and aroma to your dish. If grilling isn’t your style, you can bake the chicken. Preheat your oven to 375°F (190°C). Place the marinated chicken in a baking dish. Bake for 25-30 minutes until cooked through. This method keeps the chicken juicy and tender. For a quick meal, sauté the chicken in a skillet. Heat some oil over medium-high heat. Cook the chicken for about 6-7 minutes per side. This method gives a nice sear and keeps the chicken flavorful. Zesty Lime Chicken pairs well with many side dishes. Serve it with rice or quinoa for a healthy meal. A fresh salad also complements the flavors nicely. Try adding roasted vegetables for more color and taste. When it comes to drinks, consider a light white wine. A crisp Sauvignon Blanc works well. If you prefer non-alcoholic options, serve it with iced tea or lemonade. These beverages enhance the zesty flavors of the chicken. For the full recipe, check out the Zesty Lime Chicken Marinade. To keep your zesty lime chicken marinade fresh, store it in the fridge. Use an airtight container or a resealable bag. This will keep it safe and flavorful for up to a week. If you want to save it for longer, freezing is a great option. Pour the marinade into a freezer-safe bag. Make sure to remove as much air as possible before sealing. It can last up to three months in the freezer. When ready to use, thaw it in the fridge overnight. After cooking your zesty lime chicken, let it cool down. Then, slice it and place it in an airtight container. This will keep it fresh in the fridge for up to four days. To reheat, use the oven or stovetop. If using an oven, set it to 350°F (175°C). Cover the chicken with foil to keep it moist. Heat for about 15 minutes. On the stovetop, warm it in a pan over low heat. Adding a splash of water or broth helps retain moisture and flavor. For a more flavorful meal, consider using the leftover chicken in salads or wraps. The chicken needs to marinate for at least 30 minutes. This time allows the flavors to soak in. However, I suggest marinating for 2 to 4 hours for the best taste. If you have more time, consider marinating overnight. This will make the chicken even more flavorful and tender. Yes, you can! This marinade works great with beef, pork, or tofu. Each protein will absorb the zesty lime flavor well. For beef, try using flank steak or ribeye. For pork, tenderloin or chops are excellent choices. If using tofu, press it first to remove extra water. Then, marinate it just like the chicken. If you don't have fresh lime juice, you can use other citrus juices. Lemon juice is a great substitute. You can also try orange or grapefruit juice. Just remember that the taste will change a bit. For the best results, use a mix of these juices to keep that zingy flavor. For the full recipe, check out the Zesty Lime Chicken Marinade section. In this blog post, I shared how to make Zesty Lime Chicken, starting with quality ingredients like fresh lime juice and olive oil. We explored marinading tips and grilling techniques to ensure flavorful chicken. I also provided options for variations, cooking methods, and serving ideas. By following these steps, you can create a delicious meal that impresses. Remember, great cooking starts with great ingredients. Enjoy your tasty dish!

Zesty Lime Chicken Marinade Flavorful and Easy Guide

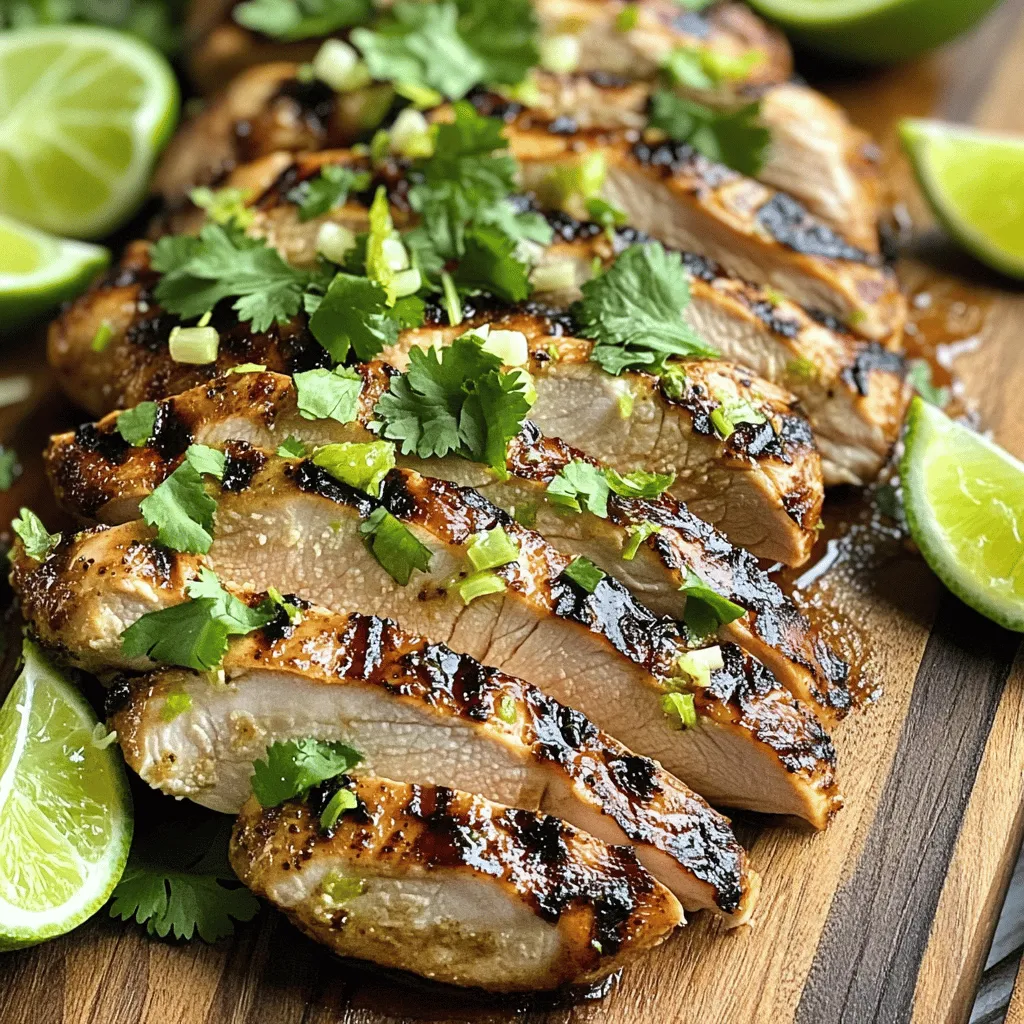
Are you ready to transform your chicken dishes? My Zesty Lime Chicken Marinade is your new go-to recipe! With fresh

- 2 cups fresh spinach, finely chopped - 1 can (14 oz) artichoke hearts, thoroughly drained and roughly chopped - 1 cup plain Greek yogurt - 1/2 cup cream cheese, softened to room temperature - 1/2 cup shredded mozzarella cheese - 1/4 cup grated Parmesan cheese - 2 cloves garlic, finely minced - 1 tablespoon fresh lemon juice - 1 teaspoon onion powder - Salt and freshly ground black pepper, to taste - An assortment of fresh vegetables (like carrots, bell peppers, and cucumber) and whole grain crackers for serving Fresh spinach is rich in vitamins A, C, and K. It also has iron and fiber. Artichokes are high in antioxidants. They support heart health and digestion. Greek yogurt provides protein and probiotics. These help your gut health. Cream cheese adds creaminess but keep it light. Mozzarella cheese offers calcium and is lower in fat. Parmesan adds flavor with fewer calories. Garlic boosts your immune system. Lemon juice gives vitamin C and brightens the taste. Onion powder adds flavor without extra calories. Salt and pepper enhance all the flavors without adding calories. You can swap Greek yogurt for low-fat sour cream if you prefer. Use low-fat cream cheese to cut down on fat. For a dairy-free option, try cashew cream or coconut yogurt. Nutritional yeast can replace Parmesan cheese for a cheesy flavor without dairy. If you want a lower-carb option, serve with sliced bell peppers instead of crackers. You can also add more veggies to bulk it up, like zucchini or broccoli. These changes keep your dip tasty and healthy. You can find the full recipe for a delightful twist on this classic dish. First, preheat your oven to 350°F (175°C). This step is key to making sure your dip cooks evenly. Next, gather all your ingredients. You need fresh spinach, artichoke hearts, Greek yogurt, cream cheese, mozzarella, Parmesan, garlic, lemon juice, onion powder, salt, and pepper. Having everything ready makes cooking easier and more fun. In a large bowl, add the Greek yogurt, softened cream cheese, shredded mozzarella, and grated Parmesan cheese. Use a spatula or mixer to blend these ingredients together. Aim for a smooth and creamy texture. Once mixed, add the finely chopped spinach, chopped artichoke hearts, minced garlic, lemon juice, onion powder, and a pinch of salt and pepper. Gently fold everything together. Make sure every ingredient is well mixed and coated. Now, transfer the creamy mixture into a baking dish. Spread it out evenly with a spatula. Place the dish in your preheated oven and bake for 20-25 minutes. Watch for bubbling edges, which means it’s done. After baking, let the dip cool for a few minutes. Serve it warm with fresh veggies and whole grain crackers for dipping. This dip is perfect for sharing or enjoying alone! For the full recipe, check the earlier section. When you mix your dip, start with the cream cheese. This helps it blend well. Make sure it is softened first. Then, add the Greek yogurt. These two create a creamy base. Use a spatula or mixer to combine them until smooth. Once smooth, fold in the spinach and artichokes gently. This keeps the spinach from breaking down too much. The right dip consistency is key. You want it creamy, but not too runny. If it feels thick, add a splash of lemon juice or a bit more yogurt. This keeps it light and fresh. After baking, the dip will thicken a bit. Check it after serving. If it is too thick, serve with extra veggies or crackers. To impress your guests, focus on presentation. Use a colorful platter for the dip. Sprinkle extra Parmesan cheese on top for a great look. Add a few whole spinach leaves for color. Surround the dip with fresh veggies like carrots and bell peppers. This makes it not just tasty but also beautiful. Your guests will love the vibrant display. Check out the Full Recipe for more tips! {{image_4}} You can easily make a vegan version of this dip. Replace the cream cheese and yogurt with cashew cream or coconut yogurt. Both options give a nice creaminess. Use nutritional yeast instead of Parmesan for that cheesy flavor. This swap adds a boost of B vitamins too. To kick up the flavor, add some spices. A pinch of cayenne pepper or red pepper flakes can bring heat. For a smoky twist, try smoked paprika. Fresh herbs like basil or cilantro also add a bright taste. Experimenting with these flavor boosters can make your dip unique. You can make this dip a full meal by pairing it with whole grain bread or pita. Serve it alongside a salad for a balanced dish. Add protein by including grilled chicken or chickpeas. These pairings turn a snack into a satisfying meal. For the complete guide to making this dip, check out the Full Recipe. After you enjoy your healthy spinach artichoke dip, allow it to cool first. Then, place the dip in an airtight container. It will keep well in the fridge for up to four days. Make sure to label the container with the date. This way, you’ll know when to use it by. To reheat your dip, scoop out the amount you want. Place it in a microwave-safe bowl. Heat it in short bursts of 30 seconds, stirring in between. This prevents hot spots and keeps it creamy. You can also reheat it in the oven at 350°F (175°C) for about 15 minutes. Cover it with foil to avoid burning the top. If you want to store the dip for a longer time, freezing is a great option. Place the cooled dip in a freezer-safe container. It can last for up to three months in the freezer. When you’re ready to eat it, thaw it overnight in the fridge. Reheat as mentioned above, and you’ll have a tasty snack ready to go! For the full recipe, check back and enjoy this guilt-free treat anytime. Yes, you can use frozen spinach. Just make sure to thaw and drain it well. Frozen spinach loses water during freezing, so drain it to avoid a watery dip. This swap is easy and saves time. I love serving this dip warm with fresh veggies. Great options include: - Carrots - Bell peppers - Cucumber Whole grain crackers also pair well. You can even use pita chips for a tasty twist. Arrange everything on a colorful platter for a fun look! To cut more calories, you can do a few things: - Use low-fat cream cheese instead of regular - Swap out mozzarella for a lighter cheese option - Increase the amount of veggies for bulk without adding many calories These changes keep the dip creamy and tasty while making it lighter. You can find the full recipe above for all details! This blog post covered key ingredients for a tasty dip. We explored the unique benefits of each ingredient and offered healthier swaps. You learned step-by-step how to prepare, bake, and serve the dip perfectly. Remember, small changes can make a big impact. Explore variations to suit your taste or dietary needs. Lastly, don't forget about storage tips to keep leftovers fresh. With these strategies, you can enjoy this dip anytime. Keep experimenting and have fun!

Healthy Spinach Artichoke Dip Flavorful and Guilt-Free

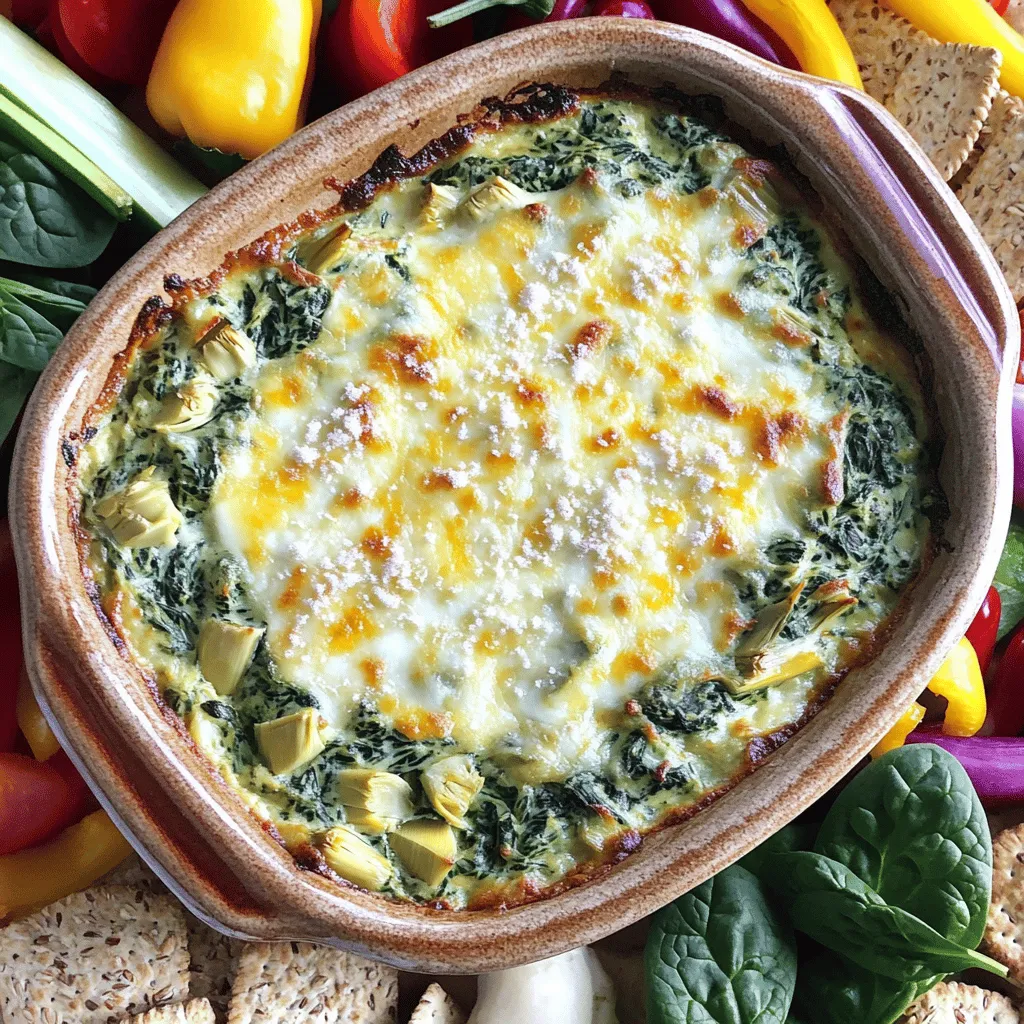
Craving a tasty snack that won’t ruin your diet? You’re in the right place! My Healthy Spinach Artichoke Dip is

- 1 cup glutinous rice - 1 ½ cups coconut milk - ¾ cup granulated sugar - ½ teaspoon sea salt - 2 ripe mangoes, peeled and thinly sliced - 1 tablespoon toasted sesame seeds - 2 tablespoons cooked and toasted mung beans - Fresh mint leaves for garnish Mango sticky rice is simple yet delightful. You only need a few main ingredients to create this sweet treat. Glutinous rice gives the dish its unique texture. Coconut milk adds creaminess and flavor. Sugar sweetens the rice, while sea salt balances the taste. The ripe mangoes bring freshness to the dessert. If you want to add more texture or flavor, consider optional ingredients. Toasted sesame seeds give a nutty crunch. Cooked mung beans add a protein boost. Fresh mint leaves make a lovely garnish and brighten the dish. For the full recipe, check out the *Mango Heaven Sticky Rice Delight*. This dessert is not just tasty, but it also looks stunning on your table! 1. Rinse the glutinous rice well under cold water. This step helps remove excess starch. Rinse until the water runs clear. 2. Soak the rinsed rice in fresh water for at least 4 hours. If you can, soak it overnight for the best texture. 3. After soaking, drain the rice. Place it in a steamer basket lined with cheesecloth or a clean kitchen towel. 4. Set the steamer over a pot of boiling water. Steam the rice for 30 to 40 minutes. It should look translucent and be tender. 1. In a medium saucepan, mix the coconut milk, granulated sugar, and sea salt. 2. Heat the mixture on medium. Stir gently until the sugar dissolves. Do not boil the sauce. This keeps it creamy. 1. Once the rice is done steaming, transfer it to a large mixing bowl. 2. Pour about 1 cup of warm coconut sauce over the sticky rice. Stir gently to combine everything. 3. Let the mixture sit for 15 to 20 minutes. This allows the rice to soak up the sweet coconut flavor. 4. To serve, mold the sticky rice into small portions. You can use a scoop or your hands for this. 5. Arrange the rice portions on serving plates. Top each with sliced mango for a bright look. 6. Drizzle more coconut sauce over the mango and rice for extra flavor. 7. For added crunch and taste, sprinkle toasted sesame seeds and mung beans if you like. 8. Finish by adding fresh mint leaves for a pop of color and flavor. Follow [Full Recipe] for detailed steps. Enjoy this sweet treat! To make the best mango sticky rice, you need ripe mangos. Look for mangos that are slightly soft when you gently press them. Their skin should have a vibrant color, often yellow or red. A sweet aroma near the stem also shows ripeness. The best varieties for this dessert are the Alphonso and Haden mangos. These types are sweet and juicy, perfect for pairing with sticky rice. Soaking the glutinous rice is key to great texture. I recommend soaking for at least four hours, but overnight is even better. This allows the rice to absorb water, making it tender when cooked. When it comes to steaming, use a bamboo steamer if you have one. Line it with cheesecloth to prevent rice from falling through. Steam the rice for 30 to 40 minutes until it looks translucent. Presentation matters! Serve the sticky rice in clear glass bowls to show off the layers of mango and rice. For added flair, drizzle more coconut sauce on top. Pair mango sticky rice with sweetened Thai iced tea or a light coconut drink. These beverages complement the dessert's flavors well and elevate the dining experience. {{image_4}} You can add new flavors to mango sticky rice. One great option is pandan extract. This green extract gives a sweet, unique taste. Simply mix a few drops into your coconut sauce. It enhances the dish and adds a lovely color. Another fun idea is to use different fruits. While ripe mango is classic, try using strawberries or kiwi. Their bright colors and flavors can make your dish pop. You can even add a mix of tropical fruits for a fruity twist. For those who prefer vegan options, you can easily modify the coconut sauce. Use a plant-based milk, like almond or oat milk, in place of coconut milk. This keeps the dish creamy and delicious while meeting vegan needs. If you need a gluten-free choice, mango sticky rice is already suitable. Just make sure all ingredients are labeled gluten-free. That way, you can enjoy this treat without worry. Mango sticky rice varies across regions. In Thailand, you might find it served with black sticky rice. This gives a different texture and flavor, making it a fun twist. You can also enjoy this dessert during Thai festivals. It is a popular dish for celebrations. Sharing mango sticky rice brings joy and warmth to gatherings. It connects people through food and culture. For the full recipe, check out the detailed guide. To keep mango sticky rice fresh, store it in an airtight container. Place the sticky rice in the container and cover it with plastic wrap. This helps keep moisture in and prevents it from drying out. You can also layer mango slices on top, but it is best to keep mango and rice separate if not eating right away. The shelf life of mango sticky rice is about 2-3 days in the fridge. After this time, the rice may lose its texture, and the mango can spoil. Always check for any off smells or changes in color before consuming. To reheat sticky rice without losing texture, steam it again. Place the rice in a steamer basket over boiling water. Cover it and heat for about 10 minutes. This method helps restore its soft and chewy feel. If you have leftover mango, keep it fresh by storing it in the fridge. Do not reheat mango, as it can become mushy and lose flavor. Enjoy your mango sticky rice cold or at room temperature for the best taste. You can easily make mango sticky rice vegan by using non-dairy milk. I recommend using almond or coconut milk. These options keep the creamy texture while making the dish dairy-free. Using regular rice changes the texture and taste. Glutinous rice gives sticky rice its chewy quality. Regular rice will be softer and less sticky. The dish may not hold together as well. You can find mango sticky rice at Thai restaurants or specialty dessert shops. Many places offer it as a popular dessert. Check local markets or food festivals for fresh options too. Making mango sticky rice takes about one hour in total. Soaking the rice needs at least four hours, or overnight is best. Cooking the rice and sauce takes about 30 minutes. Mango sticky rice is a beloved Thai dessert. It celebrates the mango harvest season. Traditionally, families serve it during special occasions and festivals. It symbolizes joy and togetherness in Thai culture. Mango sticky rice is a delightful dessert that combines glutinous rice and coconut sauce with ripe mangoes. We explored key ingredients, simple steps, and useful tips for success. You learned about flavor variations and cultural twists, making this dish versatile. Lastly, storing and reheating properly ensures you enjoy this treat longer. Whether you stick to the classic or try new ideas, mango sticky rice is fun to make and share. I hope you feel inspired to create your own delicious version!

Mango Sticky Rice Dessert Easy and Delicious Recipe

Mango Sticky Rice is one of my favorite desserts, and it’s super easy to make! With just a few simple

- Tofu selection and preparation Choose firm tofu for a great texture. Press it for 15 minutes to remove water. Cut it into 1-inch cubes. Toss the cubes with cornstarch for a crispy finish. This helps the tofu fry better and adds a nice crunch. - Fresh vegetables for the stir fry Use vibrant, fresh veggies for color and taste. I like to use: - 1 red bell pepper, sliced - 1 yellow bell pepper, sliced - 1 cup broccoli florets - 1 cup snap peas - 2 medium carrots, thinly sliced - 3 green onions, chopped (whites and greens separated) These vegetables cook quickly and stay crisp in the stir fry. - Sauces and seasonings Flavor is key. For this stir fry, I use: - 3 tablespoons low-sodium soy sauce - 1 tablespoon sesame oil - 1 tablespoon rice vinegar - 3 cloves garlic, minced - 1 tablespoon fresh ginger, grated These ingredients add depth and richness to the dish. The soy sauce ties everything together, while the sesame oil gives it a lovely nutty flavor. For the complete recipe, check out the Full Recipe section. Enjoy the burst of flavors in each bite! Pressing and cutting the tofu Start by pressing the tofu for about 15 minutes. This removes extra water. After pressing, cut the tofu into 1-inch cubes. The size helps it cook evenly. Coating with cornstarch Next, place the tofu cubes in a bowl. Sprinkle 2 tablespoons of cornstarch over them. Gently toss until all pieces are coated. This step makes the tofu crispy when cooked. Initial frying details In a large non-stick pan or wok, heat 1 tablespoon of vegetable oil over medium-high heat. Wait until the oil shimmers before adding the tofu. Texture tips for crispy tofu Cook the tofu for 8-10 minutes. Turn the pieces occasionally. You want them golden brown and crispy on all sides. Once done, remove the tofu and set it aside on a plate. Tips for aromatic infusion In the same pan, add the remaining tablespoon of vegetable oil. When the oil is hot, add minced garlic and grated ginger. Stir quickly for about 30 seconds. This releases their amazing fragrance. Timing for vegetables Now, add sliced red and yellow bell peppers, broccoli florets, snap peas, and sliced carrots. Stir-fry for 5-7 minutes. Keep tossing the ingredients until they are tender but still crisp. Steps for adding sauces Return the crispy tofu to the pan with the vegetables. Pour in the soy sauce, sesame oil, and rice vinegar. Make sure to toss everything gently. Flavor balancing tips Ensure all pieces are coated in the sauce. Sauté for an additional 2-3 minutes. This helps the flavors blend nicely. Garnishing suggestions Add chopped green onion whites and stir-fry for another minute. Serving recommendations Remove the pan from heat. Serve the stir fry hot, garnished with sesame seeds on top. This adds a nice crunch and flavor. Enjoy it with steamed jasmine rice or quinoa for a complete meal! - Ensuring the right heat: Start with high heat. This helps your veggies cook fast. It also keeps them crisp. If the heat is too low, they will steam instead of stir-fry. - Timing for cooking ingredients: Add the ingredients in stages. Start with tofu, then garlic and ginger. Next, add the hard veggies like carrots and broccoli. Finally, toss in soft vegetables like bell peppers and snap peas. This method keeps everything perfectly cooked. - Overcooking vegetables: Avoid cooking veggies too long. They should be bright and crisp. If they lose their color or become mushy, you’ve cooked them too much. - Incorrect tofu frying techniques: Don’t skip pressing the tofu. It removes excess moisture. Also, coat it in cornstarch for a crispy crust. This trick makes all the difference. - Recommended cookware: Use a large, non-stick pan or a wok. They help with even cooking and prevent sticking. - Essential utensils: A spatula is key for tossing ingredients. A sharp knife is important for cutting veggies. A cutting board helps keep your workspace organized. These tips will help you make a delicious Vegetable Stir Fry with Tofu. For the full recipe, check out the earlier section. {{image_4}} You can easily switch up the vegetables in your stir fry. Seasonal veggies add freshness and flavor. Think about using asparagus in spring or pumpkin in fall. Here are some great options: - Zucchini - Cauliflower - Mushrooms - Spinach If you have dietary needs, you can substitute as well. For example, if you’re avoiding nightshades, skip the bell peppers and add green beans or bok choy instead. Tofu is a fantastic protein choice, but you can mix it up! Here are some alternatives: - Chicken or beef for meat lovers - Tempeh for a firmer texture - Seitan for a chewy bite For vegan options, consider using chickpeas or edamame. They add protein and a nice change of taste. The sauce is key to a great stir fry. You can change it up to keep things exciting. Some ideas include: - Teriyaki sauce for a sweet twist - Hoisin sauce for richness - Chili garlic sauce for heat Don’t forget to play with spices! Adding cumin or coriander can bring new depth to your dish. Check out the full recipe for more ideas on flavoring your stir fry! To keep your vegetable stir fry with tofu fresh, store it properly. Here are some tips: - Refrigeration: Allow the stir fry to cool down. Then, place it in an airtight container. It can last for up to 3 days in the fridge. Make sure to label it with the date. - Freezing: For longer storage, you can freeze the stir fry. Use a freezer-safe container or a zip-top bag. It can stay good for about 2 months. However, the texture of the vegetables may change after freezing. When it's time to enjoy your stir fry again, here are the best ways to reheat: - Best Methods: The microwave is quick and easy. Heat for 1-2 minutes, stirring halfway. Alternatively, use a skillet on medium heat. This keeps the crispy texture of the tofu. - Maintaining Texture and Flavor: Add a splash of water when reheating in the microwave. This keeps the veggies moist. If using a skillet, stir gently to avoid breaking the tofu. Knowing how long your stir fry will last is important: - Duration for Safe Consumption: If properly stored in the fridge, it will be safe for 3 days. In the freezer, it can last for 2 months. Always check for any off smells or changes in color before eating. Fresh ingredients ensure a tasty meal! For the full recipe, you can refer back to the Veggie Delight Tofu Stir Fry section. To make this stir fry gluten-free, avoid soy sauce made with wheat. Use tamari sauce instead. Tamari gives a similar taste without gluten. Always check labels for hidden gluten in sauces. Cornstarch is naturally gluten-free, so it’s a great choice for coating tofu. Yes, you can prep this dish ahead. Chop your veggies and press the tofu the night before. Store them in airtight containers in the fridge. Just remember to cook everything fresh when you’re ready to eat. This helps keep the veggies crisp and the tofu tasty. Firm or extra-firm tofu works best for stir fry. These types hold their shape and crisp up nicely. Silken tofu is too soft and won’t work well here. Always press the tofu first to remove extra moisture. This step helps achieve a crispy texture. Absolutely! This recipe is great for meal prep. You can portion the stir fry into containers. Use separate containers for rice or quinoa. This keeps everything fresh and tasty. Store in the fridge for up to four days. Just reheat before eating. Yes, frozen vegetables can work well. They are often picked at peak freshness. However, thaw them before cooking. This helps avoid excess water in your stir fry. Stir-fry them briefly to keep them crunchy. Enjoy the ease of frozen veggies on busy nights! In this blog post, we explored how to make a delicious stir fry with tofu. We discussed selecting the right tofu and fresh veggies, plus various sauces and seasonings. I shared step-by-step instructions for preparing and cooking the tofu. We also covered tips to avoid common mistakes and how to store your dish correctly. Remember, stir fry is easy and fun to make. Now you can confidently create your own tasty version, packed with flavor! Enjoy experimenting with variations and share your results!

Vegetable Stir Fry with Tofu Flavorful and Easy Meal

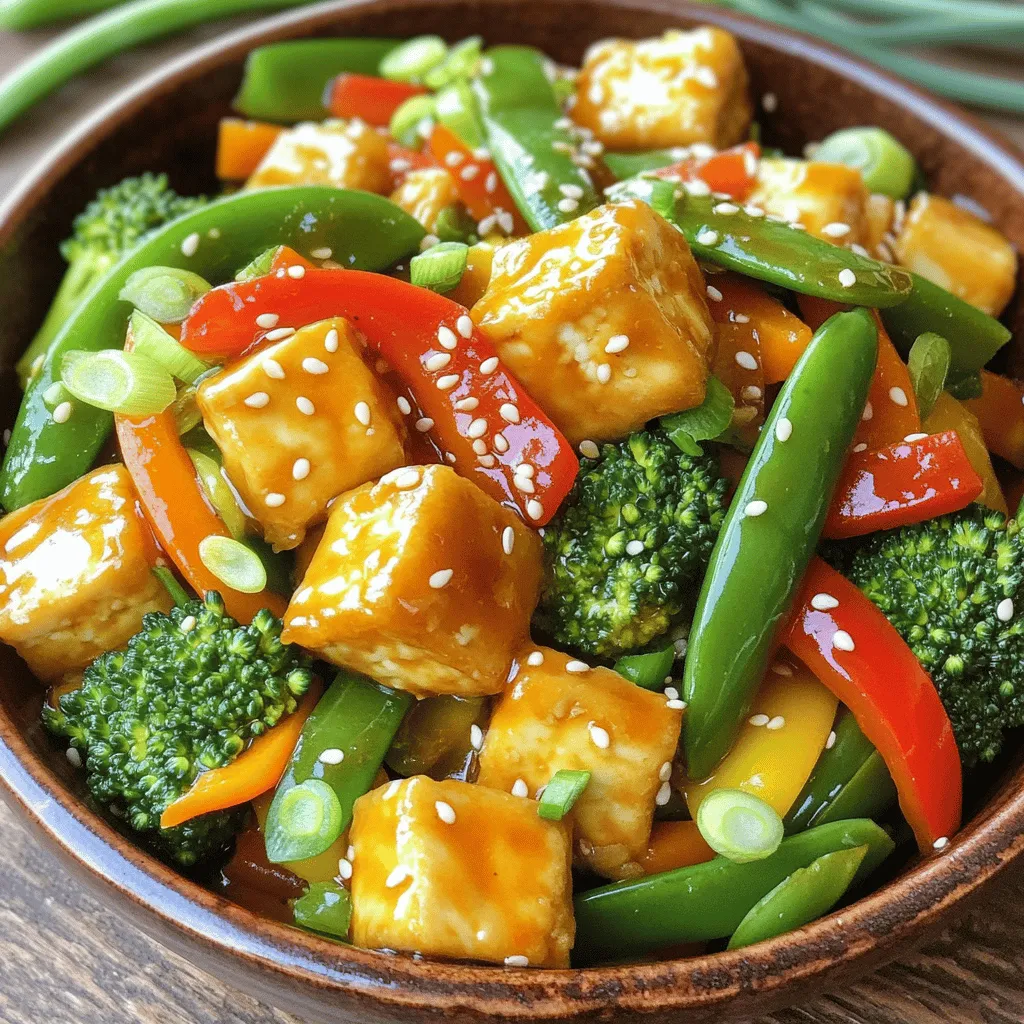
Looking for a quick and tasty meal? You’ve found it! This Vegetable Stir Fry with Tofu is not only easy

To make these amazing stuffed zucchini boats, gather the following: - 4 medium zucchinis - 1 cup cooked quinoa (preferably chilled) - 1 cup cherry tomatoes, halved - 1/2 cup black olives, pitted and diced - 1/2 cup feta cheese, crumbled - 1/4 cup red onion, finely chopped - 2 cloves garlic, minced - 1 teaspoon dried oregano - 1 teaspoon dried basil - 2 tablespoons olive oil (divided) - Salt and pepper to taste - Fresh parsley, chopped, for garnish You’ll need some basic kitchen tools to make this dish: - Sharp knife - Cutting board - Large baking dish - Medium skillet - Spoon for scooping - Measuring cups and spoons Garnishing makes dishes pop! Consider these options: - Lemon wedges for a fresh zing - Extra crumbled feta cheese for added richness - A drizzle of balsamic glaze for a touch of sweetness - Fresh basil leaves for a fragrant finish These ingredients and tools will help you create tasty stuffed zucchini boats. Enjoy the cooking process and let your creativity shine! For the complete recipe, check out the Full Recipe section. Start by preheating your oven to 375°F (190°C). This will get it ready for baking. Next, take each zucchini and slice it in half lengthwise. Use a spoon to scoop out the center. Leave some flesh inside to keep the shape of the boat. Set the scooped-out pulp aside. You will use it in the filling. Brush the cut sides of the zucchini with olive oil. Sprinkle some salt and pepper on top to add flavor. Place the zucchini halves in a baking dish with the cut side facing up. This will help them cook evenly. In a medium skillet, heat the remaining olive oil over medium heat. Once it is hot, add the minced garlic and chopped red onion. Sauté them for about 3-4 minutes until the onion turns translucent and smells great. This step builds a strong flavor base. Now, stir in the reserved zucchini pulp, diced black olives, halved cherry tomatoes, and cooked quinoa. Add the dried oregano and dried basil. Mix everything well and cook for another 5 minutes. This allows the flavors to blend nicely. Season with salt and pepper to taste. After that, remove the skillet from heat. Gently fold in the crumbled feta cheese. Ensure it mixes evenly with the other ingredients. The feta will add a creamy texture to the filling. Take the filling mixture and spoon it into each zucchini boat. Fill them generously, heaping the mixture for a lovely look. Now, place the stuffed zucchini boats in the preheated oven. Bake them for 20-25 minutes. You want the zucchinis to be tender but still hold their shape. Once done, take the baking dish out of the oven. Let the zucchini boats cool for a few minutes. Before serving, add freshly chopped parsley on top. This gives a bright color and fresh taste. For the full recipe, check the details above. Enjoy your tasty stuffed zucchini boats! When choosing zucchini, look for firm and shiny skin. Avoid ones with soft spots. Small to medium zucchinis have the best flavor. A good size is around 6 to 8 inches long. Also, check for a vibrant green color. This means they are fresh and tasty. Cooking time can vary based on zucchini size. Smaller boats may need less time, while larger ones need more. Check them at the 20-minute mark. If they aren’t tender yet, keep baking. You want them soft but not mushy. Each oven is different, so use your eyes and taste to judge. Fresh herbs can boost flavor. Try adding basil or parsley for a fresh taste. You can also use thyme or rosemary for a warm flavor. For a kick, sprinkle some red pepper flakes. Mix in spices like cumin for a twist. Don't be afraid to experiment with your own favorites. {{image_4}} You can easily switch up the filling to keep it vegetarian. Instead of quinoa, try using rice or lentils. You can also add more veggies. Think spinach, bell peppers, or mushrooms. These ingredients add flavor and texture. You can even mix in some corn for sweetness. Always season well to keep the taste bright. If you want more protein, consider adding cooked chicken or turkey. Ground beef or sausage can also work well. Just cook the meat first, then mix it into your filling. This makes the dish heartier and more filling. You can also use tofu for a meat-free protein option. It absorbs flavors nicely and keeps the dish light. To make this dish gluten-free, stick with quinoa or rice as your base. Both are naturally gluten-free. Just check your feta cheese to ensure it is gluten-free. Many brands are safe, but it’s good to verify. You can also skip cheese if you want a dairy-free version. Use nutritional yeast to mimic the cheesy flavor without gluten. For the full recipe, check out the Zesty Mediterranean Stuffed Zucchini Boats. You can store leftover stuffed zucchini boats in the fridge. Place them in an airtight container. They will stay good for about 3 to 4 days. Make sure they cool down before storing. This helps keep their texture. If you want to save more, you can freeze the stuffed zucchini boats. First, let them cool completely. Wrap each boat tightly in plastic wrap. Then, place them in a freezer-safe bag. They can stay frozen for up to 3 months. To enjoy later, just thaw them in the fridge overnight. To reheat your stuffed zucchini boats, you can use an oven or a microwave. For the oven, preheat it to 350°F (175°C). Place the boats in a baking dish and cover with foil. Heat for about 15-20 minutes until warm. If you use a microwave, place them on a microwave-safe plate. Heat for about 2-3 minutes. Check to make sure they are hot all the way through. Enjoy your meal again! For the complete recipe, check out the Full Recipe section. You can tell stuffed zucchini boats are done when they are tender. The zucchini should be soft but not mushy. A fork can easily pierce the flesh. The filling should also be hot and slightly bubbly. Check them after 20 minutes of baking, but they may need up to 25 minutes. Yes, you can make stuffed zucchini boats ahead of time. Prepare the zucchini and filling. Stuff the zucchini boats and cover them. Place them in the fridge for up to 24 hours. When you're ready, just bake them. This saves time on busy nights and keeps the flavors fresh. Stuffed zucchini boats pair well with many sides. A simple salad adds freshness. You can serve them with crusty bread for a filling meal. Rice or quinoa also works nicely, adding more texture. If you want protein, grilled chicken or shrimp complements the dish well. For more ideas, check out the Full Recipe for inspiration. This post covered everything you need for stuffed zucchini boats. We shared the right ingredients and tools for tasty results. You learned the step-by-step process, from preparing the zucchini to stuffing and baking. Tips on picking zucchini and cooking time help you get it just right. We also explored variations for different diets and gave storage advice for leftovers. Remember, stuffed zucchini boats are versatile and fun to make. Enjoy experimenting with flavors and serving them up with pride. Happy cooking!

Stuffed Zucchini Boats Flavorful and Simple Dish

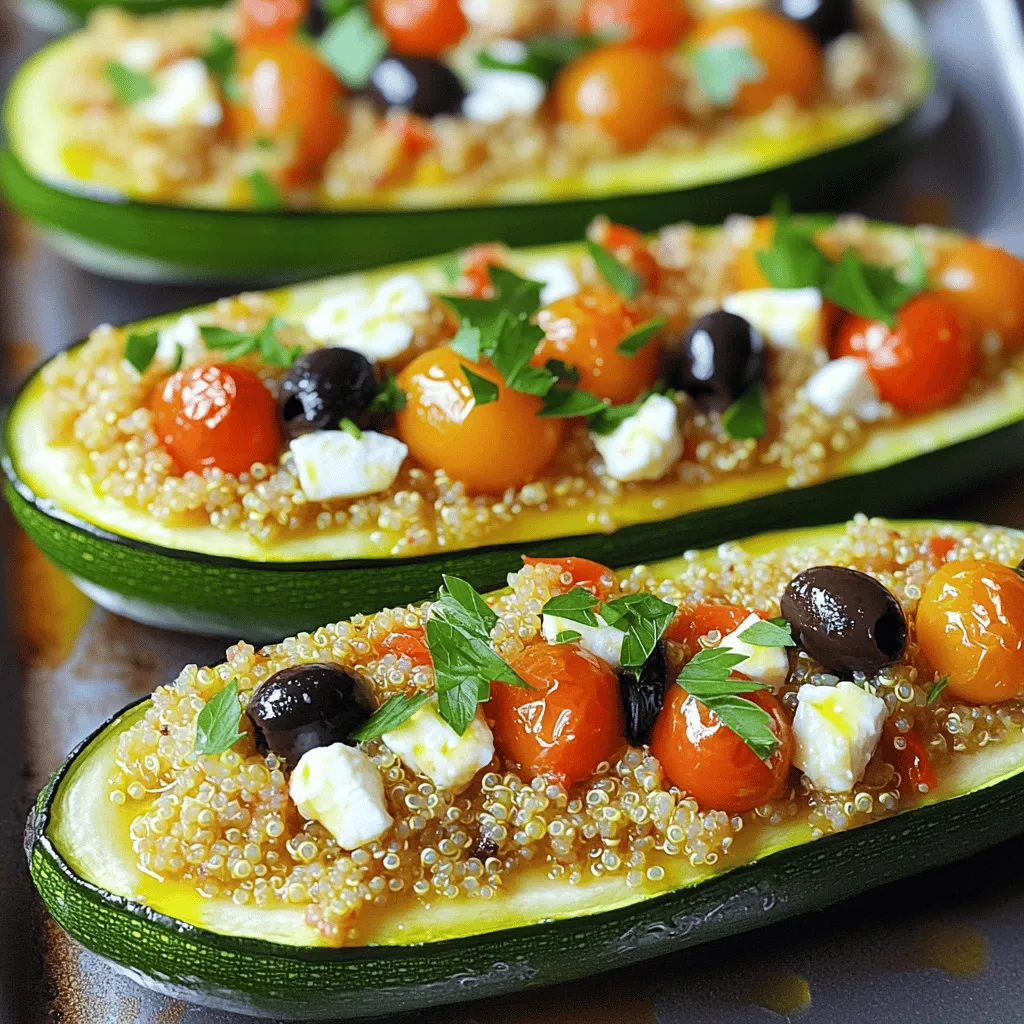
Are you ready to transform your dinner with a dish that’s both simple and delicious? Stuffed zucchini boats are your

To make a delicious peanut butter banana smoothie, you need some simple ingredients. Here’s what you will need: - 2 ripe bananas, sliced and preferably frozen - 2 tablespoons natural peanut butter - 1 cup almond milk (or your preferred milk variety) - 1 tablespoon honey or maple syrup (optional for additional sweetness) - 1/2 teaspoon pure vanilla extract - A pinch of ground cinnamon (optional) - Ice cubes (optional, for an extra thick texture) Using frozen bananas gives the smoothie a creamy texture. This recipe is easy to adapt. You can switch almond milk for any milk you like. Peanut butter adds flavor and protein. Honey or maple syrup makes it sweeter, but it’s not a must. Ground cinnamon adds warmth and spice, while ice cubes can thicken your drink. You can find the full recipe to guide you through the process and enjoy this creamy treat. First, gather all your ingredients. You will need: - 2 ripe bananas, sliced and preferably frozen - 2 tablespoons natural peanut butter - 1 cup almond milk (or your preferred milk variety) - 1 tablespoon honey or maple syrup (optional for additional sweetness) - 1/2 teaspoon pure vanilla extract - A pinch of ground cinnamon (optional) - Ice cubes (optional, for an extra thick texture) Make sure your bananas are frozen. This gives your smoothie a nice, creamy texture. Slice them into smaller pieces for easy blending. If you want extra sweetness, set out honey or maple syrup. Now, it’s time to blend. Place the frozen banana slices into your blender first. This helps them blend smoothly. Next, add the peanut butter and almond milk. If you chose to use honey or maple syrup, add that too. Don't forget the vanilla extract and optional cinnamon. Blend all the ingredients at high speed. You want a smooth and creamy mixture. If needed, stop the blender and scrape down the sides. This ensures everything mixes well. Once blended, taste your smoothie. If it’s not sweet enough for you, feel free to add more honey or maple syrup. Blend again briefly to mix in the extra sweetness. If the smoothie is too thick, add a bit more almond milk. For a thicker smoothie, you can add ice cubes and blend again. When it’s the perfect consistency, pour your smoothie into glasses or bowls. Enjoy your delicious creation! For a fun twist, check out the Full Recipe for more tips on presentation. To make your peanut butter banana smoothie creamy, use frozen bananas. They add thickness and chill. Slice ripe bananas and freeze them overnight. This step is key for a smooth blend. You can also add a bit of almond milk slowly while blending. This helps reach your desired creaminess. If you need swaps, here are some easy ideas: - Use any nut butter instead of peanut butter. Almond or cashew butter works great. - Swap almond milk for oat milk or regular milk if you prefer. - If you want a sweet touch, use agave syrup instead of honey or maple syrup. - Add spinach or kale for a green boost without changing the taste too much. How you serve your smoothie matters. Pour it into tall glasses or beautiful bowls. Top with fresh banana slices and crushed peanuts. This adds color and crunch. For a fancy touch, drizzle a little extra peanut butter on top. You can also sprinkle some cinnamon for added flair and flavor. Enjoy the creamy goodness! {{image_4}} You can boost your smoothie by adding protein. Try a scoop of protein powder. You can also mix in Greek yogurt for creaminess and extra protein. If you want more flavor, add cocoa powder for a chocolate twist. A tablespoon of chia seeds adds healthy fats and fiber, too. To make this smoothie dairy-free, use almond, soy, or oat milk. All these options work well. If you want it vegan, skip honey. Instead, use maple syrup or agave syrup. This way, you keep it sweet and plant-based. In summer, mix in strawberries or blueberries for a fruity burst. For fall, add pumpkin puree and spices like nutmeg or ginger. In winter, try adding a few slices of pear. Each fruit gives a new taste and makes it fun to change things up. If you have leftover smoothie, pour it into a clean, airtight container. Seal it tightly. Store the container in the fridge. Consume it within one day for the best taste. If you notice separation, just shake it well before drinking. You can freeze extra bananas for later use. Peel and slice them first. Place the slices in a single layer on a baking sheet. Freeze until solid, then transfer them to a freezer bag. This way, you have frozen bananas ready for your next smoothie craving. The smoothie tastes best when fresh. If stored, it lasts about one day in the fridge. The frozen bananas keep well for about three months. Using fresh ingredients ensures great flavor and nutrients. Always check for any off smells or changes in color before use. This smoothie packs a punch! A typical serving gives you about: - Calories: 300 - Protein: 8 grams - Fat: 14 grams - Carbohydrates: 37 grams - Fiber: 4 grams - Sugar: 15 grams These numbers may vary based on your ingredients. For example, using almond milk lowers calories. Yes, you can! You can choose any milk you like. Options include dairy milk, almond milk, soy milk, or oat milk. Each type of milk will change the flavor a bit. Experiment to find your favorite! Making this smoothie vegan is simple! Just use plant-based milk, like almond or oat milk. You can also substitute honey with maple syrup or agave nectar for sweetness. This way, you keep it tasty and plant-based. Frozen bananas are best for smoothies! They give a creamy texture and a chill that fresh bananas can’t match. If you use fresh bananas, add ice cubes to achieve that creaminess. Absolutely! Adding a handful of spinach or kale gives you extra vitamins. These greens blend well and won’t change the flavor much. You can boost nutrition without losing the delicious taste of the smoothie. For the full recipe, check out the section above! This blog post covered how to make a tasty Peanut Butter Banana Smoothie. We looked at the ingredients you need, step-by-step instructions, tips for the best results, and fun variations. I also shared how to store your smoothie and answered some common questions. Enjoy creating your own smoothie! It's simple, healthy, and perfect for any time.

Peanut Butter Banana Smoothie Creamy and Delicious Drink

If you crave a tasty treat that packs a nutritious punch, look no further. This Peanut Butter Banana Smoothie combines

For tasty grilled vegetable skewers, choose fresh, colorful veggies. Here are the main ones you need: - 1 medium zucchini, sliced into thick rounds - 1 large red bell pepper, cut into 1-inch chunks - 1 large yellow bell pepper, cut into 1-inch chunks - 1 medium red onion, cut into wedges - 8 oz cherry tomatoes, whole - 8 oz baby portobello mushrooms, stems removed A good marinade makes your skewers shine. Here’s what you need for that zesty flavor: - 3 tablespoons extra virgin olive oil - 2 tablespoons balsamic vinegar - 2 cloves garlic, finely minced - 1 teaspoon dried oregano - 1 teaspoon smoked paprika - Salt and freshly ground black pepper to taste Want to add a twist? Here are some optional seasonings to make your skewers special: - Fresh herbs like thyme or rosemary - A dash of lemon juice for brightness - A sprinkle of red pepper flakes for heat Using fresh, high-quality ingredients makes all the difference. Remember, you can find the Full Recipe for a complete guide. Happy grilling! To make the marinade, grab a big bowl. Whisk together three tablespoons of olive oil and two tablespoons of balsamic vinegar. Add two minced garlic cloves, one teaspoon of dried oregano, and one teaspoon of smoked paprika. Sprinkle in salt and black pepper to taste. Mix it all until smooth. This marinade gives your veggies a tasty kick. Now, add your chopped vegetables to the bowl. Use zucchini, red and yellow bell peppers, red onion, cherry tomatoes, and baby portobello mushrooms. Toss them gently to coat every piece in the marinade. Cover the bowl with plastic wrap. Let the veggies sit for at least 30 minutes. This step lets the flavors soak in, making them super delicious. Next, preheat your grill to medium-high heat. Make sure the grill grates are clean and lightly oiled. While waiting, take the marinated veggies and thread them onto skewers. Alternate the vegetable types for a colorful look. Use either metal skewers or soaked bamboo ones. Once your grill is hot, place the skewers on it. Grill for 10 to 15 minutes. Turn them now and then for even cooking. Look for a nice char on the veggies. After grilling, let the skewers cool for a few minutes. Add fresh basil leaves on top before serving. Enjoy your zesty grilled vegetable skewers! To get the best flavor, start with a clean grill. A clean grill stops food from sticking. Preheat your grill to medium-high heat. This heat helps the veggies cook evenly. Use metal or soaked bamboo skewers for easy handling. Soak bamboo skewers in water for 30 minutes. This helps prevent them from burning. Cook your vegetable skewers for 10-15 minutes. Turn them every few minutes for even cooking. Look for a nice char and tender texture. If veggies are too close, they may steam instead of grill. You want a nice grill mark on each piece. If your grill gets too hot, lower the heat. You want to avoid charring the outside too quickly. One common mistake is overcooking the vegetables. This can make them mushy. Be careful not to overcrowd the skewers. Too many veggies can block heat and make cooking uneven. Also, do not skip marinating. This step adds flavor and moisture. Lastly, let the skewers rest after grilling. This helps the flavors settle before you dig in. For the full recipe, check out the Zesty Grilled Vegetable Skewers. {{image_4}} You can easily make these skewers vegan. All the ingredients are plant-based. Use a mix of your favorite veggies. Try adding eggplant or asparagus for a tasty twist. These skewers pack a lot of flavor and color. They are perfect for any vegan meal. This recipe is naturally gluten-free. You don’t need to change any ingredients. Just make sure the marinade ingredients are gluten-free. Most olive oils and vinegars are safe. Enjoy these skewers with your gluten-free friends. You can switch up the marinade for fun. If you want a spicy kick, add chili flakes to the mix. A squeeze of lemon juice gives a fresh taste. Try using soy sauce for a savory flavor. Experiment with herbs like thyme or rosemary too. Each change brings a new flavor to your skewers. For ideas, check the Full Recipe. Store leftover skewers in an airtight container. This keeps them fresh. You can place them in the fridge for up to three days. If you want to keep them longer, consider freezing. To reheat, place skewers on a baking sheet. Preheat your oven to 350°F. Heat them for about 10 minutes. You can also use a microwave. Heat in short bursts to avoid overcooking. If you freeze the skewers, wrap them tightly in plastic wrap. Then, place them in a freezer bag. They can last up to three months. When ready to eat, thaw overnight in the fridge before reheating. This keeps the taste and texture nice. For the full recipe, check back to ensure you have everything you need. I love using a mix of veggies for grilling. The best choices include zucchini, bell peppers, onions, and mushrooms. Cherry tomatoes add a nice touch too. These veggies grill well and taste great. You can also try asparagus and eggplant for variety. Always choose fresh, firm vegetables for the best flavor. I recommend marinating the vegetables for at least 30 minutes. This time allows the flavors to soak in deeply. If you have more time, you can marinate them for up to 2 hours. Just avoid marinating too long, as some veggies can become mushy. The goal is to enhance their natural taste. Yes, a stovetop grill pan works great! It gives you nice grill marks and cooks the veggies well. Just preheat the pan and lightly oil it before adding the skewers. The cooking time may be a bit shorter, so keep an eye on them. Enjoy the same tasty results right in your kitchen! This post covered everything you need for delicious grilled vegetable skewers. We discussed fresh veggies, marinade, and flavor options. I shared step-by-step instructions and handy tips for perfect grilling. We also explored storage tips for leftovers and answered common questions. Grilling is simple and fun. With these ideas, you can enjoy tasty, healthy meals. Try new flavors and make it your own! Happy grilling, and may your skewers always be a hit.

Grilled Vegetable Skewers Simple and Tasty Recipe

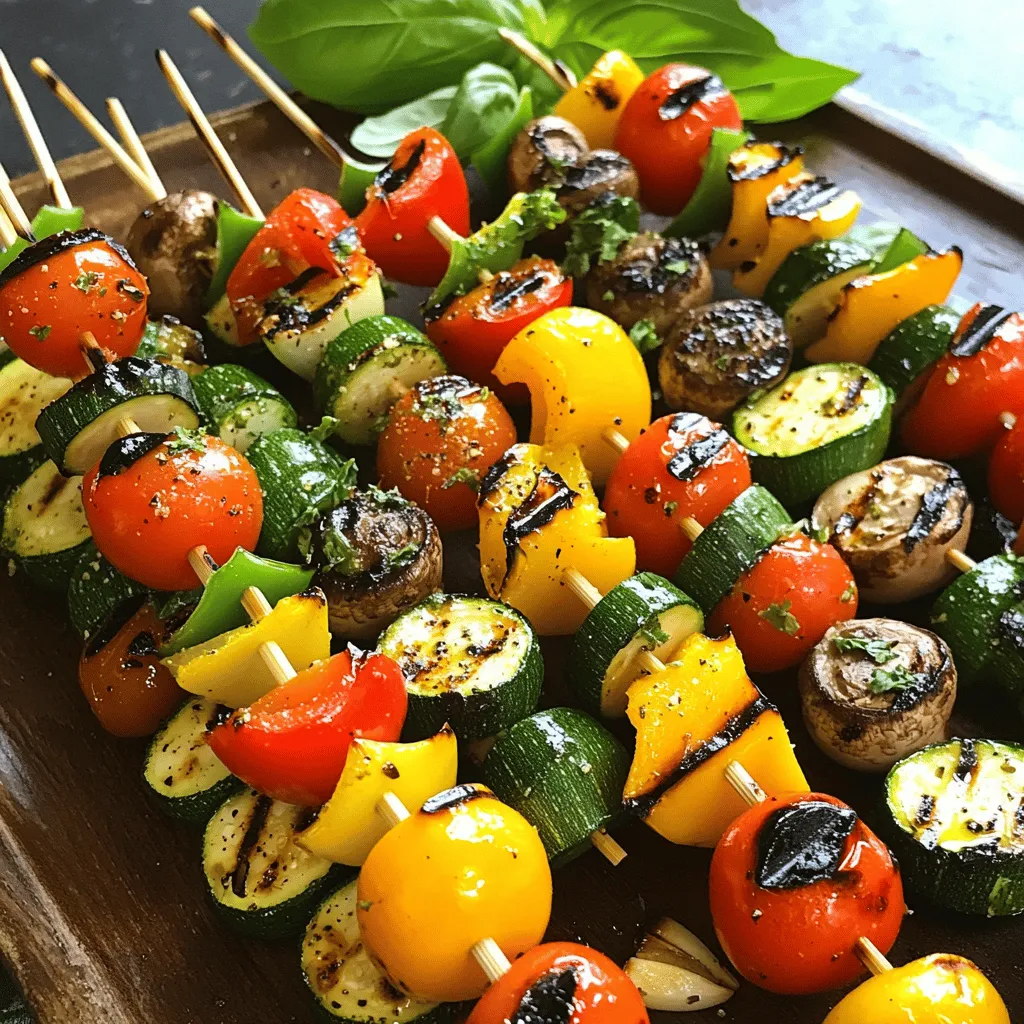
Are you ready to elevate your grilling game? Grilled vegetable skewers are a simple and tasty way to enjoy fresh

To make the best pizza dough, you need simple ingredients. Here’s what you will need: - 2 ½ cups all-purpose flour - 1 teaspoon instant yeast - 1 teaspoon sugar - 1 teaspoon salt - ¾ cup warm water (about 110°F or 43°C) - 1 tablespoon olive oil - Extra flour for dusting These ingredients work together to create soft and tasty dough. The yeast helps it rise, while the flour gives it structure. You can add fun flavors to your dough! Here are some ideas: - 1 teaspoon garlic powder - 1 teaspoon dried oregano - 1 teaspoon dried basil - A pinch of crushed red pepper flakes Mix these in with the dry ingredients. They add extra flavor to your crust, making it special. Using the right tools makes cooking easier. For this recipe, you will need: - Large mixing bowl - Fork or hands for mixing - Clean surface for kneading - Damp cloth or plastic wrap for covering - Rolling pin (optional) - Pizza stone or baking sheet Having these tools ready will help you make your dough with ease. Enjoy the process, and soon you'll have fresh homemade pizza dough! For the complete recipe, check out the Full Recipe. Start by gathering your ingredients. You need flour, yeast, sugar, and salt. In a large bowl, mix 2 ½ cups of all-purpose flour with 1 teaspoon of instant yeast, 1 teaspoon of sugar, and 1 teaspoon of salt. Stir them well. Mixing these dry ingredients evenly helps the dough rise properly. Next, you’ll combine the wet and dry parts. Make a well in the center of your dry mixture. Pour in ¾ cup of warm water and 1 tablespoon of olive oil. Warm water helps activate the yeast. Use a fork or your hands to stir it all together. Mix until you see a shaggy dough forming. This is the start of your pizza dough. Now, it's time to knead. Transfer the dough to a lightly floured surface. Knead the dough for about 8-10 minutes. Sprinkle more flour as needed to keep it from sticking. You want the dough to be smooth and elastic. Once done, shape it into a ball. Place it in a bowl coated with olive oil. Cover it with a damp cloth. Let it rise for about 1 hour in a warm spot. After it doubles in size, your dough is ready to use! For the full recipe, check out the Easy Peasy Homemade Pizza Dough section. To get the best dough texture, start with fresh ingredients. Use high-quality flour for a strong base. Mix the dry ingredients well before adding water. This helps the yeast activate better. When kneading, look for a smooth and elastic feel. If the dough sticks to your hands, sprinkle more flour. Knead until it feels soft and silky. Letting the dough rest is key. Cover it well to keep it moist. Place it in a warm area, away from drafts. A warm oven (turned off) works well. Allow the dough to rise until it doubles in size. This usually takes about an hour. Watch for bubbles forming in the dough, which shows it's ready. One mistake is not measuring ingredients properly. Use dry measuring cups for flour and liquids. Another mistake is skipping the kneading step. This step builds gluten, giving the dough strength. Avoid using cold water; it slows yeast growth. Lastly, don’t rush the rising time. A good rise makes a big difference in your pizza. {{image_4}} You can make pizza dough gluten-free. Use a blend of gluten-free flour. Mix it with the same yeast, sugar, and salt as in the regular dough. Add xanthan gum for better texture. This helps bind the dough. Follow the same steps from the Full Recipe. It will rise and bake like regular dough. Whole wheat flour adds a nutty flavor and extra nutrients. Replace half of the all-purpose flour with whole wheat flour. Keep the other ingredients the same. The dough will be denser and richer. You may need to add a bit more water. This dough works well for a hearty pizza base. You can spice up your dough with flavors. For herb-infused dough, add dried herbs like oregano or basil to the dry mix. For garlic flavor, mix minced garlic into the wet ingredients. These options make your crust delicious. Experiment with different spices to find your favorite. If you have leftover pizza dough, store it in a bowl. Lightly coat the bowl with olive oil. Cover the bowl with plastic wrap or a damp cloth. This will keep the dough moist. Place it in the fridge for up to three days. When you are ready to use it, take it out to warm up. Let it sit for about 30 minutes before rolling it out. You can freeze pizza dough for later use. First, shape the dough into a ball. Wrap it tightly in plastic wrap. Then place it in a freezer bag. Label the bag with the date. The dough can stay frozen for up to three months. When you want to use it, move it to the fridge overnight. Let it thaw slowly and rise at room temperature for about an hour. To reheat leftover pizza, use your oven for the best results. Preheat the oven to 375°F (190°C). Place the pizza on a baking sheet. Heat for about 10-15 minutes. This keeps the crust crispy. You can also use a skillet. Heat it over medium heat, then cover it. Cook for about 5-8 minutes. This method warms the pizza without making it soggy. Enjoy your tasty leftovers! Yes, you can make pizza dough ahead of time. To do this, prepare the dough as usual. After kneading, let it rise until it doubles in size. Then, punch it down and shape it into a ball. Wrap it tightly in plastic wrap and store it in the fridge for up to 3 days. When you're ready to use it, take it out and let it warm up for about 30 minutes. This gives the dough a nice texture when you roll it out. If you don’t have all-purpose flour, you can use bread flour. It gives the dough a chewier crust. You can also try whole wheat flour for a healthier option. Just remember, whole wheat flour needs extra water as it absorbs more. For a gluten-free option, substitute with a gluten-free flour blend. Make sure it has xanthan gum to help with texture. To check if your dough has risen enough, look for it to double in size. You can gently poke the dough with a finger. If the indentation stays, it is ready. If it springs back, give it more time. The dough should feel light and airy, showing that the yeast has done its job well. Trust your senses, and you will get the best results! Homemade pizza starts with the right dough. We covered essential ingredients, equipment, and step-by-step mixing. I shared tips to avoid mistakes and achieve the best texture. You can also explore dough variations like gluten-free or flavored options. Plus, I showed you how to store dough for later use. With these insights, you can make delicious pizza right at home, every time. Enjoy your pizza-making journey!

Easiest Homemade Pizza Dough Quick and Simple Recipe

Are you ready to make the best pizza dough of your life? In this guide, I’ll show you how to

Older posts
Newer posts
← Previous Page1 … Page63 Page64 Page65 … Page91 Next →

dsad

© 2025 recipesstation • Built with GeneratePress

Our Policies

  • Copyright Policy
  • Cookie Policy
  • GDPR Policy
  • Privacy Policy
  • Disclaimer
  • Terms Of Use

More Information

  • Home
  • About
  • Contact
  • Appetizers
  • Dessert
  • Dinner
  • Drinks
©2025, recipesstation About Back To Top