![When choosing mangos, look for ripe ones. They should feel slightly soft when you press them gently. The skin color can vary, but it should have some yellow or red tones. A ripe mango smells sweet near the stem. These traits ensure your salsa tastes fresh and sweet. Here’s what else you need for a delicious mango salsa: - 2 ripe mangos, diced into small cubes - 1 small red onion, finely chopped for sweetness - 1 red bell pepper, diced for crunch - 1 jalapeño pepper, deseeded and minced for heat - 1/4 cup fresh cilantro, roughly chopped - Juice of 2 limes for brightness - 1 tablespoon honey for a touch of sweetness - Salt, to taste These ingredients blend well to create a vibrant dip that everyone will love. Want to add some creaminess? You can include: - 1 ripe avocado, diced Adding avocado makes the salsa rich and creamy. It pairs nicely with the other flavors. You can choose to leave it out if you prefer a lighter dip. Enjoy experimenting with your mango salsa! First, gather all your ingredients. You need ripe mangos, red onion, red bell pepper, and jalapeño. Dice the mangos into small cubes. Chop the onion finely to bring sweetness. Dice the red bell pepper for some crunch. Mince the jalapeño pepper and take out the seeds for less heat. Lastly, chop the cilantro and squeeze the limes to get the juice. Optional: dice the avocado for a creamy touch. In a medium bowl, combine the diced mangos, red onion, red bell pepper, and jalapeño. This mix will make your salsa colorful and fresh. Next, add the chopped cilantro. Pour in the lime juice and honey, mixing sweet with tangy. Using a spatula, gently toss everything together. Make sure the mangos and veggies are coated well. Season your salsa with salt to taste. Mix it well to boost the flavor. If you want creaminess, fold in the diced avocado. Be gentle to keep the pieces whole. Once done, cover the bowl with plastic wrap. Let it rest at room temperature for 15-30 minutes. This lets the flavors blend nicely. Serve your mango salsa with tortilla chips or on tacos. Enjoy the fresh taste! Check the Full Recipe for more details. To make the best mango salsa, pick ripe mangos. A ripe mango feels slightly soft when you press it. It should give a little but not be mushy. The skin may have a mix of green and yellow. You want it to smell sweet near the stem. If it’s too hard, let it sit on the counter for a day or two. This helps it ripen nicely. To boost flavors, add fresh lime juice. It brings brightness and balance. You can also experiment with herbs. Try mint or basil for a twist. If you like more heat, add a bit more jalapeño. Taste as you go to find your perfect mix. Honey adds a nice sweetness, but you can use agave syrup too. Adjust salt to make all the flavors pop. Mango salsa shines with tortilla chips. Serve it as a dip for parties. It also pairs well with grilled meats. Try it on chicken or fish for a fresh topping. You can add it to tacos or salads for extra zest. For a fun twist, use it in wraps or sandwiches. The options are endless. For the full recipe, check out the Mango Salsa Fiesta. {{image_4}} You can change your mango salsa to fit your taste. Add diced pineapple for sweetness. Chopped kiwi brings a fun tartness. Try some diced peaches for a juicy twist. Mixing in these fruits adds a tropical vibe. It makes your salsa even more fun and colorful! If you love spice, add more jalapeño or a pinch of cayenne. For a milder flavor, remove all seeds from the jalapeño. You can also swap jalapeños with sweet peppers. This way, you keep the taste without the heat. Your salsa can be as spicy or mild as you want! This mango salsa fits many diets. If you're vegan, skip the honey or use agave syrup. For gluten-free needs, it’s great with corn chips. If you want healthy fats, add diced avocado. Each choice adds unique flavors while fitting your diet. You can enjoy this salsa no matter your eating style! For the full recipe, check out the Full Recipe section. To keep your mango salsa fresh, store it in an airtight container. This helps lock in flavors and moisture. Place the salsa in the fridge right after making it. If you plan to serve it later, use a bowl with a tight lid. This prevents air exposure, which can cause spoilage. Mango salsa lasts about 3 to 5 days in the fridge. After that, the freshness fades, and the flavors change. Always check for any off smells or changes in texture before using. If the salsa looks watery or has brown spots, it's best to throw it away. You can freeze mango salsa if you want to keep it longer. However, the texture may change when thawed. To freeze, use a freezer-safe bag. Remove as much air as possible before sealing. It can last up to 3 months in the freezer. When ready to use, thaw it in the fridge overnight. Use a gentle stir to mix the ingredients back together before serving. For the best taste, try to use the salsa fresh. For more details, check the Full Recipe. You can enjoy mango salsa with many dishes. It pairs well with crispy tortilla chips. Use it as a dip for your next party. You can also add it to grilled chicken or fish. It brightens up tacos and burritos too. You can even top your salads with it for a fresh twist. The flavors of the salsa add a nice zing to any meal. To add more heat, use more jalapeño pepper. You can also try adding diced serrano peppers. These peppers pack a punch! If you want, mix in some crushed red pepper flakes. Another option is to add a dash of hot sauce. Start with a little and taste as you go. This way, you control the spice level. Yes, you can use frozen mango for this recipe. Just make sure to thaw it first. Drain any excess liquid before using. Frozen mango works well, but fresh mango offers the best taste. If you use frozen mango, your salsa might be a bit softer. Still, it will taste great! For the full recipe, check the [Full Recipe]. Mango salsa brings fresh flavors and joy to your meals. We explored how to select ripe mangoes and mix key ingredients. You learned tips for enhancing taste and serving ideas. Remember, you can adjust the recipe for heat and dietary needs. Proper storage helps keep your salsa fresh longer. With this knowledge, you can create a delightful treat. Enjoy your mango salsa with friends and family!](https://recipesstation.com/wp-content/uploads/2025/05/a1f012cd-59a6-4049-8702-ac4aa4edb69a.webp)
Mango Salsa: Fresh and Flavorful Zesty Dip Recipe
Are you ready to bring a burst of sunshine to your table? This Mango Salsa recipe is fresh, flavorful, and
Are you ready to bring a burst of sunshine to your table? This Mango Salsa recipe is fresh, flavorful, and
. Enjoy your cooking! - Start by heating a large skillet over medium heat. - Add unsalted butter and melt completely. Melted butter will create a rich base for our dish. Swirl the pan gently to coat the bottom evenly. This step sets the stage for delicious flavors. - Sauté minced garlic in melted butter for 1-2 minutes. - Ensure garlic turns golden without burning. The garlic adds a wonderful aroma. Stir it often. You want it fragrant and light golden. Burnt garlic can spoil the dish's taste, so keep an eye on it. - Add shrimp in a single layer and season with smoked paprika, salt, and pepper. - Cook for 2-3 minutes per side until shrimp are pink and opaque. Lay the shrimp flat for even cooking. The seasoning enhances the shrimp's natural flavor. Wait for them to turn pink and opaque. This shows they are cooked through. - Drizzle fresh lemon juice and toss to combine. - Transfer to serving dish and garnish with parsley. Lemon juice brightens the dish. Toss gently to mix the flavors. For a nice touch, use fresh parsley. It adds color and freshness. Serve with lemon wedges for extra zest. For the full recipe, check [Full Recipe]. To make the best garlic butter shrimp, keep the heat at medium. This step stops the garlic from burning. Burnt garlic can make the dish taste bitter. I also like using a split non-stick skillet. It makes cleaning up much easier after cooking. Want to spice things up? Add red pepper flakes for a nice kick. You can also use fresh herbs like basil or cilantro. These add a bright twist to the dish and make it even more exciting. For a stunning look, serve the shrimp on a large platter. Arrange lemon wedges on the side for color and flavor. You can also use a shallow dish for a more elegant touch. This makes the meal feel special, perfect for guests or a family dinner. Looking for the full recipe? Check out the [Full Recipe] for all the details! {{image_4}} You can switch up the shrimp in this dish. Try using scallops or chicken breast. Both options will soak up the garlic butter flavor well. For a more luxurious meal, use cooked lobster or crab. These seafood choices add a rich taste and make the dish feel special. Not a fan of shrimp? No problem! Replace shrimp with roasted vegetables, like bell peppers or zucchini. Tofu is another great choice. It absorbs the garlic butter sauce nicely. You can also create a garlic butter sauce for pasta. This adds a hearty twist to your meal. Want to amp up the flavor? Consider adding white wine. It brings depth and a touch of acidity to the sauce. If you prefer a creamier sauce, stir in some heavy cream. This will make the dish richer and more satisfying. Enjoy playing with these variations to find your perfect taste! Store any leftover garlic butter shrimp in an airtight container. This keeps them fresh and tasty. For the best flavor, eat them within 2 days. When you reheat shrimp, do it gently over low heat. This way, the shrimp won’t become rubbery. To keep them moist, add a splash of water or broth while reheating. If you want to freeze the shrimp, lay them in a single layer on a baking sheet. Once they freeze, move them to a freezer bag. For the best taste, use them within 1 month. You can find the full recipe for garlic butter shrimp above. Enjoy cooking! You know shrimp is cooked when it turns pink and opaque. It should feel firm when you touch it. Cooking shrimp too long can make it tough, so watch it closely. The color change is your best guide. Yes, you can use frozen shrimp. Just make sure to thaw them before you start cooking. Thawing helps them cook evenly and taste better. You can thaw shrimp overnight in the fridge or quickly under cold water. Garlic butter shrimp pairs well with many sides. You can serve it with rice, pasta, or crusty bread. These options soak up the tasty garlic butter sauce. They make your meal more filling and delicious. Yes, this dish is gluten-free. All the ingredients in the recipe are naturally free from gluten. You can enjoy this meal worry-free if you have gluten sensitivities. Feel free to add your favorite gluten-free sides! In this blog post, we explored how to create simple garlic butter shrimp. We covered the key ingredients, step-by-step instructions, and tips to perfect your dish. You can also experiment with variations and storage tips to enjoy your shrimp longer. Remember, you can easily swap proteins or make it vegetarian. This dish not only tastes great but also makes a lovely presentation. Enjoy your delicious shrimp with friends or family, and don’t forget to soak up that tasty sauce!](https://recipesstation.com/wp-content/uploads/2025/05/1aa421cf-11e8-410f-a93b-6815449f229f.webp)
Looking for a quick and tasty meal? You’ll love this Simple Garlic Butter Shrimp recipe! With just a few ingredients,
![When making mouthwatering teriyaki chicken, you need a few key ingredients: - 4 boneless, skinless chicken thighs - 1/4 cup low-sodium soy sauce - 2 tablespoons honey - 2 tablespoons rice vinegar - 1 tablespoon sesame oil - 2 cloves garlic, minced - 1 teaspoon fresh ginger, grated - 1 tablespoon cornstarch (optional, for thickening) - 1 tablespoon water (if using cornstarch) - 2 green onions, chopped (for garnish) - Toasted sesame seeds (for garnish) - Steamed rice (for serving) For the best flavor, I recommend using specific brands: - Soy Sauce: Kikkoman or San-J for low-sodium options. - Honey: Local raw honey adds a nice touch. - Sesame Oil: Kadoya or Spectrum for a rich flavor. - Rice Vinegar: Marukan is a trusted choice. These brands ensure quality and flavor in your dish. If you have allergies, here are some easy swaps: - Soy Sauce: Use tamari for gluten-free needs. - Honey: Maple syrup works well for a vegan option. - Sesame Oil: Try olive oil if you're allergic to sesame. - Cornstarch: Arrowroot powder can be a suitable thickener. These substitutions keep the dish tasty while catering to dietary needs. To start, gather your ingredients. You will need low-sodium soy sauce, honey, rice vinegar, sesame oil, minced garlic, and grated ginger. In a medium bowl, mix these ingredients well. Use a whisk to combine them until smooth. This marinade will bring rich flavors to your chicken. Next, take your chicken thighs. Place them in a resealable plastic bag or a shallow dish. Pour the marinade over the chicken, making sure each piece is well coated. Seal the bag tightly or cover the dish with plastic wrap. Refrigerate for at least 30 minutes. For the best flavor, let it marinate for up to 2 hours. This time allows the chicken to soak up all the tasty goodness. Now, it’s time to cook. Preheat your grill or skillet to medium-high heat. If using a skillet, add a little oil to prevent sticking. Remove the chicken from the marinade and set the marinade aside for later. Cook the chicken thighs for about 6-7 minutes on each side. You want the internal temperature to reach 165°F (75°C). The chicken should turn a nice golden brown. After cooking, make the sauce. Bring the reserved marinade to a gentle boil in a small saucepan. If you want a thicker sauce, mix cornstarch with water and stir it into the boiling marinade. Cook for another 2-3 minutes until thick. Once done, brush the chicken with this sauce for extra flavor. Let the chicken rest for about 5 minutes before you slice it. This helps keep all the juices inside. Serve the chicken on rice, drizzle more sauce, and add green onions and sesame seeds to make it look great. This is how you create mouthwatering teriyaki chicken. Check the [Full Recipe] for more details. To cook chicken perfectly, always check the internal temperature. Use a meat thermometer. The chicken should reach 165°F (75°C). This ensures it is safe to eat. Cooking time may vary based on thickness. Thin chicken cooks faster than thick pieces. If you cook too long, the chicken can become dry. A great marinade makes teriyaki chicken full of flavor. Combine soy sauce, honey, and rice vinegar. These ingredients create a wonderful balance of sweet and salty. Minced garlic and grated ginger add depth. Allow the chicken to marinate for at least 30 minutes. For richer flavor, marinate for up to 2 hours. This soaking time helps the chicken absorb all the flavors. Avoid some common mistakes when making teriyaki chicken. First, don’t skip the marinating step. It is key to flavor. Second, don’t use high heat when cooking. Medium-high heat works best for even cooking. Lastly, always reserve some marinade to make sauce. This adds extra flavor when you glaze the chicken. Following these tips will help you create mouthwatering teriyaki chicken every time. For the full recipe, check the details provided. {{image_4}} You can switch chicken for tofu or pork. Tofu absorbs flavors well. Use firm tofu for a nice texture. Just marinate and cook the same way. Pork, like tenderloin, also works great. It has a natural sweetness. Cook it until it reaches 145°F (63°C) for safe eating. For a meat-free dish, use plant-based proteins. Tempeh or seitan can replace chicken. Both offer great texture. Marinate them just like chicken. You can even use veggies like bell peppers or mushrooms. Grill or stir-fry them until tender. Serve over rice or noodles for a filling meal. Teriyaki chicken is versatile. Try it in wraps for a fun twist. Use lettuce leaves or tortillas. Add fresh veggies for crunch. You can also create rice bowls. Layer rice, chicken, and steamed veggies. Drizzle with extra teriyaki sauce for flavor. These options make meals quick and fun! For the full recipe, check out the complete cooking guide. To keep your teriyaki chicken fresh, store it in the fridge. Use an airtight container. It stays good for about 3 to 4 days. Make sure the chicken cools down before sealing. This helps keep it juicy and tasty. If you have leftover teriyaki chicken, freezing is a great option. Place it in a freezer-safe bag or container. Remove as much air as you can. The chicken can last for up to 3 months in the freezer. When you’re ready to eat it, thaw it overnight in the fridge for best results. To reheat teriyaki chicken, you have a few options. The microwave is quick; just cover it and heat in short bursts. If you want a crisp texture, use a skillet over medium heat. Add a splash of water to avoid drying out. Heat until the chicken is warm throughout. Enjoy your flavorful dish again! For the full recipe, refer to the detailed steps above. To make teriyaki chicken less salty, use low-sodium soy sauce. You can also add more honey or vinegar to balance the saltiness. Another option is to dilute the sauce with water before using it on your chicken. This helps keep the flavors while reducing salt. Yes, you can use chicken breast instead of thighs. Chicken breast will be leaner, so adjust the cooking time. Cook them until they reach 165°F (75°C). Thighs are juicier, while breasts might dry out if overcooked. Keep an eye on them for best results. For the best flavor, marinate the chicken for at least 30 minutes. If you have more time, marinate up to 2 hours. This allows the chicken to soak in the delicious flavors of the marinade. Don’t marinate too long, or the texture may change. You can serve teriyaki chicken with steamed rice, vegetables, or salads. It also pairs well with stir-fried veggies or noodles. For a fun twist, try it in wraps or rice bowls. Each option enhances the meal and complements the chicken. Yes, you can make the teriyaki sauce ahead of time. Store it in an airtight container in the fridge for up to a week. When ready to use, simply reheat it on the stove. This saves time on busy days and lets you enjoy your tasty teriyaki chicken. For the full recipe, check out the detailed instructions above. In this article, we covered the key ingredients for teriyaki chicken, plus brands and substitutes. We shared easy steps for preparing and cooking, with tips for perfect chicken. Variations for proteins and storage tips make your meal flexible. Teriyaki chicken can fit any taste. You can enjoy it your way! Happy cooking!](https://recipesstation.com/wp-content/uploads/2025/05/da718994-0739-406f-b72a-557fbe7f1bf6.webp)
Are you ready to impress with a dish everyone loves? This easy and tasty teriyaki chicken recipe will have your
![To make savory quinoa stuffed peppers, you will need the following items: - 4 large bell peppers (pick your favorite colors) - 1 cup quinoa, rinsed and drained - 2 cups vegetable broth (or water) - 1 cup black beans, rinsed and drained - 1 cup corn kernels (fresh, frozen, or canned) - 1 small red onion, finely chopped - 2 cloves garlic, minced - 1 teaspoon ground cumin - 1 teaspoon chili powder - Salt and freshly ground black pepper, to taste - 1 cup diced tomatoes (fresh or canned) - 1 cup shredded cheese (cheddar, mozzarella, or your choice) - Fresh cilantro, chopped When using canned black beans, rinse them well. This helps to remove excess sodium. If using frozen corn, make sure it is thawed before adding. Choose cheese based on your taste preference but check for freshness. Fresh herbs, like cilantro, should be washed and dried to retain their flavor. You can swap quinoa for brown rice or farro. For a vegan version, leave out the cheese or use a dairy-free alternative. Instead of black beans, try pinto beans or lentils for a different flavor. If you want more spice, add jalapeños or diced green chilies. For a unique twist, include chopped spinach or kale in your filling for added nutrition. For the full recipe, please refer to the [Full Recipe]. First, you need to prepare the bell peppers. Cut off the tops and remove the seeds. You can save the tops for a fun garnish later. Make sure the peppers stand upright. This helps them hold the filling well. Next, cook the quinoa. In a medium pot, mix the rinsed quinoa with vegetable broth. Bring it to a boil, then lower the heat. Cover it and let it simmer for about 15 minutes. The quinoa should look fluffy when it’s done. Now, it’s time to sauté the veggies. Heat a splash of oil in a large skillet over medium heat. Add the chopped red onion and minced garlic. Stir them for about 3-4 minutes, until the onion is soft and clear. This step adds great flavor. After that, add the black beans, corn, cumin, chili powder, and diced tomatoes to the skillet. Stir well to mix everything. Gently fold in the fluffy quinoa, and season with salt and pepper. Let it simmer for 5 minutes to blend the flavors. It’s time to stuff the peppers! Spoon the quinoa filling into each pepper. Pack it down a bit to fit it all in. Place the stuffed peppers in a baking dish. If you have leftover filling, scatter it around the peppers for extra taste. Finally, sprinkle cheese over the tops of the peppers. Cover the dish with foil and bake at 375°F (190°C) for 25 minutes. Remove the foil and bake for another 10-15 minutes. The peppers should be soft, and the cheese bubbly. Let them cool for a bit before serving. Garnish with fresh cilantro for a pop of color. Enjoy this healthy meal! For the full recipe, check the section above. To cook quinoa perfectly, start with a 1:2 ratio of quinoa to liquid. I recommend using vegetable broth for added flavor. Rinse the quinoa well to remove its bitter coating called saponin. Bring the broth to a quick boil, then lower the heat and cover. Let it simmer for about 15 minutes. Once done, fluff it with a fork. This simple technique ensures a light, fluffy texture perfect for stuffing peppers. Boost the flavor of your filling by using fresh herbs. Adding chopped cilantro, parsley, or even basil can brighten the dish. Spices like cumin and chili powder give depth and warmth. Don't forget to season with salt and pepper throughout the cooking process. Taste as you go! Adjusting flavors while cooking helps create a balanced dish. Cheese adds a rich, creamy layer to your stuffed peppers. You can use cheddar for a sharp taste or mozzarella for a milder flavor. Feta cheese can add a nice tang if you want something different. For a vegan option, use nutritional yeast or dairy-free cheese. Each type of cheese will bring its unique flavor and texture to the dish. Explore different combinations until you find your favorite! For the full recipe, check out the detailed instructions. {{image_4}} You can easily make this dish vegan. Simply skip the cheese or use a plant-based cheese. For a protein boost, add lentils or chickpeas to the filling. These options still pack great flavor and nutrients. You can also add diced vegetables like zucchini or mushrooms for extra texture. The key is to keep it colorful and tasty. If you want to add meat, ground turkey or chicken works well. Brown the meat first in the skillet before adding other filling ingredients. This adds richness to the dish. You can use beef for a heartier taste. Just remember to drain any excess fat to keep it healthy. Ensure the meat is fully cooked before you stuff the peppers. Quinoa is a fantastic base, but you can switch it up. Use brown rice or farro for a different flavor. Each grain brings its unique texture. If you want a lighter option, try cauliflower rice. It’s low in carbs but still filling. Experiment with what you like best! Each grain will give your stuffed peppers a new twist. For the full recipe, check back to see how these variations fit into your cooking plans. Store leftover savory quinoa stuffed peppers in an airtight container. Keep them in the fridge. They stay fresh for 3 to 5 days. Always allow them to cool before sealing. This helps avoid excess moisture. You can freeze stuffed peppers for later meals. Wrap each pepper tightly in plastic wrap. Then, place them in a freezer-safe bag or container. They can last up to 3 months in the freezer. Thaw them in the fridge overnight before cooking. To reheat, preheat your oven to 350°F (175°C). Place the peppers in a baking dish. Cover them with foil to keep them moist. Heat for about 20 minutes, or until hot throughout. You can also microwave them for 2 to 3 minutes, but the oven keeps them crispy. Enjoy your delicious meal again! Yes, you can use other types of peppers. Bell peppers are popular, but you can try poblano, jalapeño, or banana peppers. Each type adds a unique flavor. Just remember, smaller peppers may need less filling. To make this recipe gluten-free, ensure you use gluten-free vegetable broth. Quinoa is naturally gluten-free, making it a great choice. Check your spices too. Some blends may contain gluten, so read labels. Savory quinoa stuffed peppers pair well with a fresh salad or steamed veggies. You can also serve them with a side of rice or a light soup. These options complement the flavors well. Leftovers of stuffed peppers last about 3 to 5 days in the fridge. Store them in an airtight container. Reheat them in the oven or microwave before serving. Yes, you can prepare stuffed peppers in advance. Stuff the peppers and cover them tightly. Store them in the fridge for up to 24 hours before baking. This saves time on busy days. For the best results, bake them just before you serve. This post covered all you need to know about making stuffed peppers. We explored key ingredients, cooking steps, and handy tips. You learned about substitutions and variations to fit your tastes. Remember, these peppers are versatile and good for many diets. Storage tips help you keep leftovers fresh longer. Feel free to experiment with flavors and fillings. You can create a dish that delights everyone at your table. Enjoy cooking and savoring your stuffed peppers!](https://recipesstation.com/wp-content/uploads/2025/05/446f5138-a134-4399-a500-bcb3254d2a5c.webp)
Are you craving a healthy dinner that’s as tasty as it is easy to make? Savory Quinoa Stuffed Peppers are
![To make these delightful bars, gather the following ingredients: - 1 1/2 cups graham cracker crumbs - 1/4 cup granulated sugar - 1/2 cup unsalted butter, melted - 2 (8 oz) packages cream cheese, softened - 1 cup brown sugar, packed - 1 teaspoon vanilla extract - 2 large eggs, at room temperature - 2 cups diced apples (Granny Smith work best) - 1 teaspoon ground cinnamon - 1/2 cup caramel sauce - Whipped cream for serving (optional) - Additional caramel sauce for drizzling (optional) These ingredients create a sweet and creamy treat with a lovely apple flavor. You can swap some ingredients if needed. Here are a few ideas: - Use digestive biscuits instead of graham crackers for the crust. - Coconut sugar can replace brown sugar for a different taste. - Any tart apple variety, like Honeycrisp or Fuji, can work too. - Greek yogurt can substitute cream cheese for a lighter twist. These substitutions keep the recipe tasty and fun. You can choose to make your own caramel sauce or buy it. - Making homemade caramel gives you control over the flavor. It's fun, but it takes time. - Store-bought caramel sauce saves time and still tastes great. I often go for the store-bought option for quick treats, but homemade is a special touch. For the best results, follow the [Full Recipe]. To start, preheat your oven to 325°F (160°C). Grab an 8x8 inch baking pan and grease it with non-stick spray. Line the pan with parchment paper, leaving some overhang. This helps you lift the bars out later. In a medium bowl, mix together the graham cracker crumbs, granulated sugar, and melted butter. Stir until it looks like wet sand. Press this mixture firmly into the bottom of your pan to form the crust. Bake for 10 minutes. Let it cool slightly before adding the filling. In a large bowl, use an electric mixer to beat the softened cream cheese and brown sugar together. Mix until smooth and creamy. Add the vanilla extract and blend until combined. Now, crack the eggs into the bowl one at a time. Mix well after each addition. Your batter should be silky and well-mixed. Next, gently fold in the diced apples and ground cinnamon using a spatula. Make sure the apples are evenly spread throughout the cream cheese mixture. Be careful not to overmix. Pour the cheesecake mixture over your cooled crust. Spread it out evenly. Drizzle half of the caramel sauce on top. Use a butter knife to swirl the caramel into the cheesecake, creating a nice marbled effect. Bake in the preheated oven for 30-35 minutes. The center should be set but still jiggle slightly. Once it's done, remove it from the oven and let it cool to room temperature. After it cools, cover the pan with plastic wrap and refrigerate for at least 4 hours, or overnight. This helps the bars firm up nicely. When you're ready to serve, lift the bars out of the pan using the parchment paper. Cut into squares. Drizzle with the remaining caramel sauce and add whipped cream if you like. For the full recipe, refer to the section above. To get a smooth and creamy cheesecake filling, start with softened cream cheese. If it's cold, your filling will be lumpy. Use a mixer to blend the cream cheese and sugar until there are no lumps. Mix on medium speed for a few minutes. The longer you mix, the creamier it gets. Also, add eggs one at a time. This helps keep the texture smooth. Ovens can heat differently. Always check your cheesecake bars a few minutes early. If your oven runs hot, they may bake faster. Look for a gentle jiggle in the center. If it looks too soft, bake for a few more minutes. Keep an eye on them to ensure they don't overbake. Overbaking can lead to cracks. Presentation makes a big difference! Serve the bars on a lovely platter. Add sliced apples and a sprinkle of cinnamon for color. Drizzle extra caramel sauce on top for a sweet touch. You can also add whipped cream for a creamy finish. These small details make your treat look gourmet. For the full recipe, check out the earlier section. {{image_4}} Choosing the right apple makes a big difference. I love using Granny Smith apples for their tartness. They balance the sweet caramel and rich cheesecake well. Other great options include Honeycrisp, Fuji, or Braeburn. Honeycrisp adds a sweet crunch, while Fuji offers a sweet, juicy bite. Braeburn apples give a nice balance of sweet and tart. Feel free to mix different types for more depth in flavor. If you need a gluten-free crust, swap graham cracker crumbs for gluten-free cookies. Almond flour is another great choice. Just mix it with sugar and melted butter. Press it into the pan to form a crust. This keeps the bars delicious and safe for those with gluten sensitivities. Add-ins can elevate your bars even more. Consider mixing in chopped nuts like walnuts or pecans for crunch. You can also stir in dried cranberries or raisins for a chewy texture. For toppings, drizzle with extra caramel sauce or a sprinkle of sea salt. Whipped cream adds a lovely touch, too. Each of these options makes your caramel apple cheesecake bars unique and fun to enjoy. For the full recipe, check the details above. To keep your caramel apple cheesecake bars fresh, store them in the fridge. Use an airtight container to seal in the flavor. If you have leftovers, add a layer of plastic wrap before closing the container. This helps prevent the bars from drying out. Make sure they are completely cool before you store them. When stored properly, the bars will stay fresh for about five days in the fridge. You can enjoy them cold straight from the fridge. They taste great chilled, but you can warm them slightly in the microwave for a cozy treat. This adds a nice touch to the caramel flavor. If you want to keep the bars for a longer time, freezing is a great option. Cut the bars into squares before freezing. Wrap each piece tightly in plastic wrap. Then place them in a freezer-safe bag or container. They can last for up to three months in the freezer. When you're ready to enjoy them, simply thaw them overnight in the fridge. For best results, let them come to room temperature before serving. Enjoy your homemade treat! For the full recipe, refer to the earlier section. The best apples for this recipe are Granny Smith. They are tart and firm. This helps balance the sweetness of the caramel and cheesecake. Their crisp texture holds up well when baked. If you want a sweeter flavor, you can mix in some Honeycrisp apples too. This adds a nice depth to your bars. Yes, you can make these bars ahead of time. They taste even better after chilling overnight. This allows the flavors to blend beautifully. Just follow the recipe and refrigerate them after baking. You can store them for up to five days in the fridge. This makes them perfect for parties or holiday gatherings. You can customize the caramel sauce easily. Try adding a pinch of sea salt for a salted caramel twist. You can also mix in spices like cinnamon or nutmeg. For a richer taste, use dark brown sugar instead of light. If you want a fun twist, add a splash of bourbon or rum. This gives your bars a unique flavor profile that will impress everyone. For the complete recipe, check out the [Full Recipe]. You learned how to make Caramel Apple Cheesecake Bars, a tasty treat. We covered the key ingredients and substitutions that fit your needs. I showed you how to prepare the crust and cream cheese filling. You now know baking tips for perfect results and creative serving ideas. Remember, you can mix things up with different apples and flavors. Store leftovers properly, so they stay fresh. Enjoy making these bars and share them with friends or family!](https://recipesstation.com/wp-content/uploads/2025/05/0930575a-2604-4412-840b-5ca5489aee99.webp)
If you love fall flavors, you’ll adore these Caramel Apple Cheesecake Bars! They blend sweet, creamy cheesecake with rich caramel

Get ready to wow your family with an easy and delicious Cinnamon Roll Casserole! This dish combines the gooey sweetness
![- 2 ripe avocados - 1/2 cup unsweetened cocoa powder - 1/2 cup maple syrup (or agave syrup for a milder sweetness) - 1/2 cup almond milk (or any plant-based milk of your choice) - 1 teaspoon pure vanilla extract - A pinch of sea salt - Optional toppings: coconut whipped cream, fresh berries (like raspberries or strawberries), finely shaved dark chocolate Health benefits of avocados Avocados are rich in healthy fats. They provide fiber, vitamins, and minerals. These nutrients help support heart health and digestion. Plus, they add a creamy texture to the mousse without dairy. Nutritional value of cocoa powder Cocoa powder is a powerful superfood. It is high in antioxidants, which fight free radicals. It also has magnesium, which supports muscle and nerve function. Plus, cocoa can help boost mood and energy levels. Benefits of using maple syrup Maple syrup is a natural sweetener. It has essential minerals like manganese and zinc. It offers a lower glycemic index than regular sugar. This means it can help maintain steady blood sugar levels. - First, cut the ripe avocados in half. - Carefully remove the pits. - Scoop out the creamy flesh and put it in your blender. - Next, add the unsweetened cocoa powder, maple syrup, almond milk, vanilla extract, and sea salt. - Blend on high speed until smooth and creamy. - If needed, pause to scrape down the sides of the blender. - Taste the mousse. Add more maple syrup for sweetness or more cocoa for a richer flavor. - Once it’s perfect, spoon the mousse into serving bowls or elegant glasses. - Cover the bowls and chill them in the fridge for at least 30 minutes. - This chilling time makes the mousse firmer and enhances flavors. - For a lovely presentation, serve in clear cups to show off the rich chocolate color. - Top with coconut whipped cream, fresh berries, or shaved dark chocolate for an eye-catching finish. - Arrange toppings artfully, like placing berries in a circle around the edge. To make your vegan chocolate avocado mousse perfect, start with ripe avocados. They need to be soft but not brown. Check for ripeness by gently pressing the skin. Adjust the sweetness by adding more maple syrup if needed. Start with the amount in the recipe. Taste and add more if you like it sweeter. You can also change the chocolate flavor by adding more cocoa powder. This will make it richer. For a creamy texture, blend well. Use a high-speed blender or food processor. Stop to scrape down the sides if needed. If the mousse is too thick, add a splash of almond milk. Blend again until smooth. Common mistakes include using unripe avocados or not blending enough. Avoid adding too much liquid at once. It can make the mousse runny. Serve your mousse chilled for the best taste. After blending, let it sit in the fridge for at least 30 minutes. This helps the flavors mix and makes it firmer. Pair your mousse with fresh berries like strawberries or raspberries. They add a nice tartness. Coconut whipped cream is another great topping that enhances the rich flavor. To make it kid-friendly, let them help with toppings. They can add berries or whipped cream. This makes it fun and engaging for them. Plus, they will love the taste! For the full recipe, check the section above. Enjoy creating this delicious dessert! {{image_4}} You can make this mousse even better with some fun flavor twists! Here are a few ideas: - Nut butter for richness: A spoonful of almond or peanut butter adds a creamy texture. It also gives a nutty flavor that pairs well with chocolate. Just blend it in with the other ingredients. - Spices like cinnamon or chili powder: A pinch of cinnamon gives a warm note. If you want a kick, try a small dash of chili powder. Both make the mousse unique and exciting. - Incorporating other fruits: You could blend in some banana or even a few strawberries. This adds natural sweetness and fresh flavor. Just remember to adjust the cocoa and sweetener as needed. This vegan chocolate avocado mousse is great for many diets. Here’s how to adapt it: - Making it gluten-free: All the main ingredients are already gluten-free. You can enjoy this mousse without worry! - Alternatives for nut allergies: Use sunflower seed butter instead of nut butter. You can also swap almond milk for oat or coconut milk. Both work well without nuts. - Vegan options for toppings: Top your mousse with coconut whipped cream or fresh fruit. You can also use dairy-free chocolate shavings for a tasty touch. For the full recipe, check out the details above. Enjoy experimenting with these variations! You can keep your vegan chocolate avocado mousse in the fridge for about 3 days. To keep it fresh, seal it tightly. Use plastic wrap or a lid to cover the bowl. This helps prevent air from making it brown. If you notice any browning, just stir it in before serving. Can you freeze chocolate avocado mousse? Yes, you can freeze it, but the texture may change. When you freeze it, store it in an airtight container. Make sure to leave some space at the top, as it will expand. To thaw and serve, move it to the fridge overnight. This way, it will melt slowly and keep its taste. Stir it well before serving to bring back its creamy texture. Enjoy your mousse even after freezing! For the full recipe, check out the [Full Recipe]. Is vegan chocolate avocado mousse healthy? Yes, vegan chocolate avocado mousse is healthy. It uses ripe avocados, cocoa powder, and maple syrup. Avocados provide healthy fats and fiber, while cocoa powder offers antioxidants. This dessert is lower in sugar than many traditional mousse recipes. Can I use other sweeteners? Absolutely! You can use other sweeteners like agave syrup or coconut sugar. Adjust the amount based on your taste. Each sweetener adds its own flavor, so feel free to experiment until you find your favorite. How do I know when the mousse is ready? The mousse is ready when it is smooth and creamy. After blending, taste it to check if the flavors are balanced. It should have a rich chocolate taste without any lumps. What to do if the mousse is too thick? If the mousse is too thick, add a splash of almond milk. Blend again until it reaches your desired consistency. This will help lighten the texture without losing the rich flavor. How to salvage if it tastes too bitter? If the mousse tastes too bitter, mix in more sweetener. Start with a small amount of maple syrup and blend again. This will help balance the chocolate flavor and make it more enjoyable. Can I make it in advance? Yes, you can make the mousse in advance. Store it in the fridge for up to three days. Just remember to cover it well to keep it fresh. Enjoy it chilled for the best texture and flavor. For the complete recipe, check out the Full Recipe section. This blog post covered everything you need to make delicious chocolate avocado mousse. We discussed the simple ingredients and their health benefits, plus step-by-step instructions for the perfect texture. You learned how to serve it and explore tasty variations. I shared tips to avoid common mistakes and gave storage advice. With these easy steps, you can impress anyone with a tasty, healthy dessert. Enjoy creating this mousse and feel good about what you make!](https://recipesstation.com/wp-content/uploads/2025/05/0db1b33b-d4e1-4dc3-bdef-cfcbf3de3837.webp)
Are you ready to enjoy a rich and creamy dessert that’s both vegan and healthy? This Vegan Chocolate Avocado Mousse
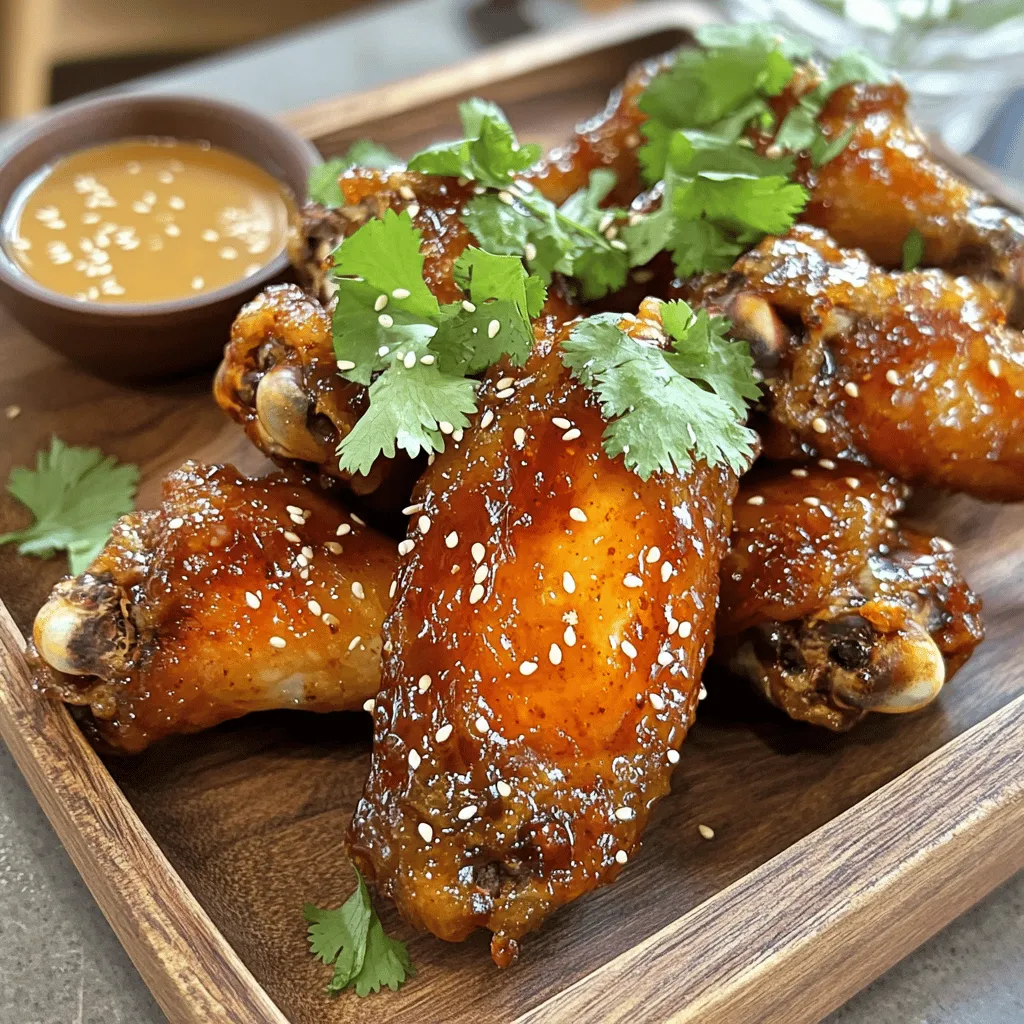
Are you ready to spice up your game day? My Sweet and Spicy Chicken Wings will make your taste buds
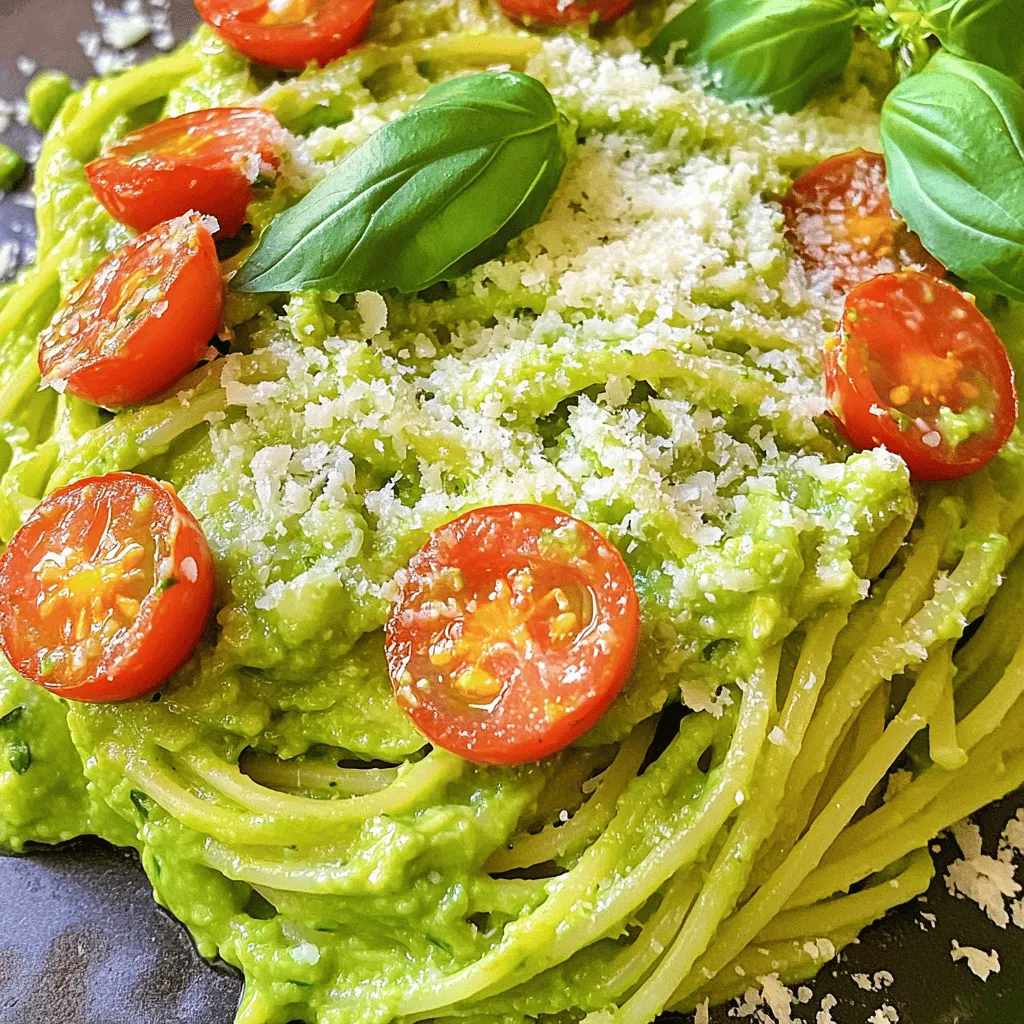
Looking for a quick, healthy meal that tastes amazing? Creamy Avocado Pasta is the answer! In just minutes, you can
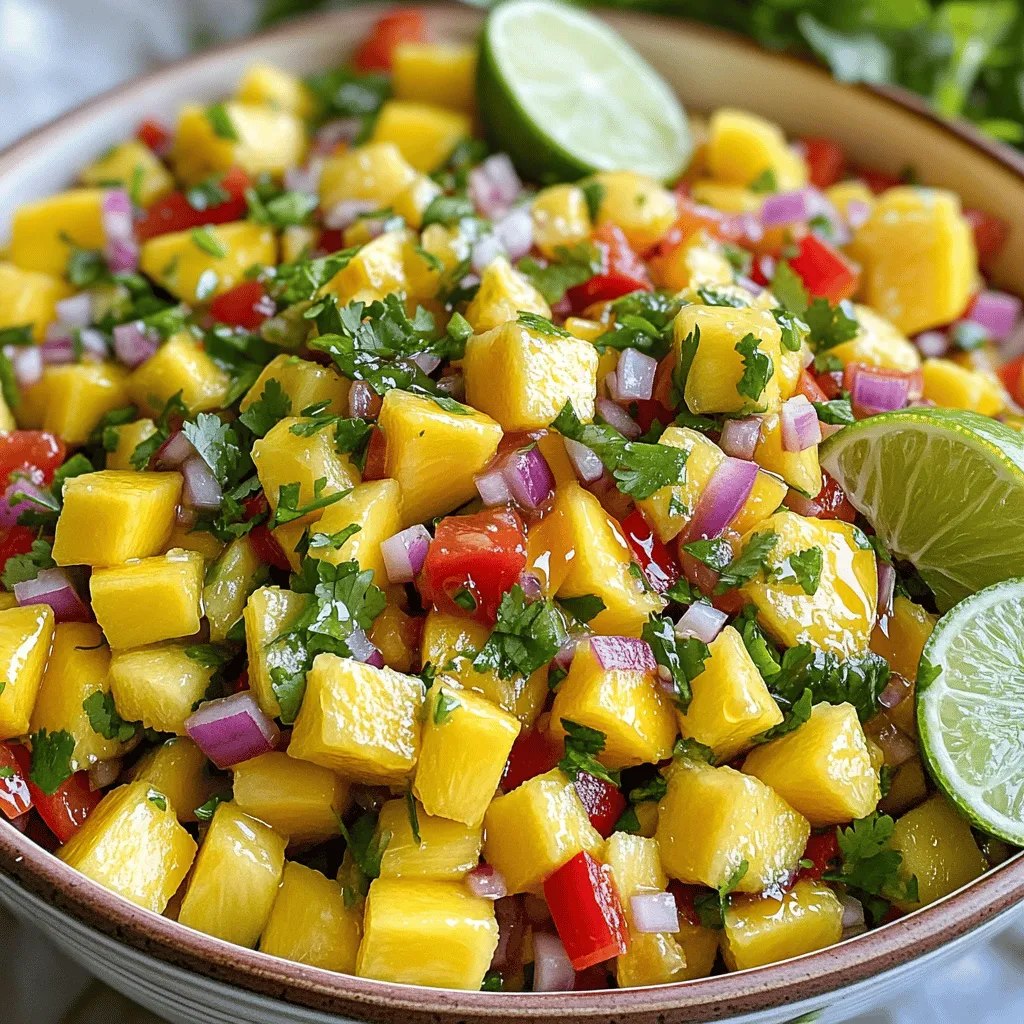
Looking for a bright, fresh addition to your meals? This Tropical Mango Salsa recipe will take your taste buds to
