Skip to content
DisclaimerTerms Of UseGDPR PolicyCookie Policy

recipesstation

  • Home
  • Drinks
  • Appetizers
  • Dinner
  • Dessert
  • About
  • Contact
  • Privacy Policy
DisclaimerTerms Of UseGDPR PolicyCookie Policy

Emily

- 1 ½ cups all-purpose flour - ½ cup granulated sugar - ½ cup powdered sugar - ½ teaspoon baking powder - ¼ teaspoon salt - ½ cup unsalted butter, melted - 2 large eggs - ⅔ cup fresh lemon juice (about 3-4 lemons) - 2 teaspoons lemon zest (from the same lemons) - 1 tablespoon cornstarch - 1 teaspoon pure vanilla extract - Extra powdered sugar for a delightful dusting To make lemon crumb bars, you need some basic ingredients. These include flour, sugar, and butter. Fresh lemons give the bars their bright taste. Using proper measurements is key. For flour, use a standard measuring cup. If you don’t have unsalted butter, salted butter works too. Just skip the added salt. If you need a gluten-free option, almond flour can work, but results may vary. Want to add a twist? Try mixing in some berries. Blueberries or raspberries pair well with lemon. You could also add fresh herbs like mint for a unique taste. Another option is to swap some lemon juice for lime juice. This gives a fun, fresh flavor. If you'd like to see the complete process, check the Full Recipe for step-by-step instructions. Start by preparing your 8x8-inch baking dish. This size is perfect for lemon crumb bars. Line the dish with parchment paper. Let the paper hang over the edges. This helps you lift out the bars later. Preheat your oven to 350°F (175°C) while you prepare the crust. In a medium bowl, mix together the dry ingredients. Combine 1 ½ cups of flour, ½ cup of granulated sugar, ½ cup of powdered sugar, ½ teaspoon of baking powder, and ¼ teaspoon of salt. This mix is the base of your crust and topping. Pour in ½ cup of melted butter. Stir gently until the dough becomes crumbly. Set aside 1 cup of this crumb mixture for later. Firmly press the rest into the bottom of your lined dish. Make sure it is smooth and even. In a large bowl, whisk together the eggs and fresh lemon juice. Use about ⅔ cup of juice, which is about 3 to 4 lemons. Add 2 teaspoons of lemon zest to boost flavor. Then, mix in 1 tablespoon of cornstarch and 1 teaspoon of vanilla extract. Blend until the mixture is smooth and frothy. Now, pour the lemon filling over the crust in your baking dish. Take the reserved crumb mixture and sprinkle it evenly on top. Bake in the oven for about 22-25 minutes. The edges should look lightly golden brown. To check if they are done, insert a toothpick into the center. It should come out clean or with a few moist crumbs. Once baked, let the dish cool completely on a wire rack. When cooled, lift the bars out using the parchment paper. Transfer them to a cutting board and slice into squares. Before serving, dust each bar with powdered sugar. This adds a lovely touch to your beautiful dessert. Enjoy your lemon crumb bars! For detailed instructions, refer to the Full Recipe. - Ensuring Even Baking: Place the baking dish in the center of the oven. This helps the heat spread evenly. Rotate the dish halfway through baking for best results. - Avoiding Overmixing: Mix your batter gently. Overmixing can make the bars tough. Stir just until you see no dry flour. - Test for Correct Consistency: Use a toothpick to check doneness. Insert it into the center. If it comes out clean or with a few moist crumbs, your bars are ready. - Dusting with Powdered Sugar: After cooling, sprinkle powdered sugar on top. This adds a nice touch and looks great in photos. - Serving Suggestions: Cut the bars into squares. Serve them plain or with whipped cream for extra fun. - Pairing with Beverages: These bars go well with iced tea or lemonade. A light drink highlights the lemon flavor. - Overbaking or Underbaking: Keep an eye on the timer. Overbaked bars can be dry; underbaked ones can be gooey. - Incorrect Ingredient Measurements: Use measuring cups and spoons for accuracy. Too much flour can change the texture. - Not Allowing to Cool Properly: Let the bars cool completely before slicing. This helps them set and makes them easier to cut. {{image_4}} You can make lemon crumb bars even more fun! Here are a few ideas: - Adding Berries or Other Citrus Fruits: Mix in fresh blueberries or raspberries for a burst of flavor. You can also add orange or lime juice for a twist. - Introducing Herbs like Basil or Mint: Adding a touch of fresh basil or mint can bring a new taste. Just chop them finely and mix into the lemon filling. - Swapping Lemon for Lime or Orange: Try using lime or orange juice instead of lemon. Each fruit will change the taste in a delightful way. If you want a lighter version of these bars, here are some swaps: - Using Whole Wheat Flour: Swap all-purpose flour for whole wheat flour. This makes the bars healthier and adds a nutty flavor. - Reducing Sugar Content: Cut back on the sugar. You can use less granulated sugar or try a sugar substitute. - Making Vegan Lemon Crumb Bars: Replace eggs with flax eggs or applesauce. Use coconut oil instead of butter for a vegan option. You can create new dessert ideas with lemon crumb bars! - Layering with Cheesecake: Create a layered dessert by adding cheesecake filling on top of the crust before the lemon layer. - Serving with Ice Cream: A scoop of vanilla ice cream complements the tartness of the bars perfectly. - Making Lemon Crumb Bar Parfaits: Layer pieces of the crumb bars with whipped cream and fresh fruit in a glass for a fun treat. Feel free to explore these variations to make your lemon crumb bars unique and exciting! For the full recipe, check the earlier section. - Storing in the Refrigerator: Keep your lemon crumb bars in the fridge. Use a covered dish or wrap them tightly in plastic wrap. This helps keep them fresh and tasty for longer. - Freezing Leftover Bars: If you want to save some bars for later, freeze them. Cut the bars into squares. Wrap each square in plastic wrap, then place them in a freezer bag. They will stay fresh for up to three months. - Using Airtight Containers: For both fridge and freezer storage, use airtight containers. They help protect the bars from drying out and absorbing odors from other foods. - How Long They Last in the Fridge: In the fridge, lemon crumb bars last about one week. After that, they may lose flavor or texture. - Guidelines for Freezing: If stored properly in the freezer, they can last up to three months. Just remember to label the bags with the date. - Best Methods for Reheating: To reheat, use the microwave. Place a bar on a plate and heat for about 10-15 seconds. This warms them up without drying them out. - How to Restore Texture: If the bars feel too soft after freezing, place them in the oven for a few minutes. Preheat the oven to 300°F (150°C) and warm them on a baking sheet. This will help restore their crumbly texture, making them delightful again. To check if your bars are done, look for a few signs. The edges should turn golden brown. The center should be set and not jiggly. You can also test with a toothpick. Insert it into the center; it should come out clean or with a few moist crumbs stuck to it. If it comes out wet with batter, bake a little longer. Yes, you can make lemon crumb bars ahead of time. They store well in the fridge. Just cover them tightly with plastic wrap. You can also freeze them. Wrap each bar in plastic wrap, then place them in an airtight container. This way, they stay fresh. If you don’t have fresh lemons, don’t worry! You can use bottled lemon juice. Look for 100% pure lemon juice without added sugars. You can also use lemon zest from dried lemon peel. Keep in mind that fresh lemons give the best flavor. You can find the full recipe for lemon crumb bars in the earlier sections. It includes all the steps and tips. Following the full recipe carefully will help you make the best bars. Don’t skip any steps for the best results! In this post, we explored the tasty world of lemon crumb bars. We covered key ingredients, step-by-step baking instructions, and tips for perfect results. You learned about fun variations and how to store your bars. Whether you want a classic treat or a healthier twist, these recipes fit your needs. Enjoying lemon crumb bars is easy when you follow these tips. So, bake these delicious bars and treat yourself and others to something special!

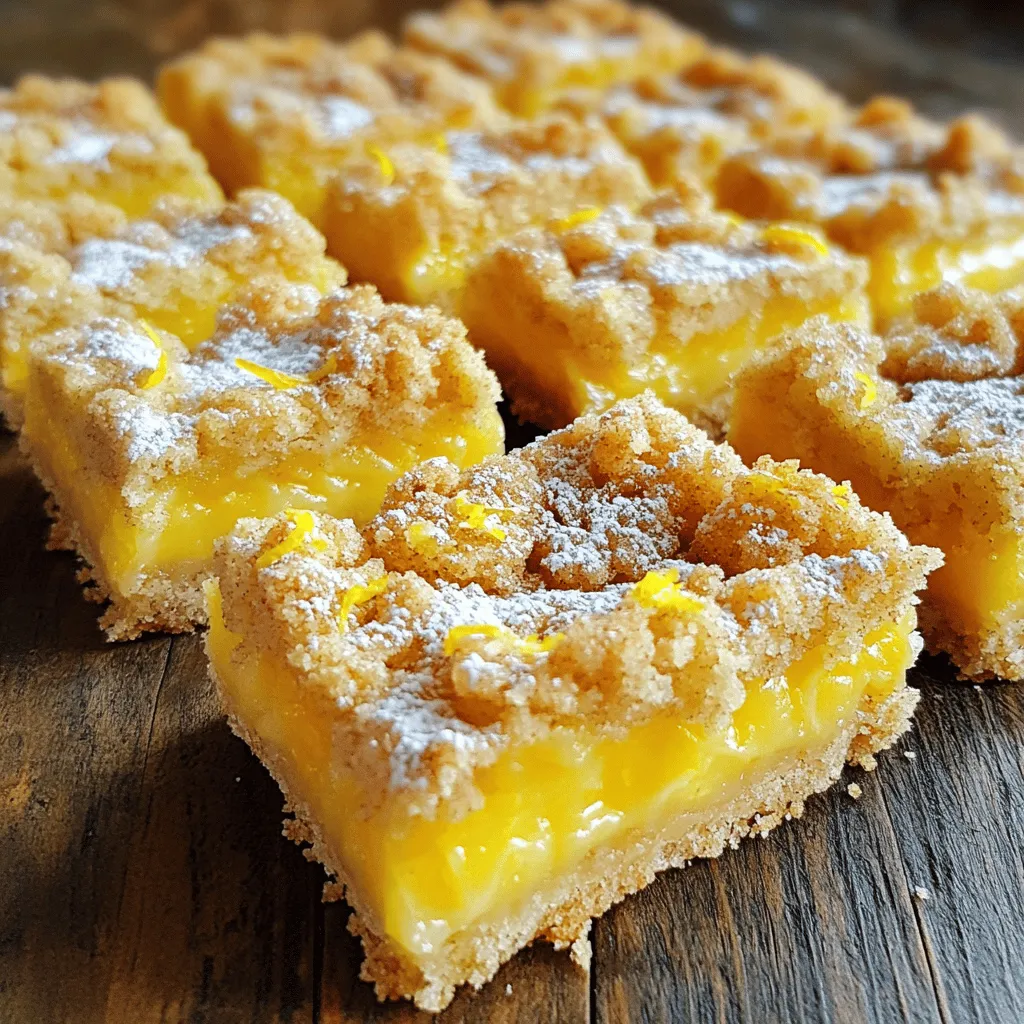
Lemon Crumb Bars Delightful and Simple Dessert Recipe

Lemon crumb bars are the perfect treat: bright, tangy, and easy to make! With a buttery crust and a sweet

- Sweet potatoes - Olive oil - Spices and seasonings - Cornstarch Uniform slices make a big difference. Cut sweet potatoes evenly for even cooking. If your fries are too thick, they will take longer to bake. If they are too thin, they may burn. Adjust the amount of olive oil based on the number of sweet potatoes. A little oil helps the spices stick and adds flavor. You can also change the spices to fit your taste. Want more heat? Add more cayenne pepper. Prefer a milder flavor? Skip it! Using cornstarch is key for crispiness. It helps the fries turn golden and crunchy. Measure it out carefully to avoid soggy fries. You want just enough to coat each fry evenly. For the full recipe, check out the detailed instructions. Enjoy your cooking! First, peel the sweet potatoes with a vegetable peeler. Make sure to remove all the skin. Next, slice the sweet potatoes into uniform fries. Aim for about 1/4 inch thick for even cooking. This helps them bake evenly. Now, preheat your oven to 425°F (220°C). A hot oven is key for getting crispy fries. In a large mixing bowl, add the sliced sweet potatoes. Drizzle 2 tablespoons of olive oil over them. Next, add 1 teaspoon each of paprika, garlic powder, onion powder, and cayenne pepper if you want some heat. Don't forget salt and pepper! Mix everything well. Make sure each fry gets a good coat of the seasoning. This step makes a big difference in flavor. Now, sprinkle 2 tablespoons of cornstarch over the fries. Toss them again to coat evenly. The cornstarch is what makes these fries super crispy when baked. Arrange the fries on a baking sheet lined with parchment paper. Lay them out in a single layer. Give them space so they don’t crowd each other. If they are too close, they will steam instead of crisp up. Put the baking sheet in the preheated oven. Bake for 25-30 minutes. Halfway through, flip the fries. This helps them cook evenly and get that golden color. Watch them closely as they bake. When they are crispy and golden, they are ready to come out. Enjoy them warm for the best crunch! To make sweet potato fries super crispy, use cornstarch. It helps absorb moisture and creates a great crunch. After tossing the fries in oil and spices, sprinkle cornstarch on them. Mix well to coat each fry evenly. The oven settings matter too. Set your oven to 425°F (220°C). This high heat helps the fries crisp up nicely. Place your baking sheet in the center of the oven. This position allows hot air to circulate. One big mistake is overcrowding the baking sheet. If the fries touch, they steam instead of crisping. Always leave space between each fry. Baking in batches is a smart choice if needed. Another mistake is skipping preheating. It’s crucial to heat the oven before baking. Preheating ensures the fries start cooking at the right temperature. Sweet potato fries taste great with dips. Try pairing them with ketchup, ranch, or a spicy aioli. These flavors blend well with the sweet and savory taste of the fries. You can also serve them with burgers or grilled chicken. They make a perfect side dish for any meal. The crunch of the fries adds a fun touch to your plate. For more ideas, check out the Full Recipe. {{image_4}} You can spice up your sweet potato fries with various herbs and spices. Try adding: - 1 teaspoon cumin for a warm, earthy flavor - 1 teaspoon chili powder for heat - Fresh rosemary or thyme for a fragrant twist If you want to explore alternatives to sweet potatoes, Yukon Gold potatoes work well. They offer a creamy texture and a slightly different taste, yet still crisp nicely in the oven. These fries can easily fit into different diets. To make them gluten-free, just check your cornstarch label. For vegan options, all the ingredients are plant-based! If you like your fries mild, skip the cayenne pepper. You can also add a pinch of black pepper for a light kick without overpowering the taste. You can achieve crispy fries in various ways. An air fryer is a great option. It cooks fries quickly while keeping them crispy. Just toss the seasoned fries in the air fryer basket and cook them at 400°F (200°C) for about 15-20 minutes. Grilling is another fun method. Slice your sweet potatoes into thicker wedges. Brush them with olive oil, season, and grill them over medium heat. This method adds a smoky flavor that’s truly delightful. For the full recipe, check out the detailed instructions above! To keep your sweet potato fries fresh, store them in an airtight container in the fridge. Make sure they cool down first. This helps keep them crispy. Use them within three to four days for the best taste. If you want to freeze sweet potato fries, follow these steps: - Allow them to cool completely. - Spread them out on a baking sheet in a single layer. - Freeze for a couple of hours until firm. - Transfer to a freezer-safe bag or container. - They can last up to three months in the freezer. When it’s time to reheat, you want fries that are still crispy. The best way to do this is in the oven. Preheat your oven to 400°F (200°C). Place the fries on a baking sheet in a single layer. Bake for about 10 minutes. Keep an eye on them to avoid burning. Avoid using a microwave if you want crispy fries. Microwaving can make them soggy. If you have to use the microwave, heat them in short bursts. But remember, the oven is best for crispiness. For the full recipe, check the recipe section. Enjoy your sweet potato fries! To make sweet potato fries crispy, start by cutting them into even pieces. This helps them cook at the same rate. Toss the fries in olive oil and spices for flavor. Adding cornstarch increases crispiness. Spread them in a single layer on a baking sheet. Make sure not to crowd them. Flip halfway through baking for even crispness. You can use frozen sweet potatoes, but fresh ones give better texture. Frozen fries may not crisp up as well. If you use frozen, skip the cornstarch step. Bake them straight from the freezer without thawing. Keep an eye on the cooking time; they may take longer. Sweet potato fries taste great with many sauces. Here are some popular choices: - Ketchup - Ranch dressing - Garlic aioli - Spicy mayo - Honey mustard Experiment with these to find your favorite dip! - How long do sweet potato fries last in the fridge? Sweet potato fries can last up to three days in the fridge. Store them in an airtight container. For best taste, eat them fresh. - Can I make sweet potato fries without cornstarch? Yes, you can make sweet potato fries without cornstarch. However, they might not be as crispy. You can still achieve some crunch by using the right oil and cooking method. Sweet potato fries are tasty and easy to make. We covered the best ingredients and tips for a crisp finish. You learned how to prepare, bake, and season them perfectly. Remember, use uniform slices and avoid overcrowding for the best results. If you try different spices or cooking methods, the possibilities are endless. Don’t forget to store leftovers properly for future enjoyment. With these steps, delicious sweet potato fries are simple to create.

Crispy Oven Baked Sweet Potato Fries Simple Delight

Are you craving a tasty snack that’s easy to make? Look no further! In this article, I’ll show you how

- 1 ½ pounds ground beef - 1 small onion, finely chopped - 2 cloves garlic, minced - 1 cup breadcrumbs (preferably seasoned) - 1 large egg - 2 tablespoons Worcestershire sauce - 1 teaspoon dried thyme - Salt and black pepper, to taste - 1 cup beef broth (low sodium preferred) - 1 cup canned diced tomatoes (with juice) - 1 cup frozen mixed vegetables (such as peas, corn, and carrots) - 2 cups mashed potatoes (prepared, warm, and seasoned to taste) - 1 cup shredded sharp cheddar cheese To make this dish, ground beef is key. It gives the bake a hearty base. Onions and garlic add layers of flavor. Seasonings and binders, like Worcestershire sauce, really boost the taste. - Fresh herbs like parsley for garnish - Additional spices like paprika or cayenne for heat - Different types of cheese, such as mozzarella or pepper jack If you want to enhance the flavor, add fresh herbs. You can also use different spices to match your taste. For those with dietary preferences, try ground turkey or meat substitutes. - Oven-safe skillet or baking dish - Mixing bowls and utensils You’ll need an oven-safe skillet or a baking dish to bake the meal. Mixing bowls help combine ingredients easily. Use simple utensils for mixing and shaping your patties. This makes the cooking process smooth and fun. Enjoy creating this comforting dish! Prepping the meat mixture Start by gathering all your ingredients. In a large bowl, mix the ground beef, finely chopped onion, minced garlic, breadcrumbs, egg, Worcestershire sauce, dried thyme, salt, and black pepper. Use your hands to blend the mix well. Make sure each ingredient is evenly spread. This will help the flavors come together. Shaping patties Next, divide the meat mixture into four equal parts. Shape each part into a patty, about ¾ inch thick. It helps to keep the patties uniform. This ensures they cook evenly. Set them aside on a plate as you prepare the baking dish. Layering the dish In a large oven-safe skillet or a 9x13-inch baking dish, pour in the beef broth. Then, add the canned diced tomatoes with their juice. Stir this mixture well. It creates a flavorful base. Next, sprinkle the frozen mixed vegetables evenly over the broth and tomatoes. This adds color and nutrition. Baking times and temperatures Carefully place the hamburger patties on top of the vegetable layer. Ensure they sit snugly in the mixture. Using a spoon, spread the prepared mashed potatoes over the patties. Cover them fully to keep them moist. Lastly, sprinkle the shredded cheddar cheese over the mashed potatoes. This adds a delicious crust. Preheat your oven to 375°F (190°C) and bake the dish for 30-35 minutes. The patties should reach an internal temperature of 160°F (71°C) when done. The cheese should bubble and turn golden. Cooling and serving tips After baking, remove the dish from the oven. Let it cool for about 5 minutes before serving. This helps the layers settle. It makes serving easier. Presentation suggestions For a lovely presentation, serve the dish directly from the skillet. You can garnish it with freshly chopped parsley for a pop of color. Drizzling a bit of extra beef broth on top adds more flavor and moisture. Enjoy your warm and hearty meal! To make juicy hamburger patties, start with fresh ground beef. Choose beef with some fat. A blend of 80/20 works best. Keep the patties thick and handle them gently. Do not overwork the meat when mixing. This keeps the patties tender. For even baking, use an oven-safe skillet. It helps the dish cook evenly. Preheat your oven properly to 375°F (190°C). This ensures the dish cooks through without burning. Check the internal temperature of the patties. They should reach 160°F (71°C) for safe eating. Adding spices can boost the taste of your dish. Try garlic powder, onion powder, or smoked paprika. These spices add depth to the flavor. Fresh herbs like parsley or thyme also enhance the dish's freshness. Using homegrown ingredients adds a nice touch. Fresh vegetables can make a big difference. If you have a garden, use your homegrown tomatoes or herbs. They bring a unique flavor to the meal. Amish Hamburger Steak Bake pairs well with simple side dishes. Mashed potatoes or a fresh salad are great choices. You can also serve it with crusty bread to soak up the sauce. For drinks, try pairing it with iced tea or lemonade. A light red wine, like Pinot Noir, also complements the flavors. These drinks balance the hearty nature of the dish. {{image_4}} You can switch up the meat in this dish. Using ground turkey or chicken is a great option. These meats provide a lighter flavor and can be just as tasty. You can also mix different meats. Try combining beef with pork for a richer taste. Each variation offers a unique flavor profile. If you want a meatless bake, there are easy substitutes. Use lentils or black beans for protein. You can also use a meat substitute like tempeh or tofu. Here’s a simple ingredients list for a vegetarian option: - 1 ½ cups cooked lentils or black beans - 1 small onion, finely chopped - 2 cloves garlic, minced - 1 cup breadcrumbs (preferably seasoned) - 1 large egg or flax egg (1 tablespoon flaxseed meal + 3 tablespoons water) - 2 tablespoons soy sauce or tamari - 1 teaspoon dried thyme - Salt and black pepper, to taste - 1 cup vegetable broth - 1 cup canned diced tomatoes (with juice) - 1 cup frozen mixed vegetables (like peas, corn, and carrots) - 2 cups mashed potatoes (prepared, warm, and seasoned) - 1 cup shredded cheese or dairy-free cheese This vegetarian version is hearty and full of flavor. For gluten-free adaptations, use gluten-free breadcrumbs. You can also replace wheat-based broth with vegetable broth. If you want a low-carb option, skip the potatoes. Use cauliflower mash instead. This keeps the dish comforting while lowering the carbs. Each variation allows for a tasty meal tailored to your needs. To store leftovers of Amish Hamburger Steak Bake, let it cool first. After cooling, place the dish in an airtight container. You can also use a glass or plastic food storage container. This keeps the meal fresh and tasty. If you want to freeze the dish, scoop portions into freezer-safe containers. Make sure to leave some space at the top for expansion. Wrap each container tightly with plastic wrap for extra protection. When you are ready to eat, thaw the dish in the fridge overnight. Reheat in the oven or microwave until hot. In the fridge, the dish lasts about three to four days. If you notice any off smells, strange colors, or mold, it’s time to toss it out. Always trust your senses when checking for spoilage. For the full recipe, check out the section above. What can I substitute for breadcrumbs? You can use crushed crackers or oats. Both work well in this recipe. You can also try cornmeal for a gluten-free option. Each substitute adds its own texture and flavor. Can I make this recipe ahead of time? Yes, you can prepare this dish the day before. Just store it in the fridge before baking. When ready to cook, let it sit at room temperature for about 30 minutes. Then bake as per the recipe instructions. How do I know when the patties are done? Check the internal temperature with a meat thermometer. It should read 160°F (71°C) for safe eating. The patties should look brown and firm. Can I use fresh vegetables instead of frozen? Absolutely! Fresh veggies can enhance the flavor. Just chop them into small pieces, and add them in the same layer as frozen ones. You might need to adjust the cooking time for fresh veggies. What sides go well with Amish Hamburger Steak Bake? Mashed potatoes fit perfectly, but you can also serve it with bread or a salad. Green beans or corn are great side dishes too. They add color and balance the meal. Can this dish be made in a slow cooker? Yes, you can make this in a slow cooker! Just layer the ingredients as you would in the oven. Cook on low for 6-8 hours or high for 3-4 hours. This method makes the meat very tender. This article covered how to make a delicious Amish Hamburger Steak Bake. You learned about key ingredients, step-by-step instructions, and handy tips for great results. Variations offer choices for different diets, while storage tips ensure freshness. Remember, cooking can be fun and flexible. Use these ideas to customize your dish. Whether you choose beef, turkey, or plant-based options, you can create a satisfying meal. Enjoy the process and the dish you make!

Amish Hamburger Steak Bake Hearty and Comforting Meal

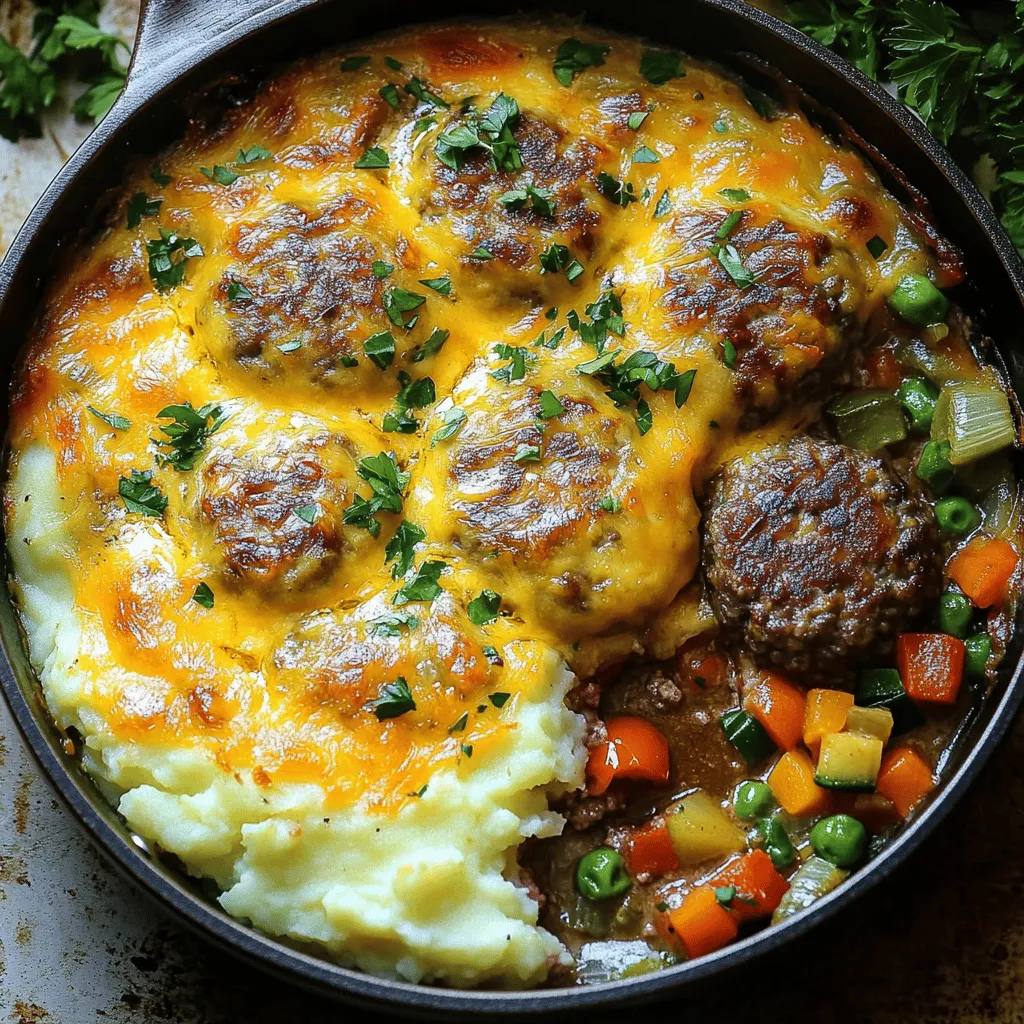
If you’re seeking a hearty and comforting meal, look no further than the Amish Hamburger Steak Bake. This recipe brings

To make easy air fryer peaches, you need a few simple items. Gather these ingredients before you start. - 4 ripe peaches, halved and pitted - 2 tablespoons brown sugar - 1 teaspoon ground cinnamon - 1 tablespoon honey - 2 tablespoons unsalted butter, melted - 1 teaspoon pure vanilla extract - A pinch of flaky sea salt - Optional: Fresh mint leaves for garnish Having the right ingredients makes all the difference in this dessert. Choose ripe peaches for the best flavor and texture. The brown sugar and cinnamon create a warm, sweet topping. Honey adds a nice touch of sweetness. The vanilla brings everything together. Don't forget the mint leaves for a fresh look! For the full recipe, check the instructions that follow. Preparing the Air Fryer Preheat your air fryer to 375°F (190°C). This step is key for even cooking. It takes about 5 minutes to heat up. Mixing Ingredients In a small bowl, combine 2 tablespoons of brown sugar, 1 teaspoon of ground cinnamon, and a pinch of flaky sea salt. Mix them well. This blend adds great flavor to your peaches. Coating the Peaches Take the peach halves and drizzle 2 tablespoons of melted butter and 1 tablespoon of honey over them. Toss gently to coat each peach evenly. Next, sprinkle your brown sugar mixture over the cut sides of the peaches. Make sure every half gets a good layer for that sweet caramel finish. Air Frying the Peaches Carefully place the peaches in the air fryer basket, cut side up. Arrange them in a single layer to ensure they cook evenly. Air fry the peaches for 10-12 minutes. Check at 10 minutes. They should feel tender and have a golden top. Final Touches Once they are done, take the peaches out. Drizzle them with 1 teaspoon of pure vanilla extract for extra flavor. Garnish with fresh mint leaves. Serve warm for a delightful treat. You can enjoy them alone or with ice cream for a special dessert. For the full recipe, check out the earlier section. Pick peaches that are yellow to orange. Varieties like Clingstone and Freestone work well. Look for peaches that yield slightly when you press them. This means they are ripe and sweet. Avoid hard peaches; they won't taste good when cooked. The goal is to find peaches with a sweet scent and smooth skin. Overcrowding your air fryer can lead to uneven cooking. For best results, cook peaches in batches. Arrange them in a single layer, cut side up. This allows hot air to circulate well, giving you that perfect caramelization. If your air fryer is small, don’t rush. Take your time for the best flavor. To amp up the taste, think about adding more spices. Nutmeg adds warmth, and lemon zest gives a bright kick. You could also try a splash of orange juice for a fruity twist. Feel free to mix and match flavors to make the dish your own. The right touch can turn a simple dessert into a gourmet treat. For the complete recipe, check out the Full Recipe. {{image_4}} You can grill peaches for a smoky twist. To adapt the recipe, preheat your grill. Cut the peaches in half and remove the pits. Brush the cut sides with melted butter and honey. Sprinkle the brown sugar mixture on top. Place the peaches cut side down on the grill. Grill for about 4-5 minutes. Flip them over and grill for another 4-5 minutes. This method gives them a nice char and a unique flavor. You can add many toppings to make your dessert special. Ice cream is a popular choice. A scoop of vanilla ice cream pairs well with warm peaches. Greek yogurt adds creaminess and a tangy flavor. For crunch, sprinkle chopped nuts like almonds or walnuts on top. You can even add chocolate sauce or caramel for extra sweetness. The options are endless! If you have frozen peaches, you can still enjoy this dish. Simply thaw the peaches before cooking. You may need to adjust the cook time. Start with 12-15 minutes in the air fryer. Check for tenderness as you go. Frozen peaches may release more juice, so keep an eye on them. This way, you still get a tasty treat! To keep your air fryer peaches fresh, store them in an airtight container. Let them cool first. Place them in the fridge. They will stay good for up to three days. If you want to enjoy them later, don’t add toppings yet. When reheating, use the air fryer again. Set it to 350°F (175°C). Heat for about 3-5 minutes. This will help keep their nice texture. You can also use the microwave. But be careful not to overheat, as this can make them mushy. To freeze peaches, first, let them cool completely. Place the peach halves in a single layer on a baking sheet. Freeze them for 1-2 hours. Then, move the frozen peaches to a freezer bag. They will last for about three months. To use them later, let them thaw in the fridge overnight. You can then air fry or bake them for a quick treat! Yes, you can! Some good options are plums, nectarines, and apricots. Each fruit brings its own taste and sweetness. Try mixing fruits for a fun twist. The air fryer works great with many fruits. Air fryer peaches are a tasty treat that can be healthy. Peaches are low in calories and rich in vitamins. They provide vitamin C and potassium. The honey adds natural sweetness, while brown sugar gives a nice touch. Using less butter makes them even lighter. You can store cooked peaches in the fridge for about three days. Keep them in an airtight container. This helps keep them fresh and tasty. If you want to enjoy them later, consider freezing them. Air fryer peaches shine when paired with ice cream or yogurt. A scoop of vanilla ice cream adds creaminess. You can also try them with whipped cream or a sprinkle of nuts. Fresh mint leaves make a nice garnish too. Yes, you can make this recipe vegan. Replace honey with maple syrup or agave nectar. Use plant-based butter instead of regular butter. These swaps keep the flavors rich and delicious. Cooking peaches with the skin on is fine! The skin adds a nice texture and flavor. It also keeps the fruit juicy. If you prefer a smoother bite, peel them before cooking. Try both ways to see which you like best! This article covers how to make delicious air fryer peaches. We discussed key ingredients, step-by-step instructions, and helpful tips. You learned how to select the best peaches and avoid overcrowding your air fryer. We also explored variations, storage info, and answered common questions. Enjoy your sweet, warm peaches and get creative with toppings! Happy cooking!

Easy Air Fryer Peaches Tasty and Quick Dessert Treat

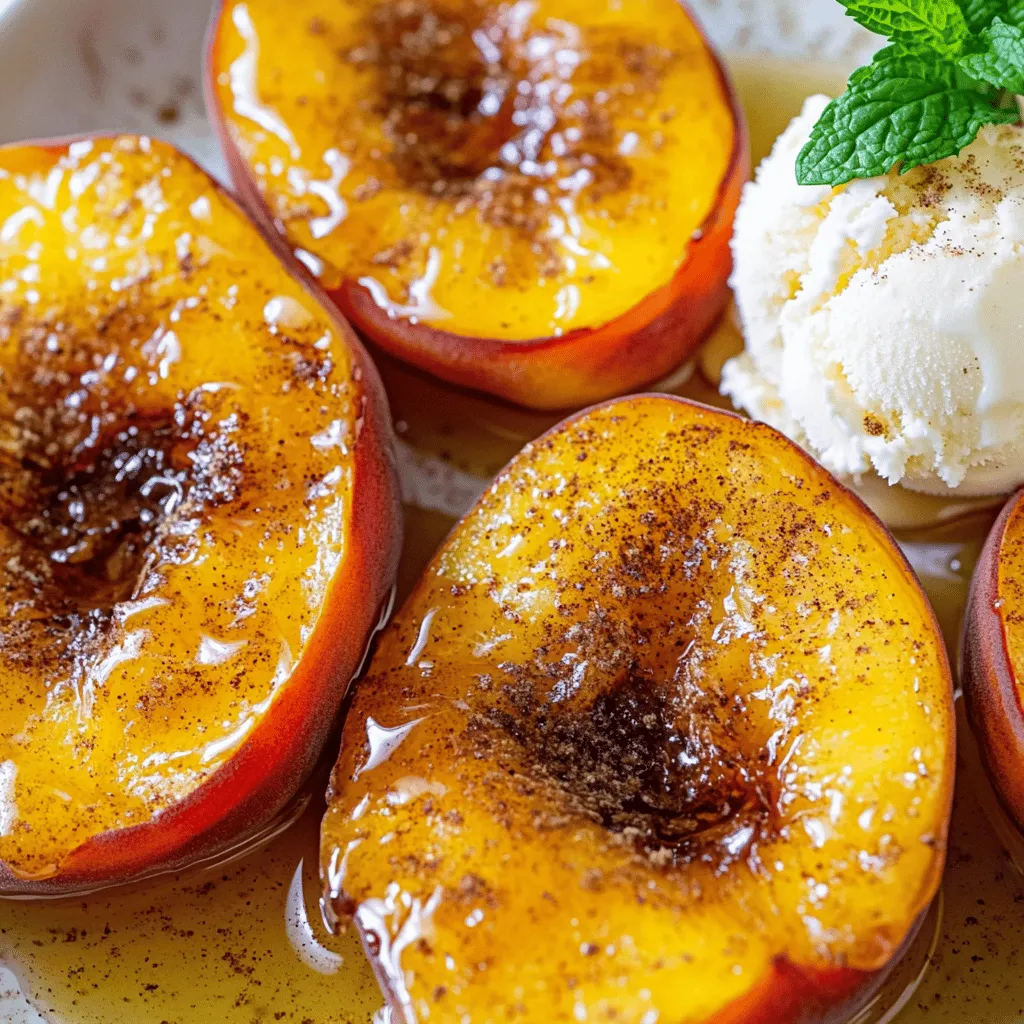
Looking for a quick and tasty dessert? You’ll love these easy air fryer peaches! With just a few ingredients, you

This recipe for spicy Brazilian coconut chicken is a delight for your taste buds. It combines tender chicken with creamy coconut milk and vibrant spices. You can make this dish in under an hour. The full recipe includes all the steps to bring this dish to life. - Chicken - 4 boneless chicken thighs - Coconut Milk - 1 can (13.5 oz) coconut milk - Aromatics and Vegetables - 1 medium onion, finely chopped - 3 garlic cloves, minced - 1 red bell pepper, diced - 1 green bell pepper, diced - 2 tablespoons red curry paste - 1 tablespoon olive oil - 1 tablespoon fresh ginger, grated - 1 teaspoon paprika - 1 teaspoon cayenne pepper (adjust according to your spice preference) - Salt and pepper, to taste - Fresh cilantro leaves, for garnish - 2 cups cooked jasmine rice, for serving These ingredients work together to create a rich and flavorful meal. The chicken provides protein, while coconut milk adds creaminess. The garlic, onion, and peppers give the dish a fresh taste. Each element plays an important role in the final flavor. - Marinating the Chicken: Start by seasoning the chicken thighs with salt, pepper, paprika, and cayenne pepper. Mix well in a large bowl. Let the chicken marinate for about 15 minutes. This step boosts the flavor of the meat. - Sautéing Aromatics: In a large skillet, heat the olive oil over medium heat. Add the finely chopped onion and sauté for about 5 minutes. The onion should become soft and clear. Next, add the minced garlic and grated ginger. Stir and cook for another minute until fragrant. - Incorporating Ingredients: Add the diced red and green bell peppers to the skillet. Stir them into the onion mix. Sauté for 3-4 minutes until they soften a bit. Then, move the veggies to the side of the skillet. Place the marinated chicken thighs in the pan. Cook for 6-7 minutes on each side. The chicken should turn golden brown. - Simmering the Sauce: Once the chicken is browned, stir in the red curry paste. Pour the coconut milk over the chicken. Mix everything well until the curry paste dissolves. Bring it to a gentle simmer. Cover the skillet and let it cook for 15-20 minutes. The chicken needs to reach an internal temperature of 165°F (75°C) to be safe. - Adjusting Flavor: After cooking, taste the sauce. If you need more flavor, add salt, pepper, or cayenne pepper for heat. - Serving Suggestions: Once cooked, let the dish rest for a couple of minutes. Serve the spicy Brazilian coconut chicken over jasmine rice. Garnish with fresh cilantro leaves. For extra flair, drizzle a bit of coconut milk around the edges of the plate. Enjoy your meal! Perfecting the Chicken Texture To get tender, juicy chicken, marinate it well. Use salt, pepper, and spices evenly. Let the chicken sit for at least 15 minutes. This allows the flavors to soak in. When cooking, avoid overcrowding the pan. Cook in batches if needed. This helps the chicken brown nicely. Balancing Spice Levels Adjust the heat to suit your taste. You can change the cayenne pepper amount. Start with less if you're unsure. Taste the sauce as it simmers. If it’s too spicy, add more coconut milk. This will tone down the heat and add creaminess. Presentation Techniques For a beautiful plate, use shallow bowls. Spoon the chicken and sauce over jasmine rice. Drizzle a little extra coconut milk around the edges. Add fresh cilantro on top for color. A lime wedge on the side gives a zesty touch. Pairing Suggestions This dish pairs well with a light salad. A simple green salad adds crunch and freshness. You can also serve it with crusty bread. It’s perfect for soaking up the creamy sauce. Consider a chilled white wine for a nice complement. {{image_4}} Protein Alternatives You can switch the chicken with other proteins. Try shrimp or fish for a lighter dish. You can also use beef or pork if you prefer a heartier option. Just adjust the cooking time based on the protein you choose. For shrimp, cook until they turn pink. For fish, cook until it flakes easily. Vegetarian Options To make this dish vegetarian, replace the chicken with tofu or tempeh. Use firm tofu, cut into cubes. Sauté it until golden before adding it to the sauce. You can also add chickpeas for protein and texture. This keeps the meal hearty and satisfying. Adjusting Spiciness If you love heat, add more cayenne pepper. Start with a teaspoon more, and taste as you go. If you prefer milder flavors, reduce the cayenne or skip it. You can also use sweet paprika instead of cayenne for a rich taste without the heat. Adding Vegetables Feel free to add more veggies! Carrots, zucchini, or snap peas work well. Just chop them into bite-sized pieces. Sauté them with the bell peppers for a colorful and healthy dish. This boosts nutrition and adds crunch. After enjoying your spicy Brazilian coconut chicken, you may have some leftovers. Here’s how to keep them fresh: - Best Practices for Refrigeration: Let the chicken cool to room temperature. Place it in an airtight container. Store it in the fridge for up to 3 days. This keeps it safe and tasty. - Freezing Instructions: If you want to save it longer, freeze the chicken. Use a freezer-safe container or bag. Squeeze out as much air as possible. It will last up to 3 months in the freezer. When you’re ready to eat, thaw it in the fridge overnight. Reheating can be tricky. You want to keep that great flavor and texture. - Best Methods to Reheat: The best way to reheat is on the stove. Place the chicken in a skillet over medium heat. Add a splash of coconut milk to keep it moist. Stir until heated through. You can also use the microwave. Just cover the dish and heat it in short bursts. - Maintaining Flavor and Texture: To keep the chicken tasty, avoid high heat. This prevents it from drying out. Checking the temperature helps too. Aim for 165°F (75°C) before serving. Enjoy your flavorful meal again! Can I use frozen chicken thighs? Yes, you can use frozen chicken thighs. Just make sure to thaw them first. I recommend placing them in the fridge overnight. This way, they will cook evenly and absorb all the flavors. What do I substitute if I can’t find curry paste? If you can't find curry paste, you can use curry powder instead. Mix about 2 tablespoons of curry powder with a little coconut milk. This will give you that nice flavor without the paste. How spicy is this dish? This dish has a good kick. The cayenne pepper adds heat, but you can adjust it. If you like it milder, just use less cayenne. Can I use light coconut milk? Yes, you can use light coconut milk. It will still taste great, but the sauce may be a bit thinner. Don’t worry, it will still be rich and flavorful! This blog post shared a simple recipe for a delicious chicken dish. You learned about the key ingredients like chicken and coconut milk. I walked you through each cooking step, from marinating to simmering. You also found tips to perfect your dish and ideas for variations. Remember to store leftovers properly to keep them fresh. With this guide, you can create a tasty meal that's fun to make and share. Enjoy your cooking journey!

Spicy Brazilian Coconut Chicken Flavorful Dinner Delight

Get ready to spice up your dinner with this Savory Brazilian Coconut Chicken! This dish blends juicy chicken and creamy

- 2 pounds chicken wings - 1 tablespoon baking powder - 1 teaspoon salt - 1 teaspoon black pepper - 1 teaspoon smoked paprika - 1 teaspoon garlic powder - 1 teaspoon onion powder - 1 teaspoon cayenne pepper (adjust to taste) - 1 teaspoon dried oregano - 1 tablespoon olive oil Gathering the right ingredients is key to making crispy dry rub chicken wings. The main ingredients include chicken wings, baking powder, salt, and black pepper. Baking powder helps the wings get that perfect crispy texture. For the additional seasonings, I love using smoked paprika, garlic powder, onion powder, cayenne pepper, and dried oregano. These spices bring a burst of flavor that makes every bite tasty. You can adjust the cayenne pepper to control the heat level. Don't forget the olive oil! It helps the dry rub stick to the wings. Once you have all your ingredients ready, you will be set to whip up a delicious batch of wings. If you want to see the complete process, check the Full Recipe. - Preheat the oven to 425°F (220°C). - Line a baking sheet with aluminum foil and place a wire rack on top. - Pat the chicken wings dry with paper towels. - Toss the wings in olive oil and dry rub mixture. To get crispy wings, drying is key. Any moisture will make them soggy. I like to use a clean kitchen towel or paper towels. This step might seem small, but it matters! Next, mix the olive oil with the dry rub. It helps the spices stick to the wings. This also adds flavor. - Arrange wings in a single layer on the wire rack. - Bake for 40-45 minutes, flipping halfway through. When you place the wings on the rack, give them space. This lets air flow around them. That’s how they get crispy! Halfway through baking, flip the wings. This helps them brown evenly. You want that deep golden color. Trust me, they will look and taste amazing! For more details, check the Full Recipe. To get the best crispy chicken wings, start by drying them well. Moisture is the enemy of crispiness. Use paper towels to pat the wings dry. This step makes a huge difference. Next, air circulation is key. Place your wings on a wire rack. This allows heat to flow around them while they bake. You can customize the spice levels to fit your taste. If you love heat, add more cayenne pepper. For a milder taste, reduce it. Feel free to experiment with different dry rub recipes. Try adding cumin or chili powder for a unique twist. Mixing and matching spices keeps the flavors exciting. When serving, make it look great! Place the crispy chicken wings on a big platter. Garnish with fresh parsley or crunchy celery sticks. This adds color and fun. For dipping sauces, I recommend creamy ranch or tangy blue cheese. These pair perfectly with the rich flavors of the wings. You can find the Full Recipe at the beginning of the article. {{image_4}} You can easily change the taste of your chicken wings. Try adding spices like cumin or chili powder. These spices give the wings warmth and depth. You can also marinate the wings in your favorite sauce before applying the dry rub. This step adds an extra layer of flavor and moisture. Want a quicker option? Use an air fryer! Cook the wings at 400°F for about 25 minutes for crispy results. Just make sure to shake the basket halfway through. If you prefer a smoky flavor, grilling is a great choice. Grill the wings over medium heat for about 20 minutes, flipping often. Pair your crispy wings with side dishes like coleslaw or fries. These sides balance the spicy wings. If you have leftover wings, make a creative appetizer. Chop the wings and mix them into a quesadilla or salad for a fun twist. You can even toss them in a new sauce for a fresh flavor. To keep your crispy wings fresh, store them in the fridge. First, let them cool down. Place the wings in an airtight container. You can also wrap them tightly in plastic wrap or foil. This keeps moisture out and helps maintain their flavor. For best results, eat the leftover wings within 3 days. Choose containers that seal well. Glass containers are great for this. They do not absorb odors and keep the wings fresh. If you use plastic, ensure it is BPA-free. This way, you can enjoy the wings again without worry. To reheat your wings and keep them crispy, use the oven. Preheat it to 375°F (190°C). Place the wings on a baking sheet lined with foil. Bake for about 10-15 minutes. This method helps restore the crunch. If you want a faster option, use the microwave. However, this can make wings soggy. For the best taste, stick to the oven. Enjoy your wings just like fresh out of the oven! To make chicken wings crispy, you must dry them well. First, pat the wings with paper towels. This helps remove moisture. Next, use baking powder in your dry rub. The baking powder helps to create a crispy skin. Cook the wings on a wire rack. This allows hot air to circulate around them. Bake at 425°F (220°C) for 40-45 minutes. Flip them halfway for even browning. Yes, you can use frozen chicken wings. However, you need to thaw them first. Place them in the fridge overnight or run them under cold water. After they are thawed, pat them dry with paper towels. This step is key to getting crispy wings. Follow the rest of the recipe as usual. Great dipping sauces include ranch dressing and blue cheese. They add a creamy touch that pairs well. You can also try a spicy buffalo sauce for extra heat. Honey mustard offers a sweet contrast. Experiment with your favorites to find the best mix. Leftover wings can stay fresh in the fridge for 3-4 days. Store them in an airtight container. This keeps them safe and tasty. If you want to keep them longer, freeze them. They can last up to 3 months in the freezer without losing flavor. You can find the Full Recipe for these crispy dry rub chicken wings at the beginning of this article. In this blog post, we covered how to make crispy chicken wings. You learned about the main ingredients and step-by-step instructions to prepare and bake them. We also discussed tips for crispiness and flavor variations, plus how to store leftovers. In closing, you can create delicious wings at home with ease. Customize your spices and enjoy different cooking methods. Get creative with dips and sides. Happy cooking!

Crispy Dry Rub Chicken Wings Flavorful and Easy Recipe

If you crave finger-licking good chicken wings, this recipe is for you! My crispy dry rub chicken wings are packed

To make creamy potato puffs, you need simple ingredients. Each one plays a key role in creating tasty bites. Here is the list of necessary ingredients: - 2 large russet potatoes - 1/2 cup cream cheese - 1/4 cup grated Parmesan cheese - 1/4 cup sour cream - 1/2 teaspoon garlic powder - 1/2 teaspoon onion powder - 1/4 teaspoon black pepper - Salt to taste - 1/2 cup all-purpose flour - 1/2 teaspoon baking powder - 1/4 cup chopped chives - Oil for frying Each ingredient adds flavor and texture. The russet potatoes provide the base. Cream cheese and sour cream give that rich, creamy taste. Parmesan adds a tasty kick. Garlic and onion powders bring out even more flavor. The flour and baking powder help bind everything. When you fry these puffs, the oil makes them crispy. The chopped chives on top not only look good, they add freshness. If you want to know how to put these ingredients together, check out the Full Recipe. To start, we must boil the potatoes. In a large pot, add enough salted water to cover the cubed potatoes. Bring it to a rolling boil over high heat. Carefully add the cubed potatoes and cook them for about 15 minutes. You want them tender and easy to pierce with a fork. After cooking, drain the potatoes in a colander and let them cool for a bit. Next, we need to mash the potatoes. Transfer the cooled potatoes to a mixing bowl. Use a potato masher or a fork to smash them until they are smooth. This step is key to getting that creamy texture in our final dish. Now, we will mix in the creaminess. Add the softened cream cheese, grated Parmesan cheese, and sour cream to the mashed potatoes. Also, include garlic powder, onion powder, black pepper, and salt. Use a spatula or a wooden spoon to blend everything until smooth. This mixture will be rich and flavorful. Next, we incorporate the spices and flour into the mixture. In a separate bowl, combine all-purpose flour and baking powder. Gradually add this flour mix to the creamy potato mixture. Stir until a slightly sticky dough forms. This dough will hold our puffs together. For the frying process, we first need to heat the oil. In a deep frying pan, pour in about 2 inches of oil. Heat it over medium heat until it reaches 350°F (175°C). To test if the oil is hot enough, drop a small piece of dough into it. If it sizzles, you are ready to fry. Now, let’s shape and fry the potato puffs. With floured hands, take small portions of the dough and roll them into balls or ovals, about the size of a golf ball. Place the shaped puffs on a floured plate to keep them from sticking. Carefully drop a few puffs into the hot oil at a time. Fry for about 3-4 minutes on each side until they turn golden brown and crispy. Use a slotted spoon to transfer the cooked puffs to a plate lined with paper towels to soak up extra oil. For the full recipe, check out the complete instructions mentioned earlier. Enjoy the process of making these delightful treats! To make creamy potato puffs light and fluffy, avoid heavy mixtures. After boiling and mashing the potatoes, let them cool. Hot potatoes can make the puffs dense. Mix in cream cheese and sour cream slowly. This helps keep the mixture airy. For even frying, watch the oil temperature. Heat the oil to 350°F (175°C) before adding puffs. Use a kitchen thermometer for best results. If the oil is too hot, the outside cooks too fast. If it’s too cool, the puffs absorb too much oil and become soggy. Fry only a few at a time. This keeps the temperature steady and ensures they cook evenly. Presentation matters! Serve your creamy potato puffs on a rustic board. Add a small bowl of sour cream for dipping. This adds a nice touch and makes it fun. For extra flair, sprinkle some paprika on top. It gives a pop of color and flavor. You can pair these puffs with various dips. Try ranch dressing, spicy aioli, or even a tangy salsa. Fresh herbs like parsley or chives also make a great garnish. This adds a fresh taste and makes the dish look inviting. For a hearty meal, serve them with a side salad or soup. This balances the rich flavors of the puffs. For the full recipe, check the earlier section! {{image_4}} You can make creamy potato puffs even better with different cheeses. Try using sharp cheddar for a bold flavor. Or, go for a creamy mozzarella to keep it mild. Adding spices can also give your puffs a fun twist. A pinch of cayenne pepper adds heat, while smoked paprika gives a nice, smoky taste. Want to mix it up? You can add other veggies too. Finely chopped spinach or kale blends well in the creamy mix. You can even switch to sweet potatoes for a sweeter flavor. Just boil and mash them like the russets. These changes keep the puffs exciting and fresh! For the full recipe, check out the detailed steps. To keep your creamy potato puffs fresh, store them in an airtight container. Use a glass or plastic container with a tight seal. Place a paper towel at the bottom to absorb moisture. This helps the puffs stay crispy. Make sure to let them cool completely before sealing. They can last in the fridge for up to three days. When it comes to reheating, the oven works best. Preheat your oven to 350°F (175°C). Spread the puffs on a baking sheet and heat for about 10-15 minutes. This keeps them crispy and warm. If you use a microwave, they may become soggy. If you must use it, heat on low power for 30 seconds at a time. Check often to avoid overcooking. Creamy potato puffs are small, golden-brown snacks made from mashed potatoes. They are light and fluffy on the inside with a crispy exterior. I mix mashed russet potatoes with cream cheese, sour cream, and spices. Then, I shape them and fry until they are golden. These puffs make a great snack or appetizer. Yes, you can make these puffs in advance. Prepare the mixture and shape the puffs. Then, place them on a baking sheet lined with parchment paper. Freeze them for up to three months. When ready to eat, fry them straight from the freezer. This saves time and keeps them fresh. You can serve creamy potato puffs with many tasty sides. Try pairing them with sour cream or a zesty dip like ranch. They also go well with a fresh salad or soup. For a fun twist, serve them with marinara sauce for dipping. You can easily customize the flavors of creamy potato puffs. Add different cheeses like cheddar or feta for a new taste. Try mixing in herbs like parsley or dill for extra freshness. You can even add cooked bacon bits or jalapeños for a spicy kick. Creamy potato puffs can be a tasty treat, but they are not the healthiest choice. They are fried, which adds extra fat. To make them healthier, you can bake them instead of frying. You can also use low-fat cream cheese and substitute with sweet potatoes for a nutritious twist. In this post, we explored how to make creamy potato puffs. We covered the key ingredients, step-by-step cooking methods, and helpful tips for great texture. You learned about fun variations and the best ways to store leftovers. With this recipe, you can impress friends and family at any meal. Enjoy creating and sharing these delicious bites!

Creamy Potato Puffs Deliciously Irresistible Snack

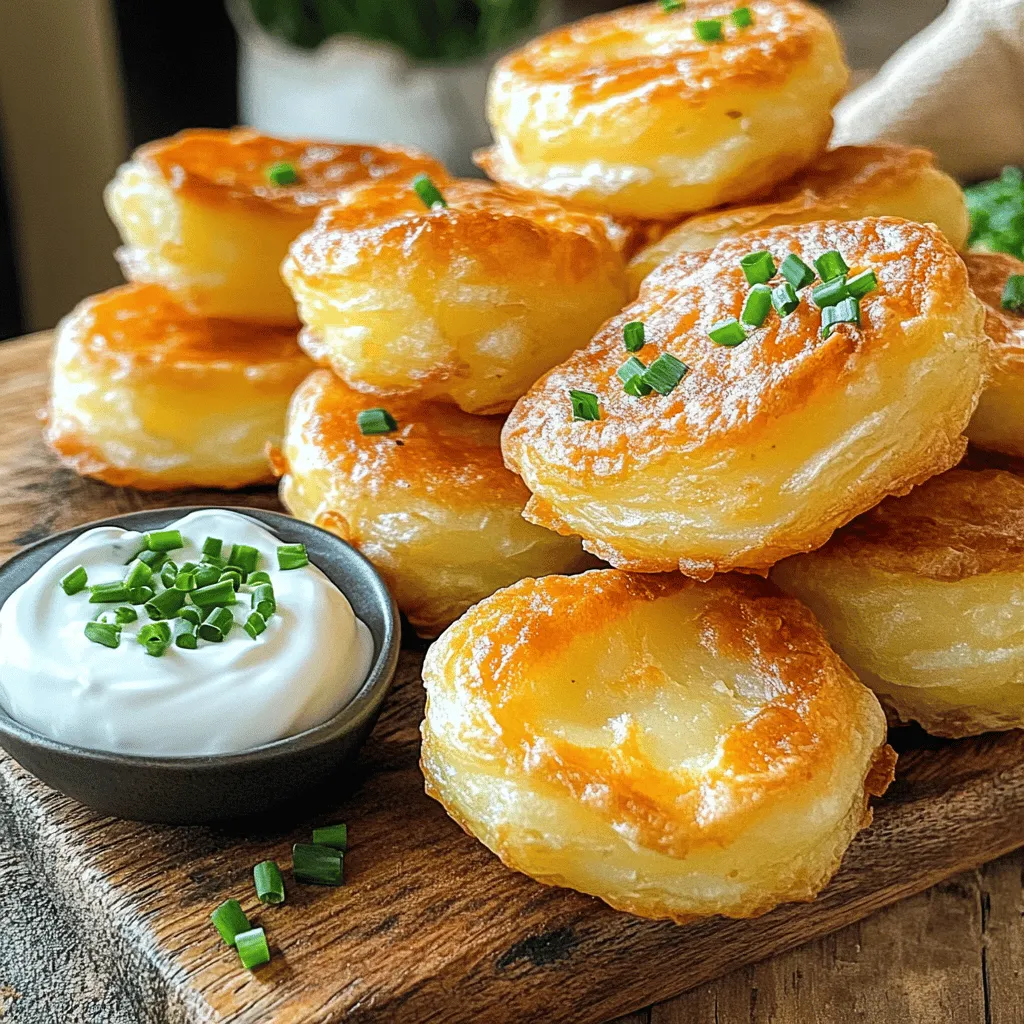
Craving a snack that’s both fun and tasty? Creamy potato puffs are the answer! These golden bites are packed with

- 1 lb ground beef (80/20 blend) - 4 slices of Irish cheddar cheese - 4 brioche burger buns - Garlic powder, onion powder, smoked paprika - Black pepper, salt, creamy Irish mustard - Crispy cooked bacon - Arugula or butter lettuce, sliced large tomato, caramelized onions The heart of a great Irish Pub Burger lies in its ingredients. I always choose a good blend of ground beef. An 80/20 blend gives you the perfect mix of meat and fat. This keeps your burger juicy and full of flavor. Next, I love adding Irish cheddar cheese. It melts beautifully and adds a rich, creamy taste. You can’t go wrong with four slices; they make the burger irresistible. Brioche buns are my go-to choice for the perfect bite. They are soft, yet sturdy, and add a nice sweetness. Toasting them enhances their flavor and makes for a great texture. Now, let’s talk about flavor enhancers. Garlic powder and onion powder bring depth to the beef. Smoked paprika adds a hint of smokiness, while salt and black pepper balance everything out. I also like using creamy Irish mustard. It adds a tangy kick that complements the rich flavors. For toppings, I can’t resist crispy cooked bacon. It adds crunch and a salty bite. Fresh arugula or butter lettuce gives a nice contrast. A slice of large tomato adds freshness and color, while caramelized onions bring sweetness. With these ingredients, you can create a burger that is juicy and full of life. Check out the Full Recipe for more details! To make the beef mixture, start with a large bowl. Add 1 pound of ground beef. Use an 80/20 blend for the best flavor and juiciness. Then, add garlic powder, onion powder, smoked paprika, black pepper, and salt. Mix gently with your hands. Be careful not to overwork the meat. This keeps the burgers tender. Next, divide the mixture into four equal portions. Shape each portion into a patty. Press your thumb in the center of each patty. This helps the burger cook evenly. Now, it’s time to cook the burgers. Preheat your grill or a cast-iron skillet over medium-high heat. Once hot, place the patties on the grill. Cook for 4-5 minutes without flipping. This gives them a nice sear. After 4-5 minutes, flip the patties. Place a slice of Irish cheddar cheese on each one. Cook for another 3-4 minutes. This melts the cheese and finishes the burgers. Aim for medium doneness for the best taste. While the burgers cook, toast the buns. Add a small amount of butter to a skillet over medium heat. Toast the brioche buns cut-side down. Cook until golden brown. This adds a nice crunch and flavor. To assemble your burger, spread creamy Irish mustard on the bottom half of each toasted bun. Place the cheese-topped patty on the mustard. Layer fresh tomato, crispy bacon, caramelized onions, and arugula or butter lettuce. Finish with the top half of the bun. Your delicious Irish Pub Burger is ready to enjoy! For the full recipe, check out the delicious Irish Pub Burger section. To make a juicy burger, I recommend using an 80/20 meat blend. This mix has enough fat to keep the burger moist. If you use lean meat, your burger may dry out. It's also important to avoid overmixing the beef. When you mix too much, it can make the meat tough. Just mix until the spices blend in, then stop. You can cook your burger on a grill or in a skillet. Grilling gives a nice smoky flavor, while a skillet can help with even cooking. If you choose a grill, preheat it well. This helps create a good sear. If using a skillet, make sure it's hot too. Start cooking the burgers without moving them for a few minutes. This allows a crust to form, sealing in juices. For sides, serve your Irish Pub Burger with crispy sweet potato fries or hand-cut chips. They pair well together. When you plate the burger, use a rustic wooden board for a nice touch. For garnish, add fresh parsley or arugula. This gives the dish color and makes it look more appealing. Enjoy your meal with a refreshing drink like a cold lager or a stout. You’ll love the taste! Check out the Full Recipe for more awesome tips. {{image_4}} You can switch up the cheese for your Irish Pub Burger. Try using a sharp cheddar for a bolder taste. You can also use blue cheese if you want a strong flavor. Creamy brie works too, adding a nice texture. Pair your cheese with toppings like crispy bacon or sweet caramelized onions. The mix of flavors will make your burger even better. Not a meat lover? No problem! You can make a tasty veggie burger instead. Look for patties made from black beans or lentils. These add great texture and flavor. Another option is using portobello mushrooms. They grill nicely and have a hearty bite. Top them with the same delicious ingredients as the beef burger. You won't miss the meat at all! Different areas have their own burger styles. In some Irish pubs, you might find a burger topped with colcannon. This dish mixes mashed potatoes with cabbage or kale. It adds a comforting touch to your burger. You might also see toppings like pickled beets or spicy relish. These give your burger a unique twist. Don't be afraid to mix and match flavors from your local favorites! To keep your Irish Pub Burger fresh, refrigerate leftovers right away. Place the burger in an airtight container. This helps keep it juicy and tasty. You can store it for up to three days. If you want to keep it longer, freeze uncooked patties. Wrap each patty in plastic wrap, then place them in a freezer bag. This way, they stay fresh for up to three months. When you want to enjoy your leftover burger, reheat it gently. The oven works great for this. Preheat it to 350°F (175°C). Place the burger on a baking tray and heat for about 10 minutes. This method keeps the burger juicy. For the buns, you can toast them lightly on a skillet. Heat them for a minute on each side for a nice crunch. Meal prepping is fun and easy! You can make your burger patties ahead of time. Shape the patties and freeze them. When you're ready to cook, just pull out the patties. For a fresh taste, store toppings separately. Keep lettuce, tomatoes, and onions in small containers. This way, everything stays fresh until you're ready to eat. Enjoy your delicious Irish Pub Burger! For the full recipe, check out the earlier section. The best way to cook an Irish Pub Burger is to grill it. Grilling gives the burger a nice char and enhances the flavor. Preheat your grill to medium-high heat. Cook the patties for 4-5 minutes on one side. Flip them gently and add cheese. Cook for another 3-4 minutes until the cheese melts. Use a meat thermometer to check for doneness. Aim for 160°F for medium. This method keeps the burger juicy and flavorful. Yes, you can use ground turkey instead of beef. Turkey is leaner, making it a healthier choice. However, it can be drier than beef. To keep it moist, add more spices or use a blend with dark meat turkey. This will help maintain flavor. Keep in mind, the taste will change slightly. Ground beef has a rich flavor that turkey lacks. To make a burger less greasy, follow these tips: - Use leaner meat, like 90/10 ground beef. - Drain excess fat after cooking. - Avoid adding too much oil or butter. - Cook on a grill or broiler to let fat drip away. These steps can help you enjoy a tasty but lighter burger. Some great condiments for an Irish Pub Burger include: - Creamy Irish mustard - Ketchup - Spicy mayonnaise - BBQ sauce - Pickles - Relish Each adds a unique flavor and complements the burger well. Experiment with your favorites to find the perfect match! Now you know how to make a tasty Irish Pub burger. We covered the best ingredients, simple steps to cook, and tips to make it juicy. You can also try different cheeses or make vegetarian versions. Remember to store leftovers properly and reheat them right. This burger is not just delicious; it’s fun to customize. Enjoy sharing it with friends or at your next gathering. Cooking can bring joy, and this recipe is sure to impress. Dive in and make your own Irish Pub burger today!

Delicious Irish Pub Burger Juicy and Flavorful Treat

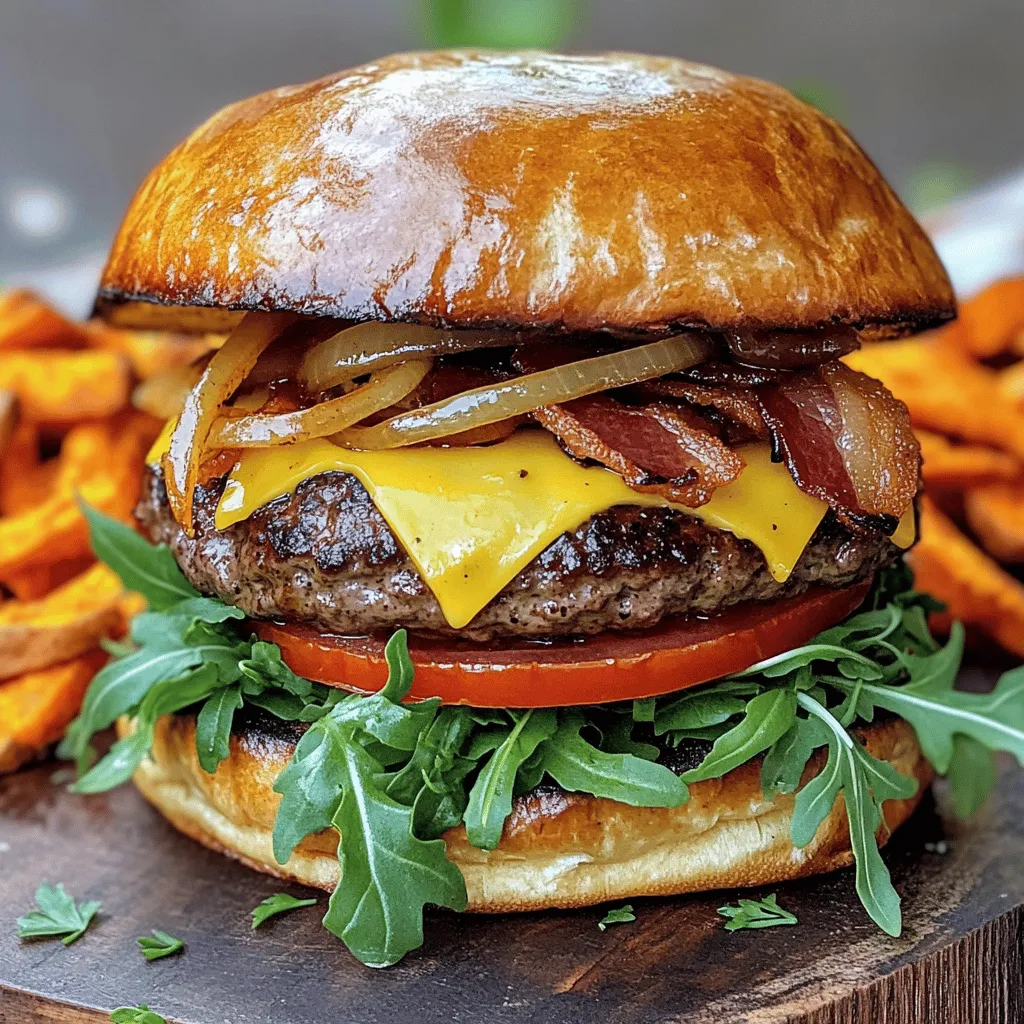
Are you ready to sink your teeth into a delicious Irish pub burger? This juicy and flavorful treat is sure

- 8 slices of rich brioche bread - 4 large eggs - 1 cup whole milk - 1 cup heavy cream - 1/2 cup granulated sugar - 2 teaspoons pure vanilla extract - 1/2 cup packed brown sugar (for the brûlée topping) - Fresh berries (for garnish) - Powdered sugar (for dusting) Gather these ingredients to create your Overnight Crème Brûlée French Toast. Each one plays a key role in building flavor and texture. The brioche bread brings a soft and rich base, while the eggs and whole milk form a creamy custard. Heavy cream adds richness, and sugar sweetens it all up. Don't forget the toppings! Brown sugar will caramelize beautifully on top, giving that classic brûlée finish. Fresh berries add a pop of color and freshness, while powdered sugar makes everything look fancy. With these ingredients at hand, you’re ready to impress anyone who takes a bite. Check the Full Recipe for exact steps and tips to make this dish truly shine! To make the custard, start with a large mixing bowl. In this bowl, add: - 4 large eggs - 1 cup whole milk - 1 cup heavy cream - 1/2 cup granulated sugar - 2 teaspoons pure vanilla extract - 1 teaspoon almond extract - 1/2 teaspoon ground cinnamon - A pinch of salt Whisk these ingredients together until smooth. Make sure there are no lumps. The mixture should look creamy and well blended. The vanilla and almond extracts add a lovely flavor that makes this dish special. Next, take a greased 9x13 inch baking dish. Carefully arrange 8 slices of rich brioche bread in the dish. You can overlap the slices a bit if needed. When all slices are in place, pour the custard mixture over the bread. Ensure every slice is soaked well. Cover the dish with plastic wrap and place it in the fridge. Leave it overnight, or at least for 6 hours. This helps the bread soak up all the yummy flavors. The next morning, preheat your oven to 350°F (175°C). When the oven is ready, take the baking dish from the fridge and remove the plastic wrap. Now, sprinkle 1/2 cup packed brown sugar evenly over the top of the soaked brioche. This will create that crispy, sweet layer we all love. Place the baking dish in the oven and bake for 30-35 minutes. You want the custard to set and the top to turn a beautiful golden brown. For the final touch, use a kitchen torch to caramelize the brown sugar until it melts. If you don’t have a kitchen torch, you can broil it in the oven for a couple of minutes. Just keep a close eye on it to avoid burning. Once it’s done, let the French toast cool for a few minutes. Then, cut it into slices and serve warm. Top each slice with fresh berries and a dusting of powdered sugar for a stunning presentation. You can find the complete instructions in the Full Recipe. To make your Overnight Crème Brûlée French Toast shine, you need to soak the brioche well. You want each slice to absorb the custard fully. This makes the toast rich and flavorful. Make sure you cover the dish tightly before refrigerating. Baking time is crucial too. Every oven is different. Start checking at 30 minutes. Look for a golden top and firm custard. If it seems too soft, let it bake for a few more minutes. A kitchen torch is a great tool for caramelizing the sugar. It gives you that perfect crackly top. If you don’t have one, no worries! You can use your oven's broiler instead—just keep a close eye on it. You’ll also need a large mixing bowl and a whisk. These are essential for blending your custard mixture smoothly. Pair your French toast with fresh fruits like berries. They add a burst of color and freshness to your dish. Drizzle some maple syrup on top for extra sweetness. For special occasions, serve with a dollop of whipped cream or a scoop of vanilla ice cream. It elevates the dish and makes it even more delightful! {{image_4}} You can make this dish even more fun by adding different flavors. Try adding hazelnut or coconut extract to the custard. These extracts bring a unique twist to the classic taste. You can also sprinkle in spices like nutmeg or cardamom. These spices add warmth and depth to your French toast. Each flavor brings its own charm, making breakfast a delightful surprise. If you need gluten-free options, use gluten-free bread. Many brands offer tasty choices that hold up well in this recipe. For those who avoid dairy, you can substitute with plant-based milk and cream. Almond milk or coconut cream works well. These swaps keep the rich taste while fitting your dietary needs. You can enjoy this dish without missing out on flavor. Make your French toast special with seasonal flavors. For the holidays, try an eggnog version. This adds a festive touch to your breakfast table. In the summer, use fresh stone fruits like peaches or plums. Their natural sweetness brightens the dish, making it perfect for warmer days. Each season offers new ways to enjoy this delicious treat. For the full recipe, check out the Overnight Crème Brûlée French Toast. To keep your Overnight Crème Brûlée French Toast fresh, place the leftovers in an airtight container. Make sure the container seals tightly to prevent air from getting in. You can store it in the fridge for up to three days. This helps keep the bread soft and the custard creamy. When it comes to reheating, I recommend the oven for the best results. Preheat your oven to 350°F (175°C). Place the slices on a baking sheet and cover with foil. Heat for about 10-15 minutes. This method keeps the texture nice. If you're in a hurry, use the microwave. Just heat for 30-60 seconds, but be careful. The bread can get soggy. If you want to save some for later, freezing works great. Slice the French toast before freezing. Wrap each piece tightly in plastic wrap, then place them in a freezer bag. They can stay frozen for up to three months. When you're ready to eat, let them thaw in the fridge overnight. Reheat in the oven or microwave for a warm treat. This keeps the flavors intact and delicious. You can tell when the French toast is cooked by checking two things. First, look for the custard to be set. It should not be runny. Next, check the top for a golden brown color. This shows that the sugar has caramelized well. If both look good, your dish is ready to enjoy! Yes, you can make the custard mixture ahead! This dish works best when soaked overnight. Just mix your eggs, milk, cream, sugar, and extracts in a bowl. Pour it over the brioche slices. Cover your dish with plastic wrap. Let it soak in the fridge for at least six hours. This step helps the bread absorb the flavors. If you don’t have a kitchen torch, don’t worry! You can use your oven's broiler. After baking, sprinkle brown sugar on top. Place the dish under the broiler for a few minutes. Keep a close eye to avoid burning. This method will also give you that nice caramelized topping. Yes, you can make this dish dairy-free! Use almond milk or coconut milk instead of whole milk. For cream, try coconut cream or cashew cream. You can also find dairy-free cream cheese for a richer taste. Just make sure to adjust the flavors to your liking! This blog post covered everything you need for Overnight Crème Brûlée French Toast. We discussed the main and extra ingredients, plus tips for success. You learned ways to store your leftovers and how to heat them again. With these steps and ideas, you can make a classic dish that fits any event. Remember, personal touches and variations bring this recipe to life. Enjoy experimenting and delight your friends and family with this sweet treat!

Overnight Crème Brûlée French Toast Irresistible Delight

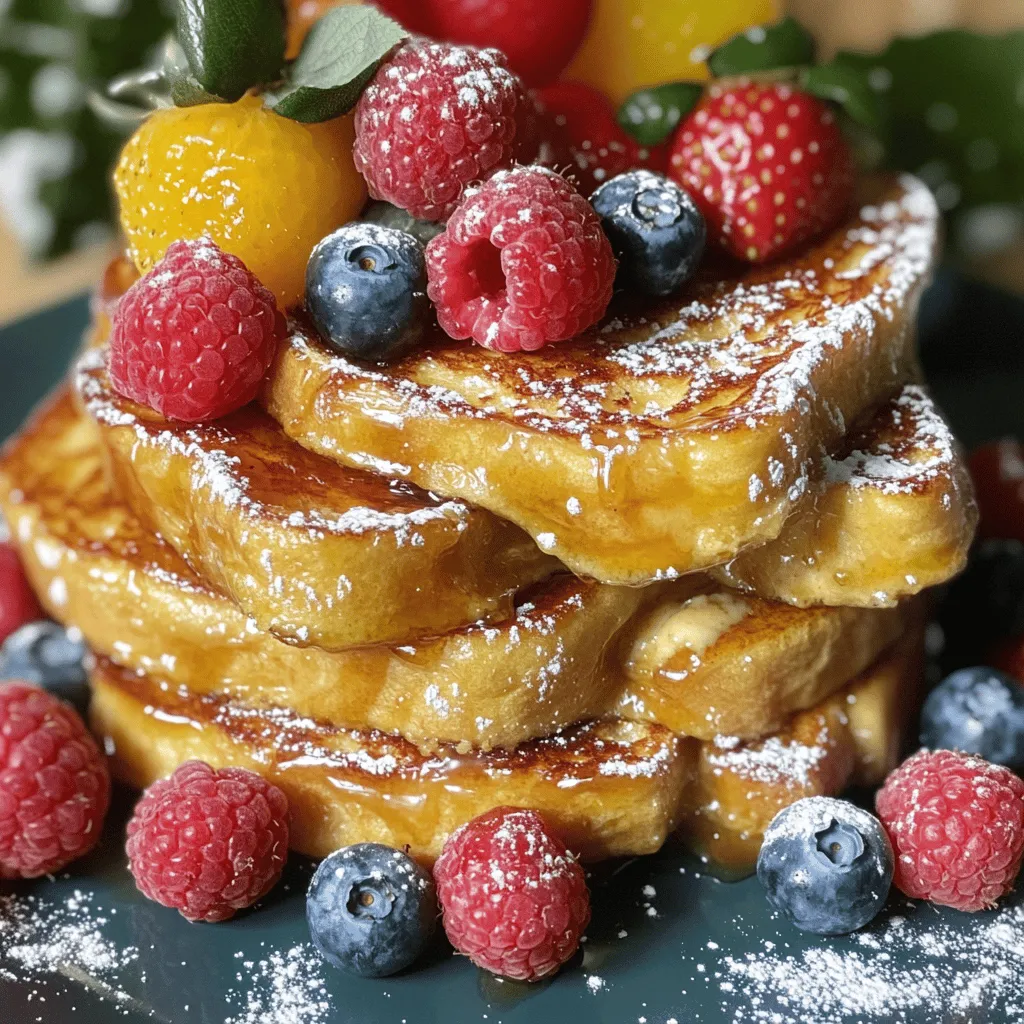
Are you ready to turn your breakfast routine into something truly special? This Overnight Crème Brûlée French Toast is an

- 1 lb large shrimp, peeled and deveined - 3 tablespoons olive oil - 4 cloves garlic, finely minced - 1 cup heavy cream - 1/2 cup low-sodium chicken broth - 1 cup fresh spinach leaves, packed - 1/2 teaspoon red pepper flakes (optional) - Salt and freshly ground black pepper to taste - Juice of 1 lemon (plus additional wedges for serving) - Fresh parsley, finely chopped (for garnish) When making creamy garlic shrimp, you will need a few key ingredients. First, get large shrimp. They should be peeled and deveined for easy cooking. Next, olive oil adds flavor and helps cook the shrimp perfectly. Garlic is a must for that rich taste we love. Heavy cream gives the dish its creamy texture, while chicken broth adds depth. Fresh spinach brings color and nutrients, and lemon juice brightens the whole dish. Optional red pepper flakes can add a little heat, so feel free to adjust based on your taste. Don’t forget salt and pepper to enhance the flavors. Finally, fresh parsley gives a lovely finish when you serve the dish. - Large skillet or frying pan - Measuring cups and spoons For this recipe, you need a large skillet or frying pan. This helps to cook the shrimp evenly. Measuring cups and spoons are also important for getting the right amounts of each ingredient. Using the right tools makes cooking easier and more fun. - Calories, protein, fats, carbohydrates breakdown per serving Each serving of creamy garlic shrimp has about 400 calories. It contains 30 grams of protein, 25 grams of fat, and 10 grams of carbohydrates. This dish is rich in flavor and offers a good balance of nutrients. Enjoy it as a meal that feels both indulgent and satisfying. For the full recipe, check the details above! To start, heat 3 tablespoons of olive oil in a large skillet over medium heat. Once the oil shimmers, add 1 pound of peeled and deveined shrimp. Cook the shrimp for about 2-3 minutes on each side. You want them to turn pink and opaque. Once cooked, remove the shrimp and set them aside on a plate to keep warm. Now, lower the heat to low. In the same skillet, add 4 cloves of finely minced garlic. Sauté gently for about 30 seconds, stirring constantly. Be careful not to let the garlic brown, as it can taste bitter. Next, pour in 1/2 cup of low-sodium chicken broth, bringing it to a gentle simmer for about 2 minutes. Gradually stir in 1 cup of heavy cream, whisking until combined. Let the sauce simmer for about 3-5 minutes until it thickens slightly. Stir in fresh spinach leaves, about 1 cup packed. Add salt and freshly ground black pepper to taste. You can also add 1/2 teaspoon of red pepper flakes for a bit of heat. Cook the spinach for 1-2 minutes until it wilts. Finally, return the shrimp to the skillet, tossing them in the creamy garlic sauce. Heat everything together for another 2-3 minutes until the shrimp is warm and coated in sauce. Serve the creamy garlic shrimp with lemon wedges and garnish with fresh parsley. For the full recipe, check the details above. How to choose fresh shrimp When picking shrimp, look for a firm texture and a clean smell. Choose shrimp with a shiny shell and no black spots. Fresh shrimp should be pink or gray, depending on the type. If you buy frozen shrimp, check for ice crystals and choose ones that are individually frozen. This shows they are fresh and have not thawed. Tips for achieving the perfect sauce consistency To get the sauce just right, use heavy cream. This gives it a rich and smooth texture. Always let the sauce simmer gently. This helps it thicken without burning. If the sauce is too thick, add a splash of chicken broth. If it’s too thin, let it simmer longer to reduce. Suggested seasonings and herbs to experiment with You can add more flavor with spices. Consider garlic powder, onion powder, or paprika. Fresh herbs like basil or thyme work great too. If you want a kick, add cayenne pepper or more red pepper flakes. Each adds a unique twist to the dish. Pairing options like pasta or rice Creamy garlic shrimp pairs well with many sides. Serve it over pasta for a hearty meal. Rice is another good option; it absorbs the sauce nicely. Crusty bread is perfect for dipping in the sauce, too. Overcooking shrimp Shrimp cooks very quickly. Overcooked shrimp turn rubbery and tough. Cook them just until pink and opaque. This usually takes about 2-3 minutes per side. Remove them from the pan as soon as they are done. Not balancing flavors properly Balancing flavors is key to a great dish. Taste the sauce as you go. If it's too rich, add more lemon juice. If it lacks depth, a pinch of salt can help. Always adjust based on your taste. {{image_4}} For a lighter version of creamy garlic shrimp, you can swap out the heavy cream. Use half-and-half or a mix of Greek yogurt and milk. This keeps the dish creamy but cuts down on calories. If you want a dairy-free option, consider coconut cream or cashew cream. These choices add a unique flavor while keeping the dish rich. If you prefer vegetarian options, try using mushrooms instead of shrimp. Sauté the mushrooms until they are golden. They soak up the sauce well and add a great texture. You can also add chickpeas for protein. They pair nicely with garlic and cream flavors. How you present creamy garlic shrimp can elevate the dish. Serve it over a bed of pasta, rice, or quinoa. This adds a hearty base that soaks up the sauce. You can also use crusty bread for dipping. Just imagine the joy of scooping up that delicious sauce with warm bread. For side dishes, consider a simple green salad or roasted vegetables. These add freshness and balance to the meal. A light, lemony side can also enhance the shrimp's flavors. You can find inspiration from different cuisines to add a twist to creamy garlic shrimp. For a Mexican flair, try adding jalapeños or cilantro. The heat will balance with the creaminess. If you want an Italian touch, stir in sun-dried tomatoes and fresh basil. Explore unique ingredients based on various cuisines. For example, using lemongrass and fish sauce can give it a Thai vibe. These changes make the dish fun and exciting each time you prepare it. To store your creamy garlic shrimp, place it in a clean, airtight container. This keeps the dish fresh for a longer time. Make sure to cool it to room temperature before sealing. Refrigerate it within two hours of cooking to avoid spoilage. It will stay good in the fridge for up to three days. When you're ready to enjoy your leftovers, reheating is key. You can use a skillet or the microwave. For the skillet, heat it on low and add the shrimp. Stir gently to warm it up. This method keeps the sauce creamy. In the microwave, place the shrimp in a bowl and cover it loosely. Heat in short bursts, stirring in between until warm. Avoid high heat to prevent the sauce from separating. Can creamy garlic shrimp be frozen? Yes, but it is best to freeze it without the cream sauce. The sauce may not thaw well, losing its creamy texture. To freeze, cool the shrimp and place it in a freezer-safe container. Label it with the date. When you’re ready to eat, thaw in the fridge overnight and reheat. If you want the sauce, make it fresh when you cook the shrimp. You can use a few options if you want a lighter base. Evaporated milk works well. It gives creaminess without all the fat. Another choice is coconut cream. This adds a nice flavor and keeps it dairy-free. You can also mix milk with cornstarch for a quick thickener. Each choice will change the taste slightly, so pick what you like best. Yes, you can use frozen shrimp! Just remember to thaw them first. Place them in the fridge overnight or run them under cold water. This keeps them fresh and safe. When cooking, they may take a minute longer to cook than fresh shrimp. Always check they are pink and opaque. This shows they are done. Creamy garlic shrimp lasts about 3 to 4 days in the fridge. Store it in an airtight container. This keeps it fresh and safe to eat. If you notice any off smells or colors, it's best to toss it. Always check before eating leftovers. The recipe can be spicy if you add red pepper flakes. You can adjust the heat by adding more or less. If you prefer no spice, skip the flakes. You can add herbs like parsley or basil for flavor instead. This keeps the dish tasty without the heat. Yes, you can prepare creamy garlic shrimp in advance. Just cook the shrimp and sauce, then store them separately. When ready to serve, heat them together. This helps keep the shrimp from getting tough. You can also add fresh spinach right before serving. It stays bright and fresh this way. For the full recipe, check the earlier section. This blog post dives deep into making creamy garlic shrimp. You learned about the key ingredients, tools, and step-by-step instructions. I shared tips to perfect the dish and variations for every taste. Storing and reheating methods ensure that leftovers stay tasty. Remember, you can swap ingredients to make it lighter or vegetarian. With these insights, you can impress anyone at your table. Enjoy cooking this delightful dish and get creative with your flavors!

Creamy Garlic Shrimp Rich and Flavorful Dinner Dish

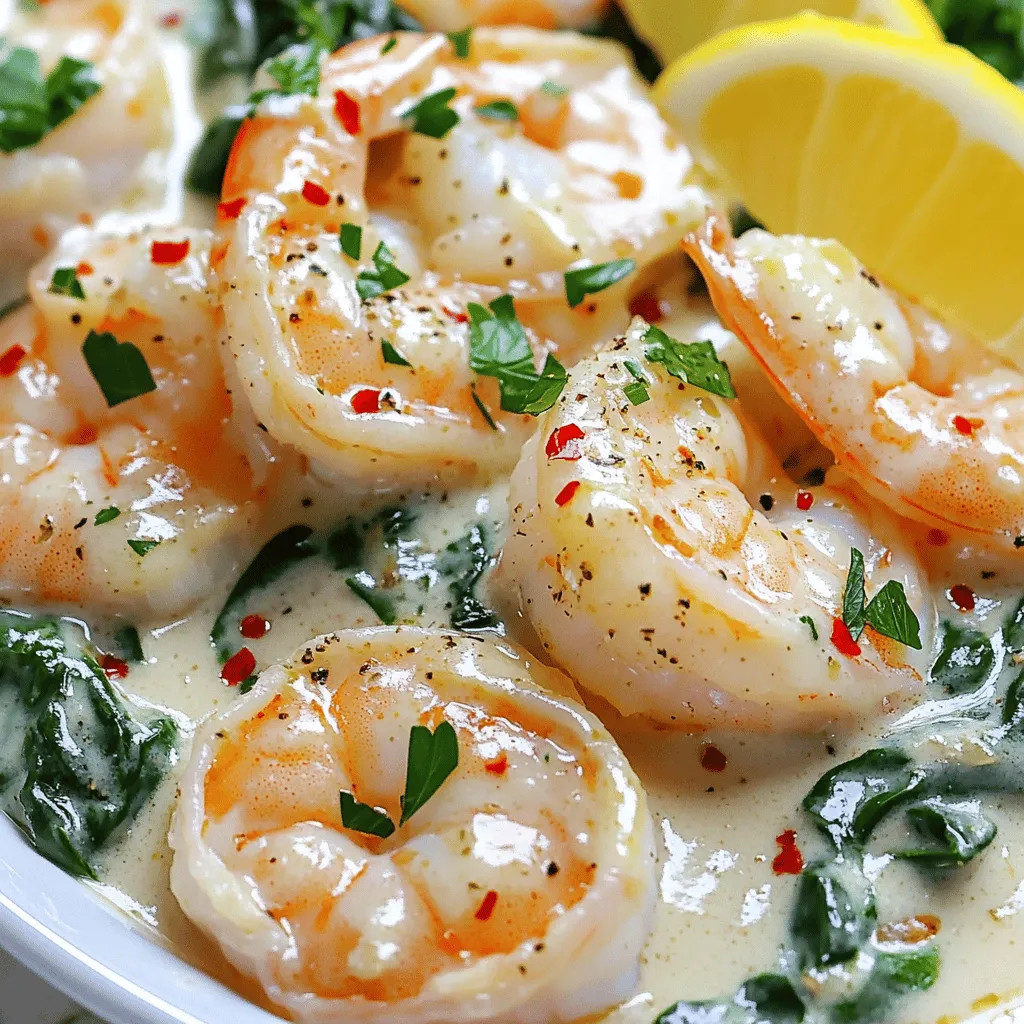
If you’re craving a rich and flavorful dinner that’s easy to make, Creamy Garlic Shrimp is the dish for you.

Older posts
Newer posts
← Previous Page1 … Page74 Page75 Page76 … Page91 Next →

dsad

© 2025 recipesstation • Built with GeneratePress

Our Policies

  • Copyright Policy
  • Cookie Policy
  • GDPR Policy
  • Privacy Policy
  • Disclaimer
  • Terms Of Use

More Information

  • Home
  • About
  • Contact
  • Appetizers
  • Dessert
  • Dinner
  • Drinks
©2025, recipesstation About Back To Top