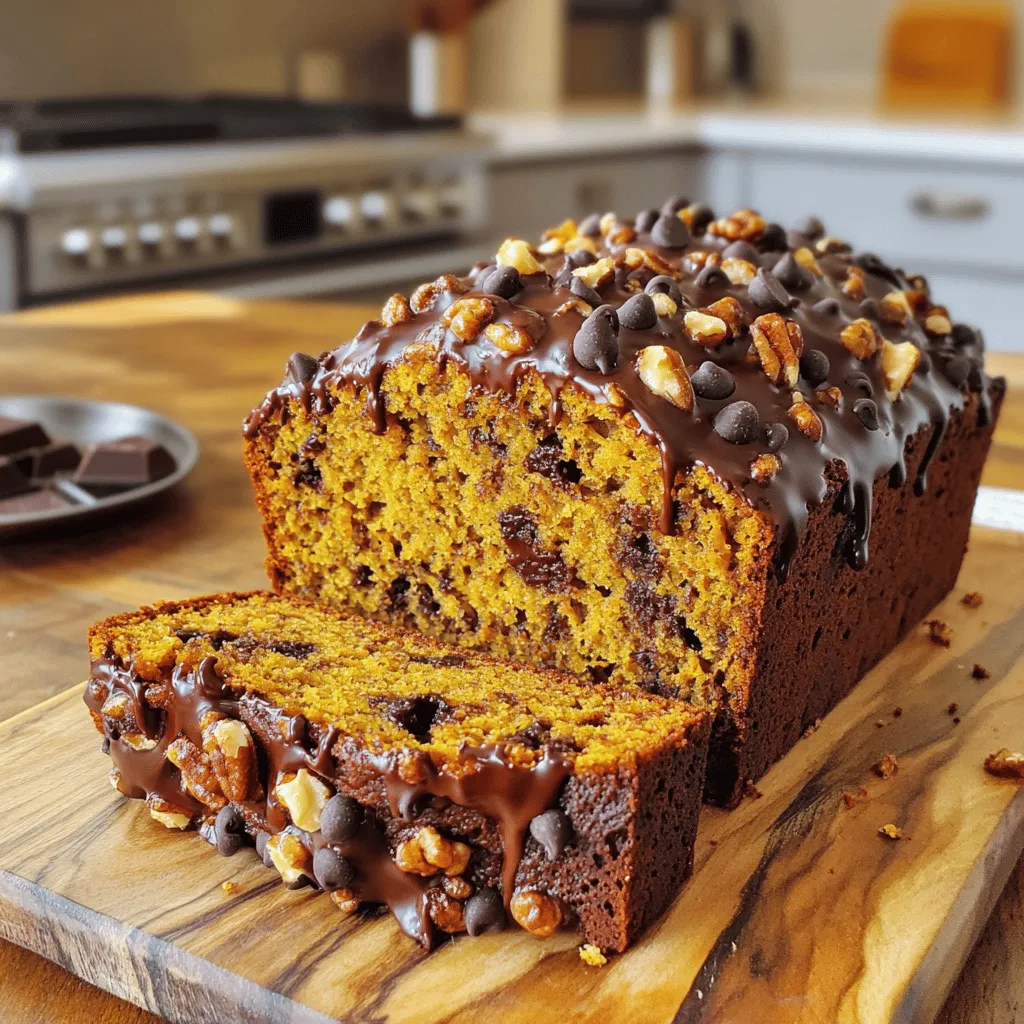
Pumpkin Chocolate Chip Bread Bakery Delight Recipe
Welcome to my kitchen, where we’ll bake a warm, tasty pumpkin chocolate chip bread together! This recipe brings fall’s flavors
Welcome to my kitchen, where we’ll bake a warm, tasty pumpkin chocolate chip bread together! This recipe brings fall’s flavors
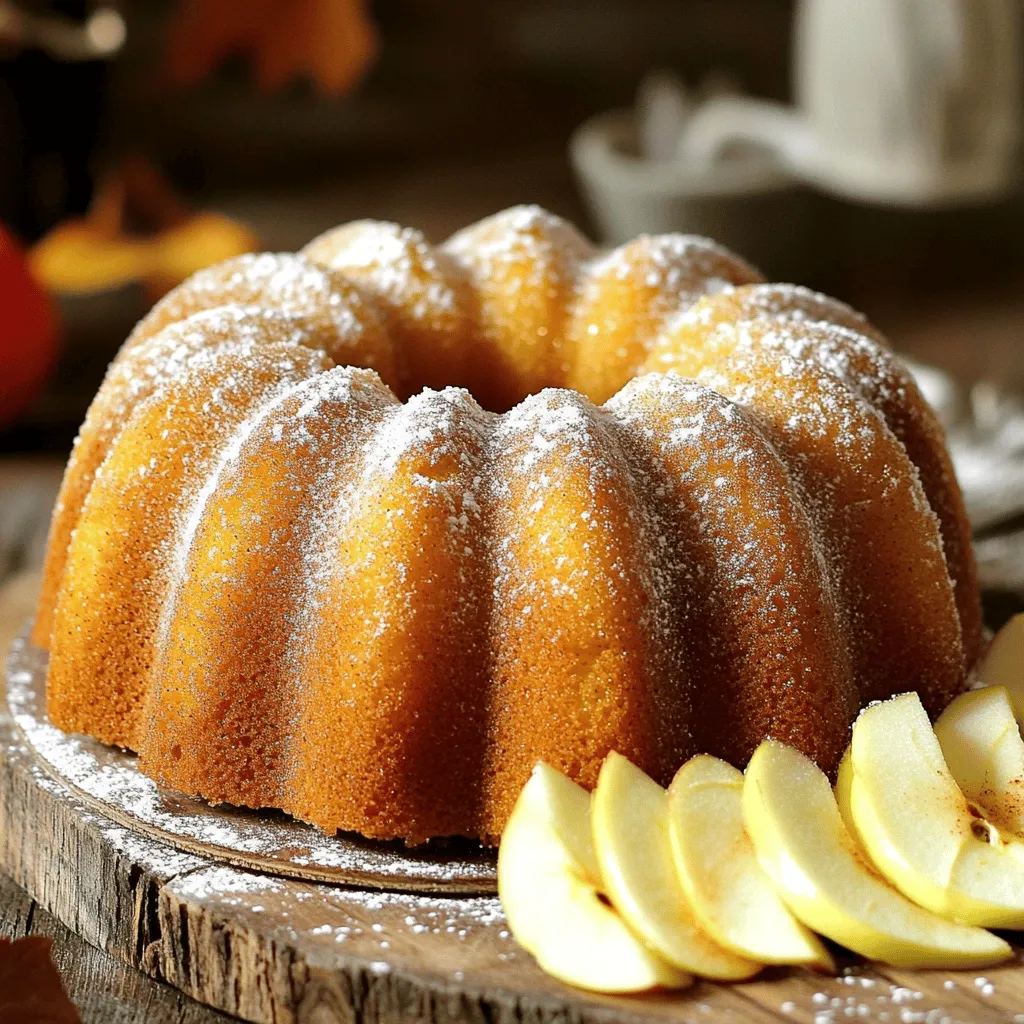
Get ready to enjoy the flavors of fall with my Apple Cider Donut Bundt Cake! This cake combines the warm
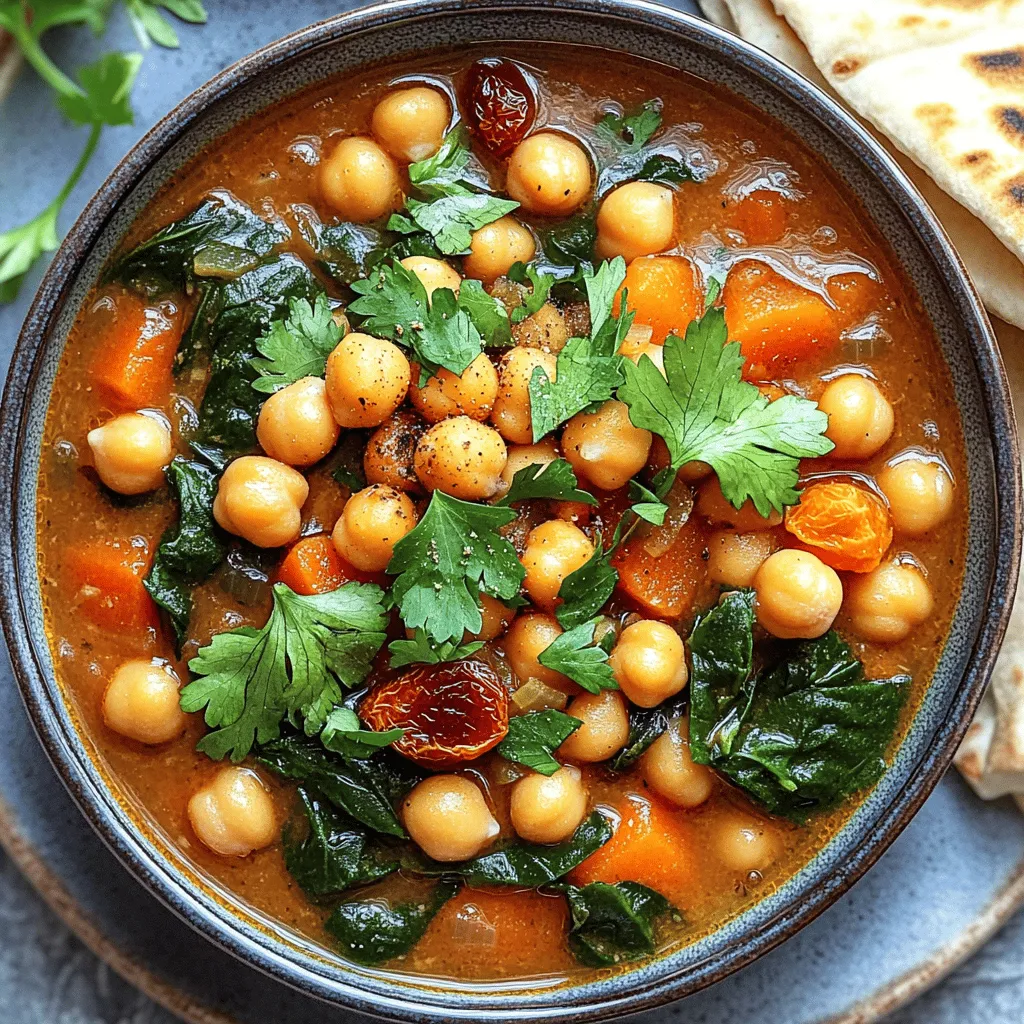
Are you ready for a cozy meal that packs a punch? This Slow Cooker Moroccan Chickpea Stew wraps you in
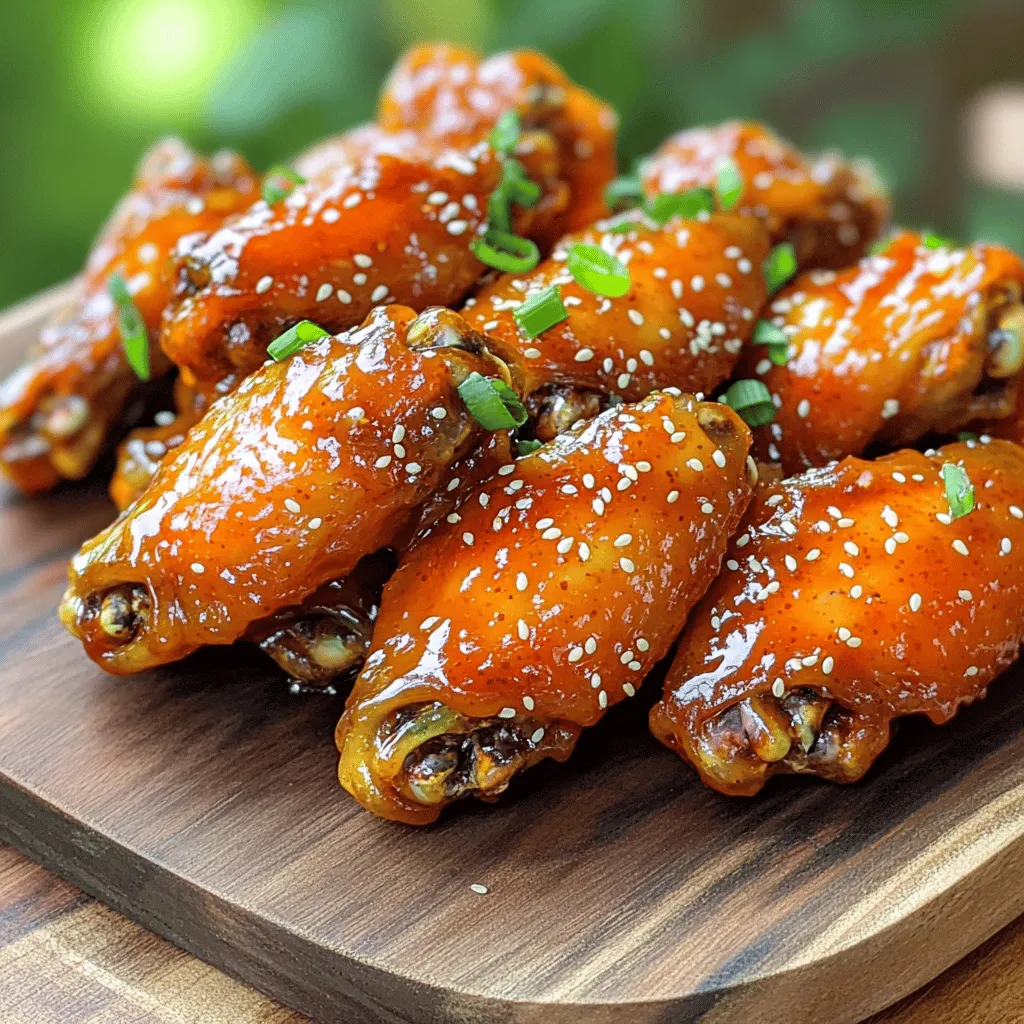
Looking for a bold and flavorful dish that packs a punch? You’ve found it! My Honey Sriracha Wings will take
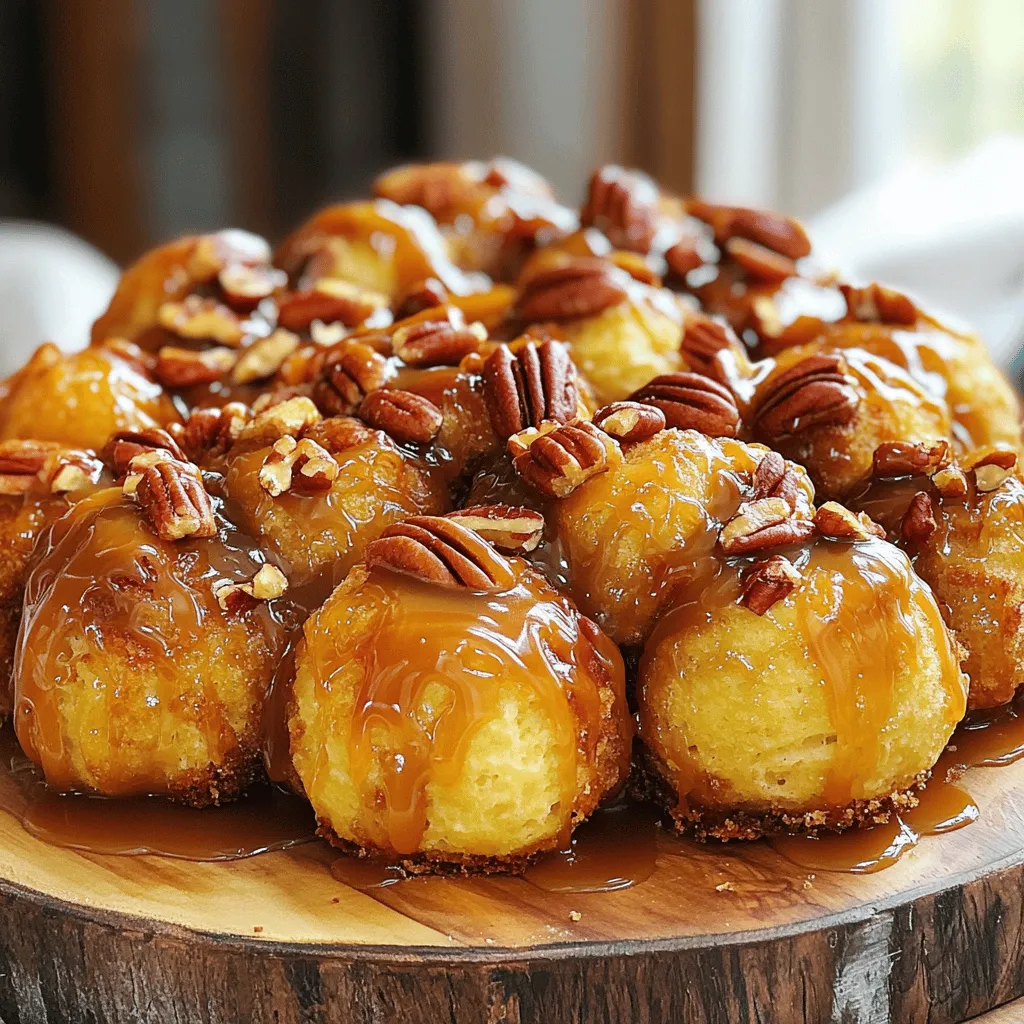
Get ready to indulge your sweet tooth with my Caramel Pecan Monkey Bread! This gooey, warm treat combines soft biscuit
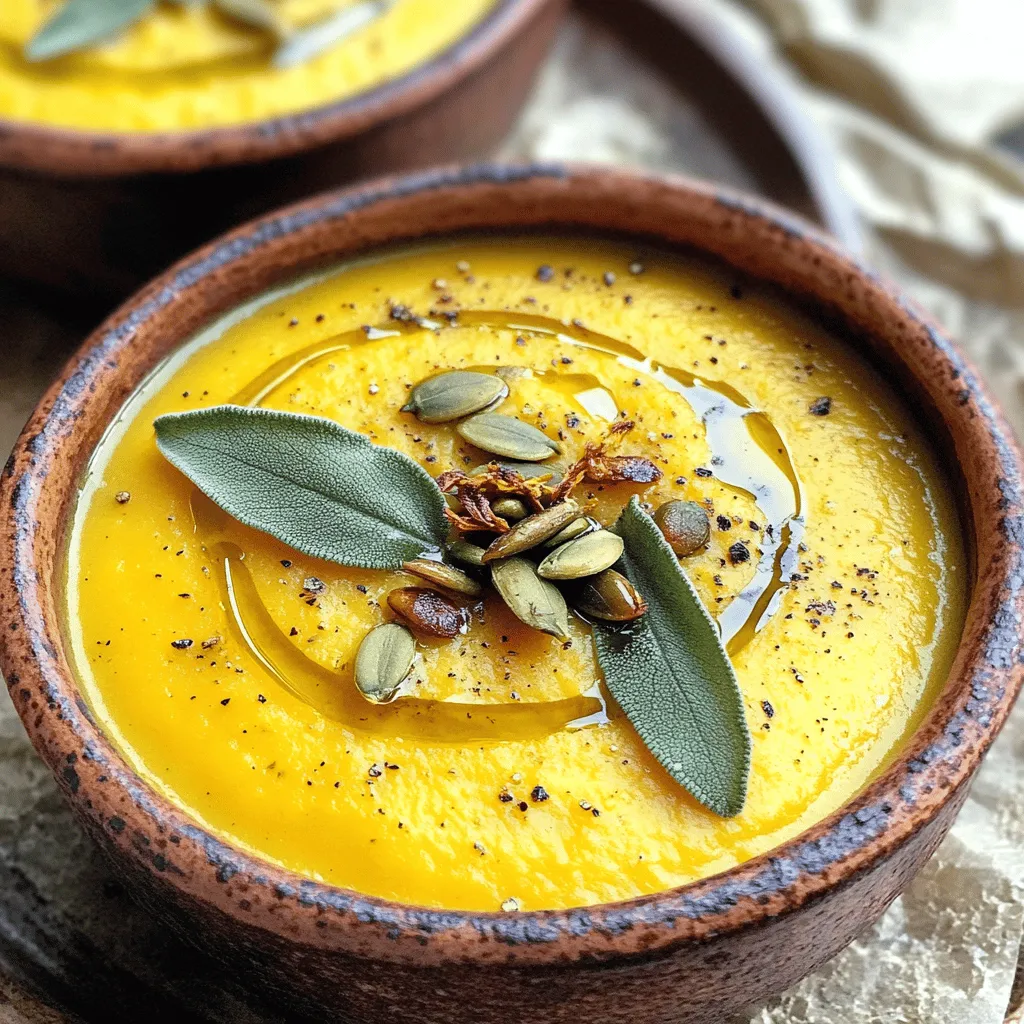
Warm up your kitchen with a bowl of Roasted Butternut Squash Soup with Crispy Sage. This soup is all about
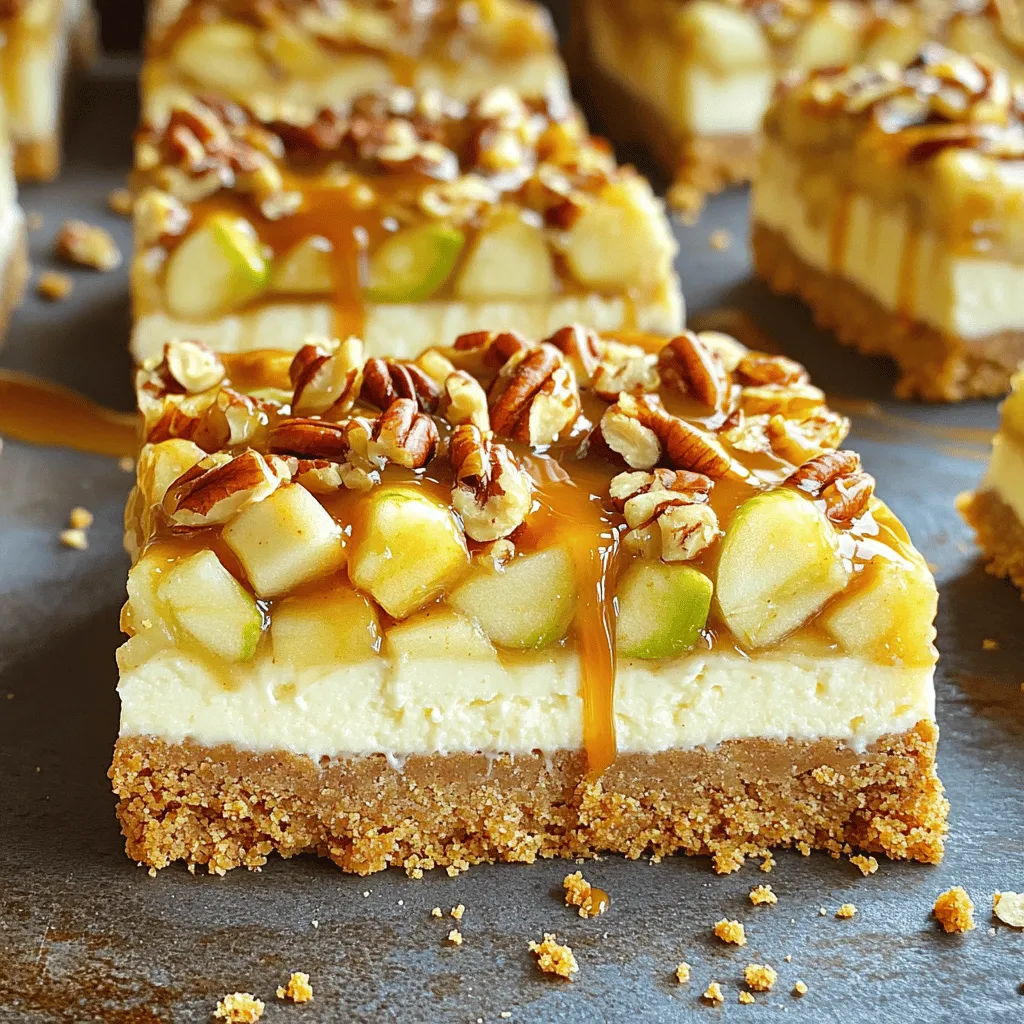
If you crave a dessert that combines the flavors of fall, you’ll love these Caramel Apple Pecan Cheesecake Bars. Picture
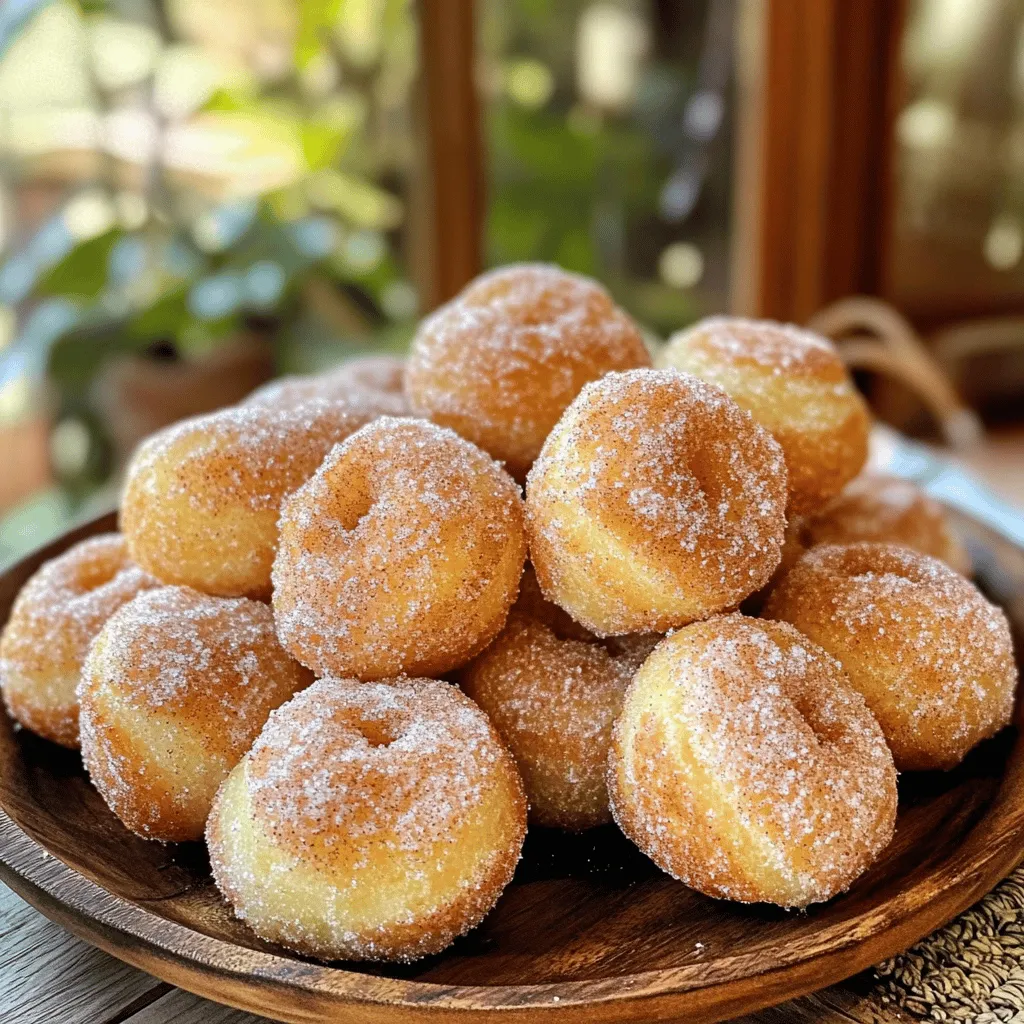
Craving a sweet treat that combines crispy, fluffy, and sugary goodness? You’re in the right place! Cinnamon sugar churro donut
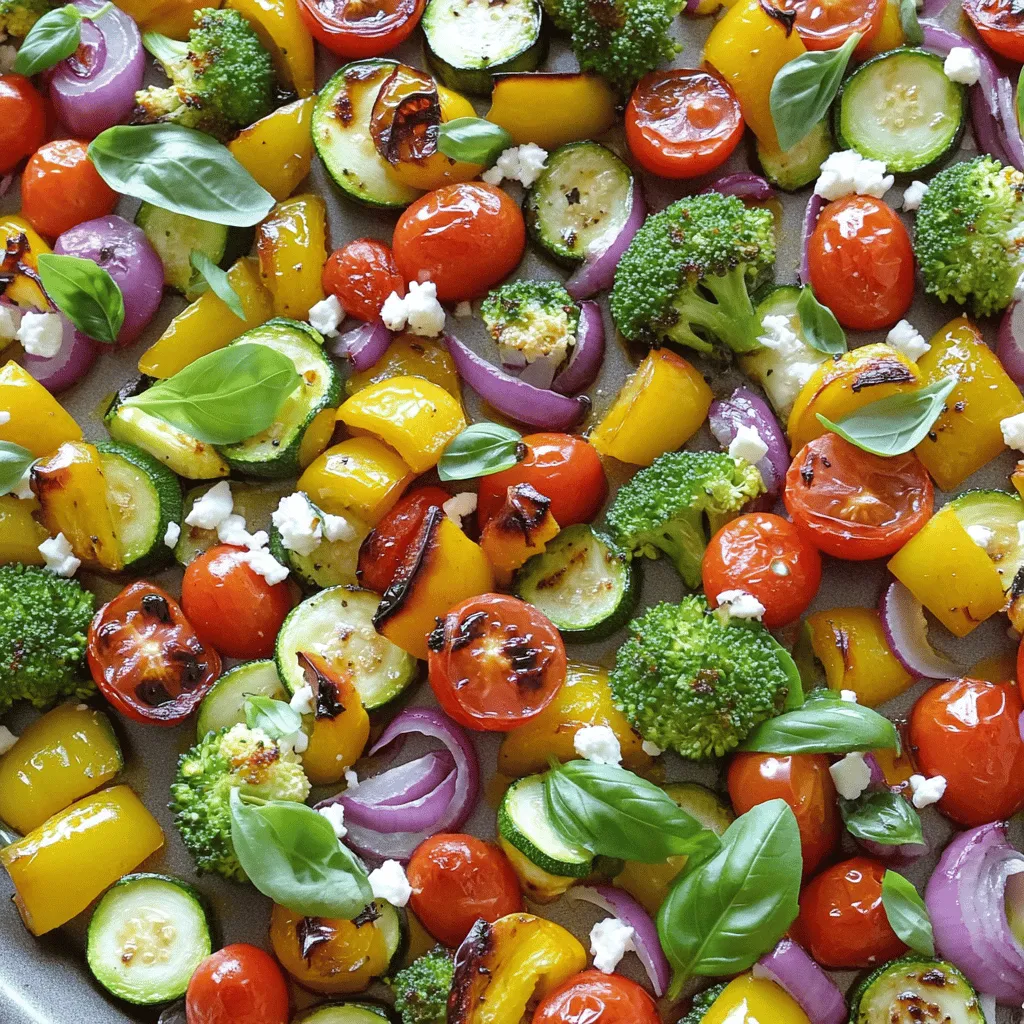
Welcome to Sheet-Pan Balsamic Roasted Veggies With Feta Delight. I’ll walk you through making a colorful, tasty dish that’s easy

If you’re craving a warm, comforting bowl of deliciousness, my Savory Slow Cooker Loaded Potato Soup is just what you
