Skip to content
DisclaimerTerms Of UseGDPR PolicyCookie Policy

recipesstation

  • Home
  • Drinks
  • Appetizers
  • Dinner
  • Dessert
  • About
  • Contact
  • Privacy Policy
DisclaimerTerms Of UseGDPR PolicyCookie Policy

Emily

To make tasty German Frikadellen, gather these key ingredients: - 500g ground beef - 200g ground pork - 1 medium onion, finely chopped - 2 cloves garlic, minced - 1 teaspoon dried thyme - 1 teaspoon paprika powder - 1 tablespoon Dijon mustard - 1 large egg - 100g breadcrumbs (plus extra for coating) - 2 tablespoons vegetable oil (for frying) - Salt and black pepper to taste - Fresh parsley, finely chopped (for garnish) These ingredients create a rich flavor and nice texture. The mix of beef and pork provides juiciness. The spices and mustard add depth. You can boost flavor with these optional ingredients: - 1 tablespoon Worcestershire sauce - 1 teaspoon onion powder - 1 teaspoon garlic powder - Chopped fresh herbs like thyme or parsley These extras add a unique twist. Worcestershire sauce gives umami, while herbs brighten the dish. Feel free to adjust ingredients based on your taste: - Use ground turkey or chicken instead of beef and pork for a lighter option. - Swap out breadcrumbs for crushed crackers or oats for a different texture. - Replace Dijon mustard with yellow mustard if you prefer a milder flavor. These swaps keep the essence of Frikadellen while allowing for personal flair. Enjoy crafting your perfect patty! {{ingredient_image_2}} Start by taking a large bowl. Add 500g of ground beef and 200g of ground pork. This mix gives Frikadellen great flavor. Next, add one medium onion, finely chopped, and two cloves of minced garlic. The onion adds sweetness, while garlic gives a nice kick. Sprinkle in one teaspoon of dried thyme and one teaspoon of paprika powder for warmth. Then, add one tablespoon of Dijon mustard for a tangy twist. Now, crack one large egg into the bowl. This acts as a binder. Add 100g of breadcrumbs to soak up moisture and keep the patties firm. Season everything with salt and black pepper to taste. Get your hands in there and mix it all well. You want each bite to burst with flavor. Once your meat mixture is well combined, it’s time to form the patties. Take a handful of the mixture and shape it into a round patty about 2 cm thick. This size cooks evenly and keeps the inside juicy. For a crispy crust, lightly coat each patty with extra breadcrumbs. This step is key for that satisfying crunch. Heat two tablespoons of vegetable oil in a large frying pan over medium heat. Wait until the oil shimmers before adding the patties. Be careful not to crowd the pan; this helps them brown nicely. Cook the Frikadellen for about 4-5 minutes on each side. Flip them gently to avoid breaking. Keep an eye on the heat, adjusting if necessary to prevent burning. Once they are golden brown and cooked through, transfer them to a plate lined with paper towels. This helps soak up any excess oil. For a pretty finish, garnish your Frikadellen with fresh parsley before serving. Enjoy your delicious creation with potato salad or pickled cucumbers for a true German experience! For tasty Frikadellen, mixing is key. Use your hands to blend the meats. This ensures the flavors meld well. Add the onion, garlic, and spices into the meat. Mix until everything is well combined. If the mix feels too wet, add a bit more breadcrumbs. This helps the patties hold their shape. Keep a close eye on your frying pan. Heat the oil over medium heat. If it gets too hot, the outside will burn. Cook each patty for about 4-5 minutes per side. Look for a golden brown color. If you’re unsure, use a meat thermometer. The inside should reach at least 160°F. This keeps your Frikadellen juicy, not dry. Frikadellen shine when paired well. Serve them with potato salad for a classic touch. Pickled cucumbers add a nice crunch. You can also add mustard for a zesty kick. For a fun touch, place them on a wooden board. Garnish with fresh parsley for color. These simple sides make your meal feel special. Pro Tips Use Fresh Ingredients: Always opt for fresh herbs and vegetables to enhance the flavor of your Frikadellen. Adjust the Spices: Feel free to tweak the spice levels according to your taste preferences; adding a pinch of cayenne can give it an extra kick. Resting Time: Allow the formed patties to rest for 10-15 minutes before frying; this helps in better texture and flavor integration. Experiment with Fillings: Add a surprise ingredient like cheese or chopped olives in the center of the patties for a delicious twist. {{image_4}} German Frikadellen have many tasty twists based on where you are. In northern Germany, cooks often add fresh fish or seafood. This brings a unique flavor to the patties. In the south, you might find cheese mixed in for extra richness. Each region adds local herbs and spices, too. For example, some use caraway seeds or marjoram. These add depth and warmth to the dish. You can easily make Frikadellen without meat. Use cooked lentils or chickpeas as a base. Mash them up and mix in finely chopped onions and garlic. You can also add grated carrots or zucchini for extra flavor and nutrition. Use bread crumbs made from whole wheat or gluten-free bread if needed. A flaxseed meal can replace the egg to bind everything together. These alternatives keep the same great taste while being plant-based. Spices can change the whole flavor of your Frikadellen. Instead of thyme, try using oregano or basil for a fresh twist. For a bit of heat, add cayenne pepper or crushed red pepper flakes. You could also use curry powder for a fun, unique taste. Experimenting with spices can turn a classic dish into something new and exciting. Don't be afraid to mix and match to find your favorite flavor profile! After cooking, let your Frikadellen cool to room temperature. This step helps keep their texture. Place the patties in an airtight container. If you stack them, add parchment paper between layers. This prevents sticking. Store them in the fridge for up to three days. Always label your container with the date. To reheat your Frikadellen, use a skillet on low heat. This method warms them evenly. Add a bit of oil to the pan to keep them moist. Heat for about 5-7 minutes, flipping carefully. You can also use the oven. Preheat it to 180°C (350°F). Place the patties on a baking sheet and cover with foil. Bake for 10-15 minutes until heated through. Freezing Frikadellen is easy and keeps them fresh. First, let the patties cool completely. Then, wrap each one in plastic wrap. Place the wrapped patties in a freezer bag. Remove as much air as possible. They will stay good for up to three months. To thaw, move them to the fridge overnight. Reheat as described above for the best taste. The best meat combination for Frikadellen is ground beef and ground pork. I use 500g of ground beef and 200g of ground pork. This mix gives a rich flavor and a nice texture. You can adjust the ratio to your taste, but this combination works great for traditional German Frikadellen. Yes, you can bake German Frikadellen! Preheat your oven to 200°C (400°F). Place the patties on a lined baking tray. Bake for about 20-25 minutes, flipping halfway. Baking is a healthier option and still yields tasty results. Just remember, they may not be as crispy as frying them. To check if your Frikadellen are fully cooked, use a meat thermometer. The internal temperature should reach 70°C (160°F). If you don’t have a thermometer, cut one open. It should be no longer pink inside. Golden brown outside and cooked through means they are ready to enjoy! In this post, I covered everything you need for great German Frikadellen. We explored essential ingredients, optional flavors, and substitutions to suit your taste. I shared step-by-step instructions to guide you in preparation, forming patties, and frying them to perfection. You also learned tips for the right texture and serving ideas, plus variations for everyone. Don’t forget how to store and reheat leftovers for the best taste. Now, you can create delicious Frikadellen that impress your friends and family. Enjoy cooking and tasting your homemade dish!

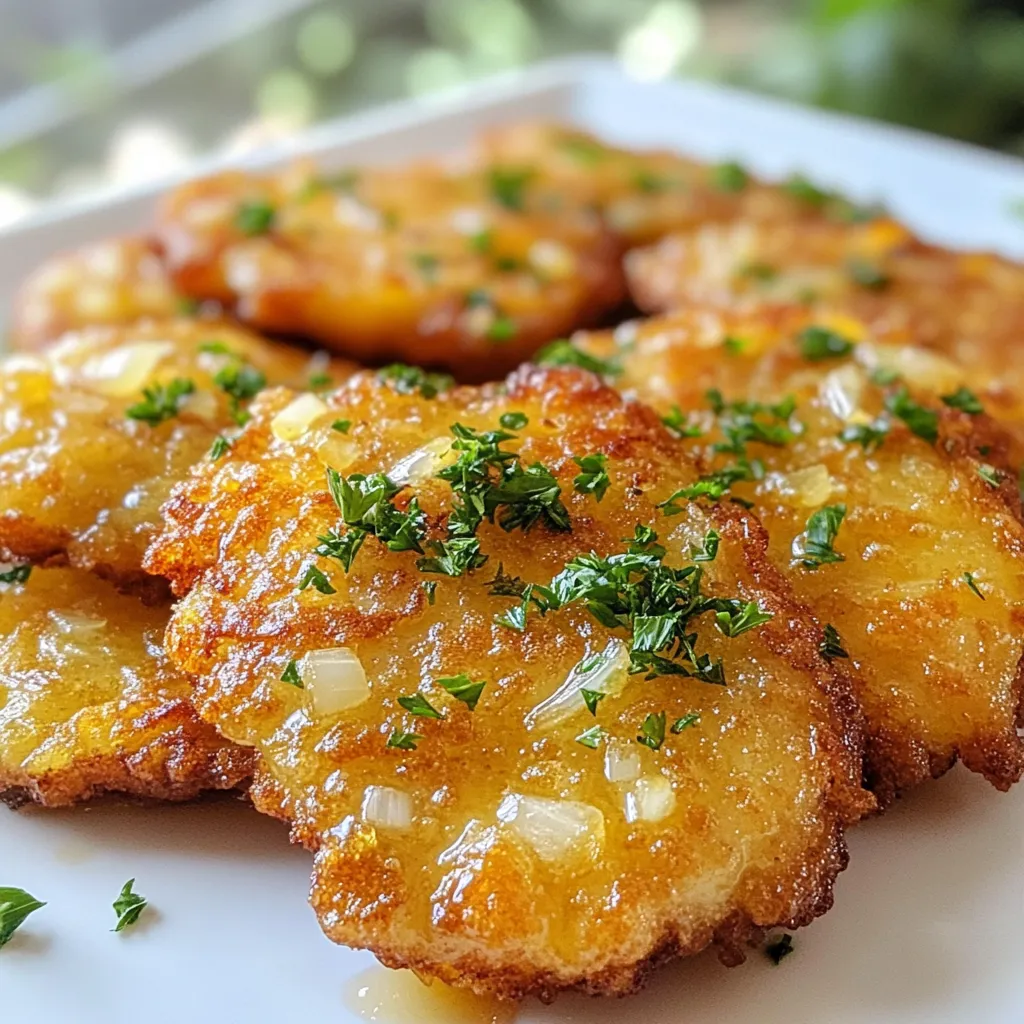
German Frikadellen Easy Recipe for Flavorful Patties

Are you ready to taste a bit of Germany with your own hands? German Frikadellen, those delicious meat patties, are

- 1.5 lbs boneless, skinless chicken thighs, cut into bite-sized pieces - 1 tablespoon ghee (or unsalted butter) - 1 large onion, finely chopped - 4 cloves garlic, minced - 1 tablespoon fresh ginger, grated - 1 tablespoon garam masala - 2 teaspoons ground cumin - 1 teaspoon turmeric - 1 teaspoon cayenne pepper (adjust based on your spice preference) - 1 (15 oz) can tomato sauce - 1 cup full-fat coconut milk (for an extra creamy texture) - 2 tablespoons brown sugar - Salt to taste - Fresh cilantro, chopped, for garnish The heart of butter chicken lies in its simple yet rich ingredients. The chicken thighs are tender and soak up all the flavors. Ghee gives a lovely buttery taste, making each bite divine. Aromatics like onion, garlic, and ginger form a fragrant base. Spices play a big role. Garam masala brings warmth, while cumin adds depth. Turmeric brightens the dish, and cayenne gives a kick. The tomato sauce and coconut milk create a creamy sauce that is hard to resist. Brown sugar balances the spices, rounding out the flavor. - Slow cooker - Large skillet - Cutting board and knife - Measuring cups and spoons Using the right tools makes cooking easier. A slow cooker perfectly blends flavors over time. A large skillet helps sauté the aromatics well. A cutting board and knife are essential for prepping chicken and veggies. Measuring cups and spoons ensure you get the right amounts of each ingredient. With these tools and ingredients, you can create a delicious slow cooker butter chicken that warms the heart and fills the belly. {{ingredient_image_2}} First, I heat 1 tablespoon of ghee in a large skillet over medium heat. Once it melts, I add 1 large finely chopped onion. I sauté the onion for about 5-7 minutes until it becomes soft. Next, I add 4 cloves of minced garlic and 1 tablespoon of grated ginger. I continue to cook this mix for 1-2 minutes until I smell that lovely aroma. After that, I sprinkle in the spices: 1 tablespoon of garam masala, 2 teaspoons of ground cumin, 1 teaspoon of turmeric, and 1 teaspoon of cayenne pepper. I let these spices toast for about 1 minute while stirring constantly. Toasting brings out their full flavors, making the dish taste amazing. Next, I transfer the fragrant onion and spice mix into the slow cooker. I then add 1.5 lbs of boneless, skinless chicken thighs, cut into bite-sized pieces. It’s important to coat all the chicken with the spice mix for the best flavor. I pour in 1 (15 oz) can of tomato sauce and 1 cup of full-fat coconut milk. The coconut milk adds creaminess to the dish. Finally, I mix in 2 tablespoons of brown sugar and season with salt to taste. Gently stirring all the ingredients together ensures they blend well. I cover the slow cooker with its lid and set it to cook. If I choose the low setting, I let it cook for 6-8 hours. On high, it takes about 3-4 hours. The key is to make sure the chicken becomes tender and fully cooked. Tender chicken makes each bite melt in your mouth. After cooking, I give the curry a good stir to mix everything. If needed, I adjust the seasoning for the perfect taste. To make your butter chicken shine, adjust the spice levels. If you want it milder, reduce the cayenne pepper. If you love heat, add more! Taste as you go. Using fresh ingredients makes a big difference. Fresh ginger and garlic add a bright flavor. Choose ripe tomatoes for the best sauce. You can also add fresh green chilies for a kick. For a creamy texture, use full-fat coconut milk. It makes the dish rich and smooth. If it seems too thin, cook it longer to thicken. To achieve your desired thickness, check the sauce before serving. If it’s too watery, let it cook with the lid off for a bit. This helps evaporate extra liquid and intensifies the flavors. Serving suggestions can elevate your dish. Pair the butter chicken with fluffy basmati rice or warm naan. This makes for a filling meal. For a beautiful finish, garnish with chopped cilantro. A lime wedge adds a pop of color and fresh flavor. Place everything in a shallow bowl for an inviting look. Enjoy! Pro Tips Marinate for Flavor: For an even richer flavor, marinate the chicken in yogurt and spices for a few hours or overnight before cooking. Adjust the Spice Level: Customize the heat by adjusting the amount of cayenne pepper. Start with less if you're unsure, and add more to taste. Use Fresh Ingredients: Whenever possible, use fresh ginger and garlic instead of powdered for a more vibrant and aromatic dish. Leftover Magic: This butter chicken tastes even better the next day! Store leftovers in an airtight container in the fridge for up to 3 days. {{image_4}} You can switch up the chicken in butter chicken. Chicken thighs add flavor and tenderness. They soak up spices well. Chicken breast works too, but may be drier. For a vegetarian option, try paneer or chickpeas. Paneer gives a creamy texture, while chickpeas add protein and fiber. Both options make the dish rich and satisfying. Add some veggies for more flavor and color. Bell peppers or peas work great in the slow cooker. They add sweetness and a pop of green. You can even use a pressure cooker for a quicker version. This method will keep flavors strong and tenderize the meat fast. The butter chicken tastes just as good, but in less time. Want to make this dish low-carb? Skip the sugar and serve with cauliflower rice instead. This keeps the meal light and still tasty. For dairy-free, use coconut cream instead of dairy products. It gives a rich flavor without any milk. Gluten-free? You’re already set! Just ensure your spices are gluten-free, and you’re good to go. After you enjoy your slow cooker butter chicken, store the leftovers properly. First, let the dish cool to room temperature. Then, place the butter chicken in the fridge. Use airtight containers to keep it fresh. Glass or plastic containers work well. Make sure to eat the leftovers within 3 to 4 days to ensure quality. When it's time to reheat your butter chicken, you have two good options: the microwave or the stovetop. The microwave is quick and easy. Just heat it on medium power in a microwave-safe dish. Stir it halfway to warm it evenly. The stovetop method is great for keeping the flavor. Use a saucepan over low heat, stirring as it warms. This helps keep the sauce creamy and tasty. If you want to freeze butter chicken, it’s simple. First, let it cool completely. Then, scoop it into freezer-safe bags or containers. Leave some space at the top for expansion. You can freeze it for up to 3 months. When you're ready to eat, thaw it in the fridge overnight. Reheat it on the stovetop for the best flavor and texture. Enjoy your meal! The best chicken for butter chicken is boneless, skinless chicken thighs. They stay juicy and tender during cooking. Thighs have more flavor than chicken breast, which can dry out. If you prefer chicken breast, you can use it, but watch the cooking time. Aim for moist and tasty chicken in your dish. Yes, you can make this recipe ahead of time. This dish is great for meal prep. You can cook it a day in advance and store it in the fridge. The flavors deepen as it sits. Just reheat it before serving. You can also freeze it for up to three months. Thaw overnight in the fridge before reheating. Butter chicken pairs well with several side dishes. Here are some popular options: - Fluffy basmati rice - Warm naan bread - Steamed vegetables - Cucumber salad - Raita (yogurt sauce) These sides help balance the rich flavors of the butter chicken. Enjoy a complete and satisfying meal! We explored how to make slow cooker butter chicken, from ingredients to cooking tips. You learned the importance of boneless chicken thighs, spices, and creamy sauces. Don’t forget the recommended tools that make your cooking easier. Experiment with flavors and textures to suit your taste. Store leftovers properly to enjoy later, or even freeze them for future meals. By following these steps, you’ll create a delicious dish that impresses family and friends. Enjoy every bite of your homemade butter chicken!

Slow Cooker Butter Chicken Flavorful and Easy Recipe

Looking for a meal that’s both easy and bursting with flavor? This Slow Cooker Butter Chicken recipe has you covered!

Here’s what you need for a tasty chicken stir fry: - 2 boneless, skinless chicken breasts, thinly sliced - 2 cups mixed bell peppers (red, yellow, green), cut into strips - 1 cup fresh broccoli florets - 2 medium carrots, julienned - 3 cloves garlic, minced - 1-inch piece of ginger, grated - 3 tablespoons low-sodium soy sauce - 1 tablespoon sesame oil - 1 tablespoon vegetable oil - 2 teaspoons cornstarch - 1 tablespoon cold water - Salt and pepper, to taste - Sesame seeds, for garnish - Cooked rice or noodles, for serving Using fresh ingredients makes the dish bright and flavorful. The chicken adds protein, while the veggies bring color and crunch. You can even switch up the veggies based on what you have. Think about adding snap peas or zucchini for extra flavor. Always remember to season well for the best taste! {{ingredient_image_2}} To start, slice the chicken breasts thinly. This helps them cook faster. I like to season the chicken with salt and pepper. You can also marinate it in soy sauce for extra flavor. Heat vegetable oil in a large skillet over medium-high heat. Once the oil is hot, add the chicken. Cook it for about 5 to 7 minutes. Stir often until it's browned and no longer pink. Then, set the chicken aside on a plate. Next, add minced garlic and grated ginger to the same skillet. This step adds great flavor. Stir them for about 30 seconds. You want them aromatic but not burnt. This is where the magic happens! Now it’s time for the veggies! Add the mixed bell peppers, broccoli florets, and julienned carrots. Stir-fry them for about 4 to 5 minutes. This keeps their color bright and texture crisp. You want them tender but still crunchy. Once they look good, it's time to add the chicken back into the skillet. Combine everything well. Pour the soy sauce and sesame oil over the chicken and veggies. Stir to mix the flavors evenly. Now, take the cornstarch and cold water mixture you made earlier. Pour it into the skillet while stirring continuously. This helps to thicken the sauce. Cook for another 1 to 2 minutes. Once it’s thick and bubbly, remove the skillet from heat. Lastly, sprinkle sesame seeds on top for a fun crunch. Enjoy your easy chicken stir fry! High heat is key for a great stir-fry. It helps the food cook fast and keeps it from getting soggy. Always preheat your pan until it’s hot. This way, your chicken will brown nicely. To avoid overcooking your veggies, keep them moving. Stir them often for about four to five minutes. They should be tender but still bright and crisp. This makes your dish colorful and fresh. To amp up the taste, try adding more spices. A pinch of red pepper flakes can add heat. You can also use a splash of rice vinegar for a tangy kick. For umami, consider making a simple homemade sauce. Mix soy sauce, honey, and a bit of lime juice. This blend enhances the dish’s depth and flavor. You can even experiment with peanut butter for a creamy texture! Pro Tips Use High Heat: Cooking at a high temperature helps to sear the chicken quickly and preserve its juiciness while giving the vegetables a nice crunch. Prep Ingredients Ahead: Having all your ingredients prepped and ready to go will make the stir-fry process smoother and quicker, allowing you to enjoy your meal sooner. Mix and Match Vegetables: Feel free to substitute the vegetables based on what you have on hand or your personal preferences. Snow peas, snap peas, or zucchini work wonderfully too! Garnish for Flavor: Don't skip the sesame seeds! They add a delightful nutty flavor and a nice crunch, enhancing the overall dish. {{image_4}} You can switch up the protein in your stir fry. Shrimp cooks quickly and adds a nice flavor. Tofu is a great choice for a plant-based meal. It soaks up the sauce well and gives a satisfying texture. Beef is another option. Use thin cuts, like flank steak, for quick cooking. These alternatives keep the dish exciting and cater to different diets. Feel free to play with seasonal vegetables. Asparagus, snap peas, and zucchini can bring fresh flavors. Think about what you have on hand. For a gluten-free option, use tamari instead of soy sauce. This keeps the taste while meeting dietary needs. Colorful veggies not only taste great but also make the dish look beautiful. Always aim for a mix of textures and colors for the best results. To keep your Easy Chicken Stir Fry fresh, store leftovers right. Use airtight containers. This helps lock in flavor and moisture. Place your stir fry in the fridge if you eat it within a few days. It stays good for about 3 to 4 days. For longer storage, use your freezer. Freeze leftovers in small portions. This way, you can heat only what you need later. When reheating, keep your stir fry tasty and fresh. The best method is using a skillet. Heat it on medium and add a splash of water. This helps steam the dish and keeps it moist. Stir often to prevent sticking. You can also use a microwave. Put your stir fry in a microwave-safe bowl. Cover it with a damp paper towel and heat in short bursts. This keeps the flavor and texture just right. To make chicken stir fry from scratch, follow these steps: 1. Prep the chicken: Slice two boneless, skinless chicken breasts thinly. 2. Heat the pan: Use a large skillet or wok. Heat vegetable oil over medium-high heat. 3. Cook the chicken: Add the chicken to the skillet. Season with salt and pepper. Cook for 5-7 minutes until browned. 4. Sauté garlic and ginger: In the same skillet, add minced garlic and grated ginger. Sauté for about 30 seconds. 5. Add vegetables: Stir in mixed bell peppers, broccoli, and julienned carrots. Cook for 4-5 minutes. 6. Combine: Return the chicken to the skillet. Pour in soy sauce and sesame oil. 7. Thicken the sauce: Mix cornstarch with cold water. Add to the skillet and stir for 1-2 minutes. 8. Serve: Garnish with sesame seeds and enjoy over rice or noodles. Watch out for these common pitfalls: - Don’t overcrowd the pan; it can steam the chicken. - Avoid burning the garlic and ginger; they cook quickly. Yes, you can use frozen vegetables in your stir fry. However, they may change the cooking time and flavor. - Cook time: Frozen veggies take longer to heat. Add them earlier than fresh ones. - Flavor impact: Frozen vegetables can lose some texture. They might not be as crisp as fresh ones. If using frozen, make sure to thaw them before cooking. Pat them dry to reduce excess moisture. The best sauce for stir fry often includes soy sauce and sesame oil for that classic flavor. Here are some recommendations: - Soy sauce: A must for seasoning. - Teriyaki sauce: Adds sweetness and depth. - Oyster sauce: Brings umami flavor. - Homemade sauce: Combine soy sauce, ginger, garlic, and a splash of rice vinegar. Feel free to mix and match sauces to find your perfect blend! You've learned how to make a tasty chicken stir fry. We covered ingredients, step-by-step cooking, and useful tips. You can also customize the recipe with different proteins and veggies. Remember, using high heat keeps veggies crisp. Store any leftovers in the fridge or freezer for later. With this guide, you can create a delicious dish with ease. Enjoy making this meal!

Easy Chicken Stir Fry Delicious and Quick Meal

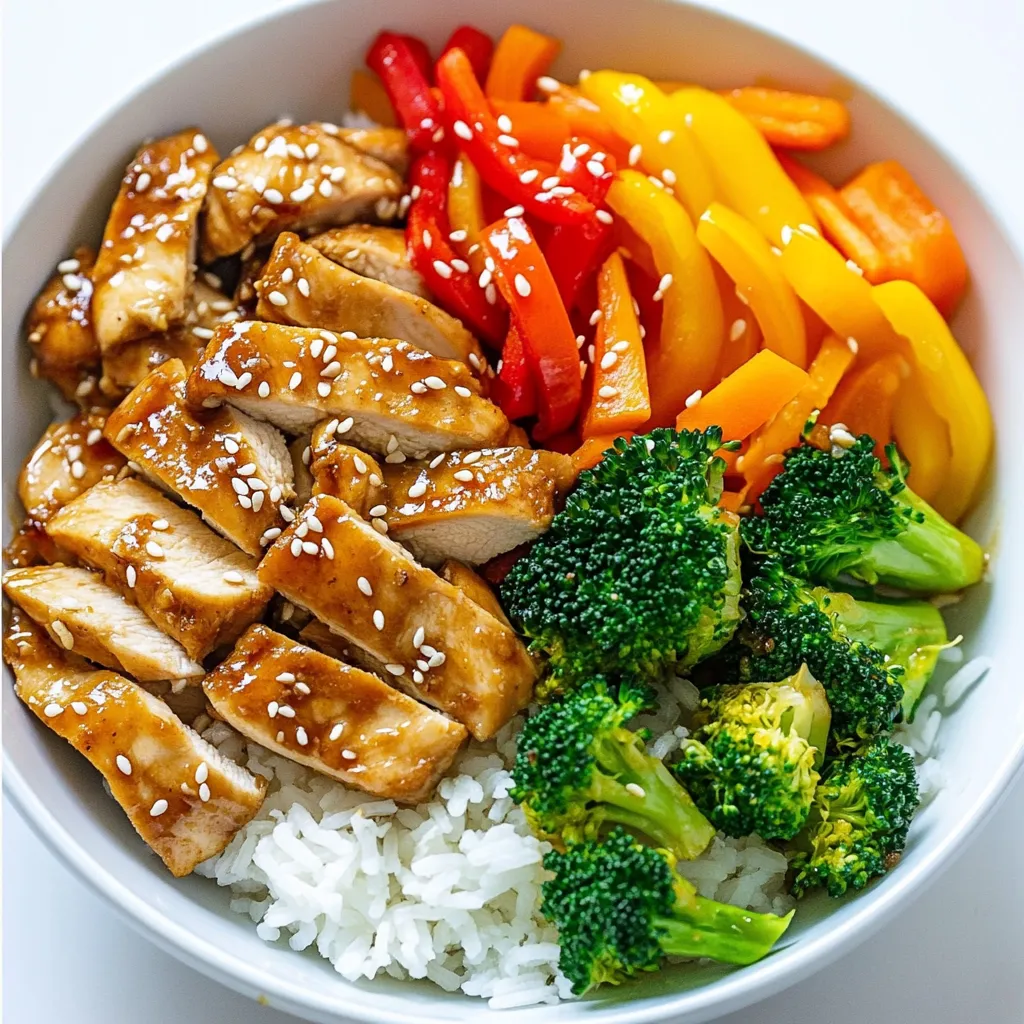
Looking for a meal that’s quick, easy, and bursting with flavor? My Easy Chicken Stir Fry will save your weeknight

- 2 cups cooked rice (white or brown) - 2 cups shredded cooked chicken - 1 can (10 oz) enchilada sauce Chicken is the star of this dish. I use shredded cooked chicken, which makes prep easy. You can use leftover rotisserie chicken or cook your own. Rice is the base of the casserole. It absorbs all the great flavors. You can choose white or brown rice based on your taste. The enchilada sauce brings the heat and flavor. You can pick mild or spicy, depending on your family’s preference. - 1 can (15 oz) black beans, rinsed and drained - 1 cup corn kernels (fresh, canned, or frozen) - 1 cup diced tomatoes (with their juice) - 1 bell pepper (any color), diced - 1 teaspoon ground cumin - 1 teaspoon paprika - 1 cup shredded cheddar cheese - 1 cup shredded Monterey Jack cheese - Salt and pepper to taste - 1 tablespoon olive oil I like to add black beans for protein and fiber. Corn adds a sweet crunch. Diced tomatoes give moisture and flavor. Bell peppers add color and taste. I always use cumin and paprika for a warm flavor. Both cheeses melt nicely, creating a gooey topping. Don’t forget to season with salt and pepper! - Fresh cilantro - Sour cream For garnishes, fresh cilantro adds a burst of color and flavor. It gives a fresh taste that brightens the dish. A dollop of sour cream serves as a cool contrast to the spices. It also adds creaminess that everyone loves. {{ingredient_image_2}} - Preheating the oven Start by preheating your oven to 350°F (175°C). This step is key to getting that perfect bake for your casserole. - Sautéing the vegetables In a large skillet, heat 1 tablespoon of olive oil over medium heat. Add 1 diced bell pepper and sauté for about 5 minutes. You want it soft and slightly see-through. - Mixing the sautéed mixture with rice Next, add 2 cups of shredded cooked chicken, 1 can of black beans, 1 cup of corn, and 1 cup of diced tomatoes with their juice to the skillet. Stir it together with 1 teaspoon ground cumin and 1 teaspoon paprika. Season with salt and pepper. Cook for an extra 3 to 4 minutes until it’s all warm and mixed well. Then, in a large bowl, combine this mixture with 2 cups of cooked rice and half of the enchilada sauce. Mix until everything is well blended. - Preparing the baking dish Grease a 9x13-inch baking dish with cooking spray or a little olive oil. Transfer the rice and chicken blend into the dish, spreading it evenly. - Pouring sauce and topping with cheese Pour the remaining enchilada sauce over the top of your casserole. Make sure it covers everything. Then, sprinkle 1 cup of shredded cheddar cheese and 1 cup of shredded Monterey Jack cheese evenly over the top. - Baking time and temperature Place your casserole in the preheated oven. Bake for 25 to 30 minutes. Look for the cheese to be melted, bubbly, and lightly golden. Once done, take it out and let it cool for about 5 minutes before serving. This lets the flavors settle and keeps you from burning your mouth! To get the best texture, use cooked rice. This can be white or brown. If you want fluffy rice, rinse it before cooking. This helps remove excess starch. For even cooking, mix the ingredients well. When you combine the sautéed mixture with the rice, stir until everything is coated. This ensures all flavors blend nicely. To add more spices, try chili powder or oregano. These spices can give the dish a nice kick. You can adjust the amount based on your taste. For extra toppings, consider sliced olives or diced avocado. These add freshness and texture. You can also use jalapeños for some heat. Don't forget to sprinkle fresh cilantro on top for a burst of color and flavor! Pro Tips Use Leftover Chicken: This recipe is perfect for using up leftover rotisserie chicken or any cooked chicken you have on hand, saving you time and effort. Customize Your Heat: Adjust the spiciness of your enchilada casserole by choosing a milder or spicier enchilada sauce and adding jalapeños if you like extra heat. Mix Your Cheeses: For a more complex flavor, try mixing different types of cheese, such as pepper jack or queso blanco, with the cheddar and Monterey Jack. Let It Rest: Allow the casserole to rest for a few minutes after baking. This helps the layers set and makes serving easier. {{image_4}} - Using different proteins: You can switch chicken for beef, turkey, or even shrimp. Tofu is a great plant-based choice too. Each protein brings its own taste. So feel free to mix things up! - Alternative vegetables: Add your favorite veggies. Zucchini, mushrooms, or spinach work well. They add color and nutrients. You can even toss in some jalapeños for a spicy kick! - Gluten-free options: This casserole is easy to make gluten-free. Just check the enchilada sauce for gluten. Most brands are safe, but always read labels. Use gluten-free rice to keep it safe for all. - Vegetarian adaptations: Replace chicken with more beans or lentils. You can use extra veggies or a meat substitute. This keeps the dish hearty and filling without meat. - Pairing with sides: This casserole pairs nicely with a fresh salad or tortilla chips. You can serve it with guacamole or salsa for extra flavor. These sides add crunch and brightness. - Adjusting portion sizes: This dish serves 6-8, but you can easily scale it. If you need smaller portions, use a smaller dish. You can also freeze leftovers for later. Just reheat for a quick meal! To keep your Chicken Enchilada Rice Casserole fresh, store it properly. First, let the casserole cool down to room temperature. Then, transfer it to an airtight container. You can keep it in the fridge for up to four days. If you want to store it longer, freezing is a great option. For freezing, place the casserole in a freezer-safe container. It can stay frozen for up to three months. Make sure to label the container with the date. This will help you keep track of how long it has been in the freezer. When it's time to enjoy your leftovers, you have two great options: the oven or the microwave. Using the oven is often best for reheating casseroles. Preheat your oven to 350°F (175°C). Place the casserole in a baking dish and cover it with foil. Bake for about 20-25 minutes until it's heated through. This method helps keep the cheese melty and the dish moist. If you're short on time, the microwave works too. Put a portion on a microwave-safe plate. Heat it in short bursts, about 1-2 minutes at a time. Stir between intervals to ensure even heating. To maintain the flavor and texture, cover the dish with a microwave-safe lid or wrap. This keeps moisture in and prevents it from drying out. Can I prepare this casserole in advance? Yes, you can prepare this casserole ahead of time. Make it, then cover it and store it in the fridge for up to 24 hours. When ready to bake, just pop it in the oven. You may need to add a few minutes to the baking time if it is cold. How can I make this dish spicier? To add spice, use a spicy enchilada sauce instead of mild. You can also add fresh chopped jalapeños or a pinch of cayenne pepper. Try adding some crushed red pepper flakes for a little kick. Caloric content and serving sizes This casserole serves about 6-8 people. Each serving has around 350-400 calories, depending on the cheese you use and any added toppings. Key nutritional benefits This dish offers protein from the chicken and beans. It also has fiber from the beans and corn. The tomatoes and peppers add vitamins, making this meal both tasty and nutritious. How to modify for various serving sizes If you need more or fewer servings, simply adjust the ingredients. For 4 servings, use 1.5 cups of rice and 1 cup of chicken. For 10 servings, double all ingredients. Tips for meal prep and batch cooking This recipe is great for meal prep. Make a large batch and portion it into containers for lunch or dinner. You can freeze any leftovers for quick meals later. Just reheat and enjoy! This blog post detailed how to make a tasty casserole. We covered main ingredients, like chicken and rice, plus beans and cheese. After outlining easy preparation steps, we shared baking tips for perfect results. We explored variations for different diets and storage tips for leftovers. Casseroles are versatile and great for any meal. Feel free to get creative with flavors and ingredients. Remember, the right spices can elevate any dish. Enjoy cooking and share this recipe with others!

Chicken Enchilada Rice Casserole Flavorful Family Dish

Looking for a dish that’s both tasty and easy? This Chicken Enchilada Rice Casserole is just what you need! Packed

- 1 whole chicken (3-4 lbs) - 2 tablespoons extra virgin olive oil - 2 tablespoons fresh rosemary, finely chopped - 1 tablespoon fresh thyme, finely chopped - 1 tablespoon fresh garlic, minced - 1 teaspoon fresh lemon zest - Sea salt and freshly ground black pepper to taste - 8 oz button mushrooms, cleaned and sliced - 1 cup heavy cream - 1/2 cup low-sodium chicken broth - 2 tablespoons fresh parsley, chopped (for garnish) To make Herb Roasted Chicken with Creamy Mushrooms, you need fresh and good-quality ingredients. A whole chicken between 3 to 4 pounds works best. Use fresh herbs for the best flavor. I love using rosemary and thyme, along with garlic and lemon zest to add a bright taste. For the creamy sauce, button mushrooms are perfect. They soak up flavor well and add a nice texture. Heavy cream and chicken broth make the sauce rich and smooth. Don't forget olive oil, sea salt, and black pepper to season everything just right. Finally, fresh parsley not only looks great but adds a fresh touch to the dish. Gather these ingredients, and you're ready to create a delicious meal that everyone will love! {{ingredient_image_2}} 1. Preheat your oven to 425°F (220°C). This helps the chicken get crispy skin. 2. In a bowl, mix olive oil, rosemary, thyme, garlic, lemon zest, sea salt, and pepper. This makes a tasty herb paste. 3. Gently loosen the skin of the chicken with your fingers. Be careful not to tear it. 4. Rub the herb paste all over the chicken and under the skin for flavor. 5. Place the chicken, breast-side up, on a roasting rack in a pan. Roast for 1 hour to 1 hour 15 minutes. The chicken is done when it reaches 165°F (75°C) and the skin is golden brown. 1. While the chicken cooks, heat some olive oil in a skillet over medium heat. 2. Add the sliced mushrooms and sauté them until tender and caramelized, about 5-7 minutes. Stir them often for even cooking. 3. Pour in low-sodium chicken broth and let it simmer for 2-3 minutes. Scrape the tasty bits off the skillet. 4. Lower the heat and stir in heavy cream. Cook for 3-5 minutes until the sauce thickens. Season with salt and pepper to taste. 1. After cooking, let the chicken rest for 10 minutes. This helps keep it juicy. 2. Carve the chicken into pieces and place them on a serving platter. 3. Spoon the creamy mushroom sauce over the chicken. 4. Finish with a sprinkle of fresh parsley for color. This simple process lets you create a lovely meal full of flavor. Enjoy every bite! A high roasting temperature is key to crispy skin. Preheat your oven to 425°F (220°C). This helps the skin crisp up nicely. To improve texture, loosen the skin gently with your fingers. Rub the herb paste directly under the skin. This adds flavor and helps with browning. You can use different herbs to change the taste. Try thyme, sage, or even oregano. Each herb adds a unique twist. For sides, roasted vegetables or a fresh salad pair well. They balance the meal and add color to your plate. For the perfect sauce thickness, let it simmer for a few minutes. Stir as it cooks to prevent sticking. If you want a lighter sauce, consider using half-and-half or coconut milk. Both options maintain creaminess while cutting down on fat. Pro Tips Use a Meat Thermometer: For perfectly cooked chicken, insert a meat thermometer into the thickest part of the thigh, avoiding the bone. This ensures it reaches the safe internal temperature of 165°F (75°C). Resting is Key: Allow the chicken to rest for at least 10 minutes after roasting. This helps the juices redistribute, resulting in a juicier and more flavorful dish. Enhance the Mushroom Flavor: For an extra depth of flavor in the creamy mushroom sauce, consider adding a splash of white wine after sautéing the mushrooms before adding the chicken broth. Herb Variations: Feel free to experiment with different herbs such as sage or tarragon for a unique flavor profile. Fresh herbs can significantly enhance the overall taste of the dish. {{image_4}} You can easily switch herbs in this recipe. Try thyme or sage for a new taste. These herbs bring their own unique flavors. You can also mix in spices like paprika or cumin. They add warmth and depth to the dish. Experimenting with herbs lets you customize the chicken to your liking. Different mushrooms can change the sauce's flavor. Use shiitake, cremini, or portobello for richer tastes. Each type adds its own twist to the creamy sauce. You can also add vegetables like spinach or peas. This makes the sauce heartier and more colorful. Roasting gives the chicken a crispy skin. Grilling adds a smoky flavor and keeps it juicy. If you want a hands-off method, use an Instant Pot or slow cooker. These methods still yield tender chicken. Adjust cooking times based on your method to ensure juicy results. After enjoying your herb roasted chicken with creamy mushrooms, let it cool down. Place the leftovers in an airtight container. You can store it in the fridge for 3 to 4 days. If you want to keep it longer, freezing is a great option. Wrap the chicken tightly in plastic wrap or foil before placing it in a freezer-safe bag. The frozen chicken will last for about 3 months. For the creamy mushrooms, store them separately. They can also stay in the fridge for 3 to 4 days or freeze for up to 2 months. To reheat the chicken, preheat your oven to 350°F (175°C). Place the chicken in a baking dish. Cover it with foil to keep it moist. Heat for about 20-25 minutes or until warm. For the creamy mushroom sauce, heat it in a pan over low heat. Stir often to avoid burning. If the sauce is too thick, add a splash of chicken broth or cream to loosen it. This way, you’ll keep all the flavor and texture of the dish. The chicken takes about 1 hour to 1 hour 15 minutes to cook. For safety, the internal temperature must reach 165°F (75°C). Cooking time varies based on the chicken's weight. A 3-4 lb chicken cooks in this range. Always use a meat thermometer for best results. Yes, you can prepare parts of this recipe ahead. You can make the herb paste and store it in the fridge. You can also cook the mushrooms and sauce, then refrigerate them. When ready to serve, reheat the chicken and sauce in the oven. Many sides go well with Herb Roasted Chicken. Here are some popular options: - Roasted seasonal vegetables like carrots or Brussels sprouts - Creamy mashed potatoes or garlic mashed cauliflower - A fresh side salad with greens and vinaigrette These sides balance the dish and enhance its flavors. You learned how to create a delicious and hearty dish with herb roasted chicken and creamy mushroom sauce. We covered the main ingredients, step-by-step preparation, and useful tips. You can customize the recipe with different herbs and cooking methods. Store leftovers properly to enjoy later. This meal is not just tasty; it’s also special for family gatherings. With these insights, you’ll impress your guests and make every bite count. Get ready to cook and enjoy!

Herb Roasted Chicken with Creamy Mushrooms Delight

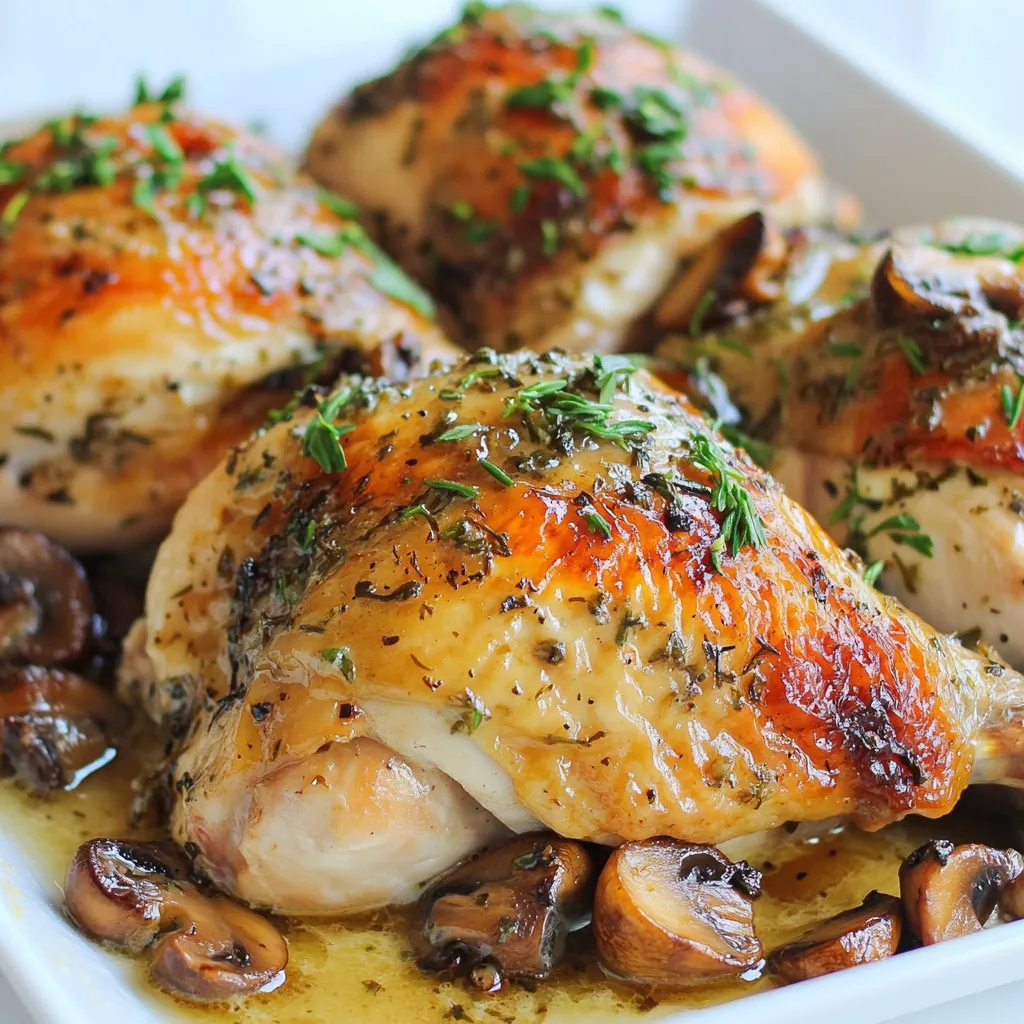
Welcome to my kitchen, where flavor meets comfort! Today, I’m sharing my favorite dish: Herb Roasted Chicken with Creamy Mushrooms.

- Chicken and Marinade Components - 2 large chicken breasts - 2 tablespoons extra virgin olive oil - 1 teaspoon dried oregano - 1 teaspoon garlic powder - Sea salt and freshly cracked pepper, to taste To make your chicken flavorful, start with a simple marinade. Mix the olive oil, oregano, garlic powder, salt, and pepper in a bowl. This mix helps the chicken soak up great flavors. - Quinoa and Broth Details - 1 cup quinoa, thoroughly rinsed - 2 cups chicken broth (or water for a lighter option) Quinoa is a wonderful base for these bowls. Rinse it well to remove bitterness. Use chicken broth for a richer taste, or water for a lighter option. - Veggies, Cheese, and Seasonings - 1 medium cucumber, diced into small cubes - 1 cup cherry tomatoes, halved for a burst of flavor - 1/2 red onion, finely diced - 1 cup feta cheese, crumbled for creaminess - 1/2 cup kalamata olives, pitted and halved for a salty kick - Juice of 1 fresh lemon for brightness - Fresh parsley, chopped finely for garnishing Fresh veggies bring color and crunch to your bowls. Feta cheese adds creaminess, while olives give a salty punch. The lemon juice brightens the dish and balances the flavors. Finally, parsley adds a nice touch of freshness. This combination of ingredients makes a tasty and healthy meal prep option. You can easily mix and match based on your preferences! {{ingredient_image_2}} - Preparing the Marinade: In a bowl, mix 2 tablespoons of olive oil, 1 teaspoon of dried oregano, 1 teaspoon of garlic powder, sea salt, and pepper. This mix gives great flavor to the chicken. - Proper Marination Techniques: Add the chicken breasts to the bowl. Make sure they are fully coated. Let them marinate for at least 30 minutes. For more flavor, cover and refrigerate them overnight. - Boiling and Simmering Steps: In a medium pot, bring 2 cups of chicken broth or water to a boil. Add 1 cup of rinsed quinoa and stir. Cover the pot and lower the heat. - Fluffing and Cooling Tips: Let it simmer for about 15 minutes. Once all the liquid is gone, fluff the quinoa with a fork. Set it aside to cool. - Grill/Skillet Preheating: Preheat your grill or skillet to medium-high heat. This step is key for good chicken. - Cooking Times and Temperature Check: Cook the marinated chicken for about 6-7 minutes on each side. Check that it reaches an internal temperature of 165°F. Let it rest for 5 minutes before slicing. - Chopping and Mixing Ingredients: In a large bowl, mix diced cucumber, halved cherry tomatoes, diced red onion, crumbled feta cheese, and halved kalamata olives. - Dressing and Flavor Integration: Squeeze the juice of one lemon over the salad mix. Stir gently to blend all the flavors. - Portioning Techniques: Divide the cooled quinoa among meal prep containers. It helps to use a measuring cup for even portions. - Presentation Suggestions: Top each quinoa portion with sliced chicken. Add a generous scoop of salad on the side. Finish with fresh parsley for a colorful touch. - Cooling the Bowls Properly: Let the meal prep bowls cool completely before sealing them. This helps prevent moisture buildup. - Refrigeration Guidelines: Store in the fridge for up to 4 days. This makes for easy, tasty meals throughout the week. Best Practices for Quick Cooking To save time, prep all your ingredients before cooking. Chop veggies and measure spices first. This helps keep the process smooth. Cook the quinoa while marinating the chicken. This way, both can finish around the same time. Tools to Simplify Preparation Use a sharp knife for quick chopping. A good cutting board helps too. A reliable pot for quinoa is key. If you have one, use a grill pan for the chicken. This makes it easy to cook and adds great flavor. Additional Seasoning Suggestions For more flavor, try adding lemon zest or smoked paprika. These add a nice kick to the chicken. You can also sprinkle some red pepper flakes for heat. Don’t be shy to adjust seasonings to your taste. Marination Time for Best Results Marinate the chicken for at least 30 minutes. If you can, let it sit overnight. This gives the chicken a deep, rich flavor. Remember, the longer it marinates, the better it tastes! Pairing Ideas and Side Dishes These meal prep bowls go well with pita bread or hummus. You can add a side of tzatziki for a creamy touch. For a fresh crunch, serve with a side of mixed greens. Creative Serving Techniques Layer the salad on top of the quinoa and chicken for a colorful look. You can also serve each component in separate containers. This keeps everything fresh and crunchy until you’re ready to eat. Pro Tips Marinate Longer for Flavor: For the best flavor, marinate the chicken overnight. This allows the spices to penetrate the meat, resulting in a juicier and more flavorful dish. Quinoa Rinsing is Key: Always rinse your quinoa before cooking. This removes the natural coating called saponin, which can impart a bitter taste to your dish. Rest the Chicken: After cooking, let the chicken rest for at least 5 minutes. This helps the juices redistribute, ensuring the meat stays moist and tender when sliced. Customize Your Salad: Feel free to add other Mediterranean ingredients like bell peppers, artichokes, or chickpeas to the salad for extra flavor and nutrition. {{image_4}} Alternatives to Chicken If you want a change, use turkey breast. It cooks like chicken and has a similar taste. You can also try shrimp or fish. Both add a fresh twist to your bowls. Plant-Based Options For a vegan twist, use tofu or tempeh. They soak up marinades well. You can also use chickpeas for protein. They add a nice crunch and flavor. Different Types of Grains to Use Quinoa is great, but you can swap it out. Try brown rice for a hearty base. Farro adds a nutty taste. Bulgur wheat is quick to cook, too. Low-Carb Alternatives For a lighter option, use cauliflower rice. It’s low in carbs and full of flavor. Zucchini noodles are another great choice. They add a unique texture. Customizing Dressing or Marinades You can change the flavor of your bowls easily. Use different herbs like basil or dill. A dash of balsamic vinegar adds a sweet touch. Experiment with spices for a kick. Seasonal Ingredient Swaps Use veggies that are in season. Spring peas add sweetness in summer. In fall, you can use roasted butternut squash. These swaps keep your meals fresh and fun. To keep your Greek chicken meal prep bowls fresh, store them in airtight containers. Use glass or BPA-free plastic containers to avoid any unwanted flavors. Make sure the food cools down before sealing. This helps prevent condensation, which can make your food soggy. For reheating, the microwave works well. Heat in 30-second intervals until warm. Stir between intervals to ensure even heating. If you want to maintain texture, try using an oven. Preheat it to 350°F and heat the bowls for about 10-15 minutes. This method keeps the chicken juicy and the quinoa fluffy. For long-term storage, you can freeze the meal prep bowls. Pack them in freezer-safe containers, leaving some space for expansion. They can last up to three months in the freezer. When ready to eat, thaw them overnight in the fridge. Reheat as mentioned before, and your meal will taste fresh and delicious. Yes, you can make these bowls in advance. I recommend prepping them on Sunday for the week ahead. This way, you can enjoy healthy meals without daily cooking. Prepare the chicken and quinoa first. Then, chop the veggies. You can store everything in the fridge for up to four days. These meal prep bowls last in the fridge for about four days. Store them in airtight containers to keep them fresh. Always check for any signs of spoilage before eating. If you notice any off smells or changes in texture, it's best to discard it. If you want to swap quinoa, try brown rice or farro. Both grains are healthy and tasty. You can also use couscous or barley. These options add different textures and flavors to your meal prep bowls. Yes, you can use frozen chicken. Just make sure to thaw it completely before marinating. This helps the marinade soak in better. You can thaw chicken in the fridge overnight or use the microwave. Once thawed, follow the marinating steps as usual. Adding more veggies is easy! Try bell peppers, zucchini, or spinach. You can also toss in some roasted broccoli or snap peas. Get creative with seasonal veggies to keep things fresh and exciting. Mix and match to find your favorite combinations! This blog post covered the process of making Greek chicken meal prep bowls. We discussed key ingredients, including chicken, quinoa, veggies, and seasonings. I detailed steps for marinating, cooking, and grilling. You also learned how to assemble and store your meals efficiently. In closing, enjoy the freedom to customize these bowls. Use different proteins, grains, and flavors. Meal prep can be simple. Plan your week and eat well. Get creative and make it fun!

Greek Chicken Meal Prep Bowls Simple and Tasty Recipe

Are you ready to take your meal prep to the next level? My Greek Chicken Meal Prep Bowls are not

- 1 lb ground turkey - 2 large sweet potatoes, peeled and diced - 1 medium onion, finely chopped - 2 cloves garlic, minced - 1 red bell pepper, diced - 1 cup black beans, rinsed and drained - Seasoning (ground cumin, smoked paprika, chili powder, salt, black pepper) - Optional toppings (shredded cheese, fresh cilantro) - Cooking oil When I create this dish, I start with ground turkey. This meat is lean and cooks quickly. I use two large sweet potatoes. They add a sweet flavor and nice texture. Dicing them into 1-inch cubes helps them cook evenly. Next, I chop one medium onion finely. Onions bring a savory taste. I also mince two cloves of garlic for a fragrant aroma. Then, I add a red bell pepper. Its color and crunch make the dish pop. For added fiber, I include one cup of black beans. They are easy to use, just rinse and drain. Now, it’s time for seasoning. I use ground cumin, smoked paprika, and chili powder to enhance flavors. I also add salt and black pepper to taste. If you love cheese, sprinkle some on top when baking. Fresh cilantro is great for garnish. It adds freshness and color. Finally, you'll need cooking oil for sautéing. I prefer olive oil for its light taste. These ingredients create a hearty and delicious meal. You can easily adjust them to fit your taste. Enjoy the process of making this tasty bake! {{ingredient_image_2}} 1. Preheat your oven to 400°F (200°C). This helps cook the dish evenly. 2. Grab a large skillet and add a drizzle of olive oil. Heat it over medium heat. 3. Once the oil is hot, add the finely chopped onion and minced garlic. Sauté for about 3 minutes. You want them soft and fragrant. 1. Now, add the diced sweet potatoes to the skillet. Mix them with the onion and garlic. 2. Cook for about 5-7 minutes. Stir occasionally until the sweet potatoes soften but still keep their shape. 3. Push the sweet potato mix to one side of the skillet. Create space by moving it aside. 4. Add the ground turkey to the empty side. Break it up with a spatula as it cooks. Cook for 5-7 minutes until it turns golden brown. 1. Once the turkey is cooked, stir it together with the sweet potato mix. 2. Add in the diced bell pepper, black beans, cumin, paprika, chili powder, and season with salt and pepper. Cook for another 3 minutes, stirring often. 3. Carefully transfer the mixture into a greased 9x13 inch baking dish. Spread it out evenly. 4. If you like cheese, sprinkle it over the top now. 5. Place the dish in the oven and bake for 20-25 minutes. You want the sweet potatoes tender and the cheese melted and golden. 6. When it’s done, take it out and let it cool for a few minutes. Garnish with chopped cilantro for color and flavor. To ensure even cooking of sweet potatoes, cut them into 1-inch cubes. This size helps them cook through at the same rate. When you sauté them, start with a little olive oil in a non-stick skillet. Keep stirring until they are soft but not mushy. This method adds flavor and keeps them intact. When sautéing ground turkey, heat the skillet first, then add the meat. Break it apart with a spatula. Cook until it turns a nice golden brown. This takes about 5-7 minutes. Mixing in the veggies helps the turkey absorb their flavors. For presentation, you can serve the bake right from the dish. This gives a homey feel. If you prefer a fancier look, scoop portions onto plates. Add a sprinkle of fresh cilantro on top for color. You can also pair this dish with a simple green salad or steamed broccoli. They both add freshness and balance to the meal. Adjust the spices to fit your taste. If you like heat, add more chili powder or some jalapeños. For a milder flavor, cut back on the spices. Fresh herbs like cilantro or parsley make great garnishes. They add a burst of flavor and make the dish look vibrant. Enjoy experimenting with different spices and herbs to find your perfect blend! Pro Tips Choose the Right Sweet Potatoes: Opt for firm, smooth-skinned sweet potatoes for the best texture and flavor. Customize Your Spices: Feel free to adjust the spices according to your taste; adding a pinch of cayenne can give it an extra kick! Make it Ahead: Prepare the turkey and sweet potato mixture a day in advance and store it in the fridge. Just bake it when you’re ready to serve. Garnish for Freshness: Always add the cilantro garnish just before serving to maintain its vibrant color and fresh flavor. {{image_4}} You can switch ground turkey for other meats or plant-based options. Ground chicken works well if you want a lighter taste. Ground beef adds a richer flavor. For a plant-based choice, try lentils or crumbled tofu. These swaps keep the dish tasty and fun. Adding different veggies can change the dish too. Try zucchini or spinach for added nutrition. Broccoli or cauliflower can also work well. Mix and match to find what you love! Spices can make a big difference in taste. You can add garlic powder or onion powder for extra flavor. Try fresh herbs like thyme or oregano for a fresh kick. Cumin and paprika are great, but you can also use Italian seasoning. If you like heat, consider adding jalapeños or a splash of hot sauce. This gives your bake a spicy twist. Adjust the heat to your taste. It’s all about what you enjoy! You can make this dish gluten-free by using gluten-free spices and checking all labels. Most ingredients are naturally gluten-free, but always double-check. For a dairy-free version, skip the cheese or use a plant-based cheese. You can also use nutritional yeast for a cheesy flavor. If you want to make it vegan, swap ground turkey for chickpeas or mushrooms. This way, everyone can enjoy this dish! To store leftovers, let the dish cool completely. Then, transfer it to an airtight container. You can keep it in the fridge for up to three days. Make sure to label the container with the date. This helps you keep track of freshness. If you want to freeze this dish, it's best to do so before baking. Place the mixture in a freezer-safe container. Make sure to leave some space at the top for expansion. The dish can last up to three months in the freezer. To reheat, thaw it overnight in the fridge. Then, bake it at 350°F (175°C) until heated through, about 25-30 minutes. You can prep components in advance for easy cooking. Dice the sweet potatoes and chop the veggies the day before. Store them in separate containers in the fridge. This makes your cooking time much shorter. Use glass or BPA-free plastic containers for storage. This keeps everything fresh and ready to go. To check if the ground turkey is cooked, look for a few key signs. First, the meat should turn a light brown color. You will notice no pink spots remaining. The texture should feel firm without being mushy. If you have a meat thermometer, the internal temperature should reach 165°F (75°C). This ensures the turkey is safe to eat. Always trust your eyes and thermometer for the best results. Yes, you can make this dish ahead of time! To do this, prepare the turkey and sweet potato mixture as instructed. After cooking, let it cool completely. Then, store it in an airtight container in the fridge for up to three days. You can also freeze it for up to three months. When you're ready to eat, reheat it in the oven at 350°F (175°C) until hot. This makes for a quick and easy meal on busy days. This dish pairs well with several sides. Consider serving a fresh green salad for a crisp contrast. You can also offer steamed broccoli or green beans for added color and nutrition. If you want a heartier meal, serve it with brown rice or quinoa. For drinks, a light white wine or sparkling water with lemon works great. These options complement the flavors of the bake and create a complete meal. In this blog post, we covered how to make a tasty Ground Turkey Sweet Potato Bake. We discussed the key ingredients, easy preparation steps, and tips to ensure great flavor. You can even modify the recipe to fit your taste and dietary needs. Remember, this dish stores well and can be made ahead of time. I hope you enjoy cooking and sharing this healthy dinner option with friends and family. Happy baking!

Ground Turkey Sweet Potato Bake Flavorful and Easy Dish

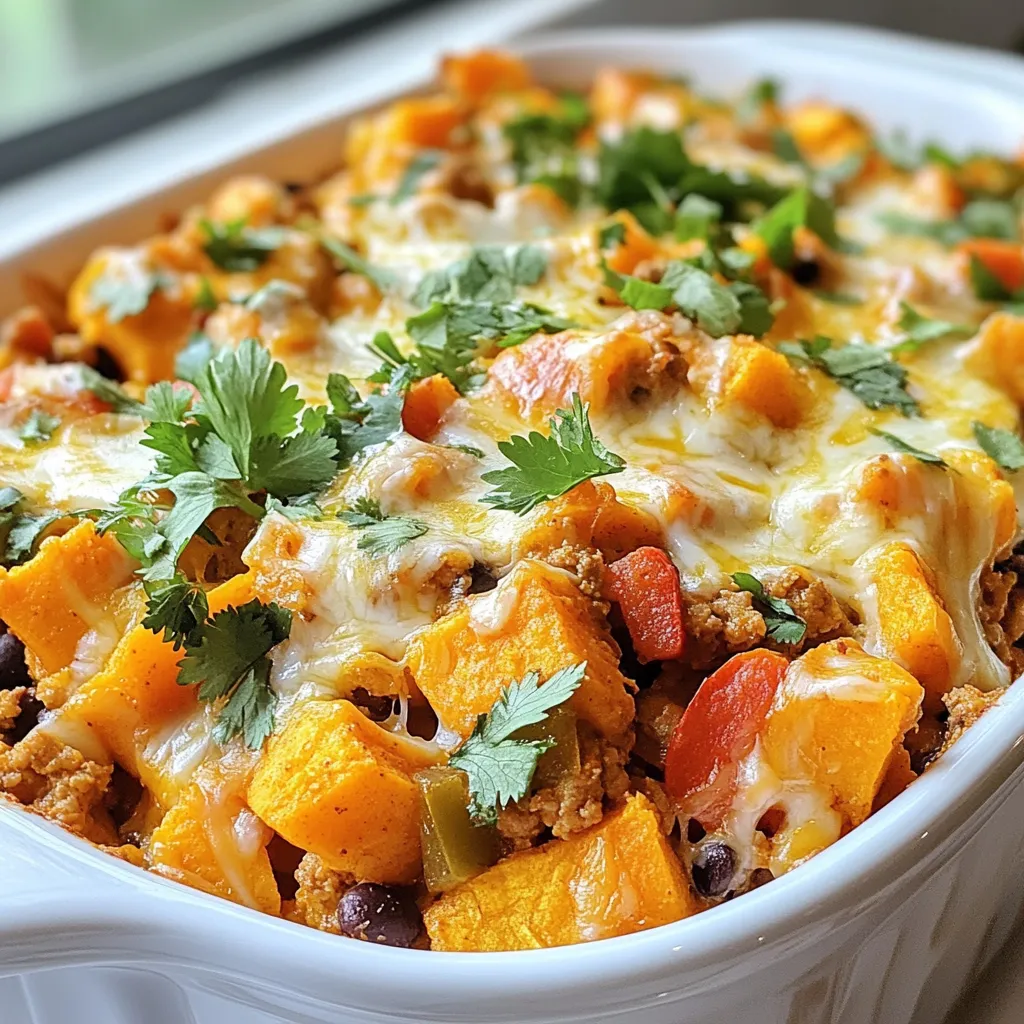
Craving a delicious, healthy dinner option? Try my Ground Turkey Sweet Potato Bake! This dish is packed with flavor and

- 1 pound boneless, skinless chicken breasts - 1 can (15 oz) black beans, drained and rinsed - 1 can (15 oz) kidney beans, drained and rinsed - 1 can (15 oz) corn, drained - 1 can (28 oz) diced tomatoes, with their juices - 1 medium onion, diced - 2 cloves garlic, minced - 1 cup chicken broth - 1 tablespoon chili powder - 1 teaspoon ground cumin - 1 teaspoon smoked paprika - ½ teaspoon onion powder - ½ teaspoon salt - ½ teaspoon black pepper - Shredded cheese - Slices of avocado - Fresh cilantro - Dollops of sour cream - Lime wedges When I make my Slow Cooker Chicken Taco Soup, I love to gather all the ingredients first. It makes cooking fun and easy. The chicken breasts are the star of the dish. They add protein and flavor. You can use fresh or frozen chicken. Just remember to adjust your cooking time if using frozen. Next, the beans and corn add great texture and taste. I like using black beans and kidney beans together for variety. They are also packed with fiber. Diced tomatoes add a nice tang and color. Don't drain them; the juices make the soup rich. Onions and garlic bring depth to the soup. I always use a medium onion and two cloves of garlic. The aroma while cooking is fantastic. For the broth, I use chicken broth to keep it simple. The spices are what make this soup special. Chili powder gives it warmth, while cumin adds an earthy touch. Smoked paprika gives a hint of smokiness. Onion powder, salt, and black pepper round out the flavors. Lastly, I love to add toppings! Shredded cheese, avocado slices, and fresh cilantro bring freshness. A dollop of sour cream adds creaminess. A squeeze of lime brightens the whole bowl. Enjoy mixing and matching your favorite toppings! {{ingredient_image_2}} - Place the chicken breasts at the bottom of the slow cooker. This step is key. It helps the chicken cook well and soak up all the tasty flavors. - Mix beans, corn, tomatoes, onion, and garlic in a bowl. Use a large bowl to give yourself room. Make sure everything is well mixed. This mix adds a lot of color and taste to the soup. - Pour vegetable mixture over chicken in the slow cooker. Spread it evenly. This ensures that every bite has the good stuff. - Whisk together broth and spices, then pour it over the top. The spices include chili powder, cumin, smoked paprika, onion powder, salt, and black pepper. This broth is what makes the soup savory and rich. - Set to low for 6-8 hours or high for 4-6 hours. The long cooking time makes the chicken very tender. You can go about your day while it cooks! - Remove and shred chicken, then return it to the soup. Use two forks to pull it apart. This makes the chicken easier to eat and spreads the flavor throughout. - Adjust seasoning to taste before serving. This is your chance to make it perfect. If you want more salt or spice, add it now. - Ladle into bowls and add optional toppings. Consider cheese, avocado, cilantro, sour cream, or lime. These toppings can boost the flavor even more. Enjoy your warm bowl of soup! To keep your chicken tender, start by layering it well in the slow cooker. Place the chicken breasts at the bottom. This allows them to soak up flavor as they cook. Cover the chicken with the veggie mix. Cook on low heat for 6-8 hours or high heat for 4-6. When done, the chicken should shred easily with a fork. If you want a kick, add more spices. Try using extra chili powder or a dash of hot sauce. You can also add diced jalapeños for a fresh heat. For a smoky flavor, consider using chipotle peppers in adobo sauce. Mix them in when you prepare the broth. To make this soup healthier, use low-sodium chicken broth. You can also add more veggies, like bell peppers or zucchini, to boost nutrition. If you want to cut calories, use less cheese or sour cream as toppings. Another tip is to skip the tortilla chips and serve it with a slice of avocado instead. Pro Tips Tip for Meal Prep: Prepare a double batch of this soup and freeze half for a quick meal later. Just thaw and reheat when you're ready to enjoy it again! Tip for Flavor Boost: For an extra kick, add a diced jalapeño or some chopped chipotle peppers in adobo sauce to the broth mixture. Tip for Texture: If you prefer a creamier soup, stir in some cream cheese or sour cream just before serving for a rich, velvety texture. Tip for Serving: Serve the soup with a side of tortilla chips for added crunch, or use them to scoop up the soup for a fun eating experience! {{image_4}} For a meatless option, I often swap the chicken for extra beans or lentils. You can use: - 1 can (15 oz) black beans - 1 can (15 oz) pinto beans - 1 cup of cooked lentils This keeps the soup hearty and filling without meat. The spices still give it that taco flavor we all love. You can mix up the beans for fun. Here are some great swaps: - Use chickpeas for a nutty taste. - Add white beans for a creamy texture. - Try black-eyed peas for a Southern twist. Each bean adds its unique flavor and texture to the soup. Boost the nutrition by adding more veggies. Here are some ideas: - Chopped bell peppers add sweetness and color. - Diced zucchini brings a nice crunch. - Corn can be replaced with diced carrots for a pop of color. These veggies not only make the soup healthier but also more colorful and exciting! To store leftovers, let the soup cool first. Pour it into an airtight container. This keeps it fresh and safe. You can refrigerate it for up to five days. For longer storage, freeze the soup. Just make sure to leave space in the container for expansion. Label the container with the date, so you know when you made it. To reheat the soup, you can use the stove or microwave. If using the stove, pour the soup into a pot. Heat it over medium heat. Stir often until it is hot. If using a microwave, place the soup in a microwave-safe bowl. Cover it loosely and heat in 1-minute intervals. Stir in between until it is hot all the way through. In the fridge, this soup lasts about five days. In the freezer, it can last for up to three months. When you’re ready to eat, just thaw it overnight in the fridge before reheating. Always check for off smells or changes in color before consuming. Enjoy your tasty meal anytime! Yes, you can use frozen chicken breasts. Just adjust your cooking time. If you use frozen chicken, cook it on high for about 6 to 8 hours. This ensures the chicken is fully cooked and tender. Always check the internal temperature to make sure it reaches 165°F. To make chicken taco soup on the stovetop, start by heating a large pot over medium heat. Add the chicken breasts and brown them for 5 minutes on each side. Remove the chicken and mix the beans, corn, tomatoes, onion, and garlic in the pot. Add the broth and spices, then return the chicken to the pot. Simmer for 30-40 minutes, until the chicken is cooked. Shred the chicken and stir it back in. Yes, you can make this soup ahead of time. Prepare it as you normally would and let it cool. Store it in an airtight container in the fridge for up to three days. Reheat on the stove or in the microwave when you are ready to enjoy. This soup pairs well with several side dishes. Try crunchy tortilla chips or warm cornbread for a tasty addition. A fresh green salad or even guacamole can also complement the meal nicely. This blog post covered how to make a delicious slow cooker chicken taco soup. We explored key ingredients, easy steps, and useful tips. You learned how to adjust flavors and even create a vegetarian version. Remember, this recipe is flexible, so feel free to add extra veggies or swap beans. Meal prepping makes it simple to enjoy at any time. Dive in with your favorite toppings and enjoy a bowl of comfort!

Slow Cooker Chicken Taco Soup Simple and Flavorful Recipe

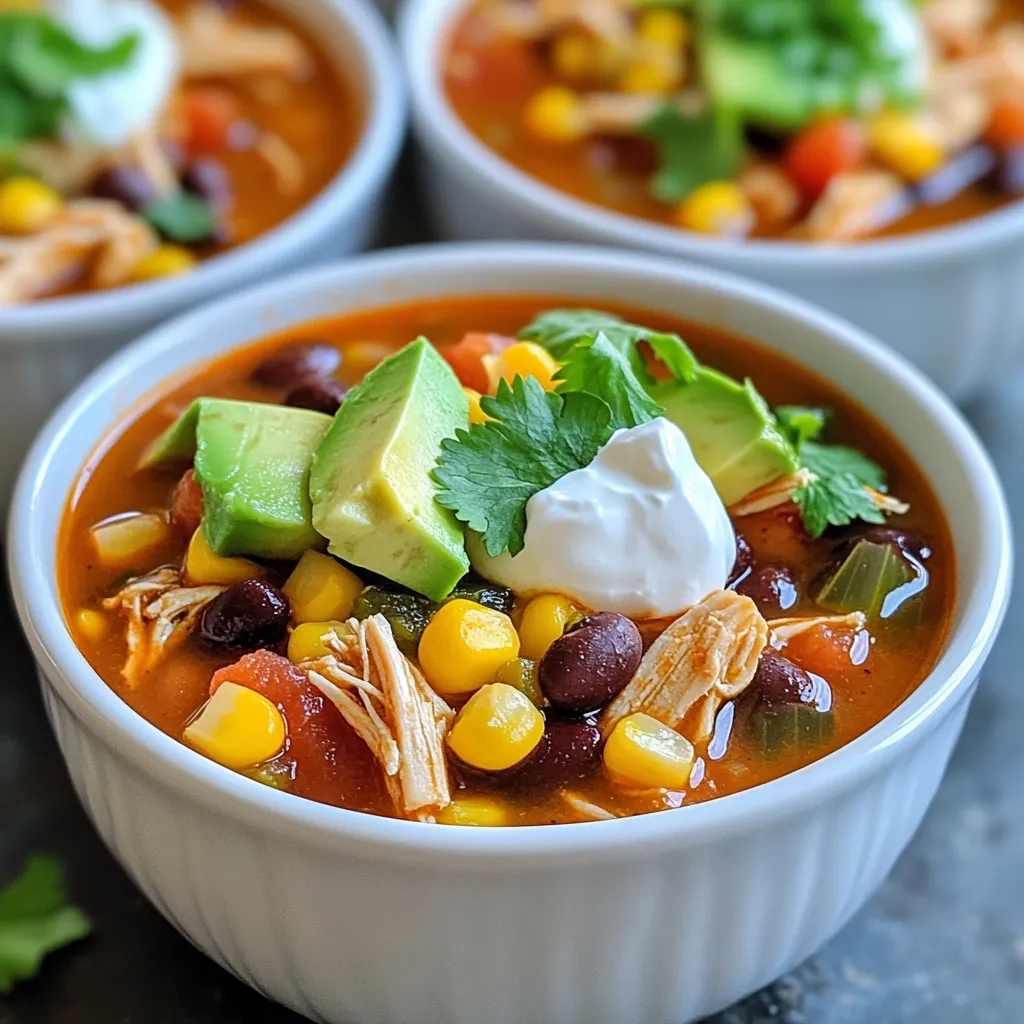
Looking for a simple and tasty meal? Check out my Slow Cooker Chicken Taco Soup recipe! It’s packed with flavors

- 2 boneless, skinless chicken breasts - 8 oz fettuccine or your favorite pasta - 1 cup heavy cream - 1 cup sun-dried tomatoes, coarsely chopped - 1 cup fresh spinach, roughly chopped - 1 cup freshly grated Parmesan cheese For this dish, I love using chicken breasts. They cook quickly and stay juicy. Fettuccine works well, but feel free to choose any pasta you like. The sauce mixes heavy cream with sun-dried tomatoes and spinach for a rich taste. Parmesan cheese adds a creamy finish. - 1 teaspoon Italian seasoning blend - Salt and freshly ground black pepper, to taste - Fresh basil leaves for garnish (optional) Seasoning is key. I use Italian seasoning for a burst of flavor. Salt and pepper enhance the taste. Fresh basil adds color and freshness, making each bite pop. - 2 tablespoons olive oil - 3 cloves garlic, finely minced Olive oil is my go-to for cooking chicken. It gives a nice sear and flavor. Garlic adds depth to the sauce. Make sure to mince it finely to release its full aroma. This dish is simple yet satisfying. Each ingredient plays a role, making it a true comfort food. Enjoy the cooking process and the delicious results! {{ingredient_image_2}} 1. Prepare a pot of salted water. Use enough water to cover the pasta well. 2. Bring the water to a rolling boil. Add 8 oz of fettuccine or your favorite pasta. 3. Cook the pasta according to the package instructions until it is al dente. 4. Drain the pasta in a colander. Reserve 1/2 cup of the pasta water for later. 1. Season both sides of the chicken breasts with salt, black pepper, and Italian seasoning. Use enough to coat evenly. 2. Heat 2 tablespoons of olive oil in a large skillet over medium-high heat. 3. Once the oil is hot, add the seasoned chicken breasts. Cook for 5-7 minutes on each side. 4. Check the chicken for a golden brown color and doneness, then transfer it to a plate. Let it rest for a few minutes. 1. In the same skillet, add 3 cloves of minced garlic. Sauté for about 30 seconds until fragrant. 2. Slowly pour in 1 cup of heavy cream and stir to combine. 3. Add 1 cup of chopped sun-dried tomatoes and 1 cup of roughly chopped fresh spinach. Cook for 3-5 minutes until spinach wilts. 4. Gradually stir in 1 cup of grated Parmesan cheese. Mix until the cheese melts and the sauce is creamy. If too thick, add reserved pasta water. 1. Slice the rested chicken breasts into strips and add them back into the skillet with the sauce. 2. Toss in the drained pasta, mixing gently. Make sure everything is well coated with the sauce. 1. Taste the dish and adjust the seasoning with more salt and pepper if needed. 2. Serve the pasta in bowls. Garnish with fresh basil leaves for a nice touch. Enjoy your meal! - Achieving perfectly cooked chicken: Start with room temperature chicken. This helps it cook evenly. Season both sides with salt, pepper, and Italian seasoning. Sear it in hot olive oil for about 5-7 minutes per side. Check for a golden crust and a safe internal temperature of 165°F. - Creating a creamy sauce consistency: After cooking the chicken, sauté minced garlic in the same skillet. Then, slowly add heavy cream while stirring. Mix in sun-dried tomatoes and spinach. Add grated Parmesan cheese gradually to avoid clumps. If the sauce is too thick, add reserved pasta water a little at a time. - Presentation ideas for dishes: Serve the pasta in shallow bowls. This adds a nice touch. Drizzle a bit of olive oil on top. Sprinkle extra grated Parmesan for flair. - Pairing with side items or salads: Marry Me Chicken Pasta pairs well with a light salad. Try a simple arugula salad with lemon vinaigrette. Garlic bread also makes a great side. - Prepping ingredients in advance: Chop garlic, sun-dried tomatoes, and spinach ahead of time. You can also season the chicken in advance. This saves you time when cooking. - Using store-bought alternatives: If you're short on time, use rotisserie chicken instead of raw chicken. You can also buy pre-chopped vegetables or jarred sun-dried tomatoes. This speeds up your cooking process. Pro Tips Rest the Chicken: Letting the chicken rest for a few minutes after cooking allows the juices to redistribute, ensuring each bite is tender and juicy. Perfectly Al Dente Pasta: Cook the pasta just until al dente, as it will continue to cook slightly when tossed with the sauce. This helps prevent overcooking. Customize Your Greens: Feel free to substitute the spinach with other greens like kale or arugula for a different flavor and texture in your pasta dish. Extra Creaminess: For an even creamier sauce, consider adding a splash of cream cheese or mascarpone along with the heavy cream for a rich, velvety texture. {{image_4}} You can easily change the pasta type in this dish. Fettuccine works well, but you can try penne, rigatoni, or even whole wheat pasta. Each type gives a unique twist to the meal. If you're not in the mood for chicken, you can swap it for turkey or shrimp. Both proteins cook quickly and add their own flavor. Just remember to adjust cooking times for different proteins. Adding vegetables boosts both taste and nutrition. You can include bell peppers, zucchini, or mushrooms. These veggies will cook well in the creamy sauce. Feel free to experiment with spices too. You might add crushed red pepper for heat or fresh herbs like oregano for a fresh taste. Mixing these flavors can make your dish stand out. Making this dish gluten-free is easy. You can use gluten-free pasta made from rice or lentils. These options taste great and offer a good texture. If you want to make it dairy-free, you can replace heavy cream with coconut milk or a nut-based cream. Nutritional yeast can be a great substitute for Parmesan cheese. With these swaps, everyone can enjoy the dish. After you enjoy your Marry Me Chicken Pasta, let it cool. Store your leftovers in the fridge. Use airtight containers to keep the pasta fresh. You can eat it within three days. If you want to save it longer, think about freezing. When you're ready to eat leftovers, use a microwave or stovetop. If using a microwave, heat on medium power. Stir often to avoid hot spots. If you're using the stove, add a bit of water or cream to keep it moist. Avoid cooking too long to keep the pasta from getting mushy. To freeze Marry Me Chicken Pasta, divide it into portions. Use freezer-safe containers or bags. Remove as much air as possible to prevent freezer burn. When you're ready to eat, thaw it in the fridge overnight. Reheat it gently for the best taste and texture. If you don’t have heavy cream, you can use half-and-half or whole milk mixed with butter. This mix gives a nice creamy texture. You could also try coconut cream for a dairy-free option. It adds a hint of sweetness and richness. Yes, you can use any pasta you like. Penne, rigatoni, or even gluten-free pasta work well. Just make sure to cook it until al dente. This keeps the pasta firm and tasty when mixed with the sauce. To make Marry Me Chicken Pasta gluten-free, choose a gluten-free pasta brand. Many options are made from rice or chickpeas. Cook them just like regular pasta. They will work great with the creamy sauce. You can serve this dish with a simple green salad. A side of garlic bread pairs nicely too. For a heartier meal, try steamed vegetables like broccoli or green beans. To check if your chicken is done, cut into the thickest part. The meat should be white, not pink. The juices should run clear. You can also use a meat thermometer. It should read 165°F (75°C) for safe eating. This blog post covered how to make delicious Marry Me Chicken Pasta. We started with the main ingredients like chicken, pasta, and sauce. I shared step-by-step cooking tips for pasta and chicken. We explored sauce-making, combining flavors, and serving suggestions. I also gave you variations, storage info, and answered common questions. In the end, this dish's creamy, rich flavors make it memorable. You can easily adapt it to suit your tastes. Enjoy cooking this delightful meal!

Marry Me Chicken Pasta Irresistible Comfort Dish

If you’re searching for a dish that brings comfort to the table, look no further! Marry Me Chicken Pasta combines

- 1 lb ground beef or turkey - 1 can (15 oz) chili beans in sauce - 1 can (15 oz) diced tomatoes, drained - 1 cup frozen or canned corn - 1 packet taco seasoning mix - 2 cups shredded cheddar cheese, divided - 2 cups frozen tater tots - Salt and black pepper to taste - Cooking spray for greasing Chili Cheese Tater Tot Casserole starts with hearty ingredients. Ground beef or turkey gives protein and flavor. Chili beans and diced tomatoes add a rich, saucy base. Corn brings sweetness to balance the spice. Taco seasoning adds a kick. The cheese melts beautifully on top. Tater tots create a crispy layer, making each bite delightful. - ½ cup chopped green onions - Sour cream or guacamole For those who love a fresh touch, chopped green onions brighten the dish. A dollop of sour cream or guacamole gives creaminess. These toppings enhance the flavors and make the dish even more inviting. - 9x13 inch baking dish - Large skillet - Spatula You will need a 9x13 inch baking dish for the casserole. A large skillet cooks the meat and combines the ingredients. A spatula helps mix and serve. These tools make the cooking process smooth and simple. {{ingredient_image_2}} Set your oven to 400°F (200°C). While it heats, grab a 9x13 inch baking dish. Spray it lightly with cooking spray to keep everything from sticking. In a large skillet over medium heat, add 1 lb of ground beef or turkey. Cook it until it turns brown. Use a spatula to break it apart while it cooks. Once it is browned, drain any excess fat from the skillet. Stir in 1 can of chili beans (with sauce), 1 can of drained diced tomatoes, and 1 cup of corn. Add a packet of taco seasoning mix, plus a sprinkle of salt and black pepper. Mix it all well and let it simmer for about 5 minutes. This step helps the flavors blend nicely. Carefully pour the chili mixture into the prepared baking dish. Spread it evenly to form a base layer. This will hold all the deliciousness inside. Sprinkle 1 cup of shredded cheddar cheese evenly over the chili mixture. This cheesy layer adds great flavor and richness. Take 2 cups of frozen tater tots and arrange them on top of the cheese. Lay them out in a single layer. This helps them get crispy while baking. Place the baking dish in the oven. Bake for 25-30 minutes. Look for the tater tots to turn golden brown and crispy on the outside. Once the tater tots are done, pull the casserole out of the oven. Sprinkle the remaining 1 cup of shredded cheddar cheese on top. Return the dish to the oven for an extra 5 minutes. This makes the cheese melt and bubble beautifully. Let the casserole cool for a few minutes after baking. Garnish it with chopped green onions for a fresh touch. Serve it warm and enjoy! If you want to swap ground meat, try ground chicken or lentils. Both work well. For a vegan option, use plant-based ground meat or mushrooms. You can also use nutritional yeast instead of cheese for a creamy texture. To ensure even cooking of tater tots, spread them out well in the dish. Do not crowd them. This helps them get crispy all around. For flavor enhancement, add a dash of hot sauce or a sprinkle of garlic powder. This will give your casserole a tasty kick. Pair your casserole with a simple green salad or some steamed veggies. This adds freshness to your meal. For presentation, serve right from the baking dish. Use a large spoon to scoop portions. A dollop of sour cream or guacamole on top makes it even better. Enjoy every bite! Pro Tips Use Leftover Chili: If you have leftover chili, feel free to use it in place of the canned chili beans for an even heartier dish. Customize Your Toppings: Add your favorite toppings like jalapeños, black olives, or even crushed tortilla chips for extra crunch. Make It Spicy: If you like heat, consider adding diced jalapeños or a splash of hot sauce to the meat mixture. Storage Tips: This casserole stores well in the fridge for up to 3 days. Reheat in the oven for best results. {{image_4}} Want to add some heat? Try adding jalapeños or hot sauce. You can mix chopped jalapeños into the meat mixture. For extra kick, drizzle hot sauce over the top before baking. Adjust the amount to fit your spice level. This adds a nice zing to every bite. If you want a lighter dish, use leaner meat like ground turkey. You can also swap in veggies for the meat. For example, use black beans or lentils. This makes it healthier while still tasty. You can add more corn or even spinach for extra nutrients. Cheese is a big part of this dish. While cheddar is classic, feel free to experiment. Try using pepper jack for a spicy twist. Mozzarella gives a milder flavor and great melt. You can also mix different cheeses together. This adds depth to the flavor and makes it fun to create. To store leftovers, let the casserole cool first. Place it in an airtight container. This keeps the flavors fresh. You can store it in the fridge for up to five days. When ready to eat, just reheat a portion. Freezing this casserole is simple. First, let it cool completely. Then, wrap it tightly in plastic wrap or foil. You can also use a freezer-safe container. It will last up to three months in the freezer. When you're ready to enjoy it, thaw it in the fridge overnight. For reheating, preheat your oven to 350°F (175°C). Take the casserole out of the fridge or freezer. If frozen, let it thaw first. Cover it with foil to keep it moist. Bake for about 25-30 minutes or until heated through. You can also microwave single servings for quick meals. Just heat in 1-minute intervals until warm. Chili Cheese Tater Tot Casserole can last about 3 to 5 days in the fridge. Store it in an airtight container. This keeps it fresh and tasty. Before serving, check for any signs of spoilage. If it smells off or looks strange, it’s best to toss it. Yes, you can make this dish ahead of time. Prepare the casserole and cover it tightly with foil. You can store it in the fridge for up to 24 hours before baking. When you are ready to bake, just add a few extra minutes to the cooking time. You can make your own taco seasoning at home. Mix these spices: - 1 tsp chili powder - 1 tsp cumin - 1 tsp paprika - ½ tsp garlic powder - ½ tsp onion powder - Salt and pepper to taste This blend works great as a substitute for taco seasoning. Yes, this casserole is great for freezing. To freeze it, make the dish up to the point of baking. Wrap it well in plastic wrap and then in foil. It can last up to 3 months in the freezer. When ready to eat, thaw it overnight in the fridge. Bake it as directed, adding a bit of time if it’s still cold. This blog covers a tasty Chili Cheese Tater Tot Casserole. We discussed key ingredients like ground meat, cheese, and tater tots. Steps include browning meat, combining ingredients, and baking. I offered tips on swaps and cooking, plus ways to serve. Don't hesitate to experiment with flavors and add your touch. Whether for family dinner or a game day snack, this dish is sure to please. Enjoy every bite!

Chili Cheese Tater Tot Casserole Flavorful Comfort Dish

Are you ready to dig into a dish that screams comfort? My Chili Cheese Tater Tot Casserole brings together warm,

Older posts
Newer posts
← Previous Page1 … Page88 Page89 Page90 Page91 Next →

dsad

© 2025 recipesstation • Built with GeneratePress

Our Policies

  • Copyright Policy
  • Cookie Policy
  • GDPR Policy
  • Privacy Policy
  • Disclaimer
  • Terms Of Use

More Information

  • Home
  • About
  • Contact
  • Appetizers
  • Dessert
  • Dinner
  • Drinks
©2025, recipesstation About Back To Top