Skip to content
DisclaimerTerms Of UseGDPR PolicyCookie Policy

recipesstation

  • Home
  • Drinks
  • Appetizers
  • Dinner
  • Dessert
  • About
  • Contact
  • Privacy Policy
DisclaimerTerms Of UseGDPR PolicyCookie Policy

Emily

To make Garlic Parmesan Roasted Brussels Sprouts, gather these fresh ingredients: - 1 lb Brussels sprouts, trimmed and cut in half - 3 tablespoons extra-virgin olive oil - 4 cloves fresh garlic, finely minced - 1/2 cup freshly grated Parmesan cheese - 1 teaspoon garlic powder - 1 teaspoon sweet paprika - Sea salt and freshly ground black pepper to taste - Fresh parsley, roughly chopped (for garnish) These ingredients create a tasty blend of flavors. The Brussels sprouts bring a nice crunch. Garlic adds robust flavor, while Parmesan cheese gives a creamy finish. Measuring ingredients is key to great cooking. Use dry measuring cups for dry ingredients like cheese and garlic powder. Use liquid measuring cups for oils. A kitchen scale can help you get exact weights too. For herbs, a handful is often just fine, but a tablespoon can give you precision. This keeps your dish balanced and tasty. Using good-quality ingredients makes a big difference. Look for fresh Brussels sprouts that feel firm and tight. Choose extra-virgin olive oil for the best flavor. Fresh garlic has a stronger taste than pre-minced garlic. Finally, always use freshly grated Parmesan cheese instead of the pre-shredded kind. This gives your dish a richer, creamier texture. For a complete guide, check out the Full Recipe. Start by rinsing the Brussels sprouts under cold water. This cleans them well. Trim off the ends and cut each sprout in half. This helps them cook evenly. You want to make sure they are fresh and firm. If any leaves fall off, that’s okay! In a large bowl, add the halved Brussels sprouts. Pour in the extra-virgin olive oil. Then, add the minced garlic, garlic powder, and sweet paprika. Season with sea salt and black pepper to taste. Use your hands or a spoon to mix them all well. You want every sprout coated with the mix for great flavor. Preheat your oven to 400°F (200°C). Line a baking sheet with parchment paper. Spread the seasoned Brussels sprouts in one layer. Don’t crowd them, or they won’t roast right. Place the baking sheet in the oven and roast for about 20 minutes. Halfway through, stir the sprouts to make them crispy. Once the sprouts are golden and tender, take them out of the oven. Sprinkle the freshly grated Parmesan cheese over the hot Brussels sprouts. This step is key for adding flavor. Return them to the oven for another 5 minutes. You want the cheese to melt and bubble. Finally, garnish with freshly chopped parsley for a pop of color. For the full recipe, visit the link provided. Enjoy your delicious Garlic Parmesan Roasted Brussels Sprouts! To get crispy Brussels sprouts, follow a few easy steps. First, make sure to cut the sprouts in half. This allows the edges to brown nicely. Next, use enough olive oil. This helps them get that golden crunch. Spread them out in a single layer on the baking sheet. Overcrowding leads to steaming, not roasting. Stir the sprouts halfway through cooking to ensure even browning. Avoid these common mistakes for the best results. First, don’t skip the preheating step. Starting with a hot oven is key. Also, be careful with the salt. Too much can overpower the dish. Lastly, don’t forget to check for doneness. If they look soft and brown, they are ready. A quick taste test will help you know if they are cooked well. For extra flavor, try adding a splash of lemon juice or balsamic vinegar. This adds brightness to the dish. You can also mix in some crushed red pepper for a kick. If you love cheese, consider adding a blend of cheeses. Mixing Parmesan with Pecorino Romano gives a unique taste. Experimenting with herbs like thyme or rosemary can also elevate the dish. Check out the [Full Recipe] for more ideas! {{image_4}} You can make these Brussels sprouts even tastier by adding bacon. Just chop up a few strips and cook them until crispy. Mix the cooked bacon with the Brussels sprouts before roasting. The bacon adds a smoky flavor that pairs well with the cheese. You can also use pancetta or prosciutto for a different taste. For a hearty dish, try adding cooked chicken or sausage. Feel free to switch up the seasonings. Instead of garlic powder, use onion powder for a milder flavor. You can try adding some red pepper flakes if you like heat. For a sweeter touch, sprinkle a bit of brown sugar. Herbs like thyme or rosemary can also enhance the dish. Play around to find your favorite mix of flavors! If you want a vegan option, skip the Parmesan cheese. You can use nutritional yeast for a cheesy flavor without dairy. Another choice is to use vegan cheese that melts well. For added protein, toss in some chickpeas or lentils. This way, you keep the dish filling while enjoying those great flavors. For more detailed instructions on making this dish, check the Full Recipe. Store your Garlic Parmesan Roasted Brussels Sprouts in an airtight container. This keeps them fresh. Allow the sprouts to cool completely before sealing the container. You can also separate layers with parchment paper to prevent sticking. To reheat, use your oven for the best taste. Preheat it to 350°F (175°C). Spread the sprouts on a baking sheet. Heat them for about 10-15 minutes. This helps maintain their crispiness. You can also use a microwave, but the texture won't be as good. Heat in short bursts and check often. You can keep your leftovers in the fridge for up to 3 days. If you want to save them longer, freeze them. They can last for up to 2 months in the freezer. Just remember to thaw them in the fridge before reheating. For longer storage, consider making a bigger batch and enjoying them later! Brussels sprouts are packed with nutrients. They are high in fiber, which aids digestion. They also contain vitamins C and K, which help boost your immune system. Plus, they have antioxidants that fight free radicals. Eating Brussels sprouts may lower your risk of chronic diseases. You get a lot of health benefits from this small veggie! Yes, you can prep Brussels sprouts ahead of time. Trim and cut them, then store in the fridge for a day. You can also toss them in olive oil and seasonings. Just wait to roast them until you’re ready to eat. Roasting fresh keeps them crispy and tasty! These Brussels sprouts pair well with many dishes. Try serving them with grilled chicken or fish. They also go great with steak or pork. For a vegetarian option, serve them with quinoa or risotto. Don't forget to enjoy them with a nice salad! This recipe is naturally gluten-free! The ingredients don’t have any gluten. Just ensure your Parmesan cheese is gluten-free. Many brands are safe, but check the label. Enjoy your Garlic Parmesan Roasted Brussels Sprouts without worry! For the full recipe, click [Full Recipe]. Garlic Parmesan Roasted Brussels Sprouts make a tasty side dish. We covered the key ingredients and their quality. I shared simple steps for prepping, seasoning, and roasting. Tips ensured crispy results while avoiding common errors. You can also mix in meats or try new seasonings. Store leftovers properly to keep them fresh. These sprouts are healthy and pair well with many meals. Enjoy making this dish, and explore the different ways to customize it. Happy cooking!

Garlic Parmesan Roasted Brussels Sprouts Simple Dish

Looking for a tasty side dish that’s easy to make? Try my Garlic Parmesan Roasted Brussels Sprouts! This simple recipe

- Ripe Mangoes: Choose mangoes that smell sweet and have a slight give when pressed. They should be bright in color. Overripe mangoes become mushy, while underripe ones taste sour. Aim for mangoes that feel firm but yield slightly to pressure. - Additional Vegetables: Use a small red onion for a sweet crunch. Finely chop it to add texture. The red bell pepper gives vibrant color and sweetness. Dice it small to blend well with the mangoes. - Optional Add-ins: A jalapeño adds a spicy kick. Make sure to deseed it for less heat. You can also add honey for extra sweetness. This is great if your mangoes are less ripe. - Fresh cilantro: Look for bright green cilantro with no wilting. Rinse it well, then roughly chop it. This adds freshness and an herbaceous flavor to the salsa. - Lime juice: Freshly squeezed lime juice is key. It brightens all the flavors and adds a refreshing zing. Bottled lime juice lacks the same fresh taste. - Salt and pepper: Use salt and freshly ground black pepper to enhance flavors. Start with a pinch of each and adjust to your taste. This simple step can make a big difference in your salsa. For the full details and instructions, check out the [Full Recipe]. 1. Gather your ingredients in a large bowl. Start by adding the diced mangoes, chopped red onion, and red bell pepper. Mix these gently to keep the mangoes whole. 2. Now, add the minced jalapeño. This gives your salsa that spicy kick without overpowering the other flavors. 3. Toss in the chopped cilantro and squeeze the fresh lime juice over the mixture. This adds a zing that brightens all the flavors. 4. If you want a touch of sweetness, drizzle in the honey. Stir everything together until well combined. 5. Season your salsa with a pinch of salt and freshly cracked black pepper. Adjust to your taste. 6. Carefully toss the mixture again, being gentle to keep the mango cubes intact. Let the salsa rest for at least 15 minutes. This resting time helps the flavors meld together beautifully. This mango salsa is a no-cook recipe, which makes it perfect for hot summer days. You can enjoy fresh, vibrant flavors without any heat or fuss. Using fresh ingredients is key. You get the best taste and nutrition when you skip cooking. Fresh fruits and veggies bring out the bright, natural flavors in this salsa. You’ll notice how each bite bursts with freshness and zest. Enjoy this easy and healthy treat without turning on your stove. For the full recipe, check out the [Full Recipe]. To make the best mango salsa, start with ripe mangoes. Look for mangoes that are slightly soft when you squeeze them. Their skin should have a vibrant color, often yellow or red. If the mango feels hard, it is not ripe yet. For storing fresh vegetables, place them in the fridge. Keep them in a crisper drawer to maintain freshness. Use them within a week for the best flavor. You can add extra ingredients to change the taste. For a sweeter salsa, mix in pineapple or mango juice. For more heat, try a serrano pepper instead of jalapeño. Lime juice is key for balancing flavors. It gives the salsa a fresh zing. If you want it sweeter, honey can add that touch. Just a tablespoon makes a difference. Combining lime juice and honey creates a nice balance of acidity and sweetness. Use these tips to make your mango salsa shine! For the complete recipe, check the Full Recipe. {{image_4}} You can make mango salsa even more exciting by adding other fruits. Pineapple or kiwi can bring a sweet twist. Just chop them up and mix them in. These fruits add a nice zing. You can also try different peppers to change the heat level. Use poblano for a mild taste, or opt for serrano for extra spice. Each pepper brings a unique flavor. Feel free to experiment and find what you love. Mango salsa pairs perfectly with many dishes. It adds a fresh touch to tacos or grilled meats. Try it on fish tacos for a bright burst of flavor. You can also serve it as an appetizer. Scoop it onto crispy tortilla chips for a crunchy snack. For a fun twist, serve it over cream cheese with crackers. This makes for a simple yet tasty treat. Mango salsa is versatile and will brighten any meal. For the full recipe, check out the Mango Tango Salsa. To keep your mango salsa fresh, store it in an airtight container. It helps to seal in the flavors. Place the container in the fridge as soon as you prepare it. This salsa tastes best when chilled. Mango salsa lasts about 3 to 5 days in the fridge. After that, the ingredients may start to lose their crispness. Always check for any signs of spoilage before using it. If it smells sour or looks off, it's best to throw it away. Yes, you can freeze mango salsa! This is great for longer storage. However, keep in mind that freezing may change its texture. The mangoes might get mushy when thawed. To freeze, use a freezer-safe container and leave some space at the top. This space allows for expansion as it freezes. When you're ready to use it, thaw in the fridge overnight. For best results, avoid refreezing after thawing. What are the health benefits of mango salsa? Mango salsa offers a burst of vitamins and nutrients. Mangoes are high in vitamin C and vitamin A. They support your immune system and eye health. The fresh vegetables add fiber, which is great for digestion. Cilantro has antioxidants, and lime juice adds hydration. This salsa is not only tasty but also a healthy choice. Can I make mango salsa ahead of time? Yes, you can prepare mango salsa ahead of time. I suggest making it a few hours before serving. This lets the flavors meld together. Just keep it covered in the fridge. However, for the best texture, serve it fresh if possible. What to do if the salsa is too salty? If your salsa tastes too salty, add more diced mango or bell pepper. These sweet ingredients can balance the saltiness. Another option is to mix in a little extra lime juice. This will help counteract the salt. How to adjust the spice level after mixing? To adjust the spice level, you can add more diced mango to tone it down. If you want more heat, finely chop another jalapeño. Mix it in slowly, tasting as you go. This way, you control the spice to your liking. Mango salsa is fresh, easy, and delicious. You learned about selecting ripe mangoes, adding vegetables, and using fresh herbs. We discussed steps for preparing your salsa without cooking and how to enhance the flavors. You can customize it with fruits and spices for a unique twist. Remember to store it properly for freshness. Enjoy this salsa as a snack or add it to your meals. Fresh ingredients make all the difference. Dive into the world of mango salsa and let your taste buds explore!

Mango Salsa Fresh and Flavorful Summer Delight

Are you ready to taste a burst of summer? This Mango Salsa is fresh, flavorful, and perfect for your warm-weather

- Cauliflower: 1 medium head, cut into florets - Coating: 1 cup all-purpose flour, 1 cup water, spices (garlic powder, onion powder, smoked paprika) - Buffalo Sauce: 1 cup, with optional melted butter - Fresh Herbs: Parsley, finely chopped Each serving has about 150 calories, 5g of fat, 24g of carbs, and 4g of protein. When you gather your ingredients, fresh cauliflower is key. It gives the bites a nice crunch. The coating mix adds a tasty layer, making each bite flavorful. Garlic powder and onion powder enhance the taste without being too strong. Smoked paprika gives a hint of smokiness that pairs well with buffalo sauce. Buffalo sauce is the star here. You can adjust the heat to suit your taste. If you want it creamier, just add melted butter. This adds richness to each bite. Don't forget the parsley! It brightens the dish and adds a pop of color. This garnishing step makes your buffalo cauliflower bites more appealing. For a full recipe, check out the detailed instructions. Enjoy cooking these easy and flavorful snacks! Start by preheating your oven to 450°F (230°C). This high heat helps the cauliflower get crispy. While the oven warms up, line a baking sheet with parchment paper. This step prevents sticking and makes cleanup easy. In a medium mixing bowl, combine the flour and water. Add the garlic powder, onion powder, smoked paprika, salt, and black pepper. Whisk everything together until smooth. Make sure there are no lumps. This batter will coat the cauliflower and give it flavor. Take each cauliflower floret and dip it into the batter. Allow any excess batter to drip back into the bowl. Place the coated florets on the lined baking sheet. Make sure they are spaced out. This spacing ensures they become crispy and do not steam. Once the oven is preheated, slide the baking sheet inside. Bake the cauliflower for 20 minutes. Halfway through, turn the florets. This step helps them cook evenly and become golden brown. While the cauliflower bakes, prepare the buffalo sauce. In a separate bowl, mix the buffalo sauce with the melted butter, if you like. This mixture adds creaminess to the sauce and balances the spice. After 20 minutes, take the baking sheet out of the oven. Drizzle the buffalo sauce over the hot cauliflower. Gently toss them to coat well. Return the baking sheet to the oven for another 10-15 minutes. This second bake will make the bites crispy. After baking, garnish with finely chopped parsley for a fresh touch. For the full recipe, refer to the beginning of this article. To get those perfect crispy bites, you need to follow a few steps. First, ensure your cauliflower florets are well-coated but not drenched in batter. The batter should cling lightly to each piece. Use a cooling rack over the baking sheet to help air circulate around the bites. This method allows steam to escape, giving you a crunchier texture. Bake them at a high temperature, like 450°F (230°C), for the best results. Flip them halfway through baking for even crispiness. Want to kick up the flavor? You can add more spices to the batter. Try a pinch of cayenne for heat or some chili powder for depth. You could also mix in some dried herbs, like oregano or thyme. If you love garlic, add minced fresh garlic to the buffalo sauce for a punch. For a smoky flavor, use smoked paprika instead of regular paprika. Mix and match spices to find your perfect blend! Pairing is key when serving these bites. Ranch or blue cheese dressing makes a great dip. You can also try a creamy avocado dip for a twist. Serve with celery sticks or carrot sticks for crunch. For a full meal, pair them with a fresh salad. You could even use them as a topping for nachos. Get creative with what you have at home! For the complete recipe, check out the [Full Recipe]. {{image_4}} To make a vegan buffalo cauliflower bite, you need to swap a few ingredients. Use a plant-based milk, like almond or soy, instead of water. For the sauce, combine vegan butter with your favorite hot sauce. This makes a creamy, spicy glaze without using dairy. You can also add nutritional yeast to the batter for a cheesy flavor. If you need a gluten-free recipe, replace all-purpose flour with gluten-free flour. Almond flour or chickpea flour works well. Both add a nice texture and flavor. Make sure your buffalo sauce is gluten-free too, as some brands can have hidden gluten. Always check the labels for safety. You can change the flavor of your cauliflower bites easily. Try using BBQ sauce for a sweet twist. Mix garlic and parmesan for a savory delight. Honey mustard adds a tangy touch. Experiment with your favorite sauces to find your perfect bite. The options are endless, so have fun with it! To keep your buffalo cauliflower bites fresh, store them in an airtight container. Place a paper towel at the bottom of the container to absorb moisture. This helps maintain their crispiness. When you’re ready to eat, reheat them in the oven at 350°F (175°C) for about 10-15 minutes. This method keeps them crunchy. You can also use an air fryer for a quick reheat. Just cook them for about 5 minutes. If you want to freeze the buffalo cauliflower bites, let them cool completely first. Then, arrange them in a single layer on a baking sheet. Freeze for about an hour until firm. After that, transfer them to a freezer-safe bag or container. Make sure to remove as much air as possible. To defrost, place the bites in the fridge overnight. Reheat in the oven to restore their crispy texture. Buffalo cauliflower bites can last in the fridge for up to 3 days. If you freeze them, they can stay good for 2-3 months. Just remember, the longer they sit, the less crispy they become. For the best taste, enjoy them fresh or within a few days of making them. Always check for any signs of spoilage before consuming. Yes, you can prepare buffalo cauliflower bites ahead of time. You can coat the florets and store them in the fridge for up to 24 hours. This saves time when you want to serve them. Just bake them before serving, and they will be fresh and tasty. Buffalo cauliflower bites pair well with ranch dressing or blue cheese dressing. Both dips balance the heat from the buffalo sauce. You can also use a yogurt dip for a lighter option. Each dip adds flavor and creaminess to the bites. To make buffalo cauliflower bites spicier, simply add more buffalo sauce. You can also mix in hot sauce or crushed red pepper flakes into the batter. This way, you control the heat level to suit your taste. Experiment to find your perfect spice blend. Yes, you can use frozen cauliflower florets. Just thaw and drain them well before coating. This prevents excess moisture, which can make them soggy. Keep in mind that frozen florets may bake a little differently, so adjust your cooking time as needed. The best way to reheat leftover buffalo cauliflower bites is in the oven. Preheat your oven to 350°F (175°C). Place the bites on a baking sheet and heat for about 10-15 minutes. This way, they regain their crispiness and taste fresh again. You learned how to make delicious buffalo cauliflower bites today. We covered each ingredient, from the main head of cauliflower to the tasty coating and buffalo sauce. I shared step-by-step instructions and valuable tips for crispiness and flavor. Variations like vegan and gluten-free options allow everyone to enjoy this dish. Store leftovers properly for the best taste later. You can have fun experimenting with dips and sauces. Enjoy these bites, and share them with friends for a great snack!

Savory Buffalo Cauliflower Bites Easy and Flavorful Snack

If you’re looking for a tasty snack that packs a punch, try savory Buffalo Cauliflower Bites. They are easy to

To make these fun bites, you need: - 1 cup all-purpose flour - ½ teaspoon baking soda - ¼ teaspoon salt - ½ cup unsalted butter, softened - ½ cup brown sugar, packed - ¼ cup granulated sugar - 1 teaspoon pure vanilla extract - 1 tablespoon milk (or your favorite dairy alternative) - ½ cup mini chocolate chips - 1 cup dark chocolate chips (for coating) These basic ingredients create a tasty cookie dough base. The mix of sugars gives the bites a sweet flavor. The mini chocolate chips add little pops of chocolate goodness. You can get creative with your cookie dough bites! Consider adding: - Chopped nuts (like walnuts or pecans) - Sea salt for a sweet-salty twist - Peanut butter or almond butter for a nutty flavor - Different types of chocolate chips (like white chocolate or butterscotch) These extras can change the taste and texture, making each batch unique and fun! You’ll need some basic kitchen tools to create these bites: - Mixing bowls (one medium, one large) - Whisk for mixing dry ingredients - Electric mixer for creaming butter and sugars - Spatula or wooden spoon for folding in chocolate chips - Cookie scoop or your hands for shaping the bites - Baking sheet and parchment paper for easy cleanup Having the right tools will make your baking experience smooth and enjoyable. Plus, you’ll have everything ready to whip up a batch of cookie dough bites quickly! For the full recipe, check out the details above. To start, gather all your ingredients. You will need flour, baking soda, salt, butter, sugars, vanilla, milk, mini chocolate chips, and dark chocolate chips. First, whisk together the flour, baking soda, and salt in a medium bowl. This helps mix everything well. Set this bowl aside for now. Next, in a large bowl, cream the softened butter with the brown sugar and granulated sugar. Mix on medium speed for about 2-3 minutes. The mix should look light and fluffy. Then, add the vanilla extract and milk. Stir it until everything combines nicely. Now, slowly add the dry mixture to the wet ingredients. Stir gently until just combined. Be careful not to overmix! Finally, fold in the mini chocolate chips with a spatula. This adds a sweet surprise to every bite. After the dough is ready, use a small cookie scoop or your hands. Portion out the dough into small balls. Aim for bite-sized pieces. Place them on a baking sheet lined with parchment paper. This makes it easy to remove them later. Once you have shaped all the dough, pop the baking sheet into the freezer. Let the cookie dough balls chill for about 30 minutes. This helps them firm up, making them easier to coat. While the dough balls chill, it’s time to melt the dark chocolate chips. Place them in a microwave-safe bowl. Heat them in 30-second intervals, stirring well after each time. Keep going until the chocolate is fully melted and smooth. Now, take the chilled cookie dough balls out of the freezer. Dip each ball into the melted chocolate. Make sure each one is fully coated. Place the chocolate-covered bites back on the parchment-lined baking sheet. For a fun touch, sprinkle a few mini chocolate chips on top of each bite before the chocolate hardens. This makes them look even better! Finally, return the baking sheet to the freezer for another 15-20 minutes. This lets the chocolate set completely. If you want the full recipe, you can refer to the earlier sections. To get the best dough texture, start with room temperature butter. Soft butter mixes well and gives a nice, creamy base. When you mix the butter and sugars, beat until fluffy. This adds air, making your bites light. Avoid overmixing when adding dry ingredients. Stop mixing just when everything is combined. This keeps the dough soft and chewy. For melting chocolate, use a microwave-safe bowl. Heat chocolate chips in short bursts, about 30 seconds each time. Stir well after each burst. This method helps prevent burning and clumping. If you see some chunks, keep stirring. The heat from melted chocolate will finish the job. You want a smooth, glossy chocolate for coating your bites. To impress your guests, serve the cookie dough bites on a nice plate. Place them in a circle for a fun look. Sprinkle extra mini chocolate chips on top of each bite. This adds color and makes them pop. You can also add a scoop of ice cream beside the bites. It makes for a fun dessert combo! For the full recipe, check the Full Recipe section. Enjoy your sweet treats! {{image_4}} You can make your cookie dough bites even tastier by adding mix-ins. Try folding in chopped nuts, like walnuts or pecans. They add a nice crunch. You can also use caramel bits for a sweet surprise. Just make sure to keep the proportions similar to the mini chocolate chips. This way, your dough stays balanced and delicious. Making gluten-free cookie dough bites is easy! Use a gluten-free flour blend instead of all-purpose flour. For a vegan version, swap the butter for coconut oil and use a plant-based milk. You can also find vegan chocolate chips. These changes let everyone enjoy this treat. They taste just as good, and you won’t miss the original recipe. Get creative with flavors! Add a teaspoon of mint extract for a fresh twist. Or, mix in peanut butter for a rich, nutty taste. You can even try almond extract for a sweet touch. Whatever flavor you choose, adjust the vanilla to keep the balance. This way, you can make your cookie dough bites unique and fun. Check out the Full Recipe for more inspiration! Store your chocolate chip cookie dough bites in an airtight container. This keeps them fresh and tasty. You can place parchment paper between layers to avoid sticking. I recommend using a container that fits well to prevent excess air. These cookie dough bites last about one week in the fridge. If you want them for longer, freeze them. They can stay in the freezer for up to three months. Just remember to thaw them in the fridge before serving. To freeze, place the bites on a baking sheet first. Once frozen, transfer them to your airtight container. A serving size is about two to three bites. This makes it easy to enjoy without overindulging. If you are serving guests, plan for a few bites per person. You can also double the recipe if you want more for a party. To see the full recipe, check out the earlier sections. Yes, you can eat raw cookie dough if it is made safely. Most cookie dough has raw flour and eggs, which can cause illness. To enjoy cookie dough bites safely, use heat-treated flour and omit eggs. This way, you get all the tasty flavor without the risk. You can find pre-made chocolate chip cookie dough bites at many grocery stores. Look in the frozen dessert aisle or the bakery section. Brands like Edoughble and Doughp offer ready-to-eat options. You can also order them online for a quick treat. The nutrition can vary based on ingredients, but a typical bite has about 80 calories. Each bite contains around 4 grams of fat, 10 grams of carbohydrates, and 1 gram of protein. Check the labels on store-bought bites for exact numbers. If you make them at home, you can adjust the ingredients for healthier options. You can easily change this recipe to match your taste. Here are some ideas: - Mix-ins: Add nuts, dried fruit, or even caramel bits. - Flavors: Use almond or mint extract for a different twist. - Dairy-free: Substitute butter with coconut oil and use dairy-free chocolate. - Gluten-free: Swap regular flour for almond flour or a gluten-free blend. For the full recipe, check out the Chocolate Chip Cookie Dough Bites Delight above! Enjoy making your very own bites! You learned how to make chocolate chip cookie dough bites, from ingredients to storage. With simple steps, even novices can enjoy this tasty treat. Experiment with different flavors and mix-ins to suit your taste. Remember to store them properly for the best freshness. Now, you can create delicious bites for any occasion and impress your friends or family. Enjoy making, sharing, and savoring these delightful snacks!

Chocolate Chip Cookie Dough Bites Easy and Fun Recipe

If you’ve ever craved the sweet, rich taste of cookie dough, you’re in for a treat! My easy recipe for

- 1 cup rolled oats - 1 cup almond milk (or any milk of your choice) - 1 tablespoon chia seeds - 1 tablespoon maple syrup (or honey for a natural sweetness) - 1/2 teaspoon vanilla extract - 1/2 cup mixed berries (such as strawberries, blueberries, and raspberries) - 1/4 cup Greek yogurt (optional) - Pinch of salt - Toppings: additional fresh berries, assorted nuts, or a sprinkle of cinnamon This recipe is both tasty and healthy. Each serving contains: - Calories: 300 (without yogurt) - Protein: 10g - Carbohydrates: 45g - Fiber: 8g - Fat: 10g These oats provide a balanced meal to start your day. They offer good fiber and protein, which help you feel full longer. Overnight oats are more than just a tasty breakfast. Here are some reasons to love them: - Quick and Easy: You prepare them the night before. No fuss in the morning! - Customizable: You can mix in your favorite fruits and nuts. This keeps breakfast fun and different. - Nutritious: Rolled oats are rich in fiber. They help with digestion and keep your heart healthy. - Portable: You can take them anywhere. Perfect for busy mornings or on-the-go meals. - Satisfying: The combination of oats and berries gives you energy. You’ll feel great all morning. This dish is a wonderful way to enjoy a healthy start. Follow the Full Recipe for more details on making this delicious meal! To start making your overnight oats, gather all your ingredients. You will need: - 1 cup rolled oats - 1 cup almond milk (or any milk of your choice) - 1 tablespoon chia seeds - 1 tablespoon maple syrup (or honey for a natural sweetness) - 1/2 teaspoon vanilla extract for added flavor - 1/2 cup mixed berries (such as strawberries, blueberries, and raspberries) - 1/4 cup Greek yogurt (optional for an extra creamy texture) - Pinch of salt to enhance flavors 1. In a medium bowl, combine the rolled oats, chia seeds, and a pinch of salt. Mix them well. 2. In another bowl, whisk together the almond milk, maple syrup, and vanilla extract. Make sure it is well blended. 3. Pour the milk mixture over the oats and stir gently. Avoid overmixing. 4. Carefully fold in the mixed berries. Save a few berries for later topping. 5. If you like it creamy, stir in the Greek yogurt now. 6. Distribute the mixture into jars or containers. 7. Seal them and place in the fridge overnight or for at least 4-6 hours. 8. When you're ready to eat, stir again and add milk if you want it thinner. When mixing your ingredients, remember these simple tips: - Mix dry and wet ingredients separately first. This helps them blend better. - Stir just enough to combine. Overmixing can make the oats mushy. - Folding in the berries gently keeps them intact. You want to see those beautiful colors! - If you add Greek yogurt, fold it in carefully for a creamy finish. Presentation makes your overnight oats look even more tempting. Here’s how to do it: - Use clear glass jars to show off the layers of oats and berries. - Top with reserved berries for a fresh touch. - Sprinkle some nuts or a dash of cinnamon on top for extra flavor. - Adding a sprig of mint can make it look fancy and fresh. This is where style meets health! Enjoy every bite of your berry bliss overnight oats. For the full recipe, check out the details above. One common mistake is using too much liquid. This makes the oats mushy. Stick to the recipe for the right balance. Another mistake is not letting the oats soak long enough. They need time to absorb the liquid and soften. If you rush this part, you won’t get the best texture. To get the perfect texture, use rolled oats, not quick oats. Rolled oats maintain their shape and provide a nice bite. If you want creamier oats, add Greek yogurt. It makes the dish rich and smooth. Also, mix your ingredients gently. Overmixing can break down the oats and chia seeds. To boost flavor, think beyond just berries. Add a splash of vanilla extract or a pinch of cinnamon. You can also try different sweeteners. Maple syrup or honey works well. Don’t forget to top with fresh berries or nuts. This adds crunch and brightness to each bite. For more ideas, check out the Full Recipe for inspiration. {{image_4}} You can change up the berries in your overnight oats. Each berry adds a unique taste and color. Strawberries give a sweet touch, while blueberries add a mild flavor. Raspberries bring a slight tartness. You can also use blackberries or even mixed berry blends. This variety keeps your breakfast exciting. Try different combinations to find your favorite mix! If you want dairy-free overnight oats, no worries! You can swap regular milk for almond milk, coconut milk, or oat milk. These milk options taste great and keep it creamy. If you want extra creaminess, consider using coconut yogurt instead of Greek yogurt. This way, you enjoy the same flavor and texture without dairy. Feel free to get creative with mix-ins! Add nuts like almonds or walnuts for crunch. You can also try seeds such as pumpkin or sunflower seeds for added nutrition. For sweetness, a dash of cinnamon or a spoonful of nut butter can elevate your oats. Top your oats with fresh fruits or a drizzle of honey for extra flavor. Let your taste buds guide you on this journey! To keep your overnight oats fresh, store them in the fridge. Use airtight containers to keep moisture out. You can prep them the night before and enjoy them the next morning. Mason jars work great for overnight oats. They allow you to see the layers of oats and berries. If you don’t have mason jars, small glass or plastic containers are also good. Just make sure they seal tightly. Overnight oats stay fresh for about 3 to 5 days in the fridge. If you add fresh fruit, eat them sooner, as they can spoil faster. For the best taste, enjoy them within 2 days. If you want to change things up, try adding nuts or seeds when serving. Overnight oats stay fresh for up to five days in the fridge. Store them in airtight containers to keep them from drying out. If you see any signs of spoilage, like off smells or changes in texture, it's best to toss them. Yes, you can use frozen berries in your overnight oats. Just add them straight from the freezer. They will thaw overnight and mix well with the oats. This method can add a nice chill to your breakfast. Plus, frozen berries are often just as nutritious as fresh ones. The best toppings for overnight oats include fresh fruit, nuts, and seeds. Here are some great options: - Sliced bananas or strawberries - Chopped nuts like almonds or walnuts - A sprinkle of cinnamon for warmth - A dollop of Greek yogurt for extra creaminess - Drizzle of honey or maple syrup for added sweetness Feel free to mix and match these toppings to suit your taste! For the complete recipe, check out the Full Recipe. Overnight oats are easy and healthy breakfast choices. We covered the key ingredients, including their nutrition and benefits. I shared steps to prepare and mix your oats to get the best texture. We also discussed variations and expert tips to enhance flavors. Lastly, I provided storage methods and answered common questions. By using these tips, you can enjoy tasty, nutritious oats every morning. Start making overnight oats today and enjoy the difference!

Overnight Oats with Berries Nutritious and Easy Recipe

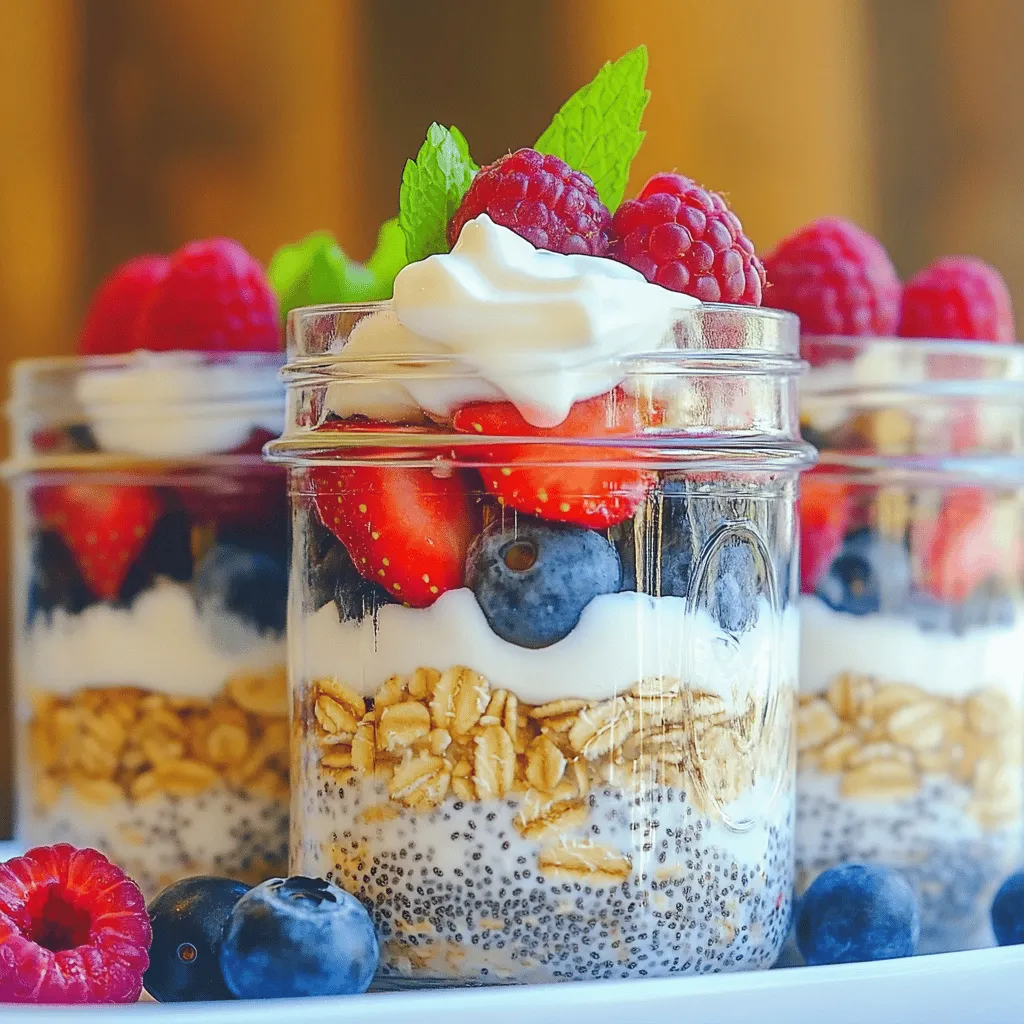
Ready to whip up a breakfast that’s both tasty and simple? Overnight oats with berries are your answer! This nutritious

To create tasty Mini Caprese Skewers, you need fresh, vibrant ingredients. Here’s what you will need: - Cherry tomatoes - Fresh mozzarella balls (bocconcini) - Fresh basil leaves - Balsamic glaze - Extra virgin olive oil - Salt and pepper - Small skewers or toothpicks Each ingredient plays a key role in making these skewers fresh and flavorful. The cherry tomatoes bring a burst of sweetness. Fresh mozzarella offers a creamy texture that pairs well with the tomatoes. The basil adds a fragrant herb note. Balsamic glaze provides a sweet tang, while extra virgin olive oil enhances the overall flavor. Finally, salt and pepper help to bring it all together. When picking your ingredients, go for the best quality. Look for firm, ripe cherry tomatoes. Choose mozzarella balls that are soft and fresh. Fresh basil should be bright green and aromatic. If you can, try to find organic options to boost flavor and support sustainable farming. For the full recipe, check out the [Full Recipe]. This simple yet elegant appetizer is sure to impress at any gathering. Enjoy the process of gathering these ingredients and let your creativity shine in each skewer you prepare! - Rinse and dry cherry tomatoes and basil. - Take the skewers and start to assemble mini Caprese stacks. - Begin with a cherry tomato, add a basil leaf, then a mozzarella ball. - Press gently to keep everything in place. - Repeat this pattern until you have three sets on each skewer. - When done, arrange the skewers on a serving platter. - In a bowl, mix olive oil, salt, and cracked pepper. - Drizzle this mixture over your skewers for flavor. - Next, add balsamic glaze to each skewer for a sweet touch. - Optional: Chop extra basil and sprinkle it over the skewers. For the full recipe, refer to the earlier section. This simple method brings rich flavors to your table. Selecting the best cherry tomatoes When choosing cherry tomatoes, look for bright colors. Red, yellow, or orange tomatoes should feel firm. Avoid any that are soft or have dark spots. Fresh cherry tomatoes will add great flavor. They should smell sweet and earthy. Finding fresh mozzarella and basil For mozzarella, pick small balls called bocconcini. They should be soft and moist. Check the packaging date for freshness. For basil, look for vibrant green leaves. Choose bunches without wilting or browning. Fresh basil gives the skewers an aromatic lift. Arranging skewers for visual appeal To make the skewers pop, use a large white platter. Place the skewers in a crisscross pattern. This will create a fun and inviting look. You can also cluster them together for a more casual style. Consider adding some extra cherry tomatoes around the skewers for color. Serving suggestions for events At gatherings, mini Caprese skewers shine as a finger food. They are easy to grab and eat. You can serve them alongside a small bowl of extra balsamic glaze for dipping. For a festive touch, add small flags or labels to each skewer. This adds charm and helps guests know what they are enjoying. Remember, you can find the full recipe to make your skewers right here! {{image_4}} You can make your mini Caprese skewers even more exciting with different flavors. Here are some simple ideas: - Adding Herbs: Try mixing in oregano or parsley. These herbs bring a fresh taste. You can place a small leaf of oregano or parsley between the tomato and mozzarella. The extra flavor will surprise your guests! - Flavored Balsamic Glazes: Instead of regular balsamic glaze, use flavored ones. There are many options like fig or raspberry. These glazes add sweetness and a twist to the classic taste. A drizzle of these glazes can elevate your dish. If you want to cater to different diets, mini Caprese skewers can adapt well. - Vegetarian Options: The recipe is already vegetarian-friendly. You can keep it as is, or add more veggies. Bell peppers or cucumbers can add crunch and color. - Gluten-Free Considerations: This recipe is naturally gluten-free. Just ensure your balsamic glaze has no added gluten. Check the label to be safe, and you’re good to go! These variations keep the dish fresh and fun for every occasion. For the full recipe, check out [Full Recipe]. To keep your mini Caprese skewers fresh, store any leftovers in the refrigerator. Place them in an airtight container to prevent drying out. This simple step helps maintain their taste and texture. I suggest eating them within two days for the best flavor. For meal prep, assemble the skewers ahead of time. Just leave out the balsamic glaze until serving. This keeps the skewers fresh and prevents sogginess. You can make them a few hours in advance and store them in the fridge, ready for your guests. If you want to refresh the flavors before serving, take the skewers out of the fridge. Let them sit at room temperature for about 15 minutes. This enhances the taste and makes them more inviting. Instead of reheating, consider drizzling more balsamic glaze on top. This adds a nice touch and boosts the flavor. Enjoy the freshness of the ingredients with each bite of your mini Caprese skewers! How to keep skewers from getting soggy? To keep your skewers fresh, avoid soaking the tomatoes before assembly. Pat them dry instead. Use a light drizzle of olive oil just before serving. This helps keep them crisp. Can I make these ahead of time? Yes, you can prepare these skewers a few hours in advance. Just keep them in the fridge. Drizzle the balsamic glaze right before serving for the best flavor. What can I serve with mini Caprese skewers? Mini Caprese skewers pair well with a variety of snacks. Consider serving them with crusty bread or a light salad. They also work great with a cheese platter. Suggestions for pairing drinks or sides These skewers match nicely with white wine or sparkling water. A fresh lemonade adds a fun twist too. For sides, try pairing with bruschetta or a light pasta dish. Creative dips or sauces to serve alongside You can serve these skewers with a tangy pesto or a creamy avocado dip. A simple garlic aioli also adds a nice touch. Each dip brings out new flavors in the skewers. For the full recipe, check the Mini Caprese Skewers with Balsamic Drizzle. To make tasty Mini Caprese Skewers, you need just a few fresh items. Here’s what you should gather: - Cherry tomatoes - Fresh mozzarella balls (bocconcini) - Fresh basil leaves - Balsamic glaze - Extra virgin olive oil - Salt and pepper - Small skewers or toothpicks These ingredients bring bright colors and great flavors. The cherry tomatoes add a burst of sweetness. The mozzarella gives a soft, creamy texture. Fresh basil brings a strong aroma. Each skewer is a mini taste of summer! When shopping, choose ripe cherry tomatoes. They should feel firm and look shiny. For mozzarella, look for small balls in water. Fresh basil should be vibrant green with no brown spots. These choices make your dish pop. The balsamic glaze adds a sweet and tangy kick. You can find it in most grocery stores. If you prefer, you can make your own by reducing balsamic vinegar. Just simmer it until it thickens. Using high-quality olive oil is key. It enhances the taste of your dish. Don't skip the salt and pepper; they boost all the flavors. Now that you have your ingredients, you’re ready to create a delightful appetizer. For the detailed steps, check out the Full Recipe. Mini Caprese skewers are simple yet delicious. We covered the key ingredients, including cherry tomatoes, mozzarella, and fresh basil. You learned how to easily assemble them and add tasty touches like balsamic glaze. Remember, sourcing fresh ingredients makes a big difference in flavor. In the end, these skewers are a fun, versatile dish for any gathering. Enjoy experimenting with variations and serving them fresh. Try these insights, and you’ll impress your guests every time!

Mini Caprese Skewers Fresh and Flavorful Appetizer

Looking for a fresh and flavorful appetizer that impresses? Mini Caprese skewers are the answer! These bite-sized treats combine juicy

- 1 cup frozen spinach - 1 cup canned artichoke hearts - 1 cup cream cheese, softened - ½ cup sour cream - ½ cup mayonnaise - 1 cup shredded mozzarella cheese - ½ cup grated Parmesan cheese - 2 cloves garlic, finely minced - ½ teaspoon onion powder - Salt and pepper to taste - Optional: Red pepper flakes for a spicy kick Gathering these ingredients is the first step to making creamy spinach artichoke dip. I love using frozen spinach because it’s easy and quick. Just make sure to thaw it and squeeze out the water. This keeps the dip from being too watery. Canned artichoke hearts are perfect for this dip. They add a nice texture and flavor. The creamy base comes from cream cheese, sour cream, and mayonnaise. This combination creates a rich and smooth dip. I always use softened cream cheese for easy mixing. Cheeses are key. I add shredded mozzarella and grated Parmesan to bring out the flavors. The mozzarella melts beautifully, while the Parmesan adds a nutty touch. Don’t forget about flavor! Garlic and onion powder give a nice depth. Salt and pepper are essential too. If you like heat, add red pepper flakes. They give the dip a spicy kick. You can adjust the amount to your liking. With these ingredients, you are ready to create a dish that is sure to impress. For the full recipe, check out the detailed instructions. Enjoy every bite! First, take the frozen spinach and let it thaw. After it is soft, squeeze out the excess water. This step is key to avoid watery dip. Next, drain the canned artichoke hearts. Roughly chop these into small pieces. This will help them mix well in the dip. In a large bowl, add the softened cream cheese, sour cream, and mayonnaise. Use a hand mixer or a whisk to blend them until smooth. This creamy base will make your dip rich and delicious. Now, add the chopped spinach and artichokes to the bowl. Stir in the minced garlic, onion powder, and both cheeses. Mix everything well until no lumps remain. Season the dip with salt and pepper to taste. If you like it spicy, add some red pepper flakes. Mix it all together until the flavors combine. Preheat your oven to 375°F (190°C). This ensures your dip cooks evenly and gets bubbly. Once the oven is ready, transfer the dip mixture into a baking dish. Smooth it out with a spatula. Bake it for about 25-30 minutes. The dip is done when it is bubbly and golden brown on top. After baking, let it cool for a few minutes before serving. This will help avoid burns. Enjoy it warm with tortilla chips or fresh veggies. For the full recipe, check the earlier section! To make the best creamy spinach artichoke dip, start with room temperature cream cheese. If it's cold, it won't mix well. This step makes the dip creamy and smooth. Use a hand mixer or a whisk to blend the cream cheese, sour cream, and mayonnaise. Mix until the base is completely smooth. This ensures all flavors blend well together. Serve your dip warm for the best taste. It pairs well with crispy tortilla chips, slices of crusty bread, or fresh veggie sticks like carrots and celery. To impress guests, sprinkle extra Parmesan on top. A garnish of fresh parsley adds color and freshness. Consider serving it in a nice baking dish to showcase its golden, bubbly top. For a fun twist, add red pepper flakes for heat, adjusting to your taste. Enjoy this creamy dip with friends and family for a perfect snack! {{image_4}} You can swap ingredients to fit your taste or needs. If you want a lighter dip, use Greek yogurt instead of sour cream. For cream cheese, try cottage cheese or a vegan cream cheese. These swaps keep the dip creamy but change the flavor slightly. Adding different cheeses can make the dip even more exciting. You could use cheddar for a sharp taste or pepper jack for a spicy kick. Mixing in feta cheese adds a nice tang. Play around with flavors to find your favorite blend. If you follow a vegan diet, use plant-based cream cheese and yogurt. This keeps the dip creamy without dairy. You can also add cashews blended with water for a rich texture. For gluten-free options, serve the dip with rice crackers or fresh veggies. This way, everyone can enjoy it. Just make sure all your ingredients are gluten-free. This is an easy way to make the dip safe for those with dietary restrictions. To keep your creamy spinach artichoke dip fresh, follow these steps: - Cool it down: Let the dip cool to room temperature before storing. - Choose the right container: Use an airtight container. Glass or plastic work well. - Refrigerate: Store the dip in the fridge. It can last for about 3-5 days. Make sure to check for any signs of spoilage before eating. If it looks or smells off, it’s best to toss it. When it’s time to enjoy your leftovers, proper reheating is key. Here’s how to do it: - Oven method: Preheat the oven to 350°F (175°C). Place the dip in an oven-safe dish. Heat for 15-20 minutes until warm. Stir halfway through to ensure even warmth. - Microwave method: Use a microwave-safe bowl. Heat in short intervals, about 30 seconds each. Stir between intervals until warmed through. To avoid separation of ingredients, do not overheat. Slow and gentle heat keeps the dip creamy and delicious. How to make the dip spicier? To make the dip spicier, add red pepper flakes. You can mix in a teaspoon for a mild kick. For more heat, add more flakes or use hot sauce. Adjust the spice to what you enjoy. Can I prepare it ahead of time? Yes, you can prepare the dip a day before. Just mix all the ingredients and store it in the fridge. When ready to serve, bake it as directed in the Full Recipe. This makes for easy party prep! What are the best dipping options? The best dippers for this dip include: - Tortilla chips - Slices of a crusty baguette - Fresh vegetable sticks (carrots, celery, bell peppers) These options add great texture and flavor! What to do if the dip is too thick or thin? If the dip is too thick, add a bit of sour cream or mayonnaise. Stir well until you reach your desired consistency. If it’s too thin, simply bake it a few extra minutes. This will help it thicken up. How to fix a bland flavor? To fix a bland dip, add more salt, pepper, or garlic. Taste as you go. You can also mix in some lemon juice for a bright flavor. A little seasoning can make a big difference! This blog post covered a tasty spinach artichoke dip recipe, focusing on ingredients, preparation, and storage. You learned the steps to create a creamy, savory dip that impresses any guest. Remember, you can tweak the recipe with substitutions or different flavors. Store leftovers properly to enjoy later and always adapt to your dietary needs. Keep experimenting and have fun with your dip creation. You now hold the key to delicious gatherings!

Creamy Spinach Artichoke Dip Irresistible Comfort Food

Craving a warm, creamy treat that brings everyone together? Look no further than my irresistible Creamy Spinach Artichoke Dip! Made

- 1 cup broccoli florets - 1 red bell pepper, thinly sliced - 1 yellow bell pepper, thinly sliced - 1 medium carrot, julienned - 1 cup sugar snap peas, trimmed - 2 cloves garlic, finely minced - 1 tablespoon fresh ginger, finely grated - 3 tablespoons soy sauce (or tamari for gluten-free) - 1 tablespoon sesame oil - 1 tablespoon olive oil - 1 teaspoon honey or maple syrup (optional) - Toasted sesame seeds, for garnish - Cooked rice or quinoa, for serving Gathering fresh ingredients is key. I love using colorful veggies for a vibrant look. The broccoli adds crunch, while the bell peppers bring sweetness. Carrots add a nice texture, and sugar snap peas give a fresh snap. Garlic and ginger are essential for flavor. They create a strong base for your stir-fry. Using soy sauce or tamari adds depth. Sesame oil adds a nutty note that ties everything together. Optional honey or maple syrup enhances the dish. It balances the savory and adds a hint of sweetness. Lastly, toasted sesame seeds give a delightful crunch. Serve this stir-fry over rice or quinoa for a filling meal. For the full recipe, check out the cooking steps that bring all these ingredients to life! - Wash and chop vegetables. - Prepare aromatics: garlic and ginger. Start by washing all the vegetables. This step is key for freshness. Chop the broccoli into small florets. Slice the red and yellow bell peppers into thin strips. Julienne the carrot into matchsticks. Trim the sugar snap peas. This prep will help the veggies cook evenly. Next, it's time to prepare the aromatics. Finely mince two cloves of garlic. Grate one tablespoon of fresh ginger. These will bring a strong flavor to your stir-fry. - Heat oil and sauté garlic and ginger. - Add broccoli and bell peppers, stir-frying. In a large skillet or wok, heat one tablespoon of olive oil over medium-high heat. When the oil shimmers, add the minced garlic and grated ginger. Stir-fry for about 30 seconds. Be careful not to burn them; you want them fragrant, not charred. Now, toss in the broccoli florets and sliced bell peppers. Stir-fry for 3 to 4 minutes. You want them to soften slightly but stay bright and crisp. This creates a colorful dish full of vitamins. - Incorporate carrot and sugar snap peas. - Add soy sauce and sesame oil, toss to coat. - Garnish with sesame seeds and serve. Next, add the julienned carrot and sugar snap peas to the skillet. Stir-fry these for another 2 to 3 minutes. This will allow all the flavors to mingle. Pour in three tablespoons of soy sauce and one tablespoon of sesame oil. If you like sweetness, add one teaspoon of honey or maple syrup. Toss everything together to coat the vegetables well. Let it cook for another minute or two. This will help the flavors blend. Remember, you want to keep the veggies bright and crunchy. Finally, remove the pan from the heat. Sprinkle a generous amount of toasted sesame seeds over the stir-fry. This adds a nice crunch and looks great. Serve the stir-fry over a warm bed of cooked rice or quinoa. This makes for a complete meal. For the full recipe, check the recipe section above. To get a crispy stir-fry, you need high heat. Use a large pan or wok. The heat helps the veggies cook fast. This quick cooking seals in flavor and keeps them crunchy. Another tip is to avoid overcrowding the pan. If you add too many veggies at once, they will steam instead of fry. Cook in batches if needed. To make your stir-fry even tastier, consider adding sauces like teriyaki or hoisin. These sauces add depth and flavor. You can also toss in fresh herbs like basil or cilantro for a burst of aroma. They make the dish bright and fresh. Pair your veggie stir-fry with simple sides like steamed rice or quinoa. These grains soak up the sauce well. You can also add protein to your meal. Tofu, chicken, or shrimp work great. Just cook them first, then mix them in with the stir-fry. For the Full Recipe, check out the instructions above. {{image_4}} You can swap in many vegetables for your stir-fry. Try using: - Cauliflower florets - Zucchini, sliced - Green beans, trimmed - Bell peppers in different colors - Mushrooms, sliced - Baby corn or bok choy Seasonal produce is great too. In spring, add asparagus or snap peas. In fall, consider squash or Brussels sprouts. Mixing colors makes your dish more fun and healthy. This stir-fry is easy to make vegan. Just use tamari instead of soy sauce. You can also skip the honey or maple syrup. For gluten-free options, always check labels on sauces. If you want low-carb, swap rice or quinoa for cauliflower rice. This change keeps the meal light and fresh while still being filling. For a kick, add chili flakes, or a splash of hot sauce. Start small, then taste. Adjust to your family’s heat level. Kids might prefer less spice, so keep their portions mild. You can also add fresh herbs like basil or cilantro for extra flavor. These add freshness without heat and make your dish pop. Enjoy experimenting with your stir-fry! For a complete guide, check the Full Recipe. To keep your leftover stir-fry fresh, use airtight containers. Glass or plastic containers work well. Make sure they seal tightly to prevent air from getting in. This helps avoid spoilage. You can store the stir-fry in the fridge for up to three days. If you want to keep it longer, freeze it for up to three months. When reheating, you want to keep the veggies crisp. The stovetop is the best method. Heat a little oil in a pan and add the stir-fry. Stir it gently until warmed through. This method keeps the texture nice. If you use a microwave, cover it loosely. Heat it in short bursts to avoid making the veggies soggy. Stir after each burst for even heating. Making Easy Veggie Stir-Fry takes just 15 minutes. You spend about 5 minutes prepping the veggies. Cooking only takes another 10 minutes. This quick meal fits perfectly into any busy weeknight. Yes, you can use frozen vegetables. They are convenient and save time. However, you may need to adjust cooking time. Frozen veggies often need a bit longer to cook. Keep an eye on them to avoid mushiness. Fresh veggies will give the best taste and crunch. This stir-fry pairs well with many grains and proteins. You can serve it over cooked rice or quinoa. Adding tofu or chicken makes it heartier. You can also add nuts or seeds for extra crunch. This meal is flexible, making it easy to customize. You can prepare the veggies ahead of time. Just store them in the fridge in an airtight container. For best taste, cook the stir-fry fresh. If you have leftovers, keep them in the fridge for up to three days. Reheat in a pan or microwave for a quick meal. Easy Veggie Stir-Fry is quick, tasty, and healthy. You can mix any veggies you love. Remember to use high heat for a great crunch. This dish shines with soy sauce and garlic. Feel free to add your favorite proteins. Store leftovers in good containers for fresh meals. You can even reheat with care. Enjoy creating your own fun stir-fry! It’s a simple way to eat well and have fun in the kitchen.

Easy Veggie Stir-Fry Quick and Tasty Weeknight Meal

Looking for a fast and healthy dinner? You’ve come to the right place! This Easy Veggie Stir-Fry is your go-to

- 2 cups rolled oats - 1 cup almonds, roughly chopped - 1/2 cup walnuts, roughly chopped - 1/2 cup sunflower seeds - 1/2 cup honey or maple syrup - 1/4 cup almond butter (or any nut butter of your choice) - 1/2 teaspoon vanilla extract - 1/2 teaspoon ground cinnamon - 1/4 teaspoon salt - 1/2 cup dried cranberries or raisins (optional) Each ingredient plays a key role in the flavor and texture of your bars. The rolled oats serve as the base. Almonds and walnuts add crunch and protein. Sunflower seeds provide healthy fats. Honey or maple syrup acts as a sweetener and binder. Almond butter gives a creamy texture. Vanilla extract, cinnamon, and salt enhance the overall taste. If you use dried fruit, it adds sweetness and chewiness. You can swap almonds and walnuts for other nuts like pecans or cashews. For nut-free bars, try pumpkin seeds or extra sunflower seeds. If you want a vegan option, use maple syrup instead of honey. You can also add dark chocolate chips for a tasty twist. Adjust the spices to your liking; nutmeg or ginger can add unique flavors. The possibilities are endless, so feel free to get creative! Start by preheating your oven to 350°F (175°C). Grab an 8x8 inch baking pan. Line it with parchment paper. Make sure to leave some paper hanging over the edges. This helps lift the bars out later. In a large mixing bowl, add 2 cups of rolled oats. Next, toss in 1 cup of roughly chopped almonds. Then, add 1/2 cup of roughly chopped walnuts and 1/2 cup of sunflower seeds. Finally, sprinkle in 1/2 teaspoon of ground cinnamon. Mix all these dry ingredients well. Make sure they are evenly combined. In a small saucepan, pour in 1/2 cup of honey or maple syrup. Add 1/4 cup of almond butter to the pan. Heat these over low heat. Stir non-stop until both ingredients melt and blend smoothly. Once melted, take it off the heat. Mix in 1/2 teaspoon of vanilla extract and 1/4 teaspoon of salt. This will enhance the taste. Now, pour the warm wet mixture over the dry ingredients. Mix everything thoroughly. Make sure the dry ingredients are well coated. If you want, fold in 1/2 cup of dried cranberries or raisins. This adds a nice touch of sweetness. Transfer the mixture into the prepared baking pan. Use a spatula or your hands to press it down firmly. Make it an even layer. Bake in the oven for 20-25 minutes. Watch for the edges to turn golden brown. When done, let the bars cool completely in the pan. Use the parchment paper to lift them out. Place them on a cutting board and cut into individual bars or squares. For the full recipe, check out the detailed instructions above! To get the right texture for your granola bars, start by pressing the mixture firmly into the pan. This helps them hold together well. If you like chewy bars, keep the baking time short. For a crunchier texture, bake them a bit longer. Letting them cool completely in the pan is key too. It helps them firm up and makes cutting easier. You can easily boost the flavor of your granola bars. Try adding different nuts or seeds that you enjoy. Use maple syrup instead of honey for a unique taste. Adding spices like nutmeg or ginger can give an extra kick. You can also toss in some dark chocolate chips for a sweet touch. Just remember, balance is key! Avoid using too much liquid in your mixture. This can make your bars too soft. Also, don’t skip the salt! It enhances all the flavors. Another mistake is not letting the bars cool completely. If you cut them too soon, they may fall apart. Lastly, be careful not to overbake. Watch them closely for that golden edge, as this means they are done. {{image_4}} You can mix and match flavors in your granola bars. Try adding chocolate chips for a sweet twist. You can also use coconut flakes for a tropical vibe. For a spicy kick, add a pinch of cayenne pepper or some ginger. Each option brings a new taste to your bars. Making these bars vegan is easy. Just swap honey for maple syrup. For gluten-free options, ensure your oats are certified gluten-free. This way, everyone can enjoy these tasty snacks without worry. Boost the nutrition by adding seeds or nuts. Chia seeds add fiber and omega-3s. Pumpkin seeds give a crunch and are packed with nutrients. You can also use protein powder for an extra protein boost. These add-ins make your bars even healthier and more filling. For the full recipe, check out the Nutty Delight Granola Bars! To keep your homemade granola bars fresh, store them in an airtight container. Make sure they are completely cool before sealing. If you stack them, place parchment paper between layers to avoid sticking. Keep them in a cool, dry place. A pantry or kitchen cabinet works well. When stored properly, homemade granola bars can last up to one week. After that, they may lose their crunch and flavor. If you notice any changes in smell or texture, it’s best to toss them out. Always check before enjoying your snack. You can freeze granola bars for longer storage. Wrap each bar tightly in plastic wrap or foil. Place them in a freezer-safe bag or container. They can last up to three months in the freezer. When you want one, just take it out and let it thaw at room temperature. Enjoy your healthy snack anytime! To cut granola bars, first let them cool fully. After cooling, lift them from the pan using the parchment paper. Place them on a cutting board. Use a sharp knife for clean cuts. Cut into rectangles or squares. For easier cutting, run the knife under hot water before slicing. Yes, you can make these granola bars without nuts. Just skip the almonds and walnuts. Replace them with more seeds or oats. You can also add ingredients like coconut or dried fruits for texture. These changes will still give you tasty bars. Homemade granola bars last about one week at room temperature. Store them in an airtight container. For longer storage, keep them in the fridge. They can last up to two weeks there. If you freeze them, they last for three months. You can use maple syrup instead of honey. Agave nectar is another great choice. Both options provide sweetness and moisture. You can also try brown rice syrup for a different flavor. Each alternative may change the taste a bit. If you want to try making these yourself, check out the Full Recipe for Nutty Delight Granola Bars. It’s simple and full of flavor! You learned how to make tasty granola bars with simple steps. We covered ingredients, measurements, and fun mix-ins. You now know how to store them well, too. With the right tips, you can avoid common mistakes. Feel free to try new flavors and adjust for diet needs. Have fun making these bars your own. Enjoy snacking on your delicious creation!

Homemade Granola Bars Easy and Healthy Snack Idea

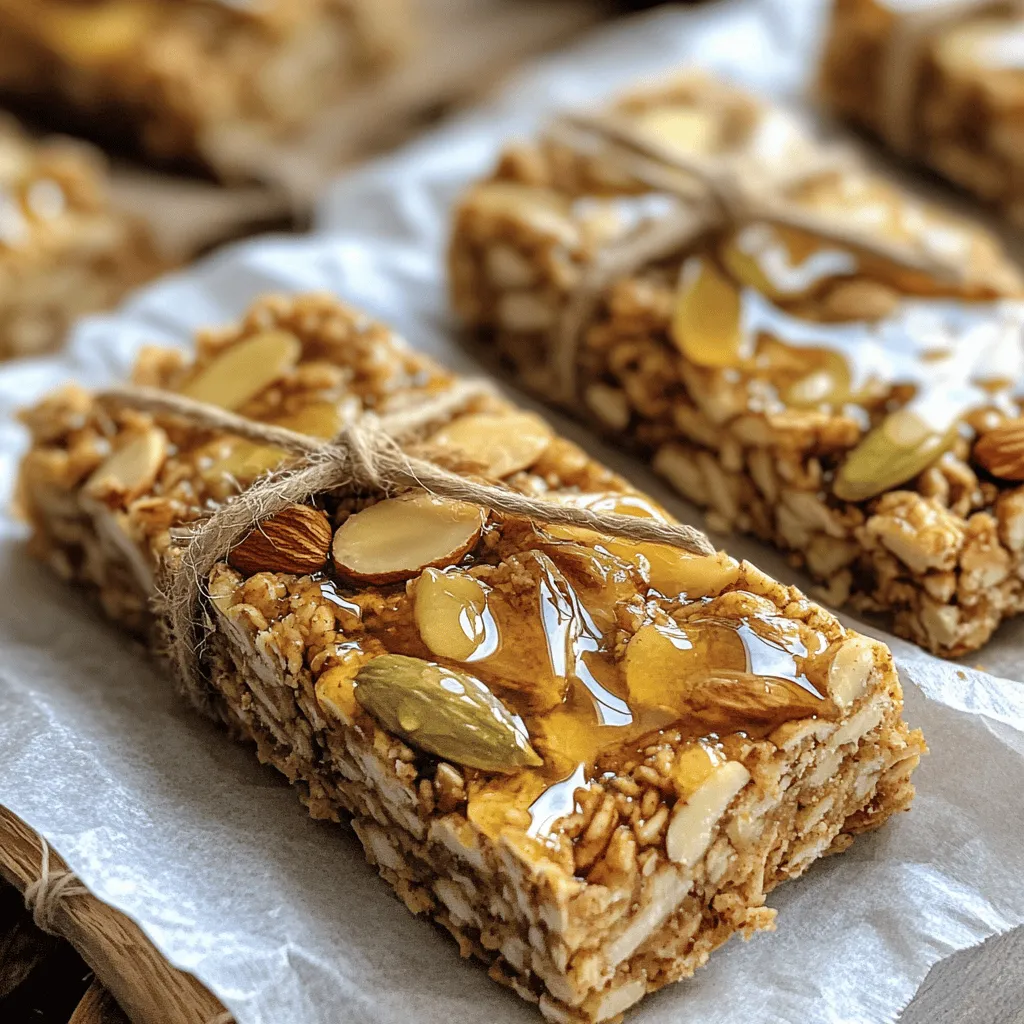
Looking for a healthy snack that’s also easy to make? Homemade granola bars are your answer! You can create delicious,

- 2 cups cooked rice (white or brown) - 2 cups fresh broccoli florets - 1 cup shredded sharp cheddar cheese (plus extra for topping) - 1 cup sour cream - 1/2 cup cream of mushroom soup (store-bought or homemade) - 1 small onion, finely chopped - 2 cloves garlic, minced - 1 teaspoon Dijon mustard - 1 teaspoon dried thyme - Salt and freshly ground black pepper to taste - 1/2 cup breadcrumbs (preferably panko for extra crunch) - 2 tablespoons olive oil I use 2 cups of cooked rice. You can use either white or brown rice. The fresh broccoli florets should also measure 2 cups. For cheese, I prefer sharp cheddar, using 1 cup for the mix and more for the top. You will need 1 cup of sour cream to add creaminess. The cream of mushroom soup can be homemade or store-bought, and I use 1/2 cup. One small onion, chopped finely, and 2 minced garlic cloves give the dish flavor. I add 1 teaspoon of Dijon mustard and 1 teaspoon of dried thyme for depth. Don’t forget salt and pepper to taste. For a crunchy topping, use 1/2 cup of breadcrumbs and 2 tablespoons of olive oil for moisture. If you want a gluten-free dish, use gluten-free breadcrumbs. You can swap the sharp cheddar for mozzarella or gouda if you prefer a milder cheese. For a lighter option, try Greek yogurt instead of sour cream. If you don’t have cream of mushroom soup, a homemade version works well too. Just blend mushrooms, broth, and cream to get a similar texture. Start by preparing your broccoli. Fill a pot with water and add a pinch of salt. Bring this to a boil. Once boiling, add 2 cups of fresh broccoli florets. Blanch them for 2-3 minutes. You want them bright green and slightly tender. After that, drain the broccoli and set it aside. Next, let’s sauté the aromatics. Grab a medium skillet and heat 2 tablespoons of olive oil over medium heat. Once it’s hot, add 1 small finely chopped onion and 2 minced garlic cloves. Cook these for 3-4 minutes. You want the onion to become translucent and smell fragrant. This step adds a great base flavor to your casserole. Now it’s time to mix everything together. In a large bowl, combine the cooked rice, blanched broccoli, and the sautéed onion and garlic. Add 1 cup of shredded sharp cheddar cheese, but save a little for later. Next, stir in 1 cup of sour cream and 1/2 cup of cream of mushroom soup. Add 1 teaspoon of Dijon mustard and 1 teaspoon of dried thyme. Don’t forget to season with salt and freshly ground black pepper to taste. Mix all these ingredients until they blend well. This will create a creamy, cheesy base for your casserole. Now, let’s get ready to bake. Lightly grease a 9x13 inch casserole dish with cooking spray or olive oil. Pour the broccoli rice mixture into the dish. Spread it evenly across the bottom. For the topping, mix 1/2 cup of breadcrumbs with a tablespoon of olive oil in a small bowl. Sprinkle this breadcrumb mix and the reserved cheddar cheese over the top of the casserole. Finally, place the casserole in your preheated oven at 350°F (175°C). Bake it for 25-30 minutes. You want the top to be bubbly and golden brown. Once it’s done, let it cool for 5-10 minutes before serving. This helps it set and makes it easier to serve. For the full recipe, refer back to the ingredients section. Enjoy your Cheesy Broccoli Rice Casserole! To boost the flavor of your casserole, try adding more spices. A pinch of paprika can add warmth. You can also mix in some cayenne pepper for a kick. Fresh herbs like thyme or parsley can brighten the dish. For the best texture, watch your cooking time. Bake the casserole until the top is golden brown. This usually takes about 25 to 30 minutes. If you want a crispier top, broil it for a minute or two at the end. Just keep an eye on it to prevent burning. When serving, consider how it looks. A sprinkle of fresh parsley over the top adds color. You can also serve it in individual bowls for a fun touch. For added crunch, serve with a side of crispy salad or garlic bread. These small details make your meal more appealing. Remember, we eat with our eyes first! For the full recipe and more details, check out the Full Recipe section above. {{image_4}} You can switch up the cheese for a new flavor. Mozzarella gives a nice stretch. Gouda adds a rich, sweet taste. You might even try a mix! Use your favorite cheese and see what happens. Want to make it heartier? Add some cooked chicken or ham. Just chop them into bite-sized pieces. Mix them in when you add the broccoli. You can also use turkey or bacon for a twist. For a vegetarian option, skip the meat and stick with the cheese. If you want it vegan, use plant-based cheese. Swap sour cream for a vegan version or plain yogurt. You can also use cashew cream for a creamy texture. This makes the dish tasty and friendly for all diets. Feeling inspired? Check out the Full Recipe to create your own Cheesy Broccoli Rice Casserole! After enjoying your cheesy broccoli rice casserole, store leftovers in an airtight container. Let the dish cool down to room temperature first. This helps keep the texture nice. You can keep it in the fridge for up to four days. If you plan to eat it later, you can freeze it too. To reheat, use your oven for the best results. Preheat your oven to 350°F (175°C). Place the casserole in a baking dish, cover it with foil, and warm it for about 20 minutes. This method keeps the cheese melty and the rice fluffy. You can also microwave it, but the oven gives a better texture. For long-term storage, freeze the casserole before baking it. Wrap it tightly in plastic wrap and then in foil. This prevents freezer burn. You can freeze it for up to three months. When ready to bake, thaw it in the fridge overnight and then bake as usual. If you want, you can add more cheese on top before baking for extra flavor. Yes, you can make this casserole ahead of time. Prepare it fully, then cover and refrigerate. You can bake it the next day. Just add a few extra minutes to the baking time if it’s cold from the fridge. This helps the cheese melt perfectly and keeps the dish moist. This casserole pairs well with many sides. Here are a few ideas: - Grilled chicken or fish - A fresh garden salad - Roasted vegetables - Garlic bread These options add more flavor and make a complete meal. To keep your casserole moist, use enough creamy ingredients. The sour cream and cream of mushroom soup help with this. Make sure to bake it covered for the first part of cooking. This traps steam and keeps the casserole from drying out. If you find it drying out, you can also add a splash of broth or water before baking. For the full recipe, check out the ingredients and steps above! This blog post covered all you need for a fantastic Cheesy Broccoli Rice Casserole. We listed ingredients, shared easy steps, and provided tips to elevate your dish. You'll find variations to suit different diets and storage tips to keep your leftovers fresh. Remember, with simple tweaks, you can make it your own. Enjoy exploring flavors and textures as you cook. This dish will surely become a favorite for you and your family. Happy cooking!

Cheesy Broccoli Rice Casserole Hearty and Easy Meal

Welcome to your new favorite dinner recipe! Cheesy Broccoli Rice Casserole is a warm and easy meal that the whole

Older posts
Newer posts
← Previous Page1 … Page35 Page36 Page37 … Page73 Next →

dsad

© 2025 recipesstation • Built with GeneratePress

Our Policies

  • Copyright Policy
  • Cookie Policy
  • GDPR Policy
  • Privacy Policy
  • Disclaimer
  • Terms Of Use

More Information

  • Home
  • About
  • Contact
  • Appetizers
  • Dessert
  • Dinner
  • Drinks
©2025, recipesstation About Back To Top