Skip to content
DisclaimerTerms Of UseGDPR PolicyCookie Policy

recipesstation

  • Home
  • Drinks
  • Appetizers
  • Dinner
  • Dessert
  • About
  • Contact
  • Privacy Policy
DisclaimerTerms Of UseGDPR PolicyCookie Policy

Emily

- 1 cup rolled oats - ½ cup all-natural peanut butter - ¼ cup honey or maple syrup - ¼ cup ground flaxseed - ¼ cup dark chocolate chips - 2 tablespoons chia seeds - 1 teaspoon pure vanilla extract - A pinch of sea salt The main ingredients in these Peanut Butter Energy Bites are simple and healthy. First, rolled oats give a great base. They add fiber, which helps keep you full. Next, all-natural peanut butter provides protein and healthy fats. Honey or maple syrup adds sweetness. Ground flaxseed offers omega-3 fatty acids. Dark chocolate chips add a fun touch of flavor. Chia seeds provide extra fiber and protein. Pure vanilla extract gives a nice aroma. A pinch of sea salt enhances all the flavors. - Calories per serving: about 100 - Key nutrients: fiber, protein, healthy fats Each serving has about 100 calories, which makes these bites a great snack. You will find fiber and protein in the oats and peanut butter. These nutrients help keep your energy up throughout the day. - Energy-boosting properties - Nutritional advantages of ingredients These energy bites are perfect for a quick boost. The oats provide complex carbs, which give lasting energy. Peanut butter keeps you satisfied and full. Ingredients like flaxseed and chia seeds help with digestion and heart health. Overall, these bites are tasty and good for your body. Enjoy them as a snack or before a workout! Check out the [Full Recipe](#) for more details on how to make them. Start by preparing your workspace. Gather all your ingredients and tools. You will need a large mixing bowl and a spatula. Next, mix the dry ingredients. In your large bowl, combine: - 1 cup rolled oats - ¼ cup ground flaxseed - 2 tablespoons chia seeds - A pinch of sea salt Stir these dry ingredients well until they are mixed evenly. This ensures a good texture in your energy bites. Now, let's handle the wet ingredients. In a separate bowl, measure: - ½ cup all-natural peanut butter - ¼ cup honey or maple syrup - 1 teaspoon pure vanilla extract Whisk these together until smooth. This blend creates a rich flavor for your bites. Carefully pour the peanut butter mixture into the bowl with dry ingredients. Use your spatula to blend them. Make sure no dry bits remain. This step is key for great taste. Next, gently fold in the dark chocolate chips. Add: - ¼ cup dark chocolate chips This adds a sweet, rich flavor. Be careful not to break the chips while mixing. Now it’s time to shape the mixture. Scoop small portions about 1 inch in diameter. Roll them into balls using your hands. Place each ball on a parchment-lined baking sheet. Make sure to leave some space between them. After shaping all the bites, cover the baking sheet with plastic wrap. Place it in the refrigerator for at least 30 minutes. Chilling makes the bites firm and easy to handle. Once chilled, transfer the energy bites to an airtight container. You can keep them in the fridge for up to a week or freeze them for longer storage. Enjoy your tasty treats! Rolling energy bites can be fun! Here are some tips to make it easier: - Wet your hands. This helps prevent the mixture from sticking to your skin. - Use a cookie scoop. It gives you even portions, making rolling quicker. - Chill the mixture. If it’s too soft, chilling it for 10 minutes can help. Want to make your energy bites even better? Try these ideas: - Add mix-ins like nuts, seeds, or dried fruit for extra texture. - Use flavored peanut butter, like chocolate or honey, to add a twist. - Sprinkle in spices like cinnamon or cocoa powder for a delightful kick. Serving your energy bites can be just as fun as making them! Here are some ideas: - Fill a jar. Present them in a glass jar for a cute display. - Pair with fruit. Serve them alongside bananas or apples for a balanced snack. - Use as toppings. Crumble them over yogurt or oatmeal for extra crunch. For the full recipe, check out the Nutty Delight Peanut Butter Energy Bites! Enjoy your tasty treats! {{image_4}} You can easily make these energy bites vegan. Just swap honey for maple syrup. Maple syrup is a great sweetener that works well in this recipe. The taste remains delicious and sweet. It’s an easy change that keeps your bites plant-based. For gluten-free energy bites, check your oats. Make sure they are certified gluten-free. Some oats may contain gluten due to cross-contamination. Always read labels to ensure your ingredients are safe and healthy. Want to try new flavors? Add different ingredients to mix things up. Here are some fun ideas: - Dried fruit: Raisins, cranberries, or apricots add sweetness and chewiness. - Nuts or seeds: Chopped almonds or pumpkin seeds add crunch and nutrition. - Spices: Cinnamon or nutmeg can give a warm, cozy flavor. Feel free to experiment with your favorite flavors and textures. Enjoy making these bites your own! For the complete recipe, check out the [Full Recipe]. To keep your energy bites fresh, store them in the refrigerator. Place them in an airtight container. They will stay good for up to a week. This short-term storage keeps them firm and tasty. For long-term storage, freezing is best. Place the energy bites in a single layer on a baking sheet. Freeze them for about an hour until firm. Once frozen, transfer them to a freezer-safe bag. This method prevents them from sticking together. To thaw, remove the desired number of bites from the freezer. Leave them in the fridge overnight to soften. They can also sit at room temperature for about 30 minutes. In the fridge, these energy bites last about a week. If you freeze them, they can last up to three months. Always check for any off smells or changes in texture before eating. Proper storage helps maintain their taste and nutrition. Yes, you can! If you want a nut-free option, try sunflower seed butter. This makes a great substitute for peanut butter. You can also use soy nut butter or pumpkin seed butter. These choices keep the flavor strong while avoiding nuts. If you need a honey alternative, you can use maple syrup or agave nectar. Both options work well and add sweetness. You could also try brown rice syrup for a thicker texture. Each option gives a unique taste to the bites. Making these energy bites is quick! It takes about 15 minutes to prep the ingredients. Then, you need to chill them for at least 30 minutes. So, the total time is around 45 minutes. This includes both prep and chill time. Absolutely! Doubling the recipe is easy. Just use double the ingredients and mix them in a larger bowl. You may need more space on your baking sheet for rolling the bites. This way, you can enjoy even more energy bites! Definitely! These energy bites are perfect before a workout. They provide quick energy from the oats and healthy fats from the peanut butter. Plus, the chia seeds add extra protein and fiber. This snack fuels your body well for exercise. These peanut butter energy bites are simple and fun to make. We covered the ingredients, health benefits, and tips for easy preparation. You have options for vegan and gluten-free adjustments. Remember to store them properly to keep them fresh. These bites are great for quick energy and tasty snacks. Enjoy experimenting with flavors and serving ideas. You now have all the tools to make this treat a staple in your kitchen.

Peanut Butter Energy Bites Quick and Easy Recipe

Looking for a healthy snack that packs a protein punch? Peanut Butter Energy Bites are quick, easy, and delicious! With

The key to a great Vegetable Pad Thai lies in its fresh ingredients. Here is what you need: - 8 oz rice noodles - 2 tablespoons vegetable oil - 1 cup firm tofu, drained and cubed - 1 red bell pepper, thinly sliced - 1 medium carrot, julienned - 1 medium zucchini, julienned - 2 green onions, chopped (white and green parts separated) - 2 cloves garlic, minced - 2 large eggs, lightly beaten (omit for a vegan version) - 1/4 cup soy sauce - 2 tablespoons tamarind paste - 2 tablespoons brown sugar - 1 tablespoon chili sauce (adjust to your spice preference) - 1/2 cup fresh bean sprouts - 1/4 cup crushed roasted peanuts - Fresh cilantro leaves for garnish - Lime wedges for serving These ingredients bring vibrant colors and bold flavors to your dish. You can customize it by adding or changing some ingredients. For example, try adding broccoli, snap peas, or mushrooms for extra flavor and crunch. Each main ingredient has its benefits: - Rice noodles provide energy and are gluten-free. - Tofu is a great protein source and keeps you full. - Bell peppers and zucchini offer vitamins and add color. - Garlic boosts flavor and supports your immune system. - Bean sprouts add crunch and fiber, making the dish light. To make your Vegetable Pad Thai, you will need some specific equipment: - A wok or a large skillet is perfect for cooking. They help heat everything evenly and allow for easy stirring. - Essential utensils include tongs and a spatula. Tongs help you toss the noodles and veggies without breaking them. A spatula is great for flipping the tofu and mixing ingredients. Having the right tools makes cooking easier and more fun. Enjoy your cooking experience! To cook the rice noodles, bring a large pot of water to a boil. Add the noodles and cook them for about 5-7 minutes or until they are just tender. You want them al dente, so check them often. Once cooked, drain the noodles in a colander. Rinse them with cold water to stop the cooking process. This helps prevent sticking. Toss them with a little oil if needed. For crisp tofu, use firm tofu. Drain it well and cut it into cubes. Heat vegetable oil in a skillet over medium-high heat. Add the tofu cubes in a single layer. Cook them for about 5-7 minutes, flipping once, until they turn golden brown. Season the tofu with a pinch of salt during cooking. This adds flavor and enhances the taste. Start by adding minced garlic to the skillet. Stir-fry for about 30 seconds until fragrant. Then, add the sliced red bell pepper, carrots, and zucchini. Stir-fry these veggies for 3-4 minutes until they are bright and slightly tender. Push the veggies to one side and add the beaten eggs if using. Scramble them until fully cooked. Mix everything together. Finally, add the cooked rice noodles, tofu, soy sauce, tamarind paste, brown sugar, and chili sauce. Toss well to coat all ingredients evenly. Cook for another 1-2 minutes for flavors to meld. - Overcooking or undercooking key ingredients: Pay close attention to cooking times. Overcooked veggies lose their crunch, while undercooked noodles can be chewy. Aim for tender-crisp vegetables and perfectly cooked noodles. - Balancing flavors in the sauce: Too much soy sauce can make your dish salty. Start with a little and taste as you mix. Add tamarind paste and sugar slowly to find the right balance. - Customizing spice levels: If you like heat, add more chili sauce. For a milder dish, reduce the amount. You can also serve extra chili sauce on the side. - Ensuring freshness in vegetables: Use fresh, crisp veggies. They add color and crunch. Look for vibrant bell peppers and firm zucchini. Fresh bean sprouts add a nice texture, too. - Ideal accompaniments and garnishes: Serve your Vegetable Pad Thai with lime wedges and crushed peanuts. Fresh cilantro brightens the dish and adds flavor. You can also add a side of pickled veggies for extra zing. - Ideal serving dishes for presentation: A large, shallow bowl works best for serving Pad Thai. It allows for easy mixing and showcases the colorful ingredients. A sprinkle of peanuts and cilantro on top makes it look even better. For more detailed instructions, check out the [Full Recipe]. {{image_4}} For a vegan version of Vegetable Pad Thai, you can skip the eggs. Instead of eggs, use extra tofu or add chickpeas for protein. This keeps the dish filling and delicious. You can also enhance flavors by adding a splash of lime juice or a bit of nutritional yeast. Nutritional yeast adds a cheesy flavor, making your Pad Thai taste richer. If you need gluten-free options, use rice noodles, which are already gluten-free. You might also try zucchini noodles, often called "zoodles". They add a nice crunch and keep the dish light. For low-carb diets, spiralized veggies like carrots or cucumbers work well. Adjust the other ingredients to balance flavors, like using coconut aminos instead of soy sauce for a lighter taste. Feel free to get creative with your Pad Thai! You can add seasonal vegetables like bell peppers or snap peas. Adding fresh spinach or kale gives it a nice color and boosts nutrition. For protein, consider adding shrimp, chicken, or tempeh. These options can change the dish daily, keeping every meal exciting and fresh. After enjoying your Vegetable Pad Thai, you might have some leftovers. To keep them fresh, follow these tips: - Cool it down: Let the Pad Thai cool to room temperature. - Use airtight containers: Store it in glass or plastic containers with tight-fitting lids. - Refrigerate: Place the container in the fridge. It can last for up to three days. Keeping your leftovers stored properly helps maintain the flavor and quality of the dish. When you're ready to enjoy your leftovers, reheating them right is key. Here’s how to do it well: - Stovetop method: Heat a non-stick skillet over medium heat. Add a splash of water or oil to prevent sticking. - Time it right: Reheat for about 5-7 minutes, stirring often. This helps keep the texture nice. - Microwave option: If you're in a hurry, place your Pad Thai in a microwave-safe dish. Heat in 30-second bursts, stirring in between, until warmed through. By following these reheating tips, you’ll have a tasty meal ready in no time! For the complete Vegetable Pad Thai experience, check out the Full Recipe. To keep rice noodles from sticking, use a few simple tips. Cook the noodles until they are just al dente. This means they should have a slight bite. After cooking, drain them well in a colander. Rinse the noodles under cold water to stop the cooking process. This cooling step also helps to separate the noodles. Finally, toss them with a little vegetable oil. This keeps them loose and ready for your Vegetable Pad Thai. Yes, you can make Vegetable Pad Thai in advance! It’s a great dish for meal prep. Cook everything as usual and let it cool. Store it in an airtight container in the fridge. This dish tastes even better the next day as flavors blend. When you’re ready to eat, just reheat it in a pan or microwave. Add a splash of water or soy sauce to keep it moist. If you want to enjoy Vegetable Pad Thai outside your kitchen, there are great places to try. Look for local Thai restaurants that offer fresh ingredients and bold flavors. Some popular chains are known for their Pad Thai. Ask friends for their favorite spots. You might discover a hidden gem! Don’t forget to check online reviews for the best places in your area. Enjoy the variety and taste of Vegetable Pad Thai from different chefs! You now have all the tools to make a great Vegetable Pad Thai. We discussed key ingredients, equipment, and step-by-step cooking methods. You learned about common mistakes and how to customize your dish. Remember to choose fresh ingredients for the best taste. Don’t hesitate to try different variations. Enjoy your cooking experience and share your Pad Thai with friends and family. Happy cooking!

Vegetable Pad Thai Delicious and Simple Recipe Guide

Craving a fresh and tasty meal? Look no further than my Vegetable Pad Thai recipe! This dish is not only

- 3 cups old-fashioned rolled oats - 1 cup pecans, roughly chopped - 1/2 cup sunflower seeds - 1/2 cup pumpkin seeds - 1/2 teaspoon salt - 1 teaspoon ground cinnamon - 1/3 cup coconut oil, melted - 1/2 cup pure maple syrup - 1 teaspoon pure vanilla extract - 1 cup dried cranberries or raisins (optional) When making Maple Pecan Granola, it's important to measure correctly. Each ingredient plays a key role in taste and texture. The oats form the base, while the nuts and seeds add crunch. Use a measuring cup for dry ingredients and a liquid measuring cup for oils and syrups. This ensures your granola has the right balance. - Old-Fashioned Rolled Oats: I recommend Bob's Red Mill for quality and taste. - Pecans: Look for Fisher or Planters for fresh and tasty nuts. - Sunflower Seeds: David's brand offers great flavor and crunch. - Pumpkin Seeds: Try the Shelled Pepitas from Trader Joe's for quality. - Coconut Oil: I like Nutiva for its pure, organic coconut oil. - Pure Maple Syrup: Use Grade A from Maple Grove Farms for rich flavor. - Vanilla Extract: Nielsen-Massey offers high-quality pure vanilla extract. - Dried Cranberries or Raisins: Ocean Spray has sweet, plump cranberries. Using these brands can make your homemade granola even more delicious! For the full recipe, check the earlier section. Start by preheating your oven to 325°F (160°C). This step is key for getting your granola nice and crispy. While the oven heats up, line a large baking sheet with parchment paper. This makes cleanup so much easier later on. In a big bowl, mix the following dry ingredients: - 3 cups old-fashioned rolled oats - 1 cup pecans, roughly chopped - 1/2 cup sunflower seeds - 1/2 cup pumpkin seeds - 1/2 teaspoon salt - 1 teaspoon ground cinnamon Stir these ingredients until they are well combined. This helps each bite to be full of flavor. Now, take a small saucepan and heat the melted coconut oil over low heat. Add these wet ingredients: - 1/2 cup pure maple syrup - 1 teaspoon pure vanilla extract Stir the mixture gently until it is warm and mixed well. This step brings out the sweetness of the maple. Carefully pour the warm wet mixture over the dry ingredients in your bowl. Mix everything together well. Make sure every oat and nut is coated in that yummy, sweet mix. Spread the granola mixture evenly on your prepared baking sheet. Place it in the preheated oven and bake for 25-30 minutes. Be sure to stir it halfway through to avoid burning. You want it to be golden brown and smell fantastic. Once baked, take the granola out and let it cool completely on the baking sheet. This cooling time is important; it helps the granola get crunchy. If you like, add dried cranberries or raisins for extra flavor. When it’s cool, store your granola in an airtight container at room temperature. It will stay fresh for up to two weeks. Enjoy your delicious snack! For the complete recipe, refer to the full recipe. To get that perfect crunch in your granola, remember these key points: - Bake Slowly: Bake at 325°F (160°C) for even cooking. - Stir Halfway: Stir the granola halfway through cooking. This helps it brown evenly. - Cool Completely: Let it cool on the baking sheet. It will harden as it cools. These steps ensure you get a granola that is both crunchy and tasty. Enhancing flavor is easy with a few small tweaks: - Add Spices: Try nutmeg or ginger for extra warmth. - Mix in Sweetness: Use honey or brown sugar alongside maple syrup for depth. - Incorporate Mix-ins: Dried fruits like cranberries or raisins add sweetness and texture. These flavor boosts can make your granola stand out. Avoid these common errors to ensure success: - Skipping the Salt: A little salt balances sweetness and brings out flavors. - Overbaking: Keep an eye on your granola. Burnt granola won’t taste good. - Not Cooling Properly: If you don’t let it cool, it may stay soft. By avoiding these mistakes, you’ll create a delightful Maple Pecan Granola. For the full recipe, check out the Maple Pecan Granola Delight. {{image_4}} You can easily make this granola nut-free. Simply skip the pecans and use more seeds instead. Sunflower seeds and pumpkin seeds work well. You can also add in some shredded coconut for added texture. This makes it safe for those with nut allergies while keeping it tasty and crunchy. To keep your granola gluten-free, always check your oats. Use certified gluten-free rolled oats. This ensures that they are safe from cross-contamination. You can also add other gluten-free grains like quinoa flakes or puffed rice. Both options give a delightful crunch, making your granola enjoyable for everyone. If you want to swap the sweetener, try honey or agave syrup. Both add a unique flavor while keeping the sweetness. You can also use brown rice syrup for a thicker texture. Just remember, each sweetener alters the taste a bit, so feel free to experiment. For a sugar-free option, consider using mashed bananas or applesauce. These add natural sweetness and moisture to your granola. Make sure to check the full recipe for all the details in creating your perfect Maple Pecan Granola! To keep your Maple Pecan Granola fresh, store it in an airtight container. Glass jars work great, as they seal tightly and show off your beautiful granola. Place the granola in a cool, dry place, away from sunlight. This helps maintain its crunchy texture. Avoid storing it near the stove or oven to prevent heat exposure. Homemade granola can last up to two weeks when stored correctly. After this time, it may lose its crunch and flavor. If you notice any changes in smell or taste, it's best to toss it. Keeping track of the date you made it can help you enjoy it at its best. For longer storage, you can freeze your granola. Place it in a freezer-safe bag or container. Remove as much air as possible to prevent freezer burn. Frozen granola can last for up to three months. When you're ready to eat it, simply take out what you need and let it thaw at room temperature. Enjoy your delicious treat without worry! For the full recipe, check out the Maple Pecan Granola Delight. To make Maple Pecan Granola, follow these easy steps: 1. Preheat your oven to 325°F (160°C). 2. In a large bowl, mix: - 3 cups old-fashioned rolled oats - 1 cup pecans, roughly chopped - 1/2 cup sunflower seeds - 1/2 cup pumpkin seeds - 1/2 teaspoon salt - 1 teaspoon ground cinnamon 3. In a saucepan, melt: - 1/3 cup coconut oil - 1/2 cup pure maple syrup - 1 teaspoon pure vanilla extract 4. Pour the wet mix into the dry mix and stir well. 5. Spread it on a baking sheet and bake for 25-30 minutes. 6. Let it cool, then mix in dried cranberries or raisins if you like. 7. Store it in an airtight container. For the full recipe, check the details above. Yes, you can customize your granola! Try different nuts like almonds or walnuts. You can swap seeds too. Use chia or flaxseeds for added nutrition. If you want a sweeter taste, add more maple syrup or try honey. Dried fruits can also change. Use apricots or figs instead of cranberries. The options are endless! Granola is a great snack packed with health benefits. Here are some advantages: - High in Fiber: Helps digestion and keeps you full. - Rich in Nutrients: Nuts and seeds provide protein and healthy fats. - Good for Heart Health: Ingredients like oats can lower cholesterol. - Energy Boosting: Great for breakfast or a pre-workout snack. Granola can help you maintain a balanced diet. Yes, homemade granola is usually cheaper. You buy ingredients in bulk, saving money over time. Store-bought granola can be pricey. Plus, you control the ingredients. This way, you avoid added sugars and preservatives. Making it at home allows for better quality. Serving Maple Pecan Granola is fun and versatile! Here are some ideas: - With Yogurt: Layer granola with yogurt for a parfait. - In Smoothies: Blend it into your smoothie for crunch. - On Oatmeal: Sprinkle it on oatmeal for added flavor. - As a Snack: Enjoy it straight from the jar for a quick bite. Granola can fit into many meals! In this post, we explored the key ingredients for your granola, showed step-by-step instructions, and shared helpful tips. You now know how to create delicious granola, including variations and storage tips. Remember, the right ingredients and methods lead to tasty results. Have fun experimenting with flavors and textures. With these tips, you'll make granola that suits your taste. Enjoy your crunchy treat!

Maple Pecan Granola Tasty and Healthy Breakfast Snack

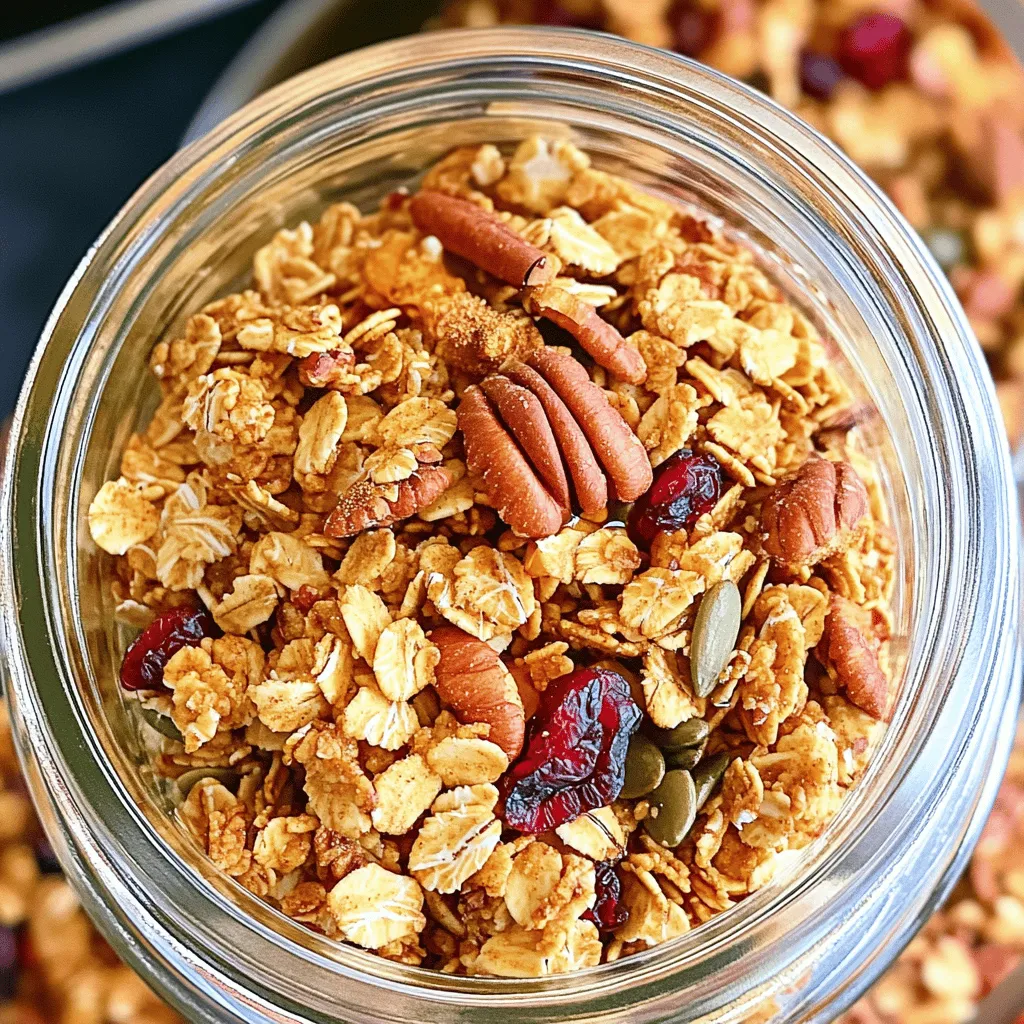
Start your day right with a bowl of Maple Pecan Granola. This tasty and healthy snack packs a crunch and

To make Lemon Herb Grilled Salmon, gather these essential ingredients: - 4 salmon fillets (approximately 6 ounces each) - 2 tablespoons extra virgin olive oil - Juice and zest of 2 fresh lemons - 2 cloves garlic, finely minced - 1 teaspoon dried oregano - 1 teaspoon dried thyme - 1 teaspoon smoked paprika - Salt and freshly cracked black pepper to taste - Fresh parsley, finely chopped (for garnish) - Lemon wedges (for serving) Each ingredient serves a purpose. The salmon provides protein and rich flavor. Olive oil adds moisture and helps the herbs stick. Fresh lemons bring brightness and zest. Garlic adds depth. The dried herbs enhance the overall taste. Smoked paprika gives a subtle smokiness, while salt and pepper season the dish. Garnishing with parsley adds a pop of color and freshness. Lemon wedges on the side let you add more zing as you wish. This mix of ingredients creates a balanced dish that is both tasty and healthy. For the full recipe, check the details above. To start, gather your ingredients. In a medium bowl, mix: - 2 tablespoons extra virgin olive oil - Juice and zest of 2 fresh lemons - 2 cloves garlic, finely minced - 1 teaspoon dried oregano - 1 teaspoon dried thyme - 1 teaspoon smoked paprika - Salt and freshly cracked black pepper to taste Whisk these ingredients well until they blend into a smooth mix. This creates a fragrant marinade that will boost the flavor of your salmon. Make sure each ingredient mixes evenly for the best taste. Now, it’s time to marinate the salmon. Place your 4 salmon fillets in a shallow dish or a resealable bag. Pour the marinade over the salmon, allowing each fillet to get coated. Cover the dish or seal the bag tight. Refrigerate for at least 30 minutes. If you want richer flavor, let it sit for up to 2 hours. Remember, the longer it marinates, the more flavor it will soak up. While the salmon marinates, preheat your grill to medium-high heat, about 375°F to 450°F. This step is key for even cooking. Lightly brush the grill grates with olive oil to prevent sticking. After marinating, take the salmon out. Allow excess marinade to drip off. Place the salmon skin-side down on the grill. Cook for 4-6 minutes on one side. Then, flip the fillets with a spatula. Grill for another 4-6 minutes until the salmon is cooked through. It should flake easily with a fork and look beautiful with grill marks. Once done, transfer the salmon to a plate and let it rest for 3-5 minutes. This resting time helps lock in the juices, making your meal even tastier. Before serving, sprinkle fresh parsley on top for color and serve with lemon wedges for an extra zesty touch. For the detailed ingredient list and cooking methods, refer to the Full Recipe. To avoid sticking to the grill, I recommend oiling the grill grates. Use a paper towel dipped in olive oil to wipe the grates before heating. You can also use a grilling spray for extra assurance. This step prevents your salmon from tearing and keeps it intact. For desirable grill marks, place the salmon skin-side down at a 45-degree angle on the grill. Let it cook without moving for 4-6 minutes. Then, use a spatula to carefully turn the fillets. This method gives you those beautiful, classic grill marks. Customizing flavor profiles is easy with this recipe. You can switch up the herbs if you want a different taste. For a minty flair, try adding fresh mint. If you love heat, mix in some red pepper flakes. Pairing herbs and spices can elevate your dish. Lemon and dill work great together, or you could try basil for a fresh twist. Experiment with what you enjoy most! I love serving Lemon Herb Grilled Salmon with roasted veggies or a fresh salad. These sides add color and crunch to your meal. You can also pair it with fluffy quinoa or rice for a filling option. For plating, place the salmon on a clean plate. Add a sprinkle of chopped parsley for color. Serve with lemon wedges on the side. This not only looks great, but it also adds a zesty kick to each bite. Enjoy your meal! {{image_4}} You can switch up the marinade for your salmon. Try using different citrus fruits, like oranges or limes. Each fruit gives a unique twist to the flavor. You can also mix fresh herbs. Basil, dill, or cilantro can add a fresh touch. Just chop them finely and blend them into your marinade. This simple change can make your dish feel new! When cooking salmon, you have options. You can grill the salmon outside for a smoky taste. Or, you can bake it in the oven. Baking gives a nice, even heat but lacks that grill flavor. An air fryer is another choice. It cooks quickly and gives a crispy finish. Choose the method that fits your time and taste. Pair your Lemon Herb Grilled Salmon with tasty sides. Roasted vegetables or a fresh salad work well. They add color and crunch. You might also serve it with rice or quinoa for a filling meal. Consider textures, too. Soft salmon pairs nicely with crunchy sides. This makes each bite more exciting. Store leftover salmon in an airtight container. This keeps it fresh. Place the container in the fridge. Salmon stays good for up to three days. If you want to keep it longer, consider freezing it. To reheat salmon, use the oven for best texture. Set it to 350°F. Place the salmon on a baking sheet. Heat for about 10 minutes. This helps keep it moist. Avoid using the microwave; it can dry out the fish. If you want to freeze leftover salmon, use freezer-safe bags. Remove as much air as possible. This helps prevent freezer burn. When ready to eat, thaw salmon in the fridge overnight. Reheat using the oven to keep the flavor. This way, you can enjoy your Lemon Herb Grilled Salmon later! Grill the salmon for 4-6 minutes on one side. Then, flip it gently and grill for another 4-6 minutes. The total time is about 8-12 minutes. This gives it a nice char and ensures it's cooked through. Yes, you can use frozen salmon. Thaw it first in the fridge overnight. This helps the marinade soak in better. If you're in a hurry, place the sealed salmon under cold water for quick thawing. If you lack smoked paprika, use regular paprika. You can add a pinch of cayenne for heat. A little extra garlic powder can also add depth to the flavor. Check the color and texture. The salmon should be opaque and flake easily with a fork. If it’s still translucent in the center, grill it a bit longer. Absolutely! You can marinate the salmon for up to 2 hours ahead of time. This will boost the flavor. After grilling, you can store leftovers in the fridge for a quick meal later. For the Full Recipe, check the detailed instructions earlier in this article. To prepare this zesty dish, start with the essential ingredients. You will need: - 4 salmon fillets (approximately 6 ounces each) - 2 tablespoons extra virgin olive oil - Juice and zest of 2 fresh lemons - 2 cloves garlic, finely minced - 1 teaspoon dried oregano - 1 teaspoon dried thyme - 1 teaspoon smoked paprika - Salt and freshly cracked black pepper to taste - Fresh parsley, finely chopped (for garnish) - Lemon wedges (for serving) You can easily find these ingredients at any grocery store. Each one plays a vital role in making the salmon flavorful and fresh. Next, we prepare the marinade. Combine the olive oil, lemon juice, lemon zest, minced garlic, dried oregano, dried thyme, smoked paprika, salt, and pepper in a bowl. Whisk until well mixed. This marinade is not just for taste; it also helps keep the salmon moist while grilling. Now, let's marinate the salmon. Place the salmon fillets in a shallow dish or a resealable bag. Pour the marinade over the fillets, ensuring they are well coated. Cover the dish or seal the bag. Refrigerate for at least 30 minutes. If you have more time, let it marinate for up to 2 hours. This gives the flavors time to soak in. While the salmon marinates, preheat your grill. Aim for medium-high heat, about 375°F to 450°F. Brush the grill grates lightly with olive oil. This step helps prevent sticking and gives you those beautiful grill marks. When the salmon is ready, remove it from the fridge. Let excess marinade drip off. Carefully place the salmon skin-side down on the grill. Cook the fillets for 4-6 minutes per side. You want them to flake easily with a fork and show nice grill marks. Once grilled, transfer the salmon to a plate. Let it rest for about 3-5 minutes. Resting helps keep the fish juicy and flavorful. Finally, sprinkle freshly chopped parsley over the salmon for a pop of color. Serve with lemon wedges for an extra zesty kick. Enjoy your Lemon Herb Grilled Salmon, bursting with flavor from the marinade! For a complete guide, refer to the Full Recipe. In this blog post, we covered key ingredients needed for Lemon Herb Grilled Salmon. You learned how to prepare the marinade, marinate, and grill the salmon to perfection. We shared tips for avoiding sticking, customizing flavors, and suggested ideal side dishes. Remember, you can also try different marinades and cooking methods to mix things up. When storing leftovers, follow best practices for freshness. Enjoy making this tasty dish and impress your friends and family with your grilling skills!

Lemon Herb Grilled Salmon Tasty and Zesty Recipe

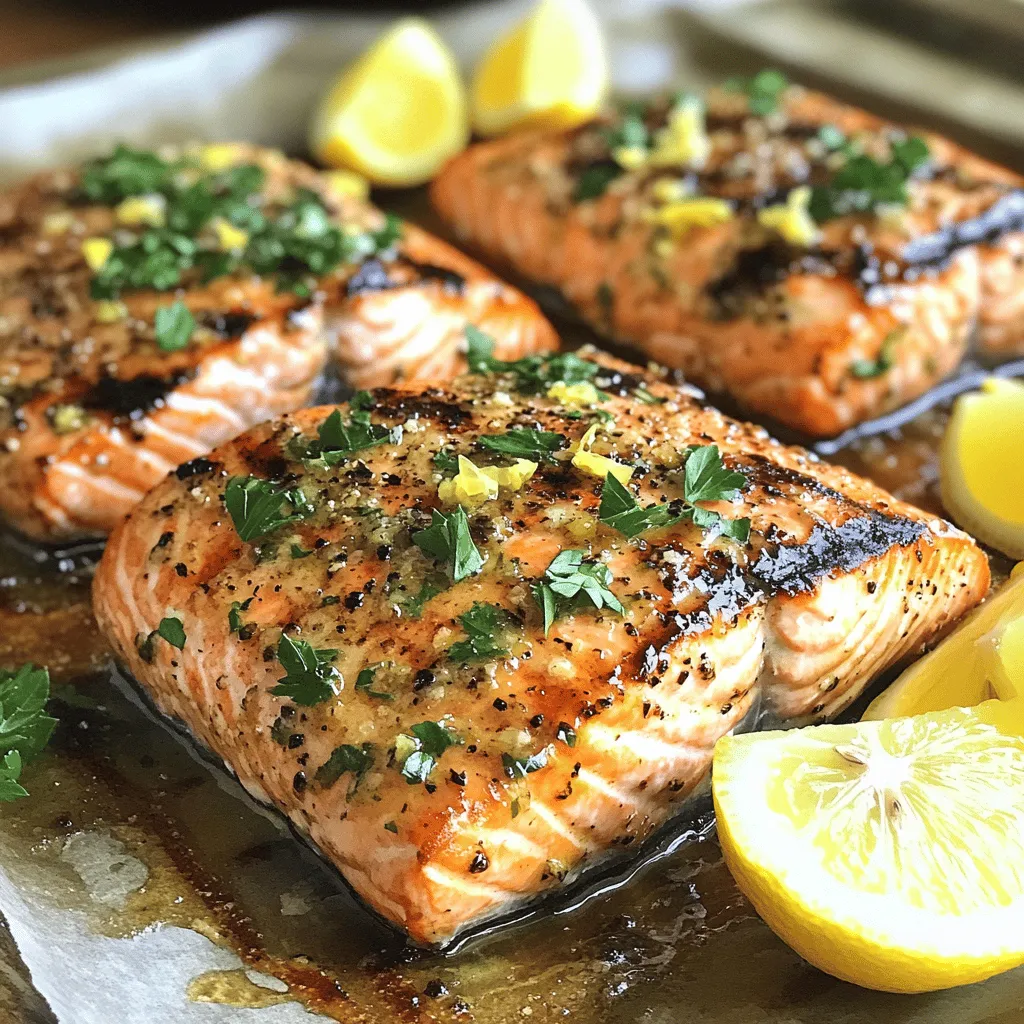
Are you ready to elevate your grilling game? This Lemon Herb Grilled Salmon recipe is not only tasty but also

- 1 large head of cauliflower - 1 cup all-purpose flour - 1 cup water - 1 teaspoon garlic powder - 1 teaspoon onion powder - 1 teaspoon smoked paprika - 1/2 teaspoon fine sea salt - 1/2 teaspoon freshly cracked black pepper - 1 cup buffalo sauce - 2 tablespoons extra virgin olive oil - Fresh parsley for garnish To make Buffalo cauliflower bites, you need a few simple ingredients. The key ingredient is the cauliflower, which gives the bites their shape and texture. The all-purpose flour mixed with water creates a batter that coats the florets. Spices like garlic powder, onion powder, smoked paprika, salt, and pepper add rich flavor. The buffalo sauce gives them that spicy kick, while olive oil adds richness. Fresh parsley not only enhances the taste but also makes your dish look appealing. - Different flavors of buffalo sauce - Additional spices or herbs - Vegan substitute options for batter You can customize your buffalo cauliflower bites with optional ingredients. Use different flavors of buffalo sauce for varied heat levels. Adding spices like cayenne pepper can boost the heat. Fresh herbs like cilantro or chives can brighten the flavor too. If you're vegan, consider using chickpea flour or almond flour in place of all-purpose flour for the batter. These choices help you create a version that suits your taste. For the full recipe, you can refer to the earlier section. Enjoy experimenting with these ingredients! 1. Preheat your oven to 450°F (230°C). This high heat helps to make the bites crispy. 2. Line a large baking sheet with parchment paper. This prevents sticking and makes clean-up easy. 3. In a mixing bowl, whisk together: - 1 cup all-purpose flour - 1 cup water (adjust for batter thickness) - 1 teaspoon garlic powder - 1 teaspoon onion powder - 1 teaspoon smoked paprika - 1/2 teaspoon fine sea salt - 1/2 teaspoon cracked black pepper Mix until smooth. No lumps should remain for an even coating. 4. Take each cauliflower floret and dip it into the batter. Make sure each piece is well-coated. 5. Allow excess batter to drip off before placing them on the lined baking sheet. Space them apart for even cooking. 6. Bake the cauliflower florets for about 20 minutes. Flip them halfway through. This step ensures they cook evenly and stay crispy. 7. While baking, prepare the buffalo sauce. In a bowl, mix: - 1 cup buffalo sauce - 2 tablespoons extra virgin olive oil Stir until well combined. This mix adds flavor and moisture to the bites. 8. After 20 minutes, remove the cauliflower from the oven. Drizzle the buffalo sauce mixture over the florets. Toss them gently to coat. 9. Return the bites to the oven for another 10 to 15 minutes. This helps the sauce stick and caramelize, making them even tastier. 10. Once done, let them cool for a few minutes. Transfer to a platter and garnish with chopped fresh parsley for a colorful touch. For the full recipe, refer to the earlier section. Enjoy making these tasty and crispy Buffalo Cauliflower Bites! To get that perfect crunch, space your cauliflower florets well. If they touch, they can steam instead of crisp. Use a large baking sheet and lay them out in a single layer. This helps hot air circulate around each piece for even cooking. For batter consistency, aim for a thick yet pourable mixture. If it’s too runny, it won’t stick to the florets. If it’s too thick, it won’t coat evenly. Start with the amounts in the Full Recipe and adjust water as needed. You can choose to bake or air fry your cauliflower bites. Baking gives a nice crunch, while air frying can make them even crispier and quicker. Both methods work well, but your choice may depend on your kitchen gear. Feel free to experiment with spices in the batter. Adding cayenne pepper can amp up the heat. You might also try adding some cumin or chili powder for a different flavor profile. Buffalo cauliflower bites shine when served with dips. Ranch or blue cheese dressing works great for cooling the spice. You can also pair them with celery sticks for a classic combo. For plating, arrange the bites on a colorful platter. Drizzle extra buffalo sauce over the top for a visual treat. Adding a sprinkle of fresh parsley adds a pop of color and freshness. Don’t forget to serve your bites hot for the best taste! {{image_4}} You can spice up your buffalo cauliflower bites in many ways. If you like heat, try using hotter sauces. You can also mix in cayenne pepper for an extra kick. For a sweet twist, add honey or maple syrup to your buffalo sauce. This balance of sweet and spicy makes for a fun flavor. If you need gluten-free options, use almond flour or chickpea flour for the batter. These alternatives will still give you a nice crunch. For vegan options, replace the all-purpose flour with a gluten-free blend and use plant-based milk. This way, everyone can enjoy these tasty bites. Buffalo cauliflower bites can be served in many fun ways. Try them in tacos or wraps for a tasty meal. You can also toss the bites into salads or grain bowls. This adds a spicy crunch that elevates your dish. Feel free to explore the possibilities! For the full recipe, check out the Crispy Buffalo Cauliflower Delight section. To keep your cooked cauliflower bites fresh, place them in an airtight container. This helps lock in flavor and texture. Use a container that fits the bites snugly, so they don’t move around. Avoid stacking them too high to prevent squishing. Store in the fridge for up to three days. When reheating, you want to keep them crispy. The best method is to use an oven. Preheat your oven to 375°F (190°C). Place the bites on a baking sheet lined with parchment paper. Heat for about 10-15 minutes. This method helps them regain their crunch. If the microwave is your only option, use a plate lined with a paper towel. Heat in short bursts of 30 seconds. Check often to avoid soggy bites. You can freeze both uncooked and cooked bites. For uncooked ones, coat them in batter and place them on a baking sheet. Freeze until solid, then transfer them to a freezer bag. This way, you can pull out just what you need later. If you freeze cooked bites, let them cool first. Store in a freezer-safe container for up to three months. When ready to eat, thaw in the fridge overnight and reheat in the oven. This keeps them tasty and crispy. I bake buffalo cauliflower bites for about 20 minutes at 450°F. This gives them a nice golden color. Flip them halfway to make sure they crisp up evenly. After that, I bake them for an additional 10 to 15 minutes after adding the buffalo sauce. This step helps the sauce stick and caramelize. Yes, you can prepare these bites in advance. I recommend baking them first. Let them cool down, then store them in an airtight container. They stay fresh in the fridge for up to three days. When you're ready, just reheat them in the oven. This keeps them crispy and tasty. Buffalo cauliflower bites pair well with many sides and dips. I love serving them with ranch or blue cheese dressing. Celery sticks and carrot sticks also add a nice crunch. You could even make a fun platter with other appetizers like hummus or guacamole. They make a great snack or party dish! Buffalo cauliflower bites are simple to make and delicious. You need a large head of cauliflower, spices, and buffalo sauce to start. Our step-by-step guide helps you achieve perfect crispiness. You can customize flavors and serve them in many creative ways. In the end, these bites are versatile and sure to impress anyone. Try them as a snack, side, or fun meal. Enjoy this tasty dish your way!

Buffalo Cauliflower Bites Tasty and Crispy Delight

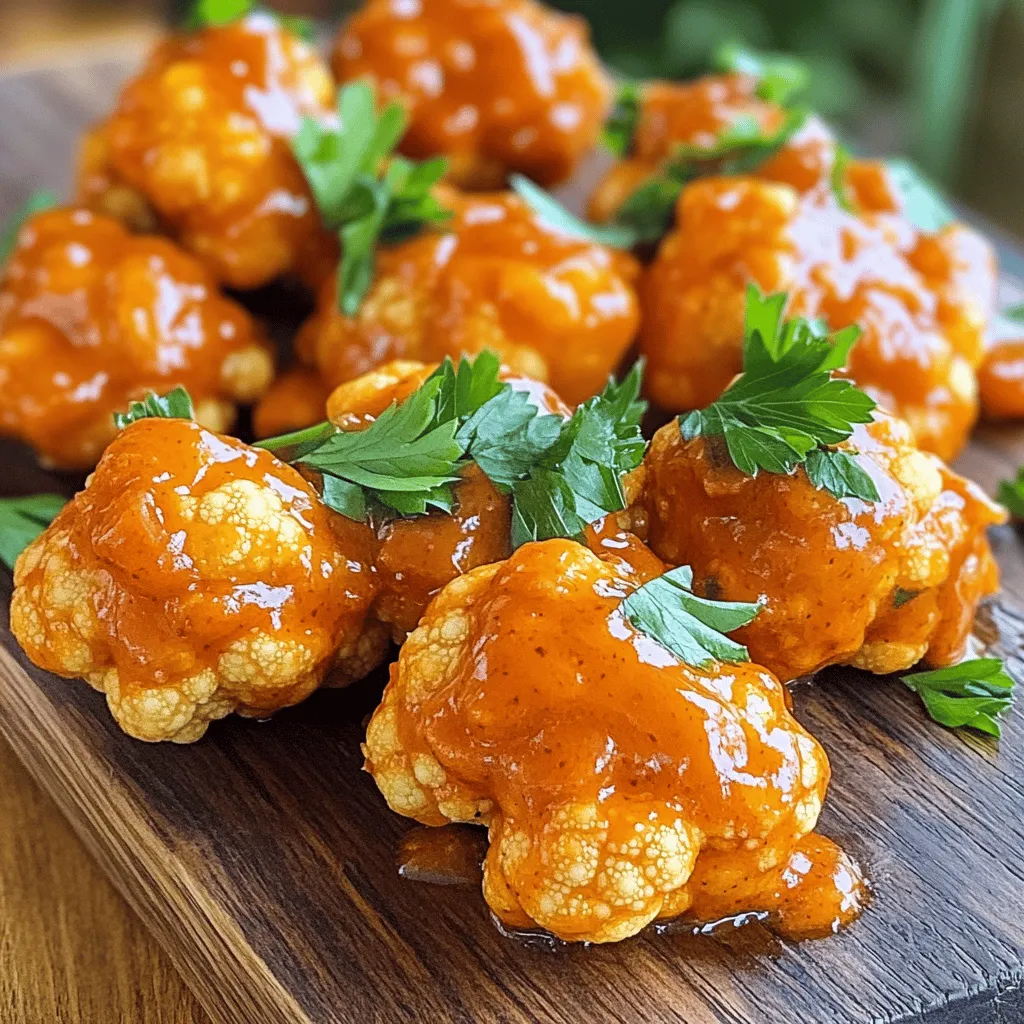
Looking for a tasty and healthy snack? Buffalo cauliflower bites are your answer! These bite-sized treats pack a spicy punch

- 4 medium zucchinis - 1 cup cooked quinoa - 1 cup cherry tomatoes, halved - 1/2 cup corn kernels (fresh or frozen) - 1/2 cup black beans, rinsed and drained - 1/4 cup red onion, finely chopped - 1 teaspoon ground cumin - 1 teaspoon smoked paprika - Salt and pepper, to taste - 1/2 cup shredded cheese (cheddar or a flavorful blend) - Fresh cilantro, for garnish These ingredients bring a burst of flavor to your stuffed zucchini boats. Zucchini acts as a vessel for all the goodness inside. Quinoa adds protein and keeps it hearty. Cherry tomatoes and corn give a sweet touch. Black beans offer fiber and a rich taste. Red onion adds crunch and flavor. Cumin and smoked paprika bring warmth and depth. Cheese melts beautifully on top, making every bite creamy. Fresh cilantro brightens the dish with its color and taste. - Calories per serving: About 250 - Macronutrient breakdown: - Carbs: 30g - Fats: 10g - Protein: 12g This dish is not only tasty but also packed with nutrients. Zucchini is low in calories and high in water, making it filling. Quinoa provides a complete protein source, great for muscle repair. Black beans add fiber, which helps digestion. The cherry tomatoes are rich in vitamins, boosting your health. Overall, these stuffed zucchini boats are a smart choice for a meal. You can enjoy them guilt-free while also savoring the flavors. For the full recipe, check out the details above. - Preheat the oven to 375°F (190°C). - Slice zucchinis in half lengthwise and scoop out the seeds and pulp. To prepare the zucchinis, start with the oven. Preheating it ensures even cooking. Next, slice each zucchini in half. Use a spoon to scoop out the seeds and pulp, creating a hollow boat shape. Save the flesh for later. - Sauté onions in olive oil until translucent. - Add reserved zucchini flesh and remaining vegetables to the skillet. - Stir in cooked quinoa and combine well. Heat some olive oil in a skillet over medium heat. Add chopped red onions and sauté them until they look clear. This should take about 3-4 minutes. Next, chop the reserved zucchini flesh and toss it in. Add halved cherry tomatoes, corn, black beans, cumin, smoked paprika, salt, and pepper. Cook this mix for about 5 minutes. The tomatoes will soften and release their juices. Then, take the skillet off the heat. Stir in the cooked quinoa and mix it all together. - Fill the zucchini boats with the mixture. - Top with shredded cheese and bake for 20-25 minutes. Now, it’s time to fill your zucchini boats! Spoon the quinoa and vegetable mix into each hollowed zucchini. Pack it in well so each bite is full of flavor. After that, sprinkle shredded cheese on top. Place the filled zucchini on a baking sheet and pop it in the oven. Bake for 20-25 minutes. The zucchini should be soft, and the cheese will be melted and bubbly. For the full recipe, check the earlier section. To avoid watery zucchini, pick firm zucchinis. Slice them in half and scoop out the seeds and pulp. This creates a boat shape and helps keep them dry. You can also salt the insides to draw out moisture. Let them sit for 10 minutes, then rinse and pat dry. The best types of cheese for melting are cheddar, mozzarella, or a cheese blend. These cheeses melt well and add great flavor. Sprinkle a generous layer on top before baking. This makes your dish look and taste amazing! Adjusting spice levels is easy. Start with the basic spices, like cumin and smoked paprika. Taste your filling before stuffing the zucchini. If you want more heat, add chili powder or crushed red pepper. For less spice, reduce these ingredients. Serve your stuffed zucchini boats on a large platter or individual plates. A drizzle of olive oil adds a nice touch. You can also sprinkle fresh herbs for color. Cilantro or parsley work well for garnish. For plating, arrange the zucchini boats neatly. Use colorful plates to make the dish pop. Place a light balsamic reduction around the dish for extra flair. This adds both taste and visual appeal. Pair sides that complement the dish. A fresh salad with tomatoes and avocado works great. You could also serve it with rice or a grain salad. This balances the meal and adds variety. For the full recipe, check out the details above. Enjoy your cooking adventure! {{image_4}} You can change the filling to fit your taste. For a vegetarian option, swap black beans for lentils. This keeps the dish hearty and adds a new flavor. If you want protein, use ground turkey or chicken instead of beans. It makes the meal more filling. For a Mediterranean twist, try feta cheese and olives. This brings a salty and creamy taste that pairs well with zucchini. To make your stuffed zucchini boats gluten-free, use quinoa as a base. Quinoa is high in protein and has a nice texture. It also fills you up without any gluten. Instead of frying, consider baking or grilling the zucchini. This keeps it light and healthy. You still get that great taste without the added fat. How do you store leftover stuffed zucchini boats? First, let them cool completely. Then, place them in an airtight container. This helps keep them fresh. You can store them in the fridge for up to three days. For meal prep, I recommend dividing them into single servings. What are the best containers for meal prep? Glass containers work well. They are durable and don't stain. You can also use BPA-free plastic containers. Make sure they seal tightly to keep air out. How do you freeze stuffed zucchini boats? Start by letting them cool. Wrap each boat in plastic wrap. Then, place them in a freezer-safe bag. This keeps them fresh for about three months. What are the thawing and reheating guidelines? To thaw, move them to the fridge overnight. For reheating, place them in the oven at 350°F (175°C) for about 15-20 minutes. This makes them warm and tasty again. How long do stuffed zucchini boats take to cook? Stuffed zucchini boats take about 20 to 25 minutes to cook in the oven. You want the zucchini to be tender and the cheese melted. Can I make stuffed zucchini boats ahead of time? Yes! You can prepare the filling a day before and stuff the zucchini just before baking. This saves time and makes dinner easier. What can I use instead of quinoa? If you don't have quinoa, try using rice or bulgur. Both can add texture and flavor to your boats. Are stuffed zucchini boats healthy? Yes, stuffed zucchini boats are healthy. They are low in calories, high in fiber, and packed with nutrients from the vegetables. How do I know when zucchini is done cooking? Zucchini is done when it is tender and can be easily pierced with a fork. The cheese should also be melted and lightly golden. For the complete recipe, check out the [Full Recipe]. This blog post shared a great recipe for stuffed zucchini boats using fresh ingredients. You learned how to prepare and cook them with simple steps. I also covered tips for perfecting your boats and variations to suit your taste. Stuffed zucchini boats are not only delicious but also healthy and easy to store. Enjoy making them for meals or snacks. Embrace your kitchen creativity, and happy cooking!

Stuffed Zucchini Boats Tasty and Easy Dinner Idea

Looking for a simple and delicious dinner idea? Stuffed zucchini boats fit the bill perfectly! With just a few fresh

You need simple ingredients for this tasty dish: - 1 cup rolled oats - 1 cup almond milk (or any milk of choice) - 1 ripe peach, diced into small pieces - 1 tablespoon honey or maple syrup - 1/2 teaspoon vanilla extract - 1/2 teaspoon ground cinnamon - 1/4 teaspoon nutmeg (optional) - 1/4 cup Greek yogurt - 2 tablespoons chopped pecans - Fresh mint leaves (for garnish) You can swap some ingredients if needed: - Use oat milk or coconut milk in place of almond milk. - For a sweeter taste, try agave syrup instead of honey. - Any stone fruit, like nectarines or plums, works well instead of peaches. - If you want a nut-free option, leave out pecans or use sunflower seeds. - Swap Greek yogurt for a dairy-free yogurt for a vegan dish. This dish offers great nutrition. Here’s a quick look at what you’ll get per serving: - Calories: About 350 - Protein: 10 grams - Carbohydrates: 50 grams - Fiber: 8 grams - Sugars: 10 grams (if using honey) - Healthy fats: 7 grams Peach Cobbler Overnight Oats not only taste great but also fill you up with good nutrients. Enjoy the flavors and benefits! Start by gathering all your ingredients. You will need rolled oats, milk, a peach, honey, yogurt, and spices. This makes the process easy and fun. Measure out 1 cup of rolled oats and 1 cup of almond milk. If you want a different milk, feel free to switch it up. Next, cut your ripe peach into small pieces. You want them bite-sized for the best taste. In a medium bowl, mix the rolled oats with the almond milk. Then, add the diced peach, honey or maple syrup, vanilla extract, ground cinnamon, and nutmeg (if you like). Stir well until everything is blended. This is where the magic starts! Now, gently fold in 1/4 cup of Greek yogurt. Do this slowly to keep the creaminess. Once mixed, divide the oat mixture into two jars or airtight containers. Leave some space at the top for toppings. Sprinkle the chopped pecans on each portion. This adds a nice crunch that everyone loves! Seal the jars tightly with lids. Place them in the fridge overnight, or for at least 4-6 hours. This allows the oats to soak and get soft. The next morning, give the oats a good stir. You can add more honey or syrup if you want it sweeter. Serve chilled and top with extra peach pieces and fresh mint. This dish looks great and tastes even better! For the full recipe, check out the previous section. To make your overnight oats creamy, use rolled oats. They soak up liquid well and become soft. If you prefer a thicker texture, add more yogurt. Mixing the yogurt gently keeps it smooth. Avoid over-mixing to preserve that creaminess. Taste your oats before serving. If you want more sweetness, add extra honey or maple syrup. You can also use ripe peaches for natural sugar. Remember, everyone likes their oats a bit different, so adjust as needed. Presentation matters! Layer more diced peaches on top for a fresh look. A sprinkle of chopped pecans adds crunch. Fresh mint leaves give a pop of color and flavor. Serve in clear jars to show off the beautiful layers. For the full recipe, check the detailed steps above. {{image_4}} You can switch up the fruit in your Peach Cobbler Overnight Oats. Try using ripe apples or juicy plums. Strawberries or blueberries also work well in summer. Each fruit brings its own flavor and texture. This change keeps breakfast exciting. You can even mix different fruits for a fun twist. Always choose fresh, ripe fruit for the best taste. To make your oats more filling, add protein. Greek yogurt is a great choice. It mixes well and adds creaminess. You can also stir in protein powder. Choose vanilla or unflavored protein for a nice touch. Nut butter, like almond or peanut, is another tasty option. Just a spoonful gives your oats a rich taste and a protein kick. Sweetness is key in overnight oats. Honey and maple syrup are popular, but you can try other options. Agave nectar is a good choice for a lighter flavor. You can also use stevia or monk fruit for a low-calorie option. If you like a richer taste, brown sugar or coconut sugar works well. Adjust the amount based on your taste. To store leftover Peach Cobbler Overnight Oats, use airtight containers. Keep them in the fridge. They will stay fresh for up to three days. Make sure to cover them well to avoid drying out. If you skip this step, the oats may become hard and less tasty. You can freeze Peach Cobbler Overnight Oats for later use. Portion them into freezer-safe containers. They last about one month in the freezer. When you’re ready to eat, pull a portion out and thaw it in the fridge overnight. If you want it faster, you can also set it on the counter for a couple of hours. After thawing, stir well and enjoy! To keep your oats fresh, add toppings just before serving. This includes fruits, nuts, and herbs like mint. If you mix these in too soon, they may lose their crunch or become soggy. Store your oats in the back of the fridge, where it’s coldest. This helps maintain their quality longer. Always check for any signs of spoilage before eating. Yes, you can use any milk you like. Almond milk works well, but try oat, soy, or coconut milk too. Each type adds a unique flavor. If you prefer a creamier texture, use whole milk or 2% milk. Experiment with what you enjoy most! You can keep Peach Cobbler Overnight Oats for up to five days in the fridge. Just make sure to store them in airtight containers. This way, they stay fresh and tasty. If you notice any strange smells or textures, it’s best to toss them out. Yes, you can make this recipe vegan easily. Just replace honey with maple syrup for sweetness. Also, use a plant-based yogurt instead of Greek yogurt. Almond milk and other non-dairy milk options will work great too. Enjoy a delicious, vegan-friendly breakfast! For the full recipe, check out the detailed instructions above. Peach Cobbler Overnight Oats is a delightful way to start your day. We covered the ingredients you need and even discussed substitutions. I shared steps to prepare, mix, and store your oats for the best flavor. You learned helpful tips for creamy texture and sweetness adjustments. Don't forget the options for variations and how to store leftovers properly. These oats are easy, tasty, and flexible. Enjoy your healthy breakfast!

Peach Cobbler Overnight Oats Easy and Delicious Recipe

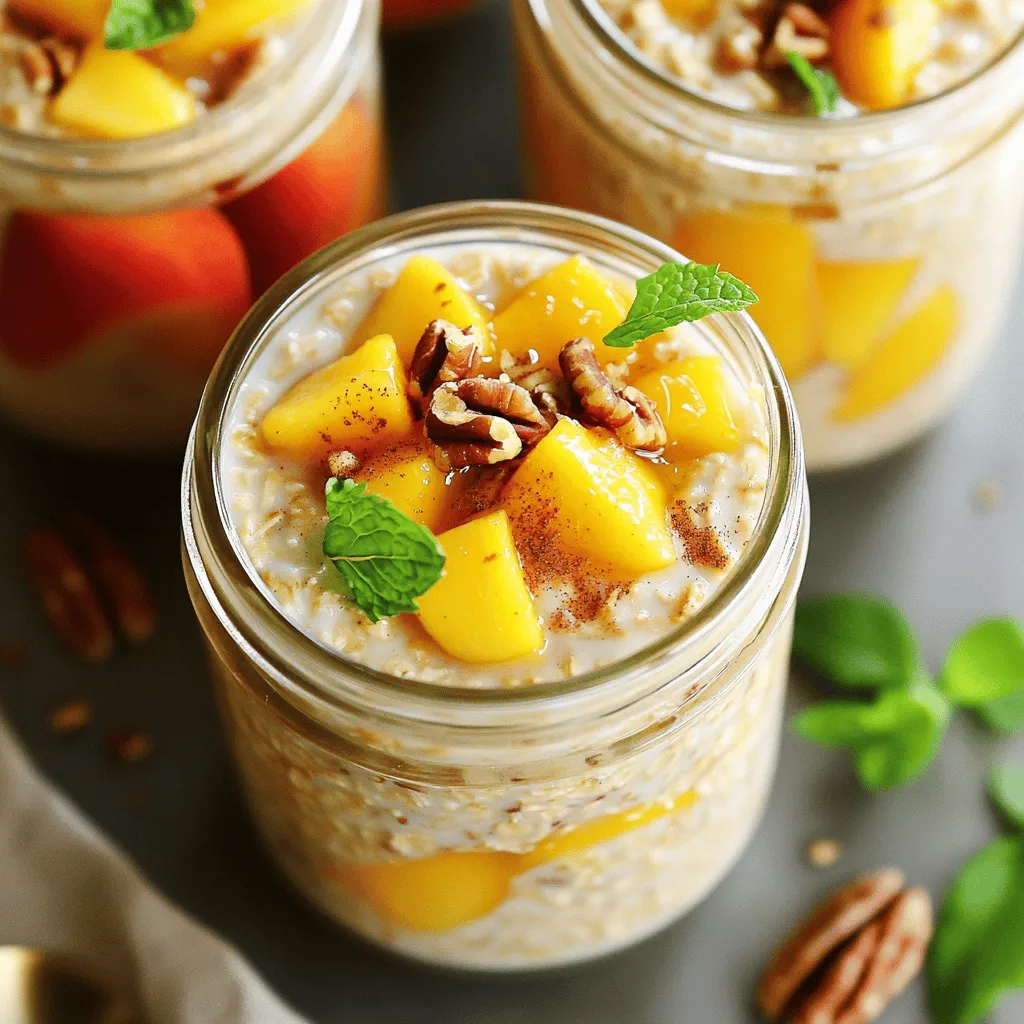
Are you ready to enjoy a sweet breakfast that’s also good for you? Peach cobbler overnight oats are a simple

To make a tasty Mediterranean quinoa salad, gather these key ingredients: - 1 cup quinoa, thoroughly rinsed under cold water - 2 cups vegetable broth (or water for a lighter flavor) - 1 cup cherry tomatoes, halved for juiciness - 1 cucumber, diced into bite-sized pieces - 1 bell pepper, diced (choose red or yellow for sweetness) - 1/2 red onion, finely chopped for a kick of flavor - 1/2 cup Kalamata olives, pitted and sliced for briny depth - 1/2 cup feta cheese, crumbled to add creaminess - 1/4 cup fresh parsley, chopped for a burst of freshness These ingredients create a colorful and vibrant dish that is both healthy and full of flavor. You can customize your salad with some optional add-ins. Consider these: - Avocado, diced for creaminess - Artichoke hearts, chopped for a tangy kick - Sun-dried tomatoes, sliced for added richness - Chickpeas, drained and rinsed for protein These additions can enhance the taste and texture of your salad, making it even more enjoyable. A great dressing will tie your salad together. For a zesty finish, use: - 1/4 cup olive oil, extra virgin for richness - 2 tablespoons lemon juice, freshly squeezed for acidity - 1 teaspoon dried oregano, for a hint of Mediterranean aroma - Salt and pepper to taste Whisk these ingredients together for a bright and lively dressing. It will elevate your Mediterranean quinoa salad to new heights. For the full recipe, check the complete guide to make this dish shine. To start, rinse 1 cup of quinoa under cold water. This step removes the bitter coating. Next, combine the rinsed quinoa with 2 cups of vegetable broth in a medium saucepan. Heat on medium until it boils. Once boiling, lower the heat and cover it. Let it simmer for 15 minutes. The quinoa will absorb the broth and become fluffy. After cooking, let it cool for a few minutes before using it in the salad. While the quinoa cools, prepare your veggies. Slice 1 cup of cherry tomatoes in half. Dice 1 cucumber and 1 bell pepper into small pieces. For added flavor, finely chop 1/2 red onion. Slice 1/2 cup of Kalamata olives. Gather all these colorful ingredients in a large mixing bowl. Add 1/2 cup of crumbled feta cheese and 1/4 cup of chopped parsley for freshness. Once the quinoa is cool, fluff it gently with a fork. Add the fluffy quinoa to the bowl with the vegetables. In a small bowl, whisk together 1/4 cup of olive oil, 2 tablespoons of lemon juice, and 1 teaspoon of dried oregano. Season with salt and pepper. Drizzle this dressing over the salad. Toss everything gently until mixed well. Let the salad rest for 15-30 minutes. This step helps the flavors blend perfectly. For the full recipe, check the complete instructions above. To make fluffy quinoa, rinse it well. Rinsing removes the bitter coating called saponin. After rinsing, cook it in vegetable broth or water. Use a ratio of 1 cup quinoa to 2 cups broth. Bring it to a boil, then reduce the heat low. Cover and let it simmer for about 15 minutes. Once done, let it sit for a few minutes. Fluff it gently with a fork to separate the grains. This method ensures each bite is light and fluffy. Balancing flavors is key to a great salad. Start with fresh ingredients like cherry tomatoes and cucumbers. Their natural sweetness adds freshness. Incorporate salty components like Kalamata olives and feta cheese. They bring depth to the dish. Don't forget the dressing! A mix of olive oil and lemon juice brightens the flavors. Taste as you go. Adjust with salt and pepper to find that perfect balance. This way, each bite bursts with flavor. Presentation makes your salad inviting. Use a large, colorful bowl for serving. This adds charm to your meal. You can also portion it into smaller dishes for individual servings. Garnish with extra parsley for a pop of color. A slice of lemon on the side adds elegance and freshness. This simple touch makes your salad look gourmet and appetizing. Enjoy this delightful treat with friends and family! For the full recipe, check the main article. {{image_4}} To make this salad more filling, you can add protein. Chickpeas are a great choice. They add a nice texture and flavor. You can also use grilled chicken or shrimp for a meaty bite. If you want a quick option, canned beans work well too. Just rinse and drain them before mixing in. If you want to keep this dish vegan, there are tasty substitutes for feta. Try using tofu crumbles mixed with lemon juice and nutritional yeast. This gives a cheesy taste without dairy. You can also use avocado for creaminess and healthy fats. Another option is to use a store-bought vegan feta. Seasonal ingredients can make this salad even better. In spring, add fresh asparagus for crunch. Summer is perfect for juicy peaches or strawberries. In fall, roasted sweet potatoes bring warmth and sweetness. Winter calls for hearty kale or even some grated carrots. These swaps keep the salad fresh and exciting all year round. For the full recipe, check out the Mediterranean Quinoa Salad section above. Store your Mediterranean quinoa salad in an airtight container. This helps keep it fresh. Place it in the fridge right after serving. Make sure it cools down first. For best taste, consume it within three days. Keep the dressing separate if you want to enjoy the salad later. This way, the salad stays crisp and fresh. When stored properly, Mediterranean quinoa salad lasts about three to five days in the fridge. The flavors meld well but may fade over time. If the salad looks or smells off, it’s best to throw it out. Always trust your senses to judge freshness. You can freeze Mediterranean quinoa salad for later use. Pack it in freezer-safe bags or containers. Remove any excess air to prevent freezer burn. This salad stays good for about one month in the freezer. When ready to eat, thaw it overnight in the fridge. Before serving, give it a good stir and taste for seasoning. If needed, add a splash of lemon juice or olive oil for freshness. For the full recipe, check out the Mediterranean Quinoa Salad section above. Mediterranean Quinoa Salad is packed with nutrients. One serving has about: - 220 calories - 8 grams of protein - 10 grams of fat, mostly healthy fats - 30 grams of carbs - 5 grams of fiber Quinoa is a complete protein. It contains all nine essential amino acids. The vegetables add vitamins and minerals, making this salad a healthy choice. Yes, you can make Mediterranean Quinoa Salad in advance. It tastes even better after resting. I recommend making it a few hours before serving. Store it in the fridge for freshness. Just keep the salad covered to avoid drying out. If you want to swap quinoa, try these options: - Couscous: A quick-cooking grain that works well. - Farro: Chewy and nutty, it adds texture. - Brown rice: A hearty substitute that is easy to find. Each grain brings its own flavor and texture. However, adjust cooking times as needed. For the full recipe, check out the details included above. This blog post covered how to make a Mediterranean Quinoa Salad. We discussed key ingredients, easy steps, and helpful tips. You learned ways to boost flavor and make it your own. We also shared storage tips to keep your salad fresh. Making this dish is fun and healthy. It’s a great way to enjoy good food. Try it out, and let your creativity shine!

Mediterranean Quinoa Salad Fresh and Flavorful Dish

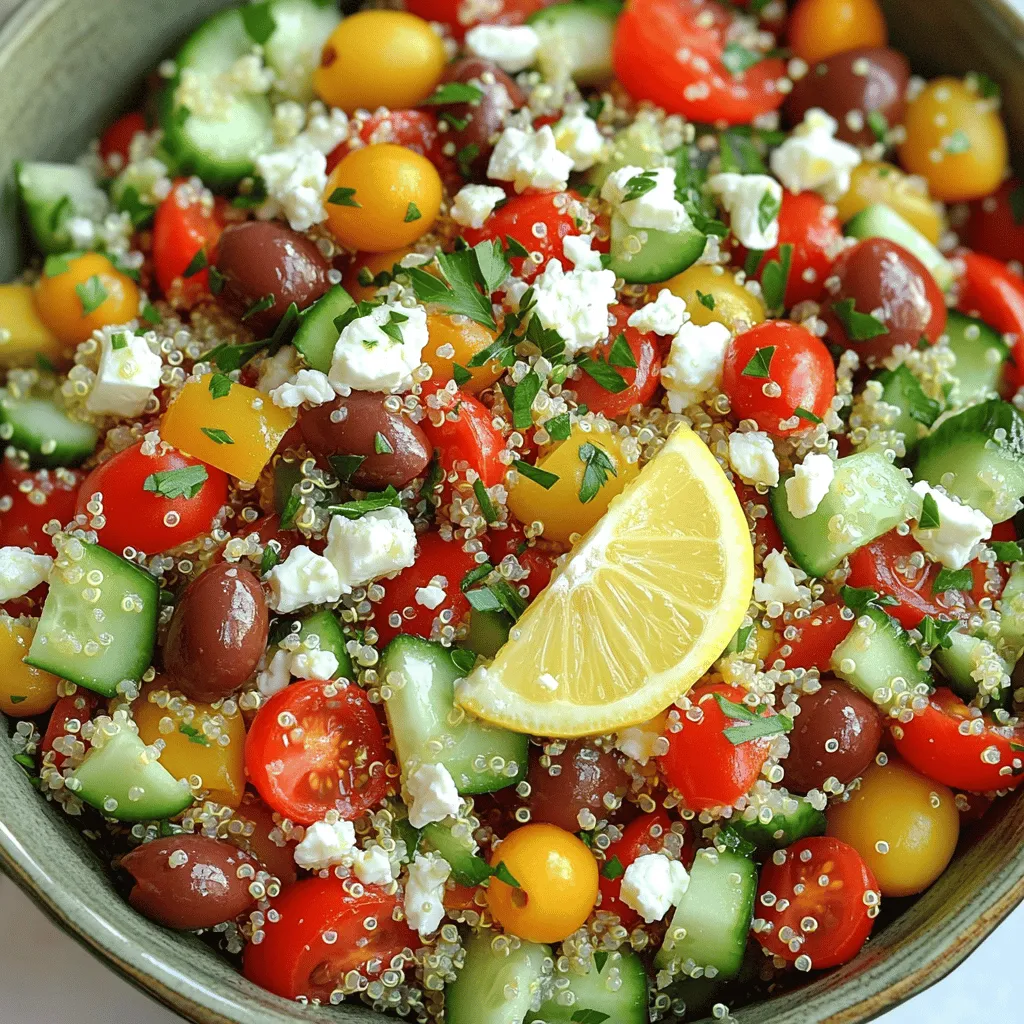
Are you ready to spice up your meal rotation? This Mediterranean Quinoa Salad is fresh, flavorful, and super easy to

- 1 cup all-purpose flour (gently heat-treated for safety) - ½ cup brown sugar, tightly packed - ½ cup granulated sugar - ½ cup unsalted butter, softened to room temperature - 2 teaspoons pure vanilla extract - 1 (8 oz) package cream cheese, softened - ½ cup mini chocolate chips - ¼ teaspoon fine sea salt - Optional dippables: graham crackers, fresh apple slices, crispy pretzels When making Chocolate Chip Cookie Dough Dip, each ingredient plays a key role. First, I use heat-treated flour. This step keeps the dip safe to eat. Raw flour can contain harmful bacteria, so heating it makes it safe. Next, I add brown sugar and granulated sugar. The brown sugar brings moisture and flavor, while granulated sugar adds sweetness. Together, they create a rich base. Unsalted butter is next. Softened butter mixes easily into the sugars, making the dip creamy. Then, I mix in pure vanilla extract. This ingredient enhances the sweet taste and smells amazing. Now comes the cream cheese. It adds a smooth texture and rich flavor. I always make sure it’s softened for easy mixing. Then, I fold in the mini chocolate chips. These little bites of chocolate are a must for that classic cookie dough taste. Finally, I sprinkle in a bit of fine sea salt. This tiny addition balances the sweetness and enhances all the flavors. For dippables, I love using graham crackers, fresh apple slices, or crispy pretzels. These options add crunch and contrast to the smooth dip. You can find the full recipe in the article, and I promise it will be a hit! First, gather your ingredients. In a large mixing bowl, combine the softened butter, brown sugar, and granulated sugar. Use a hand mixer to beat them together on medium speed. Mix until the blend is light and fluffy, which should take about 2-3 minutes. This step adds air and makes the dip creamy. Next, add the softened cream cheese and pure vanilla extract to the bowl. Blend these until the mixture is smooth and creamy. This helps to create a rich base for your dip. Now, it’s time for the dry stuff. Gradually add the heat-treated flour into the mixture. Sprinkle in the fine sea salt as you mix. Use low speed on your mixer to combine everything well. You want a dough-like texture, so take your time mixing. Once your mixture is ready, use a rubber spatula to fold in the mini chocolate chips. This ensures they are evenly spread throughout the dip. Make sure not to overmix; you want those chips to stay in place! Finally, transfer the dip into a clean serving bowl. Smooth out the top for a nice look. Chill it in the fridge for at least 30 minutes. This makes the dip taste even better and gives it a nice creamy texture. When ready, serve it chilled with tasty dippables like graham crackers, fresh apple slices, or crispy pretzels. Enjoy this delightful treat! For further details on the ingredients and preparation, refer to the Full Recipe. For the best taste and texture, chill the dip for at least 30 minutes. This time helps the flavors blend well. It also makes the dip creamier. Use room temperature ingredients, like butter and cream cheese. This ensures smooth mixing and a fluffy dip. Cold ingredients can make it hard to blend. To make your dip look fun, sprinkle extra chocolate chips on top. This gives it a charming look and adds more chocolate flavor. Arrange your dippables around the bowl in a creative way. You can use graham crackers, apple slices, or pretzels. This not only looks appealing but also makes it easy for guests to grab a bite. One common mistake is not heat-treating the flour. Always ensure your flour is safe. You can do this by baking it at 350°F for about 5 minutes. Another mistake is overmixing the dip. Overmixing can make it less creamy. Mix just until combined for the best results. {{image_4}} You can easily adapt this recipe to fit different diets. For a vegan option, use plant-based cream cheese. It gives the same creamy texture without dairy. You can also swap the butter for coconut oil. This change keeps it rich and tasty. If you need a gluten-free dip, use gluten-free flour. This swap works well and keeps the dip delicious. Just make sure you choose a high-quality gluten-free flour blend. It will help maintain the right texture. Want to switch up the flavor? Adding peanut butter or almond extract can create a new taste. Peanut butter adds a nutty richness. Almond extract gives a sweet, fragrant note that pairs perfectly with chocolate. Try both and see which you like best! You can also mix in different types of chocolate chips. Dark, milk, or white chocolate all work great. Each type will change the flavor profile. Mixing chocolate chips can make the dip even more fun and exciting. When it comes to dippers, you have many options. Vanilla wafers are a classic choice. They are sweet and crunchy, perfect for scooping. Cookie sticks are also fun and easy to dip. Fresh fruits like strawberries and bananas are great pairings too. The sweetness of the fruit balances the rich dip. Plus, the juicy texture adds a nice contrast. You can even mix and match your dippers for a fun snack platter. To keep your chocolate chip cookie dough dip fresh, use an airtight container. This helps lock in moisture and flavor. Place the dip in the container and seal it tightly. Store it in the fridge for best results. Make sure to keep it away from strong-smelling foods to avoid flavor transfer. The dip stays fresh for about five days in the fridge. After that, check for signs that it’s no longer good. Look for any changes in texture or smell. If it smells off or looks dry, it's best to toss it. Always trust your senses when it comes to food safety. Yes, you can freeze this dip! To freeze, put it in a freezer-safe container. Make sure to leave some space at the top, as it may expand. It can last about two months in the freezer. When you're ready to enjoy it, thaw it in the fridge overnight. After thawing, stir it well before serving. This will help regain its creamy texture. Enjoy it with your favorite dippables! Yes, you can make this dip ahead of time. It stays fresh in the fridge for up to three days. Just store it in an airtight container. This keeps it moist and tasty. You can also chill it for 30 minutes before serving. It helps the flavors blend well. Make sure to give it a good stir before you serve it. This will bring back its creamy texture. No, it is not safe to eat raw flour. Raw flour can contain harmful bacteria. To make it safe, heat-treat the flour first. You can do this by baking it in the oven at 350°F for about five minutes. This process kills any bacteria. Once done, let it cool before mixing it into your dip. This step is very important for safety. If you need a substitute for cream cheese, there are good options. You can use Greek yogurt for a tangy taste. Softened silken tofu works well for a dairy-free option. Another choice is vegan cream cheese, which is creamy and tasty. These substitutes keep the dip delicious while meeting dietary needs. Choose what works best for you and enjoy! This blog post shared a simple yet delicious recipe for Chocolate Chip Cookie Dough Dip. We reviewed the key ingredients, step-by-step instructions, and helpful tips. Personalizing the dip with variations and knowing how to store it ensures you enjoy it longer. Remember, the right ingredients and preparation make all the difference. Dive in, get creative with dippables, and share it with friends! Enjoy every scoop of your homemade treat.

Chocolate Chip Cookie Dough Dip Irresistible Treat

Are you ready to indulge in a sweet, creamy delight? This Chocolate Chip Cookie Dough Dip is an easy treat

- 1 cup broccoli florets - 1 red bell pepper, thinly sliced - 1 yellow bell pepper, thinly sliced - 1 medium carrot, julienned - 1 medium zucchini, sliced into half-moons - 1 cup snap peas, ends trimmed Fresh veggies add color and crunch to your stir fry. Broccoli gives great texture. Red and yellow bell peppers add sweetness. Carrots bring a nice crunch and color. Zucchini adds a soft touch, while snap peas offer a crisp bite. - 3 cloves of garlic, finely minced - 1 tablespoon fresh ginger, finely grated - 2 tablespoons soy sauce - 1 tablespoon sriracha Garlic and ginger are key for flavor. They wake up your dish with bold tastes. Soy sauce adds saltiness, while sriracha brings heat. You control how spicy it gets. Start mild, then add more if you want! - 1 tablespoon sesame oil - 1 tablespoon olive oil - Salt and freshly cracked pepper to taste Using both sesame and olive oil gives a rich taste. Sesame oil has a nutty flavor, while olive oil is smooth. A dash of salt and pepper ties everything together. These simple ingredients make your dish pop! For the full recipe, check out the details above. Happy cooking! 1. Washing and cutting techniques: Start by washing all your veggies under cold water. This removes dirt and pesticides. For cutting, use a sharp knife. Slice the bell peppers thinly and julienne the carrot. Cut the broccoli into small, bite-sized florets. For zucchini, cut it into half-moons. This helps them cook evenly. 2. Importance of uniform sizes: Cutting all veggies to the same size is key. It ensures that they cook at the same rate. You don’t want some to be mushy while others are still hard. Uniform cuts lead to a better texture in your stir fry. 1. Heat oil and sautéing aromatics: In a large skillet or wok, heat olive oil over medium-high heat. You want it to shimmer but not smoke. Once ready, add minced garlic and grated ginger. Stir it for about 30 seconds until you smell the aroma. This step builds flavor. 2. Adding vegetables in stages for optimal texture: Start by adding the sliced bell peppers. Sauté them for about 2 minutes. They should soften a bit but still be crisp. Next, add broccoli and julienned carrot. Stir and cook for another 3 minutes. Finally, mix in zucchini and snap peas. This staggered method helps each veggie keep its perfect texture. 1. Whisking the sauce ingredients: In a small bowl, combine soy sauce, sriracha, and sesame oil. Whisk them together until they blend well. This sauce packs a punch and adds great flavor to your stir fry. 2. Tossing vegetables in sauce: Once your veggies are nearly cooked, pour the sauce over them. Toss everything to coat each piece well. Cook for another 4-5 minutes. The veggies will brighten in color and become tender yet still crisp. For the full recipe, check out the Spicy Veggie Stir Fry. To get the spice just right, start with sriracha. You can add more or less to match your taste. If you want an extra kick, try adding crushed red pepper flakes or fresh chili. These will bring heat and flavor to your dish. You want your veggies to stay crunchy. To do this, keep an eye on the cooking time. Start with bell peppers, as they need just about two minutes. Then, add the broccoli and carrots for three more minutes. Finally, toss in zucchini and snap peas. They only need about four minutes to stay crisp. Use a large skillet or wok. These help the heat spread evenly. High heat is key for stir-frying. It helps to seal in flavors and keep veggies bright. A non-stick surface will help prevent sticking and make cleanup easy. {{image_4}} You can easily add protein to your spicy veggie stir fry. Tofu or tempeh works great for a plant-based option. Both soak up flavors well and add a nice texture. If you prefer meat, you can include chicken or shrimp. Just cook the protein first, then add your veggies. If you want a vegetarian or vegan dish, simply omit any animal products. Replace meat with tofu, tempeh, or even chickpeas. These options boost protein and keep your meal hearty. You can still enjoy the same great taste with these plant-based proteins. Try different sauces for a unique twist. You can mix soy sauce with teriyaki or even peanut sauce. If you like it spicy, add chili paste or red pepper flakes. Customize with your favorite spices to make it your own. The key is to find a balance that suits your taste buds. If you're interested in more details, check out the Full Recipe for a delicious way to make your stir fry! After cooking your spicy veggie stir fry, let it cool down first. You can speed this up by spreading it out on a large plate. This helps it cool evenly. Once it is at room temperature, transfer the stir fry into an airtight container. Store it in the fridge. Make sure the lid seals tightly to keep out air. This keeps the flavors fresh for longer. You can freeze your stir fry for later meals. First, let it cool completely. Then, portion it into smaller containers. This makes it easy to thaw just what you need. When you're ready to eat, take a container out of the freezer. Place it in the fridge overnight to thaw. For a quick option, you can microwave it straight from the freezer. Just be sure to stir it well while reheating. Your spicy veggie stir fry will last about three to four days in the fridge. If you see any changes in color or smell, it's best to toss it out. Fresh veggies can spoil quickly, so always check for signs of spoilage. Keeping an eye on your leftovers ensures you enjoy every bite safely. Yes, you can use frozen vegetables. Here are some pros and cons: - Pros: Frozen veggies are often pre-cut and ready to cook. They can save time and are available year-round. - Cons: They may have a softer texture after cooking. Fresh vegetables often taste better and have a crunchier bite. To reduce spice, cut back on sriracha. You can also add a bit of sugar. Another tip is to mix in more veggies or a splash of coconut milk. This will help balance out the heat. You can serve this stir fry with: - Steamed rice - Quinoa - Noodles - A side salad These dishes pair well and help soak up the flavors. Yes, the recipe can be gluten-free. Just use gluten-free soy sauce. You can easily switch out regular soy sauce for this option. This makes the dish safe for those with gluten sensitivities. This guide covers everything you need for a tasty veggie stir fry. You learned about fresh vegetables, essential sauces, and cooking methods. Remember to cut vegetables uniformly for even cooking and adjust spices to your taste. Try different proteins or sauces to make it your own. Proper storage is key to enjoying leftovers. With these tips, you're ready to create a delicious meal. Embrace your cooking skills and enjoy every bite.

Spicy Veggie Stir Fry Simple and Flavorful Recipe

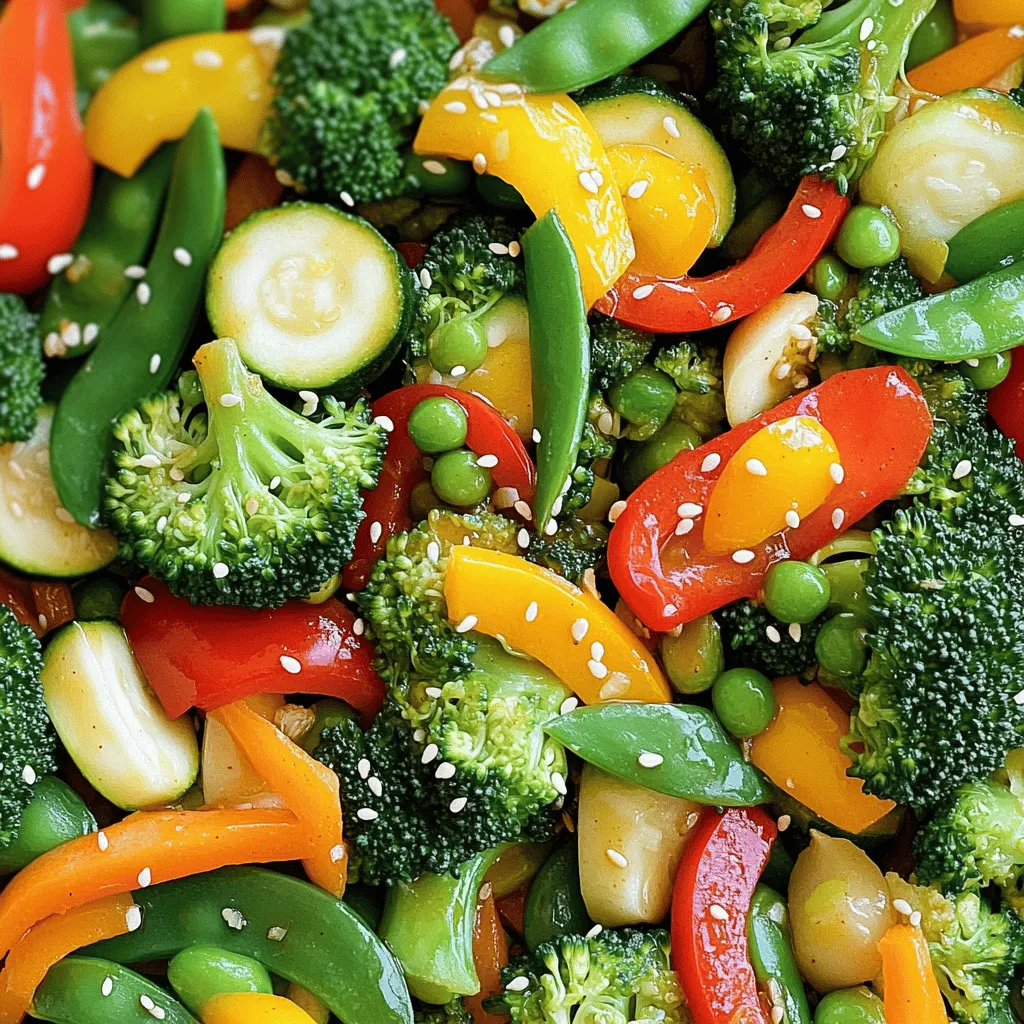
Are you ready to elevate your dinner routine? This Spicy Veggie Stir Fry is not only simple to make, but

Older posts
Newer posts
← Previous Page1 … Page37 Page38 Page39 … Page73 Next →

dsad

© 2025 recipesstation • Built with GeneratePress

Our Policies

  • Copyright Policy
  • Cookie Policy
  • GDPR Policy
  • Privacy Policy
  • Disclaimer
  • Terms Of Use

More Information

  • Home
  • About
  • Contact
  • Appetizers
  • Dessert
  • Dinner
  • Drinks
©2025, recipesstation About Back To Top