Skip to content
DisclaimerTerms Of UseGDPR PolicyCookie Policy

recipesstation

  • Home
  • Drinks
  • Appetizers
  • Dinner
  • Dessert
  • About
  • Contact
  • Privacy Policy
DisclaimerTerms Of UseGDPR PolicyCookie Policy

Emily

- ½ cup unsalted butter - 1 cup high-quality dark chocolate (70% cocoa or higher), chopped into small pieces - 2 large eggs - 2 large egg yolks - ½ cup granulated sugar - ¼ cup all-purpose flour - 1 teaspoon pure vanilla extract - Pinch of salt - Optional garnishes The key to a great chocolate lava cake is using high-quality ingredients. The unsalted butter adds richness, while dark chocolate gives that deep flavor. I always use chocolate with at least 70% cocoa for the best results. Eggs and egg yolks add moisture and help create a soft center. Granulated sugar sweetens the mix, while flour gives structure. The vanilla extract adds a nice warmth to the flavor. A pinch of salt enhances all these tastes. You can also add garnishes, like powdered sugar, fresh berries, or mint leaves, for a lovely touch. Each ingredient plays a role in making this dessert truly special. For the full recipe, refer to the detailed instructions above. 1. Start by preheating your oven to 425°F (220°C). 2. Prepare four 6oz ramekins by greasing them with unsalted butter. 3. Lightly dust the ramekins with cocoa powder or flour. 4. Make sure to tap out any excess to prevent sticking. 5. In a medium heatproof bowl, place chopped dark chocolate and unsalted butter. 6. Melt the mixture gently over a double boiler or in the microwave. 7. Heat in 30-second intervals, stirring each time until smooth. 8. Allow it to cool for a few minutes after melting. 1. In a separate mixing bowl, whisk together eggs, egg yolks, and granulated sugar. 2. Whisk until thickened and light in color, about 2-3 minutes. 3. Pour the slightly cooled chocolate mixture into the egg mixture. 4. Stir gently until fully combined and smooth. 5. Using a spatula, fold in the flour, vanilla extract, and a pinch of salt. 6. Mix just until incorporated to keep the batter light. 1. Evenly divide the batter among the prepared ramekins. 2. Fill each ramekin about three-quarters full to allow for rising. 3. Place the filled ramekins on a baking sheet for easier handling. 4. Bake in the preheated oven for 12-14 minutes. 5. Check for doneness; edges should be set, centers soft and wobbly. 6. Remove the ramekins from the oven and cool for about 1 minute. 7. Run a knife around the edges of each ramekin to loosen the cakes. 8. Invert onto serving plates and lift off the ramekin carefully. 9. Dust with powdered sugar and add fresh berries and mint leaves if desired. For the full recipe, please refer to the provided information. - Overmixing the batter: Mix gently. If you overmix, the cake will not rise well. It may turn out dense and heavy. Keep the batter light by mixing just until combined. - Incorrect oven temperature: Always preheat the oven. If the oven is too hot or too cold, it affects baking. Use an oven thermometer to check the right temperature. This ensures perfect baking every time. - Dusting with powdered sugar: After baking, sprinkle powdered sugar over the cakes. This adds a lovely touch. It also enhances the dessert's visual appeal. - Choosing complementary garnishes: Fresh berries like raspberries or strawberries work great. They add color and flavor. You can also use mint leaves for a fresh look. Serve the cakes warm for the best effect. A scoop of vanilla ice cream beside it makes it even better. {{image_4}} You can make chocolate lava cake even better with some fun flavors. One great idea is to infuse the batter with espresso or coffee. Just add a shot of strong espresso or a teaspoon of instant coffee to the melted chocolate mixture. This gives the cake a rich, deep flavor that pairs well with the chocolate. Another option is to add liqueurs for extra richness. A splash of orange liqueur or raspberry liqueur can brighten the flavors. Use about one tablespoon in the chocolate mix and stir well. These small tweaks can take your dessert to the next level! If you or your guests have dietary needs, don't worry! You can easily make gluten-free adjustments. Instead of all-purpose flour, try using almond flour or a gluten-free flour blend. This swap will keep the texture light and fluffy while making it safe for those avoiding gluten. For vegan alternatives, replace eggs with a flaxseed mixture. Mix one tablespoon of ground flaxseed with three tablespoons of water and let it sit for a few minutes until it thickens. Use this in place of eggs. You can also swap the butter for coconut oil and use vegan chocolate. These changes will give you a delicious dessert that everyone can enjoy. You can find the full recipe that includes these variations and more! - In the refrigerator: After enjoying your chocolate lava cake, store leftovers in the fridge. Place them in an airtight container. They will stay fresh for up to three days. This helps keep the texture nice. - Freezing procedures: To freeze, let the cakes cool completely. Wrap each ramekin tightly in plastic wrap. Place them in a freezer-safe bag or container. They can last up to two months in the freezer. Just remember to label them with the date. - Best methods for restoring gooeyness: To reheat, use your oven for the best results. Preheat it to 350°F (175°C). Place the ramekin on a baking sheet. Heat for about 10-12 minutes. This warms the cake and keeps the center soft. Alternatively, you can microwave the cake. Heat on low power for about 30-40 seconds. Check often to avoid overcooking. Enjoy your warm, gooey dessert! You can tell your lava cake is done by checking the edges. They should look set. The center should still wobble a bit when you gently shake the ramekin. If it looks too firm, it may be overbaked. Aim for a baking time of 12-14 minutes. This timing gives you that perfect gooey center. Yes, you can make the batter ahead of time. Prepare it and fill the ramekins, then cover them. Place them in the fridge for up to 24 hours. Just remember to add a few extra minutes to the baking time if they’re cold. This way, you can have your dessert ready with less hassle. Serve your lava cake warm for the best taste. Invert it onto a plate carefully, so the molten center flows out. Dust with powdered sugar for a nice touch. You can also add fresh berries and mint leaves for color. A scoop of vanilla ice cream on the side pairs well with the warm cake. These details make your dessert look and taste amazing. For the full recipe, check the earlier section. To make a great chocolate lava cake, use simple ingredients like butter and dark chocolate. Follow straightforward steps to prepare, mix, and bake your cake to perfection. Remember to avoid common mistakes, enhance the dish with presentation tips, and explore fun variations. Store any leftovers properly and reheat them for that delicious gooey center. With these insights, you can impress anyone with a tasty dessert. Enjoy baking!

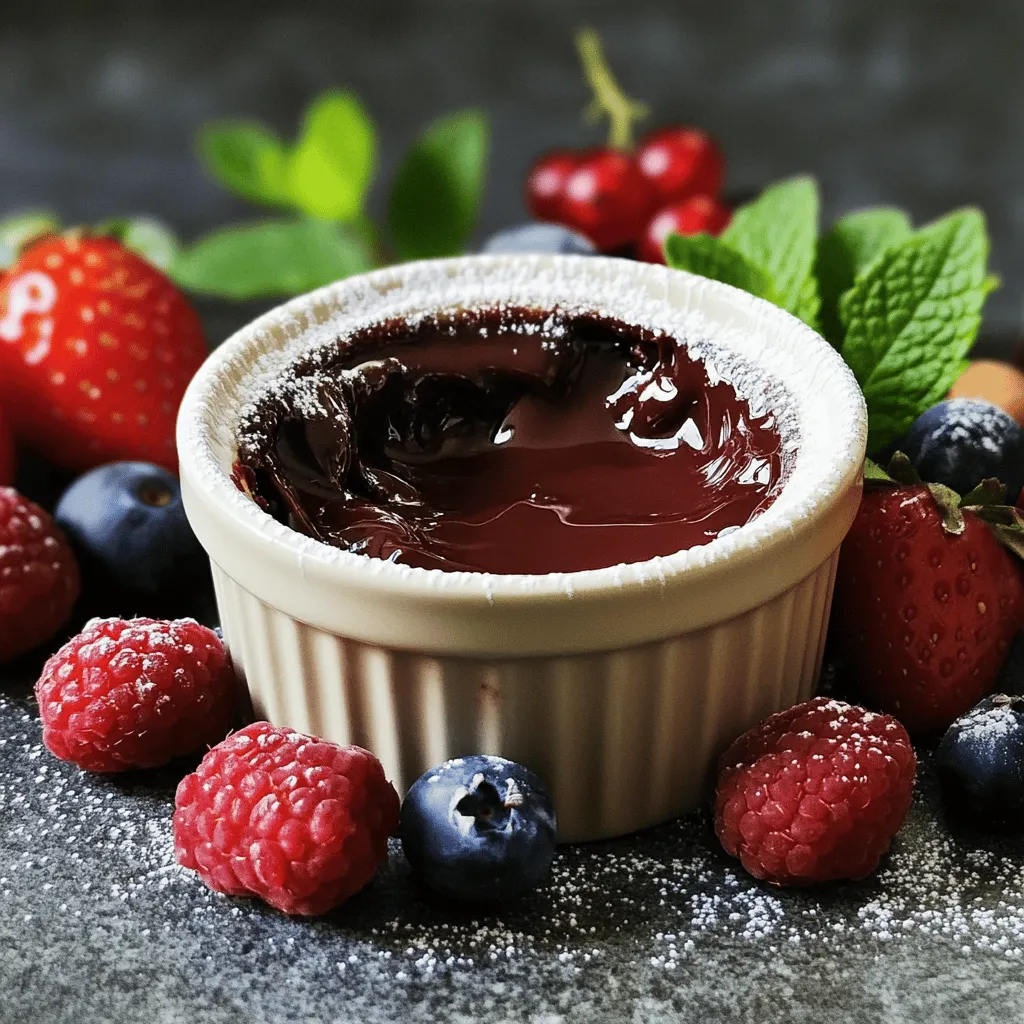
Chocolate Lava Cake Decadent and Rich Dessert Recipe

If you crave a dessert that oozes rich chocolate goodness, this Chocolate Lava Cake recipe is for you. Imagine breaking

- 4 large bell peppers (You can use red, yellow, or green for color) - 1 cup quinoa (Rinse it well to remove the bitter coating) - 2 cups vegetable broth (This adds great flavor to the quinoa) When you choose the bell peppers, pick ones that are firm and bright. This makes your dish colorful and tasty. Rinse the quinoa under cold water using a fine mesh sieve. This step is key because it removes the saponins, which can taste bitter. Using vegetable broth instead of water enhances the flavor of the quinoa, making it more delicious. - Black beans (These add protein and fiber) - Corn (Fresh corn is sweet, but frozen works too) - Diced tomatoes (Use fresh for a bright taste, or canned for ease) Black beans bring extra nutrition to your dish. They are rich in protein and fiber, which makes the meal filling. Corn adds a sweet crunch. You can use fresh corn when in season, or frozen corn, which is just as good. Diced tomatoes add moisture. You can use fresh ones for a clean taste, or canned ones if you are in a hurry. - Ground cumin (It gives a warm, earthy flavor) - Smoked paprika (This adds a nice depth to the dish) - Chili powder (You can adjust the heat to your liking) Ground cumin has a warm taste that pairs well with the other ingredients. Smoked paprika adds a rich, smoky flavor that enhances the overall dish. Chili powder gives it a kick. You can add more or less depending on how spicy you like your food. Adjusting these spices will help you create a stuffed pepper that suits your taste. For the full recipe, check out the [Full Recipe]. First, set your oven to 375°F (190°C). This step is key for cooking the peppers just right. While the oven heats, you can cook the quinoa. In a medium pot, bring 2 cups of vegetable broth to a boil. Once boiling, add 1 cup of rinsed quinoa. Lower the heat to low, cover, and let it simmer for 15 minutes. The broth will absorb, and the quinoa will become fluffy. After 15 minutes, remove it from heat and let it cool for a bit. Take your four large bell peppers and slice off the tops. Make sure to remove all the seeds and membranes inside. This helps keep the stuffing in and makes them tasty. Lightly drizzle olive oil on the outside of each pepper. Sprinkle a bit of salt to boost their flavor. Use a baking dish to place the peppers upright. This way, they won’t tip over during cooking. In a large skillet, heat a small drizzle of olive oil over medium heat. Add chopped red onion and minced garlic. Sauté them for about 3 to 4 minutes. You want them soft and fragrant. This brings out their natural sweetness. Next, stir in the filling ingredients. Combine black beans, corn, diced tomatoes, cumin, smoked paprika, and chili powder with the cooked quinoa. Mix well and let it cook for another 5 minutes. This helps the flavors blend. Season with salt and pepper, and fold in chopped cilantro for freshness. Now, it’s time to stuff the peppers! Spoon the quinoa mixture into each prepared pepper. Press down to pack it tightly. If you like cheese, sprinkle some on top of each stuffed pepper. Cover your baking dish with aluminum foil and place it in the oven. Bake for 25 minutes. After that, remove the foil and continue baking for another 10 to 15 minutes. Your goal is tender peppers and melted cheese, if you added it. For the full recipe, check out the details above. Enjoy the cooking process! When you buy bell peppers, look for bright colors and firm skin. Fresh peppers taste better and look great on your plate. Avoid any with soft spots or wrinkles. To store them, keep peppers in the fridge. They last longer when you wrap them in a paper towel. To make your quinoa filling perfect, adjust spices to your taste. If you like it spicy, add more chili powder. For a milder flavor, use less. To cook fluffier quinoa, rinse it well before cooking. Use vegetable broth instead of water for more flavor. Plating can make your meal special. Arrange the stuffed peppers on a colorful plate. You can add a sprinkle of fresh cilantro on top for a pop of color. Serve with a side salad or some crusty bread. A cold drink like lemonade or iced tea pairs well, too. Check out the Full Recipe for more ideas! {{image_4}} You can easily change the protein in stuffed bell peppers. If you want a leaner option, use ground turkey. It cooks well and adds a nice flavor. Ground beef also works great. It gives a rich taste that many enjoy. For a vegetarian choice, try tofu. Crumble it and mix it with your filling. Cooked lentils are another great option. They add protein and texture. Both options let you enjoy delicious stuffed peppers without meat. You can make stuffed bell peppers exciting with different flavors. For a Mediterranean twist, add feta cheese and olives. They bring a salty and tangy taste. If you love heat, go for a Southwestern flair. Add jalapeños and corn for a spicy kick. These flavors blend well with the other ingredients. Each bite will be full of zest and fun. Stuffed bell peppers can fit many diets. If you're gluten-free, no need to worry. All the ingredients can be gluten-free. Just double-check your labels when you shop. For vegan adaptations, skip the cheese or use dairy-free cheese instead. Many brands offer great options. You can still enjoy your stuffed peppers while keeping it plant-based. For the full recipe, check out the section above. To keep your stuffed bell peppers fresh, follow these tips: - Cool Down First: Let the peppers cool to room temperature before storing. - Use Airtight Containers: Store leftovers in airtight containers. This helps to lock in moisture and flavor. You can freeze stuffed bell peppers for later meals. Here's how: - Wrap Well: Wrap each stuffed pepper in plastic wrap or foil. This protects them from freezer burn. - Use Freezer Bags: Place wrapped peppers in freezer bags to save space. To reheat, let them thaw overnight in the fridge. Then, bake them at 375°F until heated through. This keeps them tasty and slightly firm. Stuffed bell peppers stay good for: - In the Fridge: Up to 4 days. - In the Freezer: Up to 3 months. Check for signs of spoilage, like off odors or changes in texture. Enjoy your colorful quinoa stuffed bell peppers anytime with these easy storage tips! For the full recipe, see the section above. You can tell stuffed peppers are done when they are soft. The cheese should melt and bubble on top. You can also check the filling. It should be hot all the way through. A fork should easily pierce the pepper skin. If you see these signs, your peppers are ready to eat! Yes, you can prepare stuffed peppers ahead of time. You can make the filling and stuff the peppers a day before. Just store them in the fridge. When you are ready to bake, pull them out and cook them as directed. This saves time and keeps your meal stress-free. Stuffed bell peppers pair well with many sides. You can serve a fresh salad for a nice crunch. Rice or quinoa on the side adds heartiness. Cornbread or crusty bread is also a great choice. These options complement the flavors well. Absolutely! You can create a delicious vegetarian version. Use black beans, quinoa, and lots of veggies in the filling. You can also add nuts or seeds for extra protein. Just skip the meat, and you’ll have a tasty meat-free dish. To reheat stuffed peppers, place them in the oven. Set it to 350°F (175°C). Cover the dish with foil to keep them moist. Heat for about 15-20 minutes. You can also use the microwave. Just add a splash of water and cover to keep them from drying out. Yes, you can use other veggies! Zucchini or eggplant works well. You can also try tomatoes or mushrooms. Just hollow them out like you would with bell peppers. Each veggie brings its own flavor to the dish, making it fun to experiment. Stuffed bell peppers are easy and fun to make. We covered key ingredients like quinoa and broth. You learned about extra fillings, spices, and cooking methods. Remember to choose fresh peppers and adjust the spices to suit your taste. You can also try different proteins and flavors for new twists. With the right storage, your leftovers will stay tasty. Now it's your turn to fill those peppers and enjoy your delicious creation. Happy cooking!

Stuffed Bell Peppers Easy and Flavorful Recipe

Looking for a fun and tasty meal? Stuffed bell peppers fit the bill perfectly! This easy and flavorful recipe gives

To make a great teriyaki chicken bowl, gather these main ingredients: - 2 boneless, skinless chicken breasts, diced into bite-sized pieces - 1 cup teriyaki sauce (store-bought or homemade for a personal touch) - 1 tablespoon sesame oil (adds a rich flavor) - 1 tablespoon vegetable oil (for sautéing) - 2 cups broccoli florets (fresh for best flavor) - 1 bell pepper, sliced (choose red or yellow for a hint of sweetness) - 1 medium carrot, cut into thin julienne strips - 2 cups cooked jasmine rice (or your preferred rice variety) - 2 green onions, sliced (for a fresh garnish) - 1 tablespoon sesame seeds (for a crunchy finish) These optional ingredients can boost the taste of your teriyaki chicken bowls: - Garlic, minced (for a fragrant kick) - Ginger, grated (adds warmth and depth) - Pineapple chunks (for a sweet twist) - Edamame (for extra protein) - Chili flakes (to spice it up) If you lack certain ingredients, here are some good substitutes: - Chicken thighs instead of chicken breasts for a juicier bite. - Soy sauce mixed with honey if you run out of teriyaki sauce. - Olive oil or canola oil can replace sesame oil. - Cauliflower rice for a low-carb option instead of jasmine rice. - Any fresh or frozen veggies you have on hand can work well. This recipe is flexible, so feel free to mix and match! For the full recipe, check out the detailed instructions. Start by cutting the chicken breasts into small, bite-sized pieces. This helps the chicken cook quickly and evenly. In a large bowl, mix the chicken with the teriyaki sauce. Ensure every piece is coated well. Cover this bowl and let it marinate for at least 30 minutes. For deeper flavor, marinate overnight in the fridge. Heat a large skillet or wok over medium-high heat. Add sesame oil and vegetable oil until they shimmer. Next, add the marinated chicken to the skillet. Reserve some marinade for later. Stir-fry the chicken for about 5 to 7 minutes until it turns golden brown. While the chicken cooks, toss in the broccoli, sliced bell pepper, and julienned carrot. Stir-fry these for 3 to 5 minutes until they are tender but still crisp. Now, pour the reserved teriyaki marinade into the skillet. Bring it to a simmer and cook for 2 to 3 minutes. This thickens the sauce and enhances the flavor. To serve, divide the cooked jasmine rice into bowls. Top each bowl with the chicken and vegetable stir-fry. Finish by adding sliced green onions and a sprinkle of sesame seeds. This gives your meal a nice crunch and a pop of color. Enjoy your delicious teriyaki chicken bowls! For a detailed view of this recipe, check the Full Recipe. Use a good teriyaki sauce. You can choose store-bought or make your own. I suggest marinating the chicken for at least 30 minutes. For the best flavor, try to marinate it overnight. This helps the chicken soak in all the sweet and salty goodness. Remember to coat each piece well for even flavor. To get tender chicken, heat your skillet well before adding the meat. This step helps to sear the chicken nicely, keeping it juicy. Stir-fry the chicken for about 5 to 7 minutes. Make sure it’s cooked through but not overcooked. Undercooking slightly allows for more flavor. Adding vegetables later helps keep them crisp. Fresh ingredients make a big difference. Choose bright green broccoli and firm bell peppers. Fresh vegetables add great taste and color to your bowl. For the chicken, use high-quality, boneless, skinless chicken breasts. The better the ingredients, the better your dish will taste. Always inspect your vegetables before cooking. Freshness is key to a great teriyaki chicken bowl! For the complete method, check out the Full Recipe. {{image_4}} You can easily make teriyaki chicken bowls vegetarian or vegan. For a meat-free version, use tofu or tempeh. Press the tofu to remove water, then cut it into cubes. Marinate the tofu in teriyaki sauce just like you would with chicken. Sauté the marinated tofu in sesame oil until golden. Add your favorite vegetables, like bell peppers and broccoli, for color and crunch. You can also try chickpeas for a protein boost. Drain and rinse canned chickpeas, then sauté them in the same way. The teriyaki sauce will add great flavor. This way, everyone can enjoy a delicious bowl, no matter their diet. While teriyaki sauce is classic, you can mix it up. Try using hoisin sauce for a sweet and savory twist. Or, use soy sauce mixed with honey or maple syrup for a quick option. For a spicy kick, add sriracha or red pepper flakes. You can also experiment with ginger and garlic. Fresh ginger gives a bright taste, while garlic adds depth. These additions can make your dish even more exciting and flavorful. Jasmine rice is a great base for your teriyaki chicken bowls. But you can use other grains too. Brown rice adds more fiber and nutrients. Quinoa is another excellent choice, offering protein and a nutty flavor. If you're feeling adventurous, try cauliflower rice for a low-carb option. It adds a nice texture and absorbs flavors well. With these choices, you can customize your bowl to suit any preference or diet. For the full recipe, check out the details above. To keep your teriyaki chicken bowls fresh, let them cool first. Place the leftovers in an airtight container. This helps keep the chicken and veggies safe. Store them in the fridge for up to three days. If you plan to eat them later, consider freezing them. When you're ready to enjoy your leftovers, reheat them gently. Use a microwave or a skillet. If using a microwave, cover the bowl with a lid or a damp paper towel. This keeps moisture in. Heat for one to two minutes, checking often. If using a skillet, add a splash of water or broth. Heat on medium until warm, stirring gently. To freeze your teriyaki chicken bowls, package them in single servings. Use freezer-safe containers or bags. Make sure to remove as much air as possible before sealing. Label the bags with the date. They can last in the freezer for up to three months. When you want a quick meal, thaw in the fridge overnight. Then, reheat as described above for best flavor. For the complete cooking process, check the Full Recipe. To make homemade teriyaki sauce, you need a few simple ingredients. Combine soy sauce, sugar, ginger, garlic, and water in a pot. Heat it over medium heat until the sugar dissolves. For a thicker sauce, mix a bit of cornstarch with water and add it to the pot. Stir until it thickens. This sauce is sweet, salty, and full of flavor. You can adjust the sweetness by adding more sugar or honey. Yes, you can use frozen vegetables in this recipe. They are convenient and save time. Just make sure to thaw them before cooking. Frozen veggies are often picked at their peak ripeness. This means they can taste just as good as fresh ones. However, fresh vegetables may give a better crunch and flavor. Several side dishes go well with teriyaki chicken bowls. Here are some great options: - Steamed edamame - Miso soup - Seaweed salad - Cucumber salad These sides add freshness and complement the rich flavors of the teriyaki chicken. Teriyaki chicken bowls can last in the fridge for about 3 to 4 days. Store them in an airtight container to keep them fresh. If you notice any strange smells or colors, it’s best to throw them out. To enjoy your meal later, reheat it in the microwave or on the stove until hot. In this blog post, we covered how to create flavorful teriyaki chicken bowls. You learned about key ingredients, cooking steps, and tips for the perfect dish. We also explored variations, storage methods, and common questions. Cooking can be fun and simple with these steps. Enjoy making delicious meals your whole family will love. With practice, you’ll become a pro at teriyaki bowls!

Teriyaki Chicken Bowls Flavorful and Easy to Make

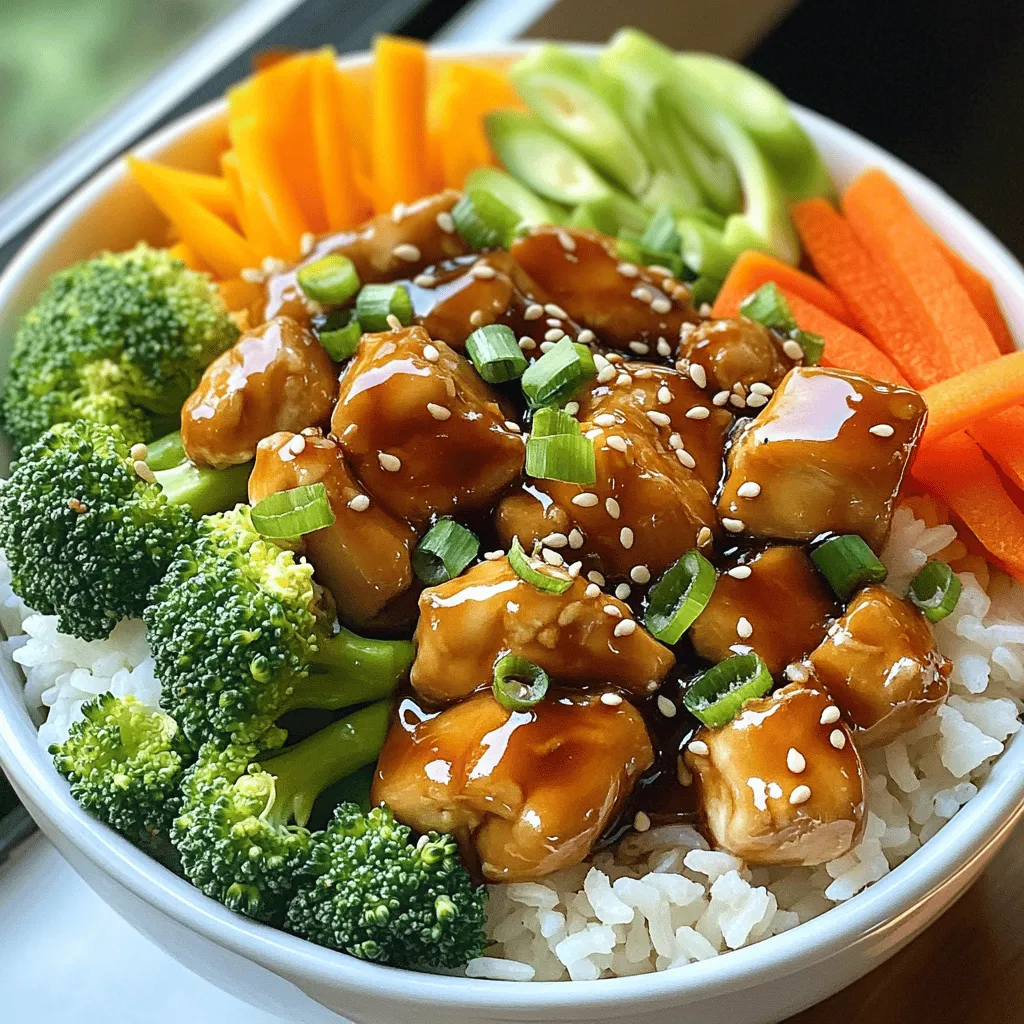
Are you ready to whip up a meal that’s both tasty and simple? Teriyaki chicken bowls bring together juicy chicken,

To make savory breakfast burritos, you need the following ingredients: - 4 large flour tortillas - 6 large eggs - 1 cup cooked and seasoned black beans (or use canned, drained and rinsed) - 1 cup shredded sharp cheddar cheese - 1/2 cup diced bell peppers (choose a mix of colors for a vibrant presentation) - 1/2 cup chopped green onions - 1 ripe avocado, sliced - 1/2 teaspoon ground cumin - 1/2 teaspoon smoked paprika - Salt and freshly ground pepper, to taste - 1 tablespoon olive oil - Salsa and sour cream, for serving (optional) These ingredients blend together to create a filling breakfast. The black beans add protein, while the eggs bring richness. The cheese melts beautifully, adding flavor and texture. The bell peppers and green onions offer a fresh crunch. You can customize the ingredients based on your taste. You can also swap in different cheeses or add cooked meats. For a kick, try adding jalapeños or hot sauce. If you want a vegetarian option, just skip the meat. It is all about making it your own. For the full recipe, check out the details. Enjoy making these delicious burritos! First, gather all your ingredients. You will need flour tortillas, eggs, black beans, cheese, and some colorful bell peppers. Dice the bell peppers and green onions. Slice the avocado and set it aside for later. Next, it's time to sauté the vegetables. Heat olive oil in a medium skillet over medium heat. Add the diced bell peppers once the oil is hot. Sauté for about 3-4 minutes. This softens the peppers and makes them fragrant. Stir occasionally to ensure even cooking. Now, let’s scramble the egg mixture. In a mixing bowl, whisk together the eggs, ground cumin, smoked paprika, salt, and pepper. Make sure everything is well mixed. Pour the egg mixture into the skillet with the sautéed bell peppers. Stir gently as the eggs cook. This should take about 3-5 minutes until the eggs are just set. After the eggs are cooked, combine the filling. Take the skillet off the heat and stir in the cooked black beans, shredded cheddar cheese, and chopped green onions. Mix until the cheese starts to melt from the heat. Now, it's time to fill the tortillas. Lay a flour tortilla flat on a plate. Spoon a generous amount of the egg mixture into the center of the tortilla. Add a few slices of avocado on top of the filling. To roll the burrito, fold in the sides of the tortilla over the filling. Carefully roll from the bottom up. Make sure to enclose the filling tightly. For added texture, you can crisp the burritos. This step is optional but delicious. Place the burritos seam-side down in the same skillet over medium heat. Cook each side for 2-3 minutes. This will give your burritos a golden brown, crispy exterior. Enjoy your savory breakfast burritos! For the full recipe, check out the detailed instructions. You can change your savory breakfast burritos to fit your taste. For protein, try: - Scrambled sausage - Chopped bacon - Diced ham - Grilled chicken For vegetarian options, add: - Spinach or kale - Mushrooms - Zucchini - Extra beans With these changes, you can enjoy a unique meal every time. You can cook these burritos in two main ways. Use a skillet or the oven. - Skillet: This method gives a nice crisp. Heat a skillet over medium heat. Cook each burrito seam-side down for 2-3 minutes. Flip until golden brown. - Oven: Preheat your oven to 400°F. Place the burritos seam-side down on a baking sheet. Bake for 15-20 minutes for a crispy finish. To ensure crispy tortillas, here are some tips: - Use fresh tortillas, as they crisp better. - Don’t overcrowd the pan. This allows even cooking. - Brush the tortillas lightly with oil before cooking. Pair your burritos with tasty salsas and dips. Good options include: - Fresh tomato salsa - Spicy salsa verde - Creamy guacamole For sides, think of: - Fresh fruit - Hash browns - A simple green salad These pairings enhance your meal and make it more satisfying. For the full recipe, check the [Full Recipe]. {{image_4}} You can change the cheese in your burritos for fun. Try cheddar, Monterey Jack, or even pepper jack for a kick. Each cheese adds its own taste and creaminess. For spice lovers, add jalapeños or hot sauce. If you prefer mild, stick with sweet bell peppers or a dash of paprika. Want to mix it up? Try a Southwestern style. Add corn, diced tomatoes, or cilantro for freshness. You can also make an international twist. Use feta and spinach for a Mediterranean flavor. Or, try bacon and cream cheese for a richer taste. These ideas keep breakfast exciting! To keep your savory breakfast burritos fresh, use airtight containers. Glass or plastic containers work well. If you have multiple burritos, wrap them in plastic wrap before placing them in the container. This extra layer helps keep them moist. Store them in the fridge for up to three days. You can freeze your breakfast burritos before or after cooking. To freeze before cooking, wrap each burrito tightly in plastic wrap. Place them in a freezer bag. If you freeze after cooking, let them cool first. Then, wrap and bag them the same way. They can last up to three months in the freezer. For reheating, use the microwave or oven. If using a microwave, unwrap and place on a plate. Heat for 1-2 minutes. For the oven, preheat to 350°F (175°C). Place the burritos on a baking sheet for about 15-20 minutes. This keeps them crispy and fresh. Enjoy your delicious meal anytime! To make savory breakfast burritos, start by gathering your ingredients. You will need flour tortillas, eggs, black beans, cheese, and veggies. First, sauté diced bell peppers in olive oil until soft. Then, scramble the eggs with seasonings and mix in black beans and cheese. Finally, fill your tortillas with the mixture, add avocado, and roll them up. For the full recipe, check below. Yes, you can make these burritos ahead of time. Prepare the filling and let it cool. Store it in the fridge in a safe container. You can also wrap the burritos tightly in foil or plastic wrap. This way, they stay fresh. You can reheat them in the oven or microwave when you are ready to eat. You can add many toppings to your breakfast burritos. Some popular options are: - Salsa - Sour cream - Hot sauce - Fresh cilantro - Diced tomatoes - Jalapeños Feel free to get creative and mix your favorite flavors. To make these burritos healthier, consider these tips: - Use whole wheat tortillas for more fiber. - Replace cheese with low-fat options or skip it. - Add more veggies like spinach or zucchini. - Use egg whites instead of whole eggs to cut calories. These changes help maintain flavor while boosting nutrition. Wrapping burritos can be easy with a few steps: 1. Place the filling in the center. 2. Fold in the sides of the tortilla. 3. Roll from the bottom up, tucking it tightly. Make sure to seal the edges well to keep the filling inside. This helps prevent spills when you eat. You learned how to make delicious breakfast burritos from scratch. We covered key ingredients like tortillas, eggs, black beans, and cheese. You now know how to prepare, cook, and assemble them perfectly. I shared tips for customization and storage, plus creative serving ideas. Breakfast burritos can be both fun and healthy. Try different flavors and fillings to make them your own. Enjoy experimenting with this easy recipe that’s great for any meal!

Savory Breakfast Burritos Quick and Easy Recipe

Start your day with a flavorful punch! Savory breakfast burritos are quick, easy, and packed with nutrients. This recipe combines

- 1 pound baby carrots (or 3-4 regular carrots) - 2 tablespoons honey - 1 tablespoon freshly squeezed orange juice - 1 tablespoon freshly squeezed lemon juice - 2 tablespoons unsalted butter - Salt and freshly ground black pepper, to taste - 1 teaspoon fresh thyme leaves (or ½ teaspoon dried thyme) - Zest of 1 orange - Calories per serving: Approximately 120 calories - Key vitamins and minerals: Rich in vitamin A, vitamin C, and potassium Carrots are not just good for your eyes; they also pack a nutritious punch! The blend of honey, citrus, and butter makes them taste sweet and bright. This dish shines with both flavor and color, making it a perfect side for any meal. Using baby carrots is easy and fun. They look lovely whole, and they cook fast. If you use regular carrots, cut them into sticks for even cooking. This will help them become tender without losing their crunch. With this recipe, you get a good dose of vitamins and minerals. Vitamin A helps with vision, while vitamin C supports your immune system. Potassium is great for heart health. You not only eat well, but you also feel good. You can find the full recipe above. Enjoy making this delightful dish that everyone will love! Start by getting your carrots ready. If you choose regular carrots, peel them first. Cut them into 3-4 inch sticks. This size helps them cook evenly. Baby carrots can be used whole for a pretty look. Uniform cuts make sure each piece cooks just right. Now, it's time to boil the carrots. Fill a medium pot with water and add a pinch of salt. Bring the water to a rolling boil. Carefully add your carrots. Boil them for 5-7 minutes until they are fork-tender, but still crunchy. Check doneness by poking a carrot with a fork. If it goes in easily, they are ready. Drain the cooked carrots and set them aside. Next, let’s create the glaze. In a large non-stick skillet, melt the unsalted butter over medium heat. Watch closely as it melts. When the butter shimmers, pour in the honey, orange juice, and lemon juice. Add the thyme too. Stir this mix until it bubbles gently. This should take about 2-3 minutes. The aroma will be heavenly! Now, add the drained carrots to your glaze in the skillet. Use tongs or a spatula to toss them gently. Coat each carrot well in the glaze. Cook them in the skillet for 3-4 minutes. Stir occasionally so the glaze thickens and flavors soak in. You’ll know it’s ready when the carrots look shiny and delicious. Remove the skillet from heat. Sprinkle the glazed carrots with fresh orange zest. Season with salt and freshly ground black pepper. Toss everything together so each carrot gets flavor. Fresh thyme adds a nice touch too. For the full steps and precise measurements, check the Full Recipe. Sautéing and roasting are both great ways to cook carrots. Sautéing cooks them quickly in a pan over medium heat. This method keeps them crisp and bright. Roasting, on the other hand, uses dry heat in the oven. It gives carrots a nice caramelized look and a deeper flavor. For a caramelized effect, roast at a high temperature. This helps bring out the natural sugars in the carrots. To get that sweet, brown crust, coat them well in the glaze. Let them cook without stirring for a few minutes. This allows the glaze to thicken and stick. Then, toss and turn them for even coating and flavor. When serving honey citrus glazed carrots, presentation is key. Use a shallow bowl to show off their vibrant color. A sprinkle of fresh orange zest or a sprig of thyme adds a nice touch. For special occasions, place them on a large platter for a family-style feast. These carrots pair well with many main dishes. They complement roasted chicken, grilled fish, or even a hearty beef stew. The sweet and tangy flavors work beautifully with savory meals. One common mistake is overcooking the carrots. If you cook them too long, they become mushy. Aim for a fork-tender texture, still with a bit of crunch. Improper glazing is another issue. If you rush this step, the glaze may not stick. Make sure to toss the carrots well in the glaze. Ensure they cook long enough to absorb all that sweet flavor. It is all about balance and patience for that perfect finish. For the full recipe, check out the steps outlined above! {{image_4}} You can switch up the flavor of honey citrus glazed carrots easily. One tasty option is to use maple syrup instead of honey. Maple adds a rich sweetness that pairs well with the citrus. You can also add a sprinkle of ginger or cinnamon. This addition brings warmth and depth to the dish. Feel free to play with the ingredients in this recipe. You can substitute different types of citrus. Grapefruit adds a tangy twist that surprises the taste buds. You can also include other vegetables. Try adding parsnips or sweet potatoes for added texture and flavor. Mixing veggies can make your dish even more colorful and fun. If you want to make the recipe vegan, simply replace the butter with oil. Olive oil or coconut oil works great. You can also swap out honey for agave nectar or maple syrup. This keeps the sweet flavor while making it suitable for a vegan diet. For gluten-free options, this recipe is already free from gluten. Just ensure that any added ingredients, like sauces, also meet gluten-free standards. You can enjoy this dish worry-free while sticking to your dietary needs. After you enjoy your honey citrus glazed carrots, store any leftovers in an airtight container. This keeps them fresh and tasty. Place the container in the fridge. They can last up to three days. If you notice any strange smells or colors, it's best to toss them. When reheating, keep the texture in mind. The best way is to use a skillet. Heat the skillet over medium heat and add a splash of water. This helps steam the carrots, keeping them soft. Stir occasionally to warm them evenly. You can also use a microwave. Place the carrots in a bowl, cover with a damp paper towel, and heat for about one minute. You can freeze glazed carrots, but they may lose some texture. To freeze, let them cool completely first. Then, place them in a freezer-safe bag. Try to remove as much air as possible before sealing. They can stay fresh in the freezer for up to three months. When you're ready to eat them, thaw in the fridge overnight before reheating. To enhance the natural sweetness of carrots, you can try a few tricks. First, choose fresh and young carrots; they tend to be sweeter. Roasting or glazing brings out their flavor. Cooking them in honey or maple syrup can boost their sweetness too. Adding a pinch of salt also helps. Salt makes sweet flavors pop, balancing the taste. Yes, you can prepare honey citrus glazed carrots ahead of time. Cook them fully and cool them down. Store them in an airtight container in the fridge for up to three days. When ready to serve, simply reheat in a skillet for a few minutes. This keeps the glaze vibrant and the carrots tasty. These glazed carrots pair well with many dishes. Try serving them with roasted chicken or grilled fish. They also go nicely with rice or quinoa. For a hearty meal, serve them alongside beef or lamb. Their sweet and zesty flavor complements rich dishes well. This recipe can be made vegan with a few swaps. Use maple syrup instead of honey for sweetness. Replace butter with vegan butter or olive oil. This keeps the dish flavorful while being plant-based. You can still enjoy the bright taste of citrus in your dish. To scale the recipe for more servings, simply increase the ingredient amounts. For example, if you want to serve eight, double the carrots, honey, and butter. Keep the same ratios for the other ingredients. Adjust cooking times as needed, ensuring the carrots cook evenly and soak up the glaze. For the full recipe, check out the detailed instructions above. This blog post detailed how to make honey citrus glazed carrots from start to finish. We covered the necessary ingredients, step-by-step cooking methods, and clever tips to avoid common mistakes. You learned about flavor variations and storing leftovers for later use. Enjoy trying this recipe with different twists. Whether for a special dinner or a weeknight meal, these glazed carrots will impress. With practice, you'll master the skills to make this dish shine on your table. Cooking can be fun and rewarding, so keep experimenting!

Honey Citrus Glazed Carrots Flavorful Side Dish Delight

Looking for a side dish that brings joy to your meal? Honey Citrus Glazed Carrots are your answer! This simple

To make a delicious beef stroganoff, you need the following main ingredients: - 1 lb beef sirloin, thinly sliced - 2 tablespoons olive oil - 1 medium onion, finely diced - 2 cloves garlic, minced - 8 oz fresh mushrooms, sliced (button or cremini work well) - 1 cup beef broth (preferably low sodium) - 1 tablespoon Worcestershire sauce - 1 teaspoon Dijon mustard - 1 cup sour cream (preferably full-fat) - Salt and freshly ground black pepper, to taste - 1 tablespoon fresh parsley, finely chopped (for garnish) - 8 oz egg noodles This dish shines with tender beef, rich sauce, and creamy sour cream. Each ingredient plays an important role in the final flavor. The beef sirloin gives a nice texture, while olive oil helps to sear it perfectly. Onions and garlic add depth and aroma to the dish. Fresh mushrooms contribute a wonderful earthiness. The beef broth adds richness, and Worcestershire sauce brings a slight tang. Dijon mustard gives a little kick to the sauce. Sour cream makes the dish creamy and smooth, while salt and pepper round out the flavors. Fresh parsley provides a nice touch of color and freshness, brightening the dish. Finally, egg noodles serve as the perfect base to soak up all that delicious sauce. For full details and preparation instructions, check out the Full Recipe. First, heat olive oil in a large skillet over medium-high heat. Add the thinly sliced beef in batches. Do not crowd the pan. Cook each batch for about 2-3 minutes. You want the beef to brown nicely. Once browned, remove the beef from the skillet. Place it on a plate and set it aside. Next, reduce the heat to medium. In the same skillet, add the diced onion. Sauté the onion for about 3-4 minutes. You want it to become translucent. Then, add the minced garlic and sliced mushrooms. Cook for another 5-7 minutes. The mushrooms should become tender and release their moisture. Now, return the browned beef to the skillet. Pour in the beef broth, Worcestershire sauce, and Dijon mustard. Stir everything well. Allow the mixture to come to a gentle simmer. Let it cook for about 5 minutes. This helps the flavors blend nicely. Lower the heat to a gentle setting. Slowly mix in the sour cream. Stir until the sauce becomes smooth and creamy. Be careful not to let it boil. This can curdle the sour cream. Finally, season with salt and freshly ground black pepper to taste. While the stroganoff simmers, boil the egg noodles. Cook them until they are al dente, according to the package instructions. Once cooked, drain well and set aside. Remember to reserve a small amount of pasta water in case you need to thin the sauce. To serve, spoon the creamy beef stroganoff over a nest of the cooked egg noodles. Garnish each plate with a sprinkle of fresh chopped parsley. This adds a nice pop of color and flavor. For a full recipe, check out the details provided earlier. To make beef stroganoff shine, you need to sear the meat well. Heat your skillet over medium-high heat and add olive oil. Once the oil is hot, add the beef in small batches. This helps the meat brown nicely. If you crowd the pan, the beef will steam instead of sear. Cook it for about 2-3 minutes until it has a lovely brown color. Then, take it out and keep it warm. Mushrooms are key in this dish. Cooking them right is important. Sauté the mushrooms until they lose their moisture. This takes about 5-7 minutes. If you skip this step, your dish might turn watery. Browning the mushrooms adds a rich flavor that makes the stroganoff even better. Choosing the right beef is crucial. I recommend using beef sirloin. It’s tender and has great flavor for stroganoff. You can also use tenderloin, but it may cost more. Always pick fresh, high-quality beef. It makes a big difference in taste. When it comes to herbs, fresh is often best. Fresh parsley adds a nice touch at the end. Dried herbs can work too, but use less. Dried herbs are more potent. You can always add more, but you can’t take it away. Balancing sour cream is key for a great sauce. Start by adding the sour cream slowly. This helps you control the creaminess. If it’s too tangy, add a pinch of sugar to balance it. Also, taste as you go. Adjust salt and pepper to your liking. To make the dish even richer, consider adding a splash of beef broth. You can also stir in a bit of Dijon mustard for extra depth. These small tweaks can elevate your stroganoff. Remember, the goal is to create a smooth, creamy, and flavorful sauce that all comes together perfectly. For the full recipe, check out the details provided above. Enjoy your cooking! {{image_4}} If you need gluten-free options for noodles, you can use rice noodles or gluten-free pasta. These will give you the same comforting feel without the gluten. For those who want a dairy-free substitute for sour cream, consider using cashew cream or a plant-based yogurt. Both will keep the dish creamy and satisfying. To add depth, think about adding a splash of wine or sherry. This small step can boost the flavor of your stroganoff. You might also like to incorporate extra vegetables. Bell peppers or spinach can add color and nutrition without changing the essence of the dish. For a hearty meal, pair stroganoff with rice or creamy mashed potatoes. Both options soak up the savory sauce well. Presentation can make a big impact, too. Serve the stroganoff in wide, shallow bowls. This allows the creamy sauce to pool beautifully around the noodles. You can also drizzle a bit of olive oil on top for an extra touch. For those looking for a bit of flair, add fresh herbs or edible flowers as a garnish. These small details can make your meal feel special. You can find the full recipe [here](#). To store your beef stroganoff, cool it first. Place it in a clean, airtight container. This will help keep it fresh. You can refrigerate it for up to three days. If you want to keep it longer, freeze it. Make sure to use a freezer-safe container. It can last up to three months in the freezer. When you are ready to eat it again, reheat it gently. Place it in a pot over low heat. Stir it often to keep it creamy. You can add a splash of beef broth or water if needed. This helps maintain the sauce's smooth texture. Avoid boiling, as this can curdle the sour cream. In the fridge, your beef stroganoff stays fresh for about three days. After that, it may start to lose quality. Always check for signs of spoilage. Look for a sour smell or changes in color. If you see any mold, throw it away immediately. In the freezer, it can last up to three months. However, the sooner you eat it, the better the taste will be. Always label your containers with the date. This helps you keep track of how long it has been stored. For easy meal prep, you can prepare components in advance. Slice the beef and store it in the fridge. Dice the onions and mushrooms as well. This way, when it’s time to cook, you can assemble everything quickly. Batch cooking is another great tip. Make a larger portion and freeze what you don’t eat. Just follow the freezing guidelines mentioned earlier. This way, you’ll have a homemade meal ready for busy nights. Enjoy the ease of having stroganoff on hand! Classic Beef Stroganoff is a creamy dish made with sautéed beef, onions, and mushrooms. It has Russian roots and dates back to the 19th century. This dish became popular for its rich taste and quick preparation. Over time, many variations have emerged, but the core flavors remain the same. It is often served over egg noodles, which soak up the savory sauce. Yes, you can make Beef Stroganoff ahead of time. Cook the dish fully, then cool it down. Store it in an airtight container in the fridge for up to three days. When you are ready to eat, heat it gently on the stove. Add a little water or broth if the sauce seems too thick. This keeps the dish creamy and delicious. Beef Stroganoff pairs well with several side dishes. Here are a few ideas: - Egg noodles - Rice - Mashed potatoes - Steamed vegetables - A simple green salad Each of these options complements the savory flavors of the stroganoff. To adjust the recipe for a larger crowd, simply scale the ingredients. For example, if you want to serve eight, double the amount of beef, onions, and mushrooms. Keep the cooking times similar. You may need to cook in batches, especially when browning the beef. This way, you ensure even cooking and flavor. Yes, Beef Stroganoff is great for freezing. After cooking, let it cool completely. Place it in a freezer-safe container and store it for up to three months. When reheating, do so gently on the stove. Avoid boiling to keep the sauce smooth. You can also add a splash of broth to help with consistency. For the full recipe, check out the detailed instructions above. You now have all the details to make a delicious beef stroganoff. We discussed the main ingredients, from tender beef sirloin to creamy sour cream. I shared step-by-step instructions to help you cook each part perfectly. You learned tips for flavor and quality, plus variations for different diets. Remember to store leftovers properly for the best taste later. With this guide, you can create a comforting meal that friends and family will love. Happy cooking!

Classic Beef Stroganoff Flavorful and Comforting Dish

Are you ready to savor a warm, flavorful bowl of Classic Beef Stroganoff? This comforting dish combines tender beef, fresh

To make the best roasted garlic tomato soup, you need fresh, simple ingredients. This recipe focuses on ripe Roma tomatoes and a whole head of garlic. The flavors blend well to create a rich, comforting soup. You can find the full recipe details above. Here’s a list of the key ingredients for this soup: - 6 ripe Roma tomatoes, halved - 1 whole head of garlic, top sliced off - 1 medium onion, diced - 3 cups vegetable broth - 2 tablespoons olive oil, divided - 1 teaspoon dried oregano - 1 teaspoon dried basil - Salt and freshly cracked black pepper, to taste - Fresh basil leaves for garnish - A pinch of red pepper flakes (optional) If you can’t find some ingredients, here are good substitutes: - Use any ripe tomatoes if Roma is not available. - For garlic, try using garlic powder in a pinch. - Swap vegetable broth with chicken broth for a different taste. - Olive oil can be replaced with avocado oil or canola oil. - Fresh herbs can be used instead of dried ones; just use more of them. These options keep the dish flavorful while allowing for flexibility in your kitchen. Start by preheating your oven to 400°F (200°C). This step helps the tomatoes roast well. On a baking sheet, place the halved Roma tomatoes with the cut side facing up. Add a whole head of garlic next to the tomatoes. Drizzle 1 tablespoon of olive oil over them. Sprinkle with salt and black pepper for flavor. Roast in the oven for 25-30 minutes. You want the tomatoes to soften and caramelize. This process brings out their natural sweetness. After roasting, let them cool slightly before handling. In a large pot, heat the remaining 1 tablespoon of olive oil over medium heat. Add the diced onion and sauté it. Cook until the onion is soft and translucent, which takes about 5-7 minutes. Stir occasionally. This step is important to avoid browning the onions. You want them to be sweet and fragrant. Once the onions are ready, squeeze the roasted garlic from its skin into the pot. Add the roasted tomatoes, along with any juices from the baking sheet. Pour in 3 cups of vegetable broth. Then, add 1 teaspoon of dried oregano and 1 teaspoon of dried basil. If you like spice, add a pinch of red pepper flakes. Increase the heat slightly and bring the soup to a gentle simmer. Let it cook for 10-15 minutes. This time allows the flavors to meld nicely. Use an immersion blender to puree the soup until smooth. If you don’t have one, use a regular blender instead. After blending, taste the soup and adjust the seasoning, adding more salt or pepper if needed. Serve the soup hot, garnished with fresh basil leaves for a pop of color. For more details, check out the Full Recipe. To boost flavor in your roasted garlic tomato soup, try these tips: - Use fresh herbs: Fresh basil adds bright notes. Add it just before serving for the best taste. - Add a splash of balsamic vinegar: This gives a sweet and tangy edge. It enhances the soup's depth. - Incorporate roasted red peppers: Blend in roasted red peppers for a smoky twist. This adds richness and complexity. - Finish with cream or coconut milk: A swirl of cream or coconut milk adds smoothness. It makes the soup feel luxurious. Avoid these common pitfalls when making your soup: - Skipping the roasting step: Roasting tomatoes and garlic enhances their flavors. Don’t skip it for a bland soup. - Overcooking the garlic: Roasted garlic is sweet. If burnt, it turns bitter. Watch the roasting time closely. - Not seasoning enough: Taste as you go. Add salt and pepper to bring out all the flavors. - Blending too long: Blend until smooth, but don’t overdo it. This can make the soup too thin. Here’s what you need for the best results: - Baking sheet: For roasting tomatoes and garlic evenly. Use parchment paper for easy cleanup. - Large pot: A heavy-bottom pot holds heat well. This helps cook the onions and blend the soup. - Immersion blender: This tool makes blending easy. It avoids messy transfers to a standing blender. - Measuring spoons and cups: Accurate measurements ensure tasty results. They help balance flavors perfectly. For the full recipe, check out the details above. Happy cooking! {{image_4}} You can easily make this soup vegan and gluten-free. The original recipe is already plant-based. Just ensure your vegetable broth is free from gluten. This soup is rich in flavor and perfect for all diets. You can enjoy it without any animal products. If you like some heat, add a pinch of red pepper flakes to the soup. You can also use fresh jalapeños. Chop them finely and add them when you sauté the onion. This will give your soup a nice kick. You can control the spice level by adding more or less. Feel free to play with herbs and spices. Try adding fresh thyme or rosemary for a unique twist. A splash of balsamic vinegar can also brighten the flavors. If you want a smoky taste, add smoked paprika. These little changes can make a big difference in taste. To keep your roasted garlic tomato soup fresh, store it in an airtight container. Let the soup cool down before sealing it. This helps prevent condensation. You can keep it in the fridge for up to five days. If you want to enjoy it later, freezing is a great option. When you’re ready to enjoy your soup again, reheating is simple. Pour the soup into a pot and heat it over medium heat. Stir it often to avoid sticking. If the soup seems too thick, add a splash of vegetable broth or water to thin it out. You can also use a microwave. Just place the soup in a microwave-safe bowl. Heat in short bursts, stirring in between. Freezing your soup is easy. Pour it into freezer-safe bags or containers. Leave some space at the top, as the soup will expand. It can last for up to three months in the freezer. When you’re ready to eat it, thaw it in the fridge overnight. For a quicker method, place the soup in warm water. After thawing, reheat it on the stove or in the microwave. Enjoy it just like the first time! Yes, you can use canned tomatoes. They work well in this soup. Choose whole or diced canned tomatoes for the best flavor. Use the same amount as fresh tomatoes in the recipe. Canned tomatoes are often sweeter and easier to blend. Just remember to drain excess juice to keep the soup thick. You can store this soup in the fridge for up to five days. Make sure to let it cool down before putting it in a container. Use an airtight container to keep it fresh. For longer storage, freeze the soup for up to three months. Just thaw it overnight in the fridge before reheating. This soup pairs nicely with many sides. Serve it with warm, crusty garlic bread for a cozy meal. A fresh salad adds a nice crunch and balances the soup’s richness. You can also enjoy it with a grilled cheese sandwich for comfort food bliss. For a twist, try it with a pesto swirl on top. You’ve seen how to make a tasty Roasted Garlic Tomato Soup from scratch. We covered ingredients, step-by-step cooking, and tips to boost flavor. You now know how to avoid common mistakes and keep leftovers fresh. Remember, this soup is flexible with various options, like vegan or spicy. Get creative with herbs and spices. Enjoy your cooking journey, and don’t be afraid to try new things in the kitchen!

Roasted Garlic Tomato Soup Flavorful and Simple Recipe

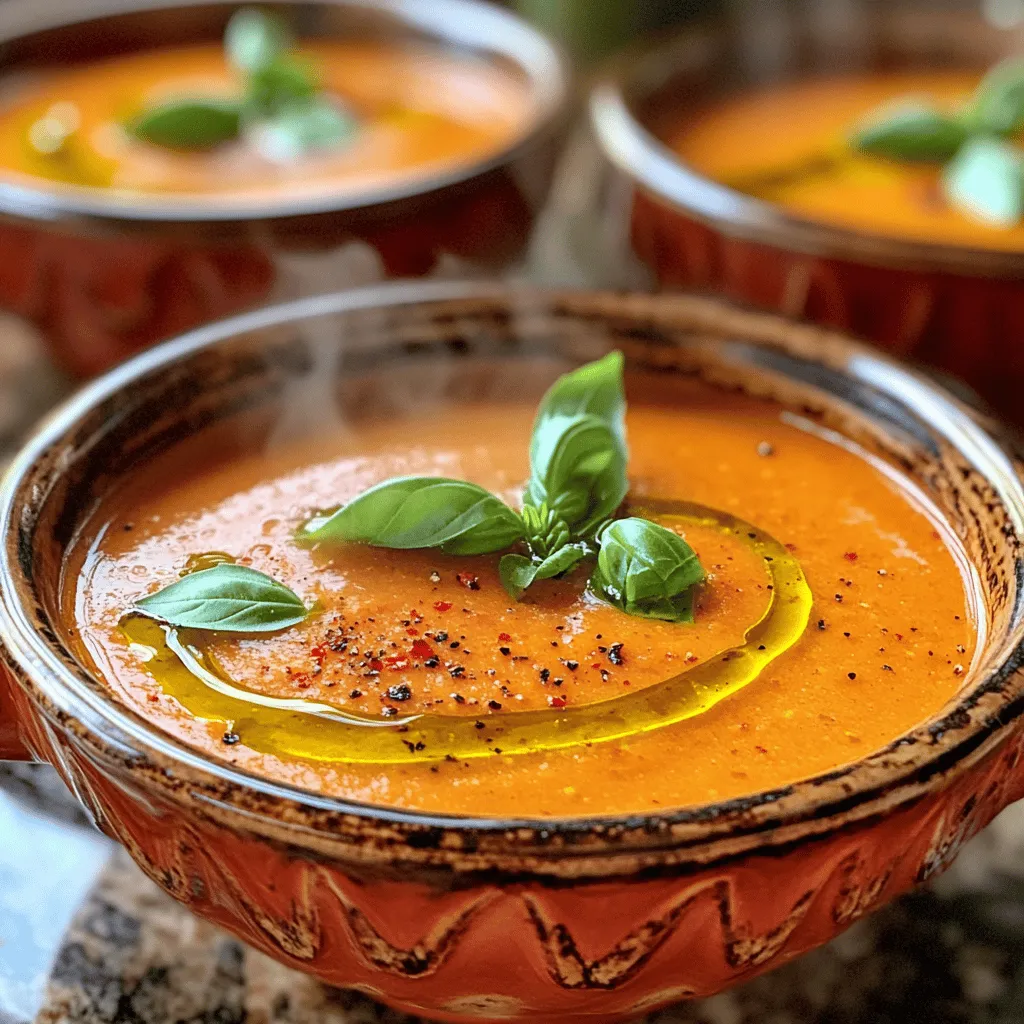
Are you ready to elevate your soup game? This Roasted Garlic Tomato Soup is packed with rich flavor and is

- 2 ripe bananas, frozen and sliced - 2 tablespoons creamy peanut butter - 1 cup almond milk (or your choice of milk) - 1 tablespoon honey (optional, adjust based on desired sweetness) - 1 teaspoon pure vanilla extract - 1 tablespoon chia seeds (for added nutrition and texture) - Ice cubes (optional, for a colder smoothie) The Peanut Butter Banana Smoothie is all about simple, wholesome ingredients. Each one plays a key role. The ripe bananas give natural sweetness and creaminess. Frozen bananas work best, as they chill the drink without needing extra ice. Creamy peanut butter adds a rich, nutty flavor. I prefer the smooth texture, but chunky can work too if you like bits of nuts. Almond milk is my go-to for a lighter taste, but feel free to use any milk you enjoy. Honey is optional. If you like your smoothies sweeter, add it! Vanilla extract gives a warm, inviting flavor. Chia seeds are tiny powerhouses. They give nutrition and a slight crunch. Ice cubes are great if you want a colder, thicker drink. - Calories per serving: About 300 - Breakdown of macronutrients: - Carbohydrates: 40g - Fats: 10g - Proteins: 8g This smoothie is not just tasty; it's also healthy. You get a good mix of carbs, fats, and proteins. Bananas and chia seeds bring fiber, which helps digestion. You also get vitamins like potassium from bananas and omega-3 fatty acids from chia seeds. Enjoy this delicious drink as a snack or breakfast. It fills you up and keeps you energized. For the full recipe, check out Creamy Banana Peanut Butter Bliss. - Begin by placing the frozen banana slices into your blender. - Add the creamy peanut butter. Using frozen bananas makes the smoothie thick and creamy. The peanut butter adds a rich flavor that pairs perfectly with the banana. - Pour in the almond milk and include optional honey and vanilla extract. - Sprinkle in chia seeds. Almond milk gives the smoothie a nice texture. Honey adds sweetness if you like it. Vanilla extract enhances the overall flavor. Chia seeds add nutrition and a fun crunch. - Secure the lid and blend until smooth. - Optionally add ice cubes and re-blend. - Taste and adjust sweetness if necessary. - Pour into tall glasses for serving. Make sure the lid is on tight before blending. This keeps everything inside. If you want it colder, add ice and blend again. Taste your smoothie to see if you need more honey. Once it’s perfect, pour it into tall glasses. You can find the full recipe above to guide you through this fun process! To make your Peanut Butter Banana Smoothie even tastier, consider these add-ins. You can toss in a handful of fresh spinach. It blends well and adds nutrients without changing the taste. Another option is protein powder. It gives you a boost and keeps you full longer. If you want to switch up the sweetness, try maple syrup or agave nectar. These natural sweeteners can add a unique flavor twist. The right liquid makes a huge difference in your smoothie’s creaminess. If you want it thicker, reduce the almond milk. For a thinner mix, add more milk. You can also blend in yogurt for extra creaminess. If you prefer a thicker drink, try adding frozen fruit instead of ice. This keeps your smoothie chilled and creamy without diluting the flavor. To make your smoothie look great, garnish it well. A sprinkle of chia seeds on top adds texture and a pop of color. You can also add a slice of banana on the rim of the glass. This simple touch makes it more inviting. Use tall glasses to showcase the layers and colors in your smoothie. It makes every sip feel special. For an extra touch, consider using clear glassware to show off your delicious creation. {{image_4}} You can make fun twists on the peanut butter banana smoothie. Try a chocolate peanut butter banana smoothie. Just add 1-2 tablespoons of cocoa powder or chocolate syrup to your mix. This adds rich chocolate flavor and makes it even more indulgent. Another great option is a green peanut butter banana smoothie with spinach. Spinach blends well and adds nutrients without changing the taste. Just toss in a handful of fresh spinach before blending. You still get the creamy banana and peanut butter goodness, plus a boost of vitamins. Switching up your nut butter is an easy way to change the taste. You can use almond or cashew butter instead of peanut butter. This will give your smoothie a different flavor profile while keeping it creamy and delicious. If you need a dairy-free drink, try coconut or oat milk. Both options add a unique flavor and keep the smoothie smooth. Coconut milk brings a tropical twist, while oat milk is mild and creamy. You can also add seasonal fruits to your smoothie. In summer, mix in some fresh berries or mango for a fruity burst. Just chop them up and blend them in with the other ingredients. This will make your smoothie even more refreshing. During the holidays, spice things up with cinnamon or nutmeg. Just a pinch of these spices can add warmth and depth. It’s a lovely way to celebrate the season while enjoying your smoothie. For the full recipe, check out Creamy Banana Peanut Butter Bliss. Store any leftover smoothie in an airtight container. Place it in the fridge right away. It will keep for about one day. The smoothie may separate after sitting. Just give it a good shake or stir before drinking. For the best taste, enjoy it within 24 hours. You can freeze the smoothie if you want to save it for later. Pour it into freezer-safe containers, leaving some space at the top. The smoothie will expand as it freezes. You can also use ice cube trays for smaller portions. To enjoy, thaw it in the fridge overnight. Blend it again for a smooth texture. In the fridge, your smoothie lasts about one day. In the freezer, it can stay fresh for up to three months. Look for changes in color or smell to check for spoilage. If it smells off or looks strange, it’s best to toss it. Enjoy your Peanut Butter Banana Smoothie fresh to maximize its flavor! You can add spinach for more vitamins. It blends well and won’t change the taste. Another great option is to use Greek yogurt. It adds creaminess and protein. You can also swap honey for maple syrup or skip it entirely for less sugar. Try adding seeds like flax or pumpkin for extra nutrition. These small changes keep the flavor while boosting health. Yes, you can! If you have nut allergies, use sun butter instead of peanut butter. For dairy-free needs, any nut milk works great, like soy or coconut. If you want it sweeter, use agave syrup instead of honey. You can even use fresh bananas instead of frozen ones, but the smoothie may be less creamy. Be sure to adjust the milk amount for your consistency. Absolutely! Kids love the sweet taste and creamy texture. You can make it more fun by adding toppings like granola or chocolate chips. For little ones, use less peanut butter to start. You can also blend in a small amount of oatmeal for extra fiber. This way, kids get a tasty drink and some healthy fuel for the day. To make this smoothie vegan, just replace honey with maple syrup or skip sweeteners. Make sure to use plant-based milk, like almond or oat milk. The peanut butter is already vegan, so it fits perfectly. For added creaminess, try using silken tofu instead of yogurt. This keeps the smooth texture while making it fully vegan. You can add protein powder, like whey or plant-based options. This helps make the smoothie more filling. Greek yogurt is another great choice if you’re not vegan. You can also toss in nuts or seeds like chia or hemp. They add protein and healthy fats without changing the taste much. For kids, try adding a scoop of nut butter for extra protein. This article provides a simple guide to making a tasty Peanut Butter Banana Smoothie. We looked at essential ingredients, how to blend them, and added tips for perfecting the taste. You can explore different flavors and storage methods too. Remember, you can adjust ingredients to suit your taste or dietary needs. With a few swaps, your smoothie can be even healthier. Enjoy making this delicious drink, knowing it can fit any season or preference. Keep experimenting and have fun in the kitchen!

Peanut Butter Banana Smoothie Packed with Flavor

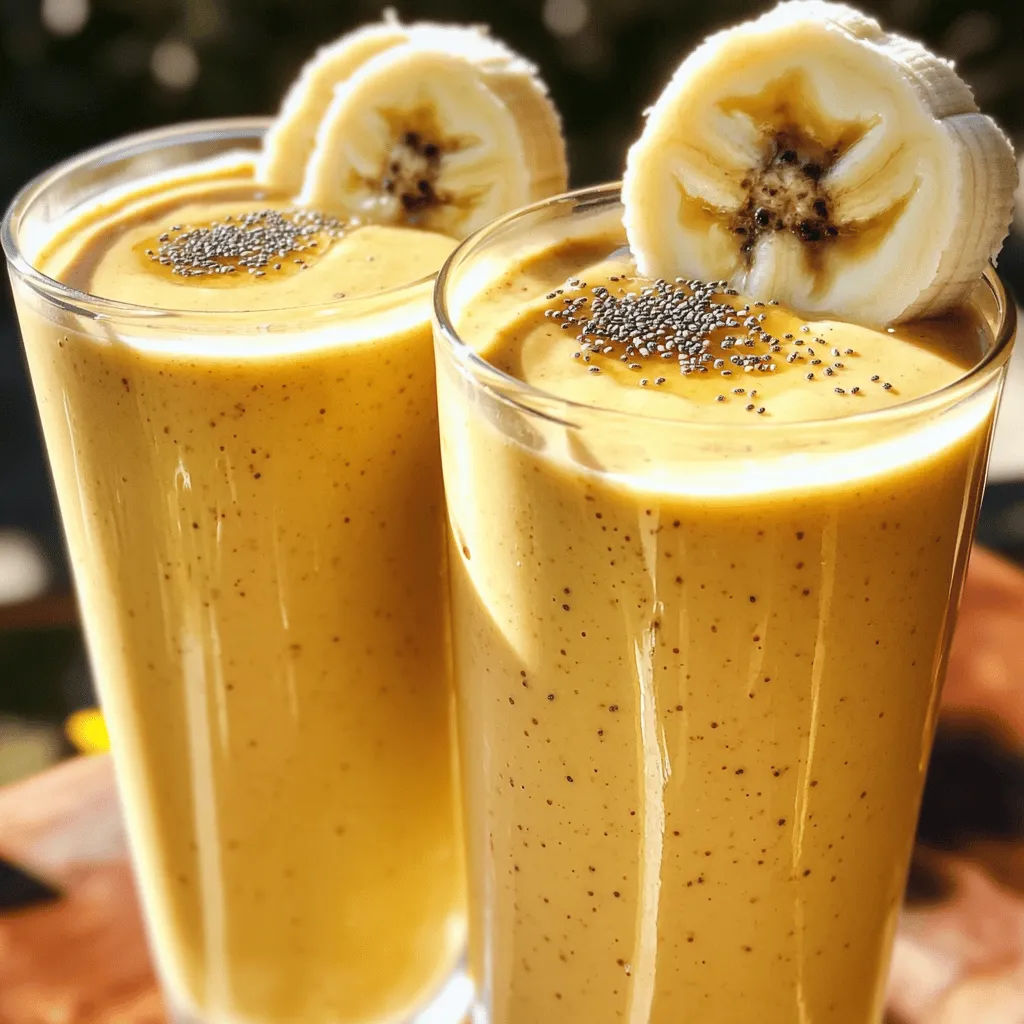
Are you ready to blend up something delicious and nutritious? This Peanut Butter Banana Smoothie is packed with flavor and

- 1 cup finely shredded cabbage - 1 cup finely shredded carrots - 1 bell pepper, thinly sliced - 1 cup fresh bean sprouts - 2 green onions, finely chopped - 2 cloves garlic, minced - 1 tablespoon fresh ginger, grated - 1 teaspoon soy sauce (or tamari) - 1 tablespoon toasted sesame oil - 12 rice paper wrappers - Cooking spray or olive oil for brushing - Salt and black pepper to taste To create these baked veggie spring rolls, gather all these fresh ingredients. I love using vibrant colors in my veggies. They not only look good but also taste amazing! The combination of cabbage, carrots, and bell pepper gives a great crunch. Fresh bean sprouts add a nice texture too. For flavor, garlic and ginger bring a punch. Soy sauce adds depth, while sesame oil gives a nutty kick. Don't forget the rice paper wrappers! They are key to making our spring rolls. I recommend brushing the rolls with olive oil or cooking spray for that lovely crispy finish. You can find the full recipe in the article above. Enjoy your cooking! - Preheat oven to 400°F (200°C). - Line a baking sheet with parchment paper. - Sauté garlic and ginger until fragrant. - Stir-fry cabbage, carrots, bell pepper, and bean sprouts. To cook the filling, I start by heating sesame oil in a large skillet. I add minced garlic and grated ginger. I sauté them for about one minute. This step adds a nice aroma to the dish. Next, I introduce the shredded cabbage, carrots, bell pepper, and bean sprouts. I stir-fry everything for 3-4 minutes. This keeps the veggies crunchy yet tender. After cooking, I remove the skillet from heat. I stir in the chopped green onions and a splash of soy sauce. I season with salt and black pepper to taste. Make sure to mix it well. - Dip rice paper in warm water and soften. - Spoon filling onto the wrapper and roll. For the spring rolls, I take a shallow dish and fill it with warm water. I dip a rice paper wrapper in the water for about 10 seconds. Once it’s soft, I lay it on a clean surface. I take about 2 tablespoons of the veggie filling and place it on the lower third of the wrapper. I then fold in the sides and roll from the bottom up tightly. I repeat this for all the wrappers and filling. - Arrange rolls on the baking sheet and brush with oil. - Bake for 15-20 minutes, flipping halfway. I place the rolled spring rolls seam-side down on the baking sheet. I lightly spray or brush them with cooking spray or olive oil. This step helps them turn golden brown. I bake them in the preheated oven for 15-20 minutes. I flip them halfway through for even cooking. When they are golden and crispy, they are ready to enjoy. For the full recipe, check below. To ensure even cooking, bake spring rolls on a lined sheet. Flip them halfway through baking. This method lets hot air circulate around each roll. Make sure they are spaced out. Crowding the pan can lead to soggy spots. For a crispy texture, lightly brush the rolls with oil. You can use cooking spray or olive oil. This step helps them brown nicely. Do not skip this, or they might not be as crunchy. Also, keep an eye on the oven temperature. Too high can burn them, while too low can make them soft. Dipping sauces make the rolls shine. Try spicy sriracha for a kick. Sweet chili sauce is a great choice for those who prefer mild spice. You can also mix soy sauce with lime juice for a fresh taste. To present your spring rolls, use a colorful platter. Add fresh cilantro and lime wedges for flair. Arrange the rolls neatly to catch the eye. This presentation makes them fun to eat. You can swap veggies based on your taste. Try zucchini or mushrooms for fun flavors. Bell peppers can be any color for a vibrant look. Even add cooked quinoa for extra texture. If you need gluten-free options, use rice paper wrappers. They are easy to find at stores. You can also use lettuce leaves for a fresh twist. This way, everyone can enjoy your spring rolls without worry. {{image_4}} You can change the filling for your baked veggie spring rolls to suit your taste. Adding proteins like tofu or shrimp gives a nice boost. Tofu is a great choice for a vegan option. It soaks up flavors well and adds a nice texture. You can also use cooked chicken or beef if you prefer meat. For a vegan twist, try adding chickpeas or lentils. They pack protein and fiber, making your rolls even healthier. You can mix in mushrooms or zucchini for extra flavor. Mix and match your favorite veggies to create your perfect filling. Adding herbs and spices can take your spring rolls to the next level. Fresh herbs like cilantro or mint give a bright taste. You can also add basil or parsley for a unique flavor. Spices like paprika or chili flakes add warmth and depth. Experimenting with different sauces can also enhance the taste. A sweet chili sauce pairs well with the crispy rolls. You can try peanut sauce for a creamy touch or soy sauce for a salty kick. Don’t be afraid to mix sauces for a fun twist! Wrapping your spring rolls can be fun and creative. Making mini rolls is a great way to serve appetizers. Just use smaller pieces of rice paper and less filling. They are perfect for parties or snacks. You can also try different kinds of wrappers. Use whole wheat or gluten-free wrappers for a healthier option. You can even use lettuce leaves for a low-carb version. It’s all about what you like and what you want to try! To keep your baked veggie spring rolls fresh, store them in the fridge. Place them in an airtight container. They will stay good for about three days. If you want to save them for longer, you can freeze them. To freeze, first, let the rolls cool completely. Then, wrap each roll in plastic wrap. Place them in a freezer-safe bag. You can freeze them for up to three months. This way, you can enjoy your spring rolls later. To reheat baked spring rolls, the oven is your best friend. Preheat the oven to 350°F (175°C). Place the rolls on a baking sheet. Bake them for about 10 minutes. This method helps restore their crispiness. If you need a quick option, you can use the microwave. Place the rolls on a microwave-safe plate. Heat them for about 30 seconds to one minute. Keep an eye on them to prevent sogginess. For best results, use the oven method when possible. For the full recipe, check out the details above. Yes, you can prepare baked veggie spring rolls ahead of time. First, make the filling and let it cool. Then, roll the spring rolls and place them on a baking sheet. Cover them well with plastic wrap, and store them in the fridge. Bake them when you are ready to eat. This way, you save time and enjoy a fresh snack! Many sauces pair well with baked veggie spring rolls. Here are some easy ideas: - Sweet chili sauce: A classic choice that adds sweetness. - Peanut sauce: Creamy and nutty, this sauce is a favorite. - Soy sauce: Simple and savory, it enhances the flavor of the rolls. - Sriracha: For those who like heat, this adds a spicy kick. Absolutely! You can mix and match your veggies. Here are some suggestions: - Mushrooms: They add great flavor and texture. - Zucchini: Thinly sliced, it brings a fresh taste. - Spinach: Packed with nutrients, it’s a great green addition. - Broccoli: Finely chopped, it adds crunch and color. Baked spring rolls are healthier than fried ones. They have less fat and fewer calories. Here are some benefits: - Low in calories: Baking reduces added oils. - High in fiber: The veggies provide fiber, aiding digestion. - Rich in vitamins: Fresh vegetables offer many essential nutrients. - Lower in sodium: You control the salt added to the filling. Baked veggie spring rolls can last up to three days in the fridge. To keep them fresh: - Store them in an airtight container. - Place a paper towel inside to absorb moisture. Reheat them in the oven or air fryer for the best results. Enjoy them crispy and warm! Baked veggie spring rolls are a fun and healthy snack. You now know the main ingredients, steps to prepare, and tips for perfecting your rolls. From serving ideas to storing leftovers, this recipe is versatile and easy. Try different fillings and sauces to suit your taste. Enjoy creating a delicious dish that your friends and family will love! These spring rolls can be a hit at your next meal. Get cooking and have fun with your food!

Baked Veggie Spring Rolls Crispy and Healthy Treat

Do you crave a snack that’s both crispy and healthy? Baked veggie spring rolls are your answer! Packed with colorful

To make Ginger Sesame Noodles, gather these fresh ingredients: - 8 oz. whole wheat noodles - 2 tablespoons sesame oil - 1 tablespoon fresh ginger, finely grated - 2 cloves garlic, minced - 1/4 cup low-sodium soy sauce - 2 tablespoons rice vinegar - 1 tablespoon honey or maple syrup (to taste) - 1 cup assorted bell peppers, thinly sliced (red, yellow, and green for a colorful mix) - 1 cup shredded carrots - 1/2 cup green onions, finely chopped - 1 tablespoon sesame seeds - Salt and pepper to taste Using fresh ingredients makes a big difference in flavor. Fresh ginger gives a warm, spicy kick. Fresh veggies like bell peppers and carrots add color and crunch. The taste of fresh ingredients pops in every bite. They also hold more nutrients, which boost the dish's health. When you pick the best ingredients, your Ginger Sesame Noodles will shine. If you can’t find an ingredient, don’t worry! Here are some swaps: - Noodles: Use rice noodles or gluten-free pasta. - Sesame Oil: Swap with olive oil for a milder taste. - Honey: Maple syrup or agave nectar works well too. - Veggies: Try broccoli or snap peas instead of bell peppers. - Soy Sauce: Use tamari for a gluten-free option. Feel free to get creative! Each swap can give the dish a new twist while keeping it delicious. First, fill a large pot with water and boil it. Once the water is bubbling, add 8 oz. of whole wheat noodles. Cook them as the package says until they are al dente. This usually takes about 8 to 10 minutes. After cooking, drain the noodles and rinse them with cold water. This step stops the cooking and keeps them from getting mushy. Set the noodles aside in a large mixing bowl. Now, let's make the ginger sauce. Grab a medium mixing bowl. Here, combine 2 tablespoons of sesame oil, 1 tablespoon of finely grated fresh ginger, and 2 minced cloves of garlic. Next, add 1/4 cup of low-sodium soy sauce, 2 tablespoons of rice vinegar, and 1 tablespoon of honey or maple syrup. Whisk everything together until it is smooth. Set this tasty sauce aside for later. In a large skillet or wok, heat a splash of sesame oil over medium heat. Add 1 cup of assorted thinly sliced bell peppers and 1 cup of shredded carrots. Sauté these veggies for about 3 to 4 minutes. Stir them often so they cook evenly. You want them to be tender but still a bit crisp. This keeps the dish fresh and vibrant. Now that the veggies are ready, it’s time to mix everything. Add the drained noodles to the skillet with the sautéed vegetables. Pour the ginger sauce over the top. Toss the mixture carefully to coat everything well. Stir for about 2 to 3 minutes until the noodles warm up and soak in the flavor. Once combined, take the skillet off the heat. Toss in 1/2 cup of finely chopped green onions. Season with salt and pepper to your taste. For a delightful crunch, sprinkle 1 tablespoon of sesame seeds on top. Serve the Ginger Sesame Noodles in individual bowls. For a fun touch, add a lime wedge for guests to squeeze over their dish. This adds a zesty kick! Enjoy your meal! To cook noodles just right, start with plenty of water. Use a large pot and bring it to a boil. Add salt to the water for flavor. Follow the package instructions for cooking time. Test the noodles a minute before the time ends. They should be firm but not hard. After cooking, drain them and rinse with cold water. This stops the cooking and keeps them from sticking. When sautéing, always heat your pan before adding oil. Use medium heat for best results. Add a splash of sesame oil first; it adds great flavor. Then, add your vegetables. Stir them often to cook evenly. Keep an eye on the time; you want them tender yet crisp. If they start to brown too fast, lower the heat. This keeps their bright color and crunch. You can make Ginger Sesame Noodles ahead of time. Store them in an airtight container in the fridge. They last up to three days. When reheating, add a splash of water or extra sauce. This keeps the noodles moist. Heat them in a skillet over medium heat, stirring gently. This method warms them without making them mushy. You can also use a microwave, but be careful not to overcook. For the full recipe, check the section above. {{image_4}} If you need gluten-free noodles, try rice noodles or quinoa noodles. These options work well and maintain great flavor. Look for gluten-free soy sauce too. It’s easy to find, and it keeps the dish tasty. To make Ginger Sesame Noodles heartier, add protein. Cooked chicken breast works nicely. Just slice it thin and toss it in. For a plant-based option, use firm tofu. Press it, cube it, and sauté until golden. Shrimp is another great choice. Cook them quickly until they turn pink. Each protein adds its unique twist to the dish. Feel free to mix in seasonal veggies. Broccoli and snap peas are great in spring. Try zucchini or asparagus in summer. In fall, add roasted squash or Brussels sprouts. This keeps the dish fresh and fun. Use whatever you enjoy or have on hand for a personal touch. For the full recipe, check out the complete instructions above. To store leftover Ginger Sesame Noodles, let them cool first. Once cooled, place them in an airtight container. This keeps the noodles fresh. You can store them in the fridge for up to three days. Make sure to label the container with the date. This will help you keep track of their freshness. You can freeze Ginger Sesame Noodles for later use. First, cool them completely. Then, portion the noodles into freezer bags. Press out as much air as you can before sealing the bags. Label the bags with the date. They can last in the freezer for about three months. When you’re ready to eat, thaw them in the fridge overnight. Ginger Sesame Noodles stay good in the fridge for up to three days. To reheat, simply place them in a pan over medium heat. Add a splash of water or extra sesame oil to prevent sticking. Stir often until heated through. You can also microwave them in a bowl. Cover the bowl with a damp paper towel to keep them moist while reheating. Enjoy your tasty meal again! Yes, you can use different noodles. Try rice noodles, egg noodles, or udon. Each type gives a unique taste and texture. I prefer whole wheat noodles for their health benefits and nutty flavor. Ginger sesame noodles have roots in Asian cuisine. They blend flavors from China and Japan. These noodles highlight ginger and sesame, two common ingredients in many Asian dishes. Yes, they can be healthy! Whole wheat noodles add fiber. Fresh veggies like bell peppers and carrots boost vitamins. Use low-sodium soy sauce to keep sodium in check. Absolutely! To make it vegan, just swap honey for maple syrup. The rest of the ingredients are already plant-based. This way, everyone can enjoy the dish. You can serve Ginger Sesame Noodles with various sides. Try steamed broccoli, sautéed greens, or a fresh salad. They also pair well with grilled chicken or tofu for extra protein. For the full recipe, check out the previous section. In this blog post, we explored the key ingredients for making Ginger Sesame Noodles. Fresh ingredients enhance flavor and quality. We also discussed cooking techniques and offered creative variations to suit your taste. Remember, you can prepare these noodles ahead of time for easy meals. With the right storage, leftovers can still taste great. Try using different proteins or veggies to make each dish unique. Enjoy your cooking, and let the flavors shine!

Ginger Sesame Noodles Flavorful and Simple Recipe

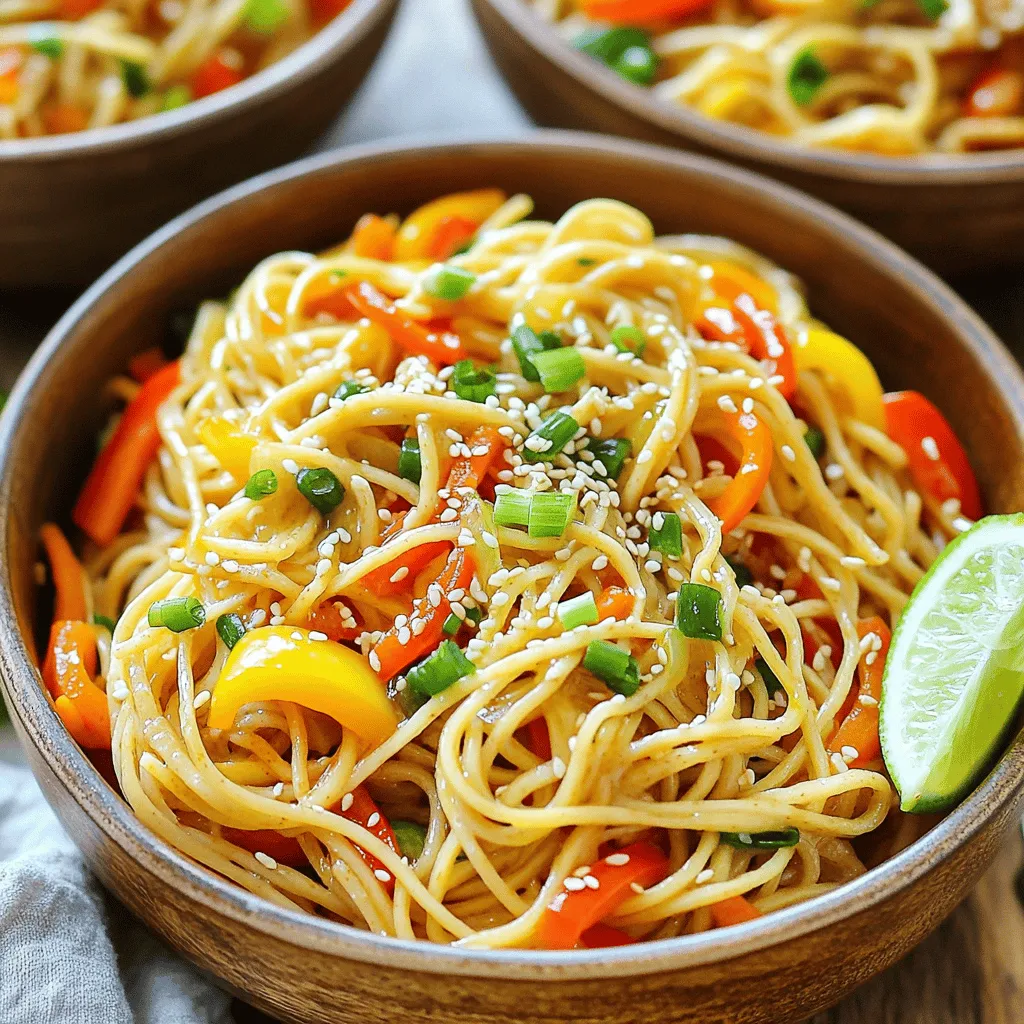
Looking for a quick, tasty meal? Try my Ginger Sesame Noodles! This simple recipe bursts with flavor and is perfect

Older posts
Newer posts
← Previous Page1 … Page43 Page44 Page45 … Page69 Next →

dsad

© 2025 recipesstation • Built with GeneratePress

Our Policies

  • Copyright Policy
  • Cookie Policy
  • GDPR Policy
  • Privacy Policy
  • Disclaimer
  • Terms Of Use

More Information

  • Home
  • About
  • Contact
  • Appetizers
  • Dessert
  • Dinner
  • Drinks
©2025, recipesstation About Back To Top