Skip to content
DisclaimerTerms Of UseGDPR PolicyCookie Policy

recipesstation

  • Home
  • Drinks
  • Appetizers
  • Dinner
  • Dessert
  • About
  • Contact
  • Privacy Policy
DisclaimerTerms Of UseGDPR PolicyCookie Policy

Emily

- 8 cups apple juice or cider - 1 cup water - 3 whole cinnamon sticks - 5 whole cloves - 3 star anise pods - 1 orange, thinly sliced - 1 tablespoon freshly grated ginger - 1/4 cup packed brown sugar (or to taste) - A pinch of ground nutmeg - Instant Pot - Fine-mesh sieve - Large pitcher or bowl To make spiced apple cider, you need a few basic items. First, apple juice or cider forms the base. This gives the drink its sweet and fruity flavor. Adding water helps balance the taste. Whole spices like cinnamon sticks, cloves, and star anise add warmth and depth. For an extra kick, fresh ginger can spice things up. Brown sugar sweetens the cider and enhances the flavors. If you want a hint of warmth, a pinch of nutmeg works well. You will need an Instant Pot for quick cooking. A fine-mesh sieve helps strain out the spices. Lastly, have a large pitcher or bowl ready to hold your delicious drink. Collect these ingredients and tools to create your cozy spiced apple cider. For the full recipe, don’t forget to check the complete instructions! First, pour 8 cups of apple juice or cider into your Instant Pot. Then, add 1 cup of water. This mix creates a rich base for your drink. Next, add the spices. Toss in 3 whole cinnamon sticks, 5 whole cloves, and 3 star anise pods. These spices give the cider its warm flavor. Then, add 1 thinly sliced orange, 1 tablespoon of freshly grated ginger, and 1/4 cup of packed brown sugar. If you like, add a pinch of ground nutmeg for extra warmth. Stir well to blend everything together and dissolve the sugar. Now, seal the Instant Pot. Make sure the steam release valve is set to the sealing position. Select the Manual or Pressure Cook setting. Set the timer for 10 minutes. Once cooking is done, do a natural release for about 10 minutes. This step allows flavors to blend well. After that, use a quick release to vent any steam left. Carefully remove the lid. Stir the cider to mix the spices again. Next, strain the mixture through a fine-mesh sieve into a large pitcher or bowl. This removes the solid spices. Now, taste the cider. You can adjust the sweetness by adding more brown sugar if you want. Serve the spiced apple cider warm. Garnish with extra cinnamon sticks or fresh orange slices for a nice touch. Enjoy your cozy drink! For the complete recipe, check out the Full Recipe. To make the best spiced apple cider, I have a couple of key tips. First, allow your cider to naturally release pressure after cooking. This process helps the flavors meld together, giving you a richer taste. It may take an extra 10 minutes, but it’s worth it. Next, be mindful of your sweetness levels. Start with 1/4 cup of brown sugar, but taste as you go. Every apple juice or cider has a different sweetness. Adjust it to fit your taste. You might find you want more or less sugar. When it comes to serving, presentation matters. Use a clear pitcher to show off the beautiful colors of your cider. Add a few cinnamon sticks and orange slices as garnish. It adds a festive touch. Pair your cider with snacks for a cozy gathering. Cheese and crackers work well. You can also serve it with warm pastries or spiced nuts. The flavors complement each other nicely. There are a few common mistakes to watch out for. First, avoid overcooking the spices. Too much time can make them taste bitter. Stick to the 10-minute cooking time. Second, don't forget to strain your cider properly. If you skip this step, you’ll end up with bits of spice floating around. Use a fine-mesh sieve to catch all the solid pieces. This gives you a smooth, enjoyable drink. {{image_4}} You can add fun flavors to your spiced apple cider. Try different fruits like pears or cranberries for a twist. You can also use spices like cardamom or allspice to enhance the taste. For sweetness, experiment with honey or maple syrup. Each option gives a unique touch to your drink. To make a spiked apple cider, add your favorite alcohol. Bourbon or rum pairs well with the warm spices. Simply pour a shot into your cup before serving. This creates a cozy drink for chilly nights. For a lighter option, try adding apple brandy for a fruity kick. You can change your spiced apple cider for different seasons. For Halloween, add black food coloring for a spooky look. Garnish with gummy worms for fun. In winter, mix in peppermint extract for a festive taste. In the summer, chill the cider and serve it over ice with fresh mint. Adjust the spices to suit the warmer months. Store your spiced apple cider in an airtight container. Glass jars work well. Place it in the refrigerator right after it cools. This keeps it fresh and tasty. Your cider will last about five days in the fridge. If you want it longer, consider freezing. To reheat, you can use the Instant Pot or the stove. If you use the Instant Pot, set it to the sauté mode. Heat it for about five minutes. If you use the stove, warm it in a pot over medium heat. Stir it often to keep flavors even. Make sure not to boil it, as that can change the taste. Yes, you can freeze spiced apple cider! Pour it into freezer-safe containers, leaving some space at the top. This allows for expansion. When you want to enjoy it, move it to the fridge to thaw overnight. You can also thaw it in a pot over low heat. Stir it well before serving to mix the flavors. You can make spiced apple cider on the stove. Start by combining apple juice, water, and spices in a large pot. Heat the mixture over medium heat. Bring it to a simmer, then reduce the heat. Let it simmer for about 30 minutes. This lets the flavors blend well. Stir often to avoid sticking. When done, strain out the spices, and enjoy your warm cider! To make spiced apple cider sugar-free, skip the brown sugar. Use a sugar substitute instead. Options include stevia or monk fruit. Add these sweeteners to taste. You can also use naturally sweet apples or apple juice. This keeps the flavor but cuts out the sugar. If you don’t have apple juice or cider, use pear juice. It has a similar flavor and sweetness. You may also try white grape juice for a different taste. Adjust the spices to balance the new flavor. It’s fun to experiment! Yes, you can use dried spices! If you choose dried spices, use less. Dried spices are stronger than whole ones. For example, use 1 teaspoon of ground cinnamon instead of a stick. Add the dried spices to the pot at the start. Check out the Full Recipe for more tips on using spices. This blog post guides you on making delicious spiced apple cider. You learned about the core ingredients, including apple juice and spices. The Instant Pot simplifies the cooking process. I shared tips for enhancing flavor and common mistakes to avoid. Enjoy experimenting with variations and serving your cider with friends. Use this recipe for festive gatherings or cozy nights in. Keep your cider fresh and tasty with proper storage. You now have everything you need for a flavorful experience. Happy brewing!

Spiced Apple Cider Instant Pot Comfort Drink Recipe

Warm up your fall nights with my easy Spiced Apple Cider Instant Pot recipe! It’s a cozy drink bursting with

For these nut-free granola bars, you will need: - 2 cups rolled oats - 1/2 cup sunflower seeds, shelled - 1/2 cup pumpkin seeds, shelled - 1/2 cup unsweetened shredded coconut - 1/2 cup honey or pure maple syrup - 1/4 cup coconut oil, melted - 1 teaspoon pure vanilla extract - 1/2 teaspoon ground cinnamon - 1/4 teaspoon sea salt - 1/2 cup dried fruits (like cranberries, apricots, or raisins) - Optional: 1/2 cup semi-sweet chocolate chips or carob chips - Rolled oats provide fiber for digestion. They help keep you full. - Sunflower seeds are rich in vitamin E and healthy fats. They support skin health. - Pumpkin seeds are good sources of magnesium and zinc. They boost your immune system. - Shredded coconut adds healthy fats and fiber. It offers a nice texture. - Honey or maple syrup serve as natural sweeteners. They provide energy without refined sugar. - Coconut oil is a healthy fat that can boost energy. It may help with weight control. - Vanilla extract adds flavor without adding calories. It enhances the overall taste. - Ground cinnamon has antioxidants. It may help regulate blood sugar levels. - Sea salt enhances flavor and balances taste. A little goes a long way. - Dried fruits add natural sweetness and vitamins. They contribute to overall health. - Chocolate or carob chips are optional, but they add a fun twist. They can make the bars more appealing. If you have allergies, here are some easy swaps: - Oats can be replaced with puffed rice for a lighter texture. - Sunflower seeds can be swapped for flaxseeds or chia seeds. - Pumpkin seeds can be substituted with sesame seeds. - Coconut can be left out or replaced with more oats for a different flavor. - Honey can be switched with agave nectar for a vegan option. - Coconut oil can be replaced with olive oil for a different taste. - Dried fruits can be substituted with fresh fruits as a topping. - Chocolate chips can be swapped with dried fruit or left out altogether. These swaps make it easy to customize the recipe. You can enjoy your nut-free granola bars without worry! Start by gathering all your ingredients. This includes rolled oats, sunflower seeds, pumpkin seeds, shredded coconut, honey or maple syrup, coconut oil, vanilla extract, ground cinnamon, sea salt, dried fruits, and optional chocolate chips. Preheat your oven to 350°F (175°C). Line an 8x8 inch baking dish with parchment paper, allowing some paper to hang over the edges. This will help you lift the bars out later. 1. Mix Dry Ingredients: In a large bowl, mix the rolled oats, sunflower seeds, pumpkin seeds, shredded coconut, ground cinnamon, and sea salt. Stir until these dry ingredients are well combined. 2. Whisk Wet Ingredients: In a separate bowl, whisk together the melted coconut oil, honey or maple syrup, and vanilla extract. Make sure this mixture is smooth. 3. Combine Mixtures: Pour the wet mixture into the dry ingredients. Use a spatula to mix everything together. Ensure all ingredients are coated well. 4. Incorporate Fruits and Optional Chips: Gently fold in the dried fruits. If you want, add in the chocolate chips or carob chips. Mix them evenly throughout the mixture. 5. Prepare for Baking: Transfer the mixture into the lined baking dish. Press down firmly with your fingers or a spatula, creating an even layer. 6. Bake: Place the baking dish in the oven and bake for 20-25 minutes. Look for golden brown edges. Keep an eye on them so they don’t over-bake. 7. Cooling Phase: After baking, remove the dish from the oven. Let it cool in the pan for about 15 minutes. Then, use the parchment paper to lift the granola out onto a cutting board. Let the granola cool completely at room temperature. Once cool, use a sharp knife to cut it into bars or squares. Store the bars in an airtight container. They will stay fresh for up to a week. For longer storage, you can freeze the bars. This keeps them ready for a quick and healthy snack later. Enjoy your nut-free granola bars! To get the best texture in your nut-free granola bars, follow these tips: - Use rolled oats. They give the best chewiness. - Press the mixture firmly into the pan. This helps the bars hold together. - Bake until golden brown. This ensures a crunchy edge and soft center. Here are some mistakes many make: - Not measuring ingredients accurately. This can change the texture. - Skipping the cooling time. Cutting too soon can make bars crumble. - Overbaking. This can lead to dry, hard bars. Always watch them closely. To keep your granola bars fresh: - Store them in an airtight container. This keeps them soft. - Keep them in the fridge for extra freshness. - Wrap each bar individually for easy grab-and-go snacks. - For longer storage, freeze them. They can last up to three months. Now, you can enjoy your homemade nut-free granola bars anytime! For a detailed recipe, check out the Full Recipe. {{image_4}} You can add more flavor to your nut-free granola bars. Try spices like cinnamon or nutmeg. You can also use sweeteners like agave syrup or brown sugar. Each choice changes the taste. For a chocolate kick, mix in semi-sweet chocolate chips. The options are endless! Need to adjust for diets? You can swap ingredients easily. If you want to avoid sugar, use mashed bananas or applesauce instead of honey. For a gluten-free version, make sure to use certified gluten-free oats. You can also use seeds like chia or flax if you want to add more nutrition. Each swap can keep things fun! Seasonal fruits can make your granola bars special. In summer, add dried mango or strawberries. In fall, try dried apples or cranberries. You can also use spices like pumpkin pie spice during the holidays. Using seasonal ingredients gives your bars a fresh twist. It keeps your snacks exciting all year round! For a full recipe, check out the Nut-Free Granola Bars Delight . To keep your nut-free granola bars fresh, store them in an airtight container. Use parchment paper between layers to prevent sticking. This method keeps the bars chewy and flavorful. If you like them crunchy, leave the lid slightly open for a few hours. This helps to dry them out a bit. Freezing is a great way to keep granola bars for a longer time. Wrap each bar tightly in plastic wrap. Then, place them in a freezer-safe bag or container. Make sure to label the bag with the date. When you want to eat them, let the bars thaw at room temperature. They will taste fresh and delicious. Nut-free granola bars can last up to two weeks at room temperature. If you store them in the fridge, they may last up to a month. Look for signs of spoilage, like an off smell or a change in color. If they feel too hard or dry, they are past their prime. Enjoy your homemade snack while it’s fresh for the best taste! Yes, you can easily make these granola bars vegan. To do this, swap honey for pure maple syrup. This simple change keeps the bars sweet and delicious. The other ingredients are already vegan-friendly. Using coconut oil, oats, and seeds makes this recipe perfect for plant-based eaters. Customizing flavors in your granola bars is fun and easy! Here are some ideas: - Add spices: Try using nutmeg, ginger, or cardamom for warmth. - Change sweeteners: Use agave nectar or brown rice syrup for a twist. - Mix in extracts: Almond or coconut extract can enhance the taste. - Include different fruits: Swap cranberries for dried mango or figs. - Try different seeds: Chia or flaxseeds can add nutrition and crunch. Feel free to get creative! Adjusting flavors helps you make the bars your own. To check if your granola bars are baked perfectly, look for these signs: - Color: The edges should be a golden brown. - Smell: A warm, nutty aroma fills your kitchen when they are done. - Firmness: Press gently on the top. It should feel firm and set, not overly soft. When you see these signs, your bars are ready to cool and cut. Enjoy the process and the tasty results! This blog post covered key ingredients for nut-free granola bars and their benefits. I shared step-by-step baking instructions and tips for perfect texture. You also learned about ingredient swaps and how to store your bars. Remember, these bars can fit many diets and tastes. Try different flavors and enjoy! With this info, you can make tasty, healthy treats right at home.

Nut-Free Granola Bars Healthy Snack Made Simple

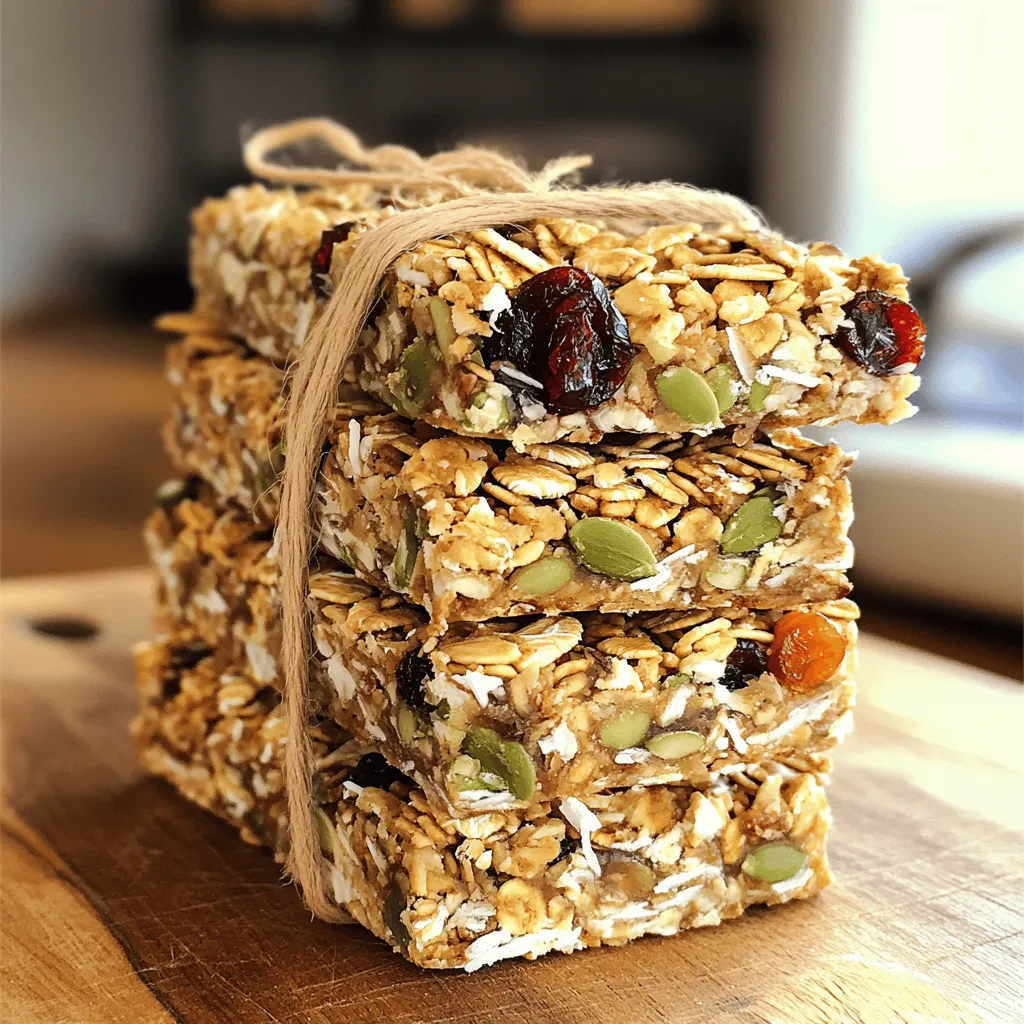
Looking for a healthy snack that’s safe for everyone? Nut-free granola bars are your answer! I’ll show you how to

- 200g (7 oz) pasta (penne or fusilli recommended) - 200g (7 oz) block of feta cheese - 250g (9 oz) cherry tomatoes - 3 cloves of garlic - 1 teaspoon red pepper flakes - 3 tablespoons extra virgin olive oil - 1 teaspoon dried oregano - Salt and freshly cracked black pepper - Fresh basil leaves for garnish - Grated Parmesan cheese for serving This dish provides about 400 calories per serving. Feta cheese offers protein and calcium. Tomatoes are rich in vitamins A and C. Olive oil adds healthy fats. Red pepper flakes can boost metabolism. Enjoy the flavors while getting good nutrition! When you cook this dish, you combine tasty ingredients and great health benefits. Each bite brings joy and good energy. You can find the full recipe within this article. 1. Preheat your oven to 200°C (400°F). This ensures your dish cooks evenly. 2. In a large baking dish, mix the halved cherry tomatoes, minced garlic, red pepper flakes, and olive oil. Season with salt and cracked black pepper. Toss everything well to coat. 1. Make a small indent in the center of the tomato mix. Place the block of feta cheese in this space. Drizzle extra olive oil over the feta and sprinkle dried oregano on top. 2. Bake in the oven for about 25 to 30 minutes. Look for blistered tomatoes and soft, golden feta. 1. While the feta and tomatoes bake, cook your pasta as per the package directions. Save about 1 cup of the starchy pasta water before draining. 2. Once the feta and tomatoes are done, take the dish out of the oven. Use a fork to mash the feta into the tomatoes, forming a creamy sauce. 3. Add the cooked pasta to the dish. Mix everything together until the pasta is coated in the sauce. If the mixture seems dry, stir in some reserved pasta water to reach your desired consistency. For detailed guidance, check the Full Recipe. How to achieve perfectly cooked pasta To cook pasta well, always use a large pot with water. Add salt to the water; it should taste like the sea. Bring the water to a rolling boil before adding the pasta. Stir occasionally to prevent sticking. Cook until al dente, which means it should be firm but not hard. Always check the package for exact cooking times. Best practices for roasting tomatoes and feta Roasting enhances flavors. Use ripe cherry tomatoes for the best taste. Toss them with garlic, olive oil, and seasonings. Make sure to spread them in a single layer on your baking dish. Place the feta in the center to soak up the juicy goodness. Bake until the tomatoes burst, and the feta softens. Presentation tips for a gourmet touch For a beautiful dish, serve in shallow bowls. Top with fresh basil leaves and a drizzle of olive oil. A sprinkle of grated Parmesan adds elegance. You can also garnish with extra red pepper flakes for color. Ideal pairs (wine, bread, side dishes) This dish pairs well with a light white wine, like Sauvignon Blanc. A crusty bread complements the creamy sauce. For side dishes, consider a simple green salad or roasted vegetables to balance the meal. Overbaking the feta Keep an eye on the feta while it bakes. If you bake it too long, it will become dry and crumbly. The goal is soft and melty feta that mixes well with the tomatoes. Not reserving enough pasta water Always remember to reserve some pasta water before draining. This starchy water helps create a creamy sauce. If your pasta seems dry, add a little reserved water to reach the desired consistency. {{image_4}} You can change the cheese or pasta type in this dish. If you want a creamier taste, try goat cheese or ricotta. For pasta, whole wheat or gluten-free options work well too. You can also add more vegetables for extra nutrition. Spinach, zucchini, or bell peppers are great choices. Just chop them up and mix them in with the tomatoes before baking. Adding herbs and spices can make this dish even better. Try fresh thyme or basil for a bright taste. You can also mix in some lemon zest for a zesty kick. If you want protein, add cooked chicken or shrimp. They complement the feta and make the meal heartier. For a vegan option, swap the feta cheese for a plant-based alternative. There are great brands that mimic feta's flavor. You can also use cashew cheese for creaminess. For gluten-free pasta, look for options made from rice or chickpeas. These choices keep the dish tasty and suitable for different diets. After making baked feta pasta, let it cool. Store leftovers in an airtight container. Place it in the fridge. This keeps the pasta fresh and safe. You can store it for up to three days. If you want it to last longer, freezing is a great option. When you want to eat the leftovers, you can reheat them in a few ways. The best method is using an oven. Preheat your oven to 175°C (350°F). Place the pasta in an oven-safe dish. Cover it with foil to keep it moist. Heat for about 15 minutes. You can also use a microwave. Put the pasta in a microwave-safe bowl. Warm it for 1-2 minutes, stirring halfway through. This helps keep the creaminess and flavor intact. Yes, you can freeze baked feta pasta! To do this, let it cool completely. Transfer it to a freezer-safe container. Make sure to leave some space for expansion. You can freeze it for up to three months. When you want to eat it, defrost it overnight in the fridge. Reheat it in the oven or microwave. This way, you get to enjoy this delightful dish anytime! For the full recipe, check out the detailed steps above. Baked feta pasta is a simple and tasty dish. It features a block of feta cheese, tomatoes, garlic, and pasta. You bake the feta and tomatoes together, creating a creamy sauce. This dish became popular on social media for its ease and flavor. It’s perfect for busy weeknights or cozy gatherings. Yes, you can prep baked feta pasta ahead of time. Cook the pasta and prepare the tomato mix. Store them separately in the fridge. Bake the feta and tomatoes when you're ready to eat. This helps keep the pasta from getting mushy. You can make a vegan version of baked feta pasta. Use a plant-based feta cheese instead of regular feta. Some brands offer great taste and texture. You can also try cashew cheese as another option. To avoid mushy pasta, cook it al dente. This means it should still have a little bite. Reserve some pasta water when draining. Add it slowly to the sauce if needed for creaminess. Mix gently to keep the pasta intact. If you don’t have feta, try goat cheese or ricotta. Goat cheese offers a tangy flavor. Ricotta adds creaminess but is milder. Both can work well in baked feta pasta. The spice level with red pepper flakes depends on how much you use. One teaspoon adds mild heat. You can use less for no spice or more for extra kick. Adjust it to your taste for the perfect dish. For the complete recipe, check out the [Full Recipe]. Baked feta pasta combines simple ingredients to create a delightful dish. We explored the main and optional ingredients, along with their health benefits. I detailed each step for preparation, baking, and mixing, ensuring you achieve a creamy sauce. To enhance your dish, I provided tips on cooking and serving. I also shared variations, storage methods, reheating tips, and FAQs. This dish is easy to customize and enjoy. Whether for a quick meal or a gathering, baked feta pasta is sure to impress.

Baked Feta Pasta Delightful and Easy Recipe

If you’re looking for a quick dinner that wows, baked feta pasta is the answer! This tasty dish combines creamy

- Broccoli florets - Bell peppers (any vibrant color) - Medium carrot - Zucchini - Sugar snap peas - Garlic and ginger - Low-sodium soy sauce - Sesame oil and olive oil - Chili flakes, salt, and black pepper - Sesame seeds - Chopped green onions To make a great easy vegetable stir-fry, you need fresh ingredients. Start with bright, crunchy vegetables. You can use broccoli florets, bell peppers in any color, medium carrots, zucchini, and sugar snap peas. These veggies offer taste, color, and texture. Next, gather your aromatics and seasonings. Garlic and ginger bring a strong flavor. Low-sodium soy sauce adds saltiness, while sesame oil gives a nutty taste. Olive oil works well for cooking. If you want heat, add chili flakes, salt, and black pepper to taste. For the final touch, consider optional garnishes. Sesame seeds and chopped green onions add nice crunch and freshness. You can find the full recipe with detailed steps to make this dish truly shine! - Wash and cut vegetables. - Measure out sauces and oils. First, you want to wash all your vegetables. Rinse them under cool water. This helps remove dirt and any chemicals. Next, cut the vegetables. Make sure they are in the right shapes. This helps them cook evenly. Now, measure your sauces and oils. You will need two tablespoons of low-sodium soy sauce, one tablespoon of sesame oil, and one tablespoon of olive oil. Having these ready makes cooking easier. - Heat the pan and sauté aromatics. - Add vegetables in order of cooking time. - Season and finish cooking. Heat a large non-stick skillet or wok over medium-high heat. Add the olive oil. Wait until it shimmers before adding anything else. Next, add minced garlic and grated ginger to the pan. Stir-fry for about 30 seconds. You want it to smell good and turn golden. Now, it's time for the vegetables. Start with broccoli, bell pepper, and carrot. These take longer to soften. Stir-fry for 3-4 minutes. They should become slightly tender. After that, add zucchini and sugar snap peas. Stir continuously for 2-3 more minutes. All vegetables should look bright and crisp. Season the stir-fry with soy sauce and sesame oil. If you like spice, add chili flakes. Mix well to ensure every vegetable gets coated. Finally, season with salt and black pepper to taste. - Garnish with sesame seeds and green onions. - Recommended serving accompaniments. Take the pan off the heat. Sprinkle sesame seeds and chopped green onions on top. This adds a nice crunch and fresh taste. You can serve this stir-fry over steamed rice or noodles. This makes a perfect meal. For the full recipe, check the section above! To get the best texture in your stir-fry, use high heat. High heat cooks the vegetables quickly, keeping them crisp and colorful. I often preheat my pan until it's hot before adding any oil. This helps the veggies sear instead of steam. Use a non-stick skillet or wok for easier cooking. Stir-frying is all about timing. Start with veggies that take longer to cook, like broccoli and carrots. After a few minutes, add quicker-cooking ones, like zucchini and snap peas. This way, everything cooks evenly, and you avoid mushy vegetables. You can boost the flavor of your stir-fry with sauces and spices. Soy sauce adds saltiness, while sesame oil gives a nutty taste. Try adding a splash of rice vinegar for a tangy twist. You can also sprinkle in some chili flakes for heat, if you like. If you want more protein, add tofu, chicken, or shrimp. Cook them first and set aside. Then, add them back in just before serving. This keeps the protein juicy and flavorful while your veggies stay fresh. A common mistake is overcooking vegetables. When they lose their bright colors and crunch, they taste less fresh. Keep an eye on the time and stir often. Another mistake is not prepping ingredients ahead of time. Chop your veggies and measure out sauces before you start cooking. This way, you can focus on stir-frying without rushing. It makes the whole process smoother and fun! For the full recipe, check out the Vibrant Veggie Delight Stir-Fry. {{image_4}} You can make your vegetable stir-fry even better with plant-based proteins. Try adding tofu or tempeh for a hearty touch. Chickpeas or edamame also work well. They boost protein and flavor. For sauces, swap soy sauce for tamari or coconut aminos for gluten-free options. Sesame or peanut sauce can add a new twist too. To keep things fresh, use seasonal veggies. In spring, asparagus and snap peas shine. Summer brings zucchini and bell peppers. Fall is great for squash and carrots. Winter veggies like kale or Brussels sprouts add depth. You can also use local produce to support farmers and enjoy fresh flavors. While stir-frying is quick and fun, oven-roasting brings out sweet flavors. Toss your veggies with oil and spices, then bake at 400°F for about 20 minutes. This method gives a nice char. If you prefer low and slow, use a slow cooker. Add your veggies with sauce and cook on low for 4-6 hours. This creates a comforting, hearty dish. For the full recipe, check out the Vibrant Veggie Delight Stir-Fry! To keep your leftover stir-fry fresh, let it cool first. Place it in an airtight container. This helps lock in flavor and moisture. Store it in the fridge for up to three days. For best taste, eat it sooner. When packing, use smaller containers. This makes it easy to grab just what you need. The best way to reheat stir-fry is in a pan. Use medium heat and add a splash of water or oil. This keeps the veggies crisp and tasty. Stir often to make sure it heats evenly. You can also use a microwave. Cover it to keep moisture in but check often to avoid sogginess. Yes, you can freeze this stir-fry! Let it cool completely before freezing. Use a freezer-safe bag or container. Remove as much air as possible to prevent freezer burn. To defrost, place it in the fridge overnight. You can also use the microwave on the defrost setting. Heat it on the stove to bring back that fresh taste. Making an easy vegetable stir-fry takes about 15 minutes. You need 10 minutes for prep and 5 minutes for cooking. This quick meal is perfect for busy days. You can add many protein options to your stir-fry. Some common choices include: - Chicken breast, sliced thin - Shrimp or prawns - Firm tofu, cut into cubes - Cooked beans, like chickpeas or black beans These options make the dish hearty and filling. Yes, you can use frozen vegetables. They are quick and easy to use. Just remember to thaw them first. Fresh vegetables have a better crunch, but frozen can save time. If using frozen, cook them a bit longer. Serve your vegetable stir-fry over a bed of rice or noodles. This adds substance. You can also pair it with: - Steamed rice - Fried rice - Quinoa For a fresh twist, add a sprinkle of sesame seeds or chopped green onions on top. You can find the full recipe for a vibrant veggie delight stir-fry in this article. In this blog post, I shared a simple guide to making a vegetable stir-fry. We reviewed fresh veggies, seasonings, and optional garnishes. I walked you through preparation, cooking steps, and serving suggestions. Plus, I offered tips to achieve the best texture and flavor. Don’t forget about variations and proper storage for leftovers. Making stir-fry is fun and satisfying. You can enjoy a healthy meal with easy swaps. Now, get cooking and enjoy your colorful, tasty dish!

Easy Vegetable Stir-Fry Powerful and Delicious Dish

Looking for a quick way to enjoy fresh veggies? I’ve got the perfect solution for you: Easy Vegetable Stir-Fry! This

- 8 oz linguine or spaghetti - 1 lb large shrimp, peeled and deveined - 4 tablespoons unsalted butter - 4 cloves garlic, finely minced - 1 teaspoon red pepper flakes (adjust to taste) - Zest and juice of 1 fresh lemon - 1/4 cup chicken or vegetable broth - 1/4 cup freshly grated Parmesan cheese - 2 tablespoons fresh parsley, finely chopped - Salt and freshly cracked black pepper to taste For this Garlic Butter Shrimp Pasta, you need fresh, simple ingredients. Start with linguine or spaghetti. I love using these pastas because they hold the sauce well. Next, grab some large shrimp. Peel and devein them for the best texture. Unsalted butter is key for richness. Fresh garlic adds a wonderful aroma and taste. Red pepper flakes give it a nice kick, but adjust to your liking. For the seasonings, lemon zest and juice brighten the dish. You can use chicken or vegetable broth for added flavor. Parmesan cheese gives it a creamy finish. Fresh parsley adds color and freshness. Don't forget salt and black pepper to taste. These ingredients come together for a simple yet flavorful meal. You can find the full recipe in the article. Enjoy cooking! First, fill a large pot with water. Add a pinch of salt and bring it to a boil. Once the water is boiling, add 8 oz of linguine or spaghetti. Cook the pasta until it's al dente, which usually takes about 8-10 minutes. Before you drain the pasta, make sure to reserve about 1/2 cup of the pasta water. This water helps to adjust the sauce later. In a large skillet, melt 2 tablespoons of unsalted butter over medium heat. Add 1 pound of large shrimp that are peeled and deveined. Season the shrimp with salt and pepper. Cook the shrimp for about 2-3 minutes on each side. They should turn pink and opaque when done. Remove the shrimp from the pan and set them aside for later. In the same skillet, add the remaining 2 tablespoons of butter. Once melted, add 4 cloves of finely minced garlic and 1 teaspoon of red pepper flakes. Cook this mixture for about one minute. You want the garlic to be fragrant but not brown. Next, pour in 1/4 cup of chicken or vegetable broth, the zest of 1 lemon, and the juice of that lemon. Bring this mixture to a simmer. Now, add the cooked shrimp and pasta back into the skillet with the sauce. Toss everything together to coat the pasta and shrimp well. If the sauce looks too thick, add a little bit of the reserved pasta water to achieve your desired consistency. To finish, stir in 1/4 cup of freshly grated Parmesan cheese and 2 tablespoons of finely chopped parsley. Taste the dish and adjust the seasoning with extra salt, pepper, or red pepper flakes if needed. This adds a nice touch to your Garlic Butter Shrimp Pasta. For the complete recipe, check [Full Recipe]. To make your garlic butter shrimp pasta shine, you can adjust the spice levels. Adding red pepper flakes gives the dish a nice kick. Start with a teaspoon, then add more if you like it spicy. You can also enhance the flavor with more lemon juice or zest. A splash of lemon brightens the dish and balances the richness of the butter. Fresh herbs, like basil or cilantro, can also add a nice touch. Sautéing shrimp correctly makes all the difference. Use medium heat to cook them evenly. Avoid crowding the pan; this helps them cook quickly and keeps them juicy. For the pasta, cook it al dente. This means it should be firm to the bite. Be sure to reserve some pasta water. It helps to loosen the sauce later on. When serving garlic butter shrimp pasta, consider sides that complement it. A light salad with mixed greens works well. You can add a vinaigrette to keep it fresh and bright. For wine, a crisp white like Sauvignon Blanc pairs nicely. The acidity cuts through the butter and enhances the meal. Check out the Full Recipe for more details on creating this delightful dish! {{image_4}} You can easily swap shrimp for chicken or scallops in this dish. Chicken gives a hearty bite, while scallops add a sweet, tender flavor. If you prefer a vegetarian option, try using mushrooms or tofu. Both add texture and soak up the garlic butter sauce well. Substituting regular pasta with whole wheat or gluten-free pasta is a great choice. Whole wheat adds fiber, while gluten-free pasta caters to dietary needs. You can also experiment with different cheeses. For a sharper taste, try using Pecorino Romano instead of Parmesan. Herbs can change the flavor of your dish. Fresh basil, thyme, or oregano can add a lovely twist. You can also toss in vegetables like spinach or cherry tomatoes. They add color and nutrition, making your Garlic Butter Shrimp Pasta even better. For the full recipe, check out the detailed instructions! To keep your Garlic Butter Shrimp Pasta fresh, cool it down first. Place it in an airtight container. Glass or plastic containers work well. Be sure to seal it tightly. Store it in the fridge for up to three days. When reheating, add a splash of water or broth to keep it moist. You can freeze Garlic Butter Shrimp Pasta for later. First, let it cool completely. Then, pack it into freezer-safe bags or containers. Remove as much air as you can. This helps prevent freezer burn. You can freeze it for up to two months. To thaw, move it to the fridge overnight. Reheat in a pan over low heat. Add a little broth or water to help it warm evenly. Leftovers are safe to eat for about three days in the fridge. After that, they may spoil. Signs of spoilage include a sour smell or changes in color. If you see any mold, throw it away right away. Always check before eating. Your safety comes first! You can easily make your dish spicier. Add more red pepper flakes or fresh chilies. Start with a little and taste as you go. This way, you control the heat level. You can also mix in some hot sauce for extra kick. Yes, you can use frozen shrimp. Thaw them in the fridge overnight or under cold water. Make sure to pat them dry before cooking. This helps them sear better and not steam. Cooking shrimp from frozen can lead to uneven cooking. Linguine and spaghetti work great for this recipe. Both have a nice texture that holds sauce well. You can also try fettuccine or even penne. Each type offers a different bite. Choose what you enjoy most! Yes, there are easy low-carb options. Use zucchini noodles or spaghetti squash instead of regular pasta. Cauliflower rice can also work for a different twist. These alternatives keep the dish light but still delicious. In this blog post, we explored how to make Garlic Butter Shrimp Pasta. We covered the key ingredients, step-by-step cooking instructions, and helpful tips to boost the dish's flavor. You learned about variations and how to store leftovers. Remember, cooking is about creativity. Feel free to adjust spice levels, try new proteins, or swap out pasta types. Enjoy the process, share your meals, and savor every bite of your tasty creation!

Garlic Butter Shrimp Pasta Easy and Flavorful Recipe

Craving a quick and tasty dinner? This Garlic Butter Shrimp Pasta is your answer! With just a few ingredients, you

To make the savory shrimp and avocado salad, gather these fresh ingredients: - 1 pound shrimp, peeled and deveined - 2 ripe avocados, diced - 1 cup cherry tomatoes, halved - 1/4 cup red onion, finely chopped - 1/4 cup fresh cilantro, chopped - 2 tablespoons olive oil, divided - 1 tablespoon fresh lime juice - 1 teaspoon garlic powder - Salt and pepper to taste - Optional: 1 jalapeño, finely chopped (for added heat) When selecting shrimp, look for firm, pink flesh with a clean smell. Avoid shrimp that appear dull or have black spots. Fresh avocados should yield slightly when gently pressed. Go for ones with smooth skin and no dark spots. If you can't find fresh cilantro, parsley works well as a substitute. For cherry tomatoes, you can use diced regular tomatoes. If you prefer a milder flavor, skip the jalapeño or use a sweet pepper instead. With this ingredient list in hand, you're set to create a fresh and tasty salad that shines with flavor! For the full recipe, check out the detailed instructions. First, let's clean the shrimp. You want to start with fresh shrimp. Rinse them under cold water. Remove the shells and tails. Then, devein them by making a small cut along the back. This helps remove the dark vein. Once cleaned, pat them dry with a paper towel. This step is key for a good sear. Now, let's cook the shrimp. Heat 1 tablespoon of olive oil in a skillet over medium heat. When the oil shines, add the shrimp. Cook for about 2-3 minutes on each side. Look for that pink and opaque color. This shows they are done. Remove them from heat and let them cool for a moment. Next, we’ll mix the salad ingredients. In a large bowl, add the diced avocados, halved cherry tomatoes, finely chopped red onion, and cilantro. Be gentle as you mix. You want to keep the avocados intact, not mushy. Now, let’s prepare the dressing. In a small bowl, whisk the remaining tablespoon of olive oil with fresh lime juice. Add a touch of salt and pepper for flavor. This dressing will tie everything together. Finally, add the cooled shrimp to the avocado mix. Drizzle the dressing over the top. If you like heat, sprinkle in the chopped jalapeño. Now, carefully toss all the ingredients. Make sure the avocados stay firm. Taste your salad and adjust with more lime juice or seasoning if needed. For a beautiful presentation, serve in a chilled bowl. Garnish with fresh cilantro and a lime wedge. This makes your dish pop with color and freshness. Enjoy this savory shrimp and avocado salad! For the full recipe, refer to the previous section. To cook shrimp perfectly, start with fresh shrimp. Look for shrimp that smell like the ocean. They should be firm to the touch. When cooking, use medium heat. This keeps the shrimp tender. Cook them for about 2-3 minutes on each side. They should turn pink and opaque. Avoid overcooking, as this makes them tough. To prevent avocados from browning, use lime juice. The acid in lime slows down browning. Cut the avocado just before serving. If you have leftover avocado, cover it tightly with plastic wrap. Press the wrap directly onto the flesh. This limits air exposure and slows browning. Enhance flavors by adding fresh herbs like cilantro or basil. You can also sprinkle in spices like cumin or paprika. For extra zest, try adding a bit of lime zest. If you want heat, a pinch of cayenne can wake up the flavors. Don't be afraid to experiment with seasonings to find what you love. For the full recipe, check out the detailed instructions that follow. {{image_4}} You can easily change this salad to fit your taste. Adding a citrus dressing can give it a bright kick. Try orange or lemon juice mixed with olive oil. This adds more acidity and freshness. For protein, you can use crab or grilled chicken. Both pair well with avocado. You can also add more veggies like bell peppers or corn. These will add color and texture to your dish. If you like spice, add jalapeño or any pepper you enjoy. Start with a little, then taste it. You can always add more if you want more heat. It’s all about finding the right balance for you. Feel free to get creative! Mixing and matching flavors keeps the salad fun. You can follow the [Full Recipe] or make your own version. The goal is to enjoy the process and the meal! To keep your shrimp and avocado salad fresh, store it in the fridge. Use an airtight container. This helps to keep flavors strong and prevents spills. The salad lasts for about one to two days in the fridge. After that, the avocados may brown and lose their taste. The shrimp can also start to smell off. Freezing is not the best choice for this salad. The shrimp can lose their texture, and the avocado will become mushy. However, you can freeze the shrimp before cooking. Just remember to thaw them in the fridge before using. For more details about making this delicious dish, check the Full Recipe. Can I use frozen shrimp for this recipe? Yes, you can use frozen shrimp. Just thaw them first. Place them in a bowl of cold water for about 15 minutes. This way, you still get fresh taste and texture. What can I serve with shrimp and avocado salad? This salad pairs well with crusty bread or tortilla chips. You can also serve it with a light soup or a side of rice. A nice glass of white wine complements the meal too. How do I know when shrimp are fully cooked? Cooked shrimp turn pink and curl slightly. They should feel firm to the touch. A good rule is to cook them for about 2-3 minutes on each side. If you're unsure, cut one open to check. Is shrimp and avocado salad healthy? Yes, this salad is healthy! Shrimp provide lean protein while avocados offer healthy fats. The fresh veggies add fiber and nutrients. It's a perfect dish for a light meal or snack. For the full recipe, check out Shrimp & Avocado Delight. This blog post shows you how to make a tasty Shrimp and Avocado Salad. We covered ingredients, cooking steps, and smart tips. You learned how to cook shrimp just right and keep avocados fresh. I shared ideas for variations, like adding citrus or other veggies. Plus, we discussed how to store leftovers safely. Now, you have all the tools for a delicious salad. Enjoy making it your way!

Savory Shrimp and Avocado Salad Easy and Fresh Recipe

Are you ready for a dish that’s easy, fresh, and full of flavor? My Savory Shrimp and Avocado Salad brings

- 1 cup rolled oats - 1 cup almond milk (or preferred milk variety) - 1 medium sweet apple, grated - 1 tablespoon chia seeds - 1 teaspoon ground cinnamon - 1 tablespoon maple syrup (or honey) - 1/2 teaspoon pure vanilla extract - A pinch of salt - 1/4 cup chopped walnuts (optional) To make Apple Cinnamon Overnight Oats, gather your ingredients. The rolled oats form the base. They soak up the almond milk and create a creamy texture. Almond milk adds a nice flavor and keeps it dairy-free. If you prefer, use cow's milk or any milk you like. Grating the sweet apple gives a burst of fresh flavor. It blends well with the oats and spices. Chia seeds add a nice touch. They help thicken the oats and add fiber. Ground cinnamon brings warmth and spice. It makes the oats taste cozy and comforting. Maple syrup or honey sweetens the dish. You can adjust this to fit your taste. Pure vanilla extract adds a hint of sweetness. Finally, a little salt enhances all these flavors. If you want some crunch, toss in walnuts. They add great texture. - Fresh apple slices - Extra sprinkle of cinnamon For a beautiful finish, add fresh apple slices on top. They make the dish look nice and fresh. An extra sprinkle of cinnamon boosts the flavor. These garnishes are simple but elevate your oats. For the full recipe, check the [Full Recipe]. Enjoy your tasty and healthy breakfast! Start by getting a mixing bowl. In that bowl, add 1 cup of rolled oats. Next, pour in 1 cup of almond milk. After that, grate 1 medium sweet apple and add it to the oats. This mixture gives your oats a fruity taste. Then, sprinkle in 1 tablespoon of chia seeds, 1 teaspoon of ground cinnamon, and 1 tablespoon of maple syrup. Add 1/2 teaspoon of pure vanilla extract and a pinch of salt. These ingredients help create a sweet and warm flavor. Now, mix everything well. You want to make sure the oats soak up the almond milk. This helps blend the flavors together. Once mixed, divide the mixture into two jars. Seal the jars tightly and place them in the refrigerator. Let them chill overnight. If you are short on time, a soak of at least 4 hours works too. This soaking time is key. It softens the oats and makes them easy to eat. The next morning, take the jars from the fridge. Stir the oats well before serving. If the mixture seems too thick, add a splash of almond milk. This helps achieve your desired texture. For a tasty touch, top each jar with fresh apple slices and a sprinkle of chopped walnuts. A light dusting of cinnamon adds a nice finish. This not only makes your dish look great but also enhances the flavor. Enjoy your Apple Cinnamon Overnight Oats! To adjust the thickness of your oats, you can add more almond milk. If your oats are too thick, just splash in a bit more milk. This will help create your desired texture. For soaking time, aim for at least four hours. Overnight soaking is best. This allows the oats to soak up the liquid fully. They will soften and become creamy, giving you a perfect bite. To boost flavor, consider adding a dash of nutmeg or ginger. You can also drizzle in extra maple syrup if you like it sweeter. These spices can take your oats to a new level. When choosing apples, select sweet varieties like Fuji or Honeycrisp. Their natural sweetness will blend well with cinnamon. Grating the apple helps it mix evenly throughout the oats. For a fun presentation, layer your oats with apple slices and walnuts in clear jars. This creates a beautiful look and shows off the colors. Using glass jars also adds a nice touch and makes breakfast feel special. To make it even more appealing, you can top the jars with fresh apple slices and a sprinkle of cinnamon. This adds both flavor and a pop of color to your dish. {{image_4}} You can make your apple cinnamon overnight oats even better by adding dried fruits or nuts. Try raisins, cranberries, or apricots for a sweet twist. Nuts like pecans or almonds can add crunch. You can also use different spices. Nutmeg or cardamom can give it a new flavor. Just a pinch can change everything! If you want to change the milk, you have options. Oat milk is creamy and works great. Coconut milk adds a tropical vibe. You can also use regular dairy milk if you like. Each milk choice will change the taste slightly. Feel free to experiment to find your favorite! To keep it vegan, use maple syrup instead of honey. For gluten-free oats, make sure to check the label. Some oats are processed with gluten products. You can swap chia seeds with flaxseeds if you prefer. These swaps ensure that everyone can enjoy this dish. For the full recipe, check out the details provided above! Storing your Apple Cinnamon Overnight Oats is simple. Use airtight jars or containers. This keeps the oats fresh and prevents strong odors from other foods in your fridge. Always let the oats cool before sealing them. This will help avoid condensation inside the jar, which can make them soggy. Apple Cinnamon Overnight Oats stay fresh for about three to five days in the fridge. The oats will absorb more liquid over time, so they may become thicker. If they get too thick, just stir in a bit of almond milk to reach your desired texture. Yes, you can freeze overnight oats! To freeze, follow these steps: - Prepare the oats as usual, but skip adding fresh toppings like apples and walnuts. - Pour the mixture into freezer-safe containers, leaving space for expansion. - Seal tightly and label with the date. To thaw, move the oats to the fridge overnight. In the morning, stir well and add fresh toppings before enjoying. To make your Apple Cinnamon Overnight Oats more filling, add protein or healthy fats. You can try: - A scoop of Greek yogurt for creamy texture and protein. - A tablespoon of nut butter, like almond or peanut, for flavor and healthy fats. - A sprinkle of hemp seeds or sunflower seeds for extra crunch and nutrients. These ingredients not only add filling power but also boost the nutrition of your oats. Yes, you can prepare overnight oats in advance! I recommend making them up to three days ahead. Just store them in airtight jars in the fridge. This way, you save time on busy mornings. Each jar will stay fresh, and the flavors will blend nicely. Overnight oats are packed with benefits. Here are some highlights: - Fiber: Oats are high in fiber, which helps with digestion and keeps you full. - Vitamins: Apples add vitamins A and C, boosting your immune system. - Antioxidants: Cinnamon has antioxidants that may help reduce inflammation. - Energy: The combination of oats and apple provides steady energy throughout the day. Eating overnight oats can support a healthy lifestyle! You can use quick oats, but expect a different texture. Quick oats are thinner and will soak up liquid faster. This may lead to a mushier result. If you prefer a chewier bite, stick with rolled oats. They provide a heartier texture and better flavor. Absolutely! This recipe is great for meal prep. You can easily double or triple the ingredients to make a larger batch. Just portion them into individual jars. They stay fresh in the fridge for several days. This way, you can grab a jar on the go and enjoy a healthy breakfast anytime. For the full recipe, check out the detailed instructions above. Apple Cinnamon Overnight Oats are easy to make and delicious. You mix oats, almond milk, and sweet apple, add chia seeds, and more. Let the mixture chill overnight for a tasty breakfast. You can also tweak it with optional spices, different milk, or garnishes. Proper storage helps keep it fresh, and it's great for meal prep. Remember, there are many ways to enjoy this dish. Try different flavors and enjoy a healthy start to your day!

Apple Cinnamon Overnight Oats Nourishing and Easy Recipe

Looking for a quick, tasty, and healthy breakfast? You’ve found it! My Apple Cinnamon Overnight Oats are both nourishing and

To make Ginger Lime Grilled Chicken, you need: - 4 boneless, skinless chicken breasts - 2 tablespoons fresh ginger, finely grated - Zest and juice of 2 limes - 3 tablespoons honey - 3 tablespoons low-sodium soy sauce (or regular, as preferred) - 2 cloves garlic, minced - 1 tablespoon sesame oil - Salt and pepper to taste - Fresh cilantro, chopped (for garnish) You will need a few simple tools: - Medium mixing bowl - Whisk - Large resealable plastic bag or shallow dish - Grill - Meat thermometer - Platter For extra flair, consider these garnishes: - Lime wedges - Sliced green onions - Additional chopped cilantro Each ingredient plays a key role in creating a bright and zesty flavor. The ginger adds warmth, while the lime brings a burst of freshness. The honey balances the ingredients with a touch of sweetness. Using fresh ingredients makes a big difference in taste. You can find the Full Recipe if you want detailed instructions on how to prepare this dish. To make the marinade, gather your ingredients first. You will need fresh ginger, lime zest, lime juice, honey, soy sauce, minced garlic, sesame oil, salt, and pepper. Start by grating the ginger finely. Then, zest two limes and squeeze their juice into a mixing bowl. Add the ginger, honey, soy sauce, garlic, sesame oil, and salt and pepper. Whisk everything together until smooth and well-blended. This marinade brings out fresh and zesty flavors. Next, take four boneless, skinless chicken breasts. Place them in a large resealable plastic bag or a shallow dish. Pour your marinade over the chicken. Make sure every piece is coated. This is key for flavor. Seal the bag or cover the dish. Let it sit in the fridge for at least 30 minutes, or up to 4 hours for more taste. The longer the chicken marinates, the better the flavors mix into the meat. Now it's time to grill! Preheat your grill to medium-high heat, aiming for about 400°F (200°C). Make sure the grill gets hot to create nice grill marks. Remove the chicken from the marinade and let any extra liquid drip off. Discard the leftover marinade for safety. Place the chicken on the grill and cook for about 6-7 minutes on each side. You know it's done when the internal temperature hits 165°F (75°C). After grilling, take the chicken off and let it rest for five minutes. This helps keep it juicy. Slice the chicken and serve it on a platter, garnished with chopped cilantro for a fresh touch. Enjoy this delightful meal! For the complete recipe, check out the Full Recipe section. Grilling chicken can be easy and fun. Here are some tips to make it great: - Use a clean grill. This helps prevent sticking. - Preheat the grill. Aim for around 400°F (200°C) for nice grill marks. - Oil the grill grates. This helps keep your chicken from sticking. - Don’t flip too often. Let the chicken cook for 6-7 minutes on each side to get the best sear. To get the best flavor from your ginger lime grilled chicken: - Marinate well. Let the chicken soak in the ginger-lime mix for at least 30 minutes. Longer is better for deeper taste. - Use fresh ingredients. Fresh ginger and limes make a big difference. - Taste as you go. Adjust seasonings in the marinade to your liking. Avoid these common mistakes for perfect chicken: - Skipping the marinade. This step adds flavor and moisture. - Cooking chicken straight from the fridge. Let it sit at room temp for 15 minutes before grilling. - Not checking doneness. Use a meat thermometer. The chicken should reach 165°F (75°C). With these tips, you’ll make ginger lime grilled chicken that tastes amazing! For the full recipe, check the earlier section. {{image_4}} You can swap chicken with other proteins for this recipe. Try using shrimp, pork, or tofu. Each option brings a unique taste. Shrimp cooks fast and absorbs flavors well. Pork adds a hearty touch, while tofu is great for plant lovers. Adjust cooking times based on your protein choice. Don't worry if you lack an ingredient! You can use different items without losing flavor. If you don’t have fresh ginger, try ground ginger instead. For honey, maple syrup works too. Low-sodium soy sauce can be replaced with tamari for gluten-free diets. Fresh cilantro can be switched with parsley or green onions for a fresh finish. Want some heat? Add chili flakes or hot sauce to the marinade. Start with a small amount and taste. You can also mix in fresh jalapeños or sriracha for a spicy kick. This spicy twist enhances the zing of ginger and lime. Adjust the heat to your preference and enjoy! After enjoying your ginger lime grilled chicken, let any leftovers cool down. Place the chicken in an airtight container. You can store it in the fridge for up to three days. Make sure it’s sealed well to keep it fresh. If you have leftover marinade, avoid storing it. It’s best to discard any used marinade for safety. If you want to save your grilled chicken for later, freezing is a great option. Allow the chicken to cool completely. Wrap each piece tightly in plastic wrap, then place them in a freezer-safe bag. Squeeze out as much air as possible before sealing. You can freeze the chicken for up to three months. Label the bag with the date to keep track. When you’re ready to eat, reheating the chicken is easy. Take it out of the fridge or freezer. For fridge leftovers, place the chicken in the microwave. Heat it on medium power for one to two minutes. Check it often to avoid overcooking. If it’s frozen, let it thaw in the fridge overnight first. Then, reheat as before. You can also reheat on the grill for added flavor. Just warm it for a few minutes until it’s hot throughout. Enjoy your meal again! I recommend marinating the chicken for at least 30 minutes. This time allows the flavors to soak in. For a deeper taste, you can marinate for up to 4 hours. Just be careful not to go too long, as the lime juice can make the chicken tough. Yes, you can use bone-in chicken. However, keep in mind that cooking time will change. Bone-in pieces take longer to cook through. Make sure to check that the internal temperature reaches 165°F (75°C) to ensure safety. Many sides complement this dish. Here are a few tasty options: - Rice pilaf - Grilled vegetables - Fresh salad with lime dressing - Quinoa with herbs - Corn on the cob These sides will balance the bright flavors of your Ginger Lime Grilled Chicken. For more ideas, check out the Full Recipe. Grilling chicken brings joy and flavor. We covered the ingredients, tools, and tips needed. Remember to marinate well for the best taste. Use our common mistakes section to avoid issues while cooking. Feel free to try different proteins or add garnishes as you like. Store leftovers properly and reheat them for future meals. Enjoy your tasty, grilled chicken, and impress your family and friends with these simple steps!

Ginger Lime Grilled Chicken Flavorful and Simple Meal

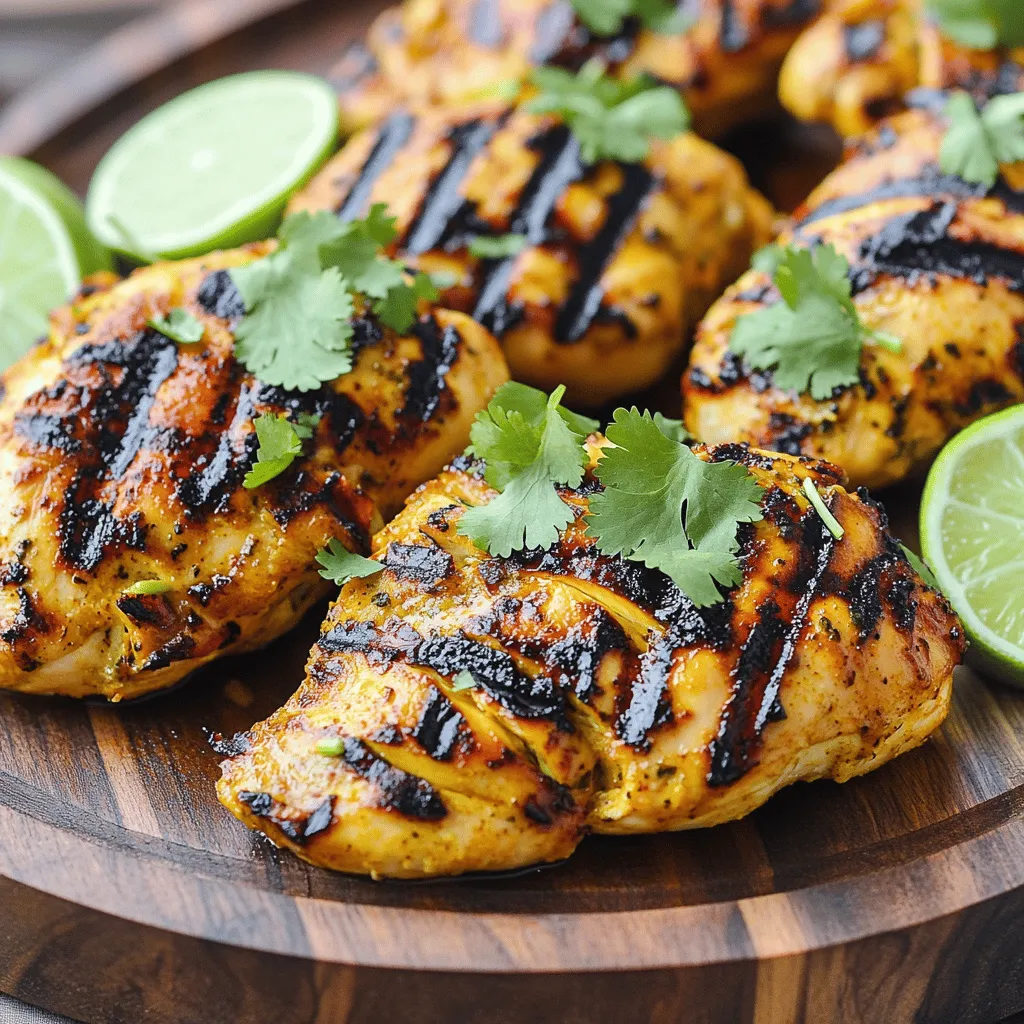
Looking for a tasty and easy meal? You’ve come to the right place! My Ginger Lime Grilled Chicken recipe combines

To make a tasty zucchini noodle stir fry, gather these fresh ingredients: - 2 medium zucchinis, spiralized into noodles - 1 red bell pepper, thinly sliced - 1 yellow bell pepper, thinly sliced - 1 cup broccoli florets - 1 cup snap peas, trimmed - 2 cloves garlic, finely minced - 1 tablespoon fresh ginger, grated - 3 tablespoons soy sauce (or tamari for gluten-free) - 1 tablespoon sesame oil - 1 tablespoon extra virgin olive oil - 1 tablespoon rice vinegar - 1 teaspoon honey (or maple syrup for a vegan option) - Sesame seeds, for garnish - Fresh cilantro, chopped, for garnish These ingredients bring a bright taste and crunch to the dish. The zucchini noodles act as a healthy base that soaks up the flavors. You can tweak this recipe to suit your taste. Here are some ideas: - Carrots, julienned for extra color - Mushrooms, sliced for an earthy flavor - Bell peppers in different colors for variety - Sriracha or chili flakes for heat Feel free to mix and match based on what you have in your fridge. This dish is very flexible! Zucchini noodle stir fry is not just delicious; it is also healthy. Here are some key points: - Low in calories, this dish is great for weight loss. - Packed with fiber from all the veggies, it helps digestion. - Rich in vitamins A and C from bell peppers and broccoli. - The use of olive oil provides healthy fats. This recipe balances nutrition with taste, making it a great choice for any meal. For the full recipe, check the earlier section. First, gather all your ingredients. Use two medium zucchinis and spiralize them into noodles. Next, slice one red bell pepper and one yellow bell pepper thinly. Take one cup of broccoli florets and one cup of snap peas, trimming the ends off the peas. Mince two cloves of garlic and grate one tablespoon of fresh ginger. Set these aside in small bowls for easy access. In a large skillet or wok, heat one tablespoon of extra virgin olive oil over medium-high heat. This should take about one minute. Once the oil shimmers, add the minced garlic and grated ginger. Sauté these for about 30 seconds. Watch closely so they do not burn. Next, add the sliced bell peppers, broccoli florets, and snap peas. Stir-fry these colorful veggies for 5 to 7 minutes. They should stay crisp but tender. Now it’s time for the star of the show. Gently fold in the spiralized zucchini noodles. Stir-fry for 2 to 3 more minutes. You want them to soften just a little while still holding their shape. In a small bowl, whisk together three tablespoons of soy sauce, one tablespoon of sesame oil, one tablespoon of rice vinegar, and one teaspoon of honey. Pour this sauce over the stir-fried veggies and noodles. Toss everything well to coat. When mixed, remove the skillet from the heat. Carefully transfer the stir fry to a serving platter. Garnish your stir fry with sesame seeds and freshly chopped cilantro. This adds a pop of color and flavor. Serve it in a large, colorful bowl. The bright veggies will look great together. Add a few more sesame seeds and cilantro on top for a nice touch. Enjoy your vibrant and healthy meal! For a complete guide, check out the Full Recipe. To spiralize zucchini, you need a spiralizer. This tool cuts the zucchini into long, noodle-like strands. First, wash the zucchini well. Cut off both ends. Place it in the spiralizer and twist. You will get long, thin noodles. Make sure to keep the zucchini steady. If you don’t have a spiralizer, a vegetable peeler works too. Just peel long strips, but they won’t be as noodle-like. Store leftover zucchini noodles in an airtight container. They last in the fridge for up to two days. If you want to keep them fresh, don’t add sauce until you’re ready to eat. To reheat, place the noodles in a pan over medium heat. Stir for a few minutes until warm. Avoid microwaving, as that can make them soggy. Add more flavor by using fresh herbs like basil or mint. You can also sprinkle some red pepper flakes for a kick. A squeeze of lime or lemon juice brightens up the dish. For extra crunch, toss in some chopped nuts like cashews or peanuts. These simple additions make the meal even more exciting. Don't forget the Full Recipe for more delicious details! {{image_4}} You can add protein to your zucchini noodle stir fry for extra nutrition. Tofu is a great choice for a vegan option. Use firm or extra-firm tofu, cut into cubes. Cook it until golden for the best flavor. If you prefer meat, chicken works well. Slice boneless chicken thighs or breasts thinly. Stir-fry them first until cooked through, then add the veggies. Shrimp is another tasty option. Use peeled and deveined shrimp. Cook them for just a few minutes until they turn pink. All these proteins blend well with the sauce in the stir fry. You can adjust the seasoning to match your taste. For a spicy kick, add red pepper flakes or sriracha. Start with a small amount and increase to your liking. If you prefer a mild flavor, keep it simple with just soy sauce and sesame oil. For a vegan option, ensure your sauce is free from honey. Replace it with maple syrup or agave for sweetness. Experiment with fresh herbs like basil or mint for a unique twist. They add freshness and a new layer of flavor to your dish. Feel free to change up the veggies in your stir fry. Carrots add crunch and sweetness. Slice them thinly or use a peeler for ribbons. You can also use mushrooms for a meaty texture. Shiitake or button mushrooms work great. Try adding spinach or kale for extra greens. They wilt nicely and mix well with the noodles. Don’t be afraid to get creative! Use what you have on hand. This dish is all about fresh ingredients and vibrant flavors. For the complete recipe and additional tips, check out the Full Recipe. Always let the zucchini noodle stir fry cool before storing. Use an airtight container to keep it fresh. This helps maintain flavor and texture. Keep the stir fry in the fridge. You can enjoy it later. Zucchini noodle stir fry stays fresh for about 3 days in the fridge. After that, the zucchini may become too soft. Check for any off smells or changes in color before eating. If you notice these, it is best to discard it. You can freeze zucchini noodle stir fry, but it’s best to use fresh noodles. Cook the stir fry, then let it cool. Place it in a freezer-safe bag or container. It can last for about 2 months in the freezer. When ready to eat, thaw it in the fridge overnight, then reheat in a skillet. This keeps the flavors intact. For a full recipe, check out the Zesty Zucchini Noodle Stir Fry. Yes, you can make Zucchini Noodle Stir Fry ahead of time. Cook the stir fry and let it cool. Place it in an airtight container and refrigerate. It stays fresh for about three days. When you want to eat it, just reheat it on the stove or in the microwave. However, the zucchini noodles may lose some crunch. Yes, Zucchini Noodle Stir Fry can be gluten-free. Use tamari instead of soy sauce to keep it gluten-free. All other ingredients in the recipe are naturally gluten-free. This makes it a great dish for those with gluten sensitivities. To keep zucchini noodles firm, do not overcook them. Add them last in the cooking process. Stir-fry for just 2-3 minutes. Also, use a good quality spiralizer to create even noodles. If you want, you can lightly salt the noodles before cooking. This helps draw out excess moisture. Zucchini noodle stir fry is a fun, tasty, and healthy dish. We covered the main ingredients, cooking steps, and how to customize this meal. You now know ways to add protein and alter flavors for your taste. Plus, I shared tips on storage and reheating. Remember, keeping your noodles firm is key. Enjoy exploring different flavors and variations. This dish can fit your busy life and still be enjoyable. Get creative in your kitchen, and make it your way!

Zucchini Noodle Stir Fry Quick and Flavorful Recipe

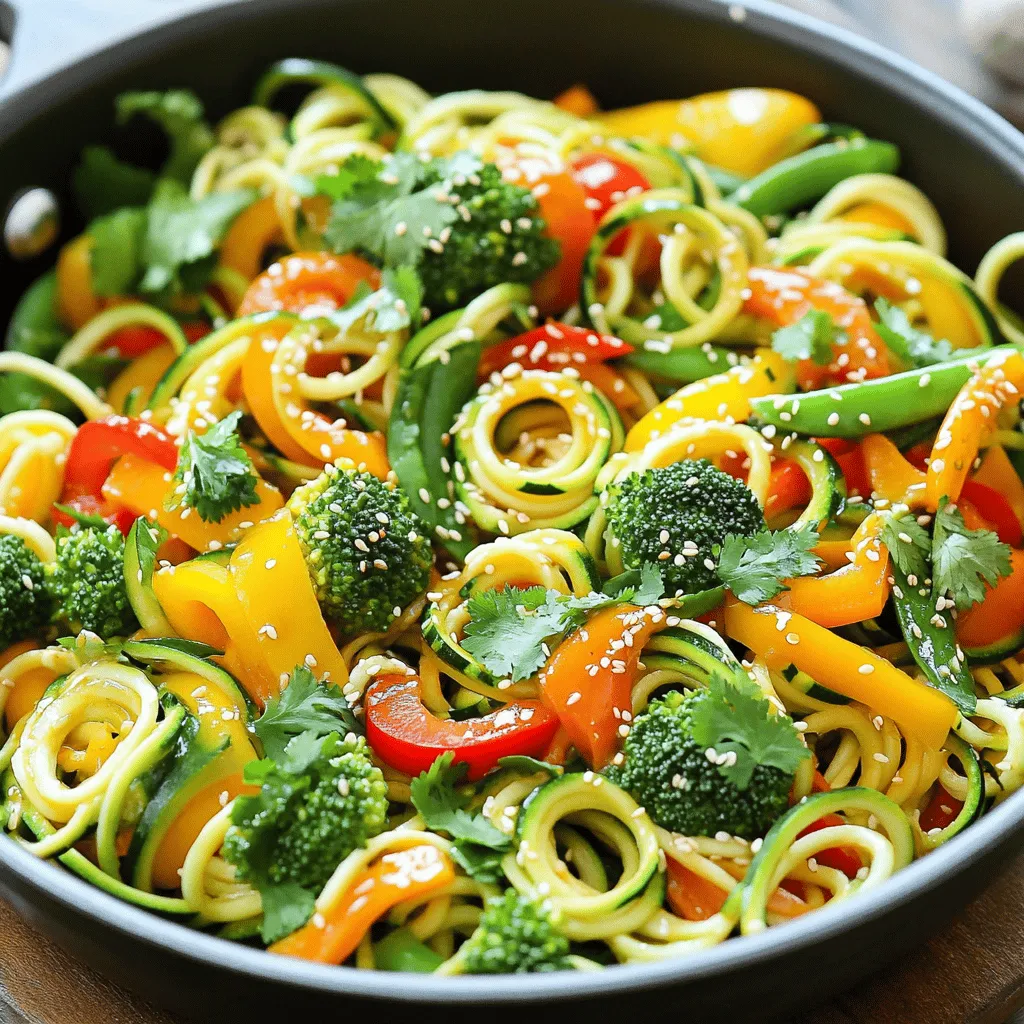
Are you ready for a quick and tasty meal? This Zucchini Noodle Stir Fry is simple and packed with flavor.

To create a perfect creamy mushroom risotto, you need the right ingredients. Here’s a complete list of what you will need: - 1 ½ cups Arborio rice - 5 cups vegetable broth - 1 cup heavy cream - 1 cup fresh mushrooms (such as cremini or shiitake), sliced - ½ cup onion, finely diced - 2 cloves garlic, minced - ½ cup grated Parmesan cheese - 2 tablespoons olive oil - 1 tablespoon fresh thyme leaves (or 1 teaspoon dried thyme) - Salt and pepper to taste - Fresh parsley, chopped (for garnish) These ingredients come together to create a dish that feels both simple and comforting. The Arborio rice is key because it absorbs flavors well and gives that creamy texture. Using fresh mushrooms adds depth and umami. Heavy cream brings richness, while Parmesan adds a savory kick. Don’t skip the fresh herbs! They brighten up the dish and enhance its flavor. Each ingredient plays a crucial role in making your risotto creamy and delicious. If you're ready to dive into this recipe, check out the Full Recipe for detailed instructions! Start by warming your vegetable broth in a saucepan over low heat. You want to keep it warm as you cook your risotto. This step is key because cold broth can slow down the cooking. It also helps the rice cook evenly. In a large skillet, pour in the olive oil. Set the heat to medium. Add your diced onion and sauté it for about 3 minutes. You should see the onion turn translucent and soft. This step releases great flavor into your dish. Next, stir in the minced garlic. Cook it for a minute. Be careful not to burn the garlic; you want it fragrant, not bitter. Now it’s time to add the sliced mushrooms to the skillet. Cook them for about 5 to 7 minutes. Stir occasionally until they turn golden brown. This browning is important as it enhances the flavor by releasing moisture from the mushrooms. Add the Arborio rice to the skillet. Stir well to coat the rice with the oil, onions, and mushrooms. Toast the rice for 1 to 2 minutes. This step is vital as it deepens the flavor and prepares the rice for cooking. Begin adding the warm broth to the rice mixture. Start with about ½ cup of broth at a time. Stir constantly until most of the liquid is absorbed. This process takes about 18 to 20 minutes. You want the rice to be cooked al dente, with a creamy texture. Once the risotto reaches the right texture, gently fold in the heavy cream and grated Parmesan cheese. Season with salt and pepper to taste. If you want a creamier risotto, add a bit more broth. Let the risotto rest for a minute off the heat. This helps thicken it a bit. To serve, ladle the risotto into bowls and sprinkle with chopped parsley for a fresh touch. For a fancy look, drizzle a bit of olive oil on top. For the full recipe, check the earlier section. Stirring is key to creamy risotto. Each stir helps release the rice's starch. This starch makes the dish rich and smooth. If the risotto gets too thick, add warm broth. Keep adding broth until you reach your desired creaminess. You can boost flavor with herbs like thyme or parsley. Fresh herbs add brightness and depth. You can also use grated cheese, like Parmesan, for richness. Want to pair something with your risotto? A crisp white wine, like Sauvignon Blanc, works well. Garnish your risotto with fresh parsley for color. It adds a nice pop and freshness. Drizzle a bit of olive oil over the top for elegance. This simple step makes your dish look restaurant-worthy. For more tips, check the Full Recipe for ideas. {{image_4}} You can make creamy mushroom risotto even better by using different types of mushrooms. Try using shiitake, portobello, or oyster mushrooms. Each type adds its own flavor and texture. For example, shiitake mushrooms give a rich, earthy taste, while oyster mushrooms add a delicate sweetness. Mixing mushrooms can create a more complex dish. Don’t hesitate to experiment with your favorites! You can turn this dish vegan by swapping some ingredients. Use plant-based cream instead of heavy cream. For cheese, try nutritional yeast or vegan Parmesan. These swaps keep the dish creamy and tasty. When cooking, use the same steps as the original recipe. The flavors will shine through with these plant-based options. You can add seasonal vegetables to your risotto for a fresh twist. In spring, try peas or asparagus. In autumn, add butternut squash or kale. These veggies enhance the dish and add color. You can also adjust the herbs to match the season. Fresh basil in summer or sage in fall can make a big difference. Enjoy experimenting with what’s in season! Store leftover risotto in the fridge. Use an airtight container to keep it fresh. Let the risotto cool before sealing the container. This helps prevent moisture build-up. Leftovers can last for up to three days. To reheat risotto, use a stovetop method. Warm it in a pan on low heat. Stir often to keep it creamy. If it seems dry, add a splash of broth or cream. This will help bring back the creaminess. You can also use a microwave. Heat in short bursts and stir in between. Freezing risotto is possible, but it may change the texture. Cool it completely before packing. Use freezer-safe containers or bags. Leave some space for expansion. When thawing, let it sit in the fridge overnight. Reheat it slowly, adding liquid as needed to restore creaminess. The best rice for risotto is Arborio rice. Arborio is a short-grain rice. It has high starch content, which helps create a creamy texture. When cooked, Arborio rice becomes tender on the outside yet firm inside. This unique property allows it to absorb flavors well. It also helps the risotto become rich and velvety. Choose Arborio rice for that perfect creamy mushroom risotto. Yes, you can make risotto ahead of time, but it’s best fresh. If you want to prepare it in advance, cook the rice until it's just firm. Cool it quickly and store it in the fridge. When you're ready to serve, reheat it slowly. Add a little broth to bring back the creaminess. Stir often to keep the texture nice. If your risotto is too thick, don't worry! Simply add warm broth, a little at a time. Stir well after each addition. This helps loosen the rice and restore creaminess. If you don’t have broth, use water. Keep stirring until you reach your desired texture. To make your risotto creamier, stir it often while cooking. This releases more starch from the rice. Adding heavy cream and Parmesan cheese also boosts creaminess. You can also finish with a pat of butter for extra richness. Always use warm broth, as cold broth can affect the texture. Mushroom risotto pairs well with many side dishes. Try a fresh salad with lemon vinaigrette. Grilled vegetables also complement it nicely. For a wine pairing, a crisp white wine like Sauvignon Blanc works well. This combination enhances the meal's flavors, making it a delightful experience. For more details, check the Full Recipe. Mushroom risotto is a delicious dish that brings comfort and flavor. We covered the ingredients, prep steps, and helpful tips for perfecting your risotto. Remember to keep your broth warm and stir often for that creamy texture. Feel free to experiment with different mushrooms and herbs to make this dish your own. Don't forget to store leftovers properly and reheat them gently. With these steps and tricks, you’ll create a delightful risotto that impresses every time. Enjoy cooking and savoring every bite!

Creamy Mushroom Risotto Simple and Comforting Dish

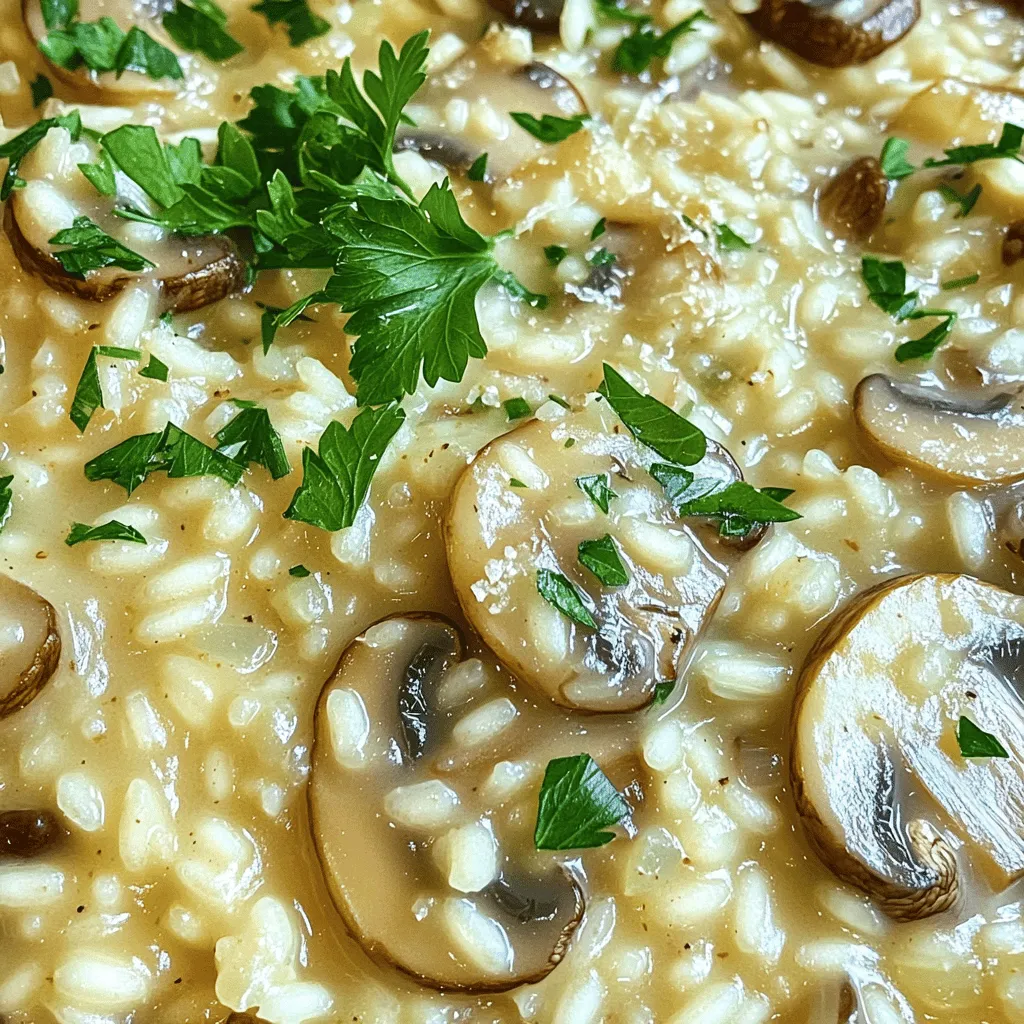
Welcome to the world of creamy mushroom risotto, a dish that brings warmth and comfort to any table. With just

Older posts
Newer posts
← Previous Page1 … Page47 Page48 Page49 … Page68 Next →

dsad

© 2025 recipesstation • Built with GeneratePress

Our Policies

  • Copyright Policy
  • Cookie Policy
  • GDPR Policy
  • Privacy Policy
  • Disclaimer
  • Terms Of Use

More Information

  • Home
  • About
  • Contact
  • Appetizers
  • Dessert
  • Dinner
  • Drinks
©2025, recipesstation About Back To Top