Skip to content
DisclaimerTerms Of UseGDPR PolicyCookie Policy

recipesstation

  • Home
  • Drinks
  • Appetizers
  • Dinner
  • Dessert
  • About
  • Contact
  • Privacy Policy
DisclaimerTerms Of UseGDPR PolicyCookie Policy

Emily

- 8 slices of rich brioche bread - 4 large eggs - 1 cup whole milk - 1 cup heavy cream - 1/2 cup granulated sugar - 2 teaspoons pure vanilla extract - 1/2 cup packed brown sugar (for the brûlée topping) - Fresh berries (for garnish) - Powdered sugar (for dusting) Gather these ingredients to create your Overnight Crème Brûlée French Toast. Each one plays a key role in building flavor and texture. The brioche bread brings a soft and rich base, while the eggs and whole milk form a creamy custard. Heavy cream adds richness, and sugar sweetens it all up. Don't forget the toppings! Brown sugar will caramelize beautifully on top, giving that classic brûlée finish. Fresh berries add a pop of color and freshness, while powdered sugar makes everything look fancy. With these ingredients at hand, you’re ready to impress anyone who takes a bite. Check the Full Recipe for exact steps and tips to make this dish truly shine! To make the custard, start with a large mixing bowl. In this bowl, add: - 4 large eggs - 1 cup whole milk - 1 cup heavy cream - 1/2 cup granulated sugar - 2 teaspoons pure vanilla extract - 1 teaspoon almond extract - 1/2 teaspoon ground cinnamon - A pinch of salt Whisk these ingredients together until smooth. Make sure there are no lumps. The mixture should look creamy and well blended. The vanilla and almond extracts add a lovely flavor that makes this dish special. Next, take a greased 9x13 inch baking dish. Carefully arrange 8 slices of rich brioche bread in the dish. You can overlap the slices a bit if needed. When all slices are in place, pour the custard mixture over the bread. Ensure every slice is soaked well. Cover the dish with plastic wrap and place it in the fridge. Leave it overnight, or at least for 6 hours. This helps the bread soak up all the yummy flavors. The next morning, preheat your oven to 350°F (175°C). When the oven is ready, take the baking dish from the fridge and remove the plastic wrap. Now, sprinkle 1/2 cup packed brown sugar evenly over the top of the soaked brioche. This will create that crispy, sweet layer we all love. Place the baking dish in the oven and bake for 30-35 minutes. You want the custard to set and the top to turn a beautiful golden brown. For the final touch, use a kitchen torch to caramelize the brown sugar until it melts. If you don’t have a kitchen torch, you can broil it in the oven for a couple of minutes. Just keep a close eye on it to avoid burning. Once it’s done, let the French toast cool for a few minutes. Then, cut it into slices and serve warm. Top each slice with fresh berries and a dusting of powdered sugar for a stunning presentation. You can find the complete instructions in the Full Recipe. To make your Overnight Crème Brûlée French Toast shine, you need to soak the brioche well. You want each slice to absorb the custard fully. This makes the toast rich and flavorful. Make sure you cover the dish tightly before refrigerating. Baking time is crucial too. Every oven is different. Start checking at 30 minutes. Look for a golden top and firm custard. If it seems too soft, let it bake for a few more minutes. A kitchen torch is a great tool for caramelizing the sugar. It gives you that perfect crackly top. If you don’t have one, no worries! You can use your oven's broiler instead—just keep a close eye on it. You’ll also need a large mixing bowl and a whisk. These are essential for blending your custard mixture smoothly. Pair your French toast with fresh fruits like berries. They add a burst of color and freshness to your dish. Drizzle some maple syrup on top for extra sweetness. For special occasions, serve with a dollop of whipped cream or a scoop of vanilla ice cream. It elevates the dish and makes it even more delightful! {{image_4}} You can make this dish even more fun by adding different flavors. Try adding hazelnut or coconut extract to the custard. These extracts bring a unique twist to the classic taste. You can also sprinkle in spices like nutmeg or cardamom. These spices add warmth and depth to your French toast. Each flavor brings its own charm, making breakfast a delightful surprise. If you need gluten-free options, use gluten-free bread. Many brands offer tasty choices that hold up well in this recipe. For those who avoid dairy, you can substitute with plant-based milk and cream. Almond milk or coconut cream works well. These swaps keep the rich taste while fitting your dietary needs. You can enjoy this dish without missing out on flavor. Make your French toast special with seasonal flavors. For the holidays, try an eggnog version. This adds a festive touch to your breakfast table. In the summer, use fresh stone fruits like peaches or plums. Their natural sweetness brightens the dish, making it perfect for warmer days. Each season offers new ways to enjoy this delicious treat. For the full recipe, check out the Overnight Crème Brûlée French Toast. To keep your Overnight Crème Brûlée French Toast fresh, place the leftovers in an airtight container. Make sure the container seals tightly to prevent air from getting in. You can store it in the fridge for up to three days. This helps keep the bread soft and the custard creamy. When it comes to reheating, I recommend the oven for the best results. Preheat your oven to 350°F (175°C). Place the slices on a baking sheet and cover with foil. Heat for about 10-15 minutes. This method keeps the texture nice. If you're in a hurry, use the microwave. Just heat for 30-60 seconds, but be careful. The bread can get soggy. If you want to save some for later, freezing works great. Slice the French toast before freezing. Wrap each piece tightly in plastic wrap, then place them in a freezer bag. They can stay frozen for up to three months. When you're ready to eat, let them thaw in the fridge overnight. Reheat in the oven or microwave for a warm treat. This keeps the flavors intact and delicious. You can tell when the French toast is cooked by checking two things. First, look for the custard to be set. It should not be runny. Next, check the top for a golden brown color. This shows that the sugar has caramelized well. If both look good, your dish is ready to enjoy! Yes, you can make the custard mixture ahead! This dish works best when soaked overnight. Just mix your eggs, milk, cream, sugar, and extracts in a bowl. Pour it over the brioche slices. Cover your dish with plastic wrap. Let it soak in the fridge for at least six hours. This step helps the bread absorb the flavors. If you don’t have a kitchen torch, don’t worry! You can use your oven's broiler. After baking, sprinkle brown sugar on top. Place the dish under the broiler for a few minutes. Keep a close eye to avoid burning. This method will also give you that nice caramelized topping. Yes, you can make this dish dairy-free! Use almond milk or coconut milk instead of whole milk. For cream, try coconut cream or cashew cream. You can also find dairy-free cream cheese for a richer taste. Just make sure to adjust the flavors to your liking! This blog post covered everything you need for Overnight Crème Brûlée French Toast. We discussed the main and extra ingredients, plus tips for success. You learned ways to store your leftovers and how to heat them again. With these steps and ideas, you can make a classic dish that fits any event. Remember, personal touches and variations bring this recipe to life. Enjoy experimenting and delight your friends and family with this sweet treat!

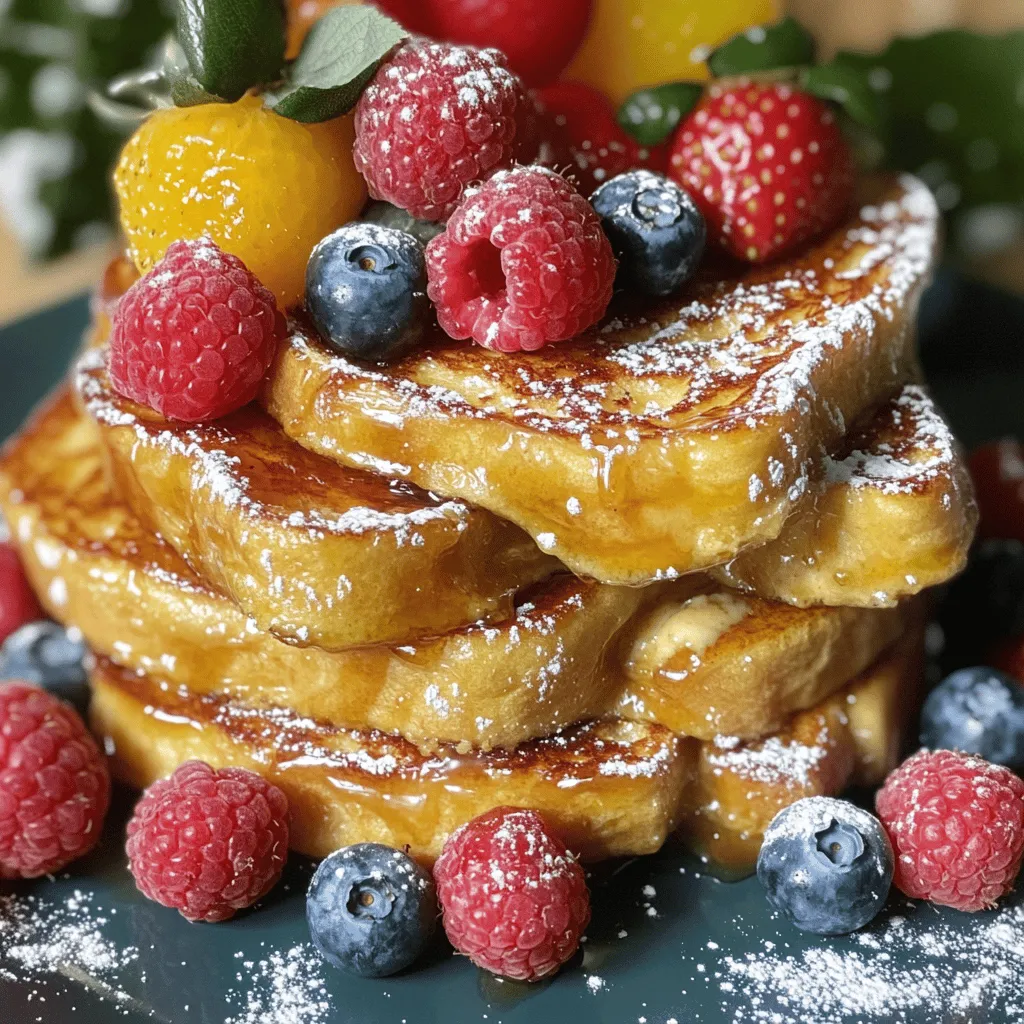
Overnight Crème Brûlée French Toast Irresistible Delight

Are you ready to turn your breakfast routine into something truly special? This Overnight Crème Brûlée French Toast is an

- 1 lb large shrimp, peeled and deveined - 3 tablespoons olive oil - 4 cloves garlic, finely minced - 1 cup heavy cream - 1/2 cup low-sodium chicken broth - 1 cup fresh spinach leaves, packed - 1/2 teaspoon red pepper flakes (optional) - Salt and freshly ground black pepper to taste - Juice of 1 lemon (plus additional wedges for serving) - Fresh parsley, finely chopped (for garnish) When making creamy garlic shrimp, you will need a few key ingredients. First, get large shrimp. They should be peeled and deveined for easy cooking. Next, olive oil adds flavor and helps cook the shrimp perfectly. Garlic is a must for that rich taste we love. Heavy cream gives the dish its creamy texture, while chicken broth adds depth. Fresh spinach brings color and nutrients, and lemon juice brightens the whole dish. Optional red pepper flakes can add a little heat, so feel free to adjust based on your taste. Don’t forget salt and pepper to enhance the flavors. Finally, fresh parsley gives a lovely finish when you serve the dish. - Large skillet or frying pan - Measuring cups and spoons For this recipe, you need a large skillet or frying pan. This helps to cook the shrimp evenly. Measuring cups and spoons are also important for getting the right amounts of each ingredient. Using the right tools makes cooking easier and more fun. - Calories, protein, fats, carbohydrates breakdown per serving Each serving of creamy garlic shrimp has about 400 calories. It contains 30 grams of protein, 25 grams of fat, and 10 grams of carbohydrates. This dish is rich in flavor and offers a good balance of nutrients. Enjoy it as a meal that feels both indulgent and satisfying. For the full recipe, check the details above! To start, heat 3 tablespoons of olive oil in a large skillet over medium heat. Once the oil shimmers, add 1 pound of peeled and deveined shrimp. Cook the shrimp for about 2-3 minutes on each side. You want them to turn pink and opaque. Once cooked, remove the shrimp and set them aside on a plate to keep warm. Now, lower the heat to low. In the same skillet, add 4 cloves of finely minced garlic. Sauté gently for about 30 seconds, stirring constantly. Be careful not to let the garlic brown, as it can taste bitter. Next, pour in 1/2 cup of low-sodium chicken broth, bringing it to a gentle simmer for about 2 minutes. Gradually stir in 1 cup of heavy cream, whisking until combined. Let the sauce simmer for about 3-5 minutes until it thickens slightly. Stir in fresh spinach leaves, about 1 cup packed. Add salt and freshly ground black pepper to taste. You can also add 1/2 teaspoon of red pepper flakes for a bit of heat. Cook the spinach for 1-2 minutes until it wilts. Finally, return the shrimp to the skillet, tossing them in the creamy garlic sauce. Heat everything together for another 2-3 minutes until the shrimp is warm and coated in sauce. Serve the creamy garlic shrimp with lemon wedges and garnish with fresh parsley. For the full recipe, check the details above. How to choose fresh shrimp When picking shrimp, look for a firm texture and a clean smell. Choose shrimp with a shiny shell and no black spots. Fresh shrimp should be pink or gray, depending on the type. If you buy frozen shrimp, check for ice crystals and choose ones that are individually frozen. This shows they are fresh and have not thawed. Tips for achieving the perfect sauce consistency To get the sauce just right, use heavy cream. This gives it a rich and smooth texture. Always let the sauce simmer gently. This helps it thicken without burning. If the sauce is too thick, add a splash of chicken broth. If it’s too thin, let it simmer longer to reduce. Suggested seasonings and herbs to experiment with You can add more flavor with spices. Consider garlic powder, onion powder, or paprika. Fresh herbs like basil or thyme work great too. If you want a kick, add cayenne pepper or more red pepper flakes. Each adds a unique twist to the dish. Pairing options like pasta or rice Creamy garlic shrimp pairs well with many sides. Serve it over pasta for a hearty meal. Rice is another good option; it absorbs the sauce nicely. Crusty bread is perfect for dipping in the sauce, too. Overcooking shrimp Shrimp cooks very quickly. Overcooked shrimp turn rubbery and tough. Cook them just until pink and opaque. This usually takes about 2-3 minutes per side. Remove them from the pan as soon as they are done. Not balancing flavors properly Balancing flavors is key to a great dish. Taste the sauce as you go. If it's too rich, add more lemon juice. If it lacks depth, a pinch of salt can help. Always adjust based on your taste. {{image_4}} For a lighter version of creamy garlic shrimp, you can swap out the heavy cream. Use half-and-half or a mix of Greek yogurt and milk. This keeps the dish creamy but cuts down on calories. If you want a dairy-free option, consider coconut cream or cashew cream. These choices add a unique flavor while keeping the dish rich. If you prefer vegetarian options, try using mushrooms instead of shrimp. Sauté the mushrooms until they are golden. They soak up the sauce well and add a great texture. You can also add chickpeas for protein. They pair nicely with garlic and cream flavors. How you present creamy garlic shrimp can elevate the dish. Serve it over a bed of pasta, rice, or quinoa. This adds a hearty base that soaks up the sauce. You can also use crusty bread for dipping. Just imagine the joy of scooping up that delicious sauce with warm bread. For side dishes, consider a simple green salad or roasted vegetables. These add freshness and balance to the meal. A light, lemony side can also enhance the shrimp's flavors. You can find inspiration from different cuisines to add a twist to creamy garlic shrimp. For a Mexican flair, try adding jalapeños or cilantro. The heat will balance with the creaminess. If you want an Italian touch, stir in sun-dried tomatoes and fresh basil. Explore unique ingredients based on various cuisines. For example, using lemongrass and fish sauce can give it a Thai vibe. These changes make the dish fun and exciting each time you prepare it. To store your creamy garlic shrimp, place it in a clean, airtight container. This keeps the dish fresh for a longer time. Make sure to cool it to room temperature before sealing. Refrigerate it within two hours of cooking to avoid spoilage. It will stay good in the fridge for up to three days. When you're ready to enjoy your leftovers, reheating is key. You can use a skillet or the microwave. For the skillet, heat it on low and add the shrimp. Stir gently to warm it up. This method keeps the sauce creamy. In the microwave, place the shrimp in a bowl and cover it loosely. Heat in short bursts, stirring in between until warm. Avoid high heat to prevent the sauce from separating. Can creamy garlic shrimp be frozen? Yes, but it is best to freeze it without the cream sauce. The sauce may not thaw well, losing its creamy texture. To freeze, cool the shrimp and place it in a freezer-safe container. Label it with the date. When you’re ready to eat, thaw in the fridge overnight and reheat. If you want the sauce, make it fresh when you cook the shrimp. You can use a few options if you want a lighter base. Evaporated milk works well. It gives creaminess without all the fat. Another choice is coconut cream. This adds a nice flavor and keeps it dairy-free. You can also mix milk with cornstarch for a quick thickener. Each choice will change the taste slightly, so pick what you like best. Yes, you can use frozen shrimp! Just remember to thaw them first. Place them in the fridge overnight or run them under cold water. This keeps them fresh and safe. When cooking, they may take a minute longer to cook than fresh shrimp. Always check they are pink and opaque. This shows they are done. Creamy garlic shrimp lasts about 3 to 4 days in the fridge. Store it in an airtight container. This keeps it fresh and safe to eat. If you notice any off smells or colors, it's best to toss it. Always check before eating leftovers. The recipe can be spicy if you add red pepper flakes. You can adjust the heat by adding more or less. If you prefer no spice, skip the flakes. You can add herbs like parsley or basil for flavor instead. This keeps the dish tasty without the heat. Yes, you can prepare creamy garlic shrimp in advance. Just cook the shrimp and sauce, then store them separately. When ready to serve, heat them together. This helps keep the shrimp from getting tough. You can also add fresh spinach right before serving. It stays bright and fresh this way. For the full recipe, check the earlier section. This blog post dives deep into making creamy garlic shrimp. You learned about the key ingredients, tools, and step-by-step instructions. I shared tips to perfect the dish and variations for every taste. Storing and reheating methods ensure that leftovers stay tasty. Remember, you can swap ingredients to make it lighter or vegetarian. With these insights, you can impress anyone at your table. Enjoy cooking this delightful dish and get creative with your flavors!

Creamy Garlic Shrimp Rich and Flavorful Dinner Dish

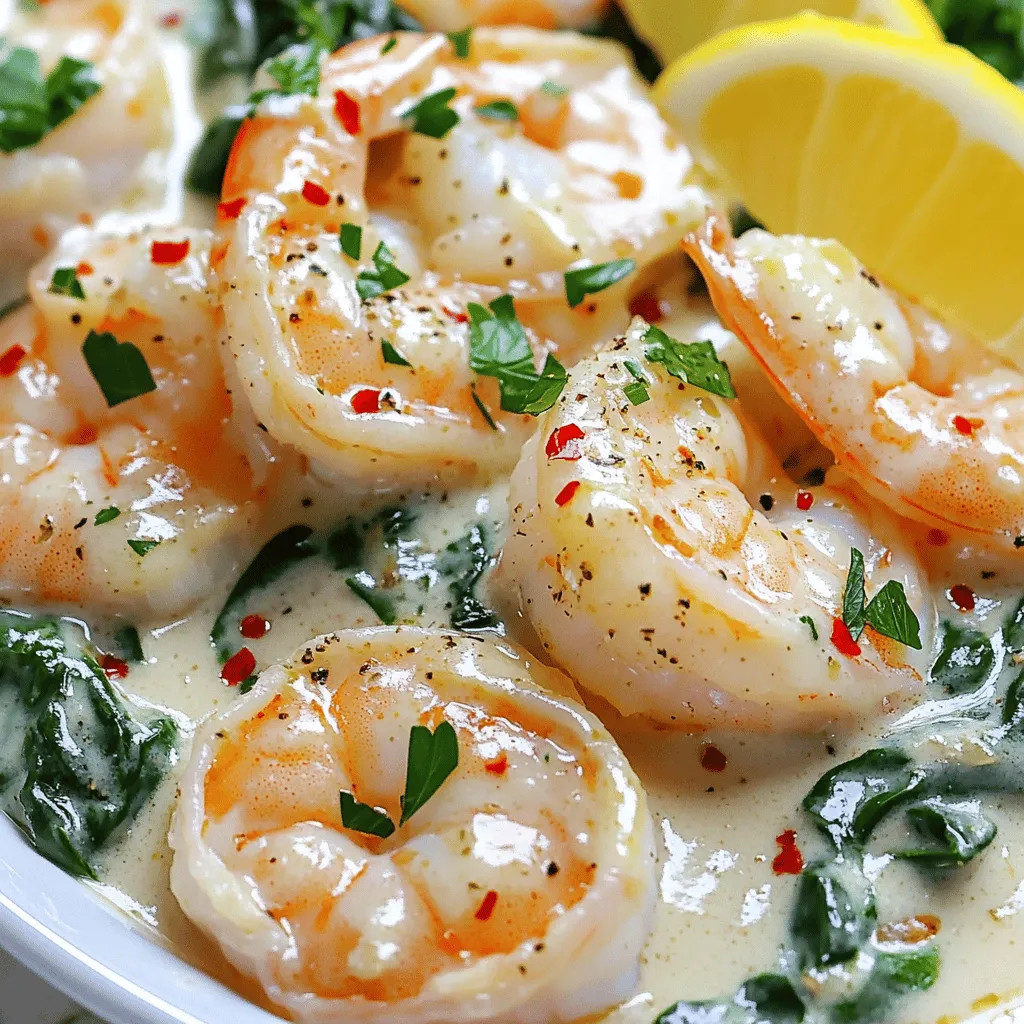
If you’re craving a rich and flavorful dinner that’s easy to make, Creamy Garlic Shrimp is the dish for you.

To make tasty banana mochi rolls, gather these key ingredients: - 1 cup glutinous rice flour (also known as sweet rice flour) - 1/4 cup granulated sugar - 1/2 cup water - 1 ripe banana, cut into thin rounds - 1/4 teaspoon pure vanilla extract - Cornstarch, for dusting These ingredients create the soft and chewy texture that mochi is famous for. You can enhance your banana mochi rolls with a few optional garnishes. Consider using: - Shredded coconut - Chopped nuts - Drizzles of chocolate or honey These additions can bring extra flavor and make your rolls look more appealing. If you need to change some ingredients, here are some easy swaps: - Glutinous rice flour: Use regular rice flour, but the texture will differ. - Granulated sugar: Try coconut sugar or honey for a healthier option. - Ripe banana: Substitute with other fruits like strawberries or mango slices. These substitutions can help you fit your dietary needs while keeping the dish delicious. Check out the Full Recipe for more details! To start, gather your ingredients. You need glutinous rice flour, sugar, water, and vanilla extract. In a bowl, mix the glutinous rice flour and sugar well. Next, slowly pour in the water and vanilla extract. Whisk until the mix is smooth and free of lumps. This is key for a nice texture. Once your mochi dough is ready, it's time to shape it. Dust your work surface with cornstarch. Take a small piece of dough and flatten it into a round disc. Aim for about 2-3 inches wide. Place a slice of banana in the center of each disc. Carefully wrap the dough around the banana, pinching the edges to seal. Be sure the banana is fully enclosed. Now, let’s cook the mochi. Pour the batter into a microwave-safe dish. Cover it loosely with plastic wrap or a lid. Leave a small gap for steam to escape. Microwave on high for 2 minutes. Afterward, stir the mixture. Return to the microwave and cook in 1-minute increments, stirring each time. You want the dough to thicken and become clear. This should take about 4-5 minutes total. Make sure to follow the [Full Recipe] for precise measurements and cooking tips. Enjoy making these delicious banana mochi rolls! To get the right dough, mix the rice flour and sugar well. Add water slowly. This helps you control the thickness. The goal is a smooth and thick batter. If too runny, add a bit more flour. If too thick, add water a tiny bit at a time. Dust your hands with cornstarch before you touch the dough. This keeps it from sticking. Also, dust the work surface with cornstarch. If you find the dough is still sticky, use more cornstarch as you form the rolls. Serve banana mochi rolls on a pretty plate. You can add extra coconut or fresh banana slices on top. This makes the dish look more appealing. You can also pair them with a scoop of ice cream for a cool treat. For a twist, try drizzling chocolate sauce over the top. Enjoy your delicious banana mochi rolls! For the full recipe, check out the main section. {{image_4}} You can change the taste of your banana mochi rolls by adding different extracts. Try almond or coconut extract for a unique twist. You can also add fillings like chocolate chips, peanut butter, or even cream cheese. These tasty additions will enhance the flavor and surprise your taste buds. If you want a gluten-free option, use a gluten-free flour blend instead of glutinous rice flour. For a lower-sugar version, reduce sugar or use a sugar substitute. If you are vegan, skip the vanilla extract if it is not plant-based. These swaps make the recipe fit different diets while still being delicious. Bananas are great, but feel free to experiment with other fruits. Strawberries, mangoes, or even kiwi work well. Just slice them thinly and place them inside the mochi dough. Each fruit adds its own flavor and charm, making your mochi rolls exciting and fresh. To store leftover mochi rolls, place them in an airtight container. Line the container with parchment paper to avoid sticking. Keep them in the fridge. They stay fresh for up to three days. If you notice any moisture, change the paper to keep them dry. When you want to enjoy your mochi rolls again, reheating is easy. I suggest using the microwave for quick results. Place the mochi rolls on a microwave-safe plate. Cover them with a damp paper towel to keep them moist. Heat for about 10 to 15 seconds. If they feel cold, heat for a few more seconds. Freezing mochi rolls is a great option for longer storage. Start by placing the rolls on a baking sheet. Make sure they don’t touch each other. Freeze them for about an hour until firm. After that, transfer the rolls to a freezer bag. Squeeze out the air and seal it well. They can last up to a month in the freezer. When you’re ready to eat them, thaw overnight in the fridge. You can then reheat them as mentioned above. To make banana mochi rolls from scratch, start with glutinous rice flour. Mix it with sugar in a bowl. Gradually add water and vanilla extract. Stir until smooth. Pour the batter into a microwave-safe dish. Cover it, leaving a small opening for steam. Microwave for 2 minutes, stir, and cook until thick and translucent. Dust your surface with cornstarch. Once cool, flatten pieces of dough into discs. Place banana slices in the center and wrap the dough around them. Pinch to seal and place them seam-side down on a plate. Optionally, coat with shredded coconut for added flavor. You can find pre-made banana mochi rolls at Asian grocery stores. Many online retailers also sell them. Check local markets that focus on Asian treats. Some bakeries may make them fresh or offer frozen options. Look for brands known for quality mochi products. Always check the ingredients to ensure freshness and taste. Banana mochi rolls are a fun treat. Each roll contains glutinous rice flour, sugar, and banana. They are gluten-free but high in carbs. A single roll has about 100-150 calories. It also offers some fiber from the banana. If you add coconut, that adds healthy fats. Always check specific brands for exact values, as they can vary. In this post, I shared how to make delicious banana mochi rolls. We covered key ingredients and optional garnishes to enhance your flavor. You learned step-by-step instructions, helpful tips, and creative variations. I also discussed how to store and reheat leftover rolls. Embrace your creativity by trying different fruits and flavors. Making banana mochi rolls can be fun and rewarding. Enjoy the process and share your tasty results!

Delicious Banana Mochi Rolls Quick and Easy Recipe

Are you ready to explore a fun and tasty treat? Banana mochi rolls are soft, chewy, and bursting with flavor.

- 4 salmon fillets (with skin for extra crispiness) - 1/4 cup honey - 4 cloves garlic, finely minced - 2 tablespoons soy sauce (preferably low-sodium) - 1 tablespoon olive oil (for cooking) - 1 teaspoon fresh ginger, grated - Salt and freshly ground black pepper to taste - 1 tablespoon sesame seeds (toasted for more flavor) - 2 green onions, thinly sliced (for garnish) - Steamed jasmine rice - Vegetable stir-fry - Non-stick skillet - Mixing bowl - Spatula - Measuring cups and spoons To make this Crispy Honey Garlic Salmon in 30 minutes, you need some key ingredients. Salmon fillets are the star of the dish. Choose ones with skin for extra crispiness. Honey gives a sweet touch, while garlic adds a strong flavor. Soy sauce brings saltiness, and olive oil helps with cooking. Fresh ginger gives warmth and depth to the dish. For seasoning, use salt and pepper to enhance the salmon's taste. Toasted sesame seeds add crunch, and sliced green onions finish the plate with color and freshness. You can serve this dish with steamed jasmine rice or a vegetable stir-fry. They make great sides to balance the flavors. Make sure to gather your equipment. A non-stick skillet is best for cooking the salmon. A mixing bowl will help combine the marinade. A spatula is needed for flipping the salmon, and measuring cups and spoons will help you get the right amounts. For the full recipe, check out the Crispy Honey Garlic Salmon section. Enjoy cooking! - Combine honey, minced garlic, soy sauce, olive oil, and ginger. - Whisk until well blended. Start with a small mixing bowl. Add 1/4 cup of honey, 4 cloves of minced garlic, 2 tablespoons of soy sauce, 1 tablespoon of olive oil, and 1 teaspoon of fresh ginger. Mixing these ingredients creates a sweet and savory marinade. This blend will coat your salmon and infuse it with flavor. - Dry the salmon fillets. - Season with salt and pepper. Take your salmon fillets and pat them dry with a paper towel. This step is key for getting that crispy skin. Next, season both sides with salt and freshly cracked black pepper. This simple seasoning enhances the natural taste of the salmon. - Heat the skillet and add olive oil. - Cook salmon skin-side down. - Flip and add marinade. Grab a large non-stick skillet and heat it over medium-high heat. Add a teaspoon of olive oil and let it heat up until it shimmers. Once the skillet is hot, place the salmon fillets skin-side down. Cook them undisturbed for about 4-6 minutes. This allows the skin to get nice and crispy. When the salmon is halfway cooked, gently flip each fillet over with a spatula. Immediately pour the honey garlic marinade over the top. Let that sauce bubble and thicken around the fish. Cook for another 3-4 minutes until the salmon is tender and flakes easily with a fork. - Sprinkle with sesame seeds. - Let rest before serving. In the last minute of cooking, sprinkle toasted sesame seeds over the salmon. This adds a nice crunch and flavor. Once done, remove the fillets from the skillet and let them rest on a plate for a minute. This helps the juices redistribute, making each bite juicy and delicious. For a beautiful presentation, garnish with sliced green onions. You can find the full recipe for this delicious dish in the previous section! To get that crispy skin, start by drying the fillets. Use a paper towel to remove moisture. This step helps achieve a nice crisp when you cook the salmon. Next, cook the fillets on medium-high heat. This temperature helps the skin crisp up quickly without overcooking the fish. You can adjust the marinade for your taste. If you love sweetness, add more honey. For a tangy kick, increase the soy sauce. Want some heat? Try adding a dash of red pepper flakes or a splash of sriracha. These small changes can really amp up the flavor of your salmon. Plating is key for a great meal. Place the salmon on a vibrant plate. Drizzle the honey garlic sauce from the skillet on top. Add a side of bright vegetables or fluffy rice for color. Finally, garnish with thinly sliced green onions. They add a fresh touch and look beautiful on the plate. For the full recipe, visit the recipe section above. {{image_4}} You can swap salmon for chicken or tofu. Both options bring unique tastes. For chicken, use boneless, skinless breasts. Cook them for about 6-8 minutes on each side. For tofu, press it to remove excess water. Cut it into thick slices and cook for 4-5 minutes on each side. Adjust the cooking time based on the protein you choose. Feel free to experiment with different sauces. Teriyaki sauce adds a sweet and savory flavor. Orange glaze gives a bright and fruity twist. Just replace the honey and soy sauce with your new choice. Keep the garlic and ginger for that great taste. Add spices or herbs to create unique flavors. Try chili flakes for heat. Fresh herbs like cilantro or basil can add freshness. Even a splash of lemon juice can lift the dish. Mix and match to find your favorite flavor combination. To keep your crispy honey garlic salmon fresh, store leftovers in the fridge. Place the salmon in an airtight container. This helps lock in flavor and moisture. If you want to save it longer, freeze the salmon. Wrap it tightly in plastic wrap, then place it in a freezer bag. This helps prevent freezer burn. Reheating needs care to keep the salmon crispy. The best way is to use the oven. Preheat your oven to 350°F (175°C). Place the salmon on a baking sheet and cover it loosely with foil. Heat for about 10-15 minutes. This helps the salmon warm up while keeping the skin crispy. You can also use a skillet on medium heat. Just add a bit of oil to the pan, then reheat for 3-5 minutes. Crispy honey garlic salmon stays fresh for 3-4 days in the fridge. If frozen, it can last for up to 3 months. Just remember to check for any off smells or discoloration before eating. Always prioritize food safety. Enjoy your meal again with the same great taste! It takes about 30 minutes to make crispy honey garlic salmon. You need 10 minutes to prep and 20 minutes to cook. This quick timing makes it perfect for a weekday meal. Yes, you can use frozen salmon fillets. To defrost, place them in the fridge overnight. For a quick method, seal them in a plastic bag and submerge them in cold water for about 30 minutes. Once thawed, follow the recipe as usual. You can serve crispy honey garlic salmon with various sides. Here are some great pairings: - Steamed jasmine rice - Vegetable stir-fry - Roasted broccoli - Quinoa salad These sides will complement the sweet and savory flavors of the salmon. Yes, you can prepare this recipe ahead of time. Cook the salmon and let it cool before storing it. Place it in an airtight container in the fridge. It will stay fresh for about two days. To reheat, use a skillet over low heat to keep the salmon crispy. In this post, I covered how to make crispy honey garlic salmon. You learned about the main ingredients, equipment needed, and step-by-step cooking instructions. I shared tips for perfect skin and flavor enhancements while suggesting variations to try. Remember to store leftovers correctly to keep them fresh. This recipe is simple and flexible. Enjoy making it your own! Happy cooking!

Crispy Honey Garlic Salmon in 30 Minutes Recipe

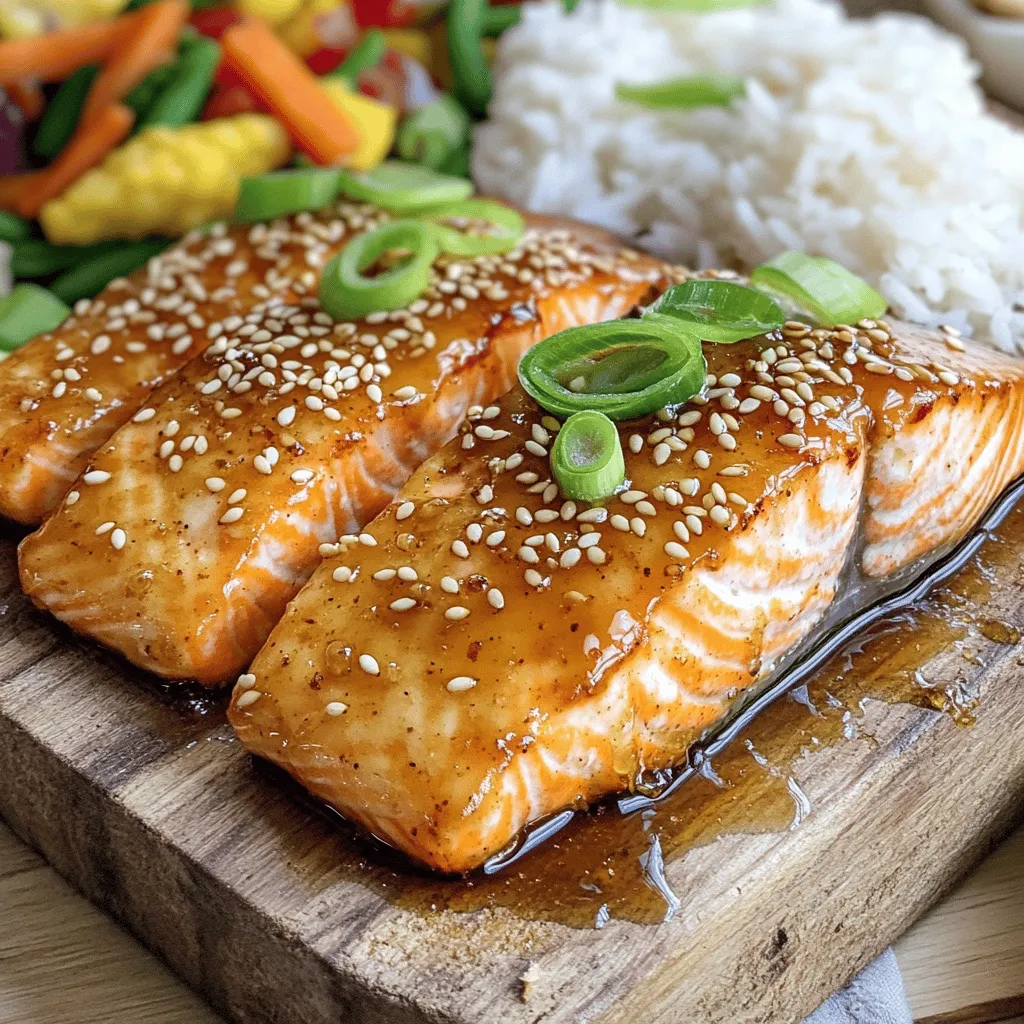
Get ready to impress your taste buds with crispy honey garlic salmon that’s ready in just 30 minutes! This simple

- 1 cup (2 sticks) unsalted butter - 2 cups granulated sugar - 4 large eggs - 1 cup all-purpose flour - 1 cup unsweetened cocoa powder - 2 cups fresh strawberries, hulled and sliced - 1 cup heavy whipping cream - 2 tablespoons powdered sugar - Zest of 1 lemon - 1/4 teaspoon sea salt - Additional garnishes like mint or extra strawberries When making this dessert, the right ingredients bring flavor and texture. First, unsalted butter gives the brownies a rich taste. Granulated sugar sweetens them perfectly. Large eggs bind everything together, ensuring a soft, fudgy texture. All-purpose flour adds structure without being too heavy. Now, the special ingredients play a big role. Unsweetened cocoa powder gives that deep chocolate flavor. Fresh strawberries add freshness and a burst of color. Heavy whipping cream transforms into light, fluffy whipped cream with just a bit of powdered sugar. It adds a nice touch of sweetness. For a twist, lemon zest enhances the berries' flavor. A pinch of sea salt balances the sweetness. You can use extra garnishes to make your dessert look even better. Finding the perfect ingredients is key to making your brownie strawberry shortcake shine. For the complete details, check out the Full Recipe. - Preheat the Oven: Start by preheating your oven to 350°F (175°C). This helps the brownies bake evenly. - Grease the Baking Pan: Use butter or non-stick spray to grease a 9x13-inch baking pan. This keeps the brownies from sticking. - Melt Butter and Combine with Sugar: In a medium saucepan, melt 1 cup of unsalted butter over low heat. Once it’s melted, take it off the heat and stir in 2 cups of granulated sugar until well mixed. - Mix in Eggs and Vanilla: Add 4 large eggs one at a time to the mixture. Stir well after each egg. Then, mix in 1 teaspoon of pure vanilla extract until smooth. - Add Dry Ingredients: In a separate bowl, whisk together 1 cup of all-purpose flour, 1 cup of unsweetened cocoa powder, 1/2 teaspoon of baking powder, and 1/4 teaspoon of sea salt. Fold this dry mix into the wet mixture gently. Don’t overmix; it’s okay to see some flour. - Pour Batter into Pan: Pour the brownie batter into your greased pan. Use a spatula to spread it evenly. - Baking Time and Testing for Doneness: Bake in the preheated oven for 25-30 minutes. Insert a toothpick into the center; it should come out clean or with a few moist crumbs. - Cooling Process: Let the brownies cool completely in the pan on a wire rack. This makes them easier to cut. - Combine Ingredients for Whipped Cream: In a large mixing bowl, add 1 cup of heavy whipping cream, 2 tablespoons of powdered sugar, and the zest of 1 lemon. - Whip cream to soft peaks: Use an electric mixer to whip the cream on medium-high speed for about 3-5 minutes. Stop when soft peaks form. - Sweetening the Strawberries: In another bowl, toss 2 cups of sliced strawberries with 1 tablespoon of granulated sugar. Let them sit for 10 minutes to draw out their juices. - Layering Brownies, Whipped Cream, and Strawberries: Once the brownies are cool, cut them into squares. Place one square on a plate, top with whipped cream, and add some strawberries. - Creating Repeat Layers for Presentation: For a fancy look, stack another brownie square on top and repeat with whipped cream and strawberries. This builds a beautiful dessert tower. - Avoiding Overmixing: Mix the batter gently. Overmixing can make brownies tough. Stop mixing as soon as you see no dry flour. It’s okay to have a few lumps; they add character. - Knowing When to Take Out of the Oven: Check brownies after 25 minutes. They are ready when a toothpick comes out clean or with a few moist crumbs. Brownies continue to cook after you take them out, so don’t wait too long. - Achieving the Right Consistency: Use cold cream for better results. Whip it on medium-high speed. Stop when you see soft peaks. Don’t go too far; you don’t want butter! - Best Practices for Sweetening Whipped Cream: Add powdered sugar to the cream. Start with two tablespoons for a subtle sweetness. You can always add more if you like it sweeter. - Creative Plating Ideas: Stack layers of brownie, cream, and strawberries on a plate. Use a ring mold for a neat look. Drizzle strawberry juices around for color and flavor. - Using Seasonal Fruits: Fresh strawberries are great, but try raspberries or blueberries in summer. They bring fresh flavors and bright colors to your dessert. You can find the Full Recipe for more details on creating this dessert delight! {{image_4}} One fun twist on this dessert is the chocolate citrus brownie shortcake. To make this, add zest from an orange or lime into your brownie batter. This bright flavor pairs well with chocolate and adds a fresh note. You can also add nuts, like walnuts or pecans, to the brownie batter for a crunchy texture. Nuts add a nice contrast to the soft strawberries and cream. If you want to mix things up, try adding different fruits, such as peaches or raspberries, instead of strawberries. Each fruit brings its unique flavor and sweetness. For those who need gluten-free options, swap all-purpose flour with a gluten-free blend. Many brands work well, and you won’t lose that rich brownie taste. Additionally, if you are dairy-free, use coconut cream instead of heavy whipping cream. It whips up nicely and gives a wonderful flavor. You can also find dairy-free butter for the brownie batter. This way, everyone can enjoy this tasty dessert. If you have a small group, you can easily scale down the recipe. Just halve the ingredients, and bake them in a smaller pan. If you have a larger crowd, double the recipe and use a bigger baking pan. This way, everyone can have a slice or two of this delightful dessert. Remember to adjust the baking time slightly if you change the pan size. Check for doneness by using a toothpick. Enjoy this treat with friends and family! For the complete recipe, check out the Full Recipe section above. To keep your brownie strawberry shortcake fresh, store it in the fridge. Place it in an airtight container. This helps to keep it moist and prevents it from absorbing other odors. If you have leftover whipped cream, store it separately. Whipped cream can deflate if it sits too long on the brownies. For freezing, cut the brownies into squares. Wrap each piece tightly in plastic wrap. Then place them in a freezer-safe bag. This way, you can enjoy them later. Don't freeze the strawberry and cream layers, as they do not thaw well. To reheat, use the microwave. Place a brownie square on a plate. Heat it for about 10-15 seconds. This warms it without making it dry. If you want it warm and gooey, check it often. Avoid sogginess by not covering the brownie when reheating. This keeps moisture in, making it too wet. Instead, let the brownie cool slightly before adding whipped cream and strawberries. In the fridge, your brownie strawberry shortcake lasts about 3-4 days. If stored properly, it stays tasty and fresh. After that, it might lose flavor and texture. Signs of spoilage include a sour smell or mold. If the strawberries start to look mushy or brown, it’s time to toss them. Always check before eating any leftovers to ensure they are safe. To make fudgier brownies, use less flour. You can also add an extra egg or use melted chocolate. These changes make the texture richer. Baking the brownies for a shorter time helps too. Aim for a moist center, and check with a toothpick. If it comes out with a few moist crumbs, they are ready. Yes, you can prepare the brownies a day ahead. Let them cool, then store in an airtight container. The whipped cream can also be made ahead. Just keep it in the fridge. Slice the strawberries and mix them with sugar a few hours before serving for the best flavor. You can use other berries like blueberries or raspberries. Peaches or mangoes also work well. Just slice them evenly and toss with sugar. This will enhance their natural sweetness, making them a great fit for this dessert. Yes, you can! Replace all-purpose flour with a gluten-free blend. Be sure your cocoa powder is gluten-free too. For best results, check the labels on all ingredients. This way, you can enjoy the same great taste without gluten. The brownies are done when a toothpick comes out clean or with a few moist crumbs. The edges should look set, and the center may still be soft. Always keep an eye on your brownies during the last few minutes of baking. - Full Recipe: Brownie Strawberry Shortcake Delight This blog post covered everything you need for a Brownie Strawberry Shortcake. We explored key ingredients, from unsalted butter to fresh strawberries. You learned simple steps for baking and whipping cream. I shared tips for perfecting texture and storage advice to extend freshness. In closing, this dessert is both fun to make and delicious to eat. Enjoy creating your own version and impressing friends and family.

Brownie Strawberry Shortcake Irresistible Dessert Delight

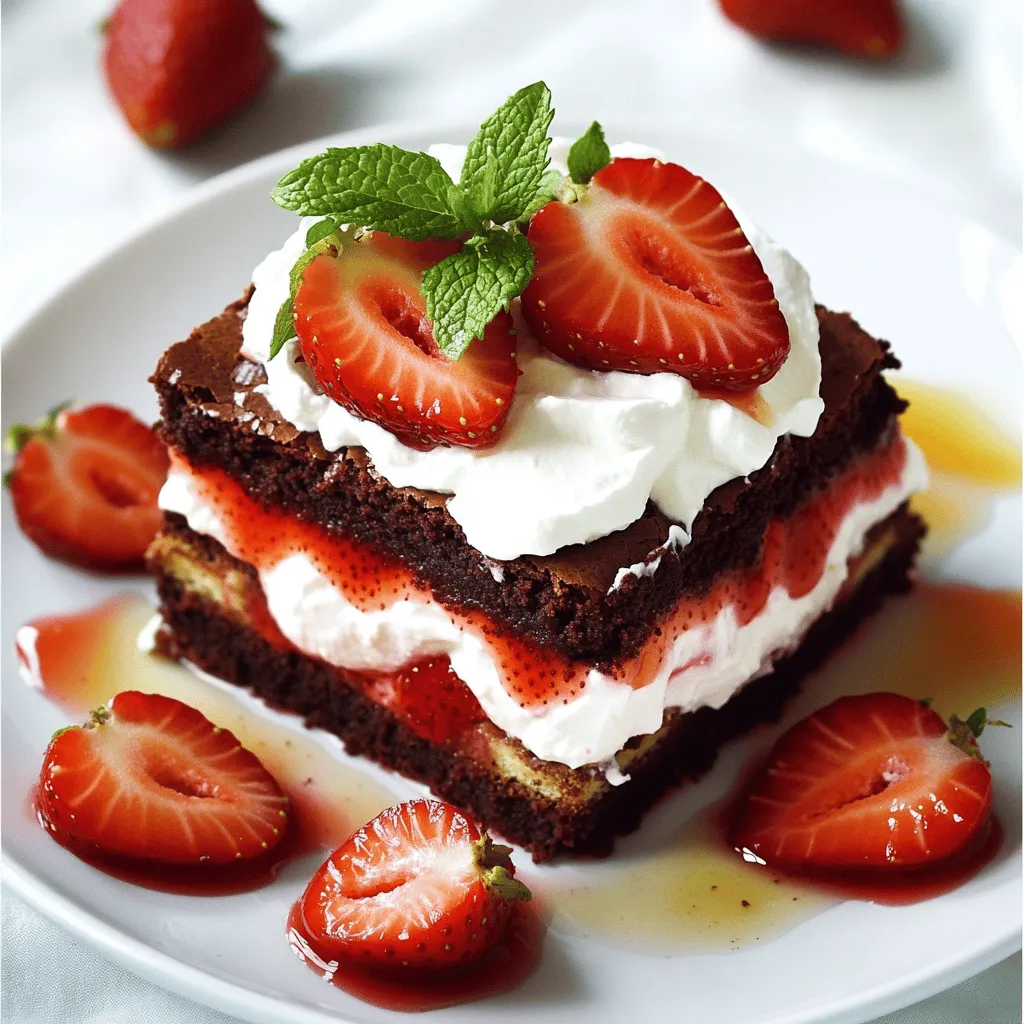
Craving a dessert that combines rich chocolate and fresh strawberries? Look no further! My Brownie Strawberry Shortcake is the perfect

- 1 lb ground beef or plant-based alternative - 1 packet taco seasoning - 1 cup cream cheese, softened - 1 cup ranch dressing - 1 cup shredded cheddar cheese - 1/2 cup diced ripe tomatoes, seeds removed - 1/4 cup sliced green onions - 1/2 cup black olives, pitted and sliced - Mini flour tortillas or tortilla chips To create the best Taco Ranch Bites, you must choose the right ingredients. I love using ground beef for its rich taste, but you can use a plant-based option if you prefer. Taco seasoning adds that classic flavor. Cream cheese gives a creamy texture, while ranch dressing adds a tangy kick. Toppings like cheddar cheese, tomatoes, green onions, and olives make each bite pop with flavor. You have a choice between mini flour tortillas and tortilla chips. Tortillas give a soft bite, while chips add a crunch. If you like, fresh cilantro can be a nice touch for garnish. It adds freshness and color to your bites. Each serving of Taco Ranch Bites has about 250-300 calories. The macronutrient breakdown includes roughly 15-20g of protein, 15-20g of fat, and 20-25g of carbs. This makes them a hearty snack for game day. You can enjoy them while still keeping an eye on your nutrition. For the full recipe, check out the [Full Recipe]. To start, heat a large skillet over medium heat. Add 1 pound of ground beef or a plant-based alternative. Cook this for about 6-8 minutes. Break it apart with a spatula. You want it to brown evenly. Once browned, drain any excess grease. This step helps keep the bites from becoming oily. Next, sprinkle 1 packet of taco seasoning over the meat. Pour in 1/4 cup of water and mix well. Stir until all the meat is coated with the seasoning. Cook for another 5-7 minutes until the mixture thickens and smells great. Remove it from heat and set aside. Now, grab a medium bowl. Add 1 cup of softened cream cheese and 1 cup of ranch dressing to the bowl. Using a spatula or a hand mixer, blend these two until smooth and creamy. Make sure there are no lumps left. This mixture adds a rich texture to each bite. Lay out mini flour tortillas on a clean surface. Take a generous dollop of the cream cheese mixture, about 1 tablespoon, and place it in the center of each tortilla. Next, add about 1 tablespoon of the seasoned meat on top of the cream cheese. Now for the toppings! Sprinkle shredded cheddar cheese over the meat. Add diced ripe tomatoes, sliced green onions, and black olives for color and flavor. These extra toppings make each bite pop. Carefully fold each tortilla over the fillings to close them up. If you prefer, use tortilla chips instead. Just layer the toppings directly onto the chips for a crunchy twist. Preheat your oven to 350°F (175°C). Arrange the assembled Taco Ranch Bites on a baking sheet in a single layer. Bake in the oven for about 10 minutes. You want the cheese to melt and the edges to turn golden and crispy. Once done, let the bites cool for a few minutes. If you like, garnish with fresh cilantro for a burst of flavor. These Taco Ranch Bites are now ready to be enjoyed! For the full recipe, check out the details above. To avoid soggy tortillas, use fresh mini tortillas. Don't add too many fillings. If your tortillas feel damp, warm them briefly in the oven. This makes them pliable and less likely to get soggy. For cheese that melts just right, shred it yourself. Pre-shredded cheese often has anti-caking agents that can prevent smooth melting. Mix the cheese with the meat while it's hot. This helps it melt evenly and blend in perfectly. For creative plating, use a large platter. Arrange the bites in a circle for a fun look. You can also stack them in small piles. It adds height and interest. For gatherings, serve with dips nearby. Salsa or extra ranch dressing adds color and flavor. You can even use small cups for individual servings. It makes it easy for guests to grab and enjoy. To prepare Taco Ranch Bites in advance, cook the meat and mix the cream cheese. Store them separately in the fridge. You can assemble the bites just before baking. This saves time and keeps them fresh. If you want to bake them later, assemble the bites, then cover and freeze before baking. Just remember to add a few extra minutes to the baking time if you bake them from frozen. This will ensure they cook evenly. For the full recipe, check out the complete guide! {{image_4}} You can add a kick to your Taco Ranch Bites. Try adding chopped jalapeños for spice. If you like heat, consider using hot sauce in the cream cheese mix. You can also swap out the cheese. Pepper jack cheese adds a nice kick, while cotija cheese gives a creamy, salty taste. These bites can fit many diets! For a vegetarian option, use lentils or black beans instead of meat. You can also use a plant-based cream cheese and ranch dressing to make it vegan. For gluten-free options, use corn tortillas or gluten-free chips. You can turn Taco Ranch Bites into a dip! Instead of folding tortillas, layer the cream cheese mix, meat, and toppings in a bowl. Serve with tortilla chips for scooping. This makes it easy for guests to enjoy and is great for sharing at parties. To keep your Taco Ranch Bites fresh, store them in an airtight container in the fridge. Make sure they cool down to room temperature before sealing. This helps avoid moisture buildup, which can make them soggy. They can last up to three days in the fridge. If you want to enjoy them longer, consider freezing. Reheating Taco Ranch Bites can be tricky if you want to keep them crispy. The best way is to use an oven. Preheat your oven to 350°F (175°C). Place the bites on a baking sheet and bake for about 10 minutes. This method helps to revive the crispiness. You can also use an air fryer, which works well too. Set it to 350°F and heat for about 5 minutes. You can freeze both unbaked and baked Taco Ranch Bites. For unbaked bites, assemble them, but don’t bake. Place them on a baking sheet, freeze until solid, then transfer to a freezer bag. They can last up to three months. When ready to bake, cook them straight from frozen. For baked bites, let them cool completely before freezing. Store them in an airtight container and reheat when you want to eat. Taco Ranch Bites can be stored in the fridge for about 3 days. Keep them in an airtight container. This helps keep them fresh and tasty. If you want to extend their life, consider freezing them. They can last in the freezer for up to a month. Just remember to thaw them in the fridge before reheating. Yes, you can easily make Taco Ranch Bites without meat. Use plant-based meat or beans instead of ground beef. Black beans or lentils work great. Just season them like you would the meat. This way, you get all the flavors without the meat. It’s a fun and tasty option for vegetarians. Taco Ranch Bites pair well with many dips and sides. Serve them with salsa for a fresh kick. Guacamole adds a creamy texture. You can also offer extra ranch dressing for dipping. For a complete meal, serve with a side salad or corn salsa. These add color and flavor to your spread. Absolutely! To add some heat, mix diced jalapeños into the meat. You can also use spicy taco seasoning instead of regular. Adding hot sauce to the cream cheese mixture is another great option. If you like it fiery, top the bites with sliced fresh chilies. These ideas bring the heat and excitement! Yes, you can use homemade ranch dressing. In fact, it often tastes better than store-bought. Making it fresh lets you control the flavors. Use fresh herbs and spices for a vibrant taste. However, store-bought ranch dressing is still convenient and works well. Choose what fits your time and taste! For the Full Recipe, check the earlier section. Enjoy making your Taco Ranch Bites! In this blog post, we explored the tasty world of Taco Ranch Bites. We covered key ingredients like ground beef and cream cheese, plus tips for perfect cooking and serving. You can customize these bites with variations for diet needs or flavor preferences. With handy storage info, you can keep them fresh for later. Enjoy this fun dish at your next gathering! Get creative and make it your own. These bites will surely please everyone.

Taco Ranch Bites Flavorful and Easy Game Day Snack

Get ready to make your game day unforgettable with Taco Ranch Bites! These snacks are loaded with flavor and super

- 3 cans refrigerated biscuit dough (16.3 oz each) - 1 cup mini marshmallows - 1 cup semi-sweet chocolate chips - 1 cup graham cracker crumbs - ¾ cup unsalted butter, melted - ¾ cup packed brown sugar - 1 teaspoon vanilla extract - ½ teaspoon ground cinnamon - Pinch of fine salt To make S'mores Monkey Bread, gather these tasty ingredients. The biscuit dough is the base. It gives the bread its fun pull-apart texture. Mini marshmallows add that gooey sweetness. Semi-sweet chocolate chips are a must for rich flavor. Graham cracker crumbs bring the classic s'mores taste. Melted butter helps bind the mix together. Brown sugar adds deep sweetness and caramel notes. Vanilla extract enhances the flavor. Ground cinnamon adds warmth, and a pinch of salt balances the sweetness. With these ingredients, you are ready to create a dessert that is not just delicious but also a fun treat to share. You can find the full recipe to guide you through the process. 1. Preheat your oven to 350°F (175°C). This helps the monkey bread cook evenly. 2. Grease the Bundt pan with cooking spray or softened butter. This step makes it easy to remove the bread later. 3. Prepare the buttery glaze. In a bowl, mix melted butter, brown sugar, vanilla, cinnamon, and salt. 1. Open the cans of refrigerated biscuit dough. Cut each biscuit into quarters with a sharp knife or pizza cutter. 2. In a large bowl, combine the biscuit pieces, mini marshmallows, chocolate chips, and graham cracker crumbs. This mix gives great flavor. 1. Pour half of the biscuit mixture into the greased Bundt pan. Spread it out evenly with a spatula. 2. Layer the remaining biscuit mixture on top in the Bundt pan. Spread it out to keep it level. 3. Place the Bundt pan in the oven and bake for 25-30 minutes. Look for a golden brown color and a clean toothpick. 4. Once baked, remove the pan from the oven. Let the monkey bread cool for about 10 minutes in the pan. 5. After cooling, carefully invert the monkey bread onto a serving platter. This lets you see the gooey, tasty center. 6. Serve warm and enjoy pulling apart pieces filled with melted marshmallows and chocolate! For the full recipe, check the main section. To make the best S'mores Monkey Bread, even coating is key. Make sure each biscuit piece gets enough buttery glaze. This helps all the flavors blend well. Toss the biscuit pieces gently with the glaze. This way, every bite has that sweet, gooey taste. Keep a close eye on your baking time. Your oven can vary, so check for doneness. The monkey bread should turn golden brown. A toothpick inserted should come out clean. This ensures the inside cooks fully and stays soft. When serving, drizzle melted chocolate on top. This adds a lovely shine and extra sweetness. You can also sprinkle more graham cracker crumbs. It gives a nice crunch and enhances the s'mores flavor. For a fun twist, offer extra mini marshmallows on the side. Guests can pull apart their pieces and add more toppings. This creates an interactive dessert that everyone will love. One common mistake is overbaking the monkey bread. Keep an eye on it near the end of the baking time. If it gets too dark, it may dry out. Another mistake is not greasing the pan well enough. A good layer of cooking spray or butter helps the bread release easily. If you skip this step, you might end up with a stuck mess. Trust me, greasing your pan is worth the extra minute! For the full recipe, check out the complete instructions above. {{image_4}} You can easily switch up the flavors in S'mores Monkey Bread. Try different types of chocolate, like dark or white chocolate. Each one gives a new taste. You can also add nuts or fruit. Chopped walnuts or pecans add crunch. Fresh berries or banana slices can bring a fresh twist. Why not make mini S'mores Monkey Breads? Use muffin tins for bite-sized treats. They cook faster and are fun to share. If you want a different look, layer the dough in a square baking dish. It cooks evenly and looks great on a plate. You can change this recipe to fit the seasons. In winter, add spices like nutmeg or allspice for warmth. In summer, include fresh fruit like peaches or strawberries. These changes keep the dessert exciting all year long. To store leftovers, place them in an airtight container. Keep the container in the fridge. This helps keep the monkey bread fresh. Cover it tightly with plastic wrap or a lid. Make sure no air can get in. This prevents the bread from drying out. If you want to save it for later, you can freeze it. Wrap the monkey bread in plastic wrap first. Then, place it in a freezer-safe bag. Make sure to press out as much air as you can. When you're ready to eat, take it out of the freezer. Let it thaw in the fridge overnight. To reheat, pop it in the oven at 350°F (175°C) for about 10-15 minutes. This warms it up without losing moisture. For the best taste, eat your monkey bread within 3 days. After that, it may start to lose freshness. Look for signs of spoilage, like a sour smell or mold. If it smells off or looks different, it's best to toss it. Enjoy your S'mores Monkey Bread fresh for the best experience! For the full recipe, check out the instructions above. S'mores Monkey Bread is a fun dessert that combines classic s'mores flavors with a pull-apart bread style. This dish has roots in the beloved campfire treat, where graham crackers, chocolate, and marshmallows come together. It gained popularity for its gooey texture and easy preparation. You can enjoy it warm from the oven, making it a hit at parties or family gatherings. Yes, you can prepare S'mores Monkey Bread ahead of time! To do this, follow these steps: - Prepare the biscuit mixture and layer it in the Bundt pan. - Cover the pan tightly with plastic wrap. - Store it in the fridge for up to 24 hours. - When ready, bake it straight from the fridge. Just add a few extra minutes to the baking time. Absolutely! You can make this dessert gluten-free by using gluten-free biscuit dough. Many brands offer gluten-free options that work well. Just make sure to check the other ingredients, like graham cracker crumbs, for gluten-free labels. If you want more chocolatey goodness, here are some ideas: - Increase the amount of semi-sweet chocolate chips to 1.5 cups. - Drizzle chocolate syrup over the warm monkey bread before serving. - Add chocolate chunks for extra melty bites. Yes, you can swap ingredients without losing flavor. Here are some easy substitutions: - Use milk chocolate chips instead of semi-sweet for a sweeter taste. - Replace mini marshmallows with large marshmallows, cut into smaller pieces. - Try using honey or maple syrup instead of brown sugar for a different sweetness. To check if your monkey bread is done, follow these tips: - Look for a golden-brown color on top. - Insert a toothpick into the center. If it comes out clean, it's ready. - The bread should feel firm but soft to the touch. For the full recipe, check it out above and get ready for a tasty treat! This blog post showed you how to make S'mores Monkey Bread. We detailed the ingredients needed and easy steps for preparation. I shared tips for perfecting your recipe and creative variations. Remember to store leftovers properly for the best taste. You can also make this recipe your own with ingredient swaps. Enjoy this delicious treat with friends and family. Baking can be fun and rewarding, so don’t hesitate to try it out!

S’mores Monkey Bread Irresistible and Fun Dessert

Get ready for a sweet adventure with my S’mores Monkey Bread! This fun dessert combines all your favorite campfire treats

For a quick and flavorful meal, here’s what you need for Easy Chicken Fajita Soup: - 1 lb boneless, skinless chicken breasts, diced into bite-sized pieces - 1 tablespoon olive oil - 1 large onion, thinly sliced - 1 red bell pepper, thinly sliced - 1 green bell pepper, thinly sliced - 2 cloves garlic, minced - 1 can (15 oz) black beans, thoroughly drained and rinsed - 1 can (15 oz) diced tomatoes with green chilies - 4 cups chicken broth - 1 tablespoon chili powder - 1 teaspoon ground cumin - 1 teaspoon smoked paprika - Salt and freshly cracked pepper, to taste - 1 cup corn (use frozen or drained canned corn) - Juice of 1 fresh lime - Fresh cilantro, finely chopped (for garnish) - Slices of ripe avocado (for topping) Easy Chicken Fajita Soup relies on fresh and pantry staples. The chicken brings protein. Onions and peppers add crunch and flavor. Garlic boosts taste. Black beans add fiber and texture. Diced tomatoes with green chilies give a tangy kick. Chicken broth ensures the soup is rich and comforting. You can enhance the soup with toppings. Fresh cilantro adds brightness. Creamy avocado adds richness. A squeeze of lime gives a fresh finish. These garnishes make each bowl feel special and inviting! To start, gather your chicken and vegetables. Use 1 lb of boneless, skinless chicken breasts. Dice them into bite-sized pieces. This helps them cook evenly. Next, slice 1 large onion and 1 red and 1 green bell pepper. Thin slices blend well into the soup. Mince 2 cloves of garlic, which will add great flavor. Heat 1 tablespoon of olive oil in a large pot or Dutch oven over medium heat. Once hot, add the chicken pieces. Cook them for 5-7 minutes, stirring often until they turn golden brown. This step seals in juices and flavor. Add the sliced onion and bell peppers to the pot. Cook for 4-5 minutes until they soften. Stir in the minced garlic for about 1 minute. You want it fragrant but not brown. Next, pour in 1 can of diced tomatoes with green chilies and 4 cups of chicken broth. Add 1 can of black beans, drained and rinsed, and 1 cup of corn. Mix everything well. Season the soup with 1 tablespoon of chili powder, 1 teaspoon of ground cumin, 1 teaspoon of smoked paprika, salt, and cracked pepper. Turn up the heat to bring the soup to a gentle boil. Then lower to a simmer. Cover the pot and let it cook for 15-20 minutes. Stir occasionally. This time allows all the flavors to blend perfectly. Just before serving, stir in the juice of 1 fresh lime. This adds a bright flavor. Serve the soup hot in bowls. Top each bowl with chopped fresh cilantro and slices of creamy avocado. For the full recipe, check the earlier section. Enjoy your delicious Easy Chicken Fajita Soup! To make the best chicken fajita soup, use two main methods: sautéing and simmering. Start by sautéing the chicken in olive oil. This creates a nice sear. It adds great flavor. Cook the chicken for about 5-7 minutes until it is golden. Next, add your onions and peppers. Sauté these for 4-5 minutes until they soften. This step builds a strong base for your soup. After you add the rest of the ingredients, simmer the soup. Keep it on low heat for 15-20 minutes. This helps the flavors blend. It makes the soup richer and tastier. Stir occasionally to prevent sticking. To boost the flavor, consider adding a few extra spices. You can add a pinch of cayenne for heat. If you like smoke, try adding more smoked paprika. Fresh lime juice gives a bright taste. Add it just before serving for the best flavor. Fresh cilantro adds freshness, too. These small tweaks can make your soup shine. For this recipe, you need a few key tools. A large pot or Dutch oven works best for cooking. Use a sharp knife for slicing your veggies. A cutting board is essential for safe chopping. A wooden spoon helps stir the soup without scratching the pot. These tools make cooking easy and fun. For the full recipe, check the detailed instructions above. {{image_4}} You can change the protein in your soup. Feel free to use shredded rotisserie chicken, turkey, or even tofu. For veggies, swap in zucchini or mushrooms. These swaps add new flavors and textures. You can even try different beans like kidney or pinto beans. Each change makes the soup unique. If you want a gluten-free version, use gluten-free broth. Most canned goods are gluten-free, but check the labels. For a vegetarian option, skip the chicken and double the beans. You can add more veggies like carrots or spinach. This keeps the soup hearty and satisfying. To make the soup mild, skip the chili powder and use sweet paprika instead. If you want more heat, add jalapeños or cayenne pepper. You can also use hot salsa for a spicy kick. Adjust the spices until you find your perfect level. Cooking is all about your taste! To store leftovers of your Easy Chicken Fajita Soup, allow it to cool first. Then, place it in an airtight container. This keeps the soup fresh and safe to eat. You can store it in the fridge for up to three days. When you're ready to enjoy it again, just take it out and reheat. If you want to save some for later, freezing is a great option. Pour the cooled soup into freezer-safe bags or containers. Leave some space at the top, as it will expand when frozen. You can freeze it for up to three months. When you want to eat it, move it to the fridge to thaw overnight. To reheat the soup, pour it into a pot over medium heat. Stir it often to prevent sticking. Heat until it's hot all the way through. If you want to keep the flavor fresh, add a splash of lime juice before serving. Enjoy your soup just like the first time! Yes, you can use rotisserie chicken. It saves time and adds flavor. Just shred the chicken and add it to the pot during the last 10 minutes of cooking. This keeps it moist and delicious. You can also skip the first steps of cooking raw chicken. This way, you speed up the recipe and still enjoy great taste. To make your soup spicier, add diced jalapeños or a pinch of cayenne pepper. You can also mix in hot sauce to your taste. Another option is to use spicy diced tomatoes instead of regular ones. Start with a small amount, then taste and adjust as needed. This way, you can find the right heat level for your liking. This soup pairs well with tortilla chips or warm bread. You can also serve it with a side salad for a fresh touch. Slices of lime or fresh avocado on top add a great flavor boost. If you want to make it a full meal, add rice or quinoa for extra filling. Enjoy your delicious soup with these tasty sides! This blog post showed you how to make Easy Chicken Fajita Soup. We covered essential ingredients, step-by-step cooking, and tips for perfect flavor. You learned about fun variations and how to store leftovers well. Remember, you can adjust heat levels to suit your taste. Experiment with garnishes or try different proteins to keep things fresh. Enjoy every sip of your delicious soup, and share it with friends!

Easy Chicken Fajita Soup Quick and Flavorful Meal

Looking for a quick and tasty meal? You’ll love my Easy Chicken Fajita Soup! It’s packed with flavor and made

To make Italian Basil Chicken Cutlets, you need simple but fresh ingredients. This will ensure your dish bursts with flavor. Let’s look at what you need: - 4 boneless, skinless chicken breasts - 1/2 cup fresh basil leaves, finely chopped - 1 cup Italian-style breadcrumbs - 1/2 cup grated Parmesan cheese - 2 cloves garlic, minced - 2 large eggs - 1/4 cup all-purpose flour - Olive oil for frying - Optional: Salt, black pepper, lemon wedges for serving These ingredients combine to create a dish that is both tasty and easy to prepare. The fresh basil adds a bright flavor, while the Parmesan gives a nice, salty touch. I love using fresh garlic for that aromatic kick. When you gather everything, you will see how easy it is to make this meal. For the full recipe, check out the details in the next section. To start, I place each chicken breast between two sheets of plastic wrap. I use a meat mallet or rolling pin to pound the chicken to a uniform thickness of about 1/2 inch. This helps the chicken cook evenly. Uneven chicken can lead to dry spots or undercooked areas, so this step is key. Next, I create a seasoning mixture. In a medium bowl, I combine finely chopped basil, minced garlic, salt, and pepper. I mix well to ensure the flavors blend. This mixture will add a burst of flavor to the chicken. Now, it's time to set up my breading station. I prepare three shallow dishes: - In the first dish, I add all-purpose flour. - In the second dish, I crack and whisk two large eggs with a dash of salt and pepper. - In the third dish, I mix Italian-style breadcrumbs with grated Parmesan cheese and half of the basil seasoning. This will give the crumbs a tasty twist. For coating, I take each flattened chicken breast and first coat it in flour. I shake off any excess. Then, I dip it into the egg wash, letting extra drip back into the bowl. Finally, I press it into the breadcrumb mixture, making sure it’s fully coated. To cook the cutlets, I pour olive oil into a large skillet, about 1/4 inch deep, and heat it over medium heat. Once the oil shimmers, I carefully add the breaded chicken cutlets. I cook each cutlet for about 4-5 minutes per side, until golden brown and cooked through. The chicken should reach an internal temperature of 165°F or 75°C. After cooking, I transfer the cutlets to a plate lined with paper towels. This helps absorb any excess oil. For presentation, I arrange the chicken cutlets neatly on a serving plate. I drizzle a bit of olive oil over them and garnish with fresh basil. I also add lemon wedges around the plate for a pop of color and flavor. This method makes for a delightful meal that is both tasty and simple to prepare. You can find the complete details in the Full Recipe. - Importance of oil temperature: Heat the oil before adding the chicken. The right temperature creates a crisp crust. If the oil is too cold, the cutlets will absorb too much oil. Aim for medium heat and look for shimmering oil. This means it’s ready for frying. - Avoiding overcrowding the pan: Cook the chicken in batches. Too many cutlets at once cool the oil. This leads to soggy cutlets. Leave space in the pan for even cooking. Each piece should have room to breathe! - Pairing with sides: Serve these cutlets with fresh salad or roasted veggies. Pasta with a light sauce also works well. These sides balance the dish and add flavor. - Utilizing lemon wedges for added flavor: Lemon adds brightness! Serve cutlets with lemon wedges. A squeeze of lemon enhances the taste and freshness of the chicken. - Overbreading or underbreading cutlets: Find the right amount of breading. Too much makes it heavy, while too little makes it bland. Ensure even coverage for the best taste and texture. - Not pounding chicken evenly: Pounding chicken to even thickness is key. Uneven pieces cook at different rates. This can lead to dry spots. Use a meat mallet to gently pound the chicken flat. This ensures juicy cutlets every time. For the complete process, check out the Full Recipe. {{image_4}} You can easily jazz up your Italian Basil Chicken Cutlets. Try adding spices to the breadcrumb mixture. A pinch of paprika or cayenne can give it a nice kick. You might also enjoy adding some Italian herbs like oregano or thyme. These little tweaks can make a big difference in flavor. Experimenting with different herbs can also lead to fun new tastes. Fresh parsley or even dill can brighten the dish. If you need a substitute for Parmesan cheese, consider using Pecorino Romano. It has a sharp taste and works well in this recipe. For those who follow a gluten-free diet, use gluten-free breadcrumbs. They still give that satisfying crunch. You can often find them in most grocery stores. These swaps allow everyone to enjoy this tasty dish. You can turn these cutlets into a fun sandwich. Just add some fresh tomatoes and mozzarella in a crusty roll. It's a great lunch option! Alternatively, serve the cutlets over pasta or salad. A light lemon vinaigrette works well with both. This allows you to make a complete meal that feels fresh and light. Each serving style offers a unique twist on this simple dish. For the full recipe, click here. To keep your Italian Basil Chicken Cutlets fresh, refrigerate them right away. Place them in a shallow container. Make sure they cool down before sealing. Use an airtight container to prevent any odors. This keeps the chicken juicy and tasty for up to three days. When it’s time to enjoy leftovers, use the oven or a skillet. Preheat your oven to 375°F (190°C). Place the cutlets on a baking sheet and cover with foil. Heat for about 10-15 minutes. This keeps them warm and helps retain crispiness. If using a skillet, add a bit of oil over medium heat. Cook for 2-3 minutes on each side until hot. If you want to store cutlets longer, freezing is a great choice. Let the cutlets cool completely. Wrap each cutlet tightly in plastic wrap, then place in a freezer bag. Label the bag with the date. They will stay good for up to three months. To thaw, move them to the fridge overnight. Reheat as mentioned above for best results. For full details on preparing this dish, check the Full Recipe. Yes, you can bake them! To bake, preheat your oven to 400°F (200°C). Place the breaded chicken cutlets on a baking sheet lined with parchment paper. Spray the cutlets lightly with olive oil to get a nice crisp. Bake for about 20-25 minutes. Flip them halfway through. Check for a golden color and an internal temperature of 165°F (75°C) to ensure they're done. These cutlets go great with many sides. Here are some tasty options: - Garlic mashed potatoes - Steamed green beans - A fresh garden salad - Pasta with marinara sauce - Roasted vegetables Mix and match based on your mood! Check the chicken's internal temperature. It should reach 165°F (75°C). You can use a meat thermometer for this. If you cut into the chicken, the juices should run clear. No pink should be visible. Yes, but fresh basil gives the best flavor. If using dried basil, use about one-third of the amount. Dried herbs are stronger, so a little goes a long way. Mix it into the breadcrumbs for a nice touch. To keep them warm, place the cooked cutlets on a baking sheet in a warm oven at about 200°F (93°C). Cover them lightly with foil to retain heat without steaming them. Serve them within 20-30 minutes for the best taste. Enjoy your meal! This blog post covered how to make Italian Basil Chicken Cutlets in detail. We shared a simple list of ingredients and easy steps for cooking. I shared tips to enhance your dish and highlighted ways to store and reheat leftovers. As you explore this recipe, you'll enjoy custom flavors and perfect textures. Remember, practice makes perfect. With these tips, you can impress anyone with your Italian Basil Chicken Cutlets. Enjoy creating a meal that brings joy to your table!

Italian Basil Chicken Cutlets Tasty and Simple Meal

Craving a delicious meal that’s quick and easy? Let’s talk about Italian Basil Chicken Cutlets! This dish combines tender chicken

To make crab cake egg rolls, you need a few key items. Here’s what you should gather: - 8 oz lump crab meat, cooked and gently drained - 1/2 cup breadcrumbs (preferably panko for extra crunch) - 1/4 cup mayonnaise (preferably homemade or a high-quality brand) - 1/4 cup diced red bell pepper (for a sweet crunch) - 1/4 cup green onions, finely chopped (both white and green parts) - 1 tablespoon Dijon mustard (for a tangy kick) - 1 teaspoon Old Bay seasoning (or more to taste) - 1/2 teaspoon garlic powder (optional but recommended for flavor depth) - 1 pack of egg roll wrappers (10-12 wrappers) - Oil for frying (vegetable or canola oil works well) This blend of ingredients creates a rich and flavorful filling. You’ll enjoy the sweet crab meat mixed with the crunchy veggies. The seasonings and fillers truly make these egg rolls stand out. Old Bay seasoning adds a classic seafood flavor. It pairs well with crab meat. Dijon mustard gives a nice tang that balances the richness. Garlic powder, while optional, adds depth and warmth to your dish. Using panko breadcrumbs instead of regular breadcrumbs is crucial. They create a lighter, crispier texture in the egg rolls. The diced red bell pepper adds a sweet crunch. The green onions give a fresh, oniony bite. To take these egg rolls to the next level, you need a great dipping sauce. I recommend sweet chili sauce. It adds a sweet and spicy contrast to the savory egg rolls. You can buy it or make your own. Either way, it complements the flavors perfectly. For a fun twist, consider trying a tangy ranch or a zesty aioli. These options can add a new flavor layer to your crab cake egg rolls. Enjoy the blend of tastes! For the full recipe, check out the details above. To start, gather your ingredients. You will need lump crab meat, breadcrumbs, mayonnaise, red bell pepper, green onions, Dijon mustard, Old Bay seasoning, and garlic powder. In a mixing bowl, gently combine the crab meat with these ingredients. Use a spatula to mix softly. This keeps the crab meat in chunky pieces. You want to see those lovely lumps of crab! Next, take an egg roll wrapper and place it on a clean surface. Position it like a diamond, with one corner facing you. Scoop about 2 tablespoons of crab filling into the center. Fold the bottom corner over the filling, then fold in the side corners. Carefully roll the wrapper away from you. Moisten the top corner with water to seal it tight. This step is key to keeping the filling inside. Repeat for all the wrappers. Now, it’s time to fry! Heat about 2 inches of oil in a deep skillet to 350°F (175°C). Use a thermometer to get it just right. Add a few egg rolls at a time. Don’t crowd the pan; they need space to fry evenly. Cook for 3-4 minutes, turning them until they are golden brown and crispy. Remove them with a slotted spoon and let them drain on paper towels. This helps them stay crunchy. Serve them hot with sweet chili sauce for a tasty dip. Enjoy the explosion of flavors! For the full recipe, check out the earlier section. When you pick crab meat, look for lump crab meat. This type has big, sweet chunks. Check the label for "fresh" or "pasteurized" crab. Avoid cans with added fillers or artificial ingredients. Fresh crab meat gives the best flavor. If you can, buy from your local fish market. Ask to smell it; it should smell like the sea, not fishy. To get that perfect crunch, use panko breadcrumbs. They add a light, crispy texture. When frying, keep the oil at 350°F. Too hot will burn them, while too cool makes them soggy. Fry in small batches. This helps them cook evenly and stay crispy. After frying, let them drain on paper towels. This removes excess oil and keeps them crisp. Egg roll wrappers can stick together if not handled right. Keep them covered with a damp cloth while you work. This prevents them from drying out. When rolling, use a little water on the edges to seal them well. If they feel sticky, dust them with a bit of cornstarch. This helps keep them separate and easy to work with. For the full recipe, check out the Crab Cake Egg Rolls section! {{image_4}} To add some heat, mix in chopped jalapeños or a dash of hot sauce. You can replace Old Bay seasoning with a spicy seafood blend. This gives a nice kick without losing the crab flavor. Your taste buds will love this twist! For a vegetarian version, swap the crab for shredded jackfruit or lump tofu. Use a blend of veggies like corn, bell peppers, and carrots to keep it tasty. For vegan, replace the mayonnaise with a vegan alternative. These options keep the egg rolls fun and fresh! Dipping sauces can change the game. Besides sweet chili sauce, try a spicy mayo or a tangy soy sauce. You can mix soy sauce with lime juice and sesame oil for a zesty option. Each sauce brings out new flavors. Enjoy testing them all! To store leftover egg rolls, let them cool down first. Once cool, place them in an airtight container. Keep them in the fridge for up to three days. If you want to keep them longer, consider freezing them. Reheating can make a big difference in taste. For the best results, use the oven. Preheat your oven to 350°F (175°C). Place the egg rolls on a baking sheet. Heat for about 10-15 minutes, until they are crispy again. You can also use an air fryer for about 5-7 minutes. This keeps the crunch intact. If you want to freeze your egg rolls, wrap them well in plastic wrap. Then, place them in a freezer bag. They can last up to three months in the freezer. When you are ready to eat them, no need to thaw. Just follow the reheating steps mentioned above. Enjoy them straight from the freezer! Yes, you can prepare crab cake egg rolls in advance. After you roll them, cover them with plastic wrap and place them in the fridge. They can stay fresh for up to one day. This is great for meal prep or parties. Just remember to fry them shortly before serving. This keeps the texture crispy and fresh. For frying crab cake egg rolls, I recommend using vegetable or canola oil. These oils have a high smoke point, which means they heat well without burning. They also have a neutral flavor that does not interfere with the taste of the egg rolls. Aim for about two inches of oil in the pan for even frying. You can bake crab cake egg rolls for a healthier option. Preheat your oven to 400°F (200°C). Arrange the egg rolls on a baking sheet lined with parchment paper. Brush them lightly with oil for crispiness. Bake for about 20 minutes, flipping halfway through. This method gives you a tasty result with less oil. Check out the Full Recipe for more details! Crab cake egg rolls bring a tasty twist to a classic dish. We explored key ingredients, perfect rolling techniques, and how to achieve crispy results. You can add your own flair with spicy or vegetarian options and choose from various sauces for dipping. Remember to store leftovers properly for future enjoyment. With these tips, you’ll impress at your next gathering. Enjoy making and sharing your crab cake egg rolls!

Crab Cake Egg Rolls Totally Flavorful Delight

Are you ready to elevate your snack game? Crab Cake Egg Rolls are a tasty twist on two beloved dishes.

Older posts
Newer posts
← Previous Page1 … Page53 Page54 Page55 … Page66 Next →

dsad

© 2025 recipesstation • Built with GeneratePress

Our Policies

  • Copyright Policy
  • Cookie Policy
  • GDPR Policy
  • Privacy Policy
  • Disclaimer
  • Terms Of Use

More Information

  • Home
  • About
  • Contact
  • Appetizers
  • Dessert
  • Dinner
  • Drinks
©2025, recipesstation About Back To Top