
If you love a tasty meal that’s quick to make, you’ll adore this Chicken Caesar Sandwich! In this post, I’ll share an easy recipe that packs bold flavor and satisfying crunch. With just a few simple ingredients, you’ll create a delicious dish that will wow your family or friends. So, grab your apron, and let’s dive into the world of this classic sandwich that’s perfect for any occasion!
Why I Love This Recipe
- Crispy Perfection: This sandwich features a wonderfully crispy chicken breast that contrasts perfectly with the creamy Caesar dressing.
- Flavorful Marinade: The buttermilk marinade infuses the chicken with rich flavors, ensuring every bite is tender and juicy.
- Customizable Ingredients: Feel free to switch up the toppings or dressings to suit your taste; this recipe is versatile!
- Easy to Make: With simple steps and common ingredients, you can whip up this delicious sandwich in no time!
Ingredients
List of Ingredients
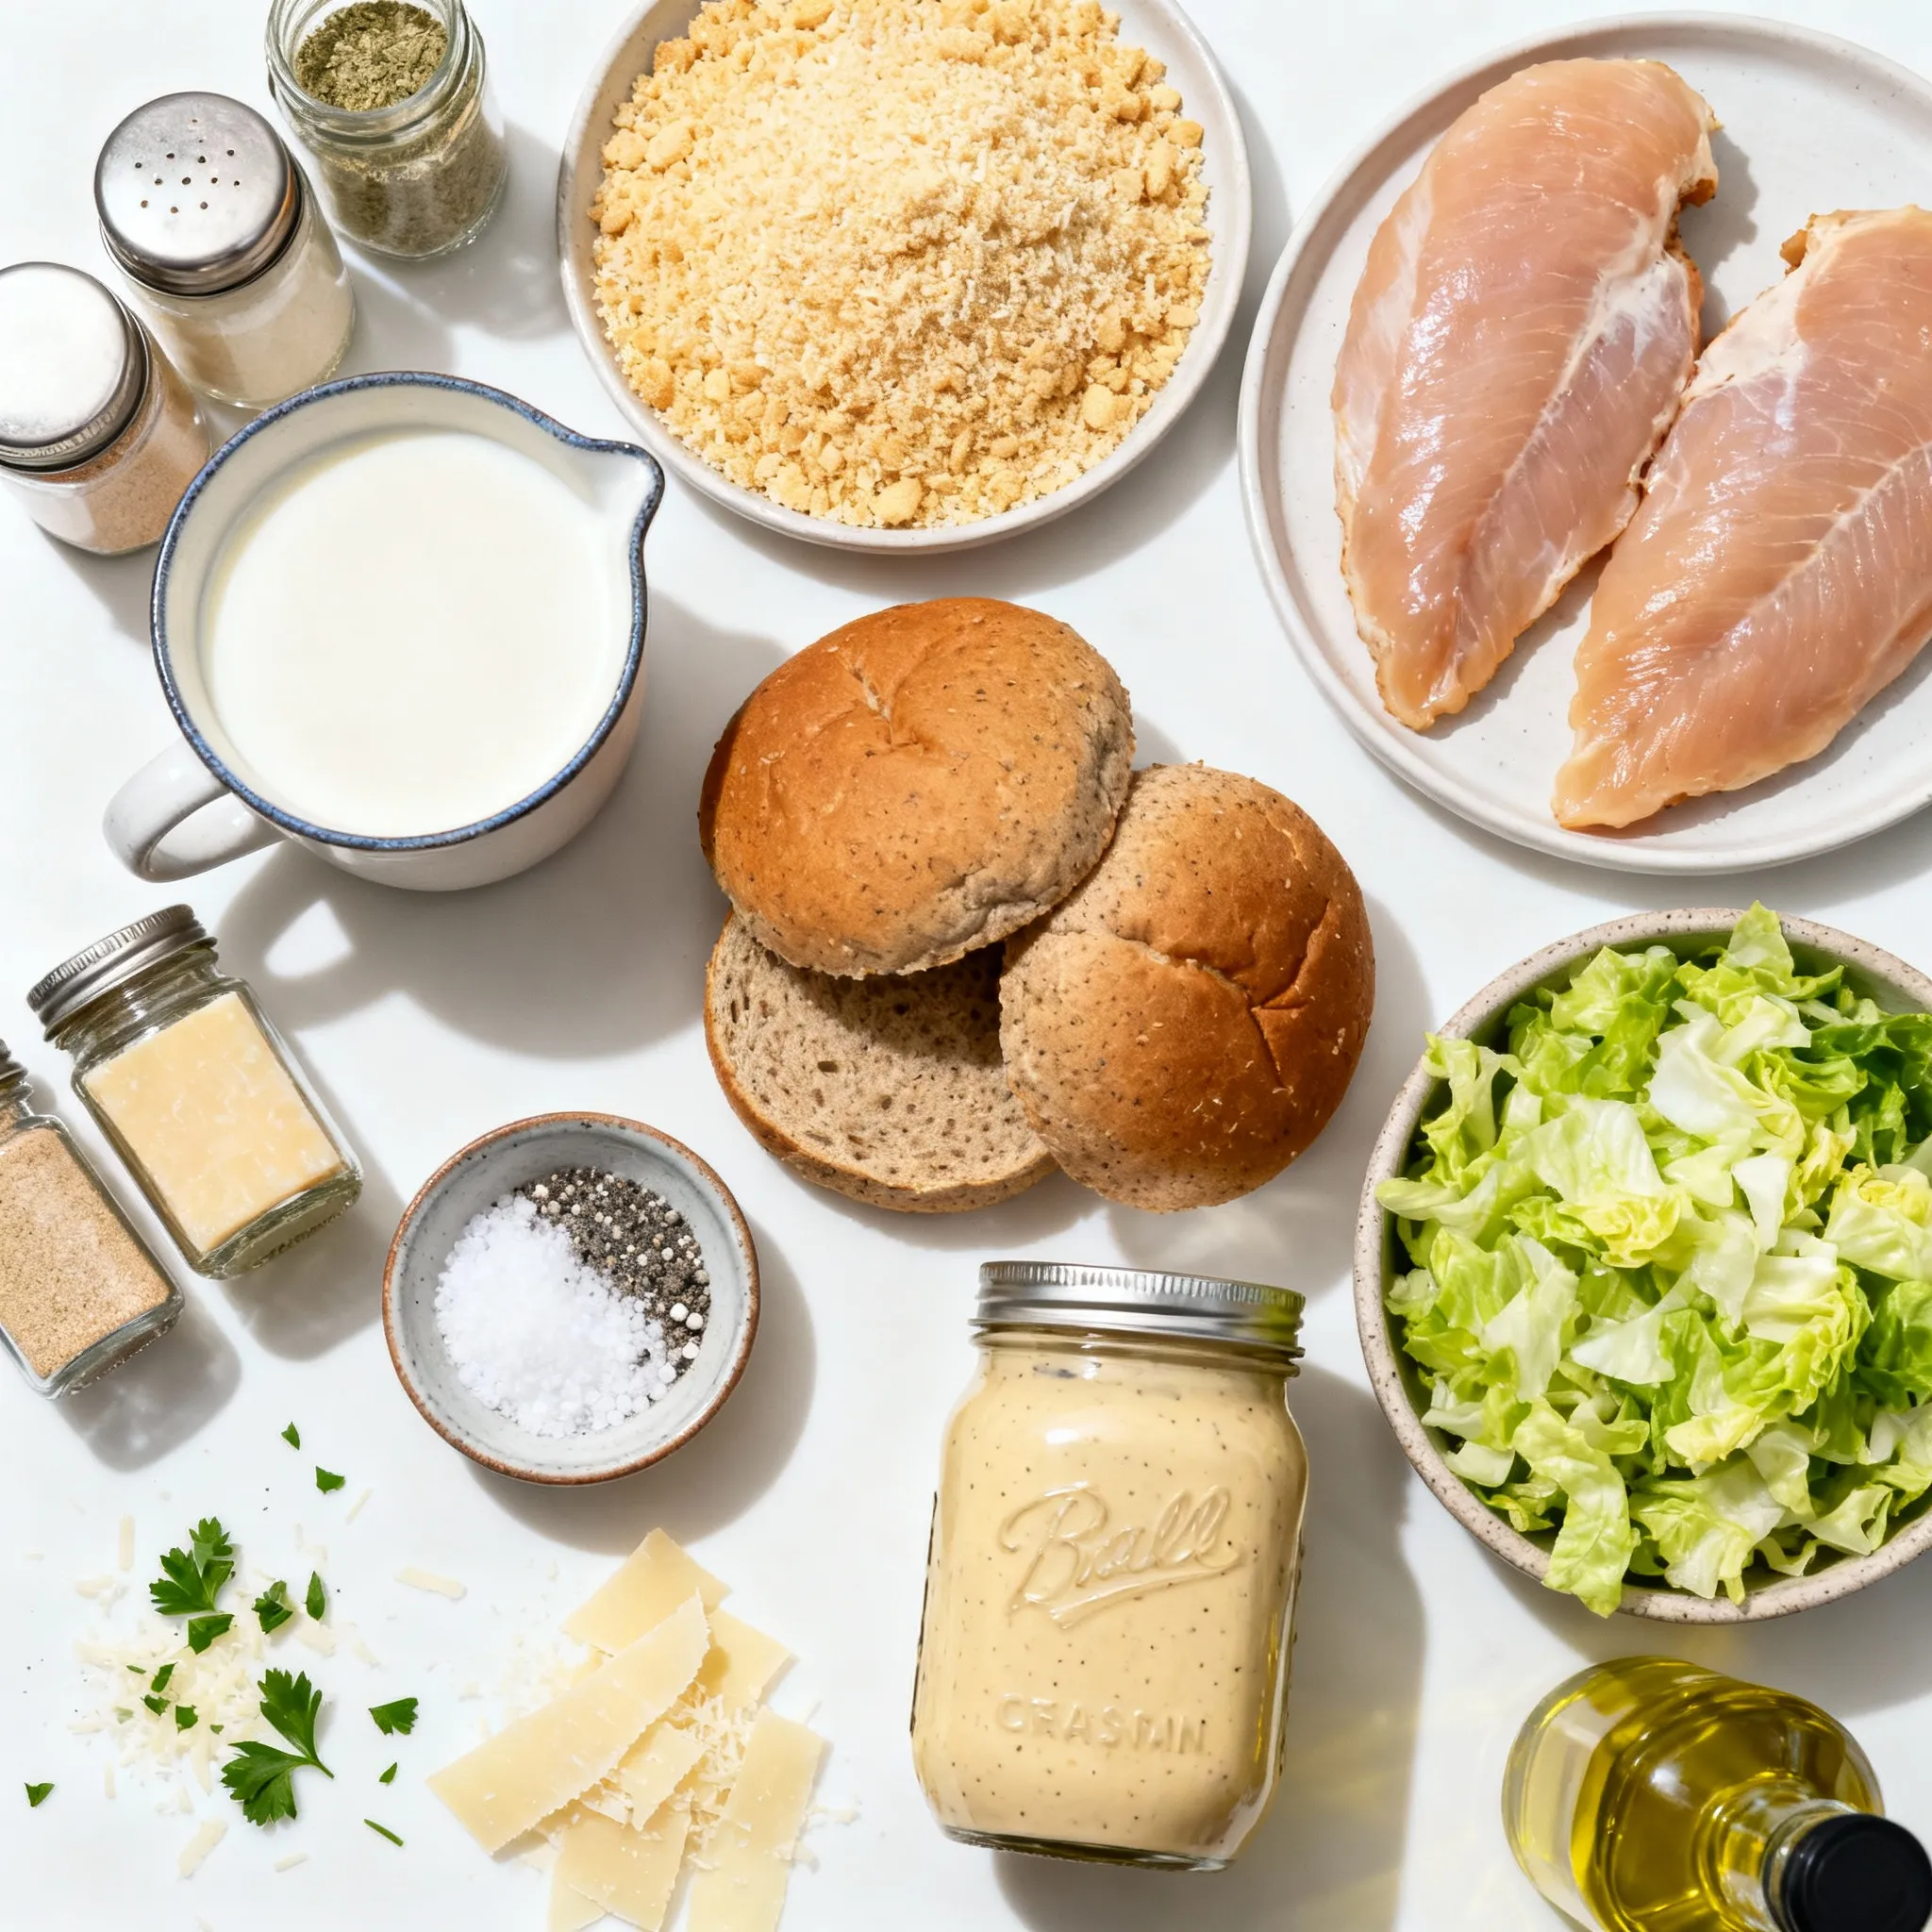
– 2 boneless, skinless chicken breasts
– 1 cup buttermilk
– 1 cup breadcrumbs (preferably panko for extra crunch)
– 1/2 cup grated Parmesan cheese
– 1 teaspoon garlic powder
– 1 teaspoon onion powder
– Salt and freshly ground black pepper to taste
– 4 whole grain sandwich buns
– 1 cup romaine lettuce, chopped
– 1/2 cup Caesar dressing (store-bought or homemade)
– Extra Parmesan shavings for garnish
– Olive oil for cooking
Optional Ingredients for Extra Flavor
– Sliced tomatoes for freshness
– Crispy bacon for added crunch
– Avocado slices for creaminess
– Fresh herbs like basil or parsley for extra taste
Nutritional Information per Serving
– Calories: 480
– Protein: 35g
– Carbohydrates: 40g
– Fat: 20g
– Fiber: 5g
This Chicken Caesar Sandwich packs a punch in flavor and nutrition. The ingredients work together to create a tasty meal that is easy to make. You can add optional ingredients for a fun twist. For example, crispy bacon can take your sandwich to the next level. Each bite will be a mix of crunchy, creamy, and savory notes. Plus, the nutritional info helps you stay on track with your meals.
When you make this sandwich, you can feel good about what you eat. Fresh romaine and chicken provide protein and fiber. Enjoy the rich taste of Parmesan without the guilt. This dish is perfect for lunch or dinner. Don’t forget to explore different toppings and variations!
Step-by-Step Instructions
Marinating the Chicken
To start, marinate the chicken. In a shallow dish, mix 1 cup of buttermilk with 1 teaspoon each of garlic and onion powder. Add salt and pepper to taste. Place the chicken breasts in the dish, ensuring they are fully coated. Cover the dish with plastic wrap and refrigerate for at least 30 minutes. You can let it sit for up to 4 hours for a richer flavor.
Preparing the Baking Sheet
Next, prepare the baking sheet. Preheat your oven to 375°F (190°C). Line a baking sheet with parchment paper. This step helps with easy cleanup and prevents the chicken from sticking.
Coating and Cooking the Chicken
Now, it’s time to coat the chicken. In a separate bowl, combine 1 cup of breadcrumbs with 1/2 cup of grated Parmesan cheese. Mix well to create a tasty crust. Remove the chicken from the marinade, letting the excess drip off. Dredge each piece in the breadcrumb mix, pressing down firmly. This helps the crumbs stick better.
Heat a few tablespoons of olive oil in a skillet over medium heat. Once the oil shimmers, add the coated chicken. Cook for 5-7 minutes on each side until golden brown and cooked through. For a healthier option, place the chicken on the prepared baking sheet and bake for 20-25 minutes, until crispy.
Assembling the Chicken Caesar Sandwich
While the chicken cooks, slice the sandwich buns in half and toast them lightly. Spread Caesar dressing on the cut sides of each half. On the bottom half, layer chopped romaine lettuce. Add a crispy chicken breast on top. Drizzle more Caesar dressing over the chicken. Finish with freshly shaved Parmesan.
Place the top half of the bun over the sandwich and enjoy the delightful crunch of the hot chicken!
Tips & Tricks
Best Types of Chicken for the Sandwich
For the best Chicken Caesar Sandwich, I recommend using boneless, skinless chicken breasts. They cook evenly and stay moist. You can also use chicken thighs for a richer flavor. They are juicier than breasts. Just make sure to adjust the cooking time as thighs may take longer.
How to Achieve the Perfect Crunch
To get that perfect crunch, use panko breadcrumbs. They are light and crispy. You can mix them with Parmesan cheese for added flavor. Make sure to press the breadcrumbs firmly onto the chicken. This helps them stick better and creates a golden crust when cooked. If you bake the chicken, spray it with a little olive oil to enhance crispiness.
Suggestions for Homemade Caesar Dressing
Making your own Caesar dressing is simple and tasty. Combine mayonnaise, lemon juice, garlic, Worcestershire sauce, and anchovy paste for a classic taste. Adjust the ingredients to your liking. Add some grated Parmesan for extra creaminess. If you want a lighter version, you can use Greek yogurt instead of mayo. This keeps the taste but cuts down on calories.
Pro Tips
- Marinate for Maximum Flavor: The longer you marinate the chicken, the more flavorful it will be. Aim for at least 2 hours, or overnight for the best results.
- Choose the Right Breadcrumbs: Using panko breadcrumbs will give your chicken an extra crunch, enhancing the texture of your sandwich.
- Perfectly Crispy Chicken: If baking, ensure the chicken is spaced out on the baking sheet to allow for even cooking and crispiness.
- Garnish with Style: Finish your sandwich with a sprinkle of freshly cracked black pepper and extra Parmesan shavings for a gourmet touch.
Variations
Chicken Caesar Wraps
You can make a tasty Chicken Caesar wrap if you want something lighter. Start by using a large tortilla instead of a bun. Spread Caesar dressing on the tortilla. Add chopped romaine, crispy chicken, and a sprinkle of Parmesan. Roll it up tightly. This wrap is fun to eat and easy to take on the go.
Vegetarian Caesar Sandwich Options
For a meat-free option, use grilled veggies or chickpeas. Grilled eggplant and zucchini are great choices. You can also use roasted chickpeas for extra crunch. Layer these on your bun with romaine and Caesar dressing. This gives you the same great taste without the chicken.
Alternative Sauces and Dressings
You can switch the Caesar dressing for other sauces. Try a ranch dressing for a creamy twist. A tangy balsamic vinaigrette can add a fresh touch. You could also use a spicy aioli for some heat. Each option brings a new flavor that can change your sandwich experience.
Storage Info
How to Store Leftover Sandwiches
To store leftover Chicken Caesar sandwiches, wrap them tightly in plastic wrap or foil. Place them in an airtight container. This keeps them fresh for up to two days in the fridge. If you have extra chicken or dressing, store them separately to avoid sogginess.
Reheating Instructions
To reheat your sandwich, use an oven or toaster oven. Preheat the oven to 350°F (175°C). Remove the sandwich from any wrap and place it on a baking sheet. Heat for about 10 minutes. This helps keep the chicken crispy. You can also microwave it, but the bread may get soft. Heat in 30-second intervals until warm.
Best Practices for Freezing Components
If you want to freeze parts of the sandwich, it’s best to freeze the chicken and buns separately. Allow the cooked chicken to cool completely. Wrap it tightly in plastic wrap, then in foil. Store in a freezer-safe bag. Buns can be frozen in their original packaging or in a freezer-safe bag. They last for up to three months. When ready to use, thaw overnight in the fridge before reheating.
FAQs
What is the origin of the Chicken Caesar Sandwich?
The Chicken Caesar Sandwich comes from the classic Caesar salad. The salad was created by Caesar Cardini, an Italian chef, in the 1920s. He made it in Tijuana, Mexico. The sandwich adds crispy chicken to the salad for a hearty meal. This twist became popular in many places.
Can I make this recipe gluten-free?
Yes, you can make this recipe gluten-free! Use gluten-free breadcrumbs instead of regular ones. Make sure your sandwich buns are also gluten-free. Many brands offer tasty options. This way, everyone can enjoy a delicious Chicken Caesar Sandwich.
How long can I store the prepared sandwiches?
You can store the prepared sandwiches for up to two days. Wrap them tightly in plastic wrap or foil. Keep them in the fridge to keep them fresh. The bread may get soggy, so it’s best to eat them soon.
What can I serve with a Chicken Caesar Sandwich?
There are many great sides to serve with a Chicken Caesar Sandwich. Here are some ideas:
– Crispy potato chips
– Fresh fruit salad
– A simple green salad
– Veggie sticks with dip
– Sweet potato fries
These sides add color and flavor to your meal. Enjoy!
This blog post covered everything you need for a Chicken Caesar sandwich. We looked at the essential ingredients, step-by-step cooking instructions, and tasty variations. Tips for perfecting your sandwich and storing leftovers will help you keep it fresh and delicious.
Remember, you can easily modify this recipe to suit your taste. Enjoy making new flavors and sharing them with friends. Now, get cooking and savor every bit