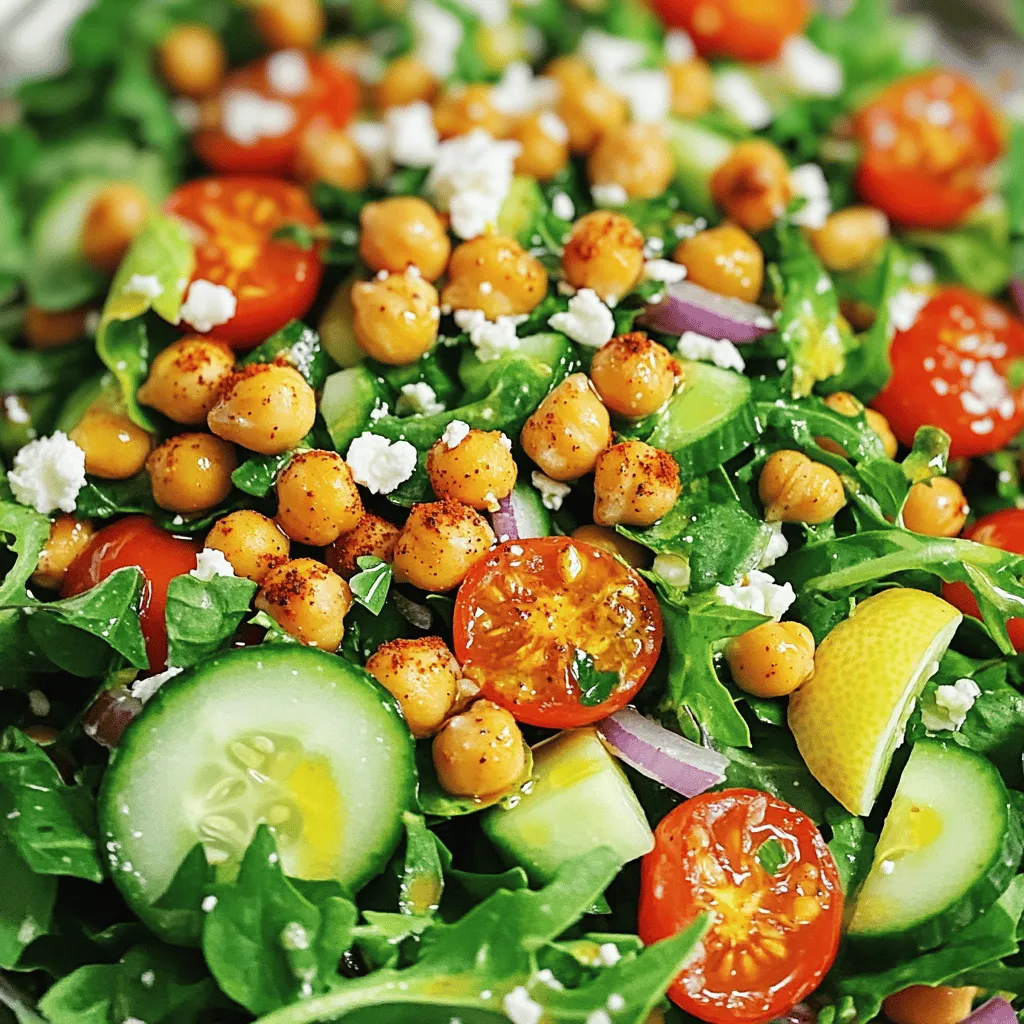
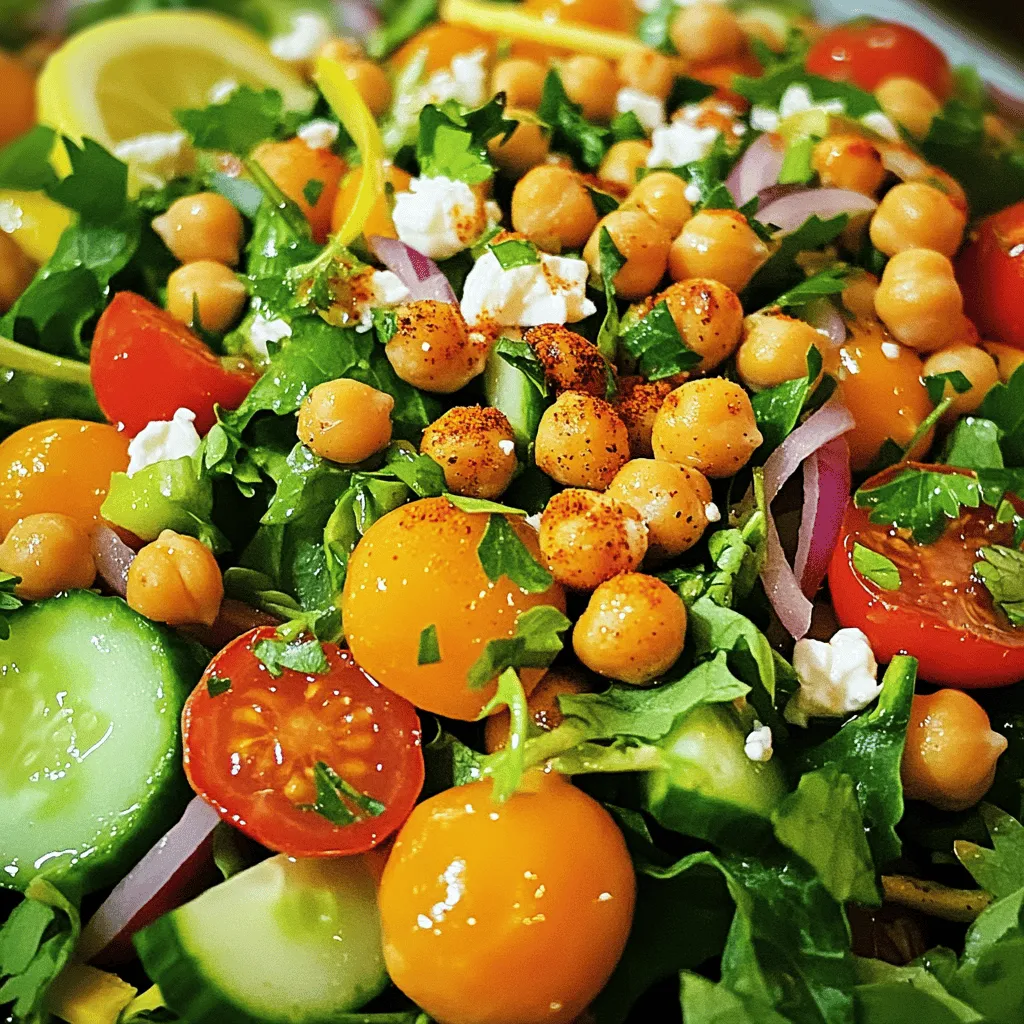
Want a fresh and tasty salad that’s easy to make? My Crispy Chickpea Salad is the perfect meal for any occasion. Packed with vibrant greens, juicy tomatoes, and, of course, crunchy chickpeas, this dish bursts with flavor. Whether you’re new to cooking or a seasoned pro, you’ll love how simple it is to whip up. Let’s dive into this colorful recipe that will excite your taste buds!
Ingredients
Main Ingredients for the Salad
– 1 can chickpeas (15 oz)
– Fresh mixed greens (spinach, arugula, romaine)
– Cherry tomatoes
– Cucumber
– Red onion
– Optional: Feta cheese, parsley
Seasoning Ingredients
– Extra virgin olive oil
– Smoked paprika
– Garlic powder
– Ground cumin
– Sea salt and black pepper
Dressing Ingredients
– Lemon juice
You need fresh and simple ingredients to make this crispy chickpea salad. Start with a can of chickpeas, which gives you a great base. After draining and rinsing, these chickpeas become crispy stars of the dish.
For greens, I love a mix of spinach, arugula, and romaine. They add a nice crunch and flavor. Cherry tomatoes bring sweetness and color, while cucumber adds crunch. Red onion gives it a bit of a kick.
You can add feta cheese for creaminess and parsley for a fresh burst.
Next, let’s talk about seasoning. Extra virgin olive oil makes everything smooth and rich. Smoked paprika adds depth, while garlic powder brings a nice warm flavor. Ground cumin gives an earthy note. Lastly, sea salt and black pepper enhance all these flavors.
For dressing, you only need fresh lemon juice. It brightens everything up and ties the salad together. This simple mix of ingredients keeps it fresh and tasty.
Step-by-Step Instructions
Preparation of Chickpeas
– Preheat the oven: Start by heating your oven to 400°F (200°C). This step is key for crispiness.
– Dry and season the chickpeas: Use paper towels to dry the chickpeas well. This helps them get crunchy. In a bowl, drizzle the olive oil over the chickpeas.
– Roasting instructions: Add smoked paprika, garlic powder, cumin, salt, and pepper to the bowl. Toss until evenly coated. Spread the chickpeas on a baking sheet. Roast for 25-30 minutes, shaking the pan halfway through. Watch for a golden, crunchy finish.
Assembling the Salad
– Combine fresh salad ingredients: In a large bowl, mix fresh greens, halved cherry tomatoes, diced cucumber, and thinly sliced red onion. Gently toss to avoid bruising the greens.
– Dress the salad with lemon juice: Drizzle fresh lemon juice over the salad. Use tongs to toss everything softly until the greens are bright and fresh.
Final Touches
– Add crispy chickpeas to the salad: Once the chickpeas cool slightly, mix them into the salad. The warm, crispy chickpeas add a great texture.
– Optionally sprinkle with feta and garnish: If you like, add crumbled feta cheese on top. Finish with fresh parsley for color. This adds a lovely touch to your dish. Enjoy your Crispy Chickpea Salad!
Tips & Tricks
Achieving Maximum Crispiness
To get the best crispy chickpeas, drying them is key. After rinsing, I always pat them dry with paper towels. Removing moisture helps them roast better. If they are wet, they won’t get crunchy.
Once dry, toss the chickpeas in olive oil and spices. I like to use smoked paprika, garlic powder, and cumin. Make sure each chickpea gets a good coating. This step adds tons of flavor.
For roasting, I recommend a hot oven at 400°F (200°C). Spread the chickpeas on a baking sheet in a single layer. This helps them cook evenly. I shake the pan halfway through. It ensures they crisp up all around. Keep an eye on them to avoid burning.
Serving Suggestions
This salad pairs well with grilled chicken or fish. The flavors blend nicely, and the crunch stays intact. You can also serve it with pita bread for a fuller meal.
To enhance the flavor, I love adding fresh herbs like cilantro or mint. They give a nice, bright note. You could also add sliced avocado for creaminess.
Alternative Dressings
For creamy dressings, try yogurt or tahini. They add richness and pair well with the chickpeas. A lemon-tahini dressing is a personal favorite of mine. It complements the salad’s freshness.
If you prefer vinaigrettes, a simple mix of olive oil and vinegar works great. Balsamic or red wine vinegar adds a nice tang. You can also mix in some honey for sweetness.
Variations
Ingredient Substitutions
If you want to shake things up, you can swap chickpeas for other legumes. Try black beans or lentils for a change. Each option brings its own flavor and texture. You can also switch greens and vegetables. Kale, romaine, or mixed baby greens work great. Bell peppers, carrots, or radishes can add extra crunch too.
Flavor Combinations
Experiment with different spices and herbs to change the taste. Try using curry powder for a warm twist. Fresh herbs like basil or cilantro can brighten the salad. You can also add fruits or nuts. Apples, pears, or dried cranberries add sweetness. Almonds or walnuts offer a nice crunch. Each addition gives your salad a unique flair.
Seasonal Adaptations
Incorporate seasonal ingredients for fresh flavors. In summer, add ripe peaches or sweet corn. In fall, consider roasted squash or apples. Adjust your salad based on dietary restrictions too. For gluten-free options, use quinoa or a different grain. This way, everyone can enjoy your crispy chickpea salad.
Storage Info
Storing Leftovers
To keep your crispy chickpea salad fresh, store it in an airtight container. This helps maintain the flavors. You can place it in the fridge for later enjoyment. To keep the chickpeas crispy, store them separately. This way, they won’t get soggy. When you are ready to eat, mix them back in for a crunchy bite.
Reheating Recommendations
Chickpeas can be reheated, but take care. Use the oven or air fryer for best results. Heat them at 350°F (175°C) for about 10 minutes. This will restore their crunch. To refresh the salad, add a bit of fresh lemon juice. This brightens the flavors and makes it taste fresh again.
Shelf Life
Expect your salad to last up to three days in the fridge. Always check for signs of spoilage. If you see any mold or if it smells off, discard it. Freshness is key for the best taste and safety. Enjoy your crispy chickpea salad while it’s at its best!
FAQs
How do I make crispy chickpeas?
To make crispy chickpeas, follow these key points:
– Dry the chickpeas well. Use paper towels to remove moisture.
– Use enough oil. Drizzle two tablespoons of olive oil for crispiness.
– Season well. Add spices like smoked paprika and garlic powder.
– Roast at the right temperature. Set your oven to 400°F (200°C).
– Shake the pan. Halfway through roasting, shake to ensure even crisping.
These steps help achieve that perfect crunch you want in your salad. Crispy chickpeas add a delightful texture to your dish.
Can I prepare this salad in advance?
You can prep the salad ahead but keep a few tips in mind:
– Store chickpeas separately. This keeps them crunchy.
– Mix greens and veggies just before serving. This prevents sogginess.
– Dress the salad last. Wait to add lemon juice until you are ready to eat.
By prepping this way, you can enjoy fresh flavors without losing texture.
What variations can I try for a vegan version?
For a vegan version, consider these ingredient swaps:
– Leave out the feta cheese. It can be omitted for a lighter taste.
– Add avocado. This gives creaminess without dairy.
– Use tahini dressing. This adds rich flavor and keeps it plant-based.
These swaps maintain the taste and make the salad vegan-friendly. Explore your options for a delicious twist!
This salad brings together simple, healthy ingredients for a tasty meal. You prepare crispy chickpeas, fresh greens, and a zesty lemon dressing. I’ve shared tips for making it great, variations to try, and how to store leftovers.
Explore different flavors and ingredients to keep it exciting. You can adapt this recipe to fit any season or taste preference. Enjoy the crunch and freshness of each bite. Making salads like this can be both fun and rewarding.