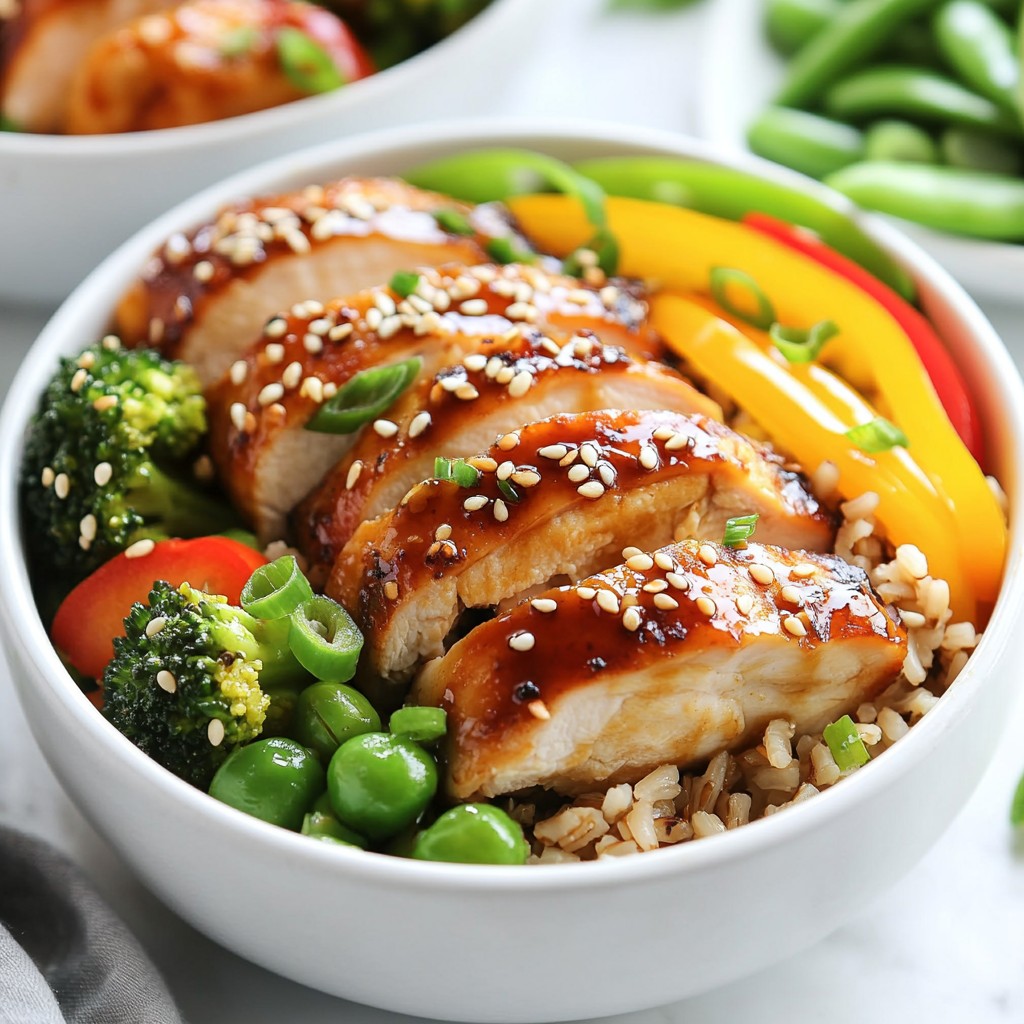
Are you ready to savor a deliciously easy meal that suits your busy lifestyle? Meal Prep Teriyaki Chicken Bowls are your answer! In this article, I’ll share a quick and tasty recipe that combines juicy chicken, vibrant vegetables, and a rich teriyaki sauce. Perfect for lunch or dinner, these bowls can be customized to fit your taste. Let's get cooking and make mealtime simple and satisfying!
Why I Love This Recipe
- Flavorful Marinade: The combination of soy sauce, honey, ginger, and garlic creates a deliciously rich teriyaki flavor that elevates the chicken.
- Easy Meal Prep: This recipe is perfect for meal prepping, allowing you to enjoy healthy lunches or dinners throughout the week.
- Colorful Vegetables: The vibrant mix of broccoli, bell peppers, and snap peas adds color and nutrition to your meal.
- Customizable Bowls: You can easily swap out vegetables or grains, making it versatile to suit your taste preferences.
Ingredients
Main Ingredients
- 1 lb boneless, skinless chicken thighs
- 2 cups cooked brown rice
- 1 cup broccoli florets
- 1 bell pepper, thinly sliced
- 1 cup snap peas
Teriyaki Marinade Ingredients
- 1/4 cup low-sodium soy sauce
- 2 tablespoons honey
- 1 tablespoon rice vinegar
- 2 cloves garlic, minced
- 1 inch fresh ginger, grated
- 1 tablespoon sesame oil
Garnishing Ingredients
- 1 tablespoon sesame seeds
- 2 green onions, chopped
When I make these Meal Prep Teriyaki Chicken Bowls, I love how simple the ingredients are. The chicken thighs provide great flavor and juiciness. You can swap them for chicken breast if you prefer.
I always use cooked brown rice. It adds a nice nutty taste and is healthier than white rice. For the veggies, I go with broccoli, bell pepper, and snap peas. They cook well and add color to the dish.
The teriyaki marinade is key here. Low-sodium soy sauce keeps it tasty without being too salty. Honey gives it a sweet touch, while rice vinegar adds a bit of tang. Fresh garlic and ginger make the marinade pop with flavor. Sesame oil ties it all together with a rich, nutty essence.
Lastly, I love garnishing the bowls with sesame seeds and green onions. They add a bit of crunch and freshness. This simple recipe has all the right components. You will enjoy making it as much as eating it.

Step-by-Step Instructions
Preparing the Teriyaki Marinade
- Combine the soy sauce, honey, rice vinegar, minced garlic, grated ginger, and sesame oil in a bowl.
- Whisk until blended. This mix gives your chicken great flavor.
Marination Process
- Coat the chicken thighs in the marinade. Make sure every piece is covered well.
- Refrigerate for 30 minutes to 2 hours. The longer, the better the taste.
Cooking the Chicken and Vegetables
- Preheat your oven to 400°F (200°C). This high heat helps the chicken cook nicely.
- Bake the chicken for 20-25 minutes. Check that it reaches 165°F (75°C) inside.
- While the chicken cooks, heat a large skillet. Add a splash of water.
- Sauté the broccoli, bell pepper, and snap peas until they are tender, about 5-7 minutes. They should be bright and crisp.
Assembling the Meal Prep Bowls
- Now it’s time to build your bowls! Start by putting cooked brown rice into containers.
- Top each rice portion with chicken slices and sautéed veggies.
- Drizzle the thickened marinade over the top of each bowl. This adds a tasty finish.
Tips & Tricks
Perfecting the Teriyaki Flavor
To make the best teriyaki chicken, marination is key. I recommend marinating the chicken for at least 30 minutes. For more flavor, let it sit for up to 2 hours. This gives the chicken time to soak up the tasty sauce. Always use fresh ingredients when you can. Fresh ginger and garlic will enhance the flavor greatly. They add a nice, bright taste to the teriyaki.
Cooking Techniques
When cooking your chicken, you have two great options: baking or grilling. Baking is easy and keeps the chicken juicy. Set your oven to 400°F (200°C) for best results. If you prefer grilling, make sure to keep an eye on the chicken so it doesn’t dry out. For the veggies, sauté them evenly. Use a splash of water to help them cook. This keeps them bright and crunchy, which is what you want.
Meal Prep Best Practices
Choosing the right containers is important for meal prep. Look for airtight containers to keep your food fresh. Glass containers are great because they are durable and easy to clean. When reheating, do it gently to keep the flavors intact. The microwave works well, but the stovetop is better for even heating. Just add a little splash of water to keep everything moist.
Pro Tips
- Marinate Longer for More Flavor: For maximum flavor, let the chicken marinate for at least 2 hours or overnight if possible.
- Use Fresh Ingredients: Fresh garlic and ginger will enhance the flavor of your teriyaki sauce significantly compared to dried alternatives.
- Customize Your Veggies: Feel free to swap in your favorite vegetables like carrots or zucchini for a different twist on this dish.
- Store Properly: These bowls can be stored in the fridge for up to 4 days. Just make sure to keep the sauce separate until you're ready to eat!
Variations
Alternative Proteins
You can switch up the main protein in your teriyaki bowls. Chicken thighs work great, but chicken breast is leaner. It will still taste fantastic. If you prefer a plant-based option, try using tofu. Tofu absorbs flavors well and adds a different texture.
For a seafood twist, add shrimp. They cook quickly and add a nice sweetness. You could also use beef if you like red meat. Just choose a tender cut, like flank steak, and slice it thin.
Vegetable Swaps
The vegetables in your teriyaki bowl are flexible. If you don’t have broccoli, use carrots or zucchini. Both add color and crunch. Seasonal veggies also work well. In spring, consider asparagus or snap peas. In the fall, use butternut squash or Brussels sprouts.
Mixing different veggies can make each bowl unique. Experiment with what you have at home for fun flavors and textures.
Sauce Variants
The teriyaki sauce can change too. Want some heat? Add chili flakes or sriracha to your sauce. This will give your meal a spicy kick. For those watching their carbs, try low-sugar or sugar-free options. You can use a sugar substitute or reduce the honey.
These variations let you customize your bowls. They keep your meals exciting and full of flavor. Enjoy your cooking adventure!
Storage Info
Storing Meal Prep Bowls
For the best storage, use airtight containers. Glass containers work great. They keep food fresh and are easy to clean. You can also use plastic containers made for meal prep.
Before you store your bowls, let the food cool down. This helps prevent moisture buildup. If you want to freeze them, make sure to cool them completely first. Divide the chicken, rice, and vegetables evenly into each container.
Shelf Life
In the fridge, your teriyaki chicken bowls stay fresh for up to four days. This makes them perfect for meal prep. If you want to keep them longer, freezing is a good option. When frozen, they can last for about three months.
For freezing, wrap each bowl in plastic wrap. Then place it in a freezer bag. This keeps air out and avoids freezer burn.
Reheating Instructions
To enjoy your meal prep bowls, reheating is key. The best way to reheat is on the stovetop. Place the bowl in a pan with a splash of water. Cover it and warm over low heat. This helps keep the chicken juicy and the veggies crisp.
If you use a microwave, heat the bowl for about 2 minutes. Stir halfway to ensure even warming. Microwaving is quick but may make veggies softer. Always check that the chicken is hot throughout before eating.
FAQs
How can I make Teriyaki chicken without soy sauce?
You can use coconut aminos or tamari as soy sauce substitutes. Both add great flavor. Coconut aminos has a slightly sweeter taste, while tamari is similar to soy sauce but gluten-free. You can also make a simple mix with broth, vinegar, and spices. This way, you keep the taste close to teriyaki.
Can I use brown rice instead of white rice?
Yes, brown rice is a great choice. It has more fiber and nutrients than white rice. Brown rice helps you feel full longer. It also has a nutty flavor that pairs well with teriyaki chicken. Using brown rice boosts the meal's overall health benefits.
What vegetables can I add to the Teriyaki chicken bowls?
You can add many vegetables! Consider carrots, zucchini, or bell peppers. Sautéed bok choy or snap peas work well too. You can even toss in some spinach for extra greens. Feel free to mix your favorites for color and taste. The more veggies, the better the meal!
Is this recipe gluten-free?
Yes, but you'll need to make a few changes. Use tamari instead of soy sauce. Ensure your rice vinegar is gluten-free too. Most honey is gluten-free, but check the label. With these swaps, you can enjoy a delicious gluten-free teriyaki chicken bowl!
This recipe for Teriyaki chicken bowls combines simple ingredients and steps for easy meal prep. You learned how to marinate chicken, cook veggies, and assemble your bowls. Experiment with variations for new flavors and find alternatives that suit your diet. Enjoy making these meals ahead of time for a quick, tasty option. Keep these tips in mind for perfect Teriyaki every time. Fresh food, good prep, and smart storage make for a great meal each day.