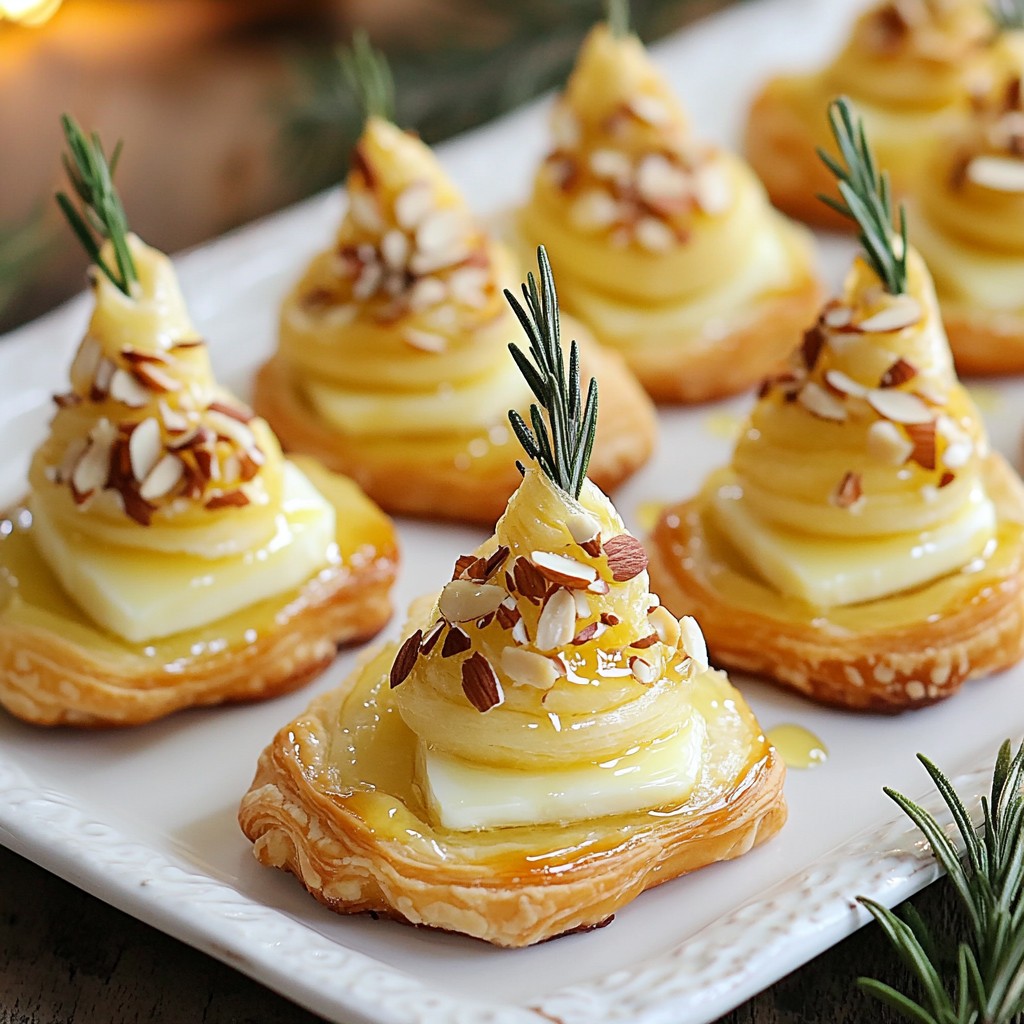
Looking for a festive appetizer that will impress your guests? Try making Mini Brie Puff Pastry Trees! These fun little treats are easy to make and packed with creamy brie flavor. In just a few simple steps, you can create a delightful addition to any holiday spread. Join me as we explore the ingredients, tips, and variations to make your puff pastry trees a hit at your next gathering!
Why I Love This Recipe
- Festive Presentation: These mini puff pastry trees are not only delicious but also make for an eye-catching centerpiece during holiday gatherings.
- Easy to Make: With just a few simple ingredients and steps, you can whip up these delightful treats in no time, perfect for last-minute guests.
- Cheesy Goodness: The combination of melty Brie cheese and the hint of rosemary offers a rich, savory flavor that everyone will love.
- Customizable: Feel free to add your favorite herbs or toppings, such as nuts or spices, to make these trees uniquely yours!
Ingredients
Essential Ingredients for Mini Brie Puff Pastry Trees
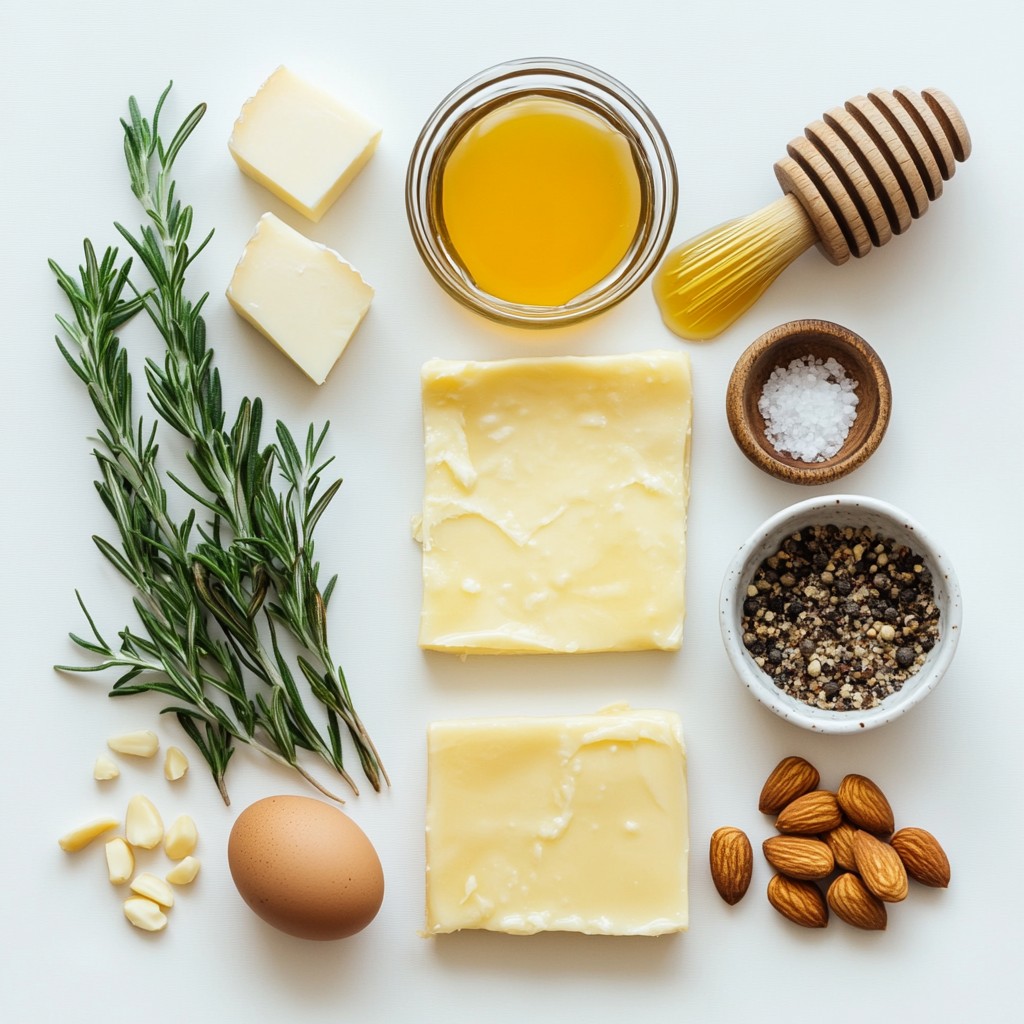
To make these tasty treats, you need:
- 1 sheet of puff pastry (thawed)
- 8 oz Brie cheese, cut into small cubes
- 1 egg, beaten (for egg wash)
- 1 tablespoon fresh rosemary, finely chopped
- 1 teaspoon garlic powder
- 1 tablespoon honey
- Sea salt and black pepper to taste
These ingredients work together to create a warm, gooey, and savory snack. The Brie cheese melts beautifully, and the puff pastry puffs up to form a lovely shape.
Recommended Pantry Staples
You might also want to have these items on hand:
- Flour for dusting your work surface
- Parchment paper to prevent sticking
- Additional spices like onion powder or pepper flakes
Having these staples ready helps you whip these trees up easily.
Optional Garnishes
To make your pastry trees even better, consider adding:
- Sliced almonds for a crunchy topping
- Extra rosemary sprigs for decoration
These garnishes add a nice touch and enhance the flavor. They also make your dish look festive and fun!
Step-by-Step Instructions
Preheating the Oven and Preparing the Pastry
First, preheat your oven to 400°F (200°C). This high heat helps the pastry puff up nicely. Next, take your thawed puff pastry and lightly flour your work surface. Roll the pastry out until it is about 1/8 inch thick. Use a sharp knife or pizza cutter to cut the pastry into triangle shapes. Each triangle should be about 3 inches wide at the base and 5 inches tall. These will form the mini trees.
Shaping the Mini Trees
Now, carefully transfer the triangular pastry shapes to a baking sheet lined with parchment paper. This step prevents sticking and makes cleanup easy. In the center of each triangle, place a small cube of Brie cheese, about 1 inch in size. This cheese melts perfectly.
Assembling the Filling and Sealing the Pastry
On top of the Brie, sprinkle a pinch of finely chopped rosemary. Add a dash of garlic powder, and season with sea salt and black pepper. Finally, drizzle a bit of honey over everything. This mix gives a sweet and savory taste. Gently fold the pastry edges over the filling to form a triangular tree shape. Make sure the base is wide, and the tip is pointed. Press the edges lightly to seal them.
Use a pastry brush to apply the beaten egg on top of each puff pastry tree. This creates a golden-brown crust when baked. If you want, sprinkle sliced almonds on top for extra crunch and flavor. Now, place the baking sheet in your preheated oven and bake for 15-20 minutes. Watch closely to prevent them from browning too quickly. Once baked, take them out and let them cool for a few minutes before serving.
Tips & Tricks
Best Practices for Puff Pastry
To get the best results, start with cold puff pastry. Cold pastry puffs up better. Use a lightly floured surface when rolling. This keeps the dough from sticking. Roll it out to about 1/8 inch thick. This thickness helps create a light and flaky crust. Cut the dough into triangle shapes carefully. Use a sharp knife or a pizza cutter for clean edges.
Customizing Flavor Combinations
You can mix and match flavors to suit your taste. Try adding herbs like thyme or basil. These herbs pair well with Brie. For a spicy kick, add some crushed red pepper flakes. If you like fruity flavors, swap honey for fig jam. It adds a nice sweetness. You can also use different cheeses. Cheddar or Gouda can give a fun twist.
Ensuring Perfect Bake Time and Temperature
Always preheat your oven to 400°F (200°C). This high heat makes the pastry puff up. Bake the trees for 15-20 minutes. Watch them closely. You want a nice golden-brown color. If they brown too fast, lower the heat slightly. Let them cool for a few minutes before serving. This helps the cheese set a bit and makes them easier to eat.
Pro Tips
- Chill the Pastry: Keep the puff pastry chilled until you're ready to use it. Cold pastry puffs up better in the oven, resulting in a flaky texture.
- Experiment with Fillings: Feel free to mix up the cheese or add other ingredients like cranberries or walnuts for a unique flavor twist.
- Watch the Baking Time: Ovens can vary, so keep an eye on your pastry trees while they bake. Remove them once they reach a golden brown for the best texture.
- Serve Fresh: These mini Brie puff pastry trees are best served warm. If you need to make them ahead of time, reheat them briefly in the oven before serving.
Variations
Sweet and Savory Flavor Twists
You can change up the flavors in your mini Brie puff pastry trees. For a sweet twist, add a dollop of cranberry sauce or fig jam inside each tree. This adds a fruity punch that blends well with the creamy Brie. If you want more savory flavors, try adding caramelized onions or sautéed mushrooms. These ingredients give a rich, earthy taste that's hard to resist.
Alternative Cheeses to Use
Brie is delicious, but you can use other cheeses too. Camembert is a great choice; it has a similar creamy texture. Goat cheese works well for a tangy flavor. For a sharper taste, try sharp cheddar or Gruyère. Each cheese brings its own unique taste, so feel free to experiment with your favorites!
Seasonal Ingredient Swaps
Using seasonal ingredients can make your puff pastry trees even better. In fall, try adding cooked butternut squash or pumpkin puree. In spring, fresh asparagus or peas can brighten the flavor. For winter, consider adding dried herbs like thyme or sage to enhance the dish. Seasonal swaps keep your appetizer fresh and exciting!
Storage Info
How to Store Leftover Puff Pastry Trees
Store leftover Mini Brie Puff Pastry Trees in an airtight container. Keep them in the fridge for up to three days. If you want to keep them longer, freezing is best. Just make sure they cool completely before storing.
Reheating Instructions
To reheat, place the puff pastry trees on a baking sheet. Preheat your oven to 350°F (175°C). Bake for about 10 minutes. This keeps the pastry crispy and warms the cheese inside. Avoid using a microwave, as it makes the pastry soggy.
Freezing Options for Meal Prep
You can freeze these trees before baking them. Assemble them as per the recipe, then place them on a baking sheet. Freeze for about 30 minutes until firm. Transfer them to a freezer-safe bag. They can stay frozen for up to three months. When ready to bake, no need to thaw. Just add a few extra minutes to the baking time.
FAQs
How long do Mini Brie Puff Pastry Trees take to make?
Mini Brie Puff Pastry Trees take about 40 minutes to make. You need 20 minutes to prep and 20 minutes to bake. This quick time makes them perfect for gatherings.
Can I make these puff pastry trees ahead of time?
Yes, you can make these trees ahead of time. Assemble them, then cover with plastic wrap. Keep them in the fridge for up to 24 hours. Bake just before serving for a fresh treat.
What can I serve with Mini Brie Puff Pastry Trees?
These trees pair well with many snacks. Serve with crackers, fruit, or nuts. A nice dip like honey mustard also works great. You can even add a salad for a full meal.
Making Mini Brie Puff Pastry Trees is fun and simple. We explored essential ingredients, shaping, and baking tips. These trees can be sweet or savory, allowing creativity. You can also store and reheat them for later.
In the end, these treats are perfect for any gathering. Enjoy crafting your own unique versions!