No-Bake Butterfinger Balls Simple and Irresistible Treat

WANT TO SAVE THIS RECIPE?

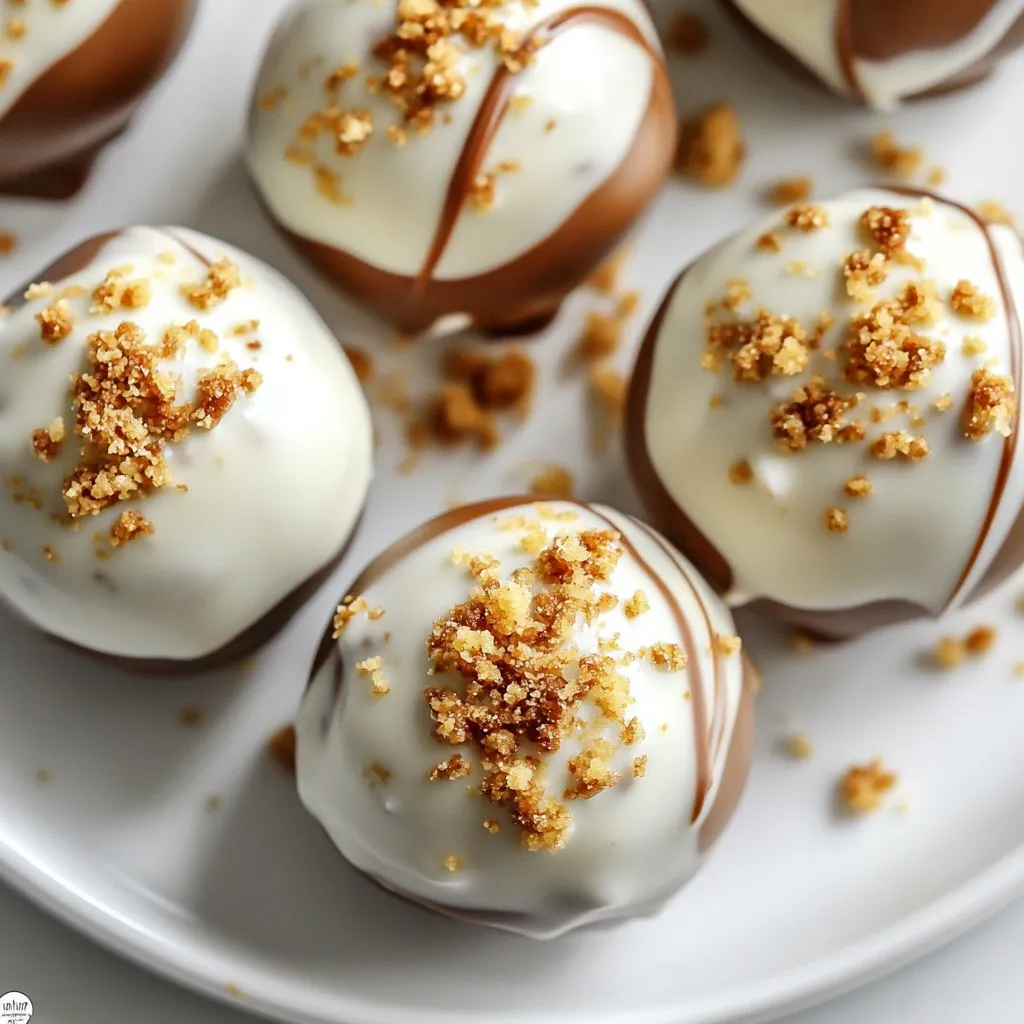
If you love easy treats that taste amazing, you’re in for a treat! No-Bake Butterfinger Balls are simple and quick to make. With just a few tasty ingredients, you’ll mix up a sweet surprise for any occasion. Imagine rich peanut butter combined with crushed Butterfinger and chocolate—you won’t be able to resist! Let’s get started on this fun and delicious recipe that everyone will love.

Why I Love This Recipe

  1. Easy to Make: This recipe requires no baking, making it a quick and simple treat to whip up.
  2. Decadent Flavor: The combination of chocolate and peanut butter with Butterfinger bits creates a rich and satisfying dessert.
  3. Perfect for Sharing: These bite-sized balls are great for parties or gatherings, allowing everyone to enjoy a sweet treat.
  4. Customizable: You can add your favorite toppings or even substitute different candies for a unique twist!

Ingredients

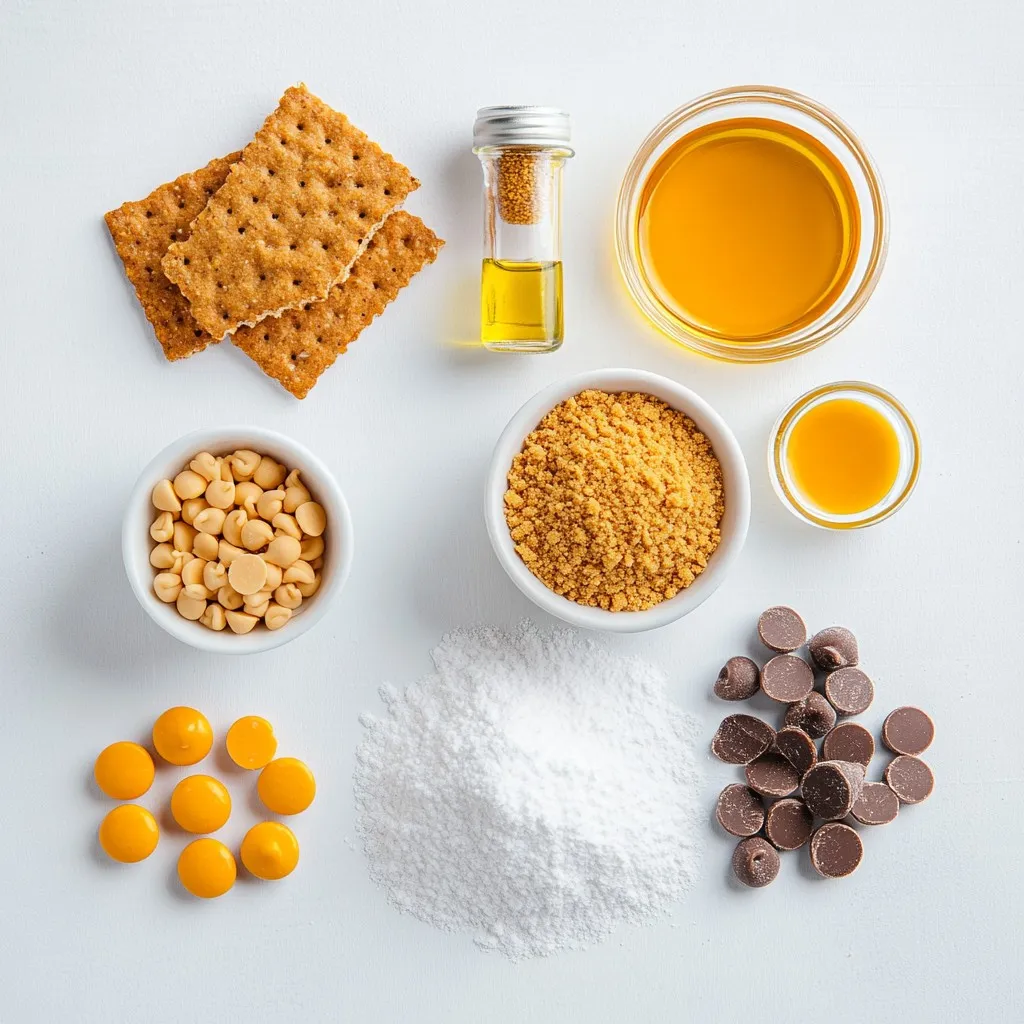
To make No-Bake Butterfinger Balls, you’ll need a few simple ingredients. Each one plays a big role in the flavor and texture. Here’s the list of what you need:

– 1 cup crushed Butterfinger candy bars

– 1 cup creamy peanut butter

– 2 cups finely crushed graham crackers

– 1 cup powdered sugar

– 1 teaspoon pure vanilla extract

– 1 cup milk chocolate chips

– 1 tablespoon coconut oil (optional)

Each ingredient adds to the treat’s sweet and crunchy goodness. The crushed Butterfinger bars give it that signature flavor. Creamy peanut butter binds everything together. Graham crackers add crunch, while powdered sugar sweetens the mix. The vanilla adds a nice aroma. Melting chocolate coats the balls and creates a shiny finish. Coconut oil helps the chocolate melt smoothly, but it’s not required.

Gather all of these ingredients before you start. This will make the process quick and fun!

Step-by-Step Instructions

Preparation of the Mixture

Start with a large mixing bowl. First, combine the dry ingredients. Add 1 cup of crushed Butterfinger candy bars, 1 cup of creamy peanut butter, 2 cups of finely crushed graham crackers, 1 cup of powdered sugar, and 1 teaspoon of pure vanilla extract. Use a spatula or wooden spoon to mix everything well. Keep stirring until the mixture feels cohesive and dough-like. You should be able to press it together easily.

Forming the Balls

Now it’s time to shape the mixture. With clean hands, take small portions of the mixture. Roll them into balls about 1 inch in diameter. Make sure to keep the size uniform for even coating. Place each ball on a parchment-lined baking sheet. Leave some space between the balls to stop them from sticking together.

Melting and Coating with Chocolate

Next, prepare the chocolate. In a microwave-safe bowl, add 1 cup of milk chocolate chips and 1 tablespoon of coconut oil if you want a smoother melt. Microwave in 30-second intervals. Stir after each interval until the chocolate is fully melted and smooth. Be careful not to overheat it, as this can burn the chocolate.

Once melted, dip each rolled ball into the chocolate. Make sure every surface is well-coated. Use a fork to lift the ball out, letting excess chocolate drip off. Place it back on the parchment-lined baking sheet.

For a fun touch, sprinkle some crushed Butterfinger pieces or graham cracker crumbs on top of each ball if you like. Finally, place the tray in the fridge for at least 30 minutes. This helps the chocolate set and harden. Enjoy your No-Bake Butterfinger Balls!

Tips & Tricks

Achieving the Perfect Consistency

To know when your mixture is right, look for a dough-like feel. When you press it, it should hold its shape. If it’s too dry, add a touch of peanut butter. If it’s too wet, add more graham crackers. You want a nice balance that makes rolling the balls easy.

Melting Chocolate without Overheating

Microwave the chocolate in short bursts. Start with 30 seconds, then stir. Repeat this until the chocolate melts smoothly. Adding coconut oil helps make the chocolate smoother. Be careful! Overheating can cause the chocolate to seize. If it does, it may not coat the balls well.

Presentation and Serving Suggestions

For gatherings, arrange the butterfinger balls on a colorful plate. You can even place them in small cupcake liners for a fun touch. Sprinkle crushed Butterfinger pieces on top for extra flair. This not only looks great but also adds texture. Your friends will love the treats!

Pro Tips

  1. Chill the Mixture: Refrigerate the mixture for about 15 minutes before rolling into balls. This helps the mixture firm up, making it easier to shape.
  2. Use Quality Chocolate: For the best flavor, choose high-quality milk chocolate chips. They melt better and provide a richer taste.
  3. Experiment with Coatings: Try using white chocolate or dark chocolate for a different twist. You can also sprinkle with sea salt for a sweet-salty contrast.
  4. Storage Tips: Keep the Butterfinger balls in an airtight container in the refrigerator. They stay fresh for up to a week, or you can freeze them for longer storage.

Variations

Flavor Variations

You can make No-Bake Butterfinger Balls even more exciting by changing the flavors. Here are some ideas:

Different chocolate types: Instead of milk chocolate, try dark or white chocolate. Dark chocolate gives a rich taste. White chocolate adds sweetness and creaminess. Both options make the treat unique and fun.

Adding flavor extracts: Boost the flavor with extracts like almond or mint. Just a few drops can make a big difference. Almond extract adds a nutty twist. Mint extract gives a refreshing lift. Try both to find your favorite!

Ingredient Substitutions

You can also switch some ingredients for different tastes or needs:

Alternative nut butters: If you need a nut-free option, use sunbutter or soy nut butter instead of peanut butter. These will keep the creamy texture while being safe for allergies.

Gluten-free options for graham crackers: Look for gluten-free graham cracker brands. They provide the same crunch and sweetness without gluten. This way, everyone can enjoy these tasty balls!

Storage Info

Storing the Butterfinger Balls

Store your Butterfinger balls in an airtight container. Keep them in the fridge. They stay fresh and tasty this way. The cold helps the chocolate stay firm. If you leave them out, they may get soft. They also absorb moisture, which can change their texture. For best taste, eat them within a week.

Freezing Instructions

To freeze Butterfinger balls, first place them in a single layer on a baking sheet. Make sure they don’t touch each other. Freeze them for about one hour until solid. Once frozen, transfer them to a freezer-safe bag or container. This helps save space. They can stay good in the freezer for up to three months.

For thawing, take them out and let them sit at room temperature for about 15 minutes. This gives them time to soften a bit. Enjoy them cold or let them warm up for a softer bite!

FAQs

How long do No-Bake Butterfinger Balls last?

No-Bake Butterfinger Balls can last up to a week at room temperature. If you store them in the fridge, they can last up to two weeks. The cool temperature keeps them fresh and tasty. Just make sure to keep them in an airtight container to avoid drying out.

Can I make these without peanut butter?

Yes, you can! If you have a nut allergy, try using sunbutter or soy nut butter. Both options work well and keep the treat tasty. You can also use a seed butter for a nut-free choice. Just check that it has a similar texture to peanut butter.

What can I use instead of Butterfinger candy bars?

If you want to switch things up, you can use other candy bars. Try Reese’s or Snickers for a different taste. You could also use crushed toffee or chocolate-covered pretzels. Each option will add a unique twist to your Butterfinger Balls.

This blog post covered how to make no-bake Butterfinger balls. We listed the key ingredients, gave clear steps for mixing and coating, and shared useful tips. You learned about fun variations and how to store these tasty treats.

Enjoy these simple and delicious snacks at your next event. With a few tweaks, you can make them your own. Treat yourself and your friends to this sweet deligh

To make No-Bake Butterfinger Balls, you'll need a few simple ingredients. Each one plays a big role in the flavor and texture. Here’s the list of what you need: - 1 cup crushed Butterfinger candy bars - 1 cup creamy peanut butter - 2 cups finely crushed graham crackers - 1 cup powdered sugar - 1 teaspoon pure vanilla extract - 1 cup milk chocolate chips - 1 tablespoon coconut oil (optional) Each ingredient adds to the treat's sweet and crunchy goodness. The crushed Butterfinger bars give it that signature flavor. Creamy peanut butter binds everything together. Graham crackers add crunch, while powdered sugar sweetens the mix. The vanilla adds a nice aroma. Melting chocolate coats the balls and creates a shiny finish. Coconut oil helps the chocolate melt smoothly, but it's not required. Gather all of these ingredients before you start. This will make the process quick and fun! {{ingredient_image_2}} Start with a large mixing bowl. First, combine the dry ingredients. Add 1 cup of crushed Butterfinger candy bars, 1 cup of creamy peanut butter, 2 cups of finely crushed graham crackers, 1 cup of powdered sugar, and 1 teaspoon of pure vanilla extract. Use a spatula or wooden spoon to mix everything well. Keep stirring until the mixture feels cohesive and dough-like. You should be able to press it together easily. Now it’s time to shape the mixture. With clean hands, take small portions of the mixture. Roll them into balls about 1 inch in diameter. Make sure to keep the size uniform for even coating. Place each ball on a parchment-lined baking sheet. Leave some space between the balls to stop them from sticking together. Next, prepare the chocolate. In a microwave-safe bowl, add 1 cup of milk chocolate chips and 1 tablespoon of coconut oil if you want a smoother melt. Microwave in 30-second intervals. Stir after each interval until the chocolate is fully melted and smooth. Be careful not to overheat it, as this can burn the chocolate. Once melted, dip each rolled ball into the chocolate. Make sure every surface is well-coated. Use a fork to lift the ball out, letting excess chocolate drip off. Place it back on the parchment-lined baking sheet. For a fun touch, sprinkle some crushed Butterfinger pieces or graham cracker crumbs on top of each ball if you like. Finally, place the tray in the fridge for at least 30 minutes. This helps the chocolate set and harden. Enjoy your No-Bake Butterfinger Balls! To know when your mixture is right, look for a dough-like feel. When you press it, it should hold its shape. If it’s too dry, add a touch of peanut butter. If it’s too wet, add more graham crackers. You want a nice balance that makes rolling the balls easy. Microwave the chocolate in short bursts. Start with 30 seconds, then stir. Repeat this until the chocolate melts smoothly. Adding coconut oil helps make the chocolate smoother. Be careful! Overheating can cause the chocolate to seize. If it does, it may not coat the balls well. For gatherings, arrange the butterfinger balls on a colorful plate. You can even place them in small cupcake liners for a fun touch. Sprinkle crushed Butterfinger pieces on top for extra flair. This not only looks great but also adds texture. Your friends will love the treats! Pro Tips Chill the Mixture: Refrigerate the mixture for about 15 minutes before rolling into balls. This helps the mixture firm up, making it easier to shape. Use Quality Chocolate: For the best flavor, choose high-quality milk chocolate chips. They melt better and provide a richer taste. Experiment with Coatings: Try using white chocolate or dark chocolate for a different twist. You can also sprinkle with sea salt for a sweet-salty contrast. Storage Tips: Keep the Butterfinger balls in an airtight container in the refrigerator. They stay fresh for up to a week, or you can freeze them for longer storage. {{image_4}} You can make No-Bake Butterfinger Balls even more exciting by changing the flavors. Here are some ideas: - Different chocolate types: Instead of milk chocolate, try dark or white chocolate. Dark chocolate gives a rich taste. White chocolate adds sweetness and creaminess. Both options make the treat unique and fun. - Adding flavor extracts: Boost the flavor with extracts like almond or mint. Just a few drops can make a big difference. Almond extract adds a nutty twist. Mint extract gives a refreshing lift. Try both to find your favorite! You can also switch some ingredients for different tastes or needs: - Alternative nut butters: If you need a nut-free option, use sunbutter or soy nut butter instead of peanut butter. These will keep the creamy texture while being safe for allergies. - Gluten-free options for graham crackers: Look for gluten-free graham cracker brands. They provide the same crunch and sweetness without gluten. This way, everyone can enjoy these tasty balls! Store your Butterfinger balls in an airtight container. Keep them in the fridge. They stay fresh and tasty this way. The cold helps the chocolate stay firm. If you leave them out, they may get soft. They also absorb moisture, which can change their texture. For best taste, eat them within a week. To freeze Butterfinger balls, first place them in a single layer on a baking sheet. Make sure they don't touch each other. Freeze them for about one hour until solid. Once frozen, transfer them to a freezer-safe bag or container. This helps save space. They can stay good in the freezer for up to three months. For thawing, take them out and let them sit at room temperature for about 15 minutes. This gives them time to soften a bit. Enjoy them cold or let them warm up for a softer bite! No-Bake Butterfinger Balls can last up to a week at room temperature. If you store them in the fridge, they can last up to two weeks. The cool temperature keeps them fresh and tasty. Just make sure to keep them in an airtight container to avoid drying out. Yes, you can! If you have a nut allergy, try using sunbutter or soy nut butter. Both options work well and keep the treat tasty. You can also use a seed butter for a nut-free choice. Just check that it has a similar texture to peanut butter. If you want to switch things up, you can use other candy bars. Try Reese's or Snickers for a different taste. You could also use crushed toffee or chocolate-covered pretzels. Each option will add a unique twist to your Butterfinger Balls. This blog post covered how to make no-bake Butterfinger balls. We listed the key ingredients, gave clear steps for mixing and coating, and shared useful tips. You learned about fun variations and how to store these tasty treats. Enjoy these simple and delicious snacks at your next event. With a few tweaks, you can make them your own. Treat yourself and your friends to this sweet delight!

Divine No-Bake Butterfinger Balls

Delicious no-bake treats made with Butterfinger candy bars and coated in chocolate.
Prep Time 20 minutes
Cook Time 10 minutes
Total Time 50 minutes
Course Dessert
Cuisine American
Servings 24
Calories 150 kcal

Ingredients
  

  • 1 cup crushed Butterfinger candy bars
  • 1 cup creamy peanut butter
  • 2 cups finely crushed graham crackers
  • 1 cup powdered sugar
  • 1 teaspoon pure vanilla extract
  • 1 cup milk chocolate chips
  • 1 tablespoon coconut oil (optional, for a smoother melt)

Instructions
 

  • In a large mixing bowl, combine the crushed Butterfinger candy bars, creamy peanut butter, finely crushed graham crackers, powdered sugar, and vanilla extract. Mix thoroughly using a spatula or wooden spoon until the mixture reaches a cohesive, dough-like consistency that holds together when pressed.
  • With clean hands, take small portions of the mixture and roll them into balls about 1 inch in diameter. Place each ball on a parchment-lined baking sheet, ensuring they are spaced apart to avoid sticking.
  • In a microwave-safe bowl, add the milk chocolate chips along with the coconut oil (if using). Microwave the mixture in 30-second intervals, stirring after each interval, until the chocolate is completely melted and smooth. Be cautious not to overheat the chocolate.
  • Dip each rolled ball into the melted chocolate, ensuring every surface is well-coated. Use a fork to lift the ball out of the chocolate, allowing excess to drip off before returning it to the parchment-lined baking sheet.
  • Once all the balls are coated, sprinkle a few crushed Butterfinger pieces or additional graham cracker crumbs on top of each for a delightful garnish, if desired.
  • Place the tray of Butterfinger balls in the refrigerator for at least 30 minutes, or until the chocolate has set completely and hardened.

Notes

Arrange the Butterfinger balls on a decorative plate or in a festive container, perfect for sharing at parties or gatherings!
Keyword Butterfinger, chocolate, dessert, no-bake

WANT TO SAVE THIS RECIPE?

Leave a Comment

Recipe Rating