No-Bake Chocolate Peanut Butter Bars Delightful Treat

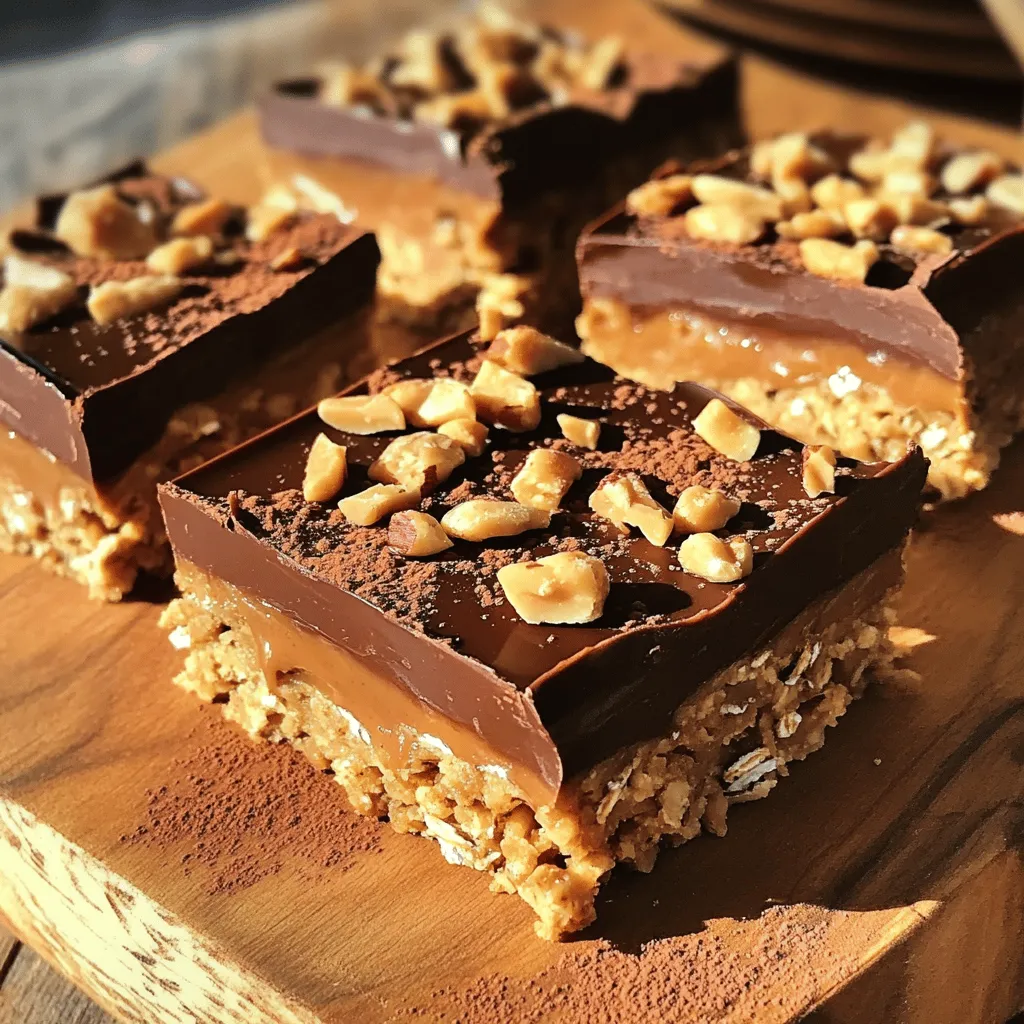
Are you ready for a sweet treat that comes together in no time? No-Bake Chocolate Peanut Butter Bars are a delicious and easy dessert perfect for all chocolate lovers. With just a few simple steps and ingredients, you can impress your friends and family. In this post, I’ll share everything you need to know to create these delightful bars, from ingredient tips to serving suggestions. Let’s dive in!

Ingredients

Complete List of Ingredients

To make these no-bake chocolate peanut butter bars, you’ll need:

– 1 cup rolled oats

– 1 cup natural peanut butter (smooth or crunchy)

– 1/2 cup honey or maple syrup (use maple syrup for vegan bars)

– 1/2 cup unsweetened cocoa powder

– 1/4 cup coconut oil, melted

– 1/2 teaspoon vanilla extract

– A pinch of salt

– 1/2 cup dark chocolate chips (dairy-free if desired)

– 1/4 cup chopped nuts (optional for topping)

Ingredient Substitutions

You can easily swap some ingredients if needed. For example, if you don’t have rolled oats, quick oats work too. You can use almond butter instead of peanut butter for a nut-free option. For a sweeter taste, substitute honey with agave syrup. If you want a nut-free version, ensure your chocolate chips are also nut-free.

Tips for Quality Ingredients

Always choose high-quality ingredients for the best flavor. Use natural peanut butter without added sugars or oils. Look for dark chocolate chips with a high cacao percentage. Fresh oats and raw honey add more taste and nutrition. If possible, opt for organic ingredients to enhance the health benefits of your bars. Quality matters, and it shows in the taste!

Step-by-Step Instructions

Preparation of the Mixture

To start, gather your ingredients. Grab a large mixing bowl. Add 1 cup of rolled oats. Next, add 1 cup of peanut butter. You can choose smooth or crunchy based on what you like. Then, pour in 1/2 cup of honey or maple syrup. This will sweeten your bars. Now, add 1/2 cup of unsweetened cocoa powder. This gives a rich chocolate taste. Don’t forget the 1/4 cup of melted coconut oil. It helps bind the mixture. Add 1/2 teaspoon of vanilla extract and a pinch of salt. Stir all these together until you have a thick, sticky dough. This is the base of your bars.

How to Press and Pack the Mixture

Now, prepare an 8×8 inch baking pan. Line it with parchment paper. Make sure some paper hangs over the sides for easy removal. Carefully transfer your oat mixture into the pan. Use the back of a spatula or your hands to press it down. You want it packed tightly and evenly. This step is key for a good texture. Take your time to make it smooth and firm.

Melting the Chocolate and Applying Toppings

Next, it’s time to melt the chocolate. Place 1/2 cup of dark chocolate chips in a microwave-safe bowl. Heat it in 30-second bursts. Stir after each time until the chocolate is smooth. Once melted, pour the chocolate over the pressed oat mixture. Use a spatula to spread it evenly. For a fun crunch, sprinkle 1/4 cup of chopped nuts on top. Press them down slightly so they stick. This adds flavor and texture. Now, refrigerate the bars for about 2 hours. They need to firm up before you can enjoy them. Once set, lift the bars out using the parchment paper. Slice them into squares or bars as you wish. For the full recipe, refer back to the beginning.

Tips & Tricks

Perfecting the Texture

To get the right texture, use fresh ingredients. Old oats or peanut butter can change the taste and feel. Mix the wet and dry ingredients well. You want a thick, sticky dough. If the mixture feels too dry, add a bit more honey or coconut oil. If it’s too wet, add more oats. This balance is key for great bars.

Serving Suggestions

When serving, cut the bars into equal pieces. You can use a sharp knife for clean edges. For a fun twist, serve them with fresh fruit or a scoop of yogurt. The creamy yogurt pairs perfectly with the rich bars. You can also drizzle melted chocolate on top for extra flair. This adds a nice touch and makes them look gourmet.

How to Slice Bars Efficiently

To slice the bars easily, chill them well first. Once they are firm, lift them out using the parchment paper. Place them on a cutting board. Use a sharp knife and cut straight down to avoid crumbling. Wipe the knife between cuts for cleaner slices. This helps keep the bars looking neat and tidy. Enjoy your tasty creation!

Variations

Healthier Options

You can make these bars healthier with simple swaps. Instead of honey, use agave syrup. This change lowers the glycemic index. You can also substitute half the oats with ground flaxseed. Flaxseed adds fiber and omega-3 fatty acids. Choose dark chocolate with a higher cocoa content for less sugar. This small change boosts the health benefits.

Flavor Enhancements

Want to mix up the flavor? Add a teaspoon of cinnamon for warmth. This spice works well with chocolate and peanut butter. You can also include a tablespoon of espresso powder. It elevates the chocolate flavor without adding caffeine. For a fruity twist, fold in dried fruit like cranberries or cherries. These additions give your bars a fun burst of taste.

Different Nut Butter Choices

Peanut butter isn’t the only nut butter that works. Try almond or cashew butter for a different flavor. Each nut brings its unique taste and texture. If you want to go nut-free, sunflower seed butter is a fantastic choice. Just make sure it’s safe for those with allergies. Each nut butter alters the flavor and makes these bars your own.

For the full recipe, check out the detailed instructions and ingredients above.

Storage Info

Best Practices for Storage

Store your no-bake chocolate peanut butter bars in an airtight container. This keeps them fresh and prevents drying out. Place parchment paper between layers if stacking, to avoid sticking. Keep them in the fridge to maintain firmness and flavor.

Freezing Tips

You can freeze these bars for longer storage. Cut them into squares before freezing. Wrap each square in plastic wrap and place them in a freezer bag. This helps keep them fresh for up to three months. Thaw them in the fridge for a few hours before serving.

Shelf Life and Freshness

These bars last about one week in the fridge. They taste best when fresh. After a week, they may still be safe to eat but will lose some texture. If frozen, they stay fresh for three months, making them a great make-ahead treat. Enjoy them whenever you crave a chocolatey snack!

FAQs

Can I make these bars vegan?

Yes, you can easily make these bars vegan. Just swap honey for maple syrup. Use dark chocolate chips that are dairy-free. With these changes, the bars will be 100% vegan and still delicious.

How long do they take to set?

These bars take about 2 hours to set in the fridge. You want them firm to the touch. After that, they are ready to slice and enjoy!

Can I use different types of sweeteners?

You can use different sweeteners in this recipe. Choices like agave syrup or coconut nectar work well. Just remember that they may slightly change the flavor and texture. Always adjust to your taste! For the full recipe, check out the details above.

This blog post shared key tips for making delicious bars. We covered ingredients, including substitutions and quality advice. I provided step-by-step instructions for the mixture, packing, and topping. You learned tricks for texture, serving, and slicing. We explored healthy variations and storage tips to keep your bars fresh. Lastly, I answered common questions about vegan options and sweeteners.

With these insights, you can make tasty bars that everyone will enjoy. Start creating your own versions and have fun!

To make these no-bake chocolate peanut butter bars, you'll need: - 1 cup rolled oats - 1 cup natural peanut butter (smooth or crunchy) - 1/2 cup honey or maple syrup (use maple syrup for vegan bars) - 1/2 cup unsweetened cocoa powder - 1/4 cup coconut oil, melted - 1/2 teaspoon vanilla extract - A pinch of salt - 1/2 cup dark chocolate chips (dairy-free if desired) - 1/4 cup chopped nuts (optional for topping) You can easily swap some ingredients if needed. For example, if you don't have rolled oats, quick oats work too. You can use almond butter instead of peanut butter for a nut-free option. For a sweeter taste, substitute honey with agave syrup. If you want a nut-free version, ensure your chocolate chips are also nut-free. Always choose high-quality ingredients for the best flavor. Use natural peanut butter without added sugars or oils. Look for dark chocolate chips with a high cacao percentage. Fresh oats and raw honey add more taste and nutrition. If possible, opt for organic ingredients to enhance the health benefits of your bars. Quality matters, and it shows in the taste! To start, gather your ingredients. Grab a large mixing bowl. Add 1 cup of rolled oats. Next, add 1 cup of peanut butter. You can choose smooth or crunchy based on what you like. Then, pour in 1/2 cup of honey or maple syrup. This will sweeten your bars. Now, add 1/2 cup of unsweetened cocoa powder. This gives a rich chocolate taste. Don't forget the 1/4 cup of melted coconut oil. It helps bind the mixture. Add 1/2 teaspoon of vanilla extract and a pinch of salt. Stir all these together until you have a thick, sticky dough. This is the base of your bars. Now, prepare an 8x8 inch baking pan. Line it with parchment paper. Make sure some paper hangs over the sides for easy removal. Carefully transfer your oat mixture into the pan. Use the back of a spatula or your hands to press it down. You want it packed tightly and evenly. This step is key for a good texture. Take your time to make it smooth and firm. Next, it's time to melt the chocolate. Place 1/2 cup of dark chocolate chips in a microwave-safe bowl. Heat it in 30-second bursts. Stir after each time until the chocolate is smooth. Once melted, pour the chocolate over the pressed oat mixture. Use a spatula to spread it evenly. For a fun crunch, sprinkle 1/4 cup of chopped nuts on top. Press them down slightly so they stick. This adds flavor and texture. Now, refrigerate the bars for about 2 hours. They need to firm up before you can enjoy them. Once set, lift the bars out using the parchment paper. Slice them into squares or bars as you wish. For the full recipe, refer back to the beginning. To get the right texture, use fresh ingredients. Old oats or peanut butter can change the taste and feel. Mix the wet and dry ingredients well. You want a thick, sticky dough. If the mixture feels too dry, add a bit more honey or coconut oil. If it’s too wet, add more oats. This balance is key for great bars. When serving, cut the bars into equal pieces. You can use a sharp knife for clean edges. For a fun twist, serve them with fresh fruit or a scoop of yogurt. The creamy yogurt pairs perfectly with the rich bars. You can also drizzle melted chocolate on top for extra flair. This adds a nice touch and makes them look gourmet. To slice the bars easily, chill them well first. Once they are firm, lift them out using the parchment paper. Place them on a cutting board. Use a sharp knife and cut straight down to avoid crumbling. Wipe the knife between cuts for cleaner slices. This helps keep the bars looking neat and tidy. Enjoy your tasty creation! {{image_4}} You can make these bars healthier with simple swaps. Instead of honey, use agave syrup. This change lowers the glycemic index. You can also substitute half the oats with ground flaxseed. Flaxseed adds fiber and omega-3 fatty acids. Choose dark chocolate with a higher cocoa content for less sugar. This small change boosts the health benefits. Want to mix up the flavor? Add a teaspoon of cinnamon for warmth. This spice works well with chocolate and peanut butter. You can also include a tablespoon of espresso powder. It elevates the chocolate flavor without adding caffeine. For a fruity twist, fold in dried fruit like cranberries or cherries. These additions give your bars a fun burst of taste. Peanut butter isn’t the only nut butter that works. Try almond or cashew butter for a different flavor. Each nut brings its unique taste and texture. If you want to go nut-free, sunflower seed butter is a fantastic choice. Just make sure it’s safe for those with allergies. Each nut butter alters the flavor and makes these bars your own. For the full recipe, check out the detailed instructions and ingredients above. Store your no-bake chocolate peanut butter bars in an airtight container. This keeps them fresh and prevents drying out. Place parchment paper between layers if stacking, to avoid sticking. Keep them in the fridge to maintain firmness and flavor. You can freeze these bars for longer storage. Cut them into squares before freezing. Wrap each square in plastic wrap and place them in a freezer bag. This helps keep them fresh for up to three months. Thaw them in the fridge for a few hours before serving. These bars last about one week in the fridge. They taste best when fresh. After a week, they may still be safe to eat but will lose some texture. If frozen, they stay fresh for three months, making them a great make-ahead treat. Enjoy them whenever you crave a chocolatey snack! Yes, you can easily make these bars vegan. Just swap honey for maple syrup. Use dark chocolate chips that are dairy-free. With these changes, the bars will be 100% vegan and still delicious. These bars take about 2 hours to set in the fridge. You want them firm to the touch. After that, they are ready to slice and enjoy! You can use different sweeteners in this recipe. Choices like agave syrup or coconut nectar work well. Just remember that they may slightly change the flavor and texture. Always adjust to your taste! For the full recipe, check out the details above. This blog post shared key tips for making delicious bars. We covered ingredients, including substitutions and quality advice. I provided step-by-step instructions for the mixture, packing, and topping. You learned tricks for texture, serving, and slicing. We explored healthy variations and storage tips to keep your bars fresh. Lastly, I answered common questions about vegan options and sweeteners. With these insights, you can make tasty bars that everyone will enjoy. Start creating your own versions and have fun!

No-Bake Chocolate Peanut Butter Bars

Satisfy your sweet tooth with these No-Bake Chocolate Peanut Butter Bars! Packed with wholesome ingredients like oats, peanut butter, and cocoa, these delicious treats are super easy to make and perfect for any occasion. In just 10 minutes of prep time, plus chilling, you can enjoy a decadent and chewy snack that is vegan-friendly if you use maple syrup. Click to explore the full recipe and indulge in a guilt-free dessert that everyone will love!

Ingredients
  

1 cup rolled oats

1 cup natural peanut butter (smooth or crunchy based on preference)

1/2 cup honey or maple syrup (for a vegan option, use maple syrup)

1/2 cup unsweetened cocoa powder

1/4 cup coconut oil, melted

1/2 teaspoon vanilla extract

A pinch of salt

1/2 cup dark chocolate chips (dairy-free if you prefer)

1/4 cup chopped nuts (optional, for topping)

Instructions
 

In a large mixing bowl, combine the rolled oats, peanut butter, honey or maple syrup, unsweetened cocoa powder, melted coconut oil, vanilla extract, and a pinch of salt. Stir vigorously until all ingredients are well mixed and form a thick, sticky dough.

    Prepare an 8x8 inch (20x20 cm) baking pan by lining it with parchment paper, ensuring that there's some overhang on the sides for easy removal later.

      Carefully transfer the oat mixture into the lined baking pan. Using the back of a spatula or your hands, press the mixture down firmly and evenly to pack it tightly into the pan.

        In a microwave-safe bowl, melt the dark chocolate chips in 30-second bursts, stirring after each interval until the chocolate is fully melted and smooth.

          Once the chocolate is melted, pour it over the pressed oat mixture in the pan. Use a spatula to gently spread the chocolate evenly across the top.

            If you desire an extra crunch, sprinkle the chopped nuts over the melted chocolate, pressing them down slightly to ensure they stick.

              Refrigerate the assembled bars for about 2 hours, or until they are firm to the touch.

                After the bars have set, lift them out of the pan using the parchment paper overhang. Place on a cutting board and slice into squares or bars of your desired size.

                  Prep Time: 10 minutes | Total Time: 2 hours 10 minutes | Servings: 12 bars

                    - Presentation Tips: For an elegant presentation, serve the bars on a rustic wooden board, dusting them lightly with cacao powder or adding a drizzle of extra melted chocolate on top. This will enhance both flavor and visual appeal!

                      Leave a Comment

                      Recipe Rating