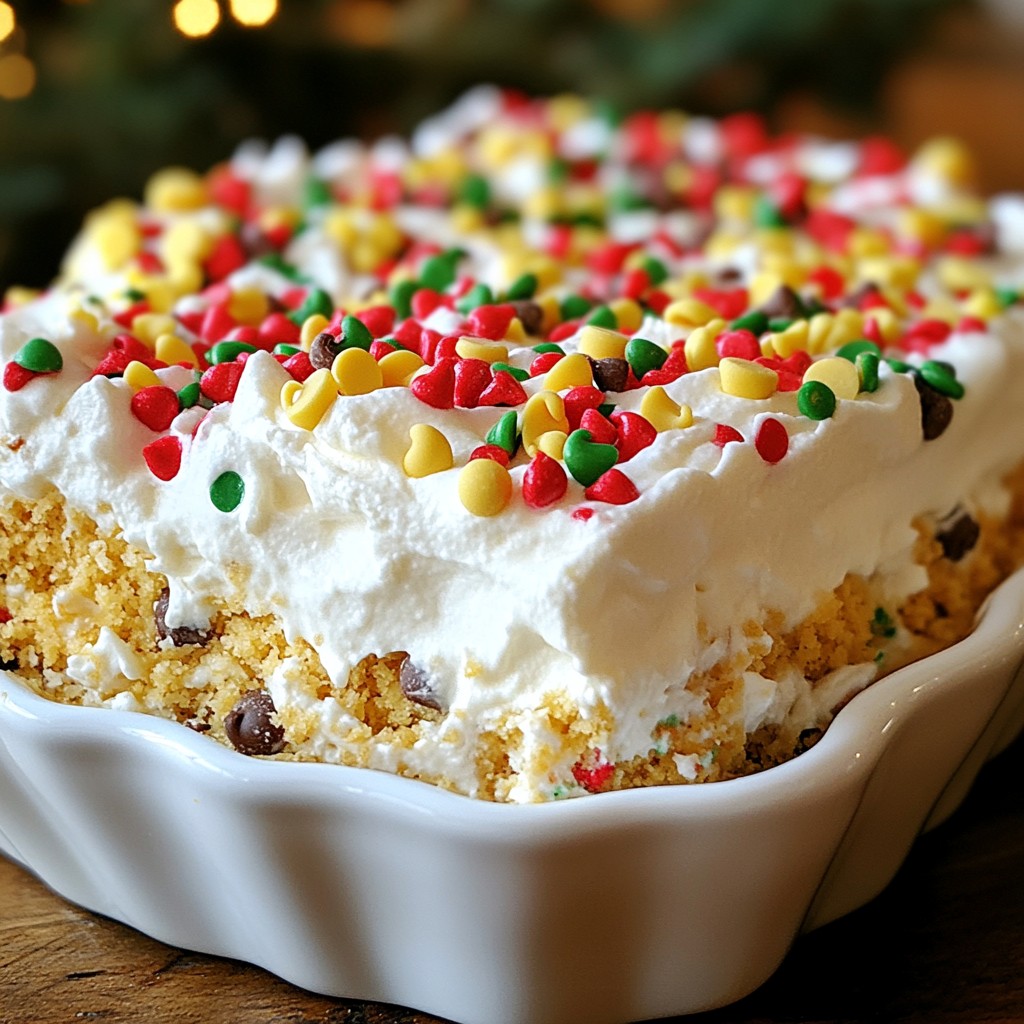
Looking for a simple yet delightful dessert for the holidays? This No-Bake Christmas Cookie Lush will steal the show! Packed with layers of creamy goodness, chocolate chips, and festive sprinkles, it's perfect for gatherings. I'll guide you through each step to create this easy treat, ensuring your holiday celebrations are sweet and stress-free. Let's dive in and make a dessert that everyone will love!
Why I Love This Recipe
- Easy Preparation: This no-bake recipe comes together quickly, making it perfect for busy holiday schedules.
- Festive Presentation: The colorful red and green sprinkles add a cheerful touch, perfect for holiday gatherings.
- Layered Flavors: The combination of creamy layers and crunchy graham cracker base creates a delightful texture experience.
- Make-Ahead Delight: With a chilling time of just 4 hours, this dessert can be prepared in advance, allowing for stress-free entertaining.
Ingredients
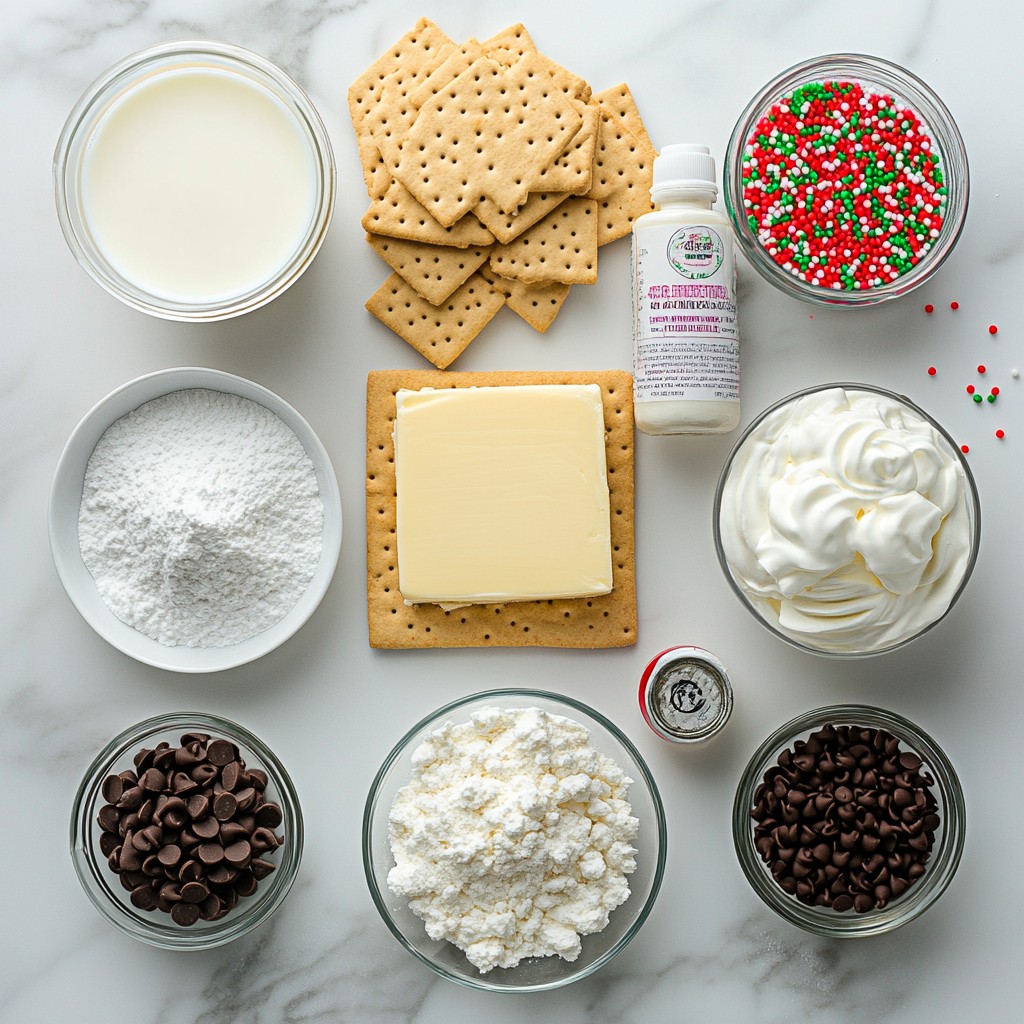
The No-Bake Christmas Cookie Lush requires simple and tasty ingredients. Here’s what you need:
- 1 package (14.4 oz) graham crackers
- 1/2 cup unsalted butter
- 2 cups powdered sugar
- 8 oz cream cheese
- 1 teaspoon pure vanilla extract
- 2 cups whipped topping
- 1 cup instant vanilla pudding mix
- 3 cups cold milk
- 1/2 cup mini chocolate chips
- 1/2 cup red and green sprinkles
These ingredients come together to create a smooth, layered dessert. Each part adds flavor and texture. The graham crackers form a crunchy base. The cream cheese layer gives a rich taste. The pudding adds creaminess. Lastly, the chocolate chips and sprinkles bring fun to this festive treat.
Using quality ingredients enhances the overall flavor. Always choose fresh cream cheese and real vanilla extract. These choices make the dessert even better!
Step-by-Step Instructions
Preparing the Base
To start, take your package of graham crackers and crush them finely. You can use a food processor or place them in a zip-top bag and crush them with a rolling pin. Next, melt your unsalted butter. Combine the crushed graham crackers and melted butter in a bowl. Mix well until the crumbs are fully coated. This mixture should feel sandy. Now, firmly press this crust into the bottom of a 9x13 inch dish. Make sure it is packed tightly. This will give you a sturdy base for your dessert.
Creating the Cream Cheese Layer
In a large bowl, beat together the powdered sugar, softened cream cheese, and vanilla extract. Use an electric mixer for about 2-3 minutes until smooth. This step is key for a creamy layer. Once smooth, gently fold in 1 cup of whipped topping using a spatula. Make sure no streaks remain. Spread this cream cheese mixture evenly over the graham cracker crust. Smooth the top with your spatula for a nice finish.
Making the Pudding Layer
For the pudding layer, take another bowl and whisk together the instant vanilla pudding mix and cold milk. Keep whisking for about 2 minutes. You want the mixture to thicken. After it thickens, carefully fold in the remaining 1 cup of whipped topping. This will keep it light and airy. Pour this pudding mixture over the cream cheese layer. Spread it evenly to cover the entire surface.
Assembling the Dessert
Now it’s time to add some fun! Evenly sprinkle the mini chocolate chips over the top of the pudding layer. This will give you delightful chocolate bites in every slice. Then, add your festive red and green sprinkles on top. This adds a joyful touch for the holidays.
Chilling and Serving
Next, transfer the dish to the refrigerator. Let it chill for at least 4 hours. This time is crucial for the layers to set. Once set, you can cut the cookie lush into squares. Serve chilled to enjoy the layers of creaminess and festive flavors! For a fun touch, consider serving each square on a festive plate or adding a sprig of mint on top.
Tips & Tricks
Perfecting the Layers
To make your No-Bake Christmas Cookie Lush great, pack the crust firmly. This helps keep the layers together. If the crust is loose, it can crumble when you cut the dessert. Use the bottom of a glass to press it down well.
For a smooth and creamy texture, whip the cream cheese and sugar well. Use an electric mixer, which makes this easy. Mix for 2-3 minutes until fluffy. When adding the whipped topping, fold it in gently with a spatula. This keeps the mixture light and airy.
Garnishing Ideas
Garnish your treat to make it look festive. Add extra whipped topping on each square when serving. It adds a nice touch and creaminess. You can also use fresh mint leaves for decoration. The green mint looks pretty and gives a fresh taste.
Making Ahead
You can prepare this dessert in advance. Make the layers and chill them for about 4 hours. This helps all the flavors blend well. For best results, make it the day before you plan to serve it. This way, you have a delicious treat ready to go!
Pro Tips
- Chill for Perfection: Allow the cookie lush to chill for a minimum of 4 hours, but overnight is even better. This ensures the layers meld together beautifully and the dessert sets perfectly.
- Customize Your Toppings: Feel free to mix up the toppings! You can use crushed candy canes, festive sprinkles, or even a drizzle of chocolate sauce for a unique twist.
- Use Room Temperature Ingredients: Make sure your cream cheese is softened to room temperature before mixing. This helps achieve a smooth and creamy texture in your filling.
- Perfectly Portion: Use a sharp knife to cut the cookie lush into squares. Wipe the knife with a damp cloth between cuts for clean edges and a beautiful presentation.
Variations
Flavor Variations
You can change the flavor of your No-Bake Christmas Cookie Lush easily. Try using different flavored pudding mixes. Chocolate, butterscotch, or even pumpkin spice can add a fun twist. Each flavor brings its own charm and taste. You can also substitute other toppings. Instead of mini chocolate chips, use crushed candy canes or chopped nuts. These swaps keep the dessert exciting and fresh!
Dietary Modifications
If you need gluten-free options, look for gluten-free graham crackers. Many brands offer these, and they taste just as great. You can also make this dessert vegan. Use vegan cream cheese and whipped topping instead. These swaps let everyone enjoy this treat, no matter their dietary needs.
Seasonal Adaptations
To make your dessert even more festive, add seasonal spices. A sprinkle of cinnamon or nutmeg can enhance the flavor. You can also customize the sprinkles. Instead of red and green, try pastel colors for Easter or orange and black for Halloween. These small changes make your No-Bake Christmas Cookie Lush fit for any holiday!
Storage Info
How to Store
To keep your No-Bake Christmas Cookie Lush fresh, use an airtight container. Glass or plastic containers work well. Make sure the dish is covered tightly to avoid drying out. If you do not have a lid, you can wrap it with plastic wrap. This helps seal in the moisture and flavor.
Shelf Life
This dessert can stay fresh in the fridge for about three to four days. To check for spoilage, look for changes in smell or texture. If it starts to separate, it’s best to discard it. Always trust your senses. If something seems off, don’t eat it.
Freezing Tips
Yes, you can freeze No-Bake Cookie Lush! To freeze, cut it into squares and place them in a single layer in a freezer-safe container. Make sure to layer parchment paper between the squares to avoid sticking. For thawing, transfer the container to the fridge for a few hours or overnight. Avoid thawing at room temperature to keep the texture nice.
FAQs
How do I make No-Bake Christmas Cookie Lush ahead of time?
You can make this dessert a day in advance. Prepare the layers as directed, then cover them tightly. Chill it overnight for the best results. The flavors meld beautifully, making it even more delicious.
Can I substitute ingredients in this recipe?
Yes, you can swap some ingredients. For instance, use dairy-free cream cheese for a vegan version. You can also try sugar substitutes if you want a lower-sugar option. Just keep in mind that these changes may alter the taste and texture slightly.
How long can No-Bake Cookie Lush be stored in the fridge?
You can store No-Bake Cookie Lush in the fridge for up to five days. Make sure to cover it well to keep it fresh. If you see any signs of spoilage, like an off smell or discoloration, it's best to discard it.
What is the best way to serve No-Bake Cookie Lush?
Serve the lush cold, cut into squares. For a festive touch, add a sprig of mint or a dollop of whipped topping on each piece. This makes it look extra special for holiday gatherings.
Can I use a different crust for this recipe?
Absolutely! You can use crushed Oreos or even a nut-based crust. Each option will give a different flavor and texture. Just make sure the crust is firm enough to hold the layers together.
You now know how to make a No-Bake Cookie Lush. We covered the ingredients, step-by-step instructions, and tips to create perfect layers. You can also explore tasty variations and storage tips. This dessert is easy to customize for any season or diet. I hope you feel inspired to try this fun recipe. It's perfect for gatherings or just a treat for yourself. Enjoy every layer of this delightful dessert!