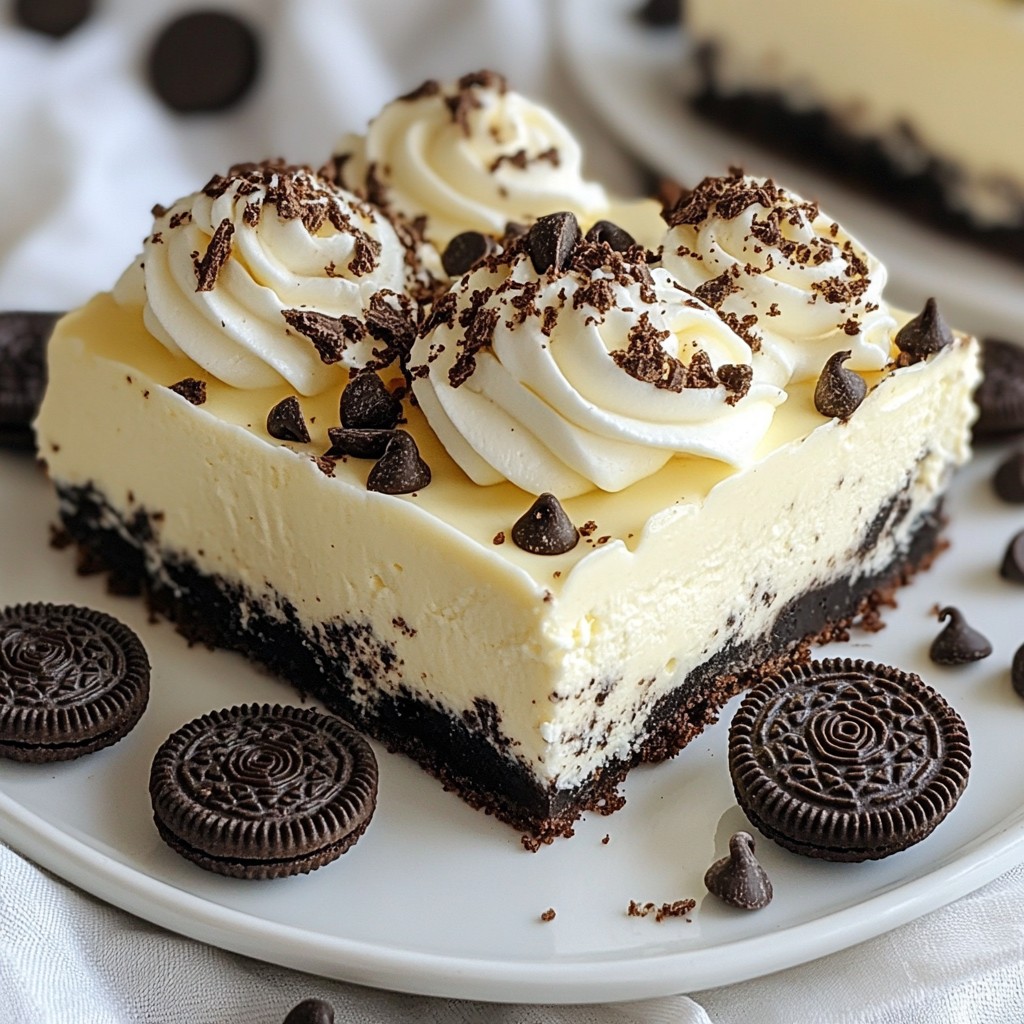
Craving something sweet? These No-Bake Oreo Cheesecake Bars are a game-changer! They are easy to whip up and taste amazing. With just a few simple ingredients, you can create a delightful dessert that everyone will love. I’ll guide you through each step, ensuring your bars turn out perfect every time. Let’s get started on this delicious treat that will impress your friends and family!
Why I Love This Recipe
- Decadent Flavor: This cheesecake bars are rich and creamy with the perfect balance of sweetness and chocolatey crunch from the Oreos.
- No-Bake Convenience: These bars are easy to prepare and require no baking, making them perfect for warm days or last-minute gatherings.
- Simple Ingredients: With just a handful of ingredients, this recipe is accessible and can be made with items you likely already have on hand.
- Impressive Presentation: These bars look beautiful when served, topped with whipped cream and extra crushed Oreos, perfect for any occasion.
Ingredients
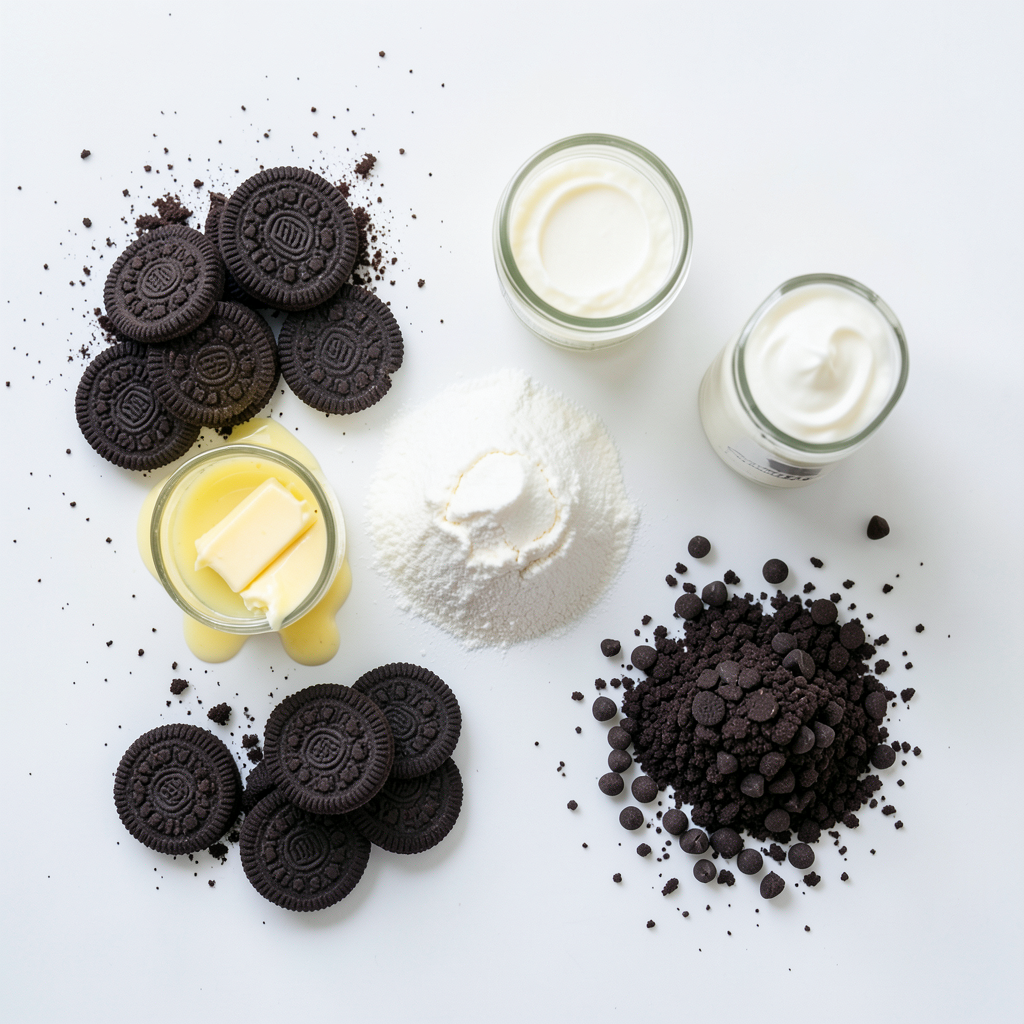
For this delightful No-Bake Oreo Cheesecake Bars recipe, you will need the following ingredients:
- 24 Oreo cookies, finely crushed
- 5 tablespoons unsalted butter, melted
- 16 oz cream cheese, softened
- 1 cup powdered sugar
- 1 teaspoon pure vanilla extract
- 2 cups heavy whipping cream
- 1 cup mini chocolate chips
- Extra Oreos for garnish
These ingredients work together to create a rich and creamy cheesecake. The crushed Oreos form a tasty crust, while the cream cheese and whipped cream create a smooth filling. The mini chocolate chips add a fun touch of sweetness. You can use extra Oreos to make the bars even more special.
Step-by-Step Instructions
Prepare the Crust
- First, take 24 Oreo cookies and crush them finely. You can use a food processor for this.
- In a medium bowl, mix the crushed cookies with 5 tablespoons of melted butter. Stir until it feels like wet sand.
- Next, press this mixture firmly into the bottom of a lined 9x9-inch baking pan. Make sure it is even.
- Place the pan in the fridge for about 15 minutes. This helps the crust get firm.
Cream Cheese Mixture
- In a large bowl, beat 16 oz of softened cream cheese until it is smooth. Use an electric mixer for best results.
- Gradually add 1 cup of powdered sugar and 1 teaspoon of vanilla extract. Mix until everything is blended well.
Whip the Cream
- In a separate bowl, pour in 2 cups of heavy whipping cream.
- Whip it on high speed until stiff peaks form. This should take about 3 to 4 minutes.
Combine and Layer
- Now, gently fold the whipped cream into the cream cheese mixture using a spatula. Make sure to combine it well without losing air.
- Carefully fold in 1 cup of mini chocolate chips. This adds a nice touch.
- Pour the cheesecake filling over the chilled Oreo crust. Spread it evenly with a spatula.
Chill and Serve
- Cover the pan tightly with plastic wrap and place it in the fridge. Let it chill for at least 4 hours, or until it is firm.
- When ready, slice the cheesecake into bars and serve them chilled. For a nice touch, sprinkle crushed Oreos on top for garnish.
Tips & Tricks
Achieving Perfect Texture
To get the best texture for your no-bake Oreo cheesecake bars, start with room temperature cream cheese. Cold cream cheese can make mixing tough. You want it soft and easy to blend. Leave it out for about 30 minutes before you start.
When you whip the heavy cream, use a large bowl. Whip on high speed until stiff peaks form. Do this for about 3-4 minutes. Be careful when you fold it into the cream cheese mix. Gently combine them with a spatula. This keeps the whipped cream light and airy.
Presentation Ideas
Make your cheesecake bars look special. Serve them on a fun platter. Add a dollop of whipped cream on each bar. A sprinkle of crushed Oreos on top adds a nice touch. You can also use fresh berries, like strawberries or raspberries, for color.
For a twist, drizzle some chocolate or caramel sauce over the bars. This adds flavor and makes them even more appealing.
Time-Saving Tips
You can make these bars ahead of time. They freeze well, so make a batch and store them. Just wrap them tightly in plastic wrap, then put them in a freezer bag.
If you're short on time, use a store-bought Oreo crust. This saves you from crushing cookies and mixing butter. Simply pour your cheesecake mix into the crust, and you’re ready to go!
Pro Tips
- Use Room Temperature Cream Cheese: Ensure your cream cheese is softened to room temperature for a smooth and creamy mixture. This helps to avoid lumps in your cheesecake filling.
- Chill the Cream Whipping Bowl: For better results, chill your mixing bowl and beaters in the refrigerator before whipping the cream. This will help the cream whip up faster and achieve stiff peaks more easily.
- Don’t Overmix the Cream: When folding the whipped cream into the cream cheese mixture, be gentle. Overmixing can deflate the whipped cream, resulting in a less airy texture.
- Customize Your Toppings: Feel free to get creative with toppings! Consider adding fresh berries or a drizzle of chocolate sauce for an added flavor twist and visual appeal.
Variations
Flavor Variations
You can make this dessert even more fun by adding flavors. Use fruit purees like raspberry or strawberry. They add a fresh taste and color to your bars. You can also swirl in chocolate or caramel for a rich twist. Just drizzle them on top before chilling. This makes each bite exciting and different.
Dietary Adjustments
If you need a gluten-free option, use gluten-free Oreos. They work just as well and taste great. For those who want a vegan version, substitute dairy-free cream cheese and a plant-based whip. These swaps allow everyone to enjoy this tasty treat, no matter their diet.
Different Sizes and Shapes
Want to change the shape? You can use a larger pan for a thicker bar. Just adjust the chilling time. For mini versions, pour the mixture into muffin tins. Each mini cheesecake will be a perfect bite-sized treat. This is great for parties or gatherings.
Storage Info
Proper Storage Guidelines
To keep your No-Bake Oreo Cheesecake Bars fresh, use an airtight container. A glass or plastic container works well. Make sure the bars are completely cool before sealing. This helps prevent moisture buildup and keeps the bars firm. For best results, place parchment paper between the bars and the lid. This allows airflow and helps maintain texture.
Freezing Instructions
If you want to freeze these cheesecake bars, follow these steps:
1. Prepare for Freezing: Slice the bars first. This makes it easier to grab a piece later.
2. Wrap Them Up: Wrap each piece in plastic wrap tightly. This helps keep air out.
3. Use a Container: Place the wrapped bars in a freezer-safe container. Make sure it’s airtight.
4. Label and Date: Write the date on the container. This helps you know how long they’ve been frozen.
To thaw the bars, simply transfer them to the fridge overnight. You can also leave them at room temperature for about 30 minutes. This will help them regain their creamy texture.
Shelf Life
No-Bake Oreo Cheesecake Bars stay fresh in the fridge for about 5 days. Always check for signs of spoilage before eating, like an off smell or mold. If the bars have a watery texture or crust changes, it’s best to discard them. Keeping them properly stored will help them last longer and taste great!
FAQs
Can I make No-Bake Oreo Cheesecake Bars ahead of time?
Yes, you can make these bars ahead of time. I recommend preparing them a day before you plan to serve. This gives them enough time to chill and set properly in the fridge.
What can I substitute for cream cheese?
If you need a substitute for cream cheese, try using mascarpone or Greek yogurt. These options provide a similar creamy texture. You can also use vegan cream cheese for a dairy-free version.
How do I know when the cheesecake is set?
To check if the cheesecake is set, look for a firm texture. It should not wobble when you shake the pan. The top should feel slightly firm to the touch but still smooth.
Can I add extra toppings?
Absolutely! You can add various toppings to enhance the bars. Consider fresh fruit, whipped cream, or even chocolate sauce. Crushed nuts or caramel drizzle will also add a tasty twist.
This blog post covered a delicious No-Bake Oreo Cheesecake Bars recipe. We explored the key ingredients, how to prepare them, and tips for perfecting texture and presentation. I shared fun variations and storage information, along with answers to common questions.
Now you have everything to create these tasty treats. Enjoy making and sharing them with family and friends. Get creative, and don’t hesitate to try new flavors or toppings! Your baking adventure starts now.